Hi - I'm new to this forum, and maybe not a regular visitor (who knows?), but I wanted to say thank you to Ana for the plans for the favorite bookshelves. I modified them a bit as I needed 9 feet of shelves. I widened each shelf to 3 feet, built 3, and for the crown moulding put side trim only on the outermost sides.
Finishing did not turn out as well as I'd like. I followed another blog's directions for a brushstrokeless gloss finish, and the results were not ideal. But they're good enough for a house with two small children who will, no doubt, abuse them.
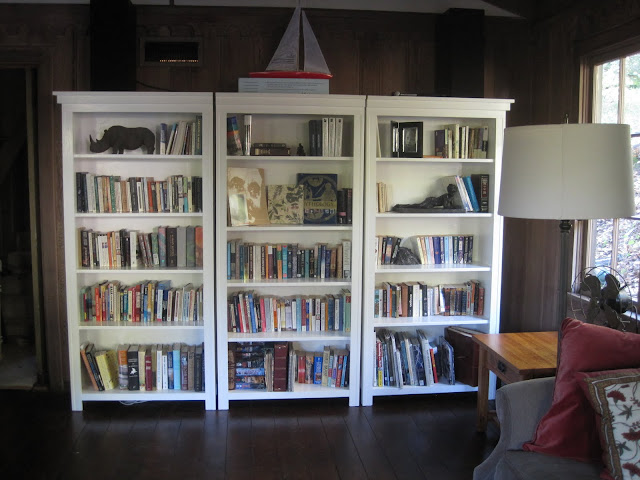
First installed, in shiny white newness:

And then I had to rearrange all the furniture in the room so I can see them while I sit:

I really love them. They're exactly what I wanted, and couldn't find in stores. Ana, thanks so much!! Your site is a treasure.
bugnbelle
Sat, 01/01/2011 - 20:44
Those look fantastic! That's not a plan I'd considered doing, but now I'm thinking I might have just the place to put those down the line.
mkmb129
Sun, 01/02/2011 - 03:14
They look great!!
brookethebuilder
Tue, 01/04/2011 - 23:56
Those look absolutely beautiful. You are probably the only person who will ever notice the finish isn't perfect!
hnharris86
Wed, 01/05/2011 - 08:31
I love this. It was also not on my "to build" list but the 3 combo has just been added to the top of my idea list for the bare wall in my dining room. Still not sure what I am doing there but I could fit a LOT of pictures on thoses shelves. Not to mention cookbooks!
Is this your first project? It looks beautiful. Any more information on the cost? How much supplies did you need, if it's not too much to ask. Also, how long did this take you?
rebeccawithtools
Wed, 01/05/2011 - 09:18
Thanks for the great compliments, everyone!
Heather, to answer your questions:
1. I've previously built a dining table, but I built it using traditional craftsman techniques - wooden joins, traditional 12 step mission oak finish. It was a very different, 3 month project. This was my first knock-off project.
2. We did it right after moving into a new house, and were buying a lot from hardware stores at the time, so I don't have an exact project cost. I'd guess a couple hundred bucks of wood & paint. Maybe $250. I live in a pretty pricey area, though. And this was still a lot cheaper than buying them premade, by four figures.
3. If I was at home, I could post my buy and cut lists. If you want them, let me know. It took an hour of working with Ana's cut lists to adjust them to the wider shelves, adjust the trim, make sure I had it all correct. You'd likely want to do it yourself to customize it to your space, rather than using the same widths I used. Basically:
Triple the number of everything except for the side trim of the crown molding. Widen the shelves, top, and front trim/crown molding, making sure your width accounts for the crown molding to stick out as necessary to the left on the left piece and the right on the right piece. We custom cut the crown molding pieces after the shelves were assembled to make sure they fit correctly.
4. I have two very small people I'm working around, a and very little uninterrupted building time. So I worked in bits and pieces over a month to get them complete. I did all the cutting in about 3 hours. It takes longer at first because you're calculating which cuts to make on which boards, and of course I wasted some wood with poor cut planning and had to go buy more. I'd say the first one took all day, and after that, once we knew what we were doing and the wood was already cut, we pounded the next two out in a couple two-hour increments (I have carpal tunnel so my husband is my handy assistant for driving screws). 2 hours to build the box and put in the shelves and square it up (including measure and mark shelf locations, predrill all holes, etc) then let the glue dry overnight, then an hour to add all the legs and trim. Each coat of paint - we did 4 - takes at least an hour to put on, and then several hours/days before the paint was dry or we had time to get back to it.
thedabblingcrafter
Wed, 01/12/2011 - 10:56
Pretty! The finishing looks great to me!