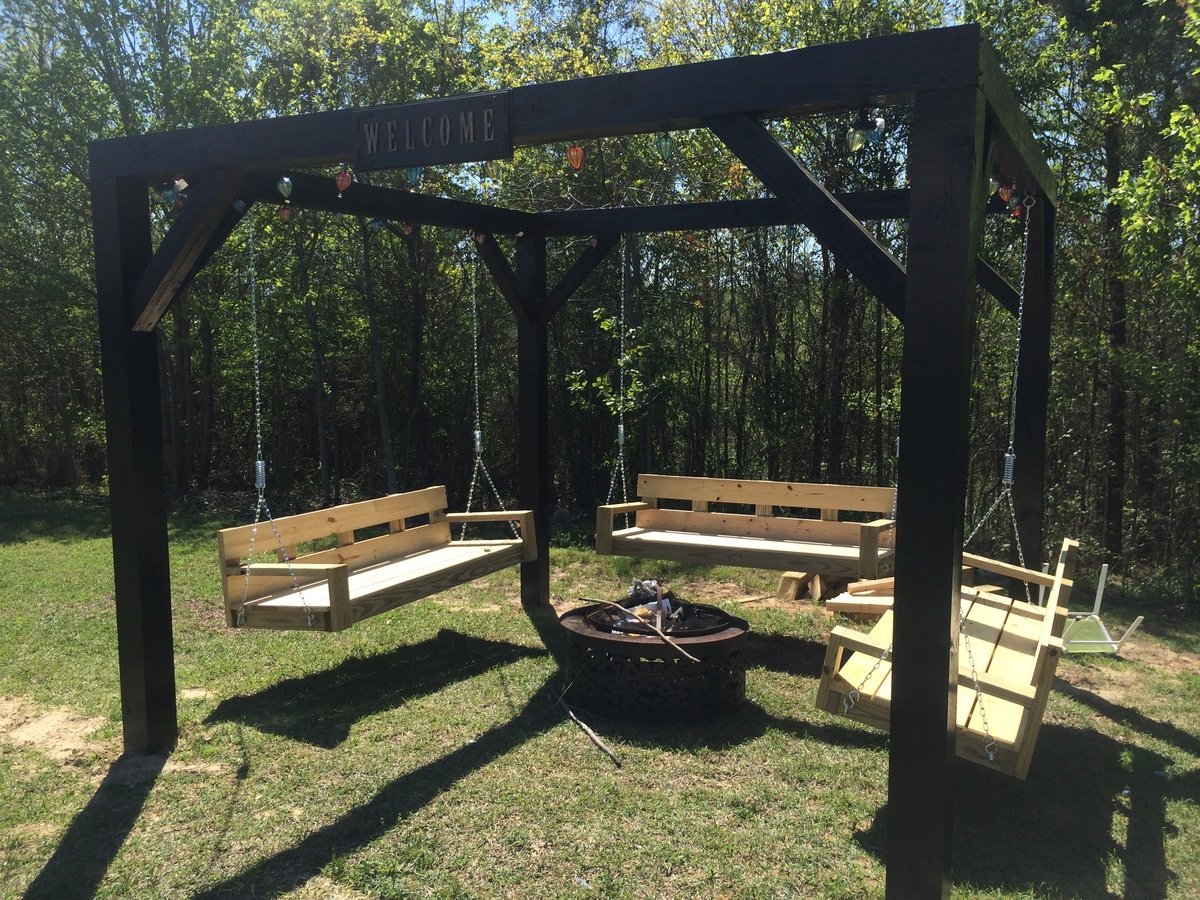
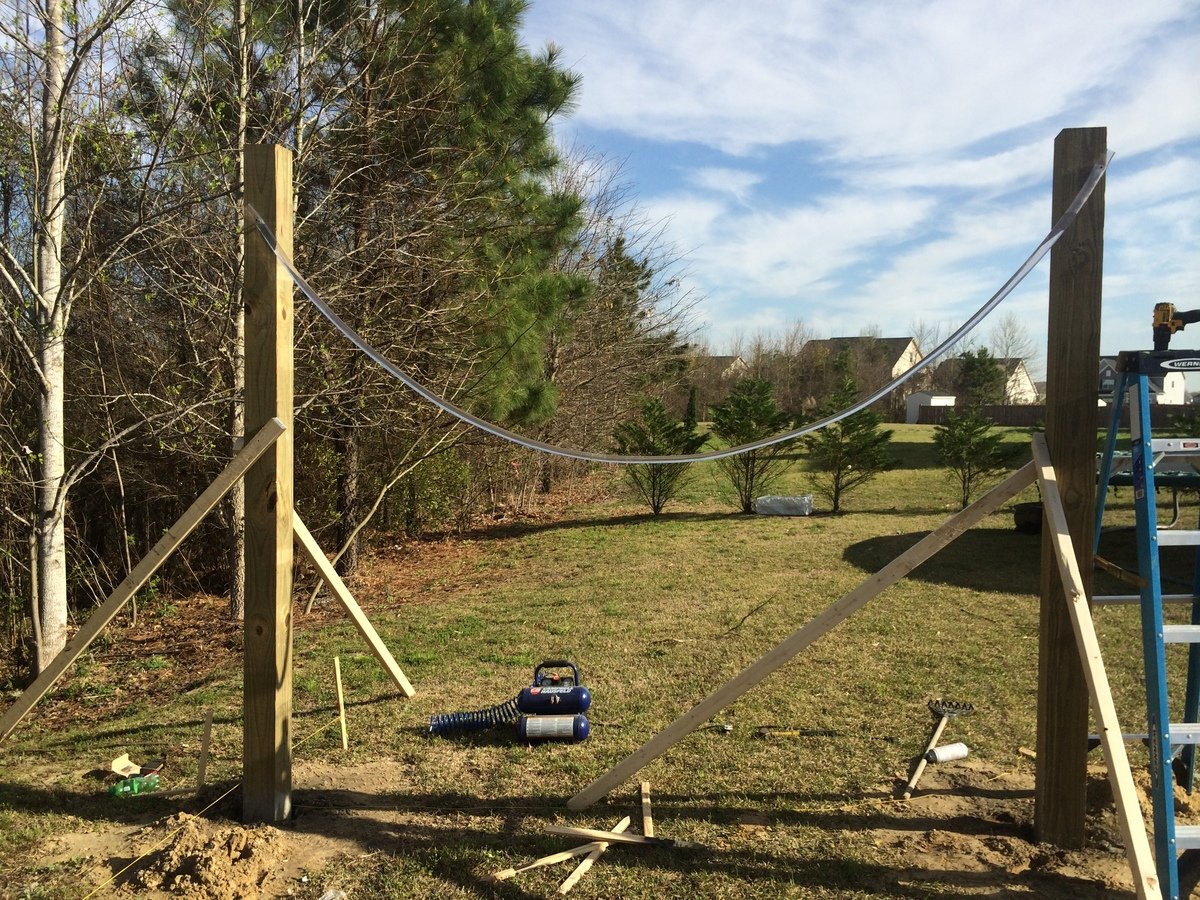
My wife saw something like this on Pinterest and desperately wanted one. The one she saw was hexagonal in shape. We didn't need as many swings so we went with just a plain square shape. We used 6x6s for the legs and posts across the top and used 4x4s for the angled support pieces. We built the swings using the plan from this website. All the materials can be picked up at the blue and orange stores. However when it came to the springs for the swings, the blue store was 1/3 of the price of HD. The legs are 12' long and buried 4' under the ground and cemented in for strength. Luckily I am retired military and was able to rent an auger for 1/2 the price of HD or the blue store. You could do it by hand but it saved us hours and lots of back pain. We found our dimensions for the size we wanted and spray painted dots on the ground where the posts were going to go. We dug the holes and stuffed the 6x6s in them. Using a post level we made sure they were plum. We braced them and added the quickrete and left them to setup over night. The next day we had to make sure all the tops were level with each other. This is where having some knowledge of physics paid off. I took clear tubing and screwed it above the height that I wanted on one post and then screwed the other end to another post. Fill it with water until the water level on the first post is where I wanted it (8 feet high) and it will automatically fill it level on the other end. There is a picture of this above. Water will always level itself out. I had to do this because my yard is at a slight down hill grade. We marked it and cut the tops off to make it level. After attaching the 6x6s on the top with 8" lag bolts it was time to paint. After painting was done we built 3 swings from Ana's plans. We shortened them by 6" to give room to walk between the legs and the swings. All in all it was a great project that only took two dedicated weekends. My wife still has to paint the swings though.


Comments
Ana White Admin
Thu, 04/17/2014 - 11:15
WOW!
You have done an amazing job here!
birdsandsoap
Sun, 04/20/2014 - 18:55
I want this!! great job!
I want this!! great job!
tolbertemmett
Wed, 05/27/2015 - 07:42
6x6 attachment to the top
How did you attach the 6x6's to the top? Is it a miter cut at 45 degrees and then put together with the lag bolts. I'm kinda confused. Thanks.
jkread
Wed, 05/27/2015 - 22:38
Sounds Like
It sounds and looks like the top 6x6s are mitered and sit on top of the end of the vertical posts. I'd say at least one lag bolt each way to hold the mitered corner together and then at least one in each piece down into the vertical to hold it in place.
coachconn
Sun, 07/19/2015 - 16:26
Are there plans?
I have looked at several versions including the hexagon pergola's, but this is exactly what we want. Do you have plans that you can email me? [email protected]
ripsmith88
Sun, 04/19/2020 - 12:33
Plans please
If you recurved plans can you please send to me?
[email protected]
ripsmith88
Sun, 04/19/2020 - 12:33
Plans please
If you recurved plans can you please send to me?
[email protected]
jfam2009
Wed, 04/29/2020 - 16:18
Need material list and plans
I was looking for material list and plans if you have any please send to [email protected] thanks
ldinv
Mon, 03/16/2020 - 09:37
Would like to see the plans…
Would like to see the plans on this. Very nice
ripsmith88
Sun, 04/19/2020 - 12:35
Would like to see plans on…
Would like to see plans on this please.
carewarner
Mon, 04/27/2020 - 10:24
WOW, LOVE!!! This is simply…
WOW, LOVE!!! This is simply gorgeous! What a warm and welcoming addition to your yard. And thanks for sharing your method of finding level for your posts on your sloped yard. I absolutely love it!
Kris Hankins
Tue, 04/28/2020 - 10:00
That tube level....genius!…
That tube level....genius! Great job!
Mullentj
Thu, 10/22/2020 - 06:53
Requesting Plans
Love this, can you please email me the plans @ [email protected]
JillS
Fri, 03/26/2021 - 05:58
This is beautiful. Would…
This is beautiful. Would love to see the plans for this. How small can it be made?
ladydavis00
Tue, 04/06/2021 - 16:18
Would love to see the plans…
Would love to see the plans. Thanks
gonzo2roy
Tue, 11/02/2021 - 14:22
has anyone gotten plans to…
has anyone gotten plans to Fire Pit Swings