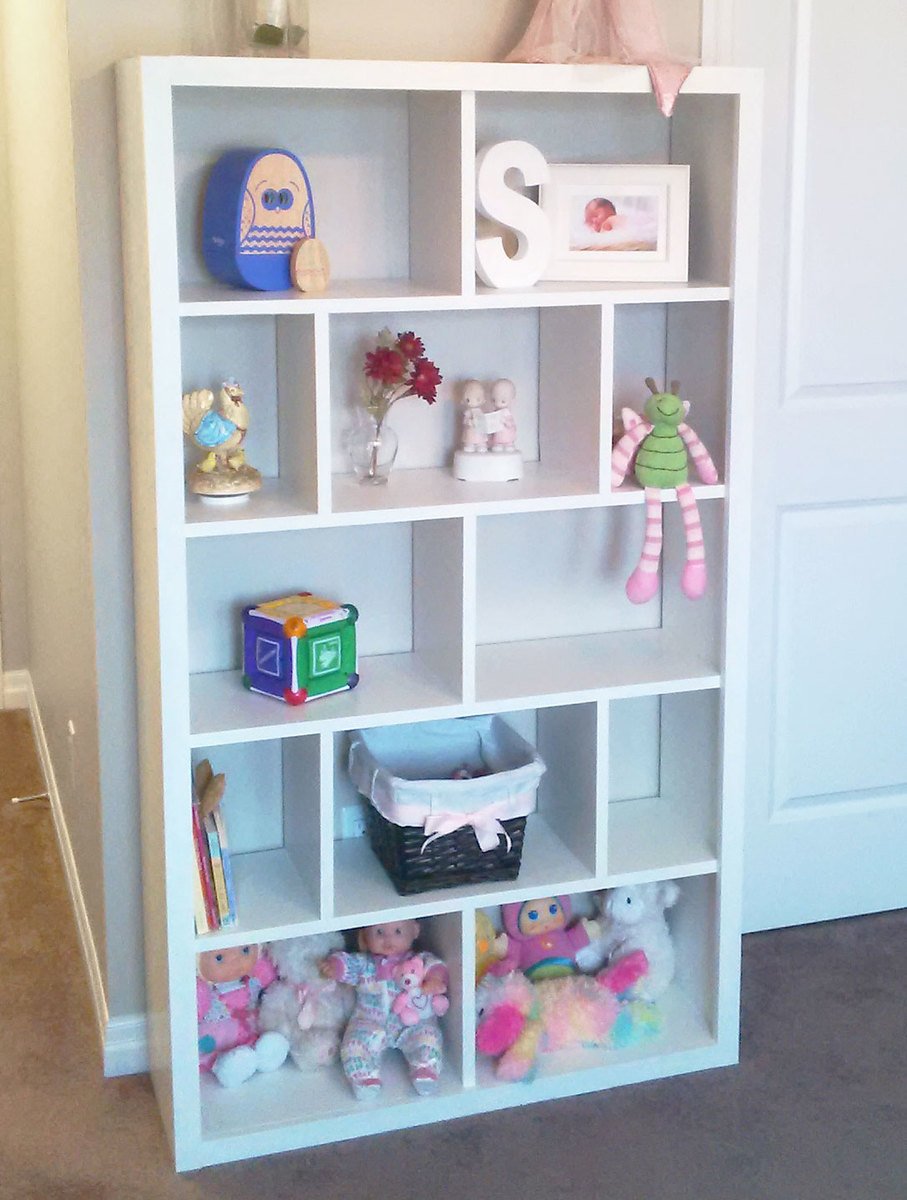
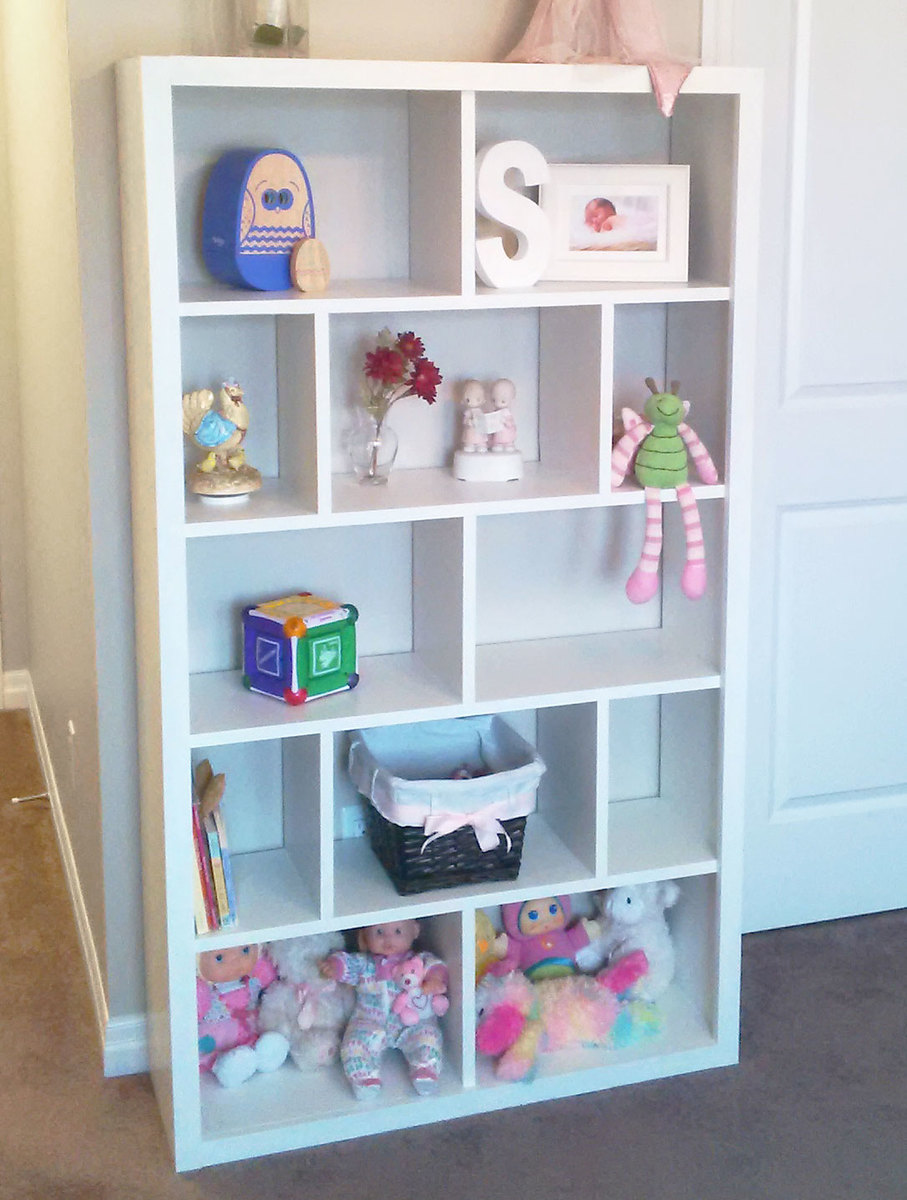
Free plans to make a subway tile bookshelf from Ana-White.com #plans #diy #furniture #modern
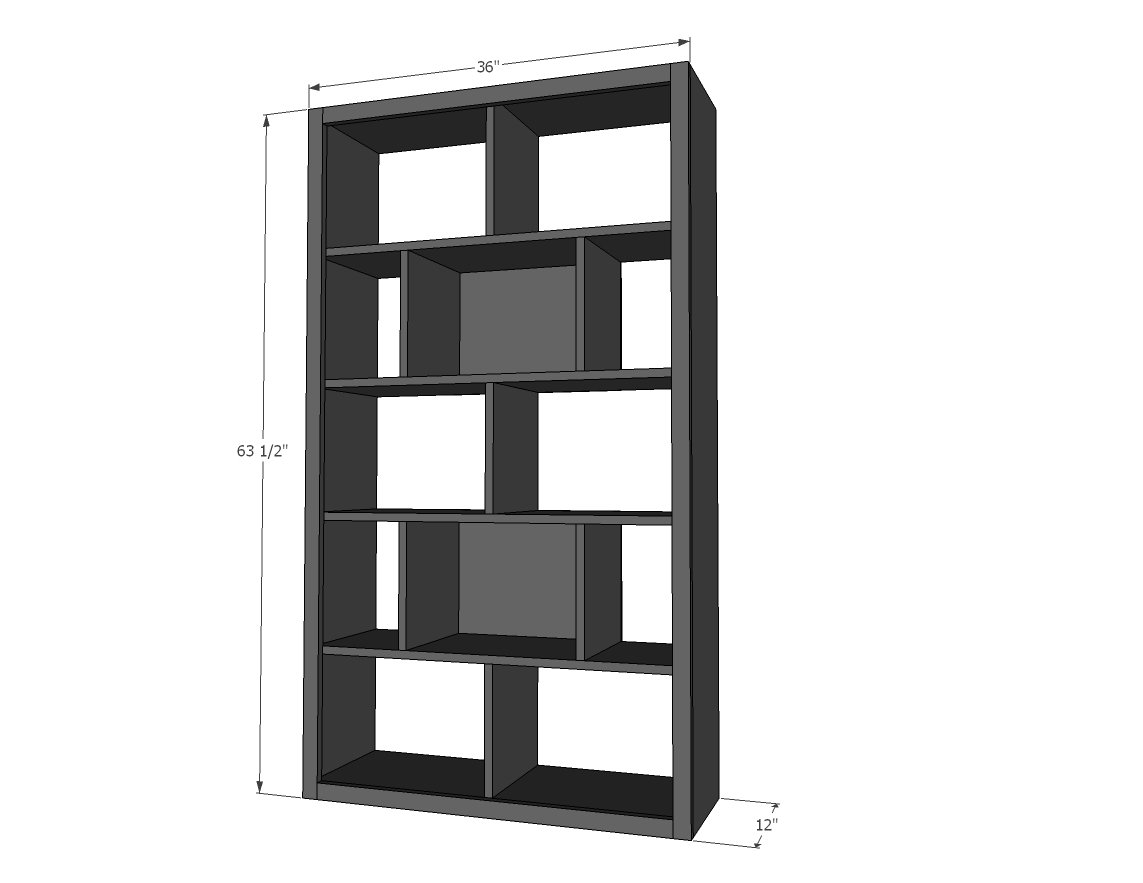
Preparation
1/4" plywood (1/4 sheet or scraps)
4 - 1x12 @ 8 feet long
6 - 1x2 @ 8 feet long
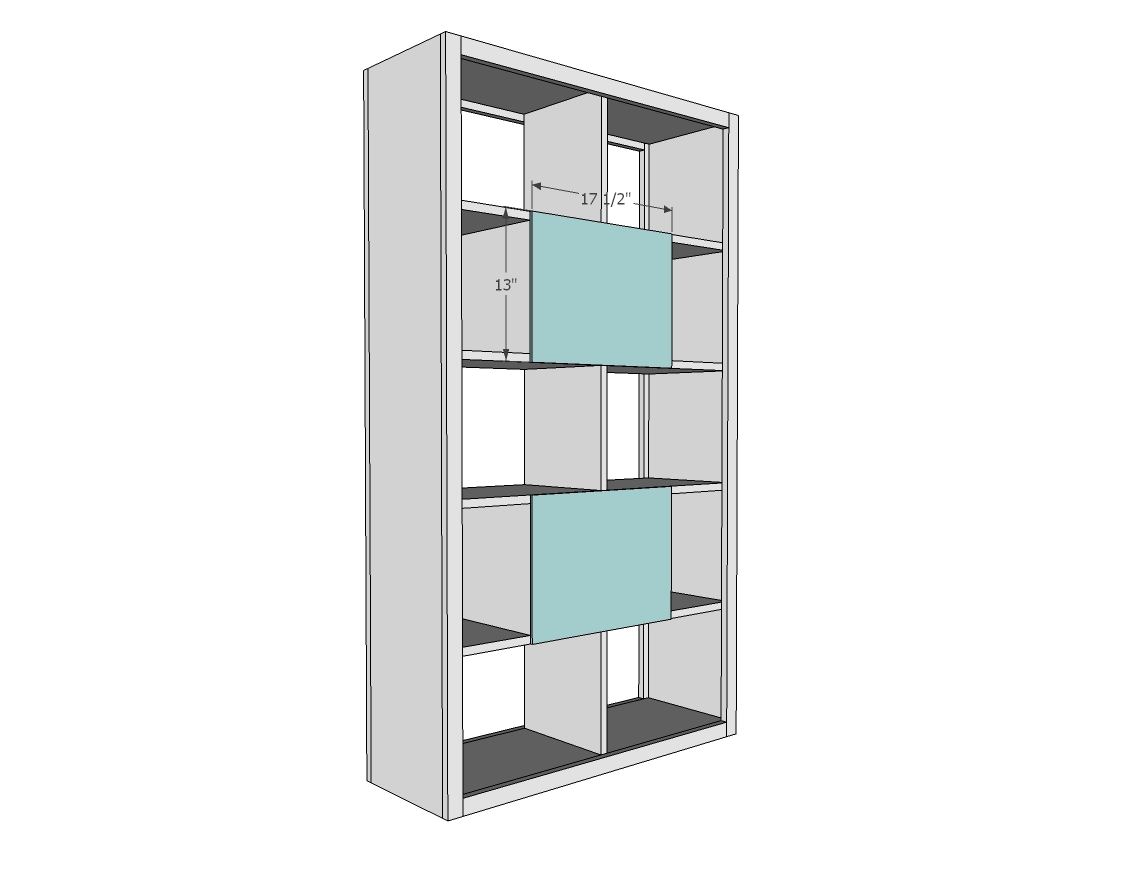
2 – 1/4" plywood @ 17 1/2″ x 12 1/2" (Back of the Cubbies)
6 – 1×12 @ 11 1/2″ (Vertical Dividers for all but top shelf)
6 – 1×12 @ 34 1/2″ (Shelves)
1 – 1×12 @ 12 1/4″ (Top Vertical Divider)
2 – 1×12 @ 63 1/2″ (Sides)
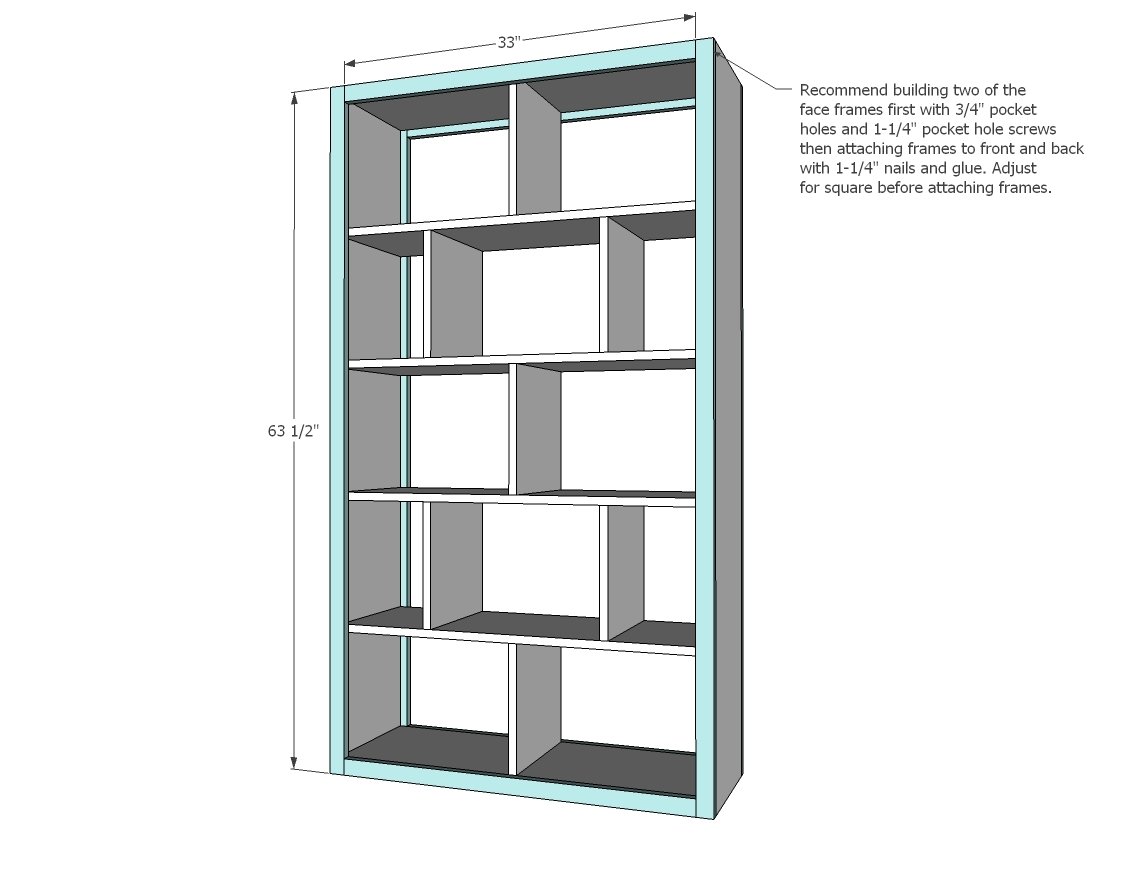
4 – 1×2 @ 63 1/2″ (Side Trim)
4 – 1×2 @ 33″ (Top and Bottom Trim)
Cut all your boards. Always use glue and 2″ or longer nails unless otherwise directed.
Instructions
Step 1
Step 2
Step 3
Face frames on the front and back will help beef up this bookshelf. If you have a pocket hole jig, build your frames first, and then attach with glue and 1-1/4" nails. Otherwise, attach the longer frame pieces first, and then add the shorter ones.
Nail and glue the face frames to all shelves and top divider too.


Comments
hzgrace (not verified)
Wed, 12/16/2009 - 11:38
Having a grandmother who made
Having a grandmother who made her own kitchen cabinets ( this was in the 30's) I come from a long line of can do women. So when I came across your blog It was love at first sight. In just the few days I have "known" you, I have shared with several about your wonderful blog. And to really bless my heart my 16 yod has been perusing your plans to see what she can use for her new bedroom design... is that not cool?
THANK YOU for sharing. You Rock!
Ana White (not verified)
Wed, 12/16/2009 - 12:58
Your grandmother is amazing.
Your grandmother is amazing. No power tools in the 30's, or dimensional lumber . . . That is truly amazing!
I see the spirit lives on in you and your daughter! I am so excited that your daughter has an interest in building! Our high school droped the woodworking program because "no one builds furniture and cabinets anymore." This is very sad to me, our next generation not having the interest or capabilities to build . . . and with it, the joy and satisfaction of building something yourself is gone.
Thanks for sharing and visiting my blog! I appreciate your support and enthusiasm!
Karen (not verified)
Wed, 12/16/2009 - 14:49
Ana, Are you aware of any
Ana, Are you aware of any reason why in Google Reader I can no longer see pictures? From the beginning of your blog thru 11/27 they're there, then poof! No more pictures, just text. I know that's an option the author can set in Blogger...
Ana White (not verified)
Wed, 12/16/2009 - 18:05
Karen, Thanks for updating me
Karen, Thanks for updating me on this problem. I think I fixed it. Let me know if you still have problems. Thanks for reading my blog! Ana
lacysummer (not verified)
Tue, 01/19/2010 - 17:58
Speaking of kitchen cabinets,
Speaking of kitchen cabinets, I have been considering remodeling the kitchen and keep thinking the upper cabinets are just boxes with shelves and doors, the bottom cabinets are a bit more fancy with the pull out shelves and trash bins, what I am wondering is if you have built any kitchen cabinets. What should be done to protect the wood and is using MDF a option? I love the simple shaker style doors which resemble the doors on the Pottery Barn, Cameron media wall. Do you think its possible? What are your ideas or recommendations.
Thanks for your wonderful blog and plans they are an inspiration.
Anonymous (not verified)
Fri, 01/22/2010 - 09:27
Hi Ana - I am attempting this
Hi Ana - I am attempting this book shelf as my first project, making two to go next to my bed.
What kind of wood would you recommend if I was going to stain it black and put a glossy finish on it?
Thanks so much, you are such an inspiration!!!
Michelle
Anonymous (not verified)
Tue, 03/02/2010 - 18:46
I am currently working on
I am currently working on building this project, well written plans so far, i did however notice these are a lot shorter then the ones at West Elm, No problem though, i was looking for something shorter anyways.
Thanks,
Mike
Anonymous (not verified)
Thu, 03/04/2010 - 16:12
Yeah, make sure if your wood
Yeah, make sure if your wood is too narrow, you add height to the dividers....
We have some issues with the one we built