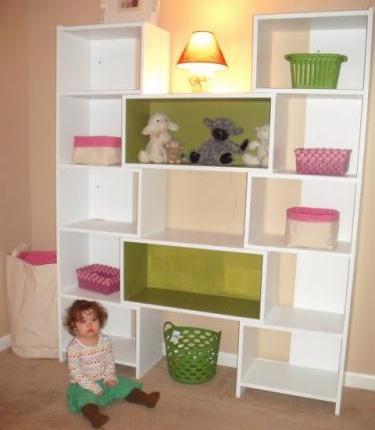
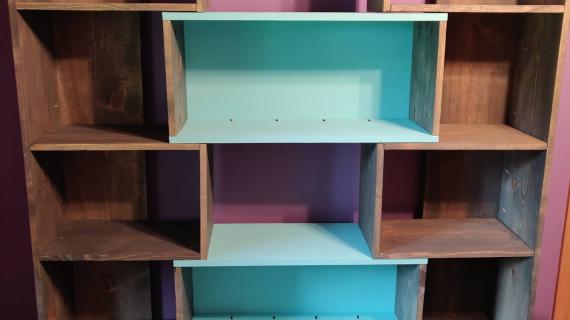
Fits in corners, expands to a wider or narrower width, and stores all in modern style. This clever bookcase is both functional and stylish.
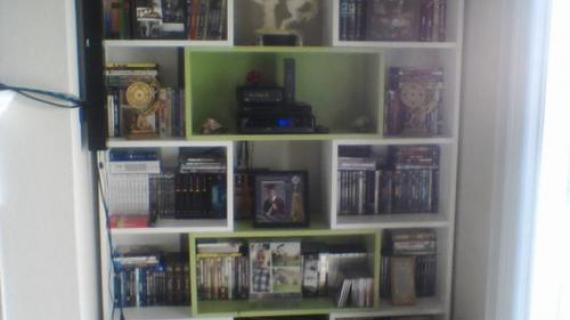
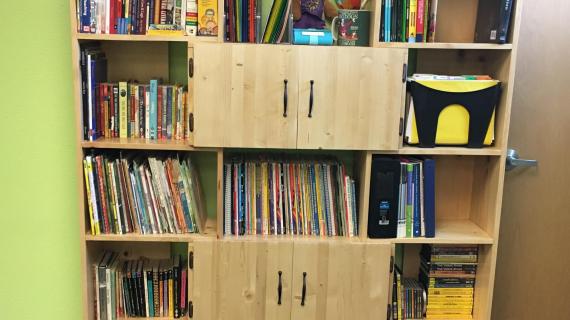
Special thanks to Abby for sharing her photo.
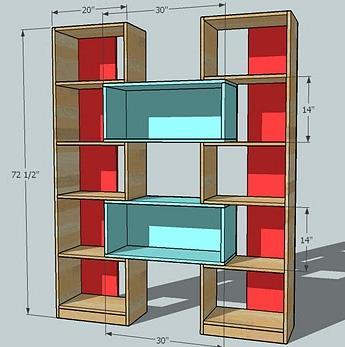
Preparation
For 1 Side Bookcase, you will need
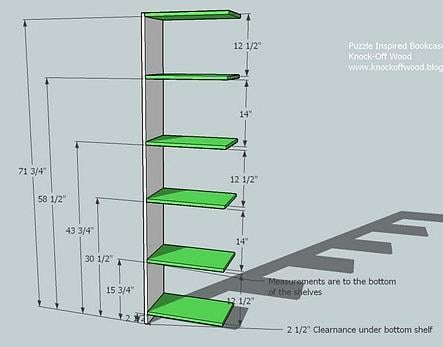
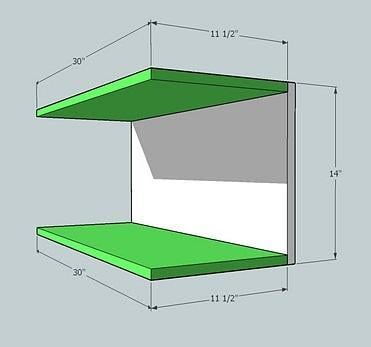
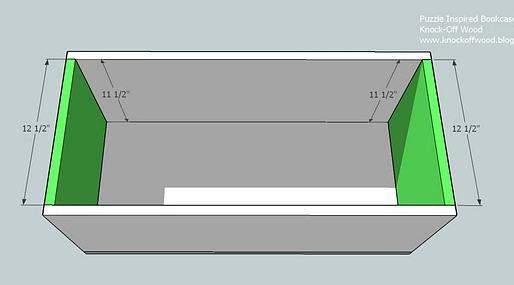
Cut List for 1 Side Bookcase for the Puzzle Bookcase
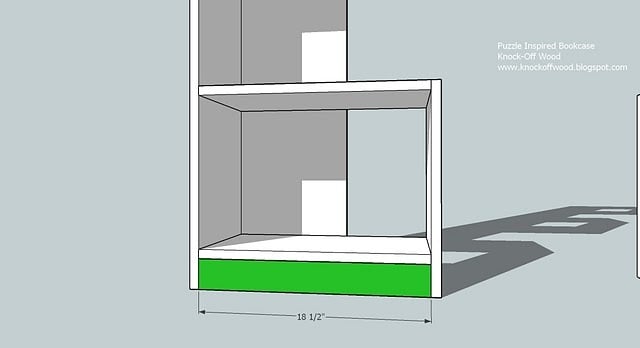
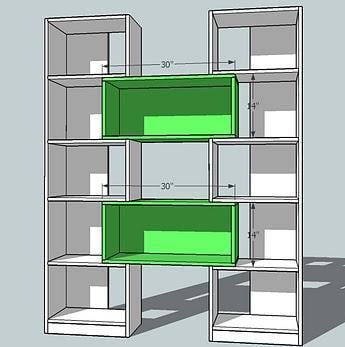
Because you may choose to just build one of the side bookcases, the plans are for just one of the bookcase and one of the cubbies. Double as you see fit.
If you are painting the bookcase, you can use MDF cut into 11 1/2″ strips, 8 feet long. You can also use A1 Plywood if you would like the look of Maple, Birch or other hardwoods. If you use A1 plywood, you will need to cut the plywood into 11 1/2″ strips, 8 feet long. The strips will then replace the 1x12s. Also, if you use plywood, you will need to finish edges with edge banding. On second thought, many furniture companies are embracing exposed plywood edges – you may like this look on your modern project.
Make straight square cuts. Work with straight boards. Mark out your fastening points before building. Predrill and coutnersink any screw holes. Check for square after each step. Work on a clean level surface. If you are using MDF, use drywall screws, predrilled the entire length of the screw’s shaft, or finish nails. When using MDF avoid fastening within 1″ of the edges. Always use glue and 2″ fasteners unless otherwise directed.





Comments
Dani (not verified)
Mon, 01/18/2010 - 02:24
Oh my gosh, I just found your
Oh my gosh, I just found your blog through a friend and I am so excited! Seriously, this may be the best blog I have ever seen. My husbands shop is going to have a new occupant. :)
Carla (not verified)
Mon, 01/18/2010 - 03:13
Is there a way that you can
Is there a way that you can make your plans printer friendly? I am unable to print the plans effectively.
Kelly O. (not verified)
Mon, 01/18/2010 - 03:57
okay--seriously!! I am in
okay--seriously!! I am in love with you (in the not so creepy sense!)
You are my hero!
Hubby's gonna get busy building this (He loves woodworking I just need to give him the ideas--or you do !)
thank you for sharing this!
maggs (not verified)
Mon, 01/18/2010 - 05:38
this is AWESOME! i have
this is AWESOME! i have wanted this bookcase for ages, but didn't want to fork over the money. now i just need to learn how to build it. thank you!!!!!!!
mom2domgigi (not verified)
Mon, 01/18/2010 - 05:42
I just found your blog and I
I just found your blog and I am so excited. DH & I have been married for 12 years and just moved into our forever home. We decided that we need some new, nice furniture and your site is SO!!! inspiring. I am going to start small and raid my dad's basement for tools that he no longer uses. Thanks for all your hard work and all the free tutorials. You are amazing!!!!!!
Tiffany (not verified)
Mon, 01/18/2010 - 05:58
I recently found your blog
I recently found your blog and love it. And I really love this bookcase, we are moving soon and I can't wait to figure out what pieces we are going to need. Hubby will have lots of projects to do thanks to your great plans.
Travis Schenk (not verified)
Mon, 01/18/2010 - 08:45
I love this! My wife and I
I love this! My wife and I are looking for the perfect corner media stand for our living room. I believe, by modifying the dimensions, that I can put a 40" TV into/onto one of the middle cubbies.
I didn't see any other designs on your site for a corner TV stand. Did I miss anything? Do you have any other suggestions?
Thanks a bunch!!
Phoenix (not verified)
Mon, 01/18/2010 - 09:57
You are amazing! Your work is
You are amazing! Your work is great and thanks for sharing it with us.
Journey (not verified)
Mon, 01/18/2010 - 11:47
I just recently came across
I just recently came across your blog - it's wonderful!!!!! Do you have any great ideas/suggestions for a bookcase/desk unit for an office (one wall)?
Renee de Jong (not verified)
Mon, 01/18/2010 - 13:59
Hi there,I am loving your
Hi there,
I am loving your plans, and would like to get started with a project- and this would be perfect, as I would like a bookcase!
What is your opinion in getting the timber (lumber) cut to size at the harware store, and then just banging it all together at home? I don't want to invest in a power saw until I am a little more sure that I have what it takes to build a few projects. You make it look easy, but I am still somewhat sceptical that I can do it!
Cheers.
StepherB (not verified)
Tue, 01/19/2010 - 10:22
I love this plan - I will
I love this plan - I will definitely have to try this one! Your site is amazing!
rae333 (not verified)
Mon, 01/25/2010 - 06:24
I love these plans, it would
I love these plans, it would be so much more awesome if you supplied a printable pdf link at the end of your posts so that we dont need to highlight everything to print :)
Keep it up i love it!
Christina (not verified)
Sat, 01/30/2010 - 06:40
Your blog is such an
Your blog is such an inspiration and very addictive. I love checking it to see what beautiful furnature you are making plans for next.
Thanks for sharing your plans with us!
Kathy B (not verified)
Mon, 02/22/2010 - 09:12
My brother and I built this
My brother and I built this bookcase last weekend. Neither of us had any wood working experience. Although I think we're both pretty handy.
The plans were very easy to follow, and the bookcase turned out really well. We stained it with ebony wood stain and didn't varnish it. :)
The plans state 4 1x12x8' boards for one book shelf and 1 1x12x8' board for one cubby. However, if you plan it out, you can make all four pieces with only 9 1x12x8' boards.
Thanks for the plans!!
R-foo (not verified)
Wed, 05/12/2010 - 06:57
my husband made this for me
my husband made this for me for Mothers Day. i love it! thank you so much! i will post a pic to the bragging board after we stain it. thanks again! you're amazing.
honestnicewoman (not verified)
Tue, 07/06/2010 - 11:55
I love this design. I love SO
I love this design. I love SO MANY of your designs! My mother did woodwork, and I wish I had paid more attention. She still helps me with some house remodeling. Now its time for me to start organizing my space and show her I can do it too! Thanks for you help and inspiration!! I'm posting to FB and will be adding you to my Blogspot!
kimdavis86 (not verified)
Thu, 08/19/2010 - 17:57
We just made this, and I love
We just made this, and I love love love it!!! It was our first project, so we had some rocky points and learned a lot of good lessons. All in all, it looks great! Thank you!!
kaycee (not verified)
Mon, 10/18/2010 - 14:27
Do you happen to know the
Do you happen to know the dimensions of this if it were to be put in a corner? I mean how much space on each wall you would need? I have a corner I want to put it in but it runs into our glass sliding doors. I would hate to make it and find out it hangs over. Thanks. :)
Erin Rodgers (not verified)
Mon, 12/13/2010 - 10:45
Just built this! Tweaked the
Just built this! Tweaked the plans a bit (taller and wider) - love the final result!!
http://thatsloverly.blogspot.com/2010/12/bonding-over-bookcase.html
Bonding over a… (not verified)
Wed, 01/12/2011 - 07:31
[...] bookcase” was designed
[...] bookcase” was designed by Crate and Barrel and we loved it… thankfully I found the plans on Knock-Off Wood so we were able to use her design as a starting point. We discussed the plans and did some [...]
Guest (not verified)
Mon, 10/24/2011 - 07:43
beautiful work but PLEASE BE SAFE when using...
I just found this site and love it! I just want to mention to the masses that when bringing large heavy wooden furniture into a home with small children, please PLEASE be sure to anchor the furniture to the wall to prevent accidental tipping. I saw the pic of this bookshelf with the baby sitting in front of it, and I cringed just a little (but I'm a worrying mama).