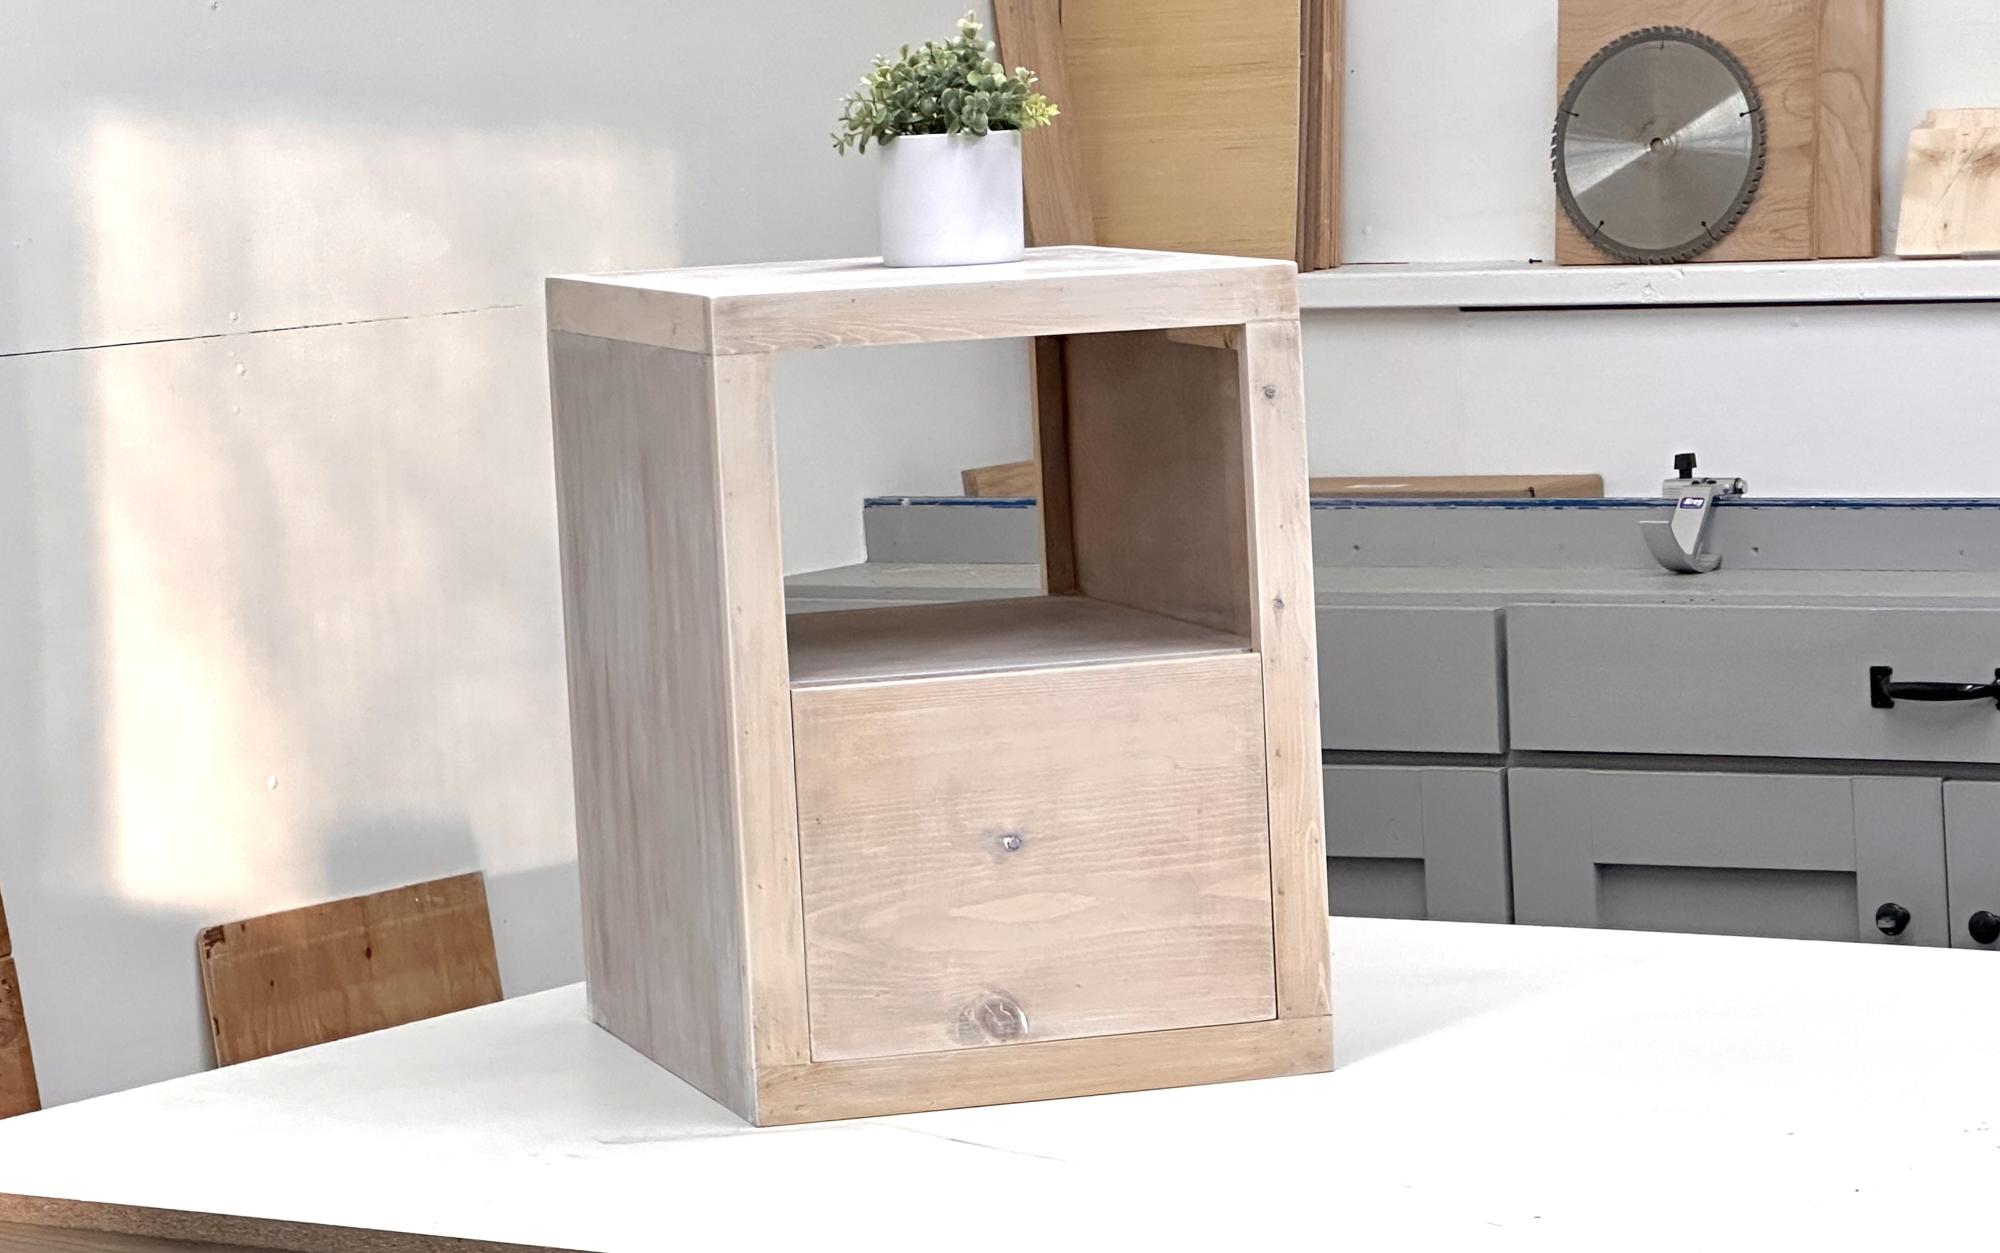
Minimalist Modern Nightstand (Narrow) - Free Plans

The free plans on this website are made possible with advertising and affiliate links.  Thank you for helping us keep plans free.


DIY modern nightstand plans pottery barn cayman
Error: View not found.
Difficulty
Beginner Projects
| Print this plan

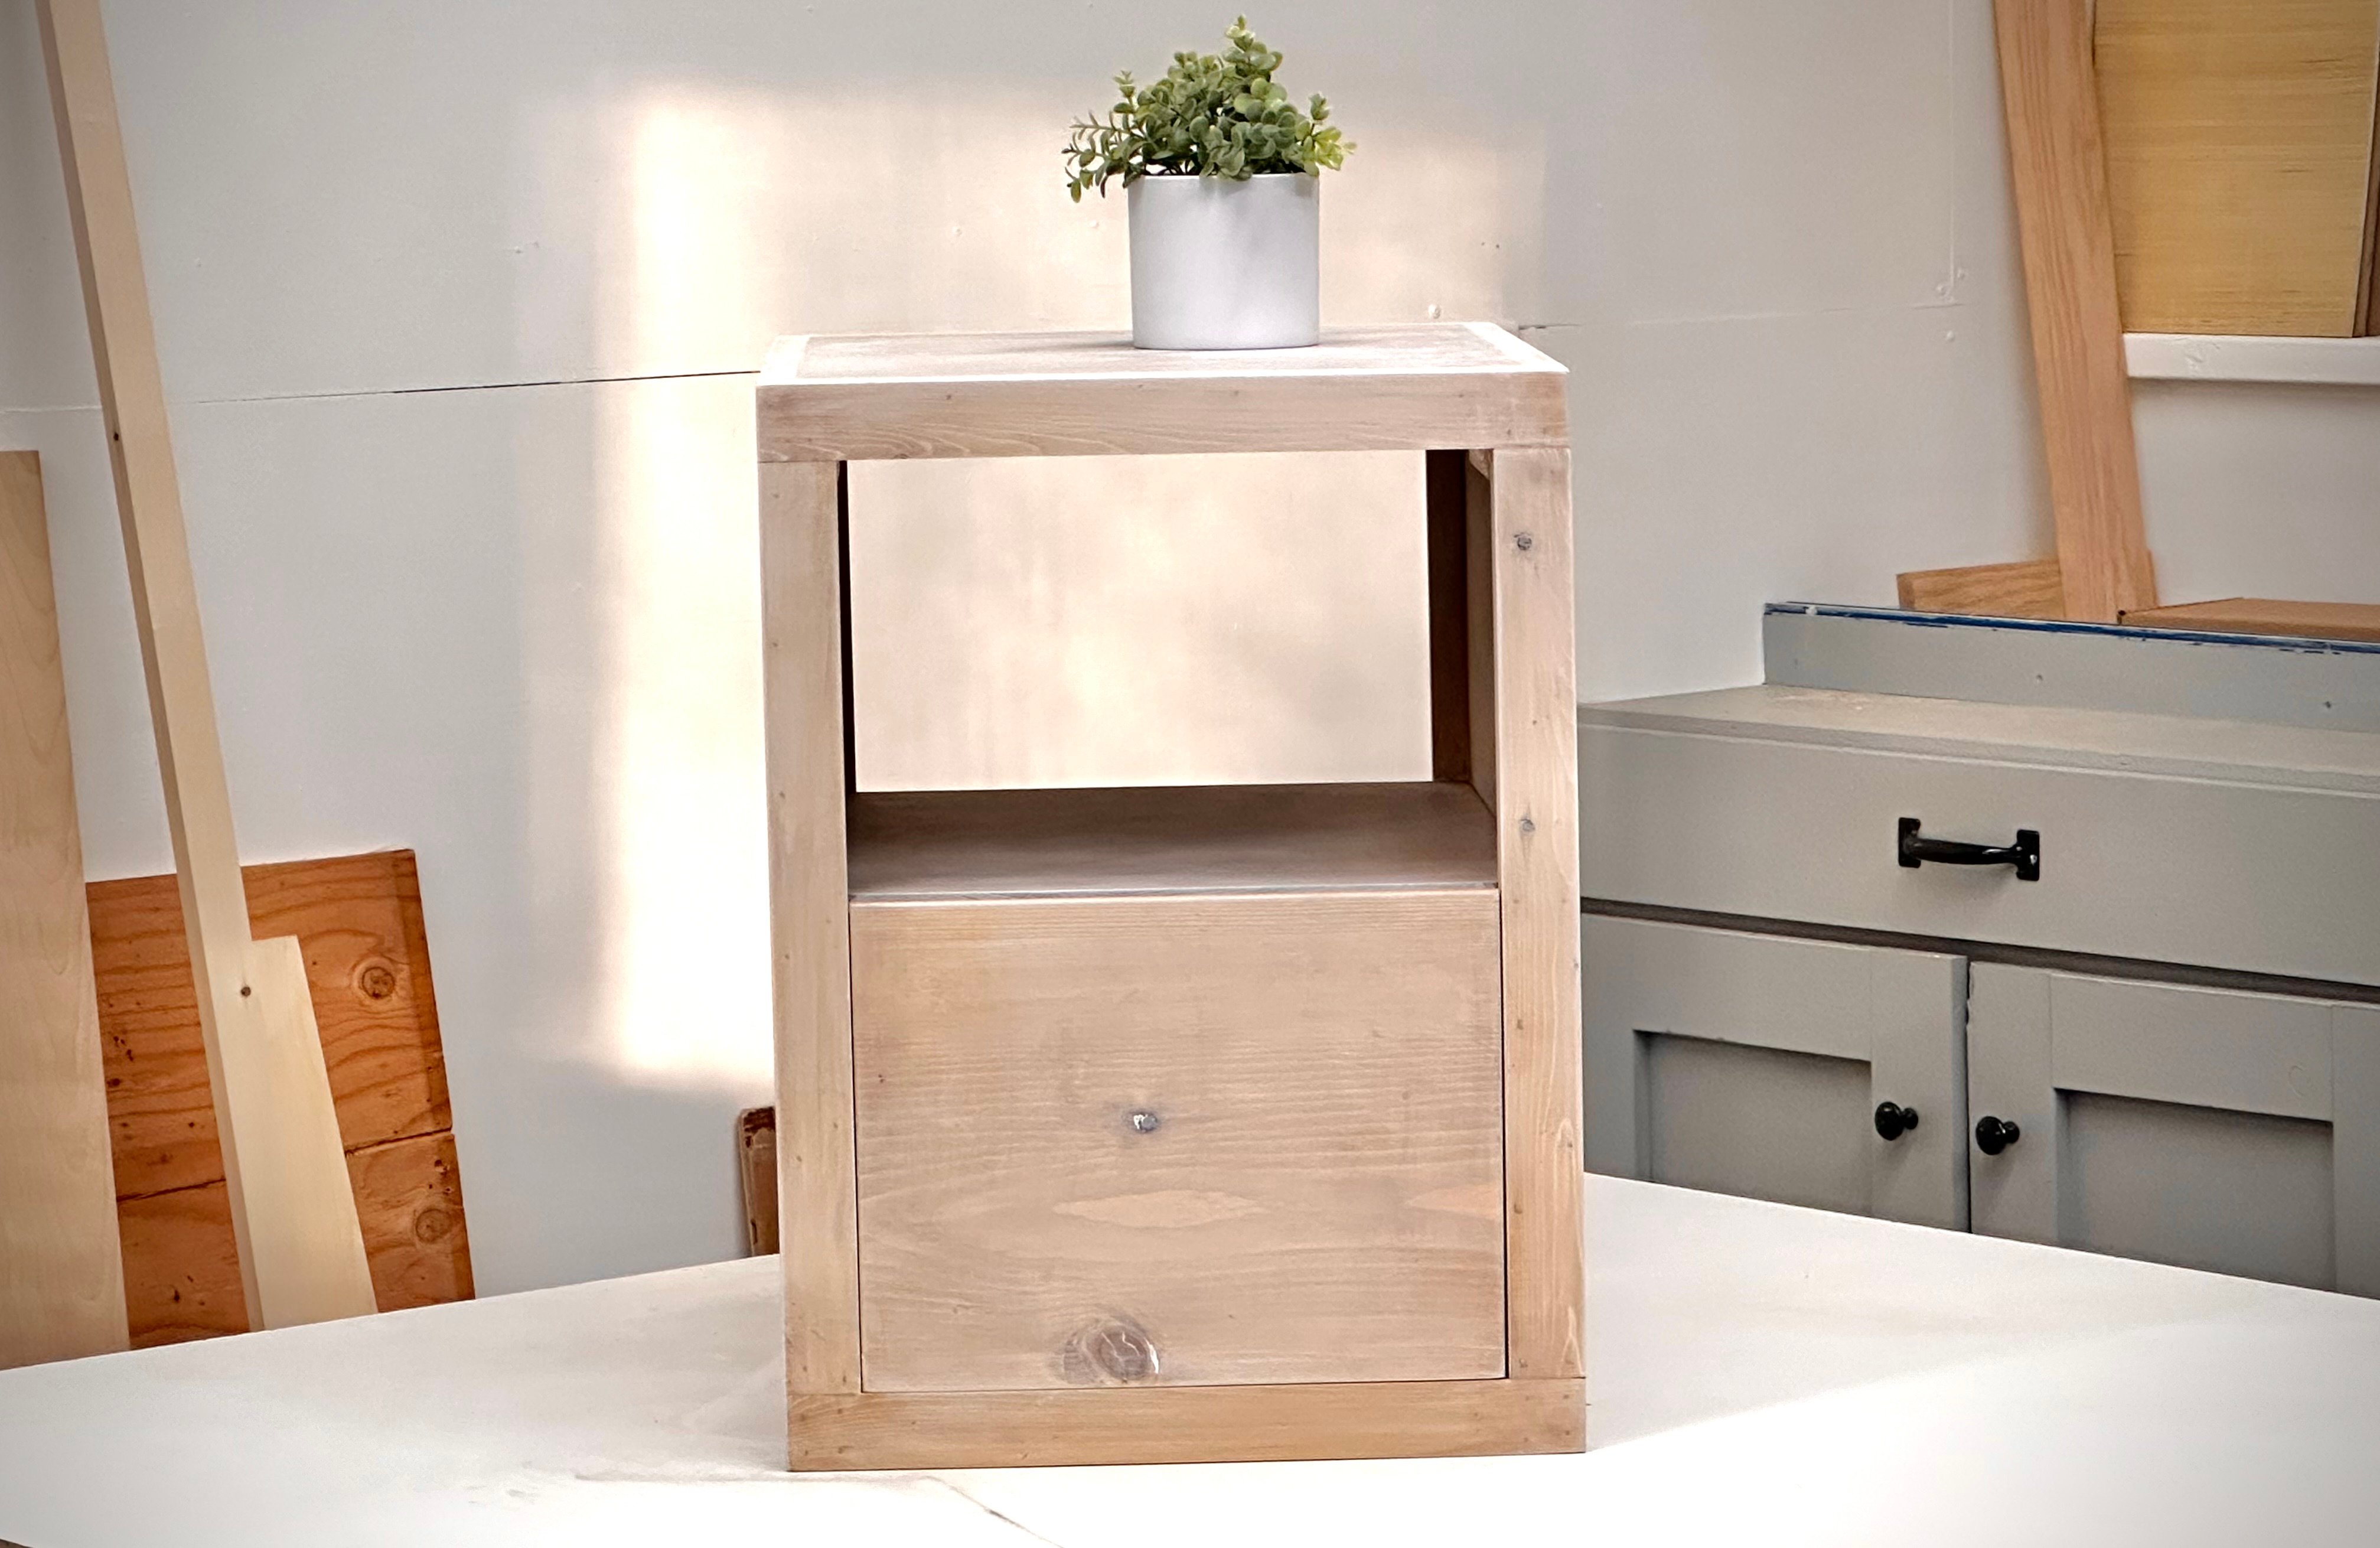
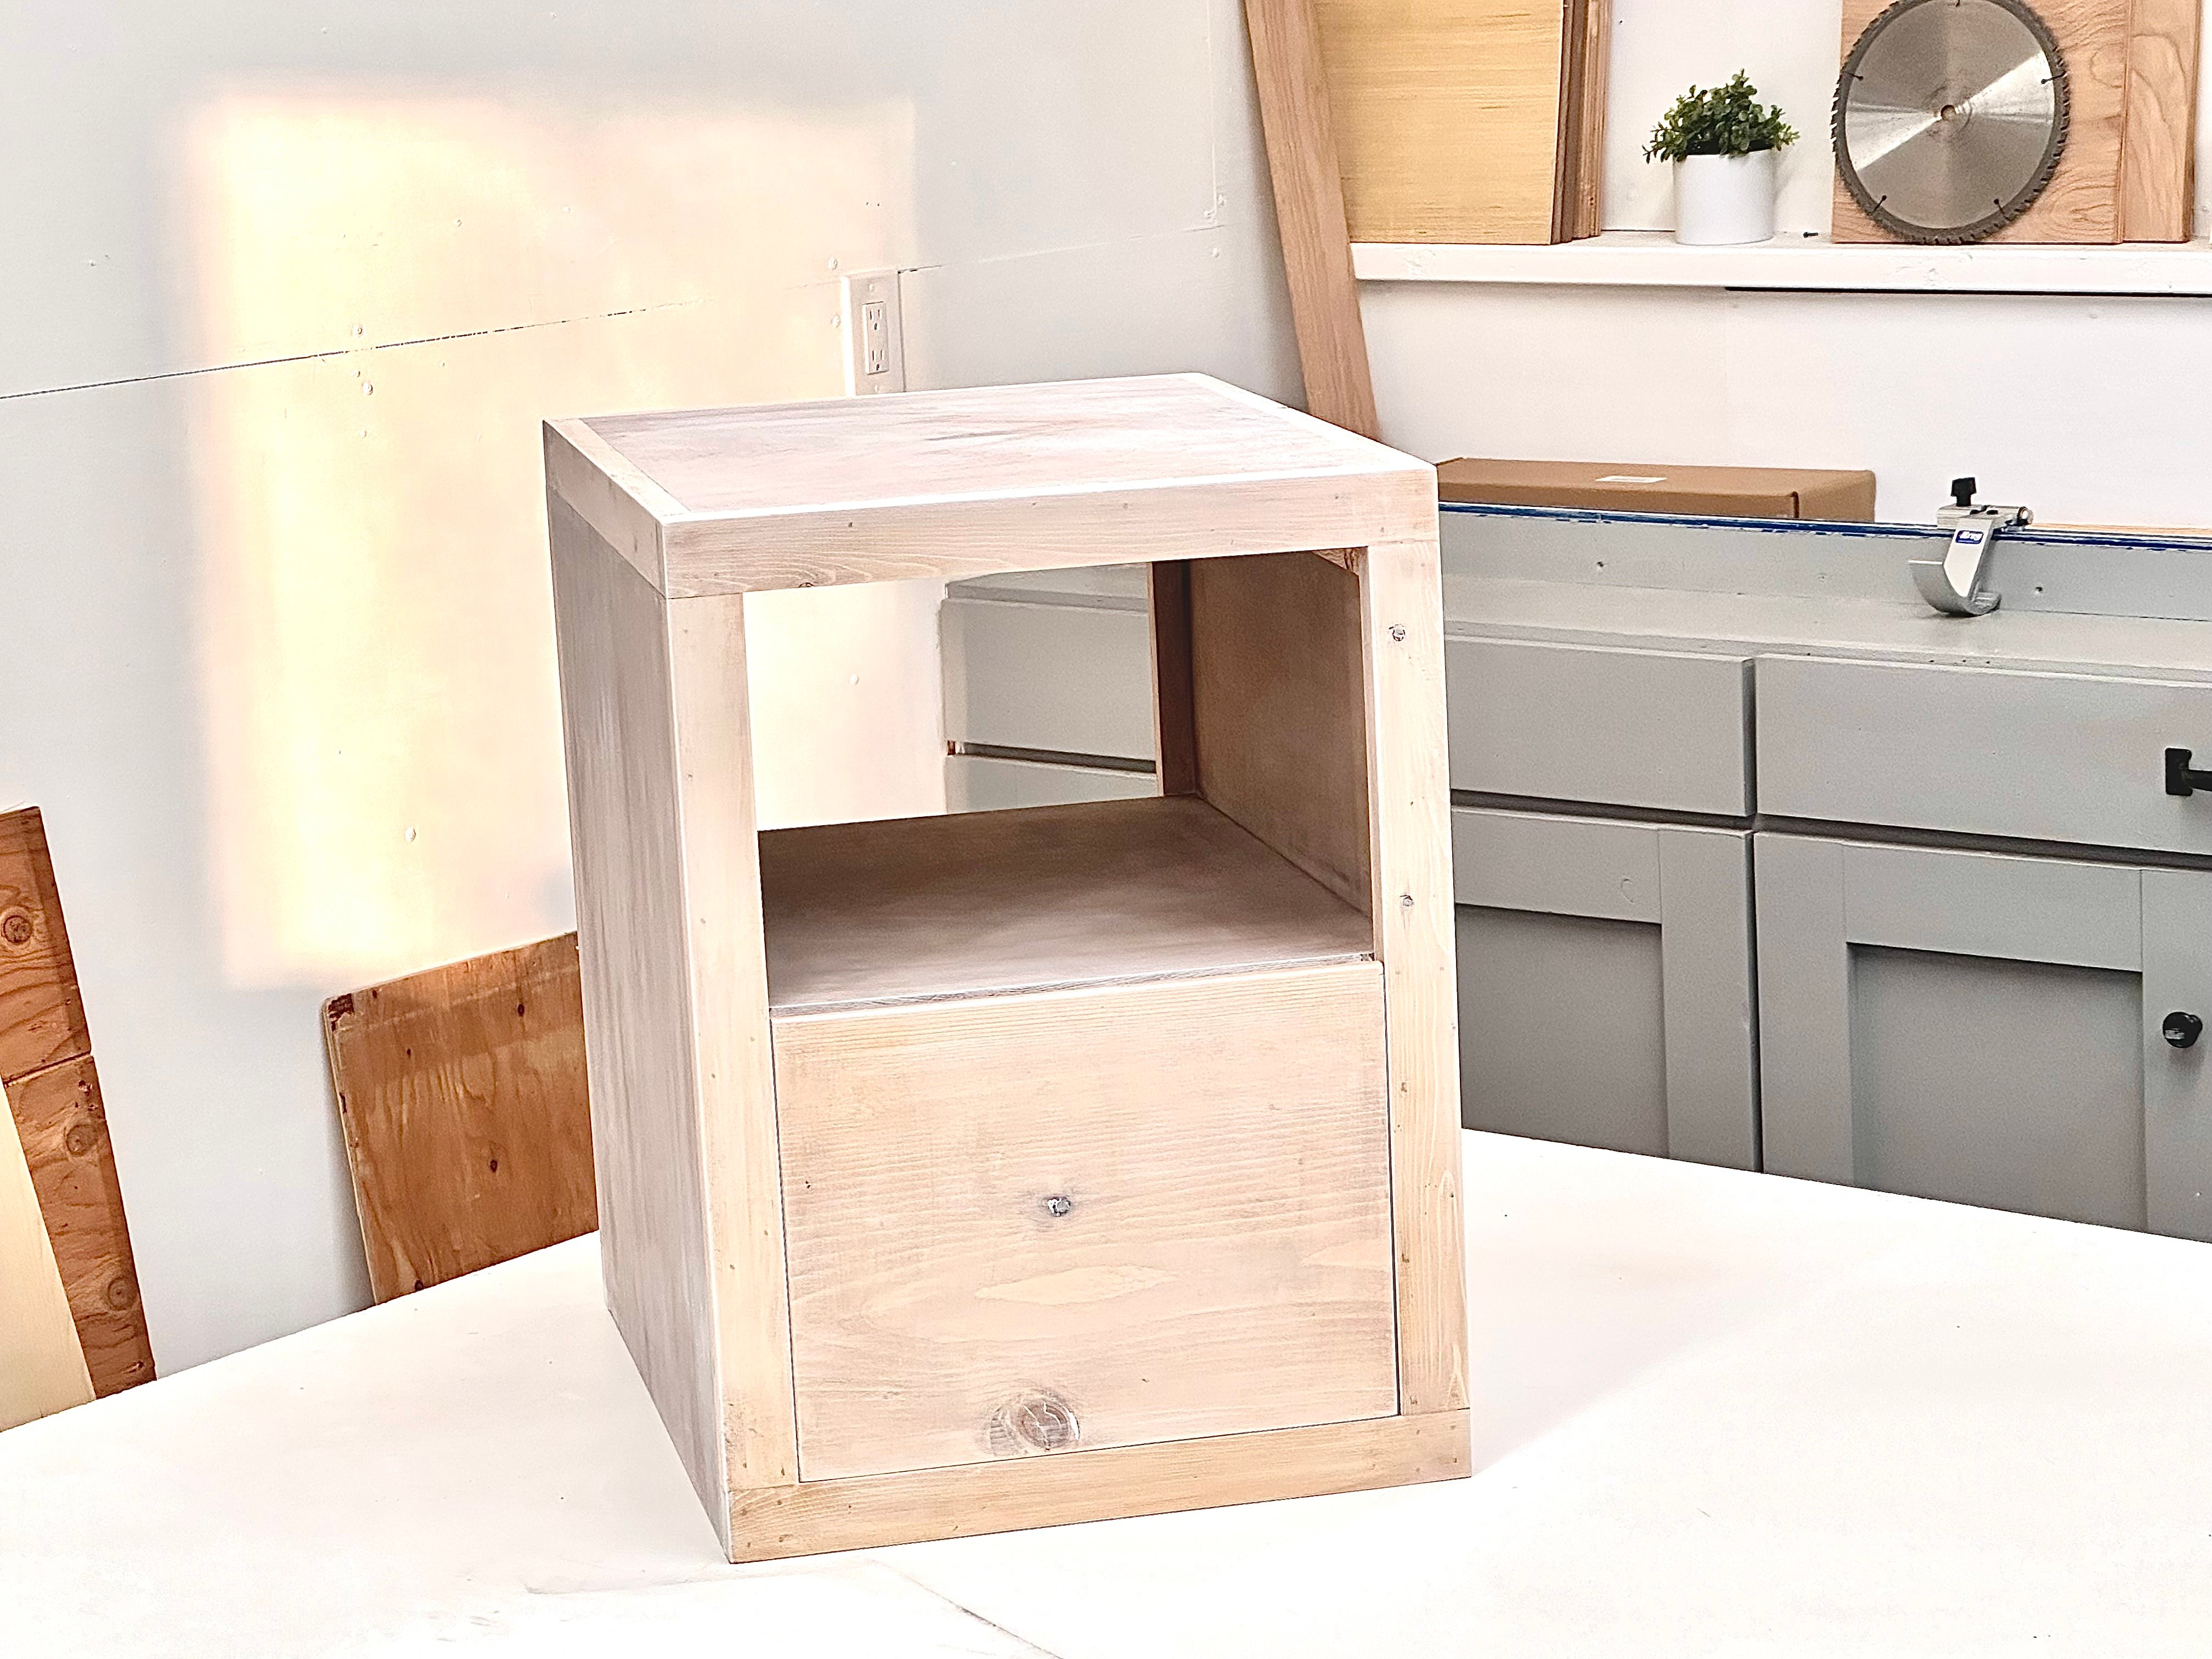
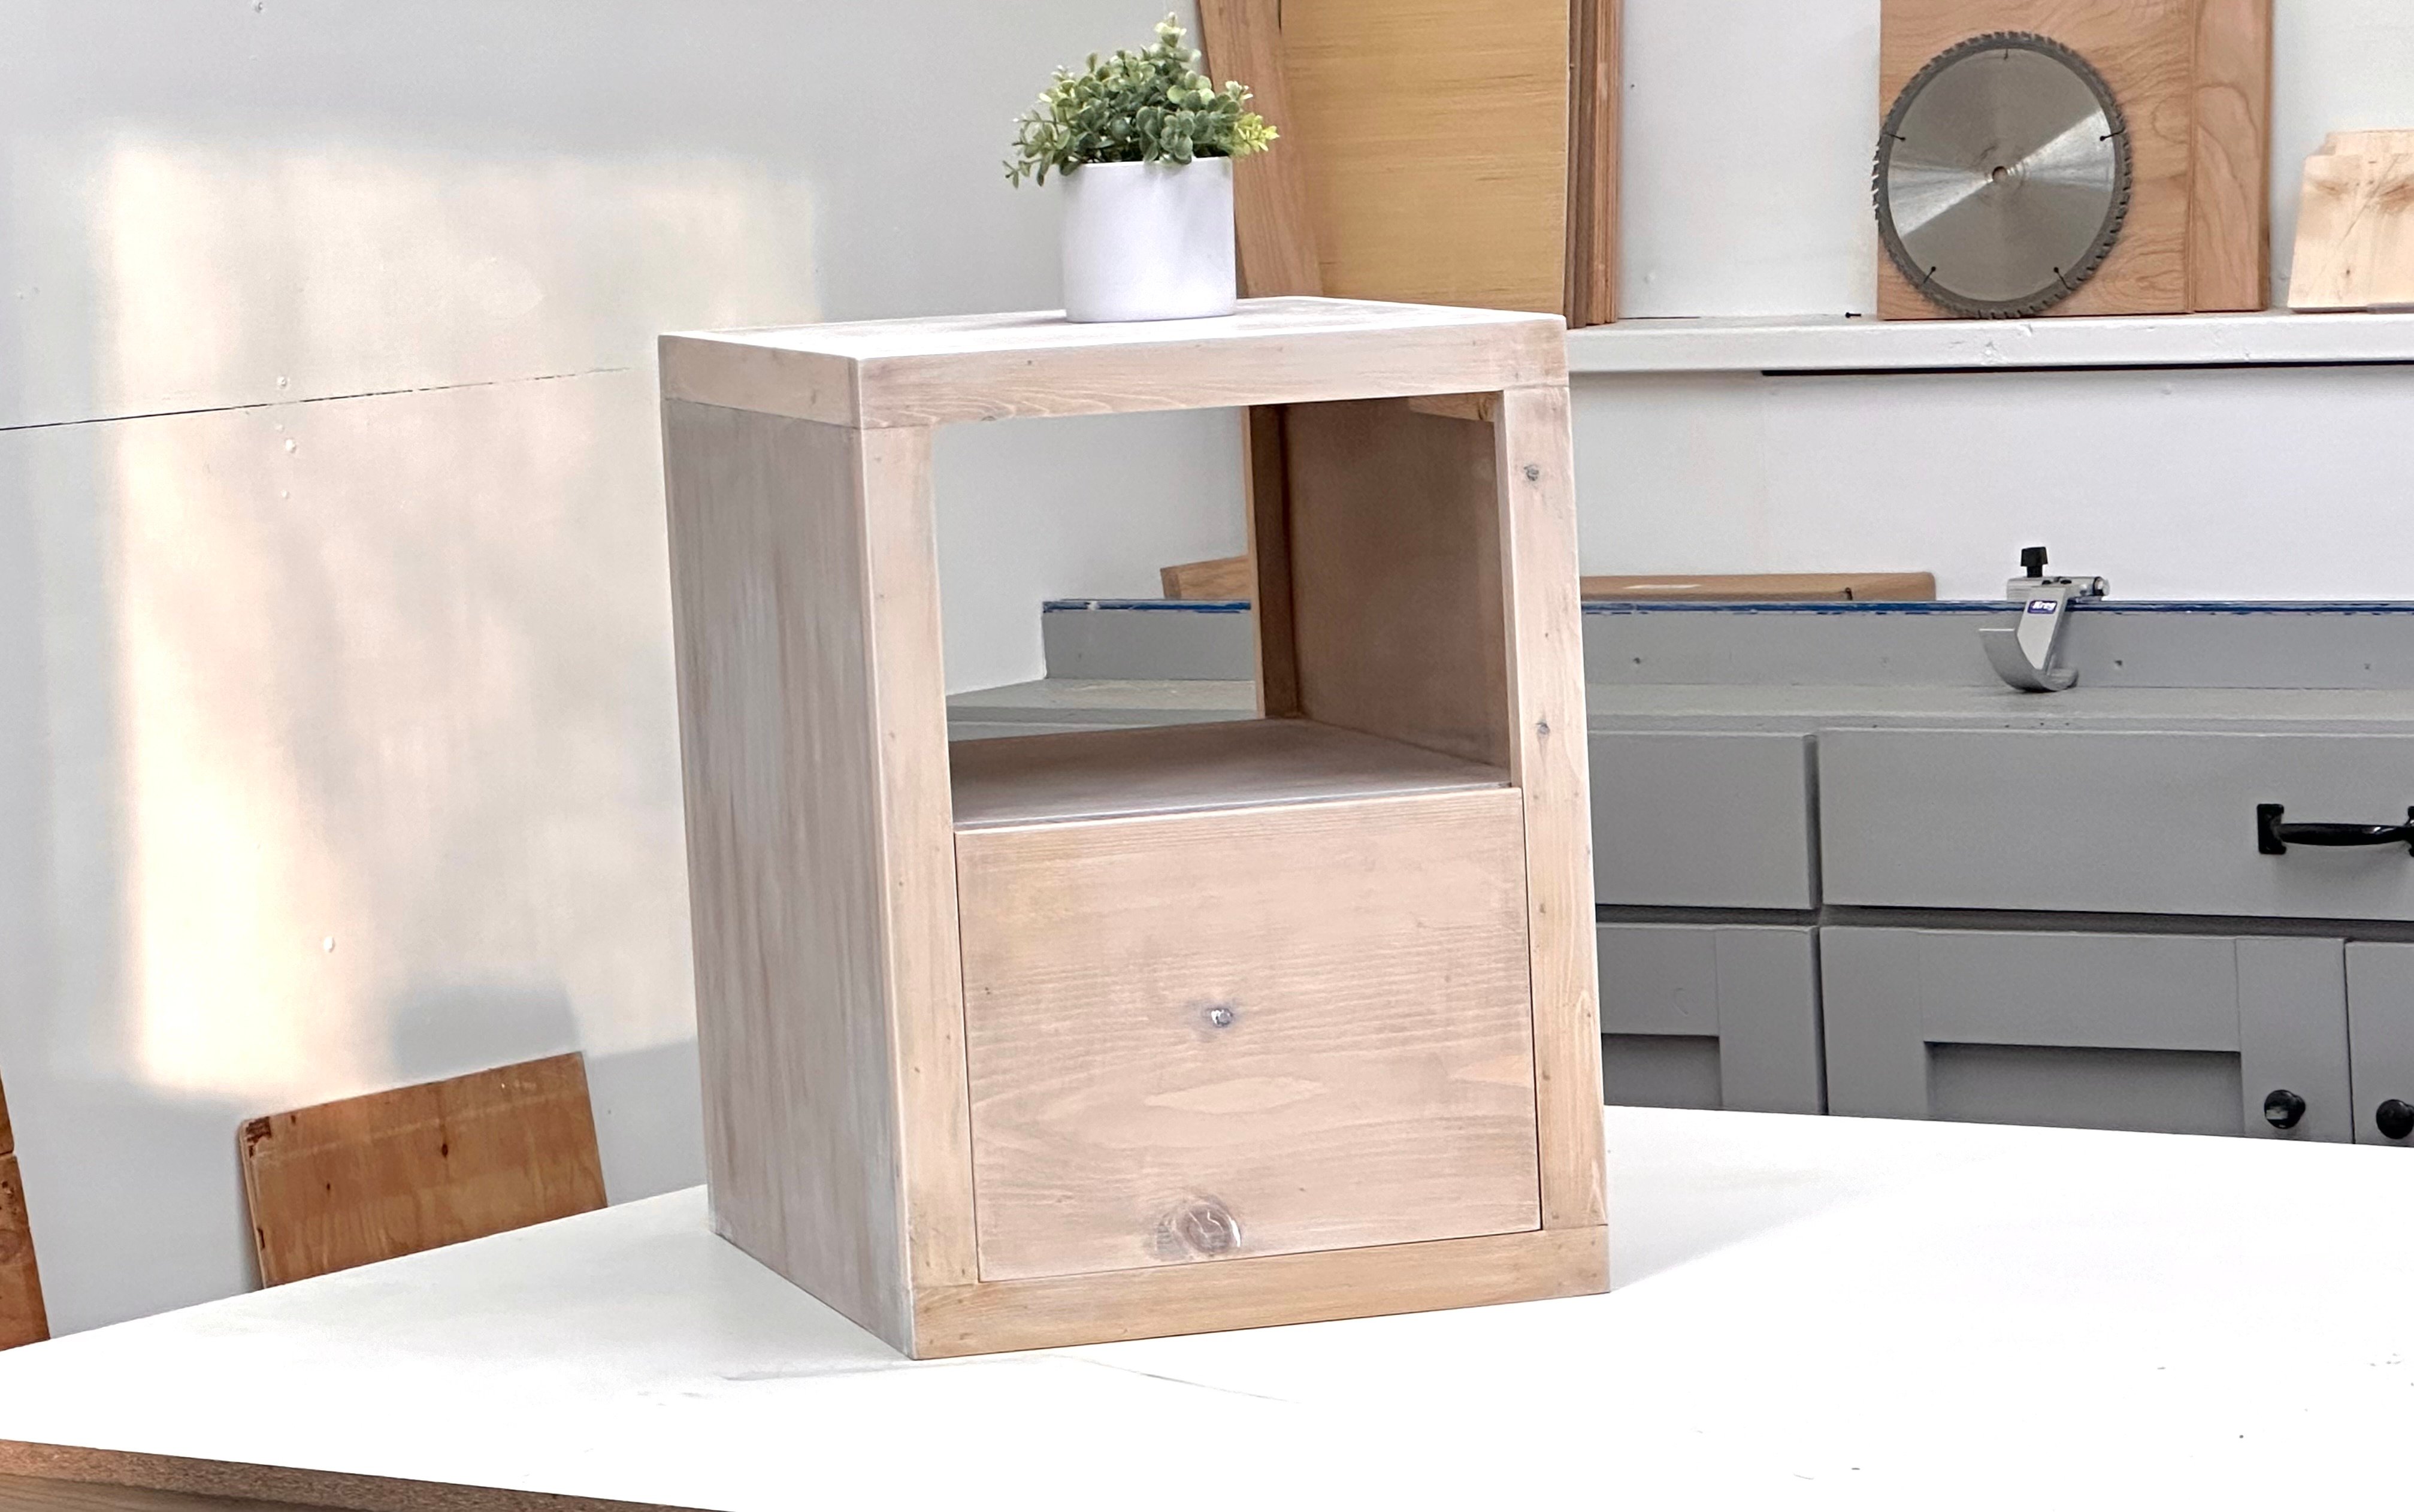
This is a free plans to build your own nightstand inspired by the Pottery Barn Cayman nightstand, in the narrow design.

Put together with BRAD NAILS (Yep, NO pocket holes), this is a fast and beautiful build! I built it in about two hours! This will take longer for a beginner, but as you gain woodworking experience, a couple hours is a reasonable build time.  

We love this design with the drawer, open space, and smooth top.  This narrow design brings tons of style in a small footprint! Don't pay $450 for one tiny nightstand!  You can build it for way less!
Cayman nightstand
Cayman nightstand
Cayman nightstand

Why I Built this Modern Narrow Nightstand

Well, it's a long story!

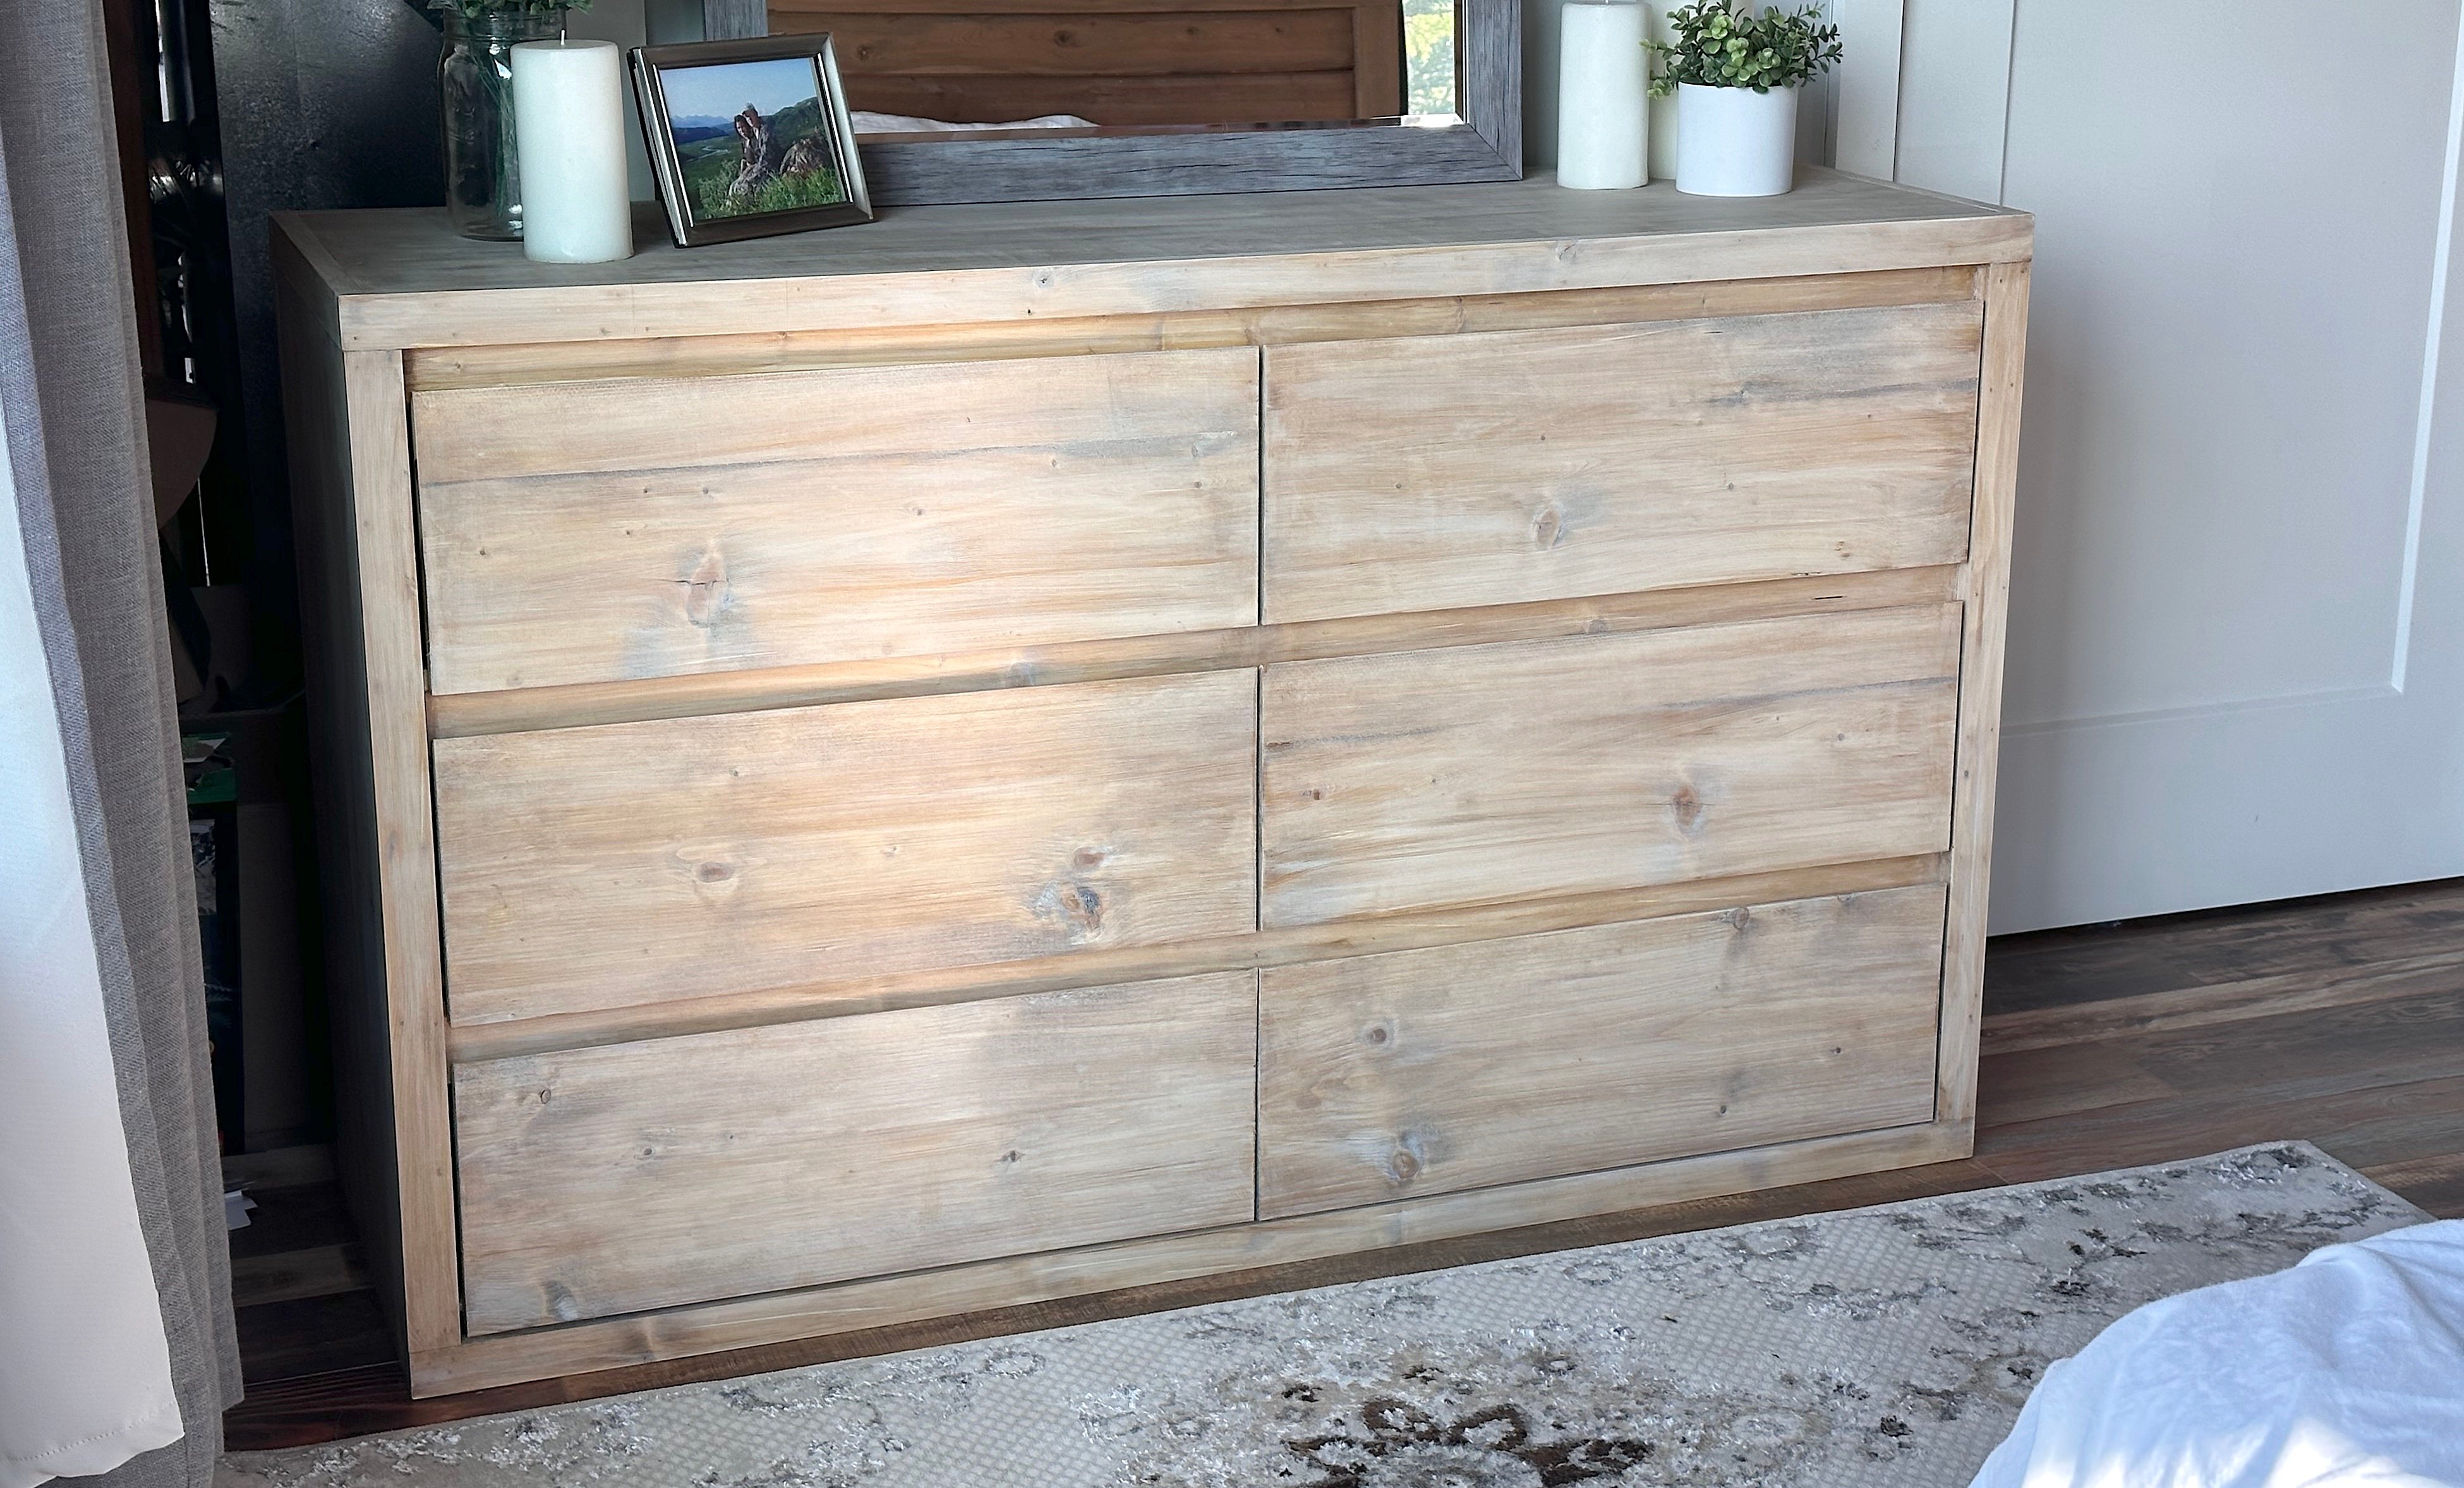
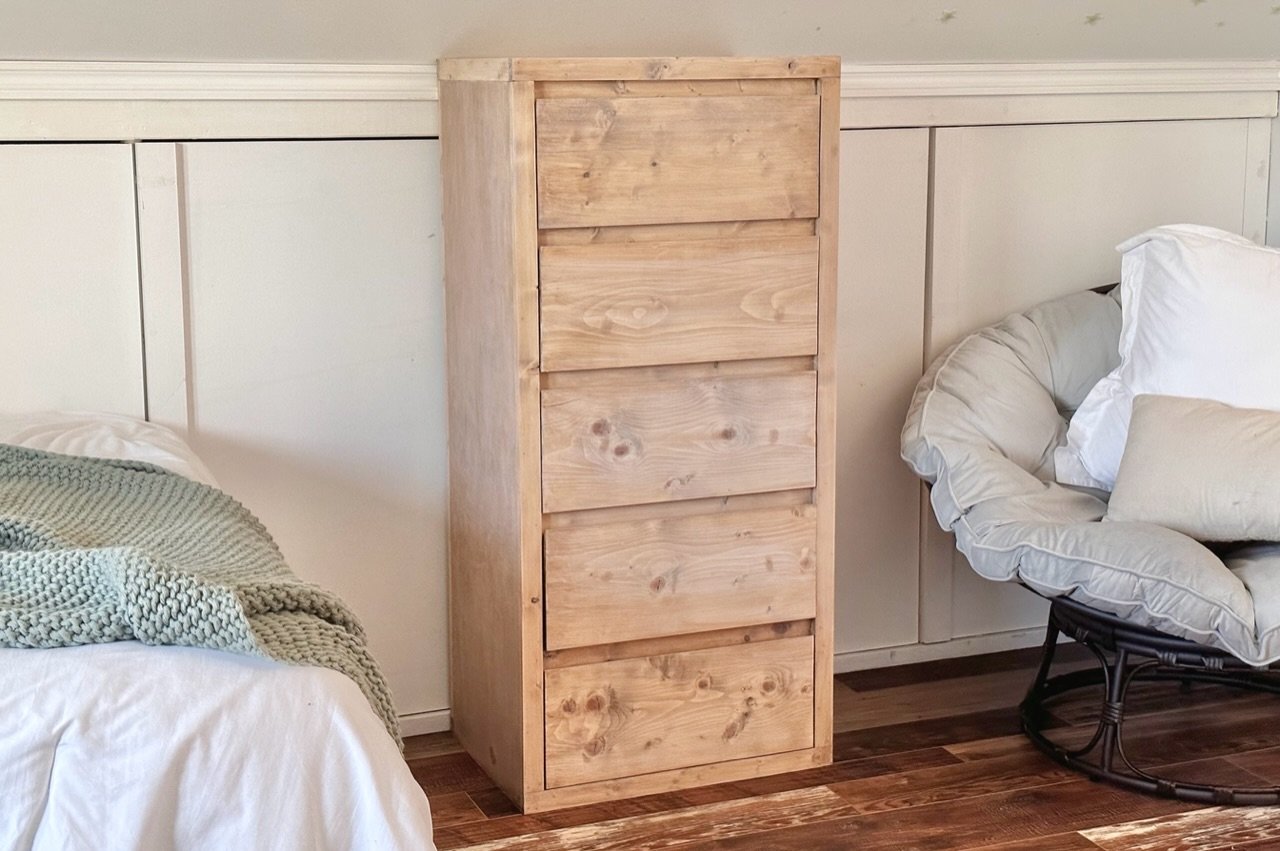
A couple years ago I built this dresser -

pottery barn cayman dresser $250

It turned out so awesome, really has been one of my all time favorite dressers ever.  We are still using and loving it! So much, that my older daughter asked for another dresser in the tall version! 

Free tall dresser plans pottery barn cayman

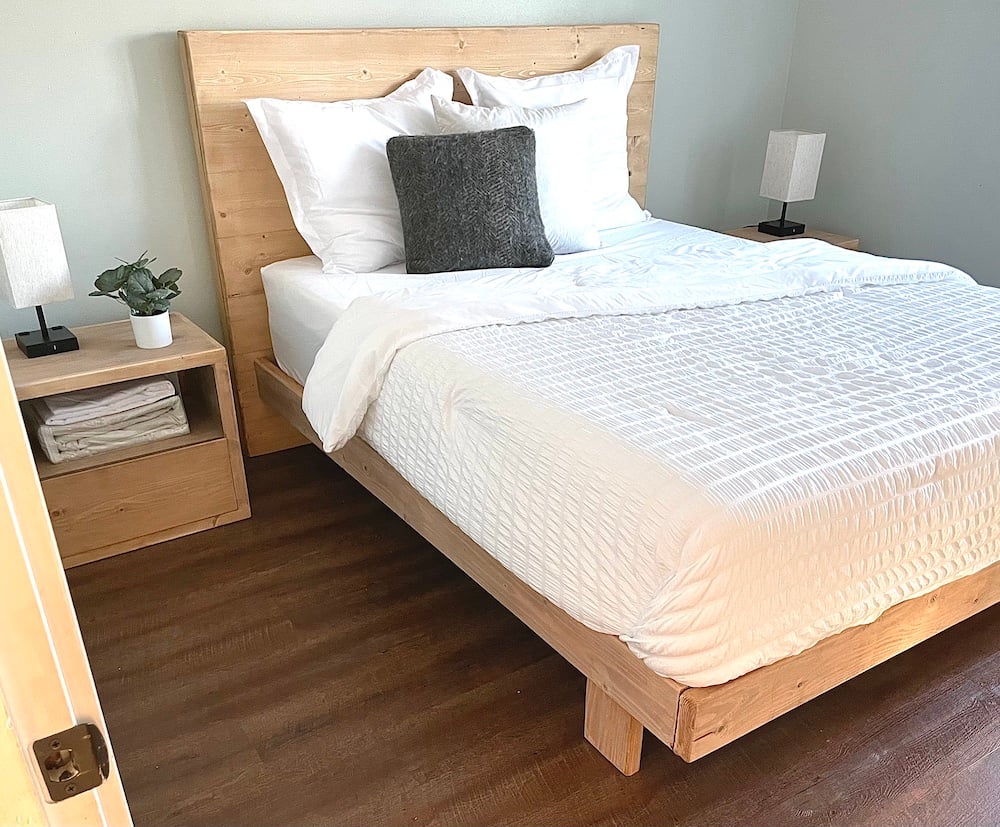
 Because this building process for this collection is so easy and fast, I built the matching bed and standard sized nightstands for a short term rental property.

ana white midcentury bed

So when my daughter asked for a new nightstand, I was excited to get an opportunity to build this narrow version!


Why We Love this Narrow Minimalist Modern Nightstand

  • Fast and easy build!
  • Modern design
  • Drawer and shelf combo great for storage
  • Paint or stain any color!
  • Simple off the shelf materials
  • NO POCKET HOLES! Just nail together!
  • Build the entire collection with all free plans 


Watch!  Build Video for This Project

Here's a quick reel of building this narrow nightstand.

And here's a longer video showing how I built the standard sized nightstand - it's the same build process in just a different size format.


Free Plans to Build Your Own Narrow Minimalist Modern Nightstand

Ready to build this yourself?  Here's the free plans, enjoy!

Dimensions
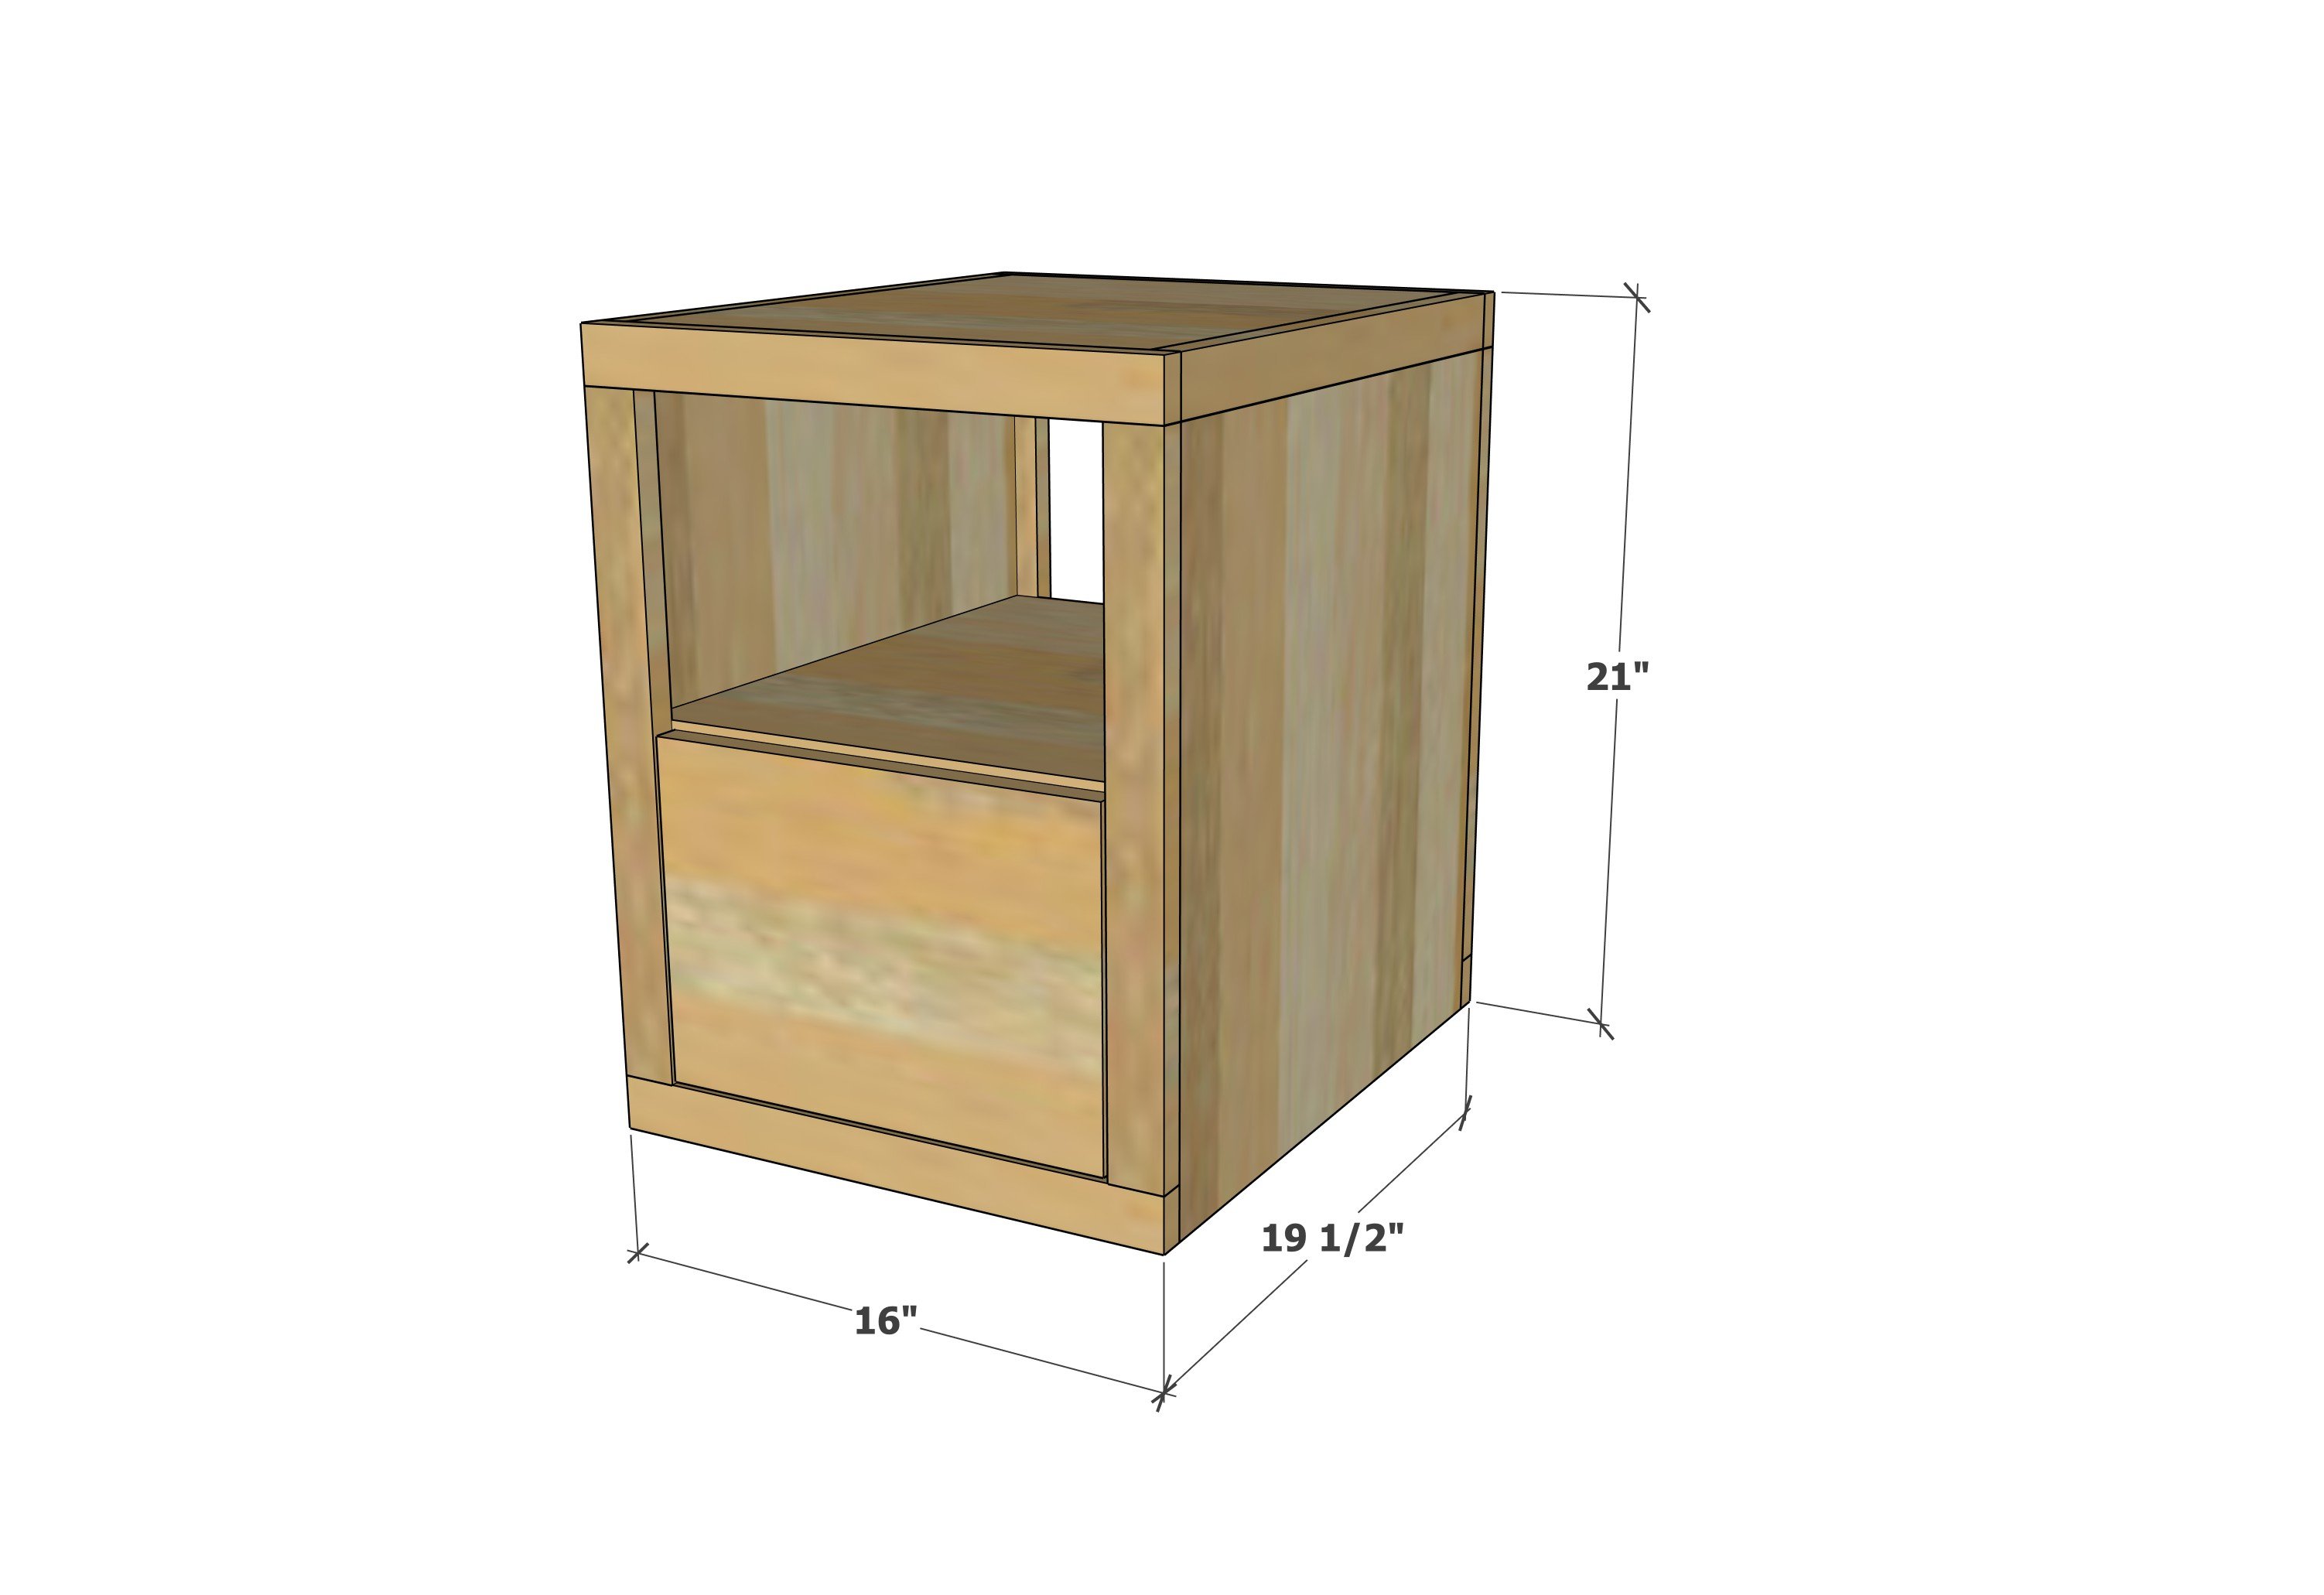
dimensions for minimalist modern nightstand free plans
16" wide x 19-1/2" deep x 21" tall

Preparation

Shopping List
  • Half sheet of 3/4" thick cabinet grade plywood, ripped into strips 18" wide
  • 1/4" plywood piece 12" x 18"
  • 3 - 1x2 @ 8 feet long
  • 1 - 1x6 @ 5 feet long
  • 1 - 1x10 @ 13" long
  • 1-1/4" and 3/4" brad nails
  • wood glue
  • 18 euro drawer slide
Cut List
  • 2 - 3/4" plywood @ 18" x 19-1/2" - sides
  • 2 - 3/4" plywood @ 18" x 14-1/2" - top and shelf
  • 4 - 1x2 @ 10-3/8" - inside cleats
  • 4 - 1x2 @ 16" - horizontal trim pieces
  • 6 - 1x2 @ 18" - measure and cut to fit
  • 4 - 1x2 scraps @ about 6" long
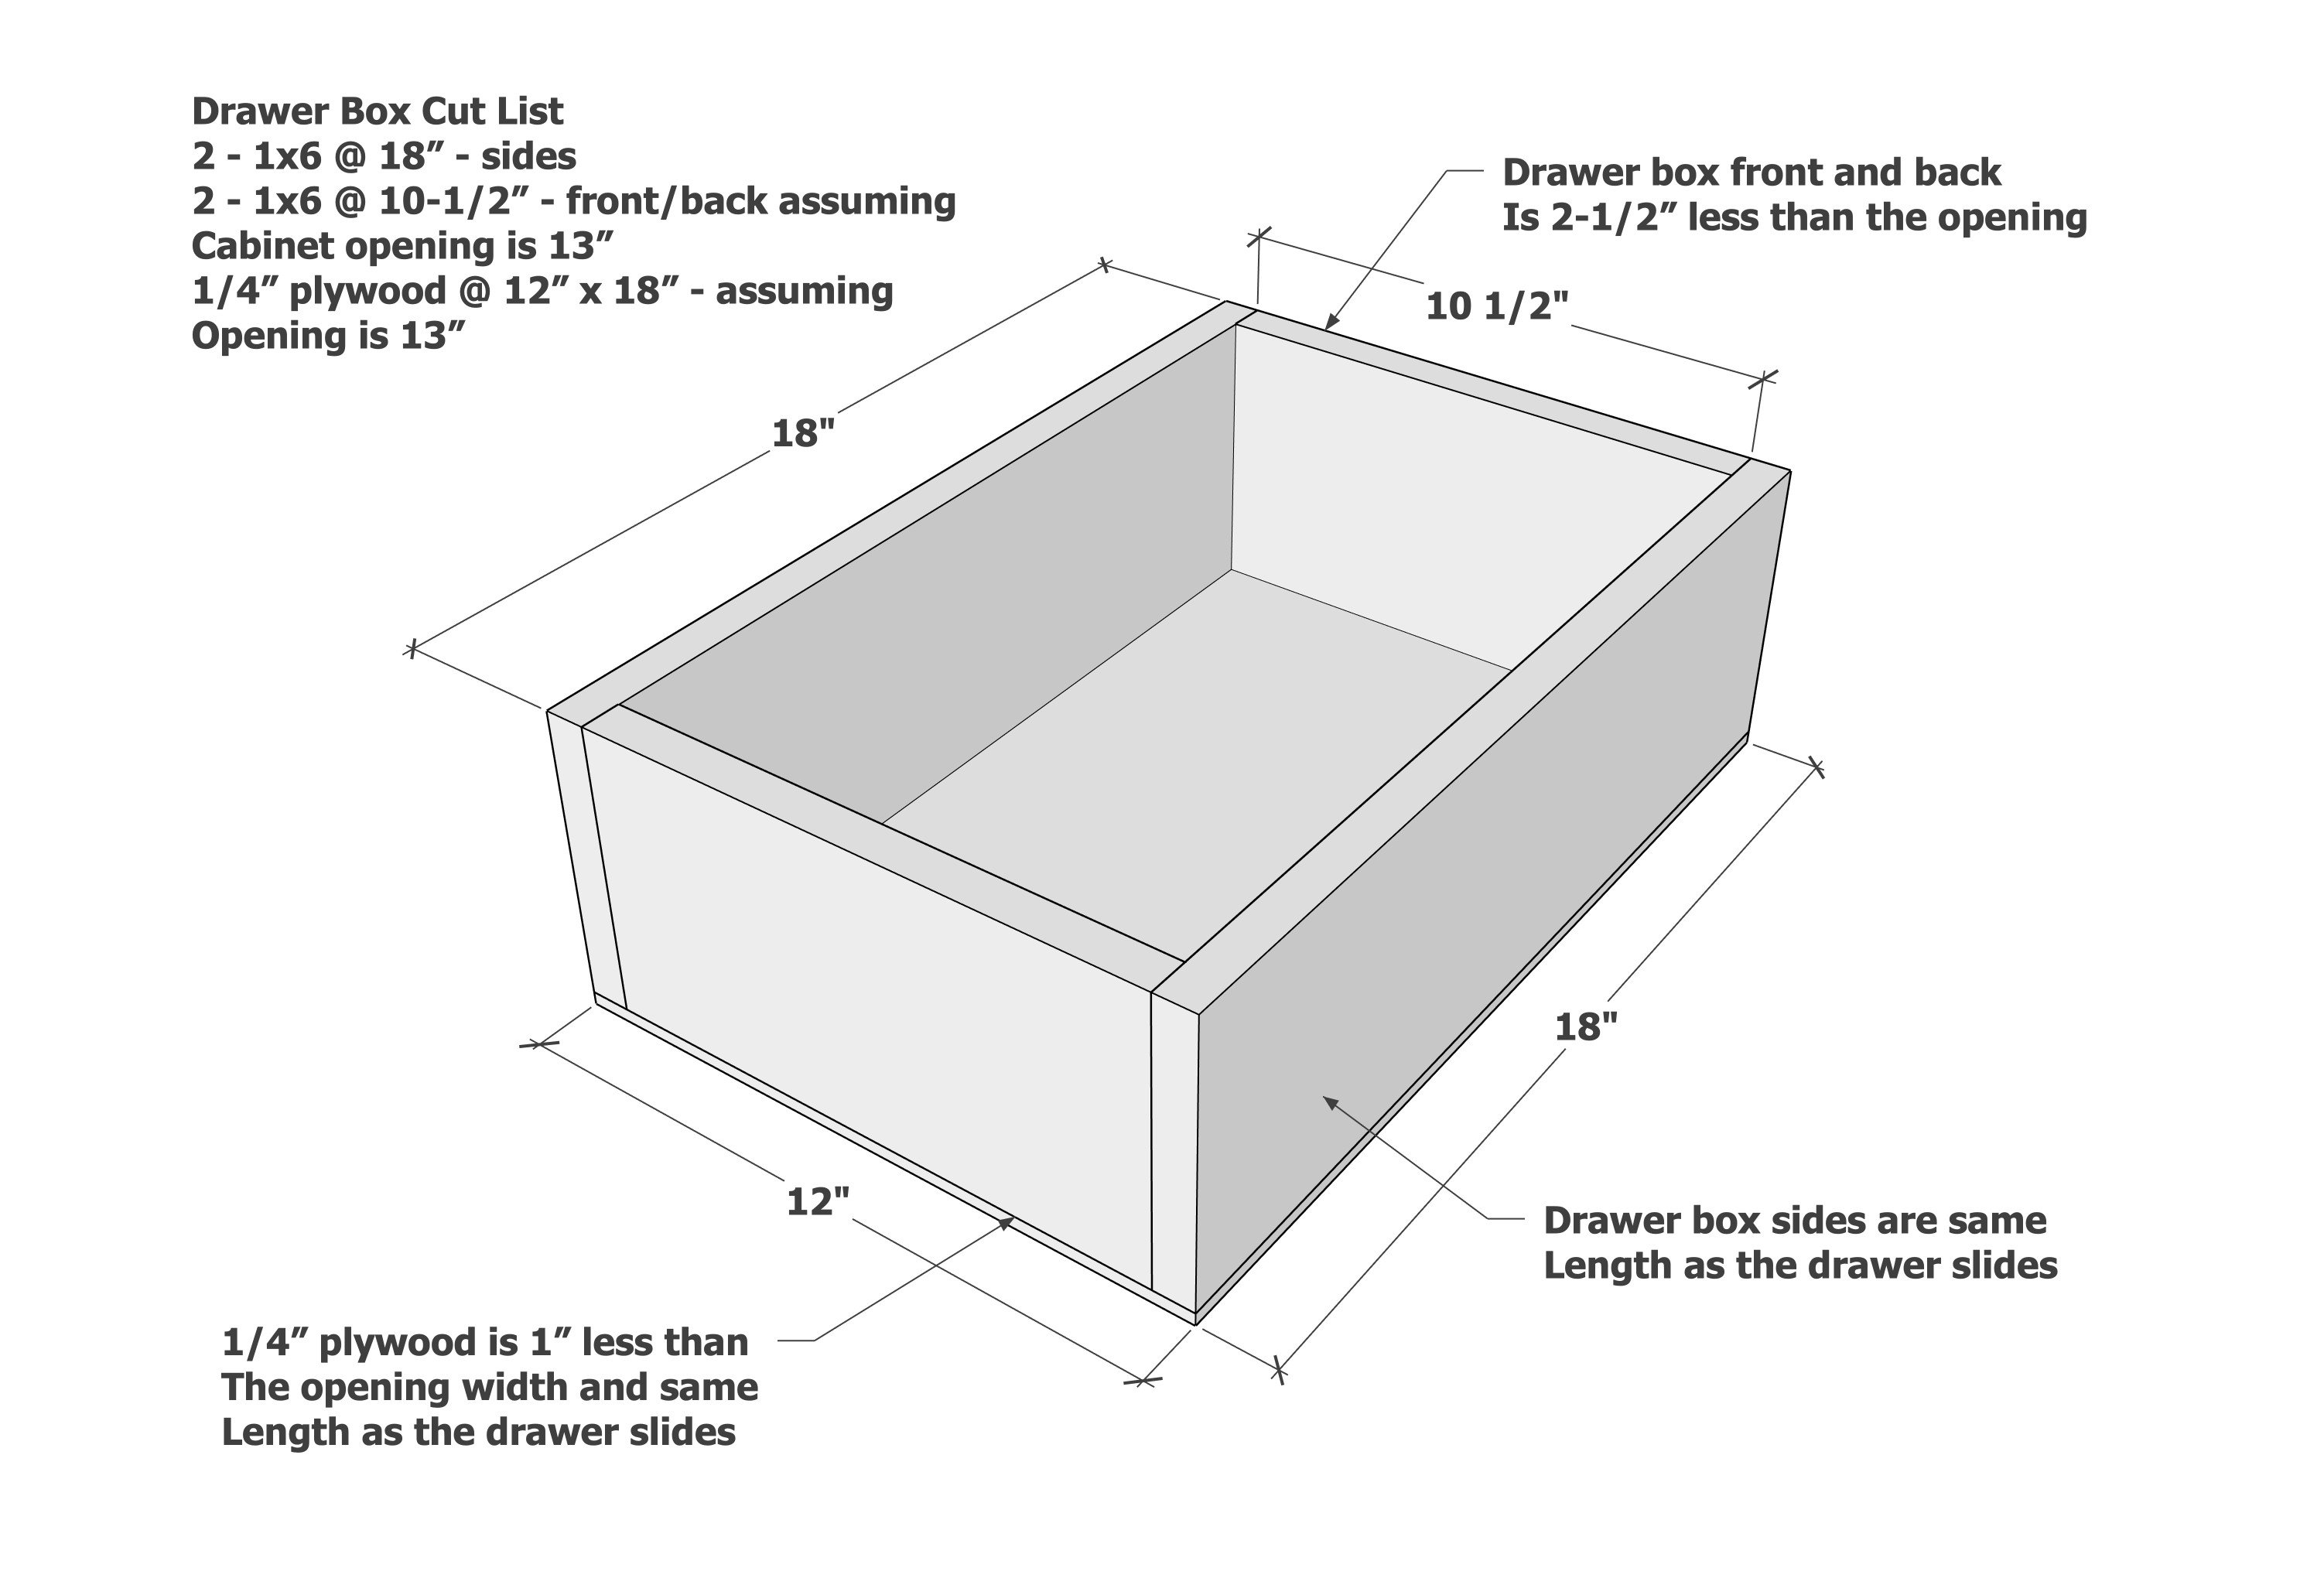
  • 2 - 1x6 @ 18" - drawer box sides
  • 2 - 1x6 @ 10-1/2" - drawer front and back, measure and cut to fit
  • 1 - 1/4" plywood @ 18" x 13" - drawer bottom
  • 1 - 1x10 @ 12-3/4" - measure and cut to fit, drawer face
Cutting Instructions

Good cuts are what makes this project look good!  To cut the plywood, first rip into strips along the grain in 18" widths.  Then cross cut to match the cut list.  Use a table saw or a guide to make sure you are getting good cuts.

For the 1x pieces, a chop saw or miter saw is needed for straight and accurate cuts.

Tools
Tape Measure
Pencil
Safety Glasses
Drill
Miter Saw
Table Saw
Brad Nailer
Power Sander

Instructions

Step 1

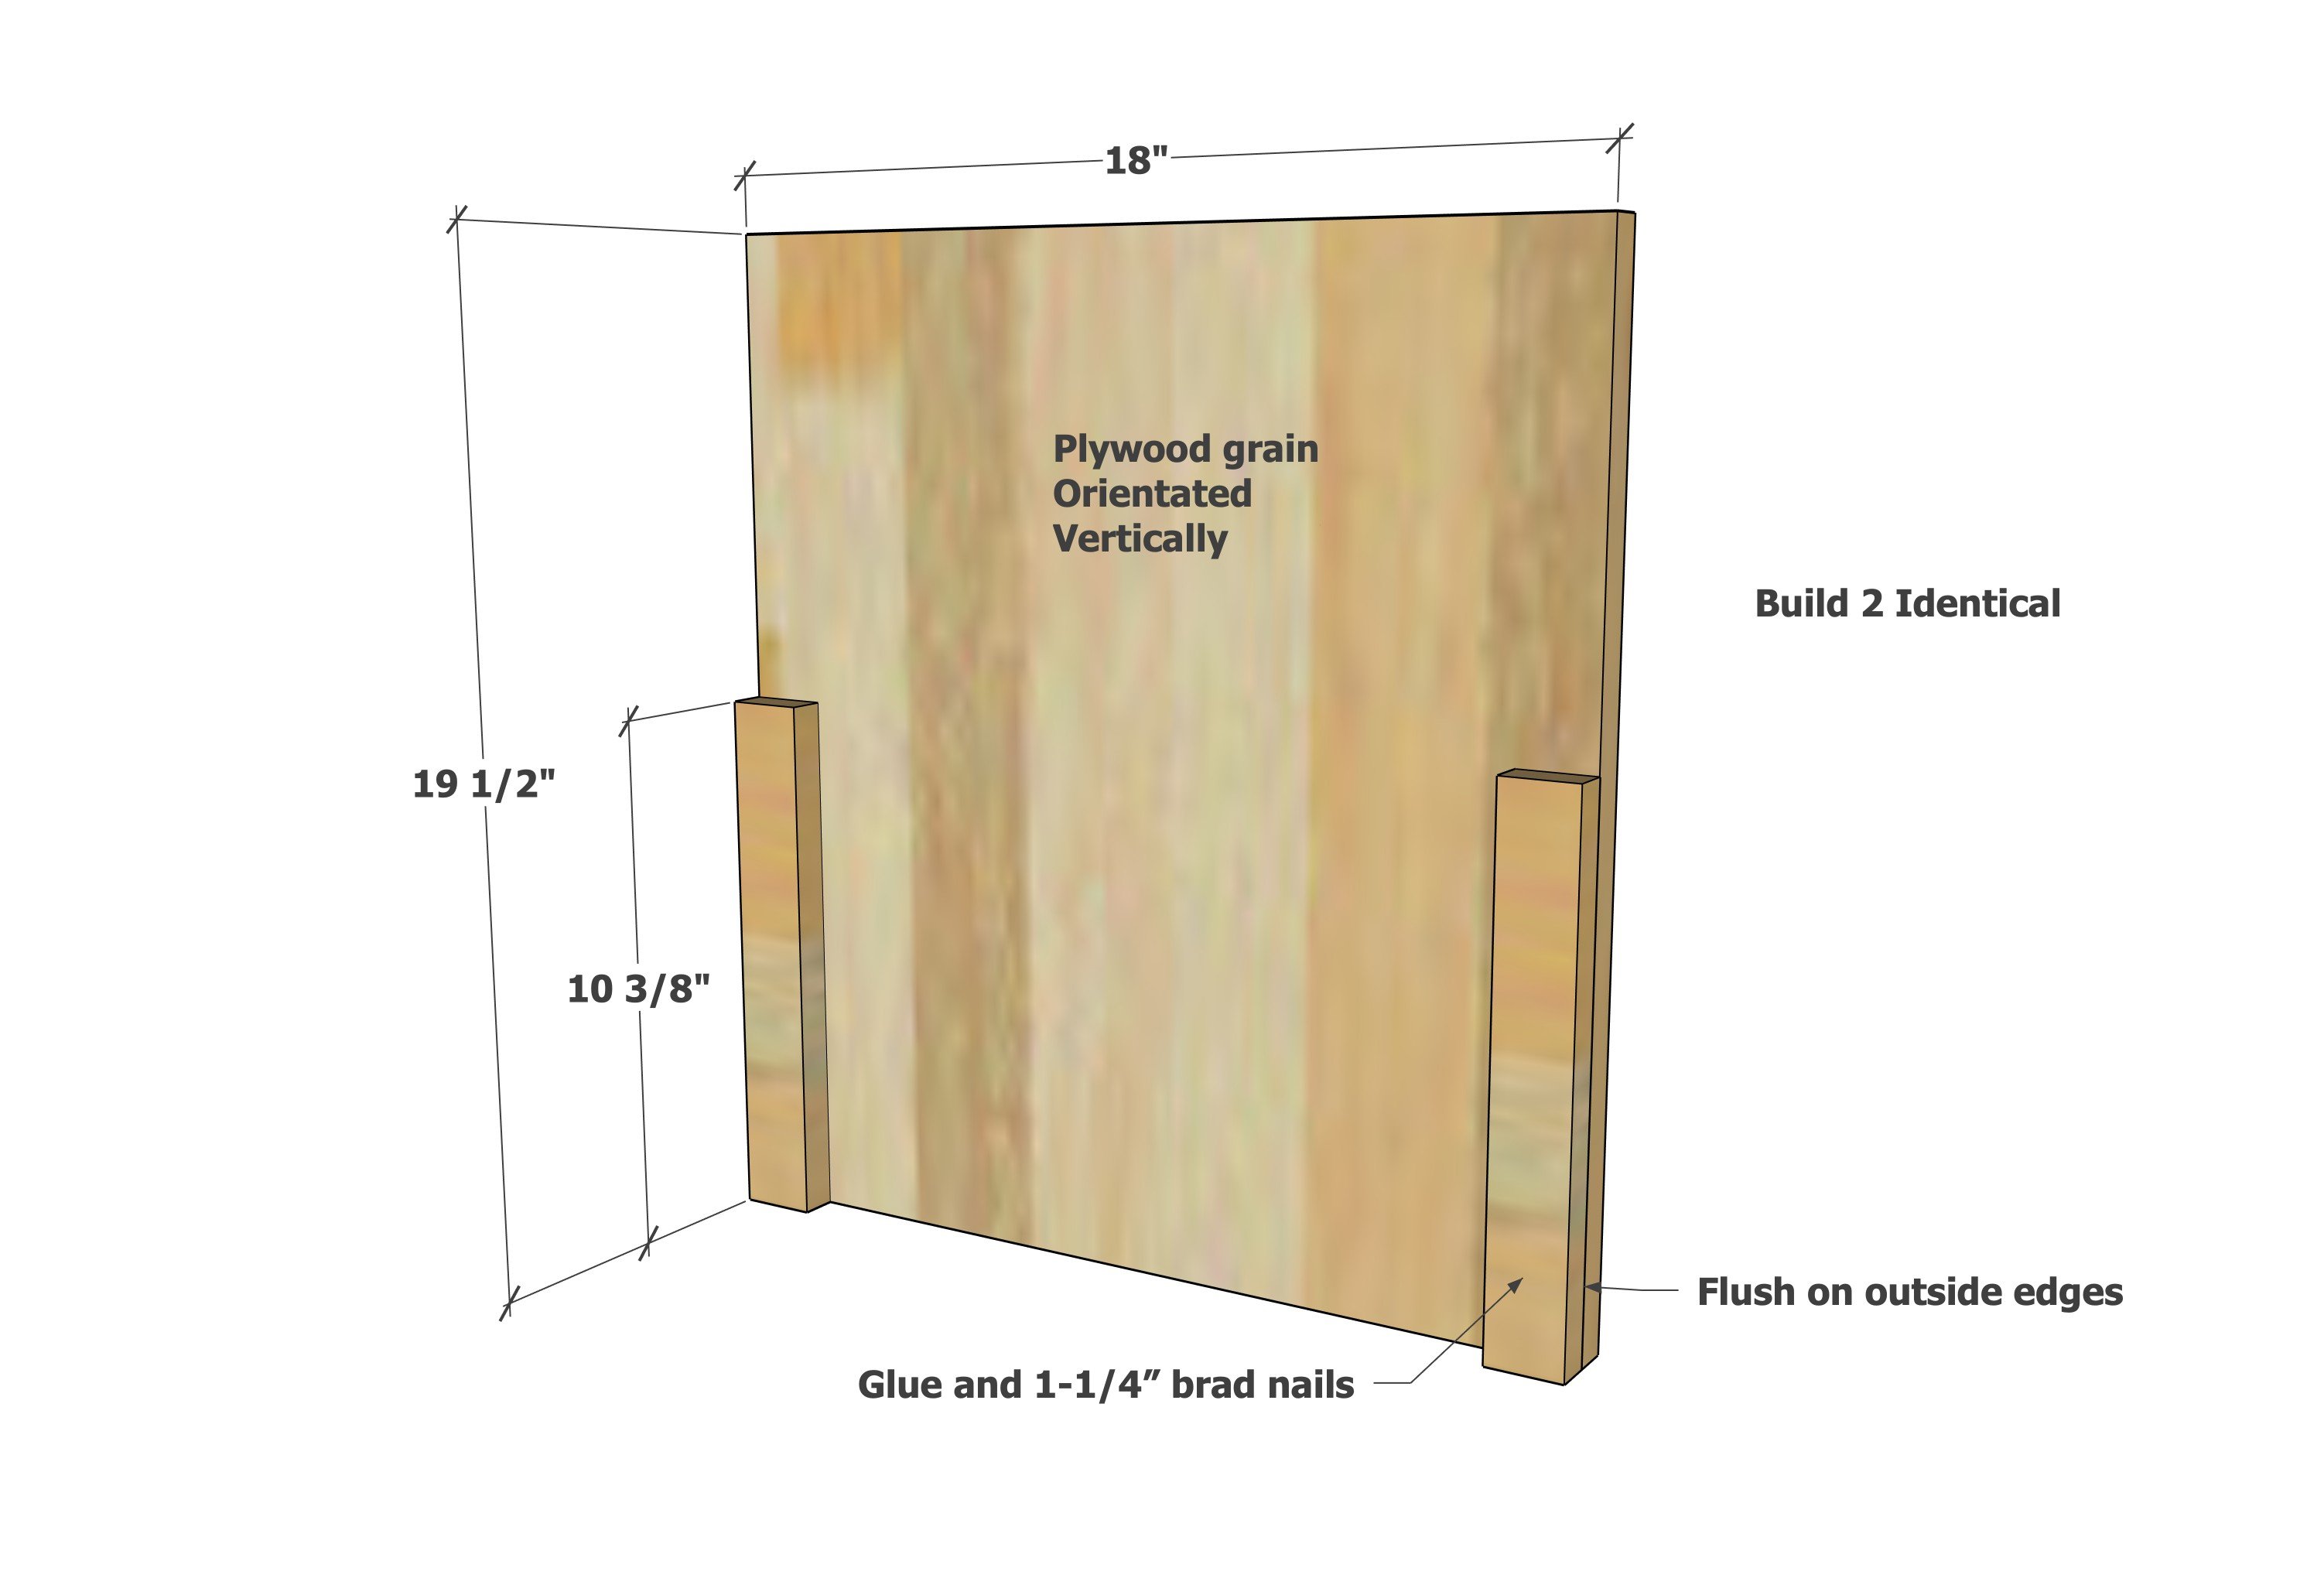
On the two side panels, nail the 1x2 cleats as shown with glue, so the outside edges are flush.

Step 2

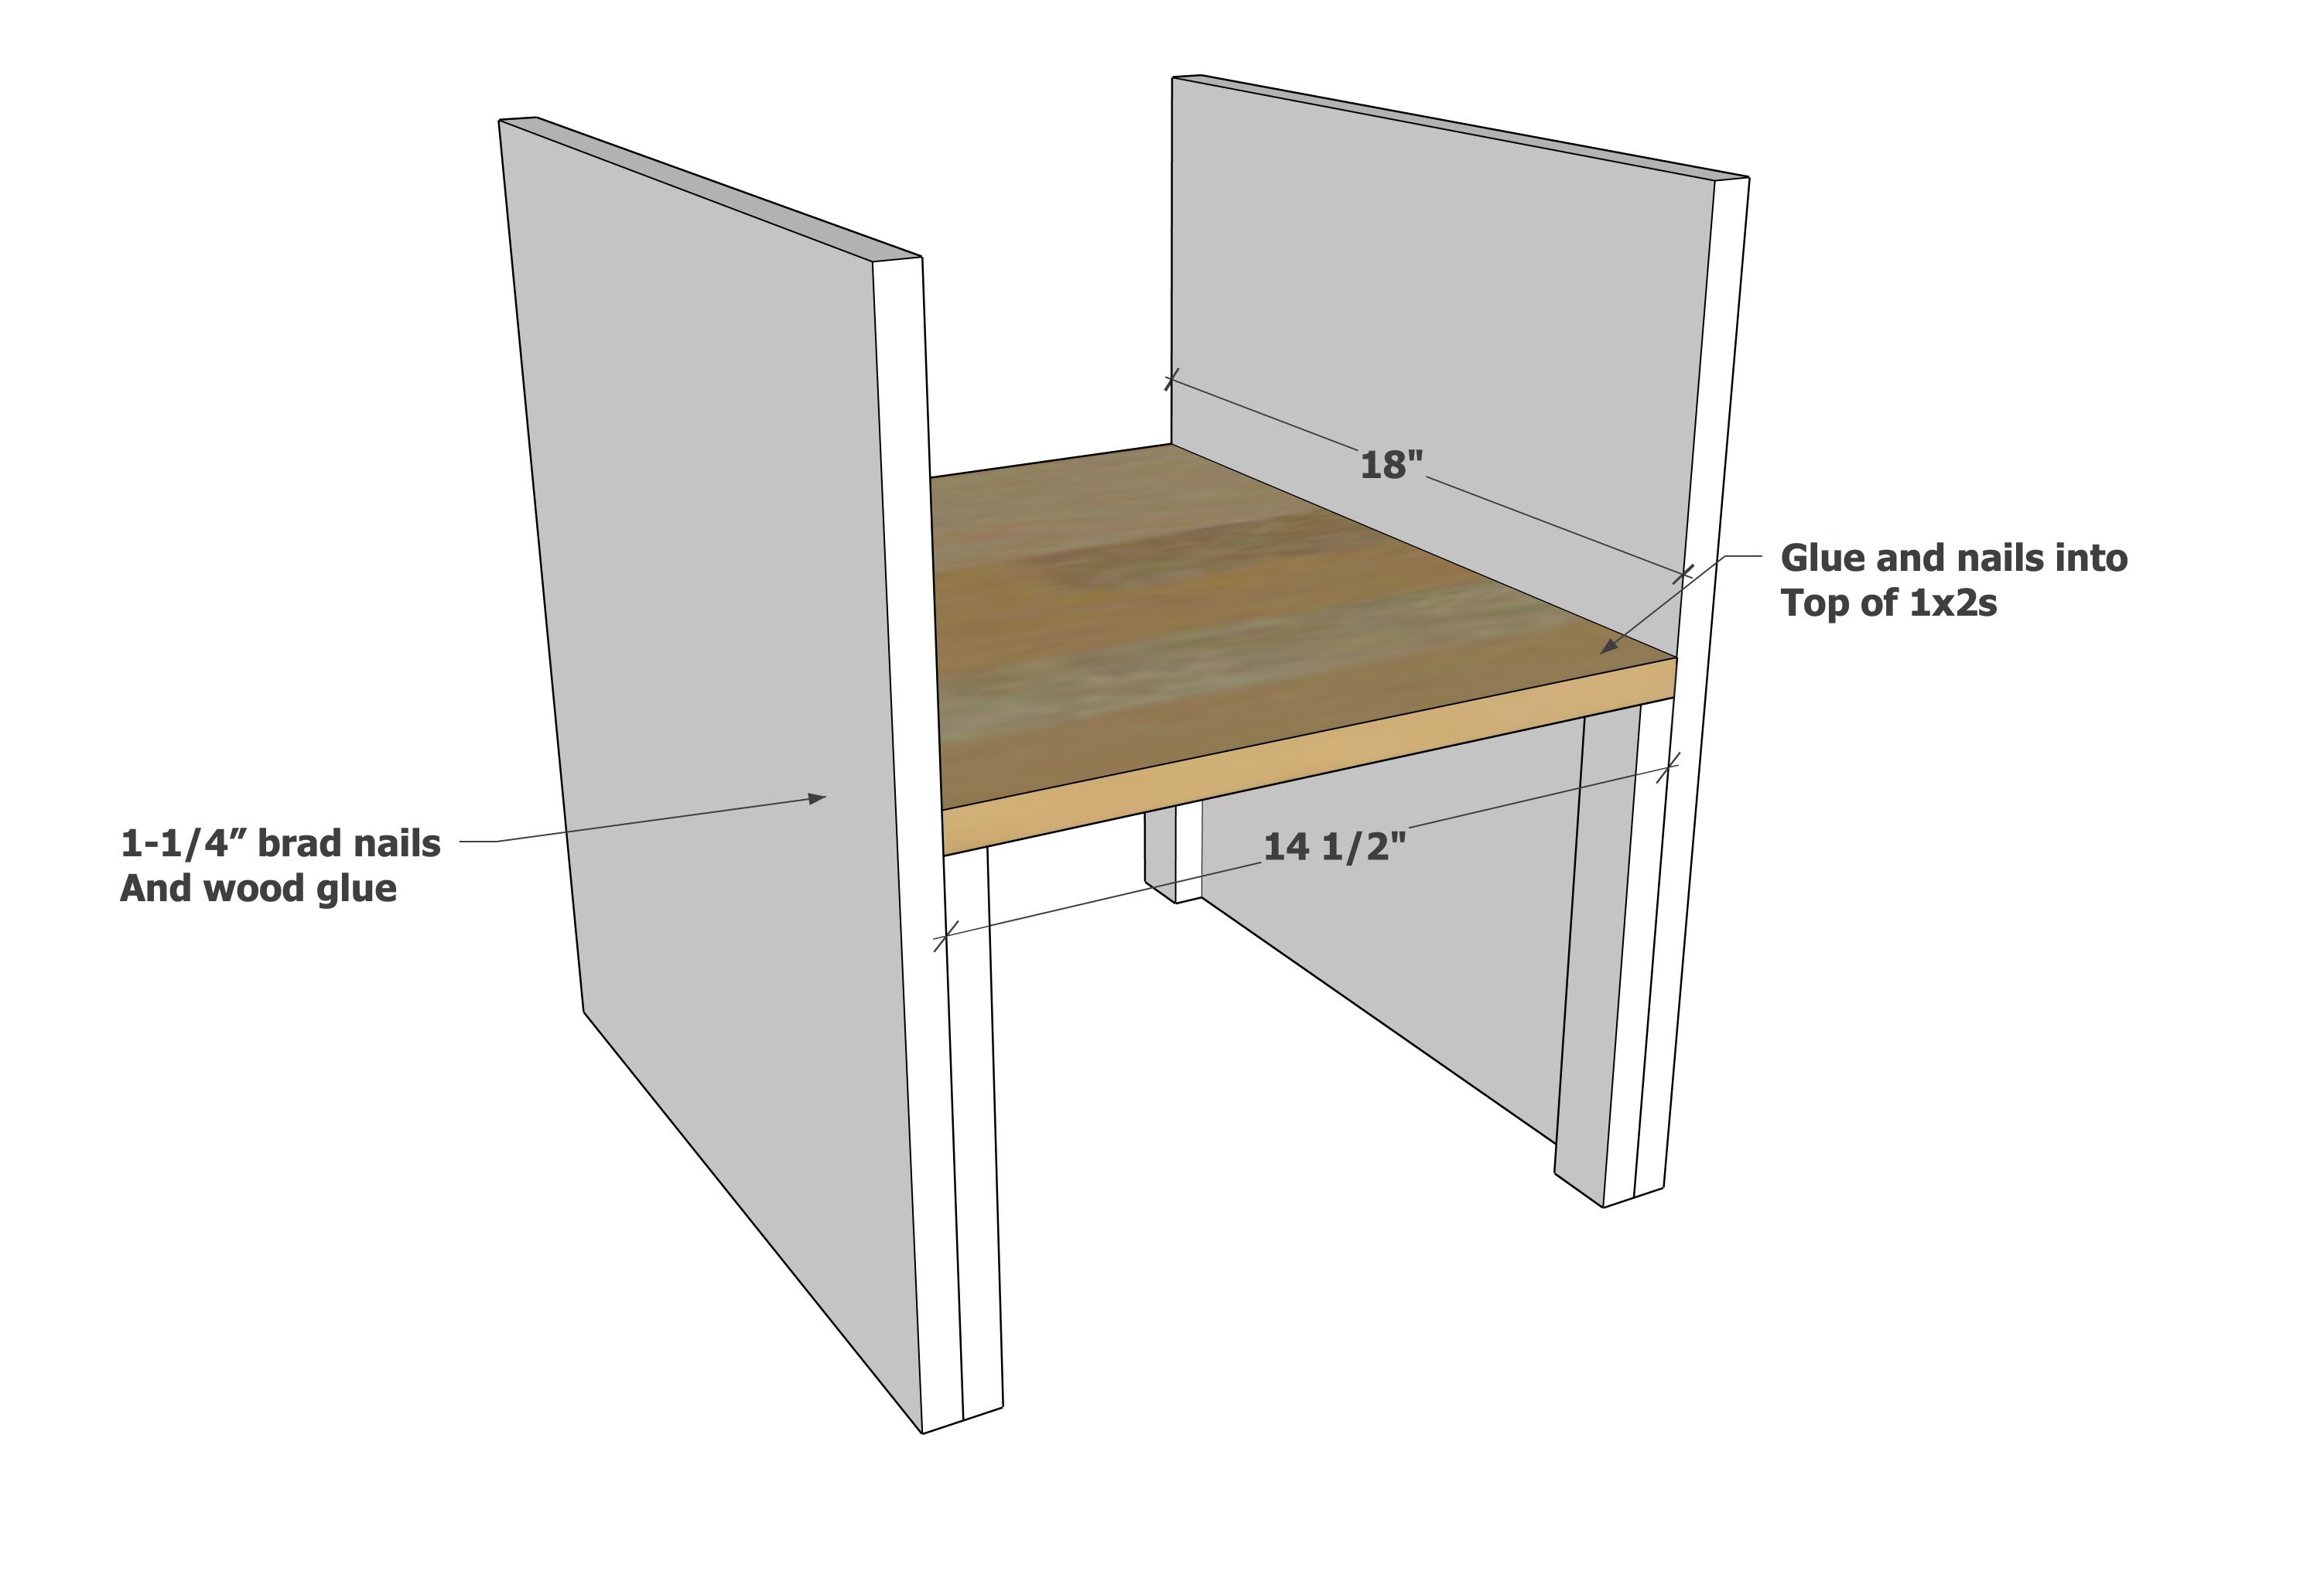
Apply glue to the side edges of the shelf and tops of the 1x2 cleats.  Place the shelf inside the side panels and attach with 1-1/4" brad nails and wood glue.

Step 3

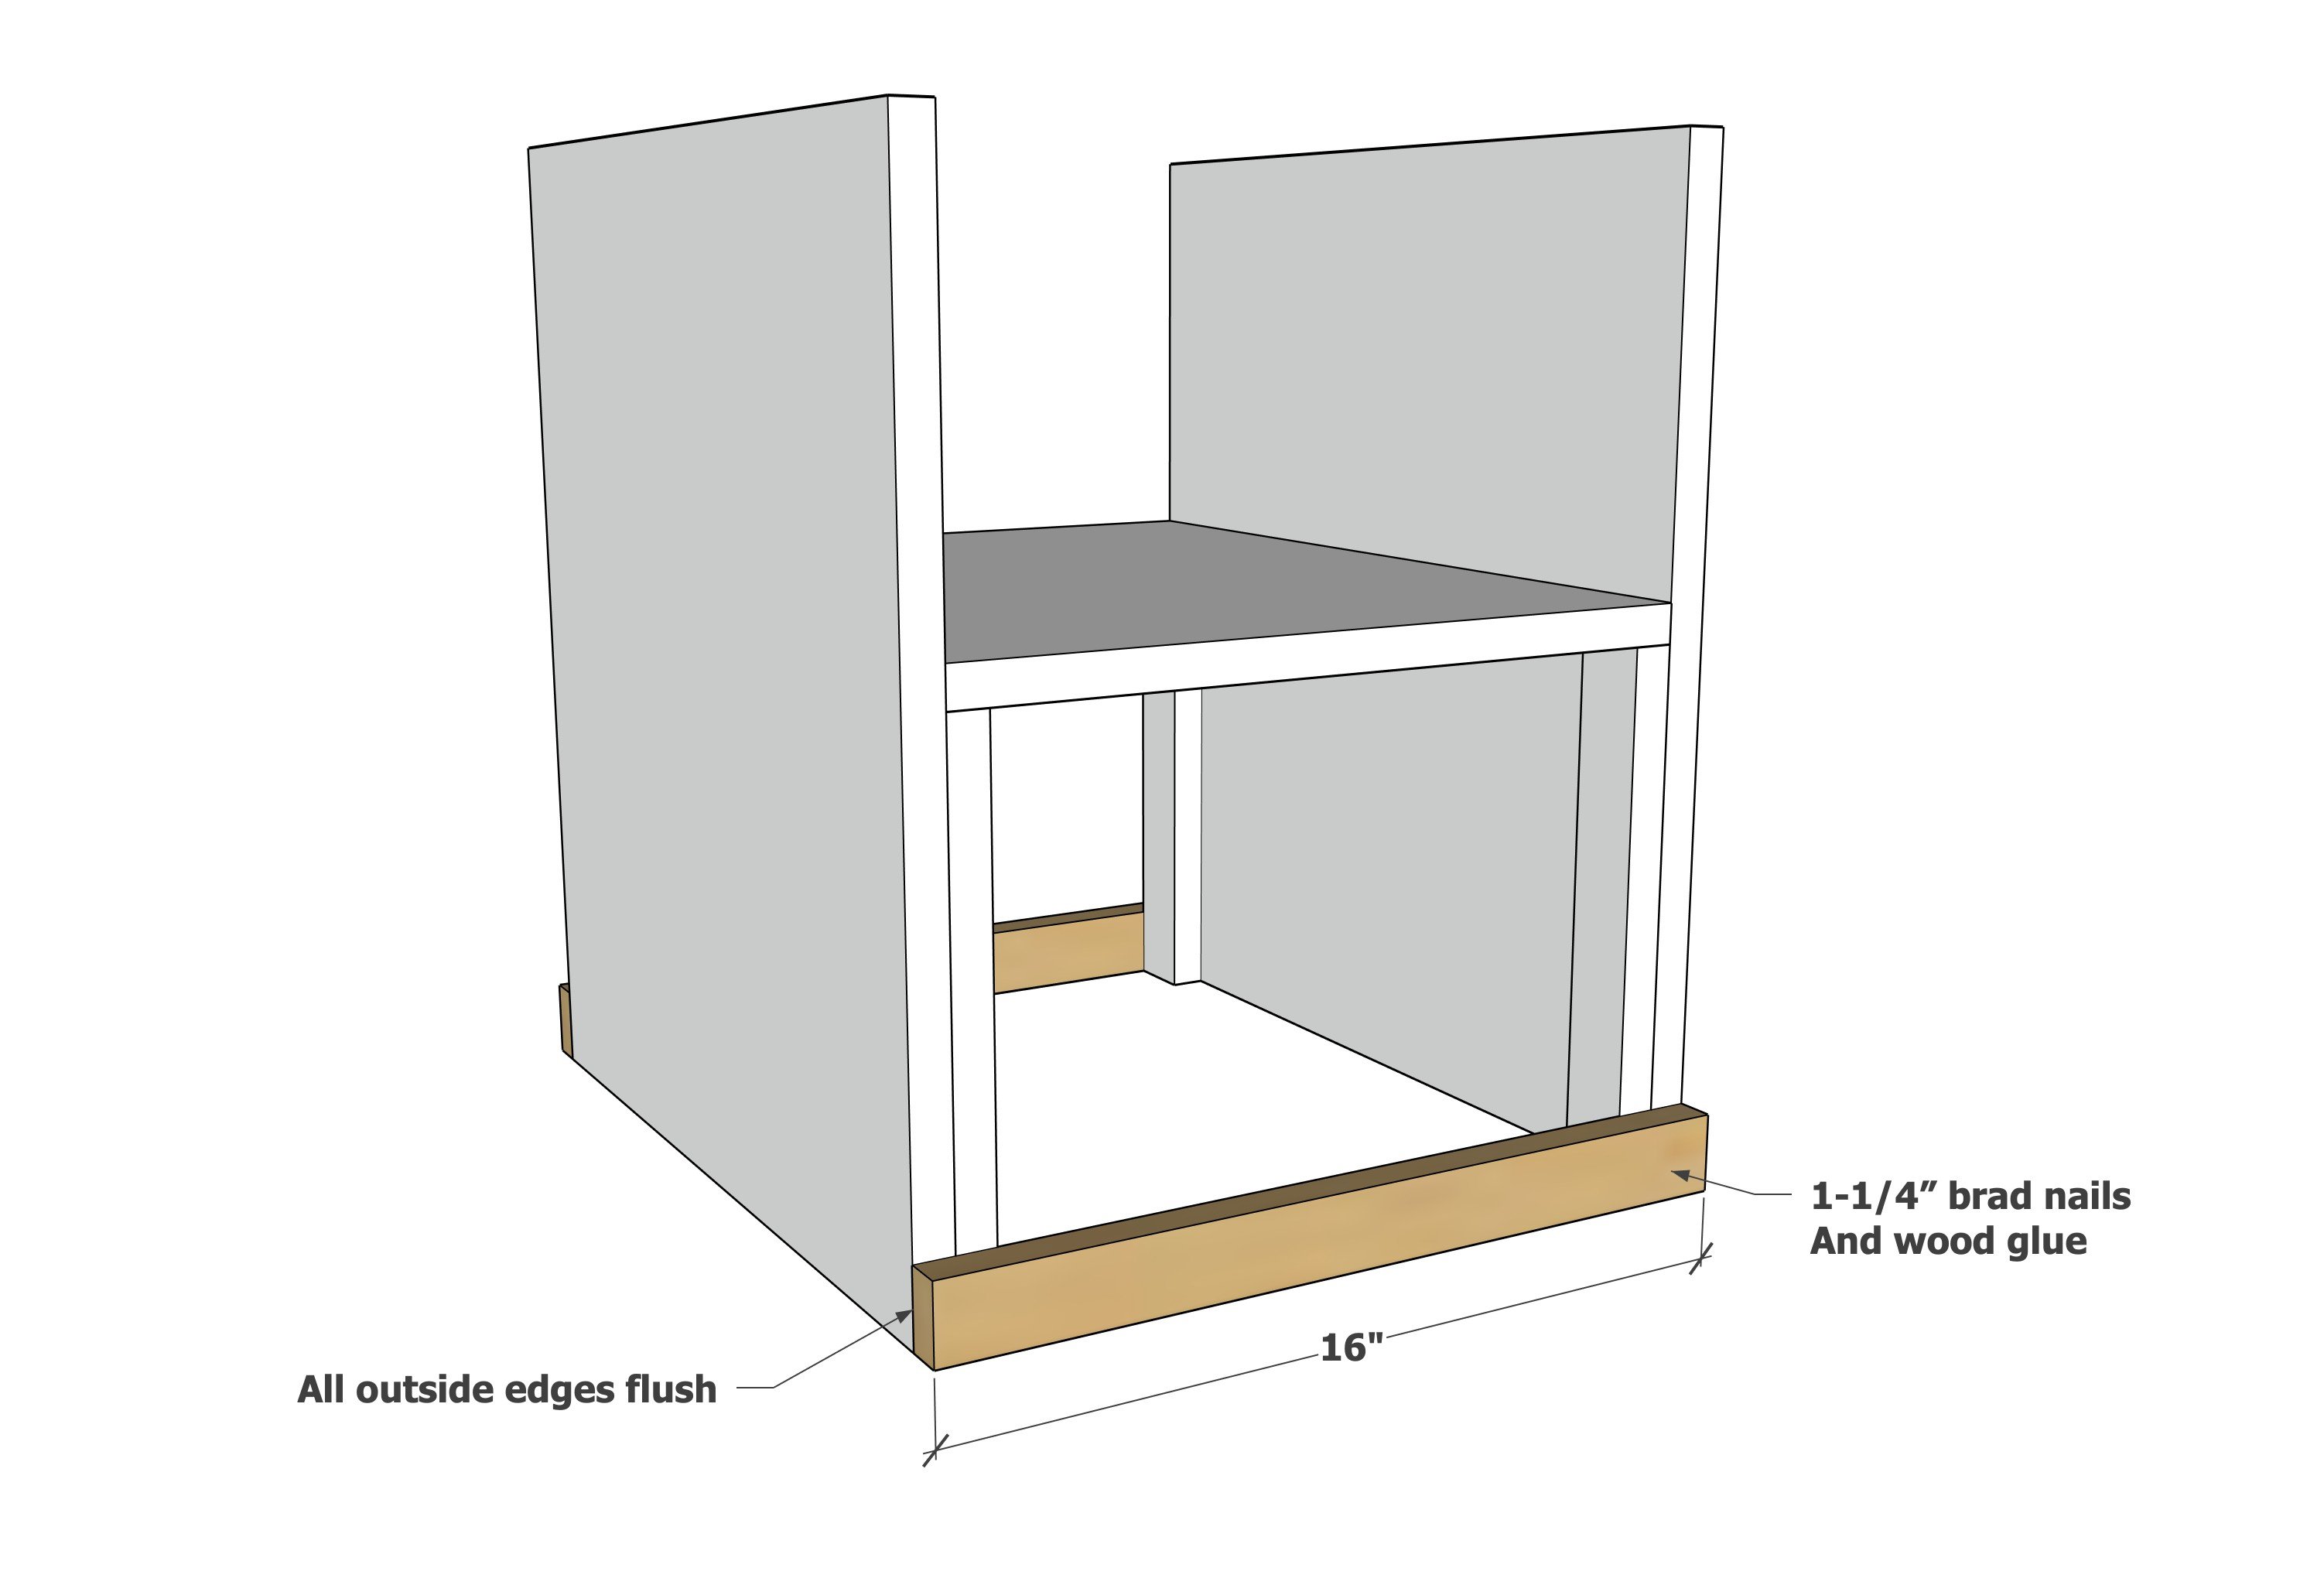
At the bottom, attach 1x2s @ 16" long to the bottom of the side panels and the cleats.  Do on both front and back.

Step 4

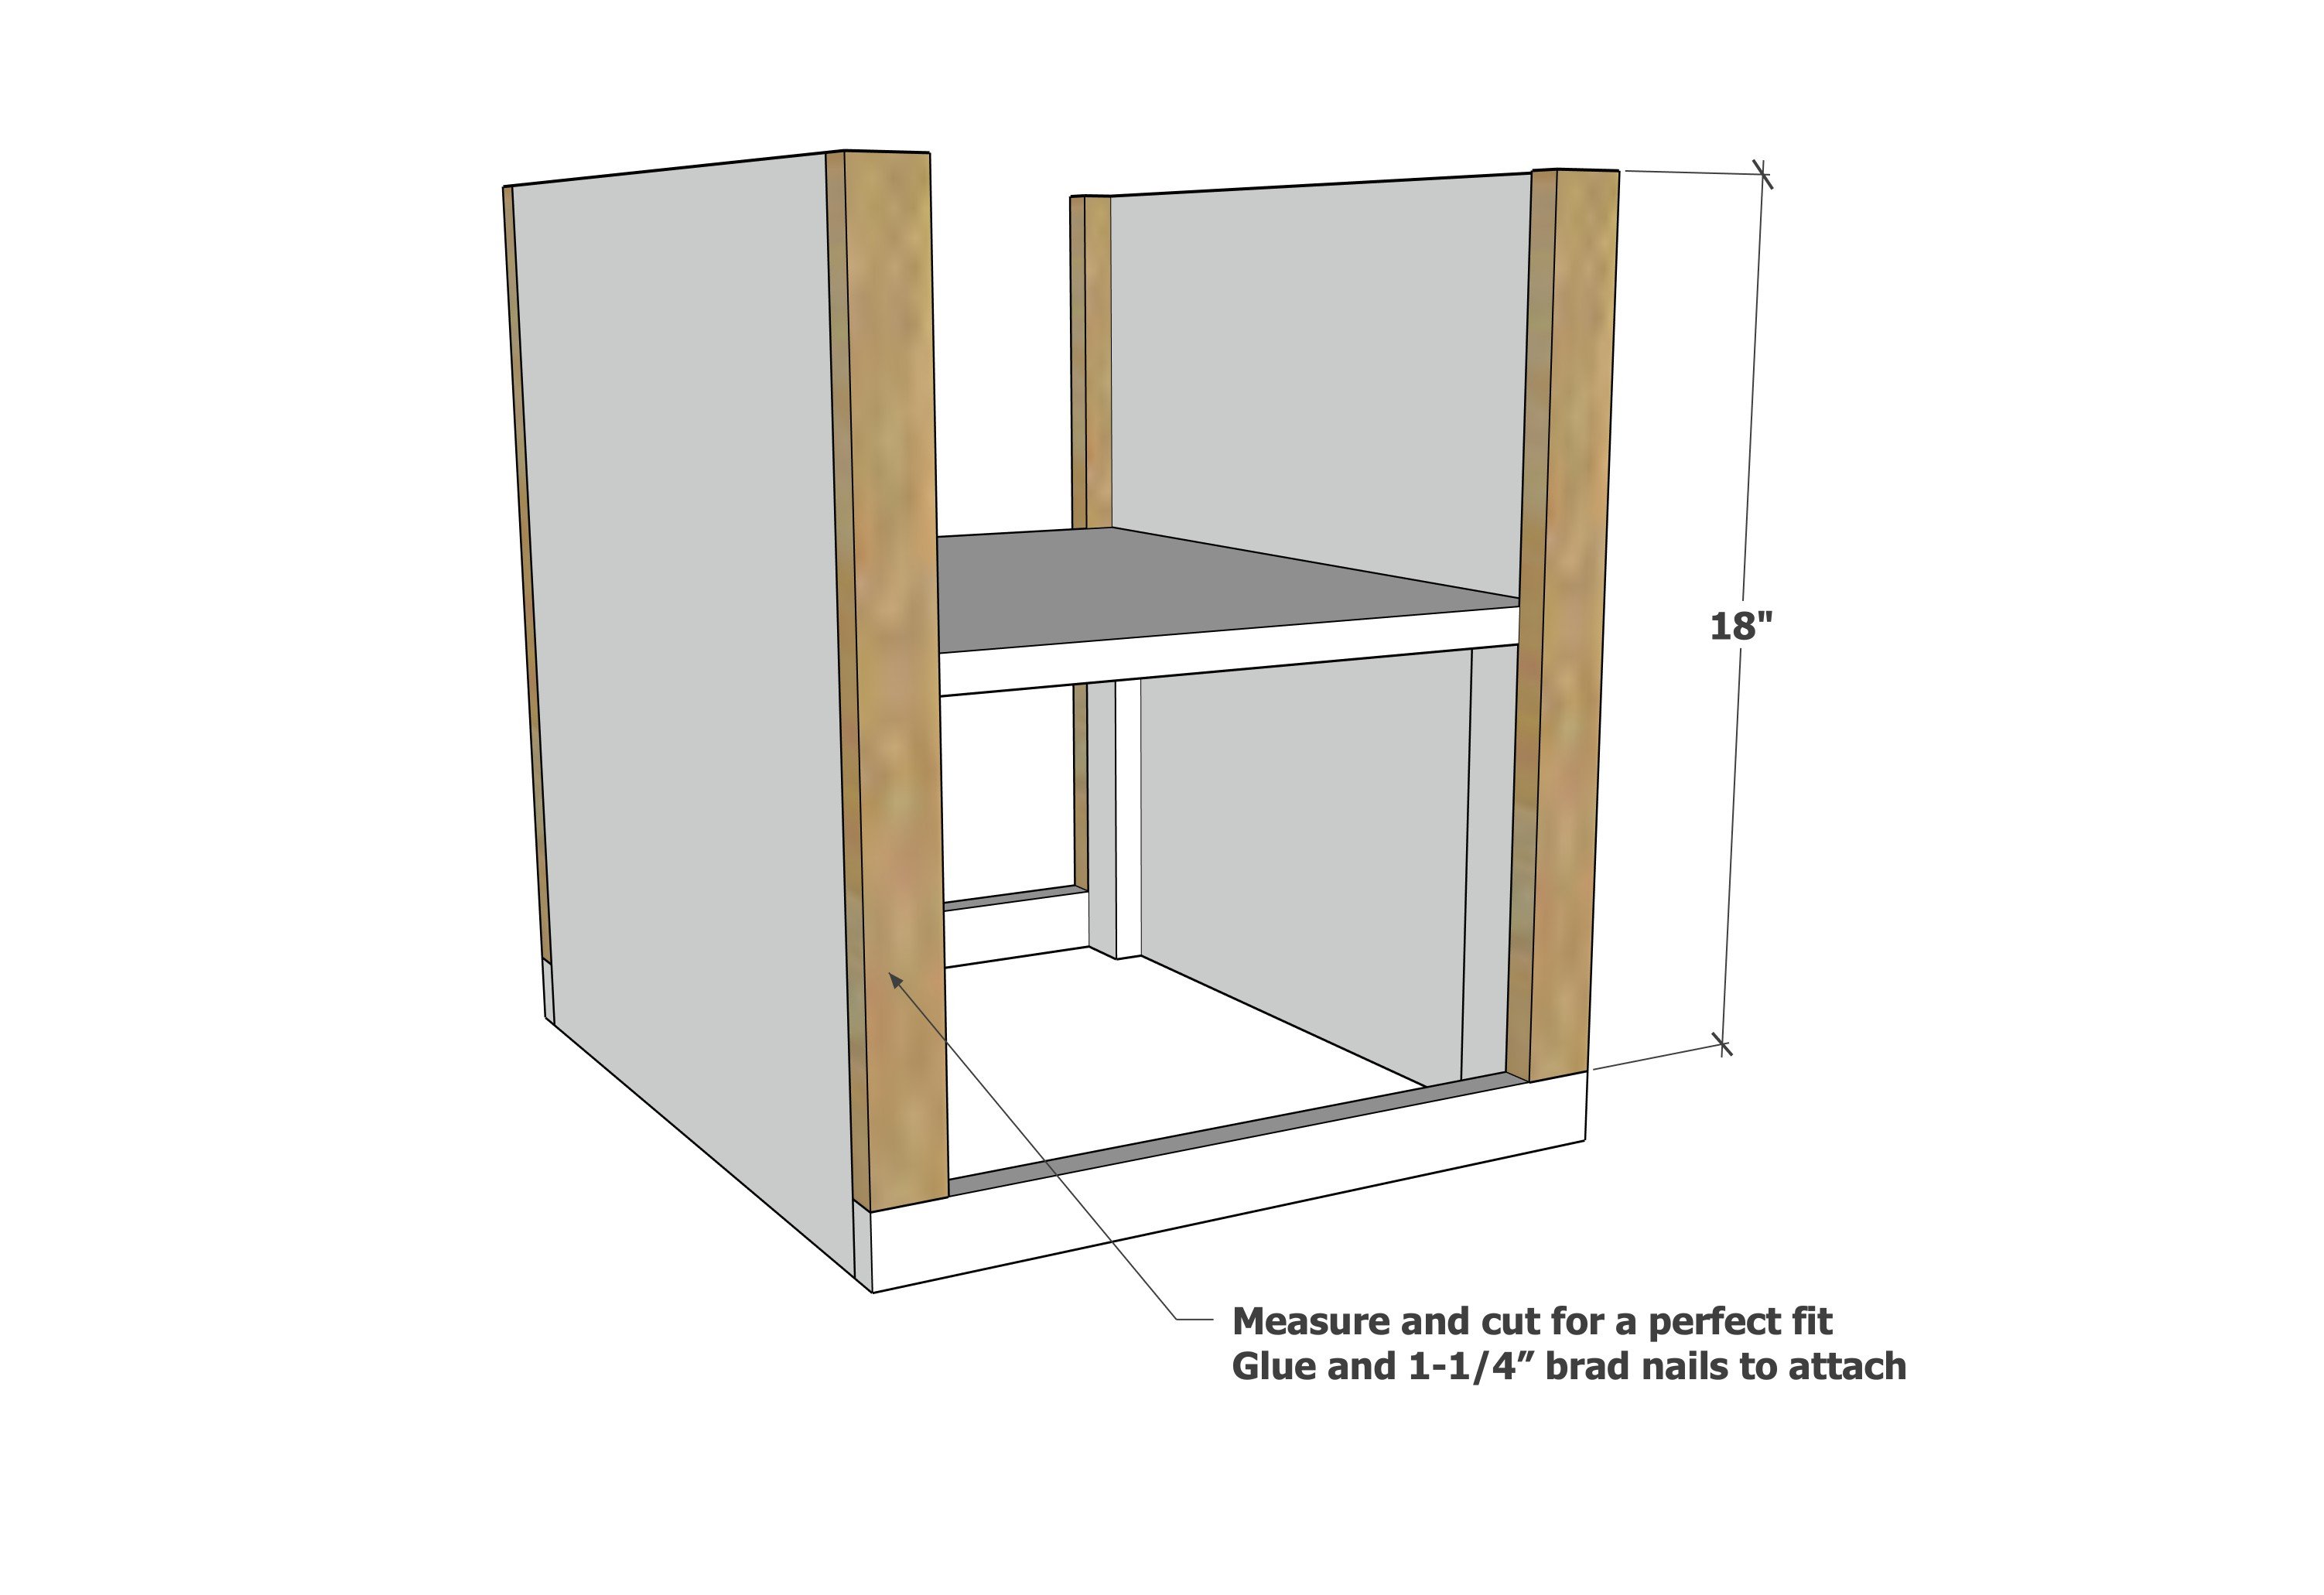
Measure and cut the vertical trim and attach with 1-1/4" brad nails and wood glue.

Step 5

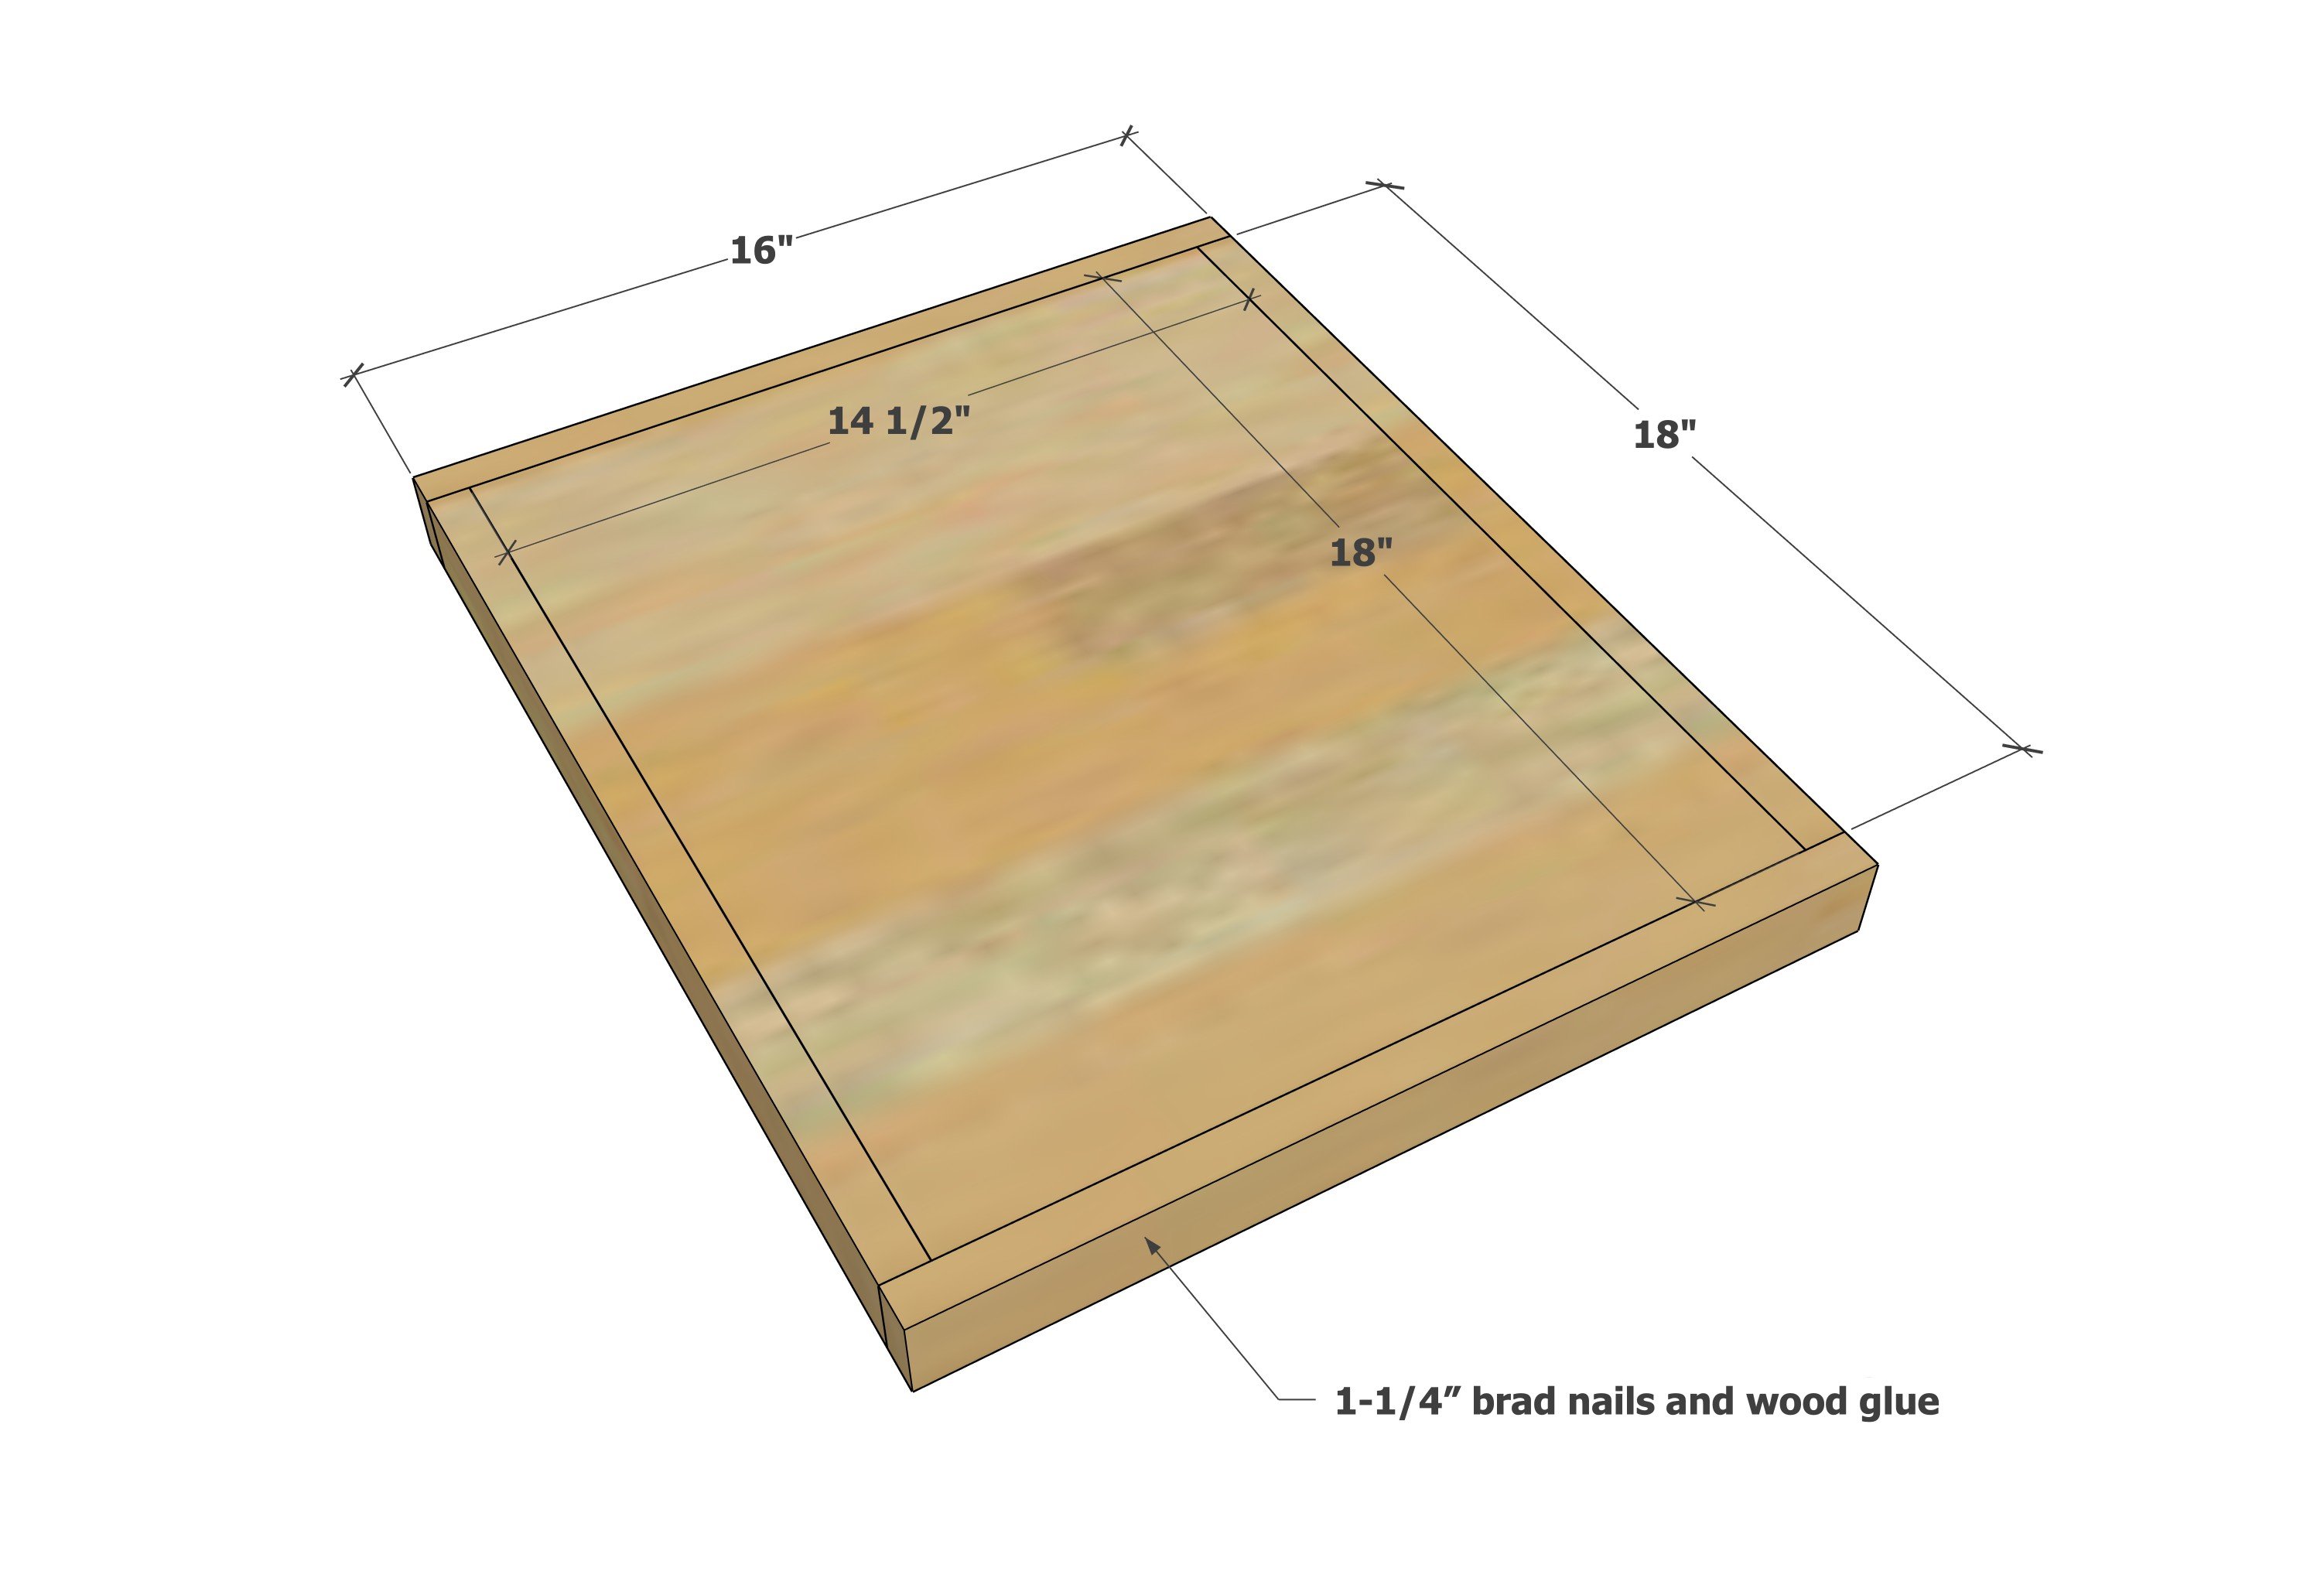
Trim the remaining top plywood panel out with 1x2s, so the top is flush.  Use glue and 1-1/4" brad nails.

Step 6

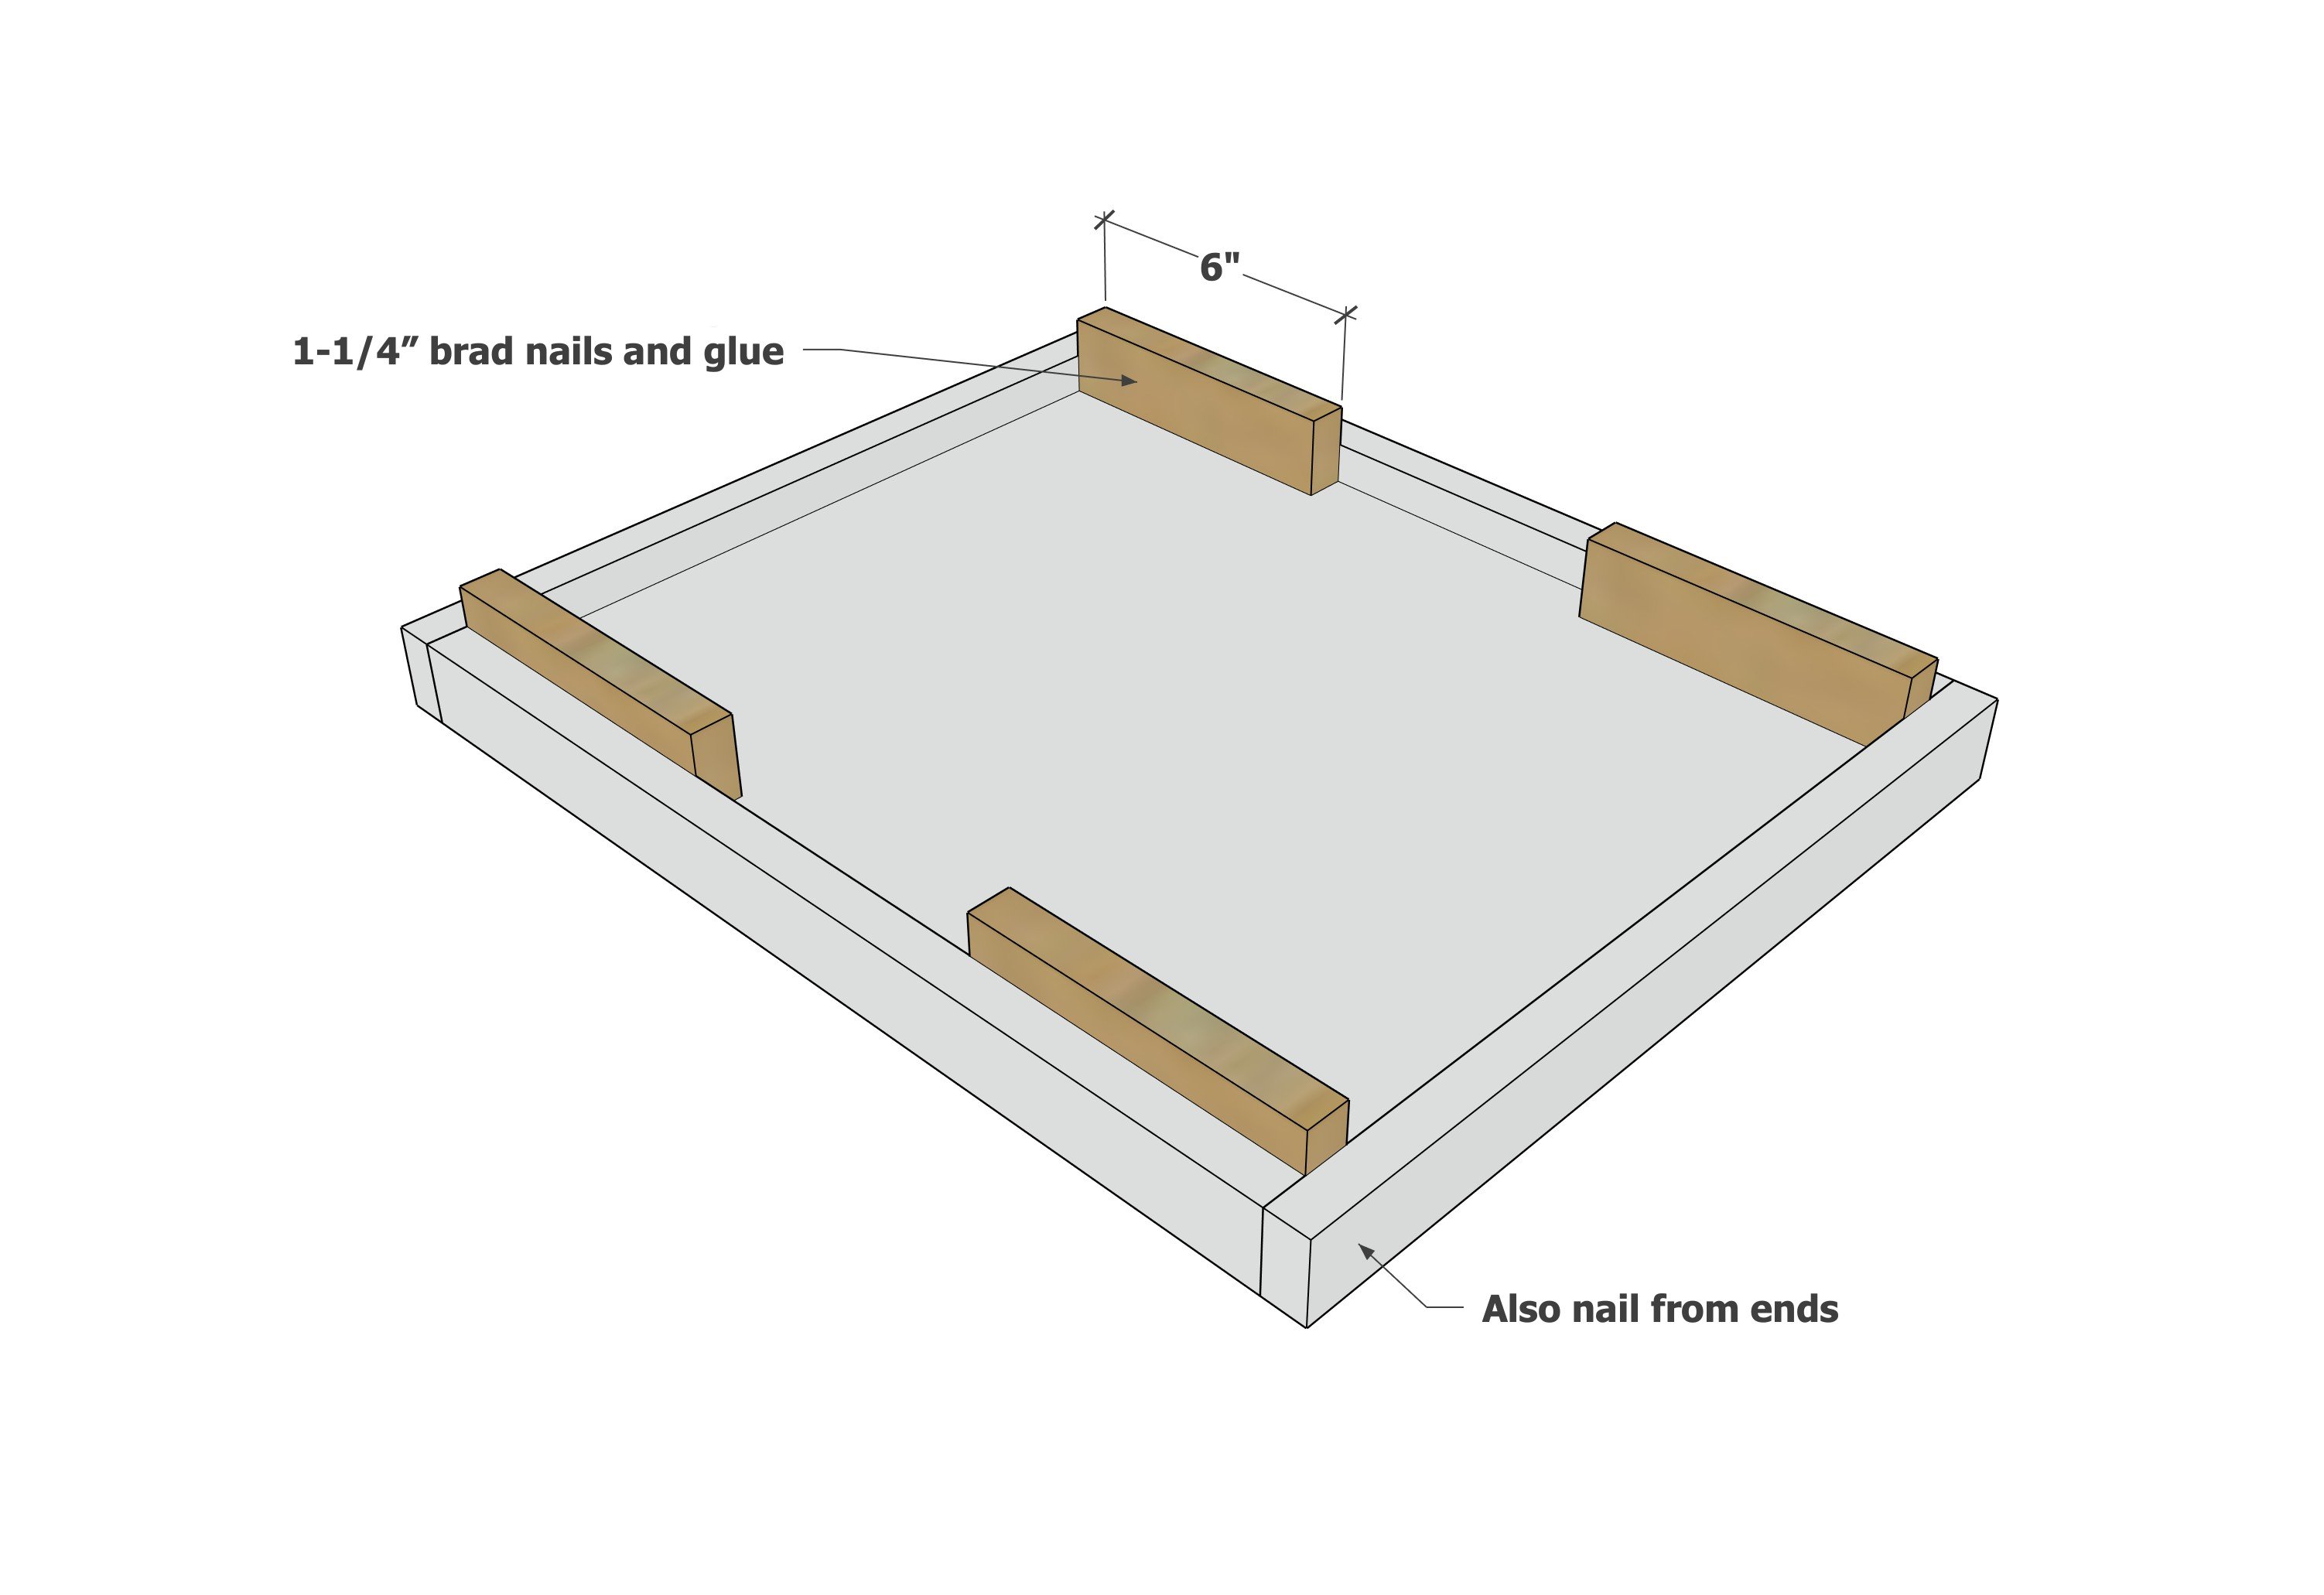
Attach the 1x2 cleats to the insides with glue and 1-1/4" brad nails.  

Step 7

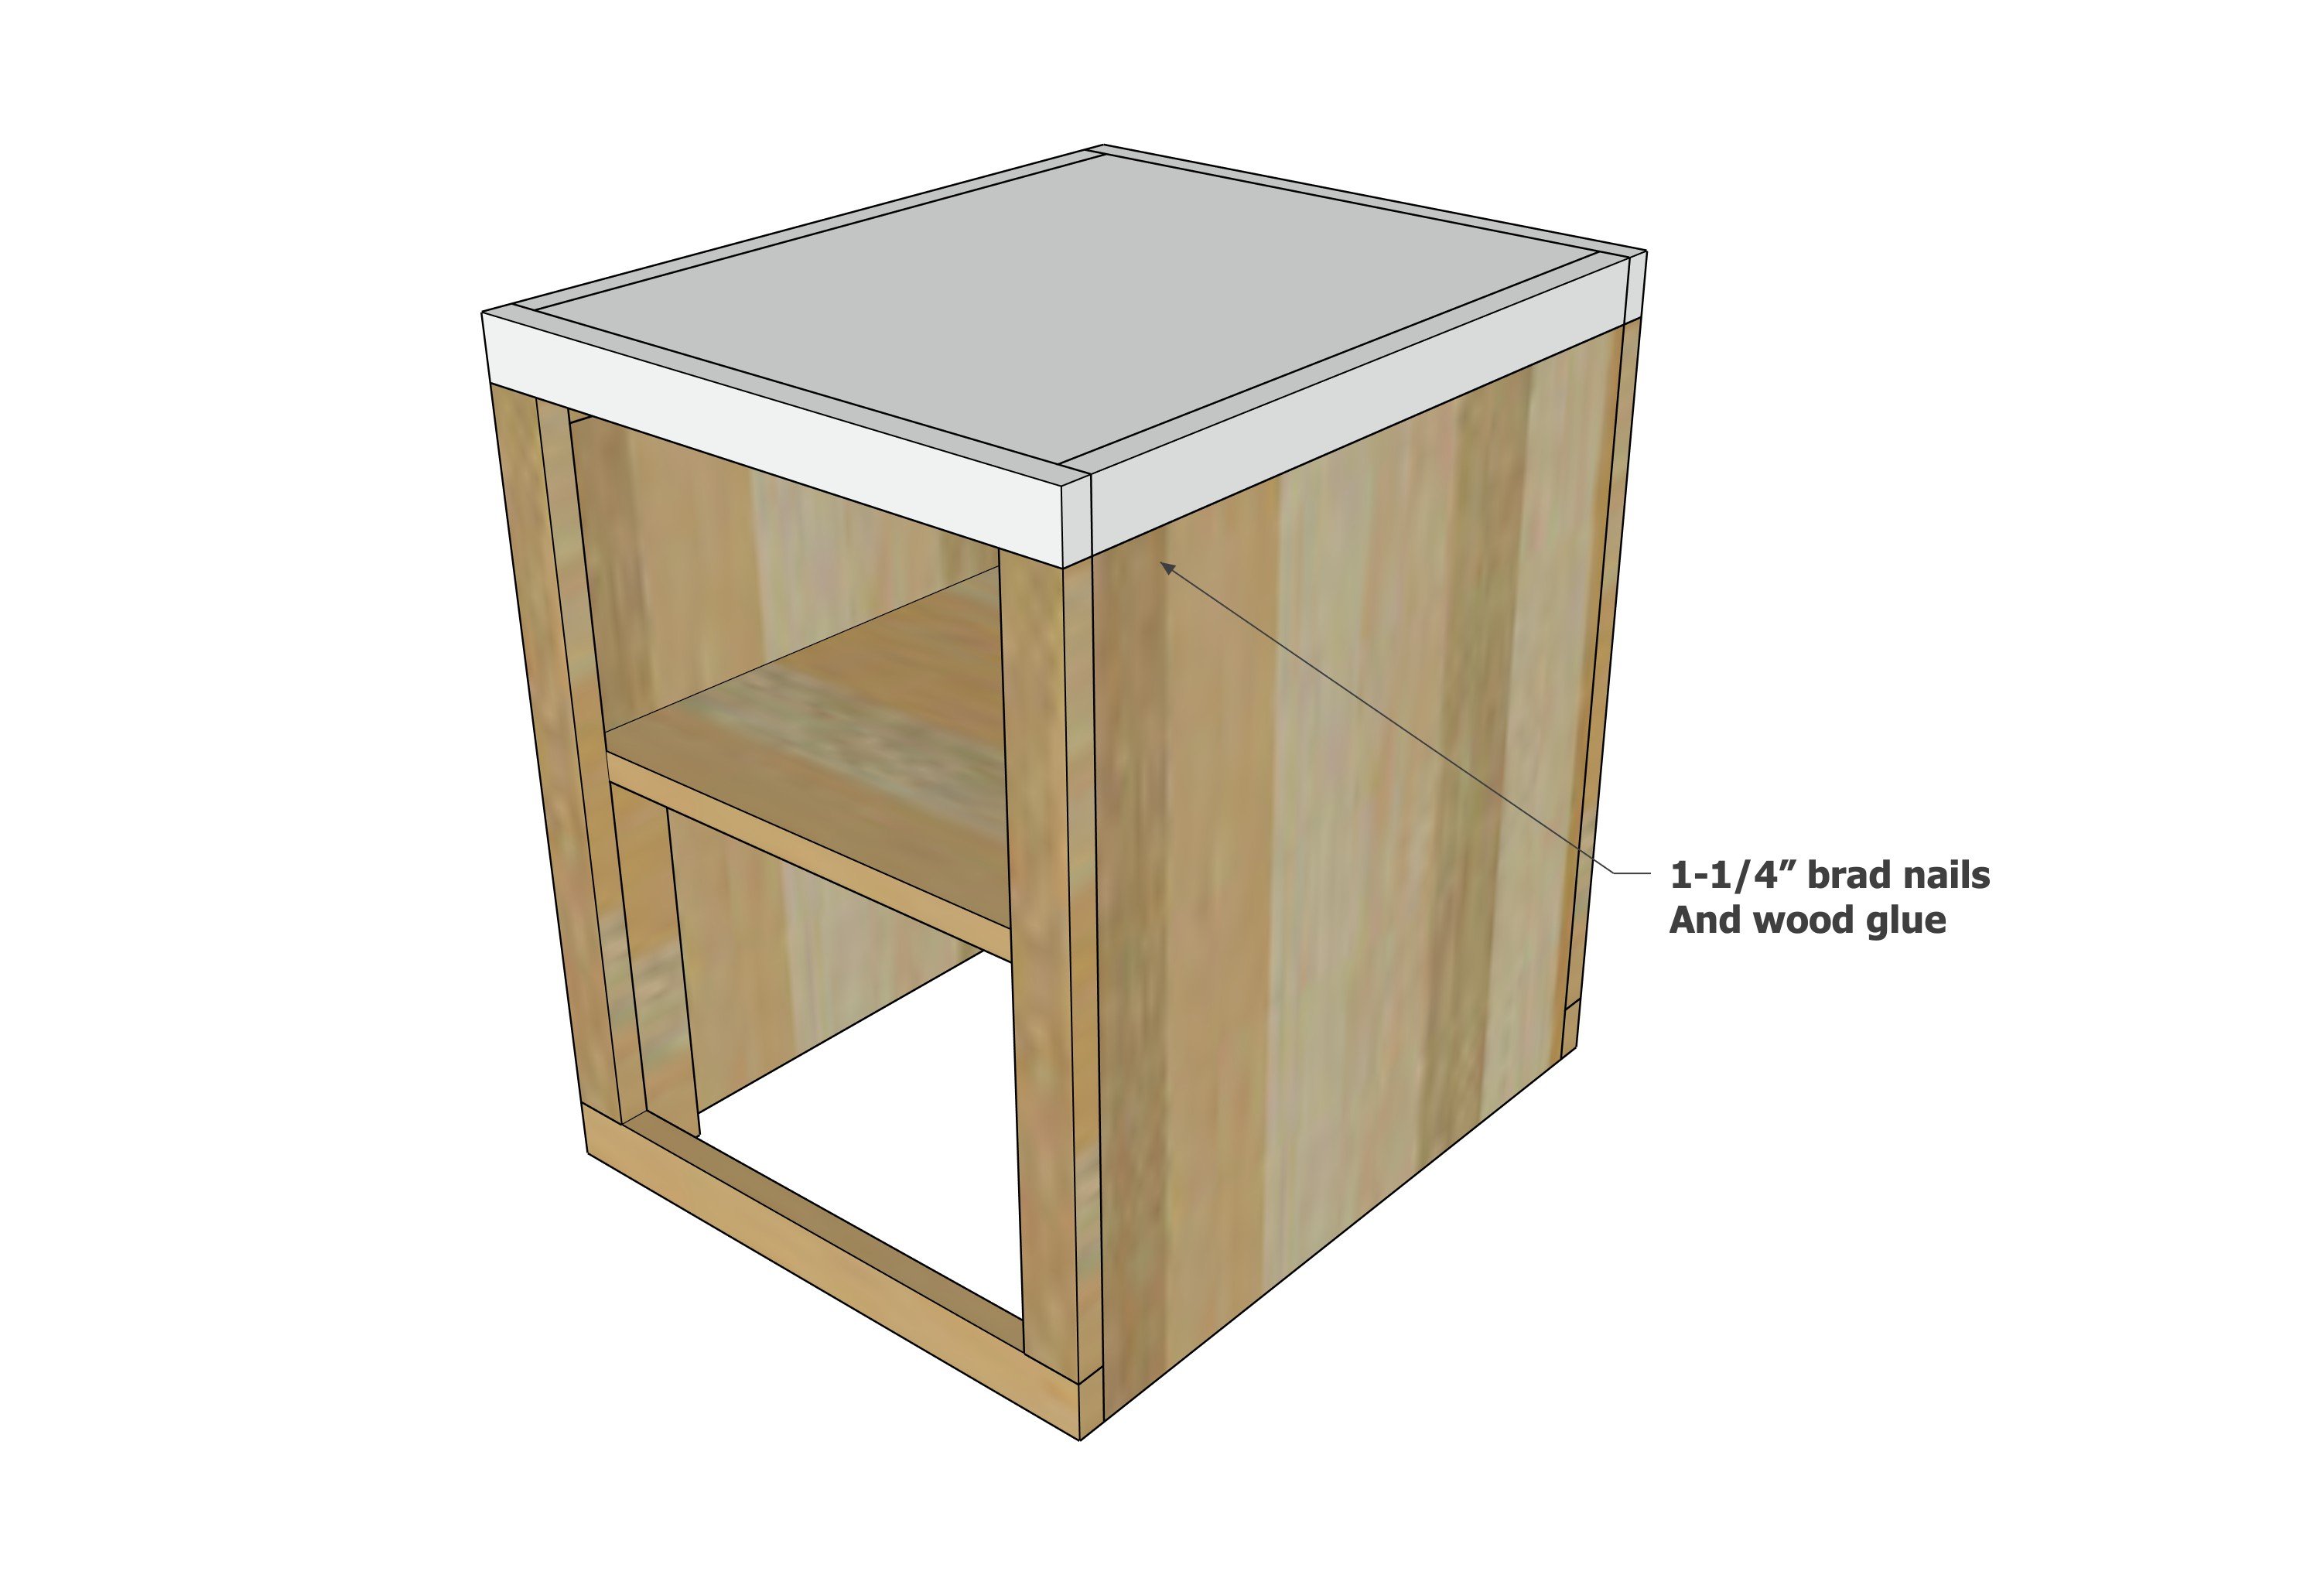
Place the top on the base with glue at attachment points.  Nail with 1-1/4" nails to secure.

Step 8

Measure the opening - it should be 13" - if not, make adjustments to your drawer box cut list before building. Build the drawer box with 1-1/4" brad nails.  Attach the bottom plywood with 3/4" brad nails.  Use the bottom plywood piece to square up the drawer box.  The drawer box must be square to slide right.

Step 9

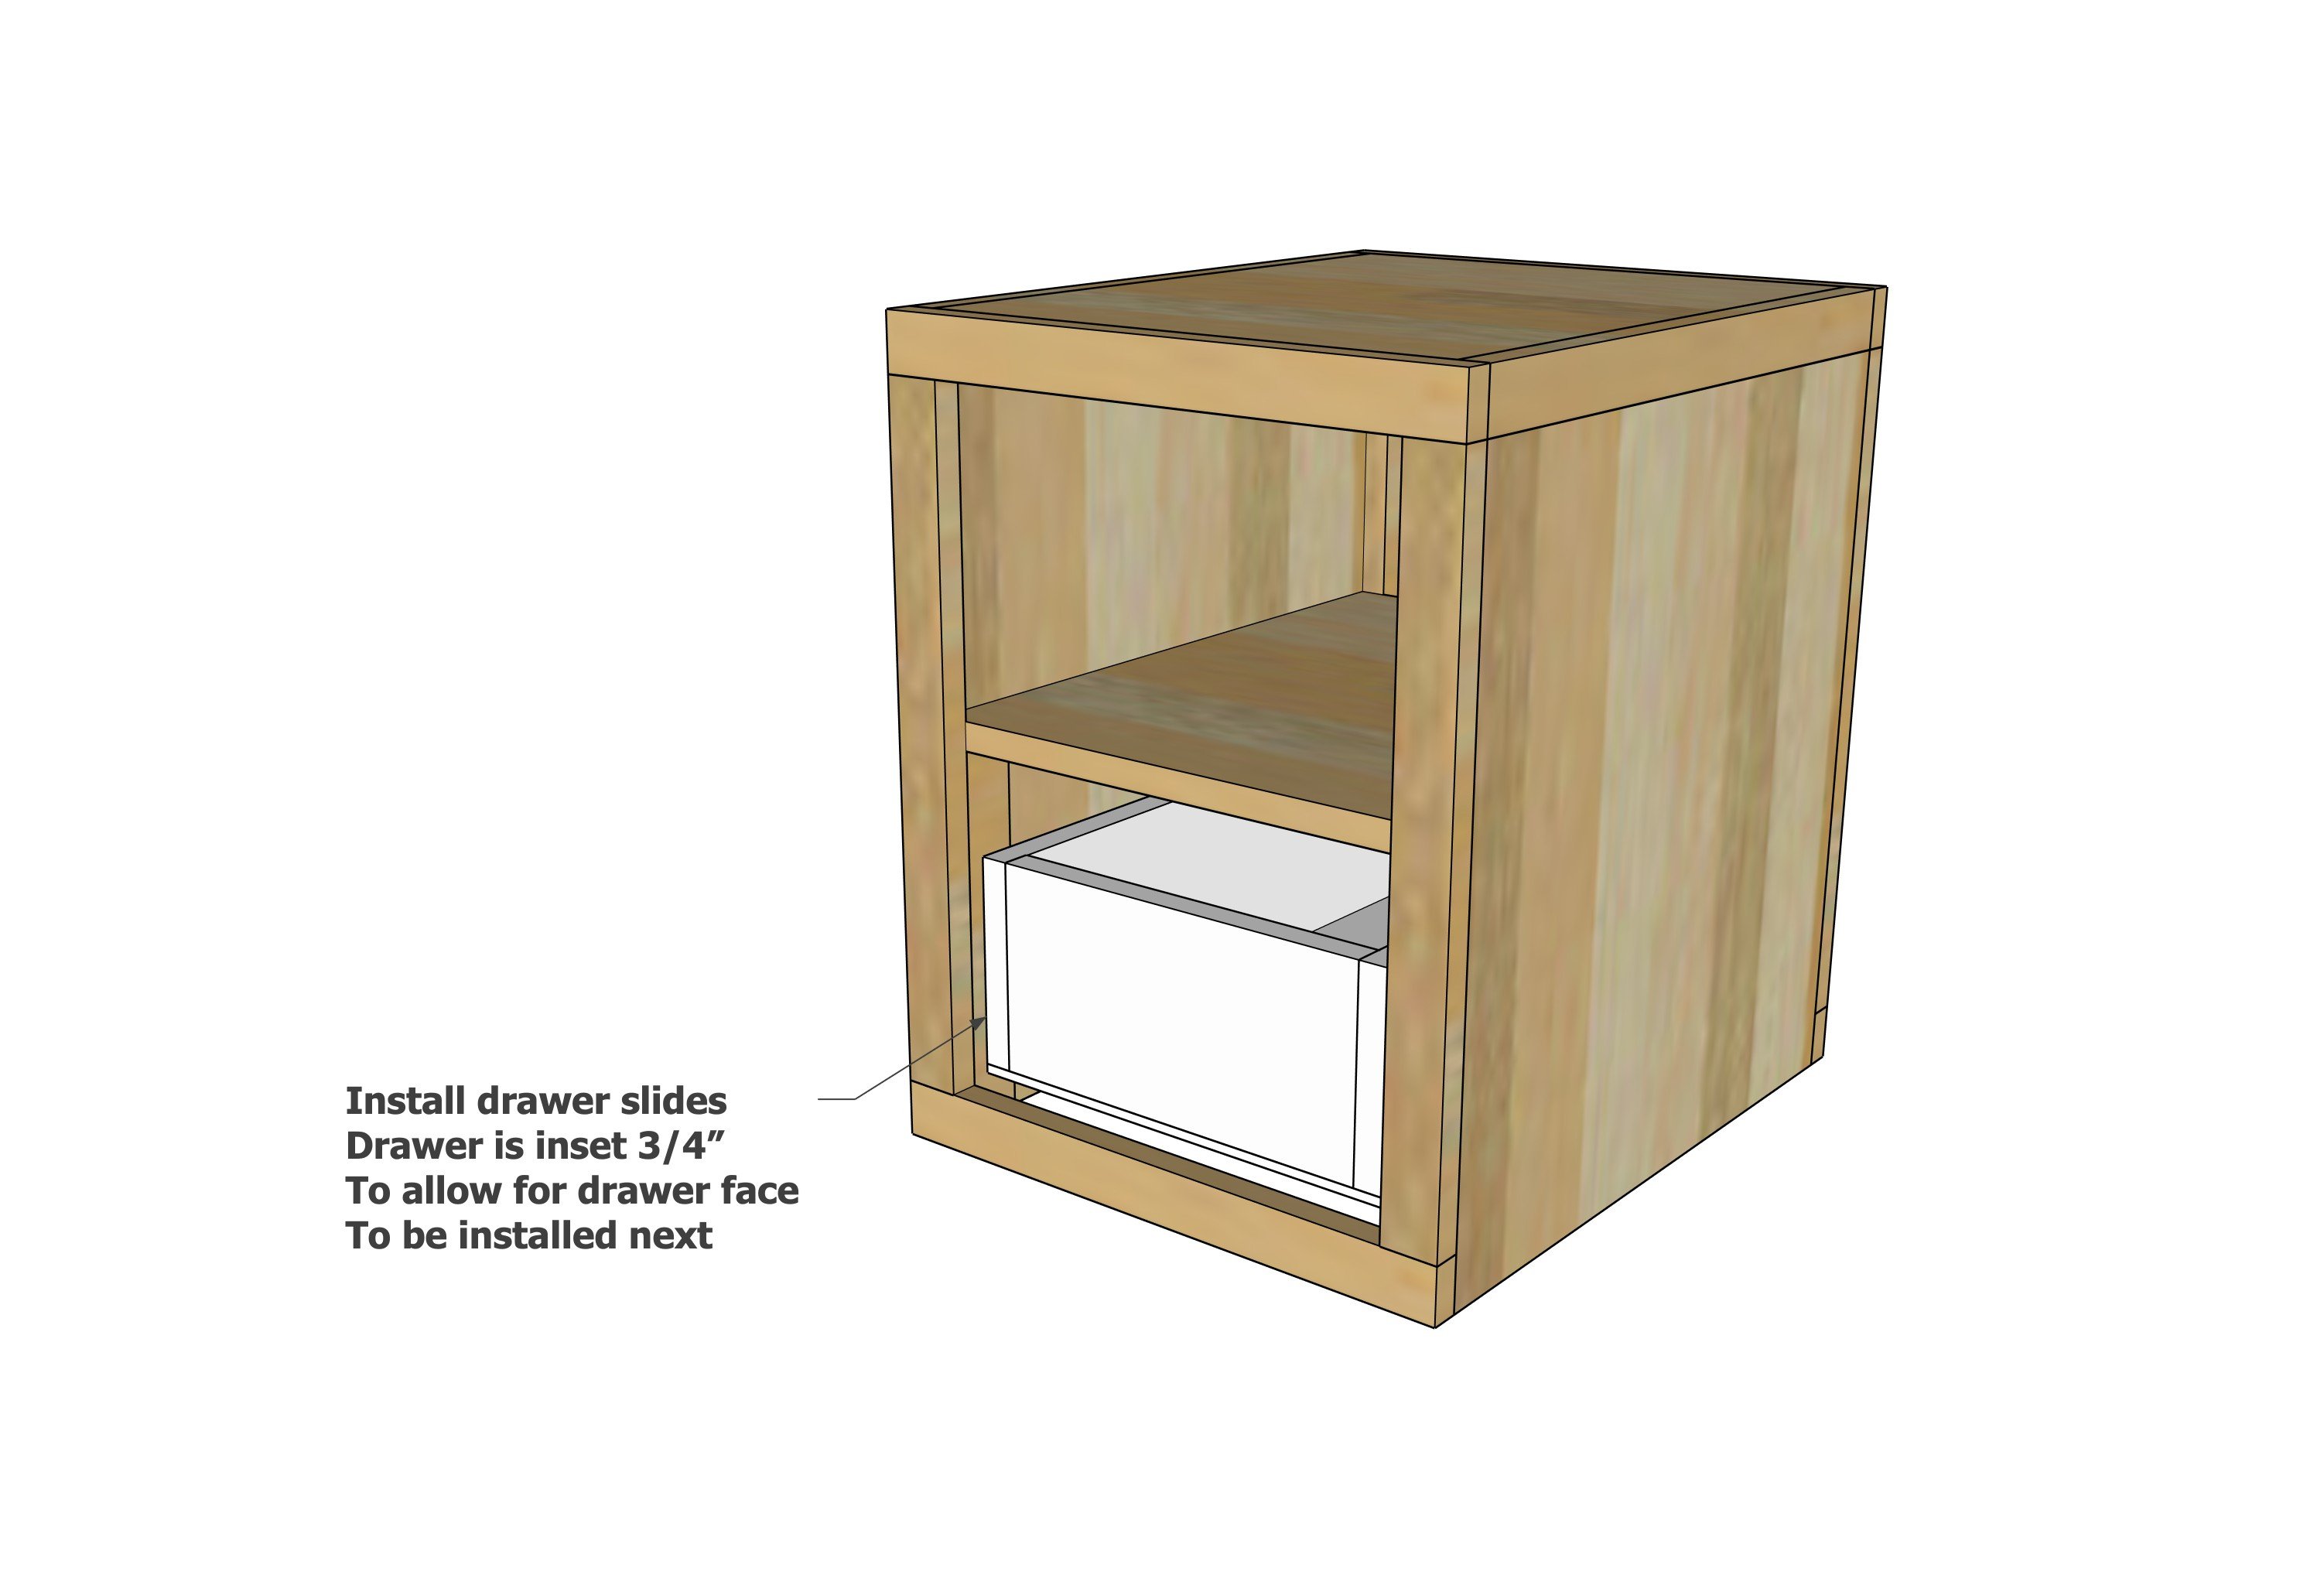
Install the drawer box inside the cabinet, using the drawer slides.  Here is a video tutorial showing the steps to install these drawer slides -

Step 10

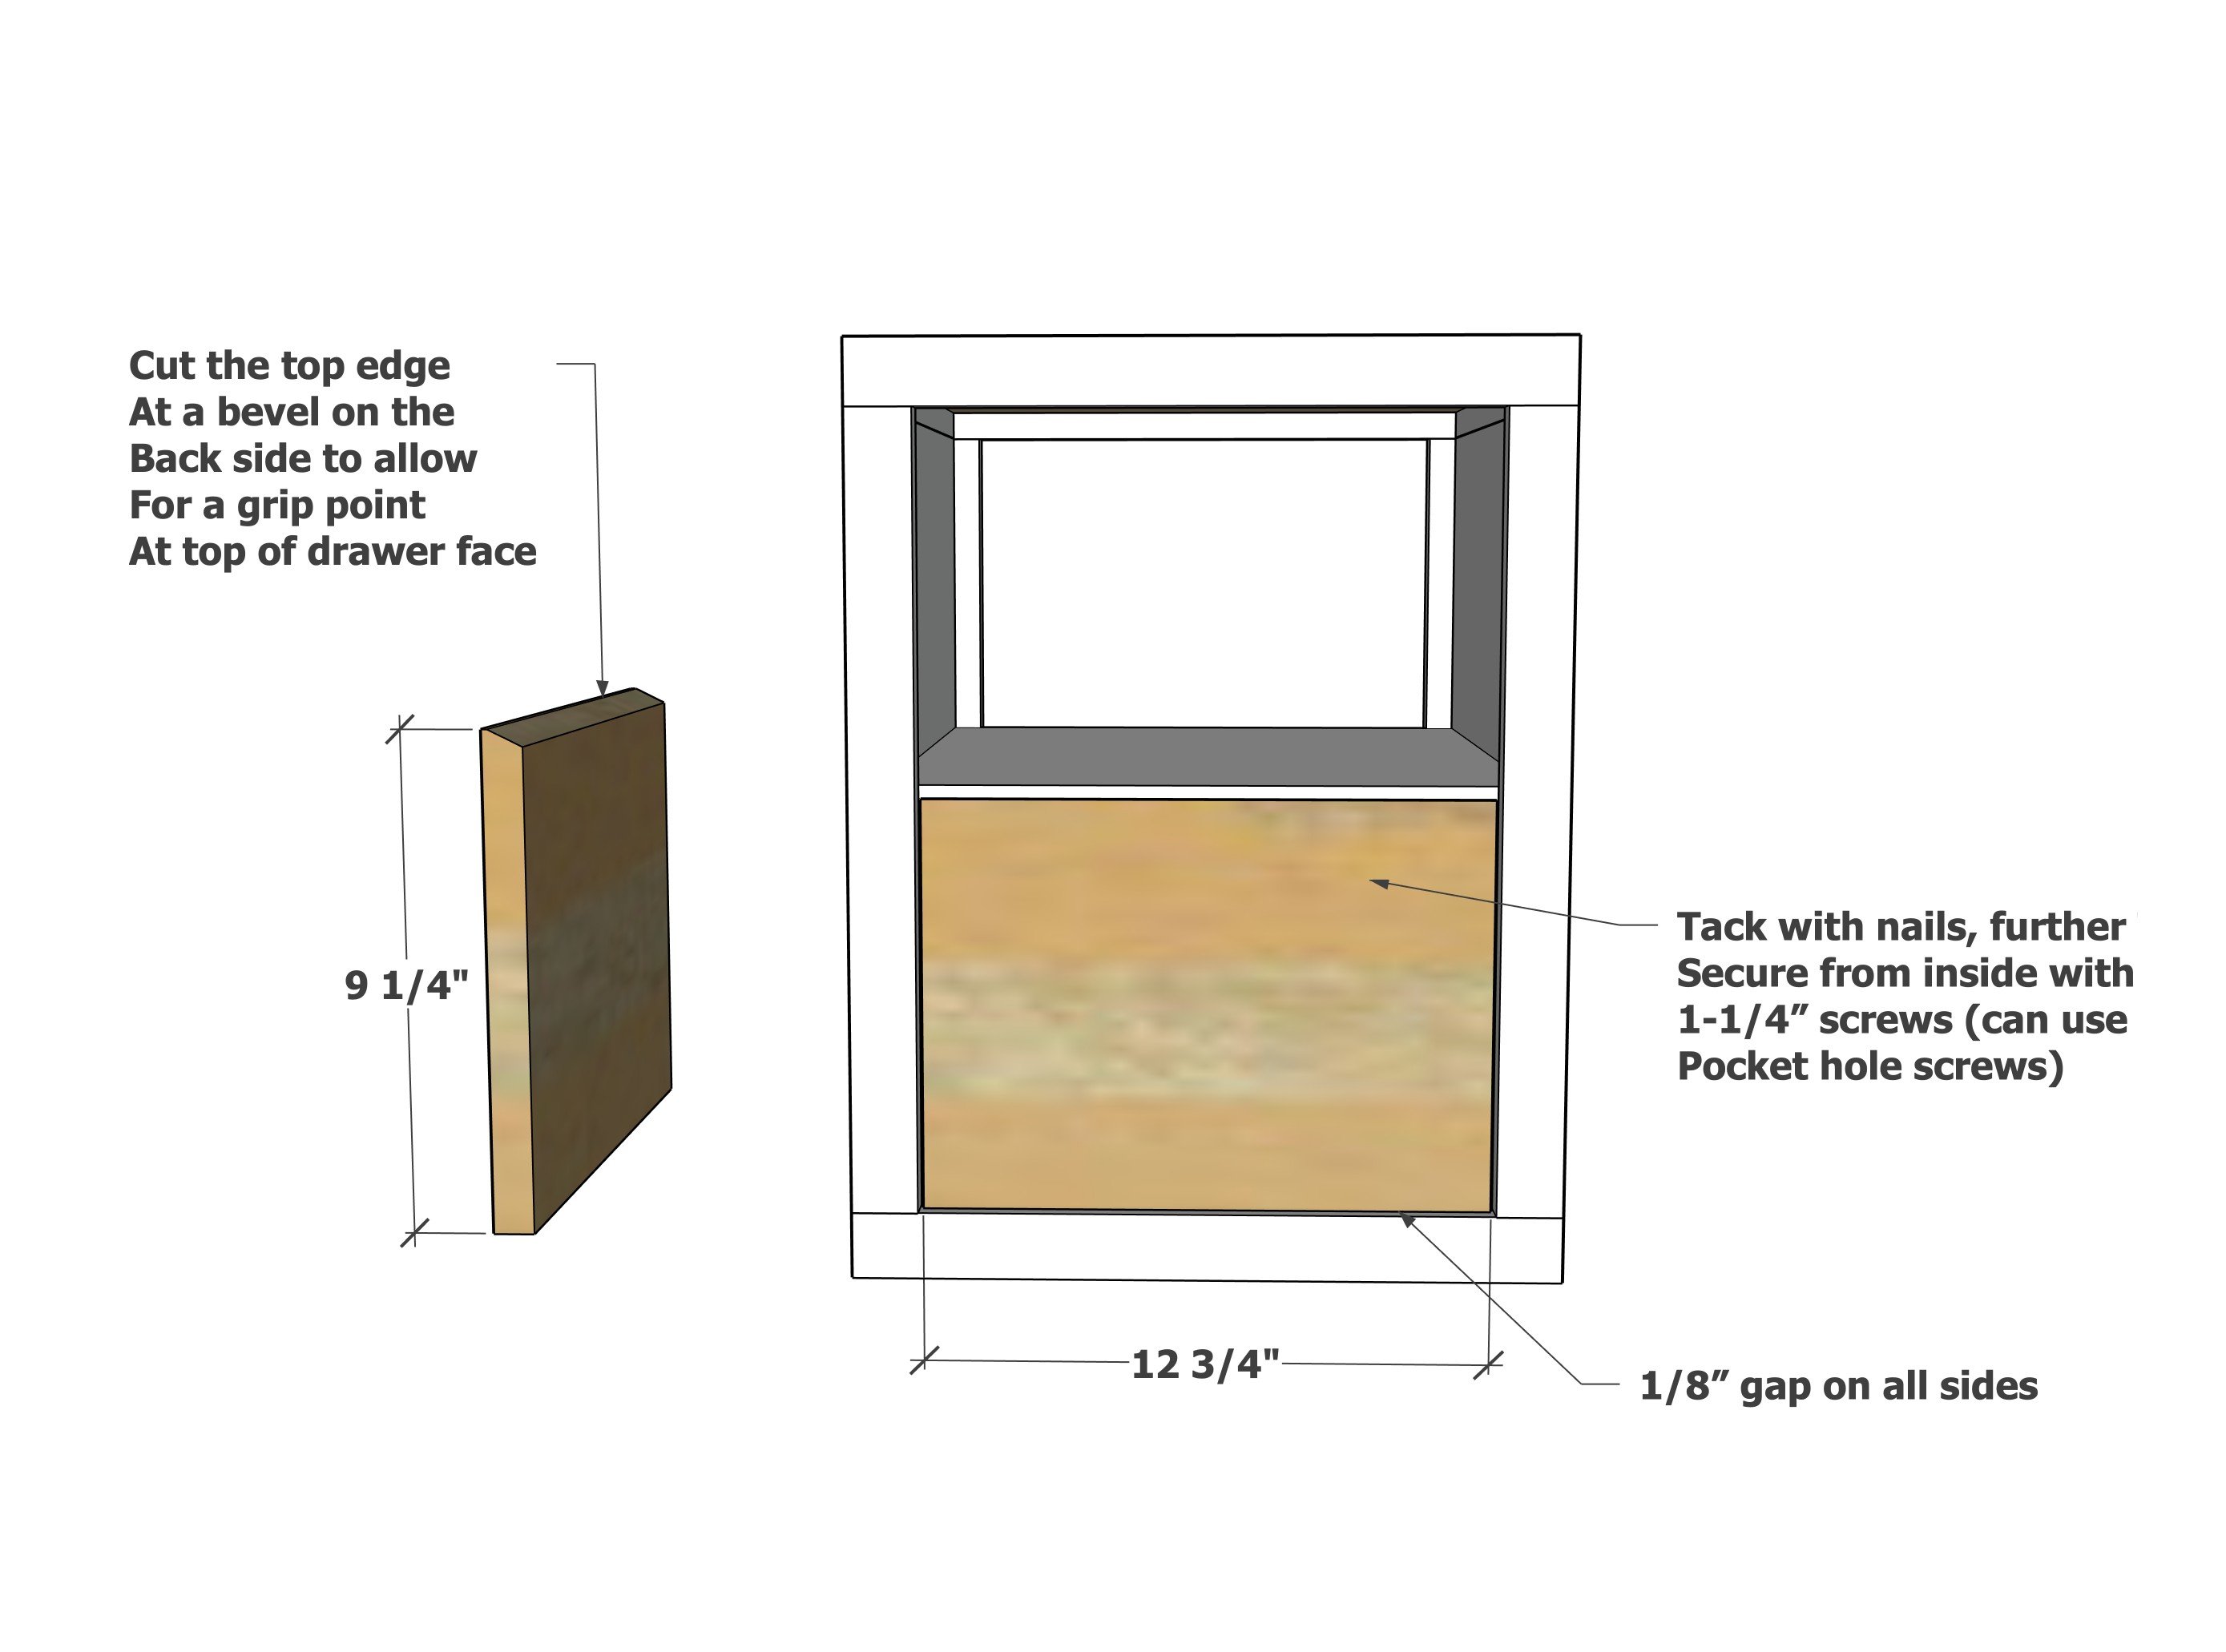
Cut the 1x10 drawer face to fit the opening.  Cut the top back at an angle to create a lip to act as a grip point for opening the door. 

Attach the drawer face with 1/8" gap at bottom and sides, using 1-1/4" brad nails.  Further secure from inside with 1-1/4" screws (can be pocket hole screws)

Finishing Instructions
Preparation Instructions
Fill all nail holes with wood filler. Let dry.
Sand the entire project with 120 grit sandpaper, working in the direction of the wood grain.
Sand sharp corners smooth.
Remove sanding residue with a vacuum with a soft bristled brush. Then wipe clean with a damp cloth.
Finish Used
The finish I used was one coat of Golden Oak stain, applied with a cloth.
Then I applied a whitewash over (just white paint watered down and brushed on lightly over the stain and wiped in)