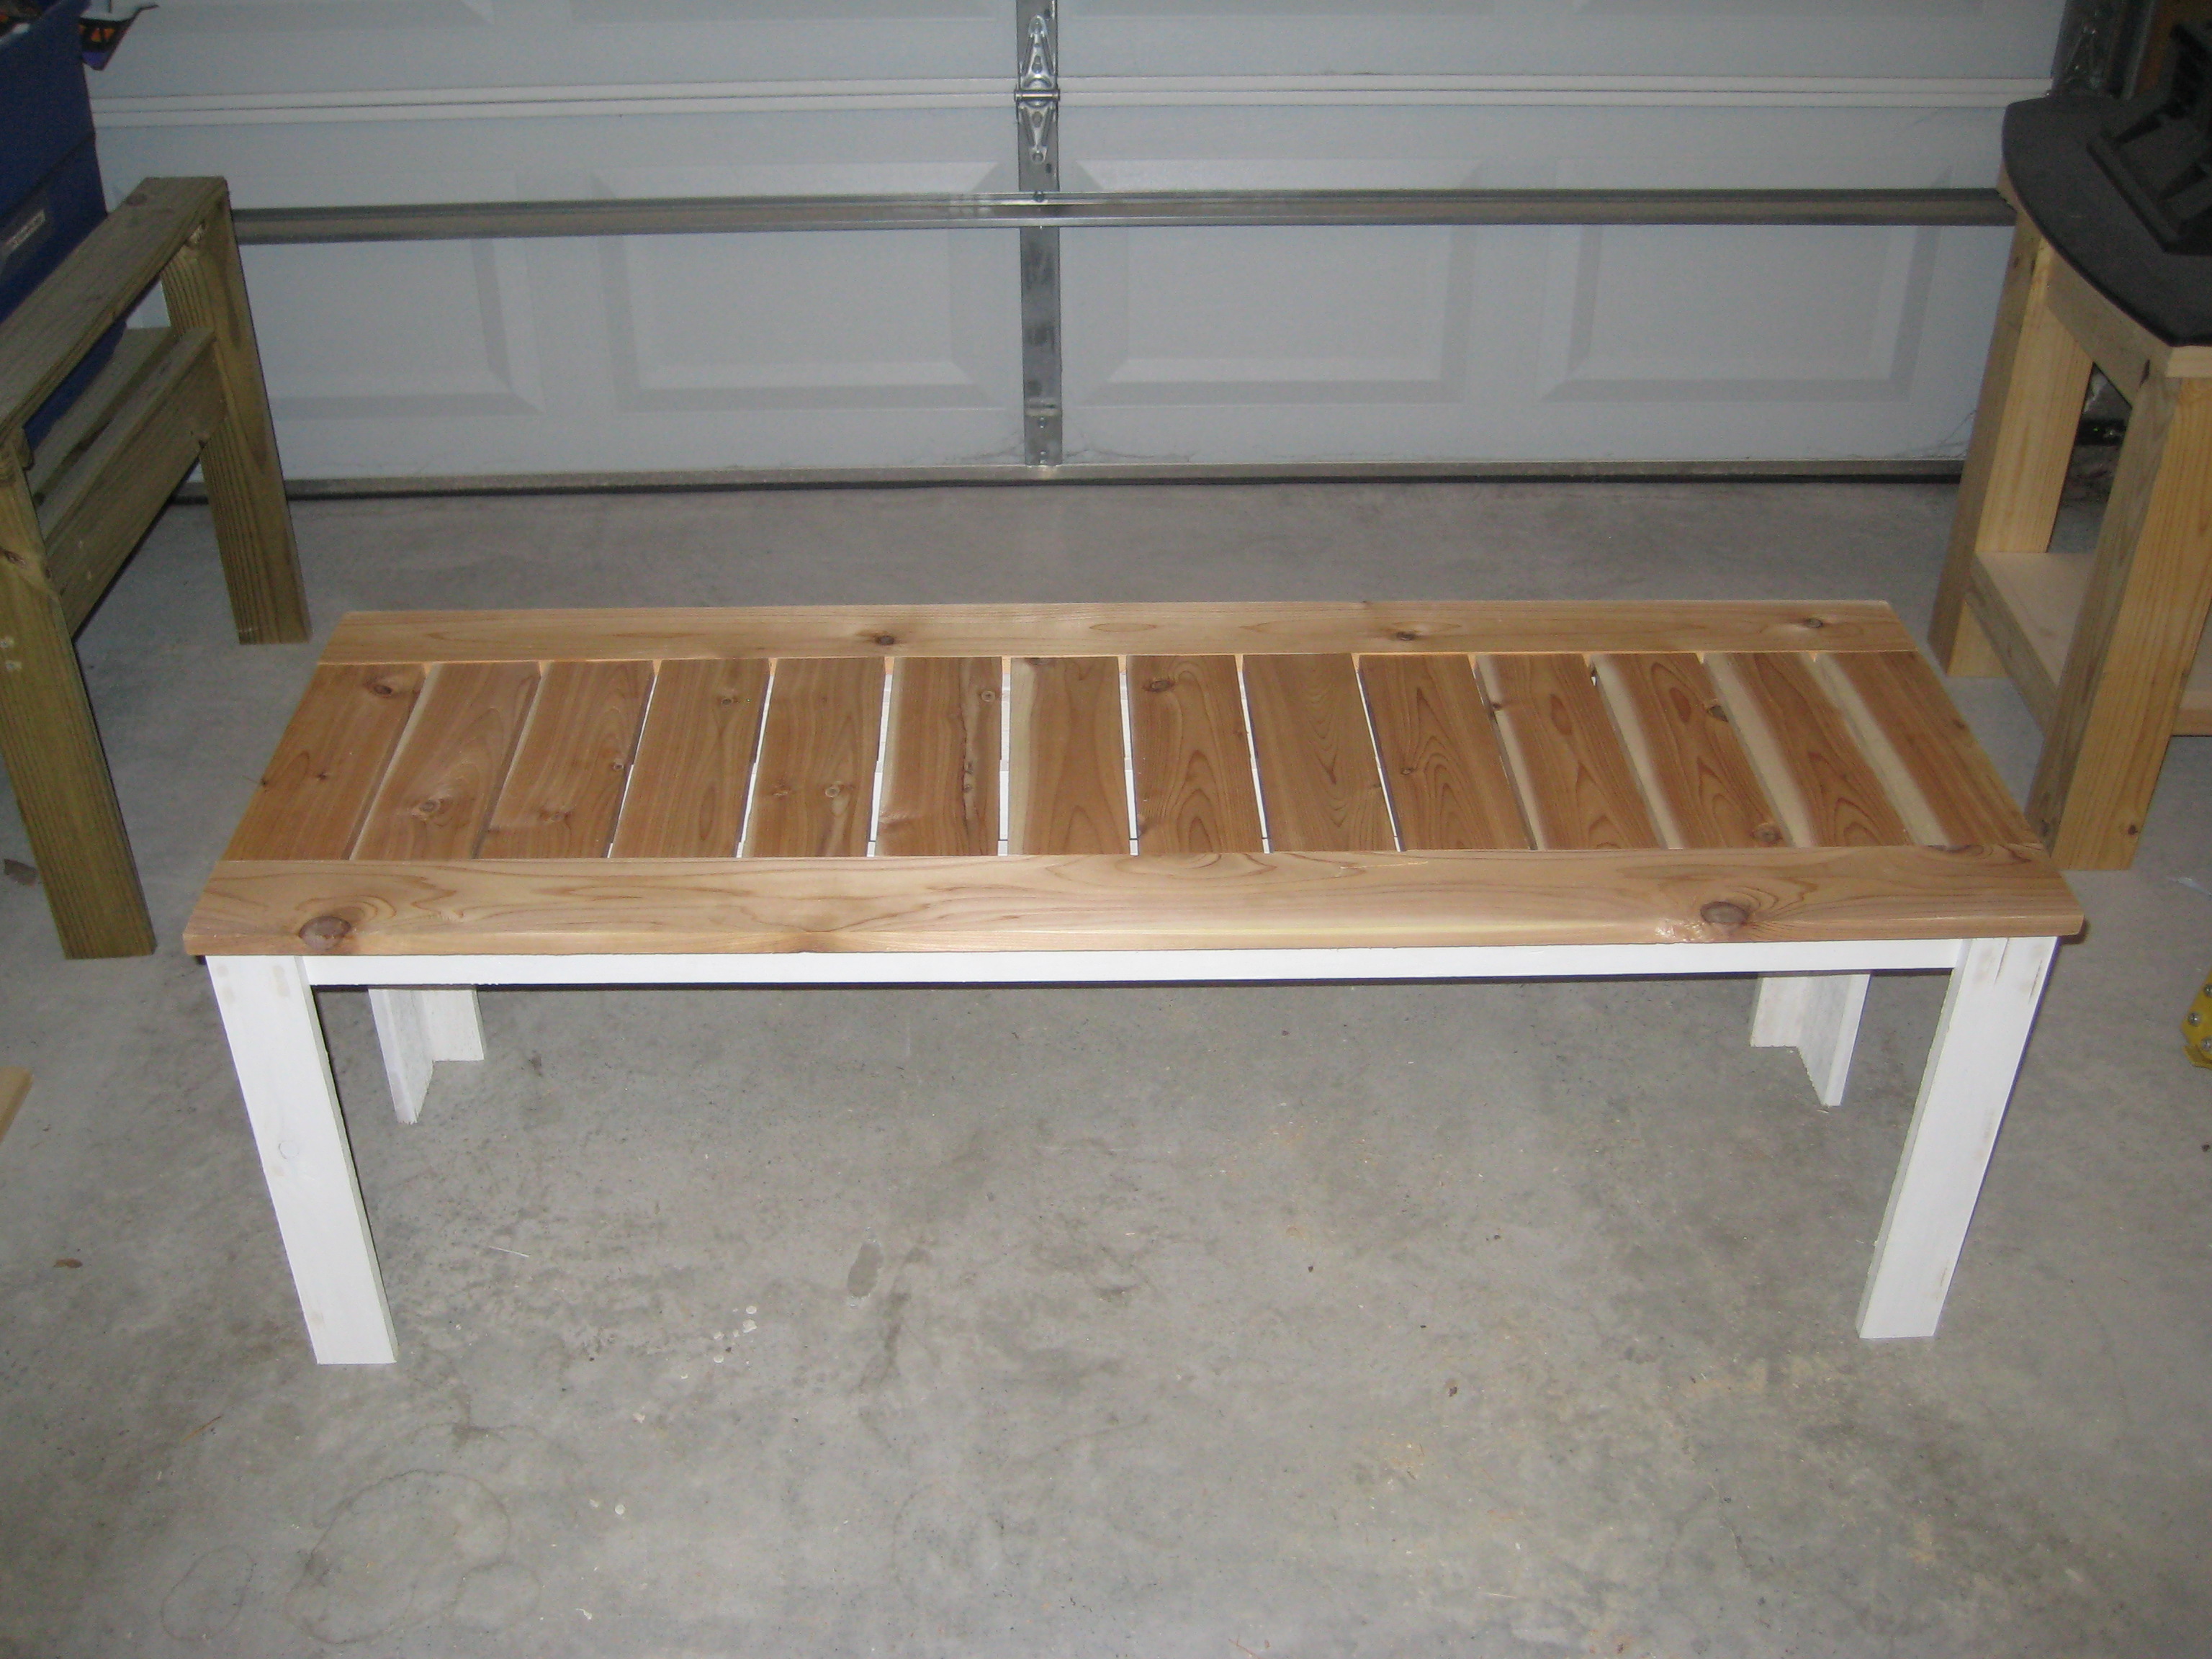
I am close to completing an outdoor set with only the table to go. My parents are going to love this at their new house they are building!! I found the cedar 1x4's at home depot for about six dollars a piece. I painted the base a basic semi-gloss white before I built the bench. It's so much easier to paint first and build later. I have a few more touch ups but I am happy with it. I used the Kreg Jig Jr to screw in underneath($40), which made this project and every project I've done so far that much easier.

Estimated Time Investment
Day Project (6-9 Hours)
Finish Used
Semi-gloss white exterior.
Recommended Skill Level
Beginner
Comments
bhoppy
Tue, 07/26/2011 - 15:28
top question
Looks great! Love the two toned wood look. I wondered whether you added an extra support in the middle... sort of seems like there's one at least in the last picture. Also did you build the top completely separate so it was one piece? Sorry for all the questions. I really want to make this bench for a friend and I would like it to look better than the last outdoor table I made with my kreg jig. Thanks
kmatt55
Tue, 07/26/2011 - 16:42
Thanks! The bench had a
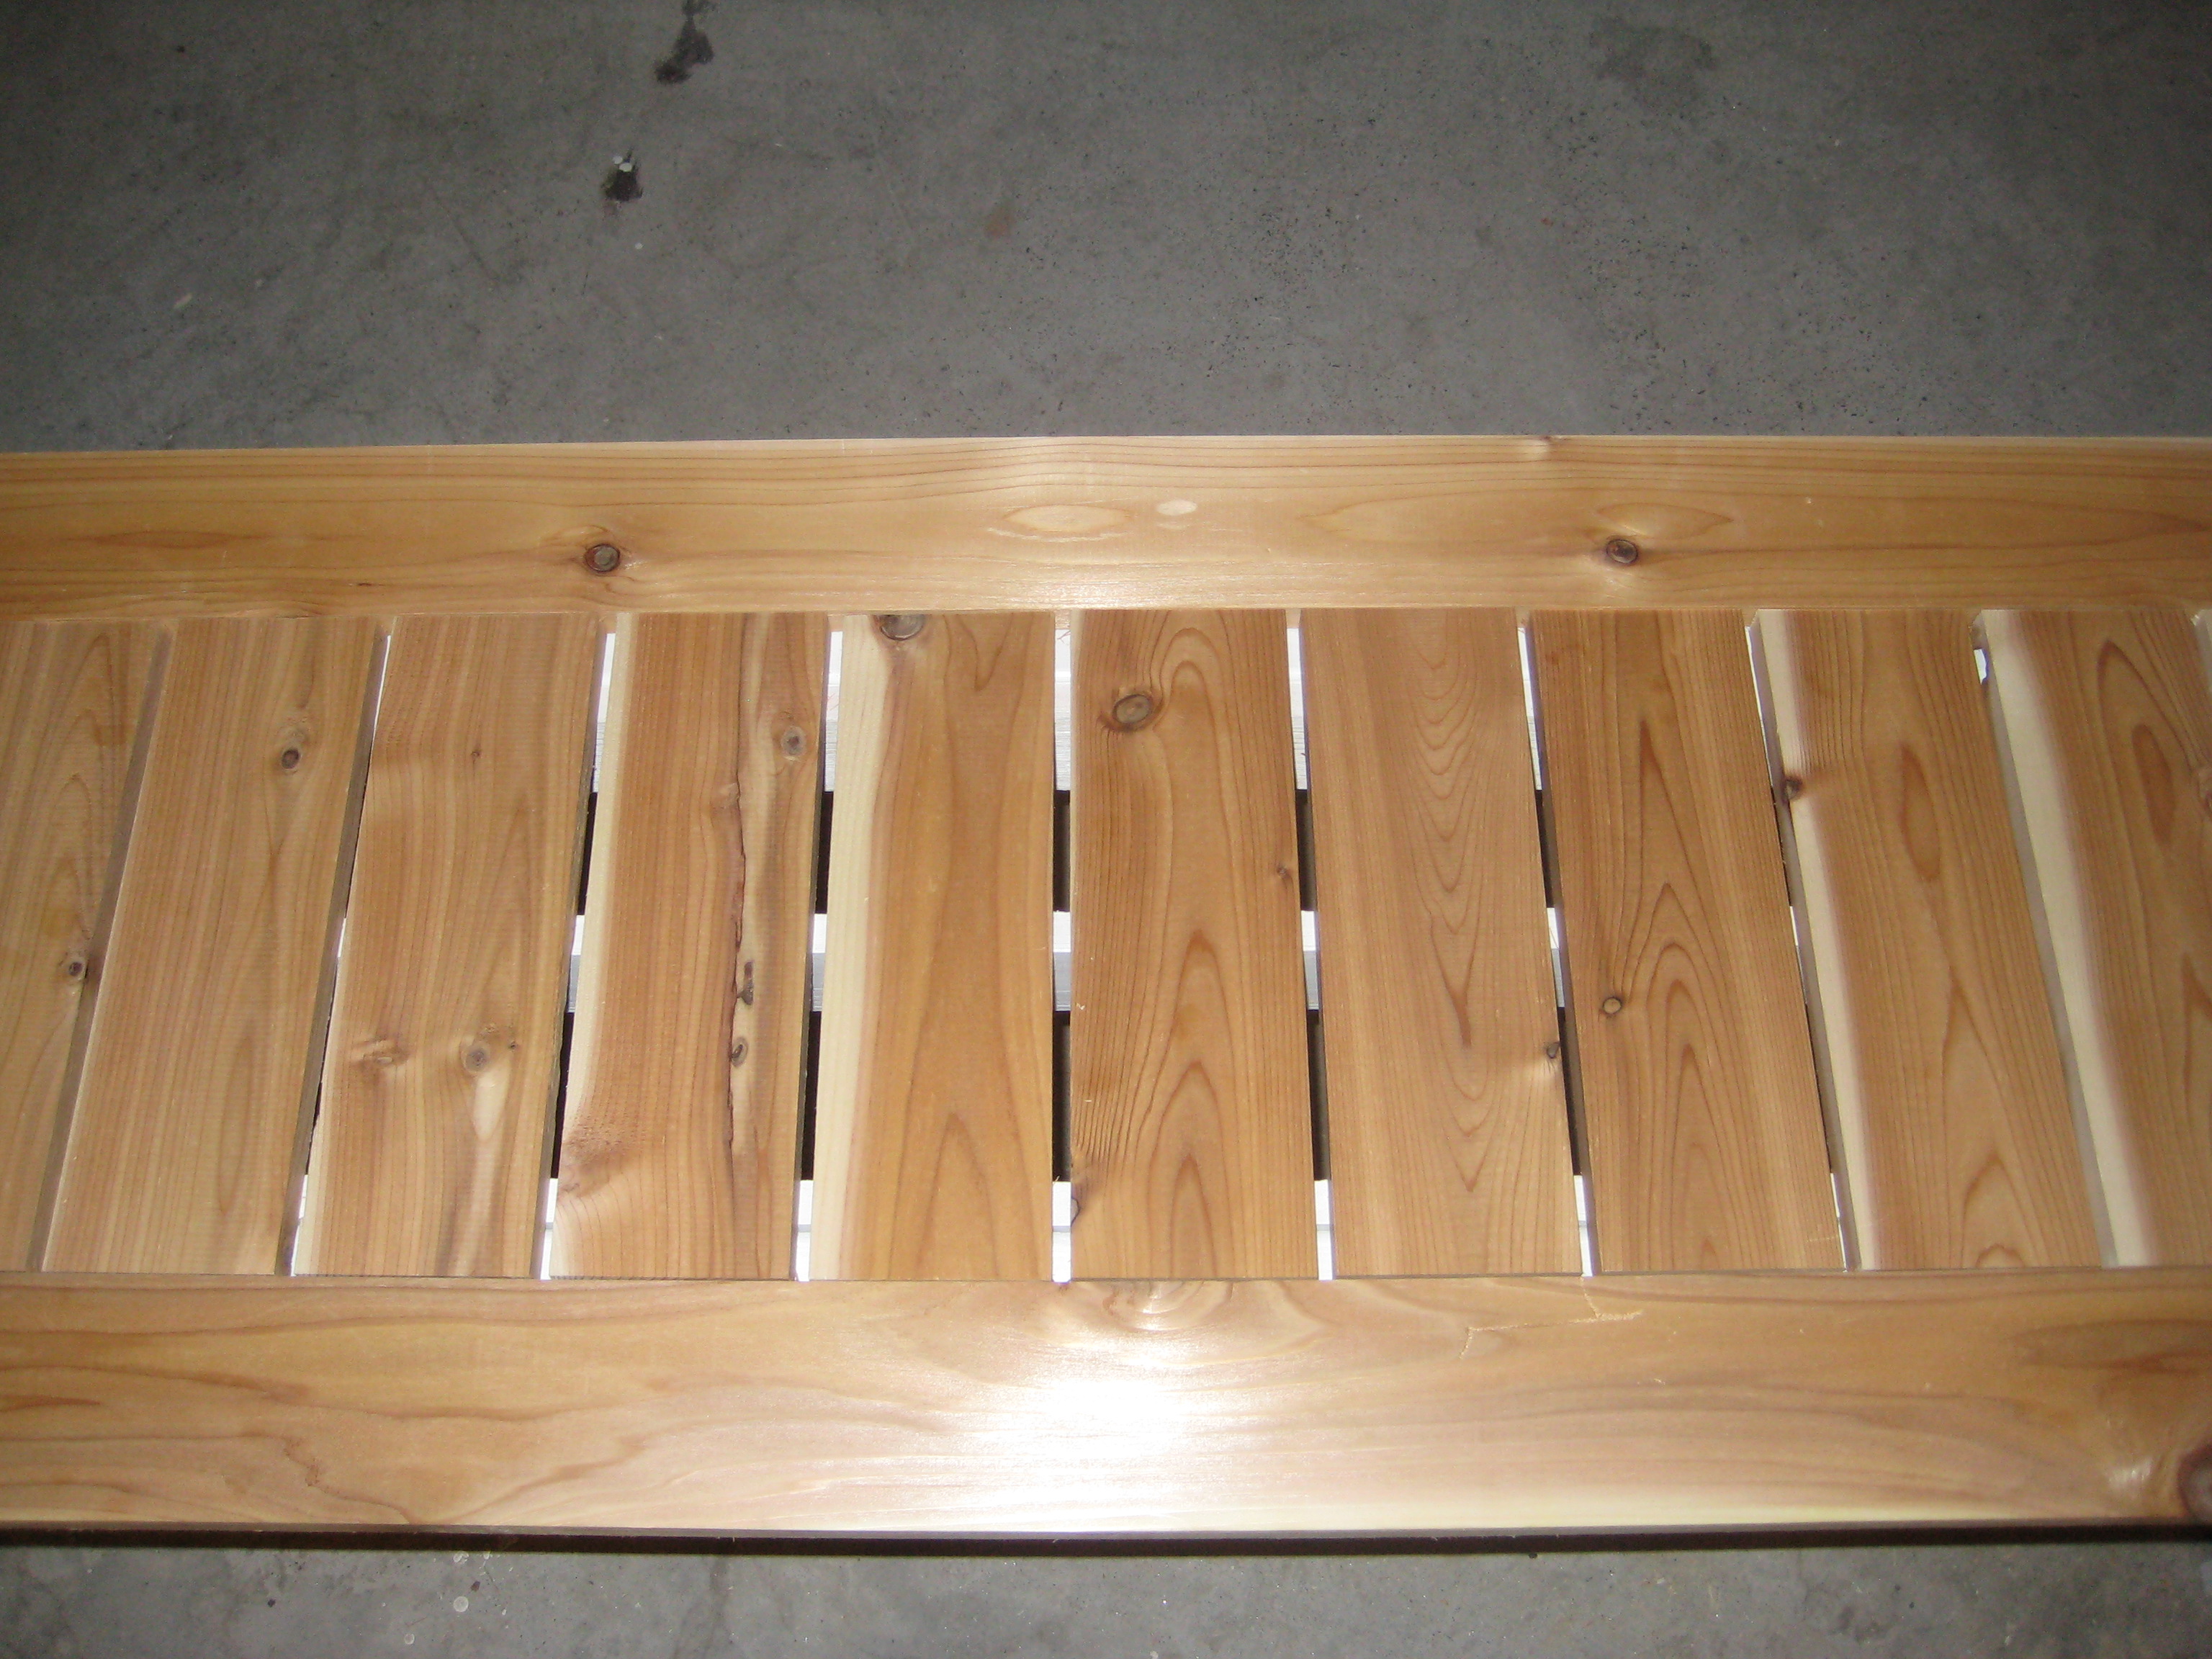
Thanks! The bench had a little flexibility when I sat in the middle of the bench. I added the extra support in the middle which made no difference at all. It turns out that cedar is a naturally light and flexible wood. If I had it to do over again I would use treated pine for the white base and keep the top cedar. The 1x4 cedar from home depot I used is actually .625 x 3.3875 not .75 x 3.5. So as you can imagine, it threw off the whole slat configuration. Best thing to do is use 28 or so .25 inch spacers to place in between the 14 or so slats on level ground. Once you space the slats like you want, then you can maneuver the frame freely until its even on both sides. Once it looks even on both sides start screwing kreg screws at one end and continue until the last one is done. FYI - I highly recommend drilling the pocket holes first before building the frame in Step 1. Hope that helps!!
kmatt55
Tue, 07/26/2011 - 17:05
Almost forgot. I did add
Almost forgot. I did add 2x2's in between the blue and green boards on each side of the frame to add more support. The middle board I added as you can see in the last picture did nothing structurally speaking.
bhoppy
Fri, 08/05/2011 - 10:11
just one more question
Thanks for the tips. I finished cutting all the wood and am going to start putting it together tonight... After reading through the comments I think I'll join the 14 slats together with the side 52 1/4 boards before attaching it to the frame. Did you use an extra 1x3 for the second leg board?
kmatt55
Fri, 08/05/2011 - 10:17
I did use 1x3's for the
I did use 1x3's for the second leg board.