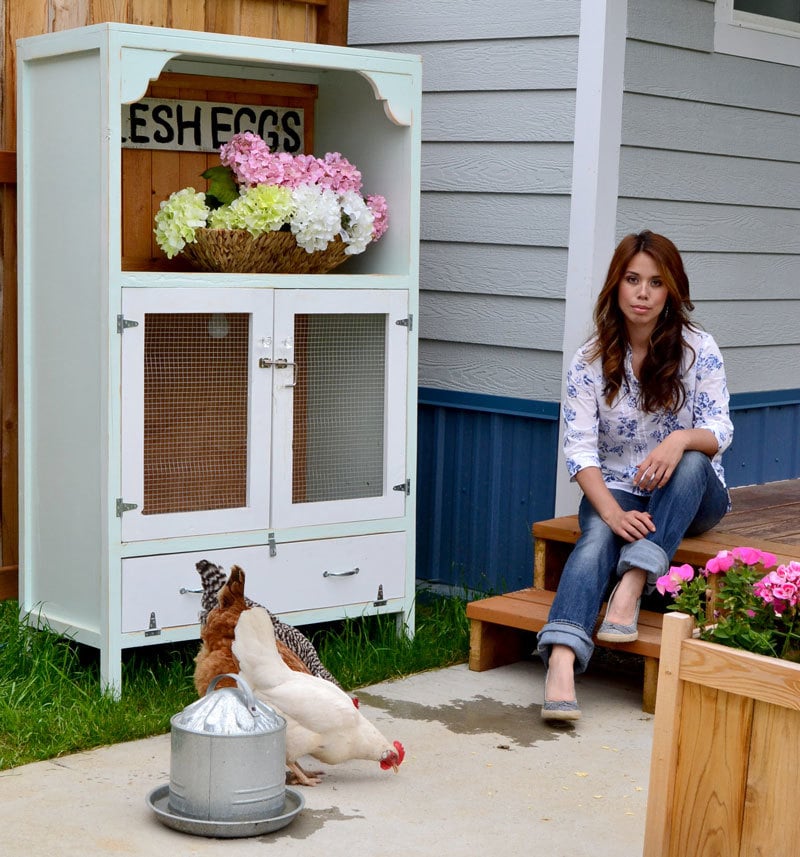
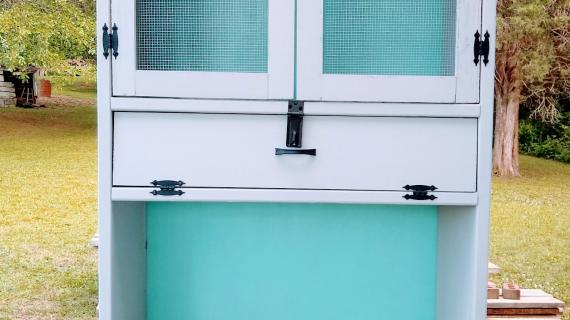
Build a cabinet for brooding chicks! Use as a pet cage for birds and other animals! Free plans!
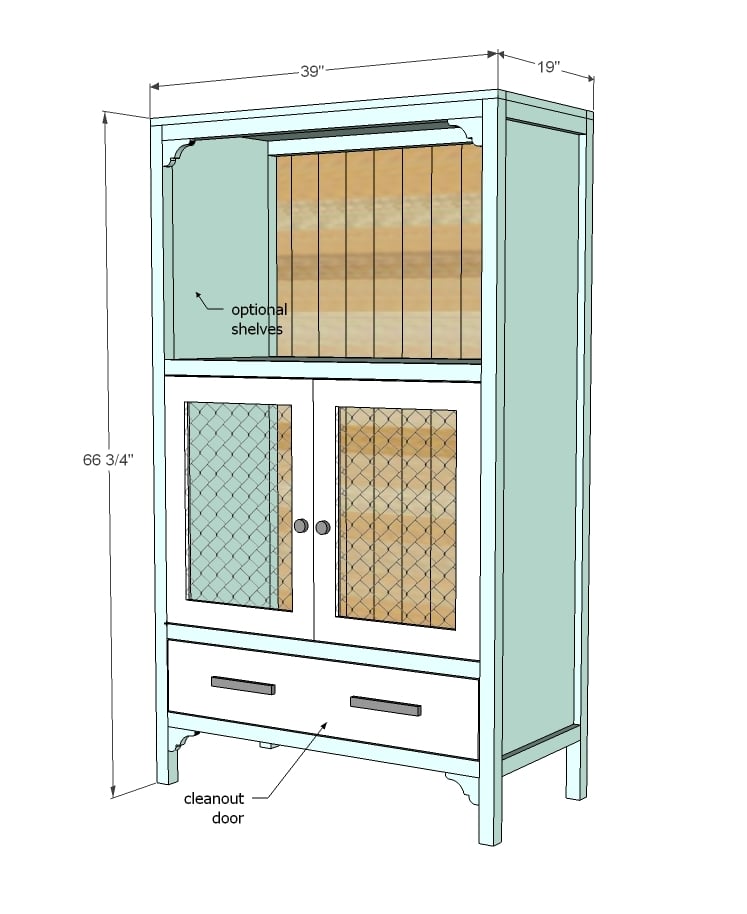
Preparation
1 - sheet 3/4" plywood, ripped into 3 strips 15 1/2" wide by 8 feet long (referred to as 1x16 in this plan)
2 - 1x2 @ 8 feet long
2 - 1x3 @ 8 feet long
8 - 2x2 @ 8 feet long
1 - 1x8 @ 3 feet long
36" wide hardware cloth or chicken wire - I used about 4 feet total
3 sets of hinges
1/2" staples
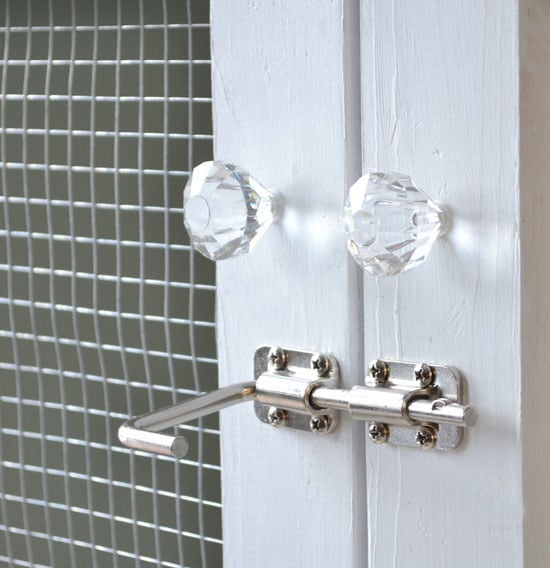
knobs, handles and latches
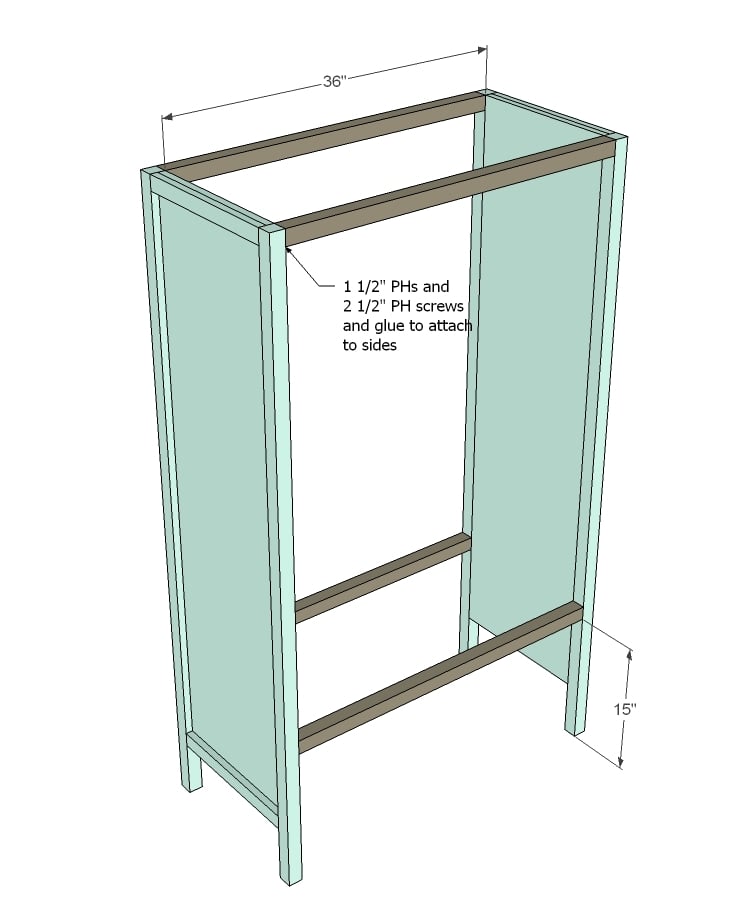
2 - 1x16 @ 60" (sides)
4 - 1x2 @ 15 1/2" (side trim)
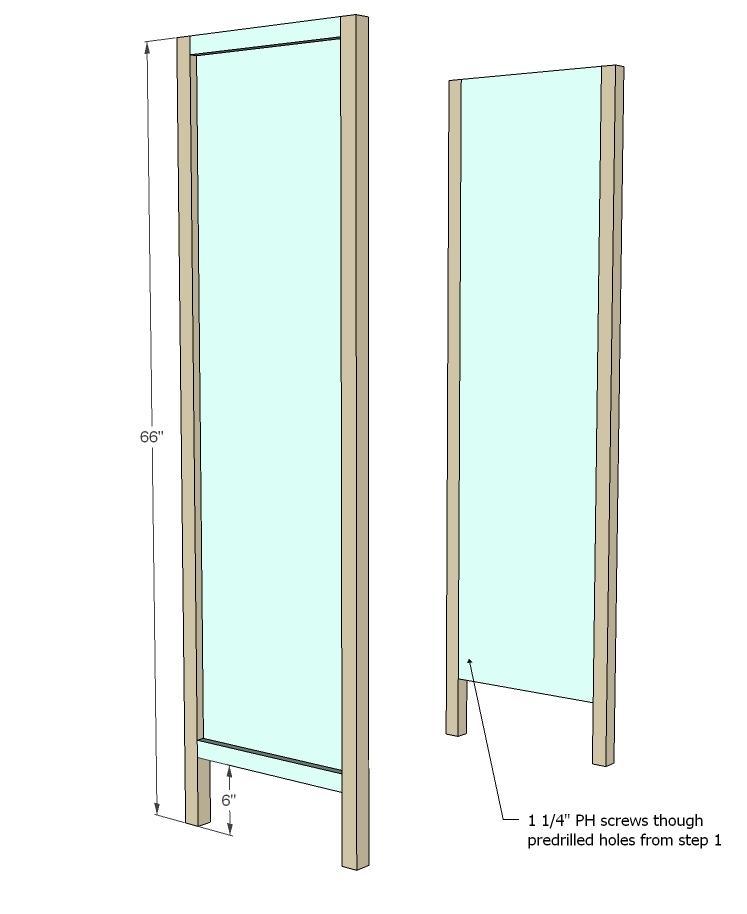
4 - 2x2 @ 66" (legs)
8 - 2x2 @ 36" (front/back trim)
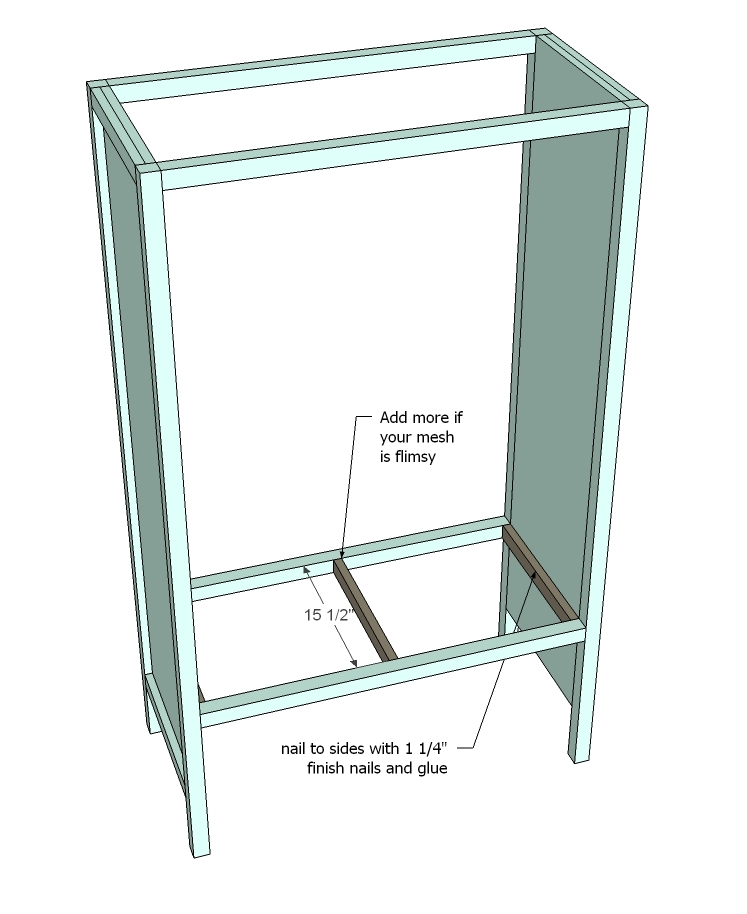
3 (or more) 1x2 @ 15 1/2" (for supporting grated bottom)
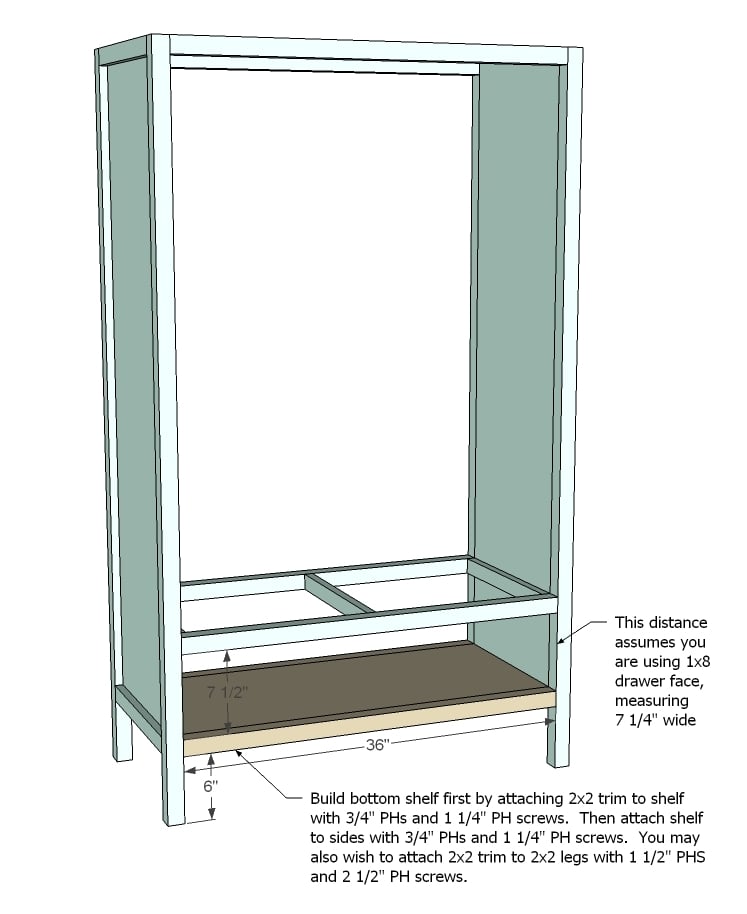
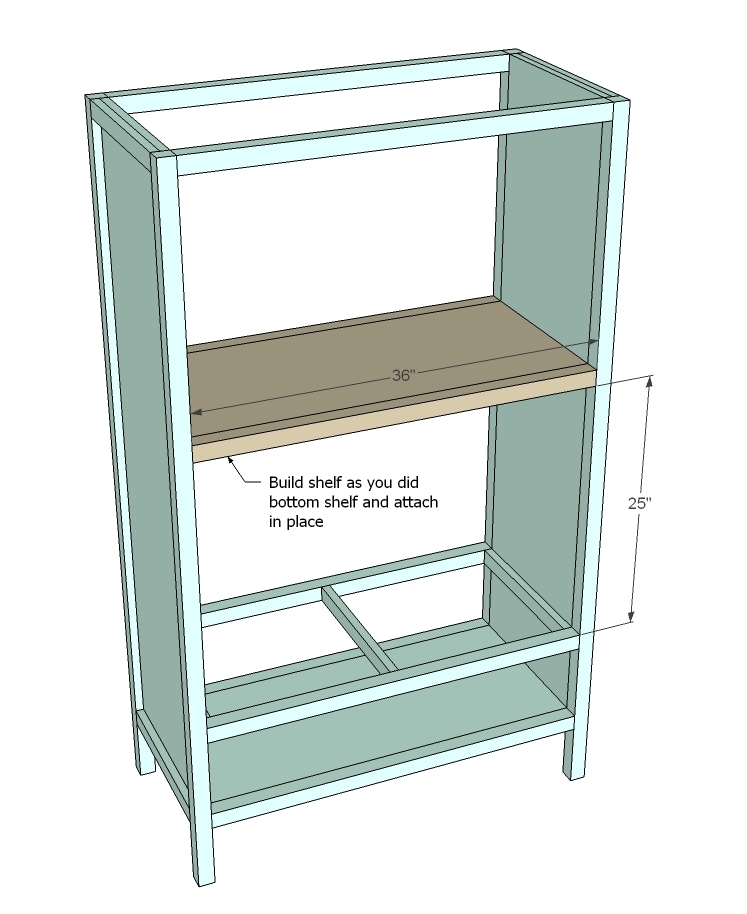
3 - 1x16 @ 36" (shelves) - extra is optional shelf not shown
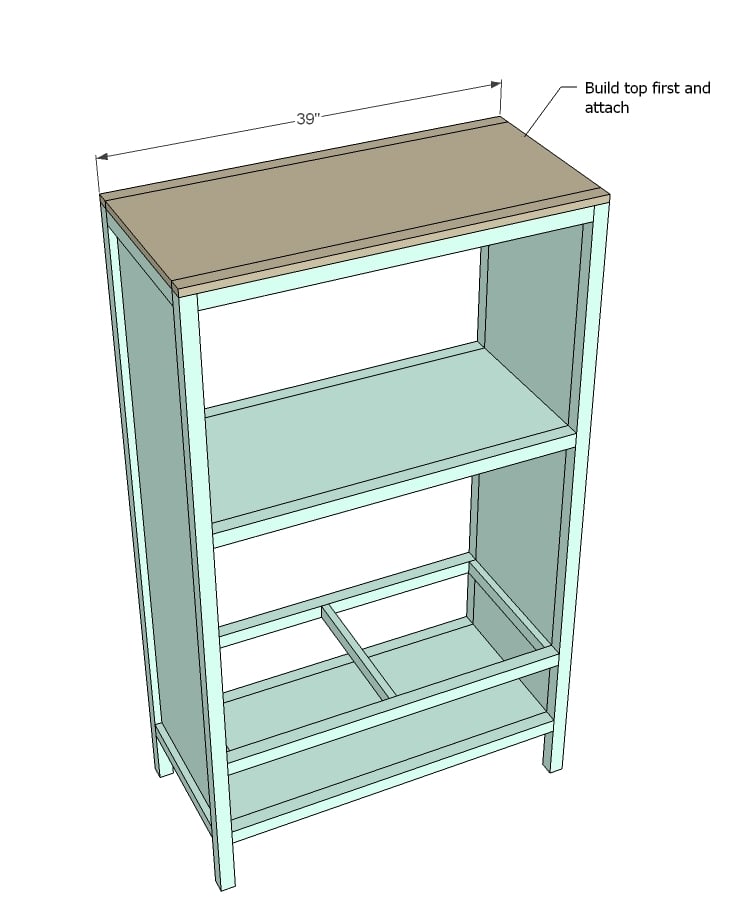
1 - 1x16 @ 39" (top)
2 - 1x2 @ 39" (top)
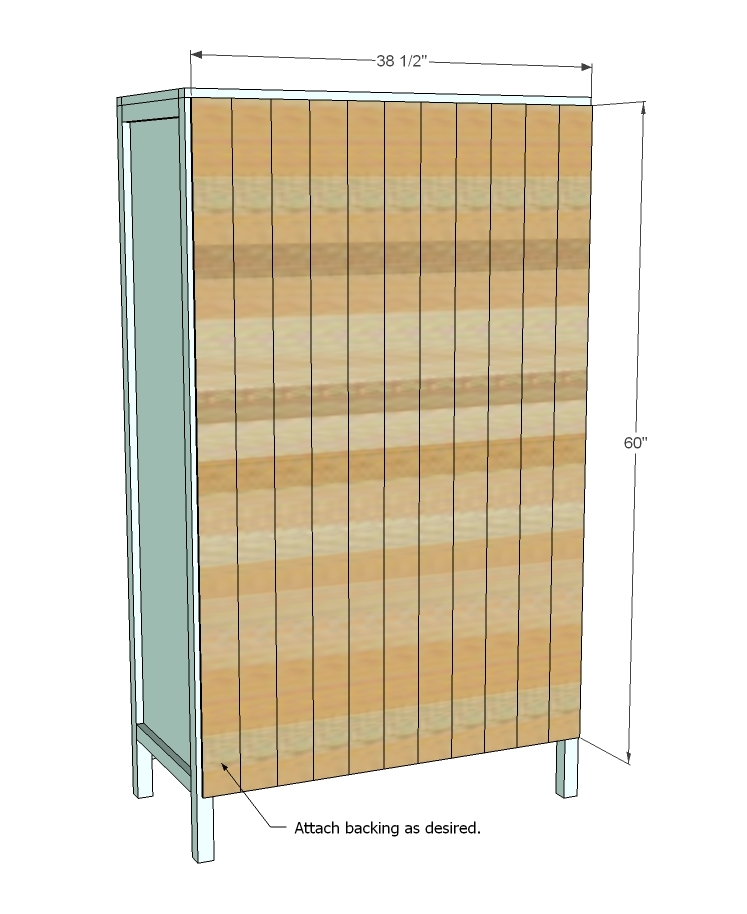
1/4" plywood or other materials 38 1/2" x 60" (back)
1 - 1x8 @ 35 3/4" (bottom door tilts down)
DOORS
4 - 1x3 @ 24 3/4"
4 - 1x3 @ 12 3/4"
Hardware cloth or chicken wire stapled to back
Please read through the entire plan and all comments before beginning this project. It is also advisable to review the Getting Started Section. Take all necessary precautions to build safely and smartly. Work on a clean level surface, free of imperfections or debris. Always use straight boards. Check for square after each step. Always predrill holes before attaching with screws. Use glue with finish nails for a stronger hold. Wipe excess glue off bare wood for stained projects, as dried glue will not take stain. Be safe, have fun, and ask for help if you need it. Good luck!
Instructions
It is always recommended to apply a test coat on a hidden area or scrap piece to ensure color evenness and adhesion. Use primer or wood conditioner as needed.


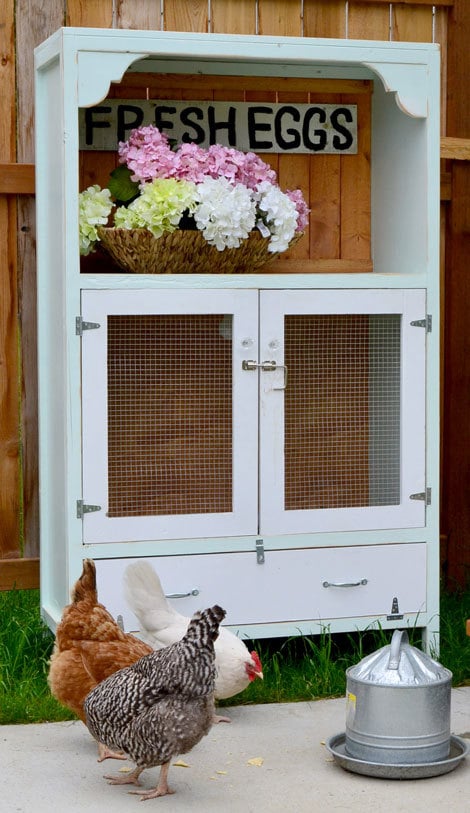
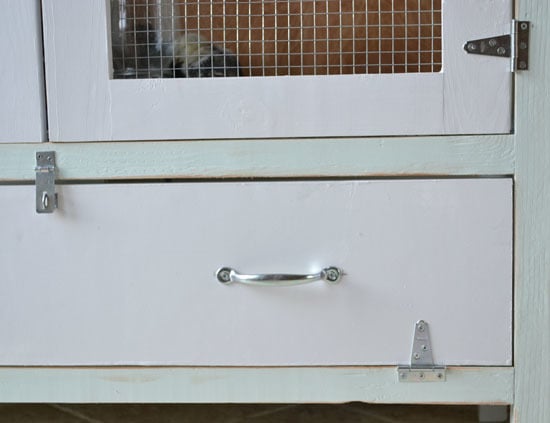
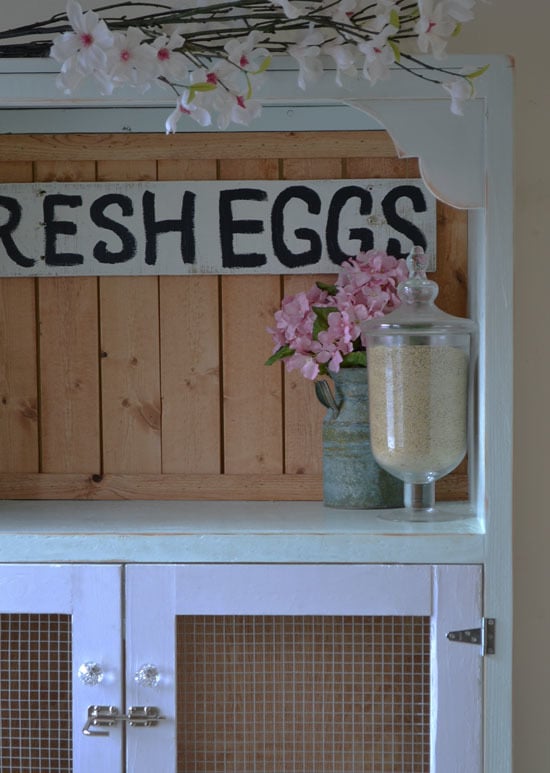
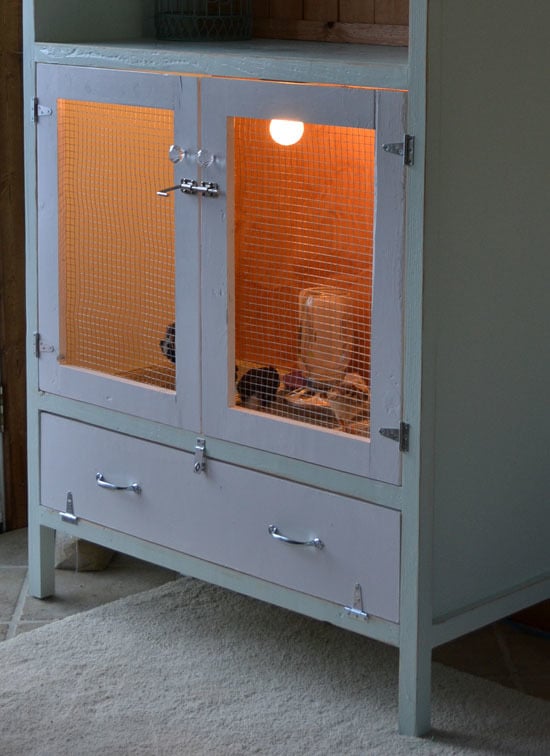
 The other day we stopped by here





Comments
Guest (not verified)
Wed, 04/04/2012 - 10:28
Very nice!
This looks so adorable! I can't wait to see plans for a chicken coop.
Chair
Wed, 04/04/2012 - 10:30
Your Awesome Just Got Awesomer
I love it! There's a lot of news going around these days (particularly here in Canada) about urban hens and much of the nay-saying is based on fear of unattractive set-ups. Your plans certain kick that line of thought in the butt :)
I am going to be getting my own coop and flock this summer... I'm eagerly anticipating your plans for a coop (nudge nudge). I've been reading quite a bit about design and function but I'm still a bit of a building noob so I know whatever you come up with will not only be attractive and functional but also well-suited to a harsh climate.
Cluck on!
[email protected] (not verified)
Wed, 04/04/2012 - 10:37
PDF Version
Please provide a working PDF version!
Thanks, Darin
Sunny (not verified)
Wed, 04/04/2012 - 11:19
Darin, I bet she has seen
Darin,
I bet she has seen your other comments on previous threads, so repeating yourself is probably unnecessary. She has stated many, many times that this website is a DIY in itself, and she is not a web design expert. Other posters have replied to you that you can "print preview" from another screen then save as a PDF. Has that suggestion worked for you?
I, for one, have been incredibly blessed by you, Miss Ana White, and all you have done to inspire me to a new craft to not only better my family but to channel creative energy. I appreciate all you have done to offer an incredible resource for FREE, and it is my pleasure to return to you the gift of my patience through your growing pains. Thank you for taking all suggestions into account and working on them as you have time.
(For the record, I would rather see posts about building cool stuff than perfect PDF downloads.)
Sunny
terrillr (not verified)
Wed, 04/04/2012 - 17:49
cute pdf writer
Download and install the Cute PDF Writer program and the Ghostscript Converter to your computer, and you change the document into a pdf and save to your computer. The Cute pdf writer shows up in your printer list. When you want to convert to pdf, click on print / change printer to Cute PDF Writer / Change properties if needed. Before long, a "save as" box appears and you name/save. EASY! I've used this program for years.
here's a "How to" with links to the writer & converter under Resources. http://www.ehow.com/how_5089608_use-cutepdf-writer.html
Brook @ BeingBrook (not verified)
Wed, 04/04/2012 - 10:48
LOVE!
It is SO cute! Makes me want to run out and get some little baby chicks! Would be really cute on a deck too as a little serving area and storage.
Julie Novak (not verified)
Wed, 04/04/2012 - 10:58
Chicken coop
So will we be seeing plans soon for a chicken coop ? Maybe a chicken tractor ? I would definitely be interested. We love your website and have built 2 farmer beds. Today got the wood for a king size farmer bed to work on this weekend.
Laura Haggarty (not verified)
Wed, 04/04/2012 - 11:24
This is quite lovely! May I
This is quite lovely!
May I make a few suggestions though? Be aware, that keeping chicks inside your home will soon fill your house with dust. As chicks grow, they shed dander at a ferocious rate, and dust gets everywhere. This can be very allergy provoking, and annoying to deal with.
As well, please be aware that smaller chicks (like bantam breeds) can actually get themselves stuck in the wire mesh (by their hocks.) For the first week or so, it's best to put down paper towel (not newspaper, it's too slick) on top of the wire until they get large enough to avoid getting stuck.
Great post though, love the design! And thanks for the step by step.
Guest (not verified)
Wed, 04/04/2012 - 11:27
Love it!! i really want to do
Love it!! i really want to do this but suburban lifestyle in a condo doesn't lend well to raising chickens.
I follow Jaden at Steamy Kitchen and her boys have a few chickens and her husband built this out back. http://steamykitchen.com/20640-the-palace-chicken-coop.html
way cool!
David (not verified)
Wed, 04/04/2012 - 11:41
wow, very cool
Did you use Google Sketchup to build the 3D model you used for the diagrams? very nicely done.
Guest (not verified)
Wed, 04/04/2012 - 11:57
Chick Brooding...
Ana...AMAZING as always!!! What an Inspiration you are, thank you so much!
Jess
Kathy Webster-Link (not verified)
Wed, 04/04/2012 - 12:11
Awesome build
This is way better than the converted dog crate that I've been using as a brooder! It's been a mess, but I've loved it. Still I'd decided NOT to have them in the house again, but this design could change my mind! Really, really cute.
My go-to website for everything chicken related is backyardchickens.com! Just in case you wanted to know. ;)
mebohn
Wed, 04/04/2012 - 12:23
Diverse!
This is too cute! I want to build it just b/c it's fabulous, though - not to put chicks in. Is that crazy? I'd just like to have it in my dining room or somewhere sans chickens. :-)
cakelady
Wed, 04/04/2012 - 13:03
Great Job
I got my first chicks this spring. I built my coop last week. Backyardchickens.com is the way to go to learn lots. They even have a bunch of alaska chicken keepers on there to help with the bitter cold issues. Who knew chickens were so hardy!!
I am cooking up an idea for a brooder that docks to a run for a chicken tractor when the chicks get bigger.
whitney_smith
Wed, 04/04/2012 - 13:55
Who knew!
Who knew a chicken brooder could be so darn cute!
Kerry Andrus (not verified)
Wed, 04/04/2012 - 16:19
Waiting for the next step!
Can't wait to see your chicken coop!!! I realize that you have 4 chicks, but I really hope you'll show a design that could be expanded to holding a larger flock!
Guest (not verified)
Wed, 04/04/2012 - 16:33
I am going to get my hubby to
I am going to get my hubby to make this for our pet rabbit! EXCELLENT!!!!
Robinwood
Wed, 04/04/2012 - 16:38
Copy into Word Document
For those who are having trouble with PDF's - Just click on the printer friendly copy and then copy and paste to a Word document. I have tried to save as PDF using the print preview, but my printer options seem to be much more limited and I haven't been able to save as a PDF. However, the Word document still gives me what I need to build the project.
In reply to Copy into Word Document by Robinwood
claydowling
Thu, 04/05/2012 - 04:54
Simpler solution
Right click on the link and choose "Save link as" It will save the PDF file to the disk.
Johan (not verified)
Wed, 04/04/2012 - 22:49
Enjoy them, they grow big
Enjoy them, they grow big pretty quick.
A few weeks ago I hatched 6 eggs in a makeshift incubator (11-11-2011) and they are almost fully grown New Hampshire Chickens already, but still pets, wanting to climb onto your lap when you sit with them.
Rhoni T (not verified)
Thu, 04/05/2012 - 06:07
too cute, I'd like it without
too cute, I'd like it without chicks, with shelves. It would make a nice cabinet for dishes or pantry cabinet.
My husband and I started building our chicken coop a few weeks ago (the hubs now refers to it as the "Chicken Mansion" ... Okay so WE got a bit carried away on the size). Only being able to work on it 3 days a week and building with no plans has been a test of "he said, she said", a few arguements later and I am happy to say it is finished! woo hoo Unfortunately we still have the run to building, hopefully that will go smoothly so we can official put are two girls in there for a few weeks until the baby chicks arrive the end of May.
some might say two hens that is all, I live in OK and last year we had a drout, 100+ temps for the better part of two months. I lost three of the best laying hens ever. They would get in the boxes to lay or brood and, well the heat was to much. so that is why the new coop that I can lock them out of when the it gets to hot and lock them in when it is too cold, with a heat lamp inside!!
Go online and look up Heather Bullard Chez Poulet, her coop is awesome, ours is built kinda like hers, but without plans and an added closet for garden stuff.
Mills Snell (not verified)
Thu, 04/05/2012 - 09:11
Future Plans for full grown hens?
Just wondering what kind of creative ideas you have for the girls when they outgrow the brooder cabinet?
My wife and I have 3 hens in South Carolina, and we just moved and are about to build them a new and permanent home. We have been pleased with a coop and run in a single enclosure. We had them in 4x8ft, but will probably expand that since we want more!
pogonip (not verified)
Thu, 04/05/2012 - 21:23
New Family Members
Oh, how I remember our teeny chicks and the poop they generated! You are going to be totally spoiled by their fresh eggs. And probably will coddle your girls as much as we do when it gets cold!
Oh, and I love their names!
Elaine Belange… (not verified)
Mon, 05/14/2012 - 11:59
Use of article in magazine
Hi, I love the brooder article and would like to talk to you about publishing it in our magazine in early 2013. Please contact me by email at [email protected] to discuss publishing arrangement. I work from home and can also be reached by phone at 715-965-5923 8-5 eastern time. Thanks in advance, Elaine Belanger, Editor, Backyard Poultry.
denogirl
Sat, 07/14/2012 - 23:04
Pool storage
I've been looking for something that I could use as an outdoor pool chemical storage, that could double as pool toy storage on the bottom with shelves, and doors on top (with a lock on them), and this seems really close to what I was looking for. Do you NEED the legs on the boom of this, or could you skip them? Because if toys rolled under this I'd never get them back :) And would you do anything special with this for an outdoor area where it's going to get wet, other than the paint type used?