Last fall, it was tough to walk away from this pile of trusses.

I felt like we had not only failed ourselves, but that we had failed the Moms and failed you who have supported us and cheered us on.<p></p><p>I was disappointed.</p><p></p><p>I was disheartened.</p><p></p><p>I was sad.</p><p></p><p></p><p>But today, as we set these trusses, I am thankful we waited.
And today, this day only a few months delayed, I am happy.</p><p></p><p>The sun is shining, the mountains are out. There is not ice covering the trusses or bone chilling wind. We are not encumbered by layers of down gear or wearing thick always in the way gloves. The sun won't go down in a few hours, shutting our job site down. </p><p></p><p>It was wise to wait for spring.</p><p></p><p></p><p><img src="https://lh5.googleusercontent.com/-napONXDYnOs/T4hTi_kVc_I/AAAAAAAAKDY/…; style="width: 470px; " alt="" /></p><p></p><p>The blocking is cut, we are prepped and ready to go. </p><p></p><p>Today, we set trusses!</p>

When we built our house, it was just me and the Ram and his dad on truss day. We tied a rope around each truss, and one at a time, we pulled each truss on top of the house. Then we moved each truss by hand in place. It was tough work. And those trusses were half the length and height of these trusses. And our house is only one story, not built into a hill.
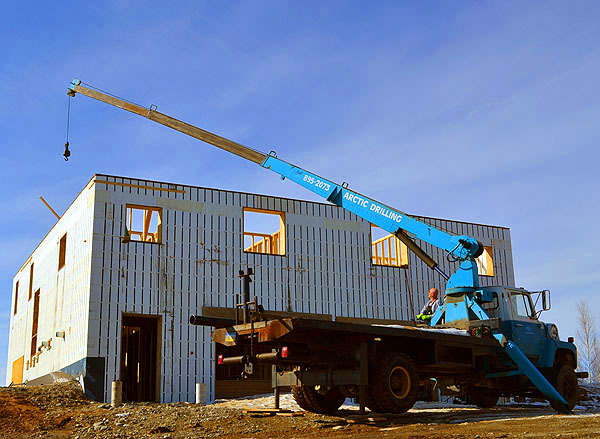
For the Momplex, we have to hire a boom truck.
The trusses are huge. The Momplex is tall. And there's alot of them.

The boom truck first sets up in front of the garages, between the Momplex and trusses. Then we quickly check to make sure the boom can reach far enough.
Just barely.

It will be a little tricky lifting the trusses up over the side of the Momplex and into position. But we want to avoid moving the boom truck too many times.
Time is money.

The boom truck has a hook on the end for lifting, but we will need rigging to attach the trusses to the hook.

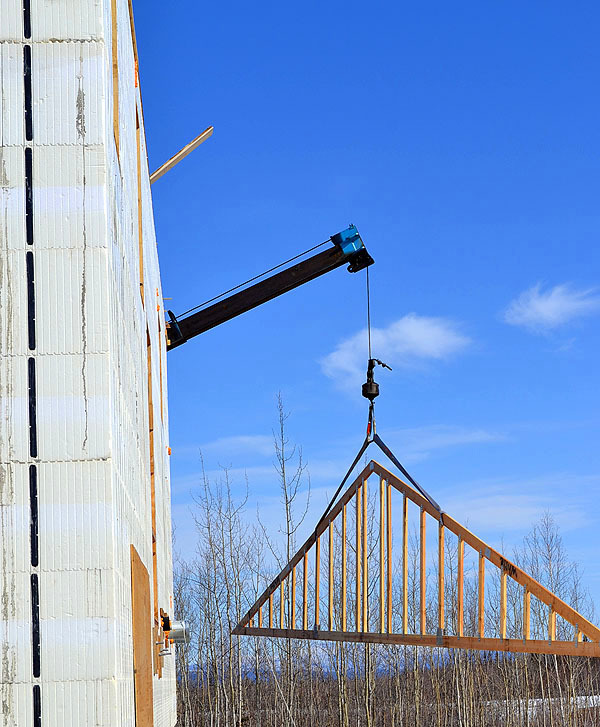
The first truss is looped in two places with heavy straps

And then the straps are looped into the hook.
That's Uncle Bill and Grandpa Tim helping us today. They are my favorites.

Once the truss is secured to the hook, Uncle Bill gives the signal.
Up.

And the boom truck slowly lifts the very first truss off of the stack.
This is a gable end truss. It is shorter than the common trusses, and features studs every 24" so nailing plywood on later reduces waste. Also, the center is open to allow for an access vent.

When the first truss clears the pile, I can't really believe it is happening. Over the winter, I've lost hope, felt overwhelmed, asked myself, have we taken on more than we can do????
But today, as I see this truss moving, I feel newly enthusiastic and optimistic about the Momplex. Yes, our family can DIY this Momplex. We can do it!

The truss is every so slowly brought around.
They are fragile and there is a little wind today.

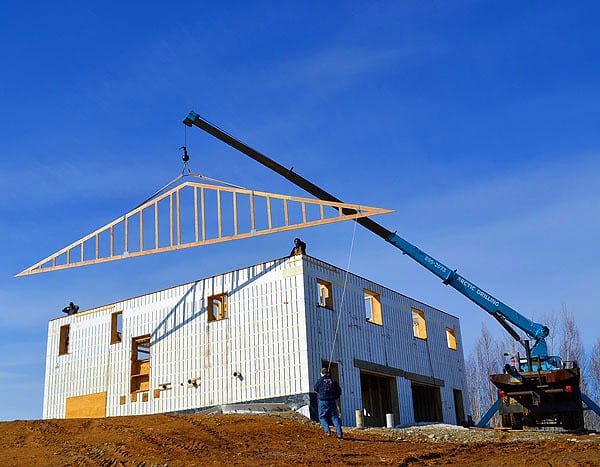
Around the side of the Momplex it comes. It is huge.

And then the truss starts to go up ...

Up top the Ram waits for it.
This takes forever as the boom extends, then the truss drops to allow for the boom extension. Then it extends and rotates, drops, and so on.

Finally, the boom has the first truss in the right position

Comments
dmcarwin
Fri, 04/13/2012 - 10:10
Wow!
Jenn W (not verified)
Fri, 04/13/2012 - 10:49
YAHOO! That is a beautiful
Ana White
Fri, 04/13/2012 - 10:54
Thank you for reading and
Jodi G (not verified)
Fri, 04/13/2012 - 11:37
Keep it up Anna... you are
In reply to Keep it up Anna... you are by Jodi G (not verified)
Ana White
Fri, 04/13/2012 - 11:50
Hi Jodi, you are so
kim k (not verified)
Sun, 04/15/2012 - 18:51
ahhh...i often wondered about
tracysmith
Fri, 04/13/2012 - 11:40
Oh Happy Day!!!
Ana White
Fri, 04/13/2012 - 11:51
Hi Tracy!!!! Thanks for
Sue O'Halloran (not verified)
Fri, 04/13/2012 - 11:51
So cool, I am so happy for
sueslager
Fri, 04/13/2012 - 12:04
i'm impressed!
melanie dahlan (not verified)
Fri, 04/13/2012 - 12:12
So excited
JoanneS
Fri, 04/13/2012 - 12:42
Way to go Ana and family!
Tsu Dho Nimh
Fri, 04/13/2012 - 12:56
Good explanation
Jaime Costiglio (not verified)
Fri, 04/13/2012 - 15:36
Your name on the truss!
NikkiS (not verified)
Fri, 04/13/2012 - 16:57
Congrats!
Danielle Z. (not verified)
Fri, 04/13/2012 - 20:54
Awesome!
YankeeBelle
Sat, 04/14/2012 - 04:30
How Exciting!
Guest (not verified)
Sat, 04/14/2012 - 20:36
WAY TO GO!! Your on a roll
Shasta (not verified)
Mon, 04/16/2012 - 05:44
YAY!!!!
stitchak
Tue, 04/24/2012 - 15:49
Neighbors
kally
Tue, 05/29/2012 - 08:55
This looks so easy in
Guest5151 (not verified)
Thu, 06/14/2012 - 14:11
منتديات رسائل - مسجات -