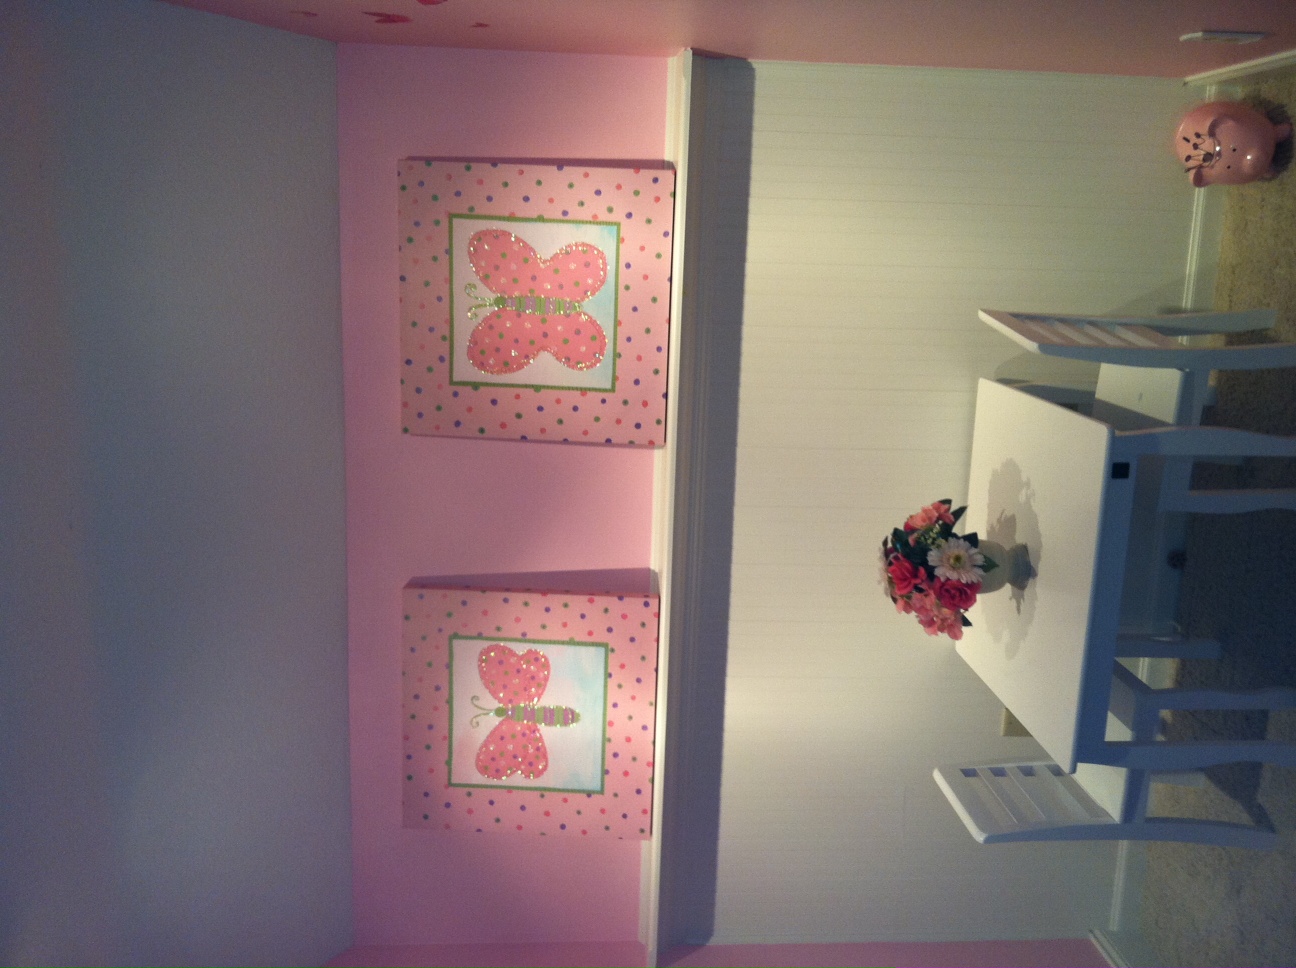
I once read that children that have their pictures and trophies displayed in their rooms had higher self esteem in general. I made a place in my kids rooms to display those type of things so they see them every time they enter their rooms. Very easy process.
This might be missing some details. This shelf is not for heavy items but is perfect for pictures, plates, trophies, etc.

Preparation
1x2's to run the length of the entire wall
crown molding to run the length of the wall
1x3 or 1x4 inch board to make the actual shelf....width depends on how wide the crown molding is
nail gun or screws
stud finder
glue
wood filler
desired finish paint or stain
120 sand paper
router for the edge of your choice (optional)
Cut the boards to the desired length of the room. The 1x2's can be scraps and don't need to be coninuous. Router out the top edge of the shelf that you would like to face the room and give everything a good sanding.
You want a nice snug fit so be as exact as possible. Measure where the actual shelf will be as walls tend to settle and are not always perfectly straight.
Please read through the entire plan and all comments before beginning this project. It is also advisable to review the Getting Started Section. Take all necessary precautions to build safely and smartly. Work on a clean level surface, free of imperfections or debris. Always use straight boards. Check for square after each step. Always predrill holes before attaching with screws. Use glue with finish nails for a stronger hold. Wipe excess glue off bare wood for stained projects, as dried glue will not take stain. Be safe, have fun, and ask for help if you need it. Good luck!
Instructions
Step 1
Cut 1x2's, crown molding, 1x3 or 1x4 board to the length of the room.
Step 2
Mark where the studs are on the wall with a stud finder and attach 1x2's to the studs with a nailer checking for level along the entire length. You could screw them also.
Step 3
Place 1x3 or 1x4 on top of the 1x2's after adding glue or an adhesive like loctite along the top of the 1x2's. Check to make sure that the shelf is level along the wall and coming from the wall and use the nailer to attach the board to the 1x2 and if possible nail at an angle to hit studs where you can.
Step 4
Attach crown molding by nailing into studs and also try to hit the 1x2 underneath
It is always recommended to apply a test coat on a hidden area or scrap piece to ensure color evenness and adhesion. Use primer or wood conditioner as needed.


Comments
chaschl
Sat, 03/24/2012 - 10:40
Finishing at the baseboard
What a fantastic way to break up the wall and add storage for awards and decorations! I like this idea for my teen's room but how did you match up the 1x4 boards on the wall with the baseboard?
Craftycraftswoman
Sat, 05/26/2012 - 11:48
I upgraded the baseboards in
I upgraded the baseboards in this room (cheap builder grade) I used the same 1x6 on the bottom also