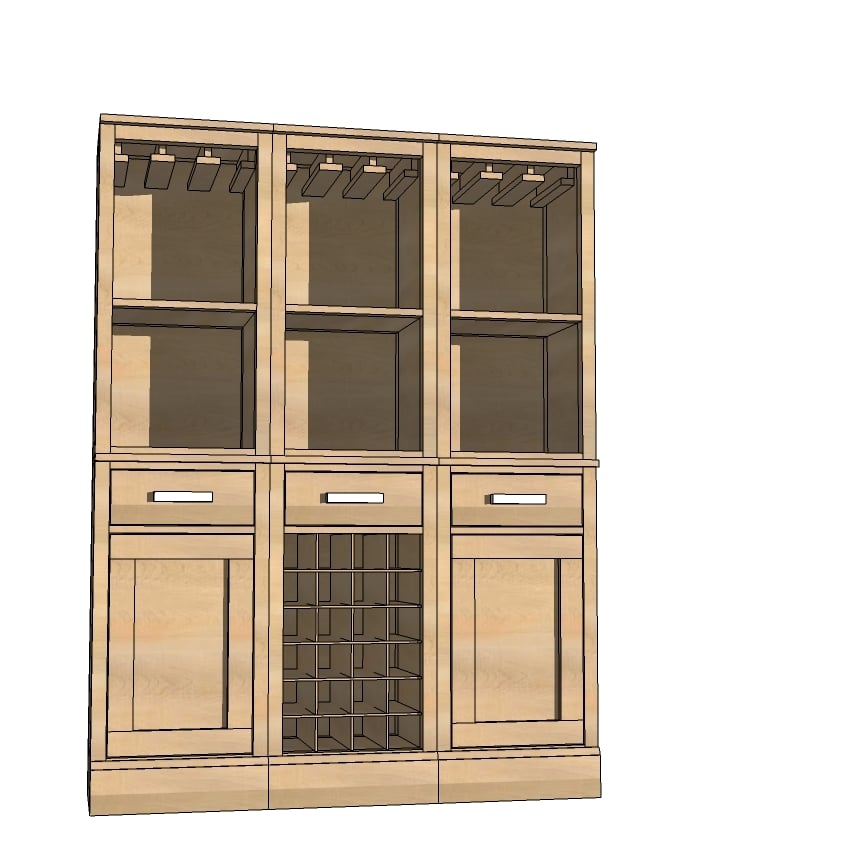


How to build a door for the Modular Bar Plan collection.
Well, Happy Monday!!!
Spring Cleaning

New Blog Friends Page

Amazing Brag Posts


Thank you for Your Support!
Building Plans


Preparation
1 - 1x3 @ 8 feet long
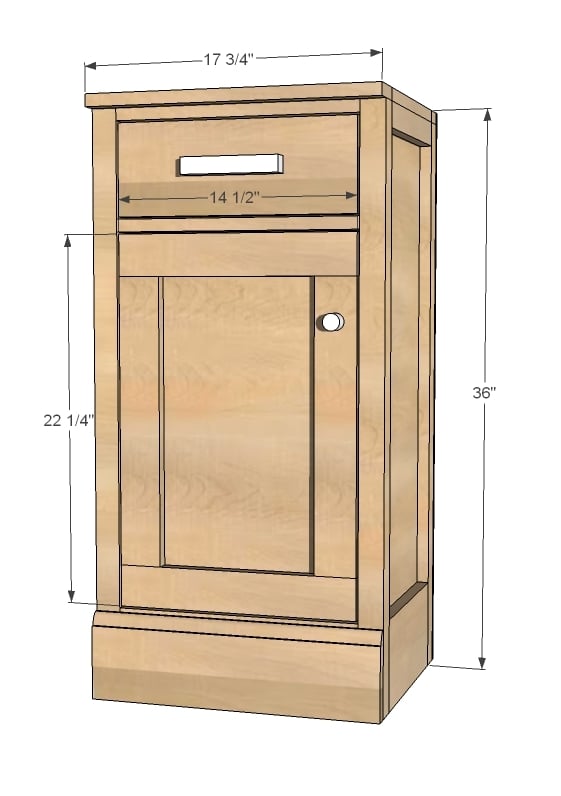
1 - base cabinet
1 - knob or handle
1 set of either narrow profile or surface mount hinges
Measure your door openings first before building doors. Doors should be 1/8" less on each side, or 1/4" smaller overall.
2 - 1x3 @ 17 1/4"
2 - 1x3 @ 14 1/2"


Please read through the entire plan and all comments before beginning this project. It is also advisable to review the Getting Started Section. Take all necessary precautions to build safely and smartly. Work on a clean level surface, free of imperfections or debris. Always use straight boards. Check for square after each step. Always predrill holes before attaching with screws. Use glue with finish nails for a stronger hold. Wipe excess glue off bare wood for stained projects, as dried glue will not take stain. Be safe, have fun, and ask for help if you need it. Good luck!
Instructions
Step 1

First you will need to build the base from this plan. If you add shelves, leave the front trim off to give room for the inset door. Measure the opening, confirming it is 1/4" wider and taller than the overall dimensions of door in this plan.
Step 2
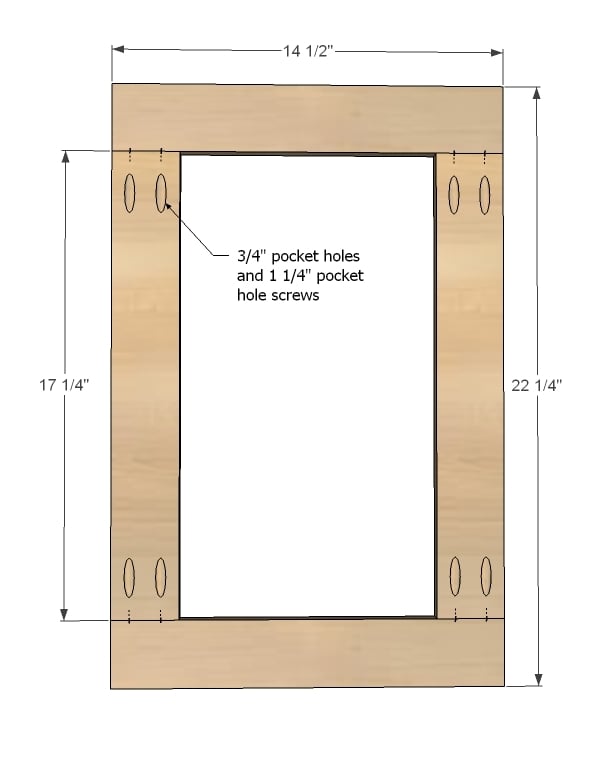
Build the door with 3/4" pocket holes and 1 1/4" pocket hole screws.
Step 3

Cut plywood to fit back and attach with glue and nails. It's better to make the plywood smaller than larger - this is not the place for overhangs.
Step 4
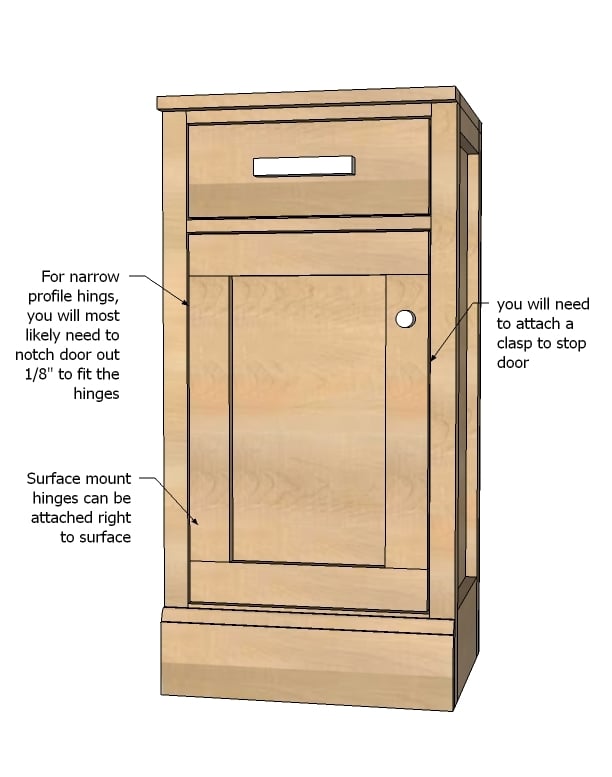
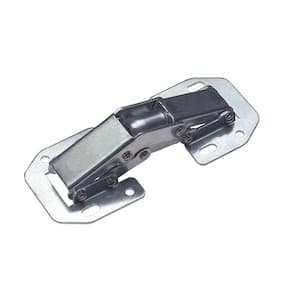
We have been putting hinges on quite a few projects lately, and have been using a few different types.
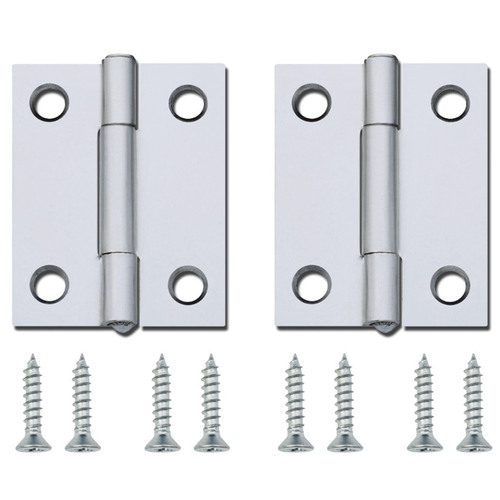
Narrow Profile or Butt/Mortise Hinges

It is always recommended to apply a test coat on a hidden area or scrap piece to ensure color evenness and adhesion. Use primer or wood conditioner as needed.
Comments
Bunnie1978
Tue, 03/13/2012 - 14:09
*Blushing*
Thank you, Anna!
I'm still so proud of my work! The newness hasn't worn out for Aiden either. Every time he goes into his room he says "LOOK! Its my new bed that Mommy made for you! I want to slide" LOL
He's 4.
Darin@Molnar.com (not verified)
Thu, 03/15/2012 - 09:30
PDF File
Can someone there please fix the PDF file link so I may download it? This is my preferred plan saving method.
Thanks for the help!
Darin
birdsandsoap
Sun, 03/18/2012 - 00:14
Thanks for the mention!
I'm trying to get over the learning curve with sketchup. UGH! I want to try to post some plans with my next big projects I'm currently working on (bunkbed that literally kicks a$$ and a bowfront fishtank stand). Loving the few days of sunshine in between the cloudy, rainy days because it gets me outside working on these awesome plans. I just ordered a rail and stile router bit and I'm going "full cabinet door" on this tank stand. We'll see how that one goes....
Bunnie1978
Sun, 03/18/2012 - 05:55
fish tank stands ae fun
And a little bit scary. I have 30 tanks all on stands made out of 2 x 4s... Scary. But if the outside of your tanks is handmade and the inside is designed...what a great representation of you.
In reply to fish tank stands ae fun by Bunnie1978
birdsandsoap
Sun, 03/18/2012 - 11:06
thanks!
My husband decided that he wanted to set up a tank, then quickly decided that he wanted to try saltwater. I was against the idea forever because I didn't want an eyesore tank in the house. So, I decided that if I could build the stand to my liking, we would both be happy.
I've been reading reef forums for months trying to glean knowledge on stand design and setup. I think I am more into this than my husband now! So far, all of the builders have chimed in saying that 2x4 construction is overkill for a 72 gallon tank. And I must say, I am thrilled to hear it!
Bunnie1978
Sun, 03/18/2012 - 11:52
yes I would agree
You can easily build it with just plywood just make sure that it is really supported on the ends of the tank.
AScherrer (not verified)
Sat, 06/30/2012 - 03:44
Please fix the PDF file
Yes, please fix the PDF file so that it can be downloaded!