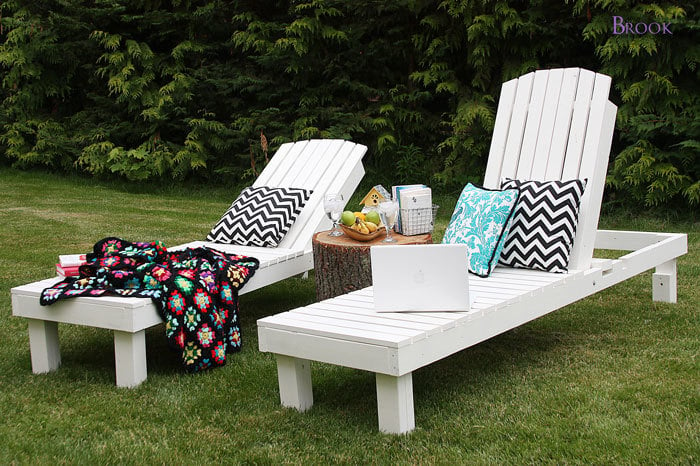


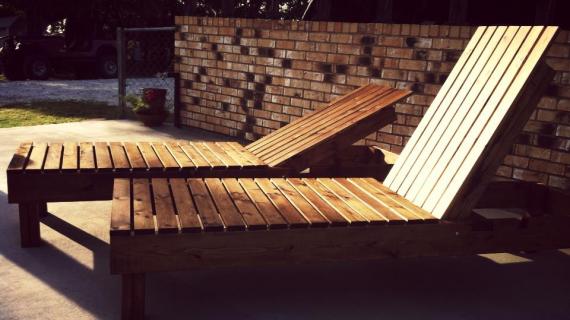
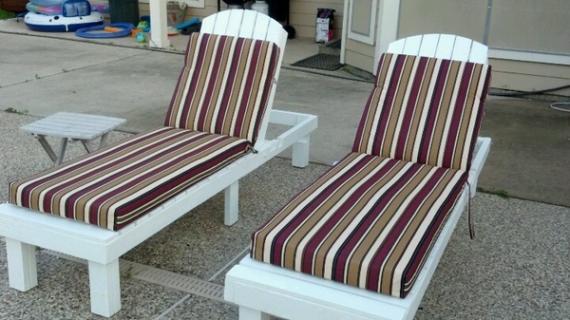
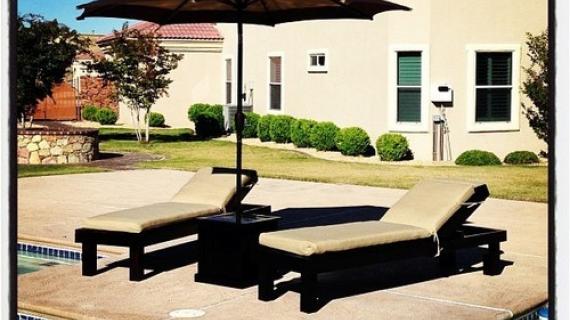
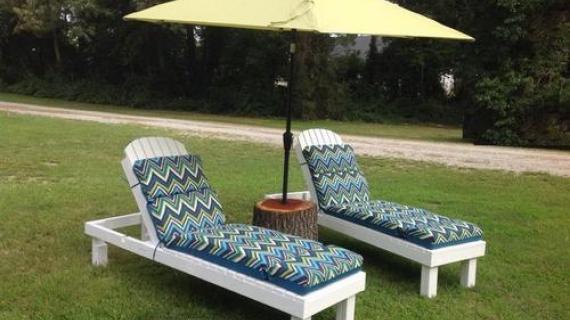
Make your own wood outdoor chaise lounge for a fraction of the cost to buy! Free step by step DIY plans from Ana-White.com


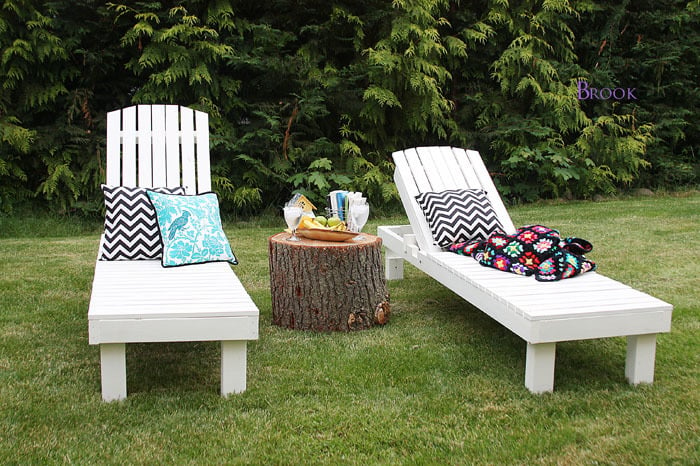
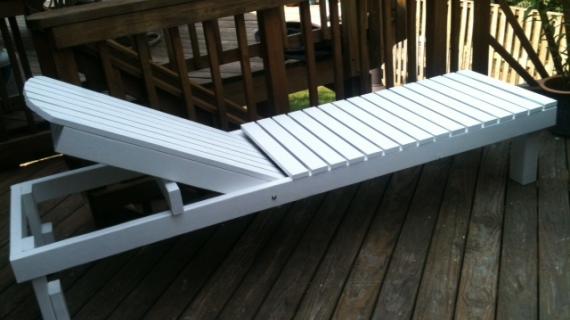
These beautiful and inexpensive outdoor lounge chairs were designed by Ana White and built by Brook over at Being Brook

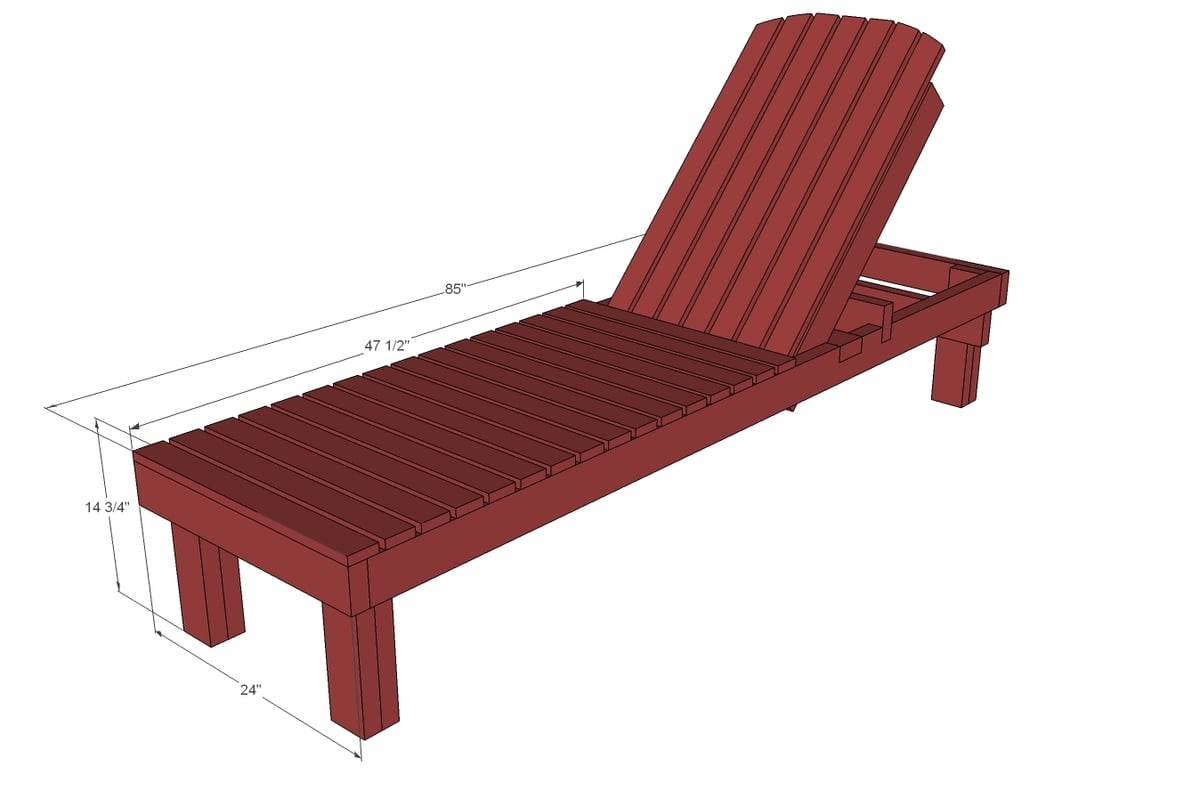
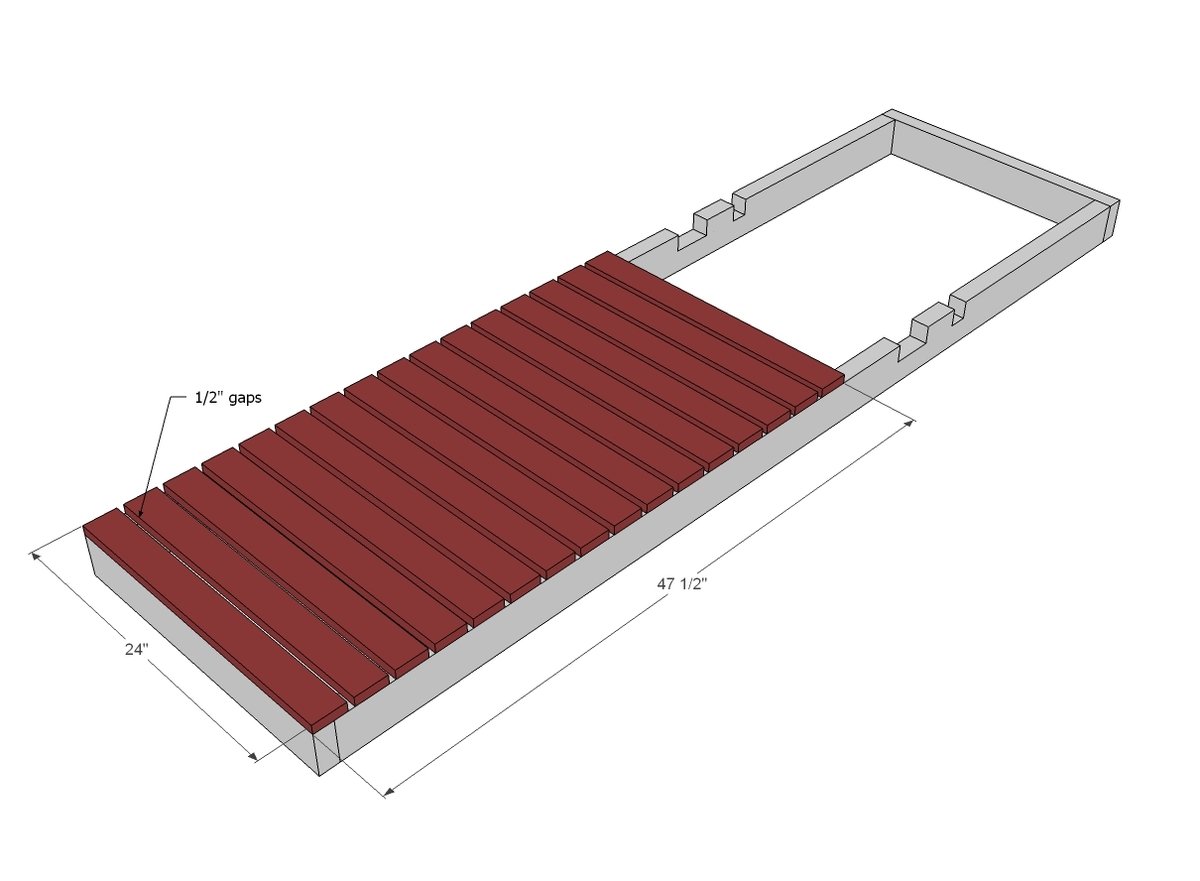
We really wanted to make these chaise lounges very affordable, so they are 24" wide to conserve wood - made of 1x3s which tend to be significantly cheaper than their slightly larger buddies, 1x4s.
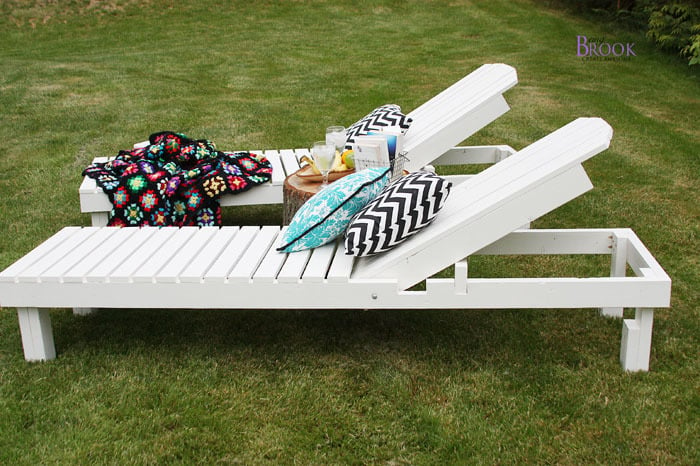
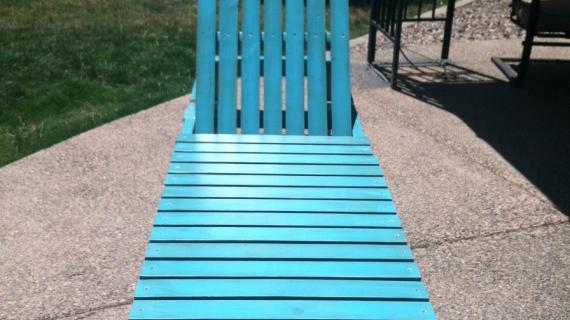
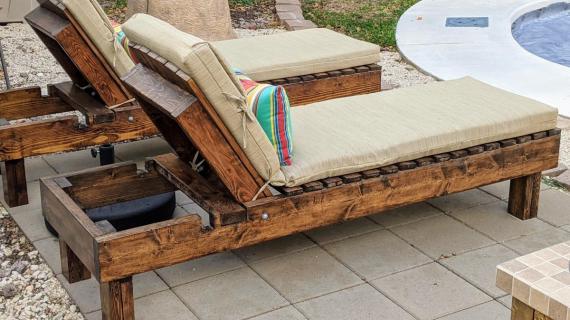
The frame itself is made of sturdy 2x6s, and we used a simple bolt for the hinge. Can you see it?
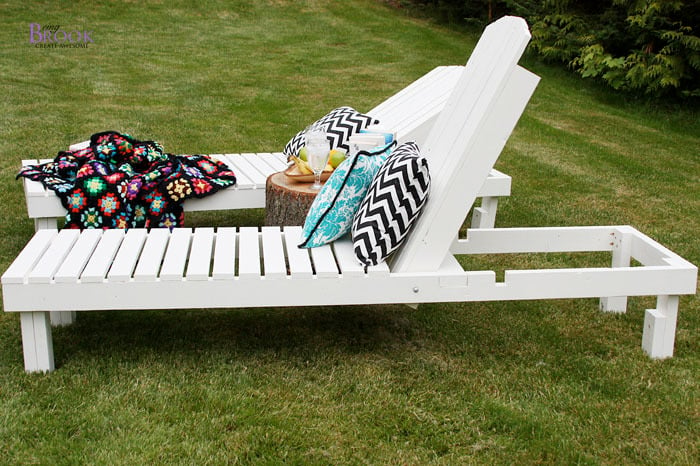
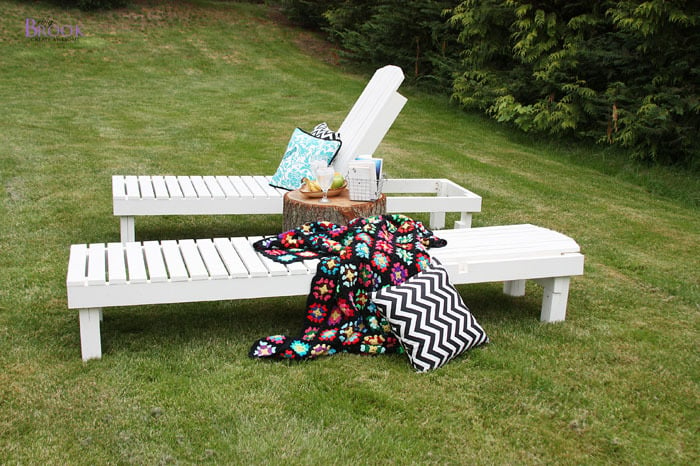
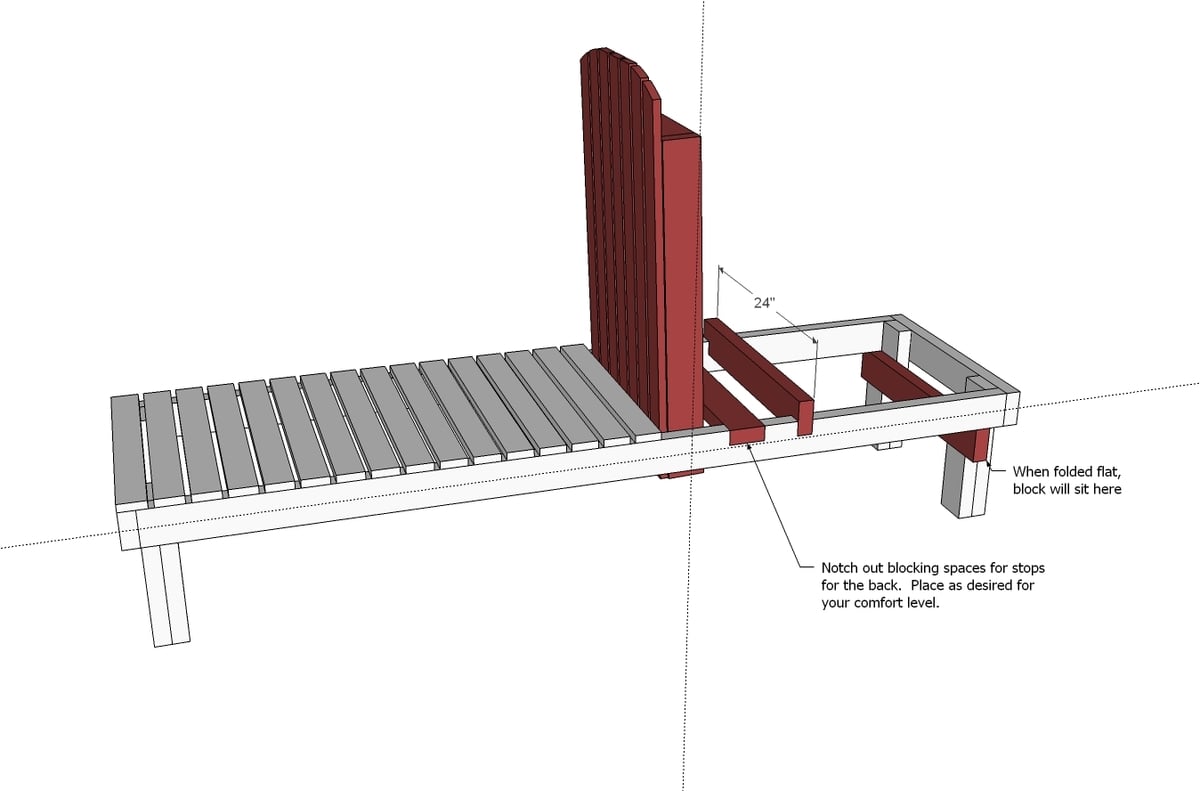
To get the back to rest at different angles, there is notch-outs that fit a 2x4.

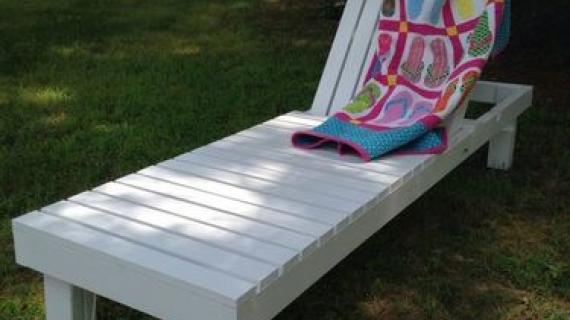
And then you can go into full recline mode and the stop block fits under the back legs!!!
Of course we have the plans right here for you - but please, take a second and stop over and read Brook's post on building these lounge chairs and her tips and tricks! Thanks Brook!
Preparation
2 - 2x6 @ 9 feet long (can be 9 foot studs)
3 – 2x4 @ 8 feet long
8 – 1x3 @ 8 feet long
2 – ¼” bolts 4” long with nuts and 6 washers
2-3/4” self tapping exterior wood screws
2” exterior screws or galvanized brad nails and glue to nail slats down with
BASE
2 – 2x6 @ 85” - main frame sides
2 – 2x6 @ 21” - main frame front/back
16 – 1x3 @ 24” - seat slats
6 – 2x4 @ 14” - legs
2 – 2x4 @ 7” - legs
BACK
2 – 2x4 @ 32” - back frame
3 – 2x4 @ 17 ½” - back frame
7 – 1x3 @ 37 ½” - back slats
1 – 2x4 @ 24” (stop block)


Instructions
Step 1
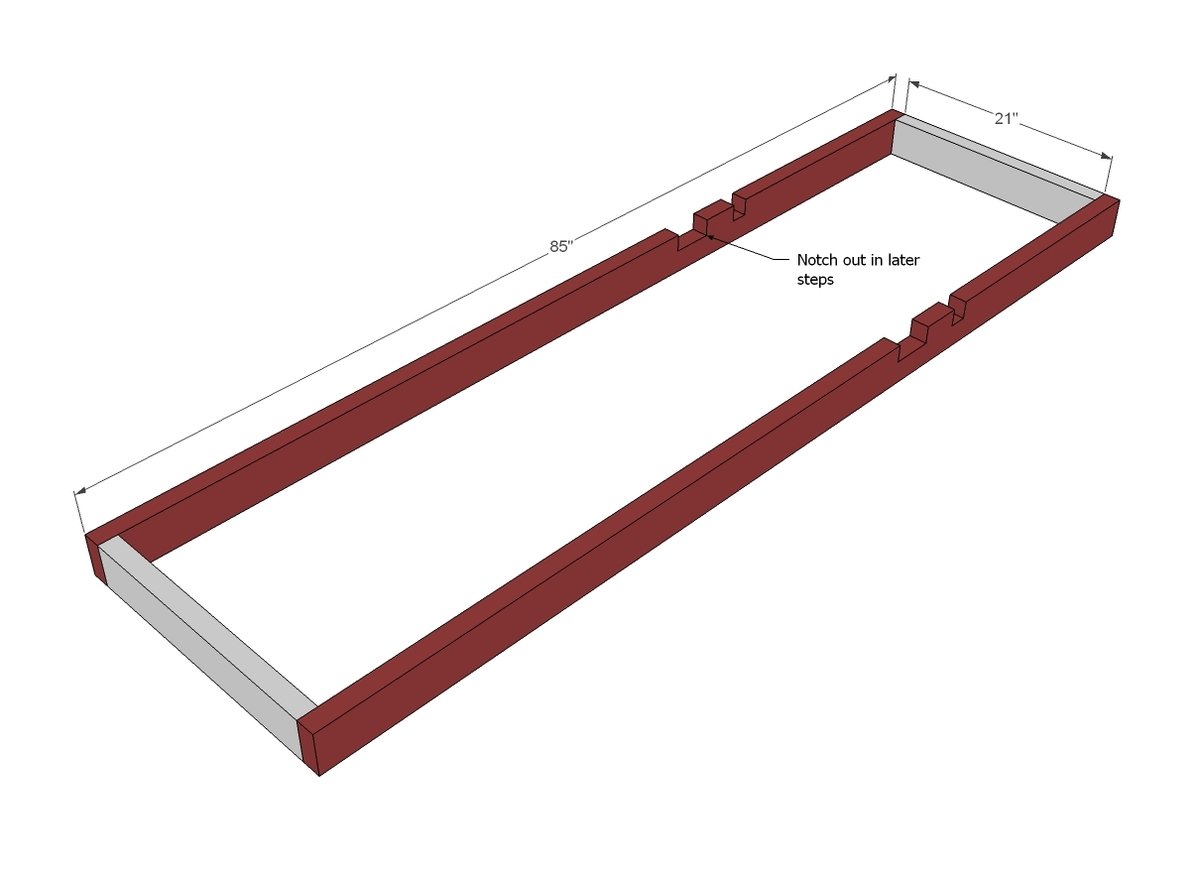
Build your frames first. You can use 1 1/2" PHs and 2 1/2" PH screws OR 2-3/4" countersunk screws.
I do recommend the PHs because it will hide your screws holes, making it easier to paint the pieces, and then attach later through the PHs.
NOTE: The diagrams show 2x4s. We have updated this plan per user recommendations to use 2x6s for the frame.
Notch out for the back support with a jigsaw.
Step 2
Next add your slats. You can also attach slats from underneath with PHs if desired.
Step 3
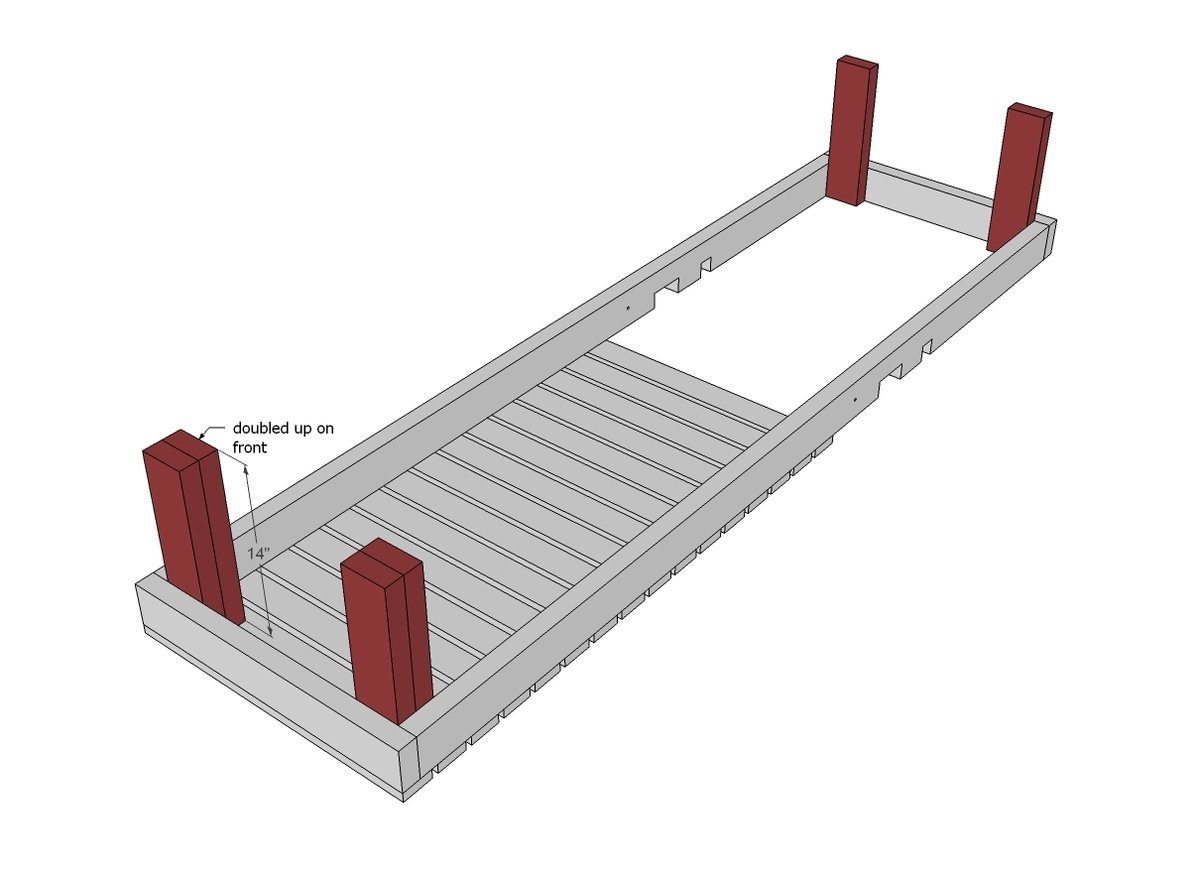
Attach legs, and then to front, attach second row of legs. Use 2 3/4" self tapping screws and glue here.
Multiple screws are recommended to keep the leg joints solid.
Step 4
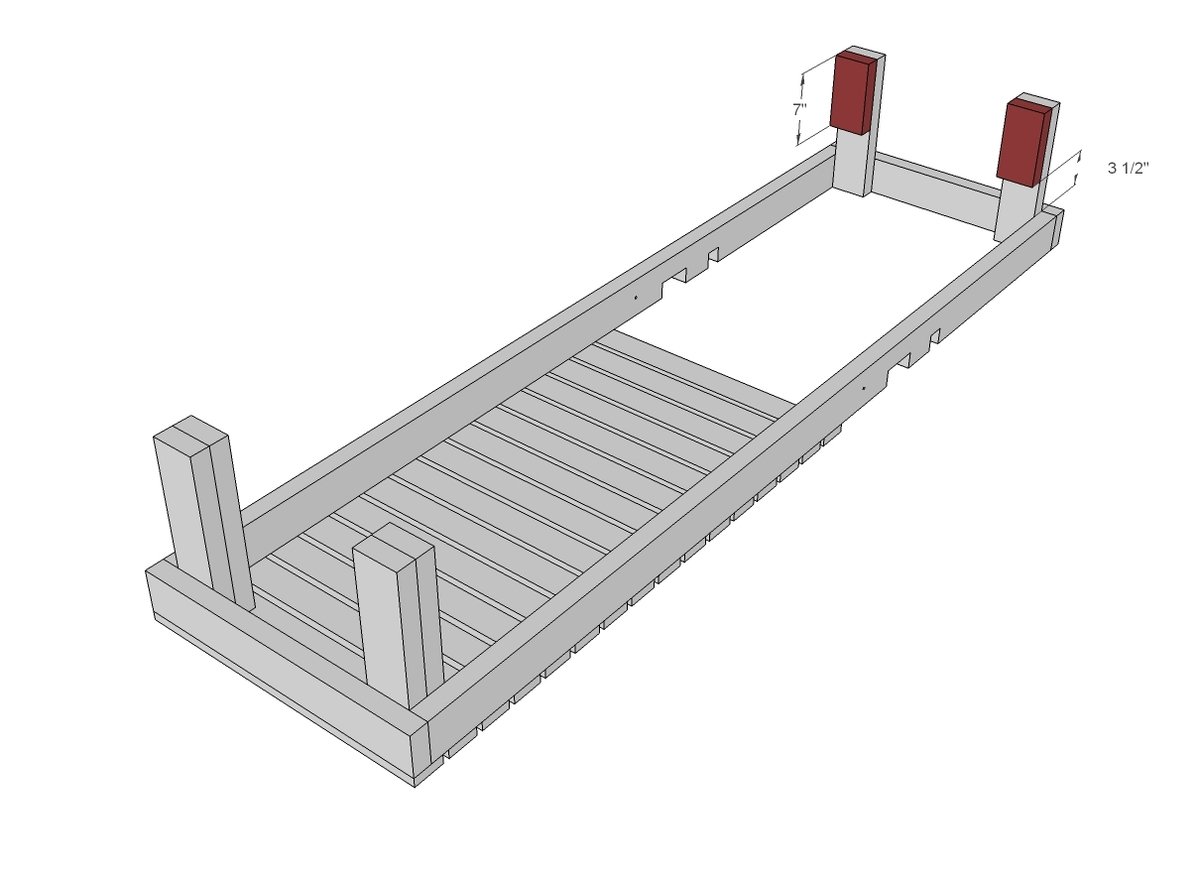
These legs are just long enough to provide you a spot to put the stop block when chaise is fully reclined.
Step 5
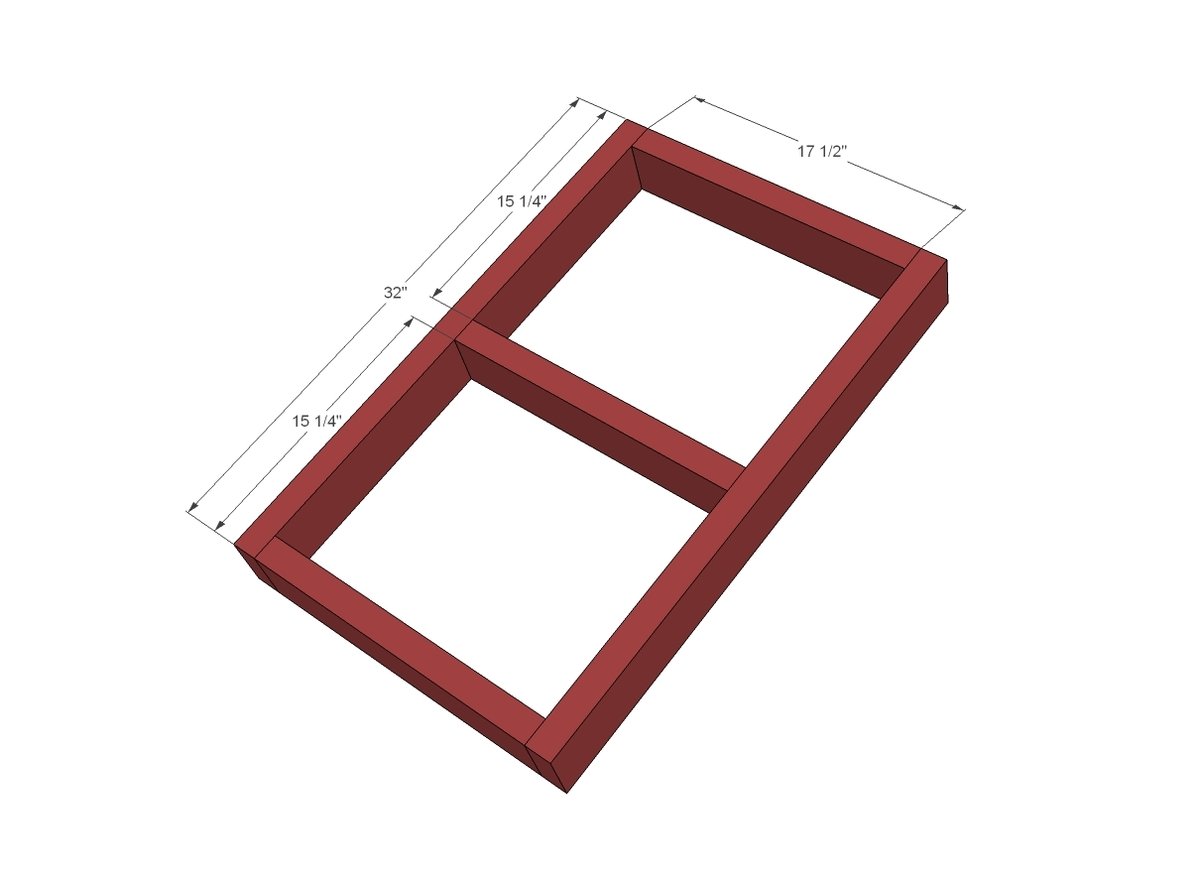
Build the frame for the seat back as you did the main frame.
Step 6
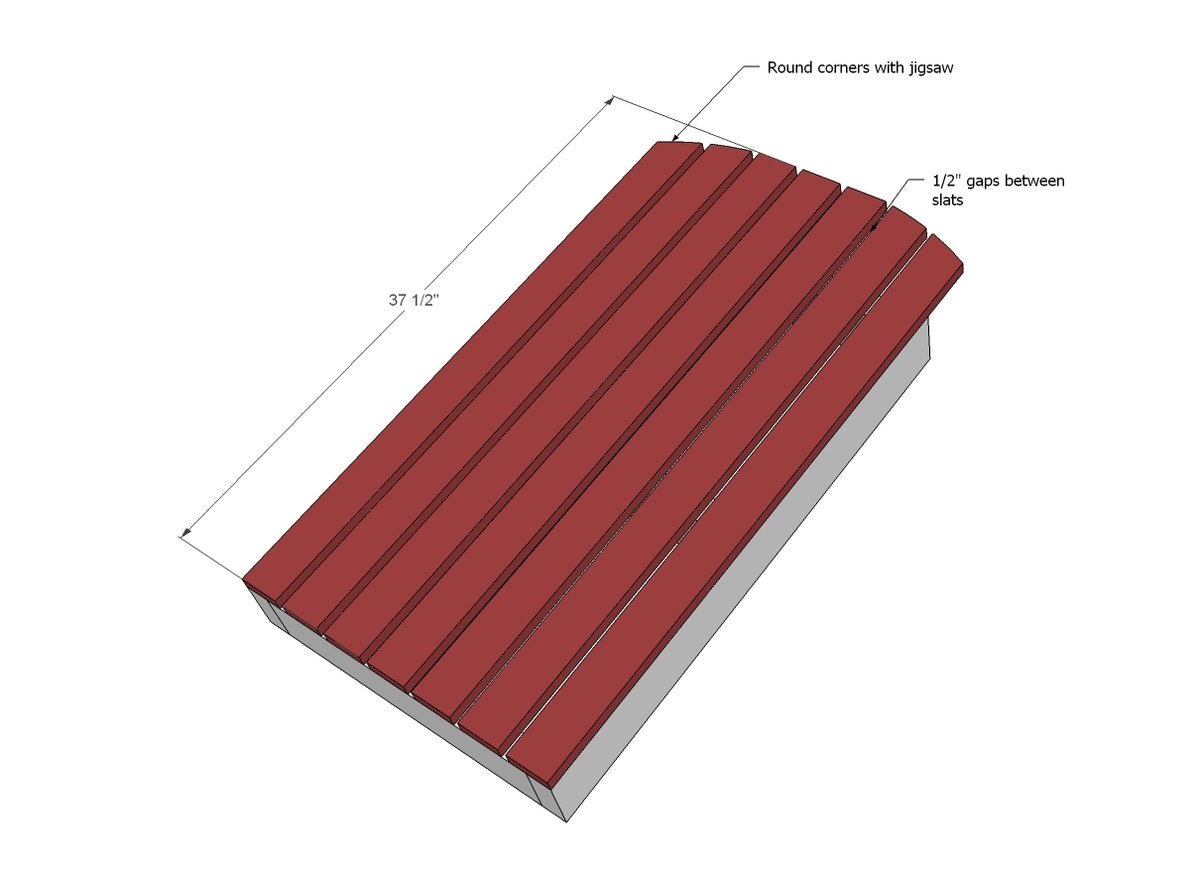
Attach back slats to the frame.
TIP: Users have commented that it is easier to install the seat frame on the pivot bolt first, then add the slats later.
Step 7

Now we attach back to chaise with the pivot bolt. The easiest way to do this for me was to clamp the pieces in place and drill through both the main frame and the seat frame.
NOTE: The diagram shows a 2x4 - we have upgraded this plan to recommend using a 2x6 instead.
Step 8

Brook is also sharing with us her step by step finishing tutorial here to get this amazing finish!
Step 9
Here is the diagram for the stop block.


Comments
markw
Wed, 06/06/2012 - 12:33
Stop Block Notches
What are the measurements/locations of the stop block notches in the base frame? The first step says to add them in a later step, but I'm not seeing that step - or did I miss something :)
In reply to Stop Block Notches by markw
Ana White
Thu, 06/07/2012 - 11:43
Hi Mark - I asked Brook to
Hi Mark - I asked Brook to place the notches where she felt they would be most comfortable to you.
SingleMomThriving
Thu, 06/07/2012 - 08:08
Can I see a picture of the Pivot Bolt?
It's helps when I am shopping to know what to look for. Is it one long bolt or two at each end.
Liquid6 (not verified)
Fri, 06/08/2012 - 06:37
RE to SingleMomThriving
You will need 2 - 1/4" bolts that are 4 inches long. You will need 2 nuts to match the threading on 2 bolts. You will also need 6 washers with 1/4" holes.
Start on the outside. Thread one bolt through a washer, slide the bolt through the whole on the outside rail, add one more washer, add the back of the chair, add another washer and then the nut on the end. This should allow the back to move independently.
May I recommend you use stainless steel hardware.
FlyingMatilda
Thu, 06/14/2012 - 11:59
Slide-out desk...?
Great plans! I'd love to see a modification for a little slide-out desk like the one from World Market! But if I had a great big stump, I'd use it for a side-table instead, too...totally cute. Great plans, wish I had time to do this this season...maybe next!
Theo Rioles (not verified)
Wed, 06/20/2012 - 04:19
screws
hi--bought the 2.5" Kreg screws to affix the slats: went straight up through! set jig at 1.5"...
Theo Rioles (not verified)
Wed, 06/20/2012 - 05:23
screws
hi--bought the 2.5" Kreg screws to affix the slats: went straight up through! set jig at 1.5"...
EleyAnn (not verified)
Mon, 06/25/2012 - 12:23
What Kind of Wood?
From someone whose big accomplishment this year was learning how to use a dremmel to build a pinewood derby car (cute but not fast), I have a few layman questions . . .
1. The plans provide specifications, but do not indicate the type of wood . . . does that matter?
2. Does the type of wood contribute to the life of the chaise lounger? Or do other things matter like stain/paint?
3. My husband is a big guy 220-240 lbs . . . provided I can actually build it correctly, will it hold his weight?
Thank youI love this site and if I can pull this off, I think I will double major in mommying and wood shop and build lots more stuff!
Tami220 (not verified)
Mon, 08/27/2012 - 10:15
Great Questions
These are great questions...was a reply ever sent? I wouold like to know the answers as well :)
Thanks
Tami
In reply to What Kind of Wood? by EleyAnn (not verified)
jigganancy
Mon, 08/27/2012 - 11:13
1. The plans provide
1. The plans provide specifications, but do not indicate the type of wood . . . does that matter?
... usually, no.
2. Does the type of wood contribute to the life of the chaise lounger? Or do other things matter like stain/paint?
... if it's outdoor, yes. It's good to use cedar or pressure treated outside. Waterproofing staining is supposed to last longer than paint.
3. My husband is a big guy 220-240 lbs . . . provided I can actually build it correctly, will it hold his weight?
... when building your own furniture, sometimes its trial and error. My finance is about 200 lbs and sits on the chaise just fine. If you're really concerned, you might want to tweek the legs or the support with beefier wood like 2x4.
Tami220 (not verified)
Mon, 08/27/2012 - 10:16
EleyAnn's Questions
These are great questions...were they aver answered? I would love to know myself...thanks :)
Tami
EleyAnn (not verified)
Mon, 08/27/2012 - 11:17
Questions not answered (yet)
I am probably going to make this my winter project with my husband so that we have a lovely set come Spring/Summer out here in California.
If I get to it first, I will let you know Tami!
Eley :)
In reply to Questions not answered (yet) by EleyAnn (not verified)
jigganancy
Mon, 08/27/2012 - 11:20
Hi, Eley - I just tried to
Hi, Eley - I just tried to answer your questions above
Elliott Strom
Tue, 06/11/2013 - 15:21
Cutting Diagram
Hi Ana,
I just began working on this project for this week. And one thing I came up with that might be very helpful to anyone tackling this project is a detailed cutting diagram. Is there a way for me to post an image file or PDF file? This diagram helps to make sure all the pieces can be cut from the amount of lumber in the shopping list.
Thanks!
jennilynne16
Mon, 06/23/2014 - 12:54
Cutting notches?
I'm wondering what tool to cut the notches with? Specifically speaking, I don't have a jig saw, unfortunately. All I have is a circular saw and a sawz-all (sp?). I'm hoping that doesn't put this project on a "can't do" list for me. But I can't imagine how in the world to cut those notches with what I have.
papabear
Mon, 06/30/2014 - 22:07
cutting notches
all you need is a circular saw, a chissle, and a hammer.
Using circular saw cut through the wood in straight lines about a 1/4 to a 1/2 inches wide. next use hammer to knock out the wood t obe removed . finally use hammer and chissle to remove the rest of the wood in the notch and smooth it out with chssle for a good fit. i hope i have been of somehelp.
papabear
vickie458
Mon, 06/23/2014 - 16:12
Stop Block
hello can someone please help me I am stuck. I have the chaise lounge built, I'm having a hard time understanding how the stop block and notches work. Do you attach the block to the legs? The back of the chair? I'm really confused with the step.
dsipe
Sun, 05/17/2020 - 14:56
Stop Block Help
How do you get the stop block to fit when the chair is fully reclined with the new plans?