Are you having Momplex withdrawals?
Guess what?
We are too!
Winter is here to stay this year in Alaska, and we are so thankful that all of our outside work has been completed for the year. We did not get the decks on, but we did pour the deck footings, so decks can go up before the ground thaws in June.
Inside, we did not get to where we wanted to be by winter. We were hoping to have the ceiling drywalled and insulated, but with a little thing like oh a first book releasing we had some scheduling conflicts. So we are pretty happy with being darn close to a fully insulated Momplex.
In our last Momplex post, we foamed all gaps, cracks, doors and windows in the Momplex to fully seal all the walls in. Then we put foam baffles up to keep the blow in insulation in the ceiling.
So after all this hard work to carefully seal the Momplex in, inspecting every square inch of the walls for any holes, filling even the tiniest cracks with foam ... what are we going to do?
Cut some giant holes in the sides of the Momplex, of course!

Because the Momplex is so airtight, we must consider how we can get the moisture out or the Momplex will have mold problems.
Top offender?
Bathroom shower of course.
And this baby promises to do the trick.
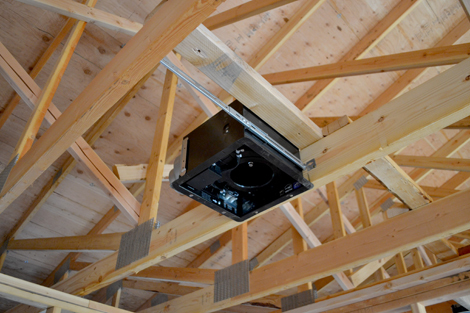
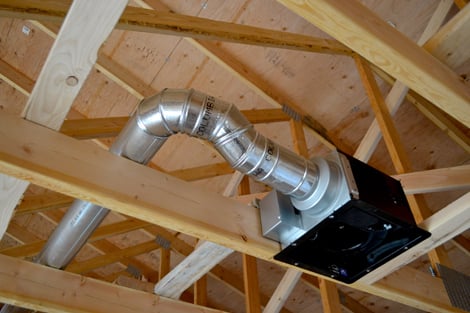
The bathroom fan/light combo in installed in the studs in the ceiling of each bathroom. We placed them in the center of the bathrooms. Of course, there will also be a vanity light for better light over the sink.
The fan/light combo will suck moist air up and out. But we will need to duct that moist air outside the Momplex.
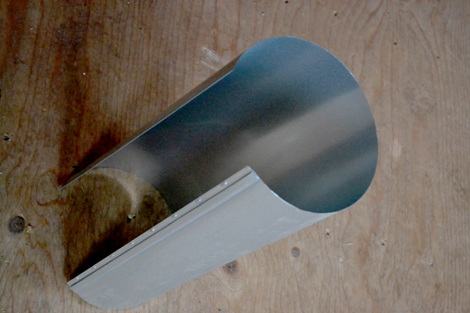
Since we are going the blow in insulation route, we are using metal vent pipes. The flexible pipes can collapse under weight of the blow in insulation. This means the Ram will be up fixing it, wading through thigh deep blow in insulation. The Ram does not want to do this. So we are using metal vent pipes.
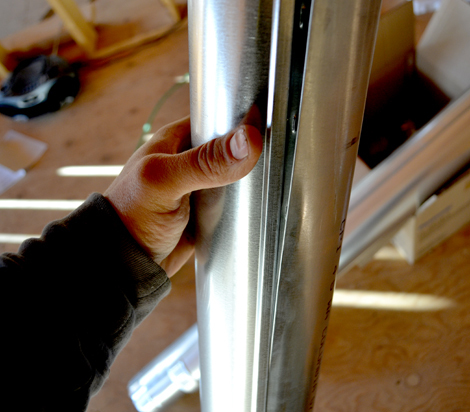
The pipes just snap together at a seam.<p></p><p><img src="https://lh4.googleusercontent.com/--1LfG_Z5Qlc/UIlmXYtRdqI/AAAAAAAAMUc/…; style="width: 470px; " alt="" /></p><p></p><p>Each pipe has a flat end and a crimped end so you can join them together.</p><p></p><p><img src="https://lh5.googleusercontent.com/-tn3O_-TujjI/UIlmYSUiGRI/AAAAAAAAMUk/…; style="height: 313px; " alt="" /></p><p></p><p>There's the crimped end.</p><p></p><p></p><p><img src="https://lh4.googleusercontent.com/-I_qqJbkkJ1U/UIlmZFEOKfI/AAAAAAAAMUs/…; style="width: 470px; " alt="" /></p><p></p><p>And the flat end. </p><p></p><p><img src="https://lh6.googleusercontent.com/-t3IiJZZTqEk/UIlmTFHcRBI/AAAAAAAAMUE/…; style="width: 470px; " alt="" /></p><p></p><p>The crimped end just fits in the flat end.</p><p></p><p><img src="https://lh4.googleusercontent.com/-9vOn-CzQInk/UIlmSvogGVI/AAAAAAAAMT8/…; style="width: 470px; " alt="" /></p><p></p><p>So you can get a longer pipe.</p><p></p>
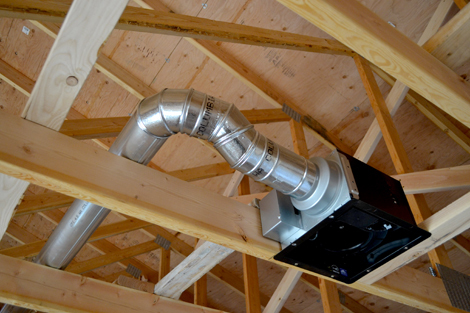
And you can get elbows and adjustable elbows and lots of other different types of transitions to make the pipe go anywhere you choose.
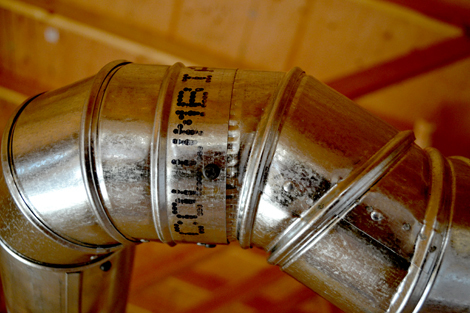
All joints are screwed together.
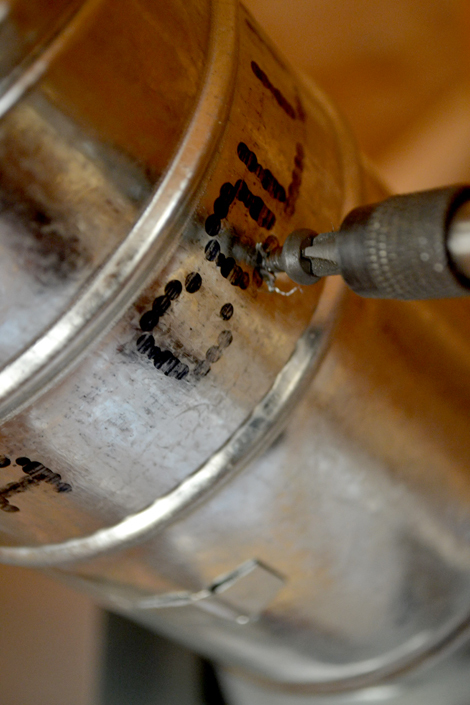
You use a special metal stitching screw, at least three per joint.
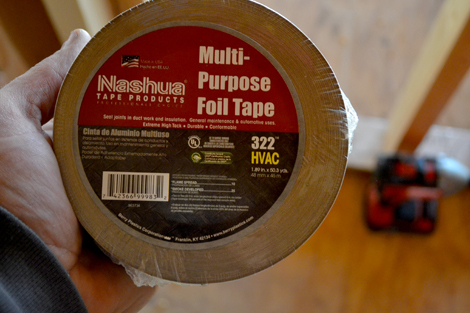
Ah, tape. Yes, tape.
If you can tape, there's a job for you in construction. Seems there's some sort of tape for every step! Vent pipes are not exception.
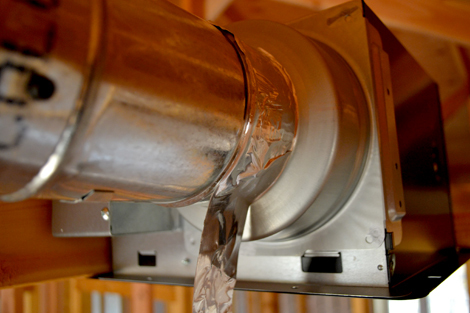
The joints are taped off to prevent air leaking out.
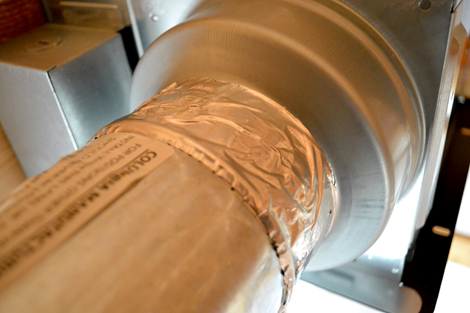
This is actually pretty simple to do.
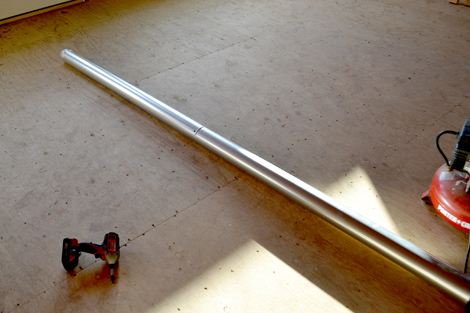
For the longer strips of pipe, sometimes it makes more sense to join them down on the ground. One thing to be careful of is considering if the pipe is going to be maneuverable up into the rafters as a long pipe, or if smaller sections would make more sense.

When possible, we joined the smaller pipe pieces into larger ones on the ground just because everything is easier to do while you aren't balancing between trussses, eight feet off the ground. The joints are screwed together.
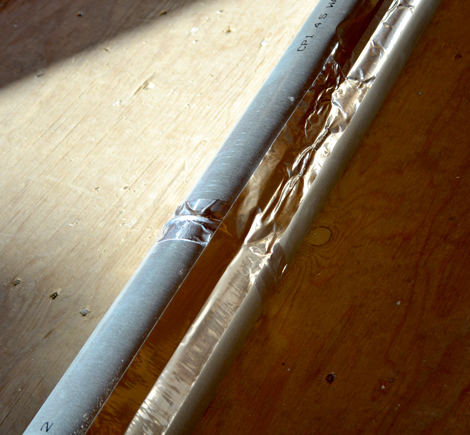
And then all seams are taped.
This is one high security vent pipe. That moist air doesn't have a chance against the Ram!
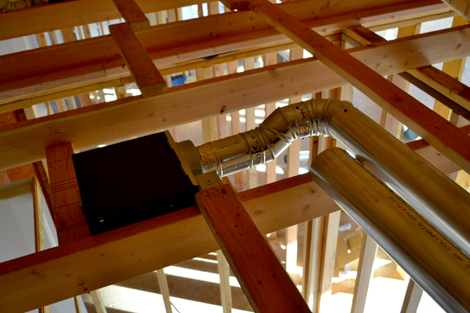
And because this is the Momplex .... everything you do ... you get to do twice.<p><br /></p><p><img src="https://lh4.googleusercontent.com/-kMBrKEj-Yb8/UIlmV1LDHYI/AAAAAAAAMUM/…; style="width: 470px; " alt="" /><br /></p><p><br /></p><p>There's one Mom's bath vent.</p><p><br /></p><p><img src="https://lh4.googleusercontent.com/-_NBpzSFSwWI/UIlmWszM-uI/AAAAAAAAMUU/…; style="width: 470px; " alt="" /><br /></p><p><br /></p><p>And the other Mom's bath vent.</p><p><br /></p><p><img src="https://lh6.googleusercontent.com/-boGTpc4SZgA/UIlmfvfOklI/AAAAAAAAMVQ/…; style="width: 470px; " alt="" /><br /></p><p><br /></p><p>And then of course we had to put in range hood vents to vent their stoves. These we just stub down over the ranges.</p><p>And where do they all go?</p><p><img src="https://lh6.googleusercontent.com/-qHGyh60R9Z4/UIlmk6k5yzI/AAAAAAAAMV8/…; style="width: 470px; " alt="" /><br /></p><p><br /></p><p>The Ram cuts big holes in the sides of the Momplex.</p><p>Yep, all that careful insulating just to cut 6" holes in the sides of the Momplex. </p><p><br /></p><p><img src="https://lh3.googleusercontent.com/-gg49p0zN518/UIlmmy9mV-I/AAAAAAAAMWM/…; style="width: 470px; " alt="" /><br /></p><p><br /></p><p>The pipe is a little short, and we will need to cut pipe to fit.</p><p><br /></p><p><img src="https://lh4.googleusercontent.com/-TWcBrg4SWa0/UIlmh9djv1I/AAAAAAAAMVc/…; style="width: 470px; " alt="" /><br /></p><p><br /></p><p>We just use the tin snips to cut the pipe. </p><p><br /></p><p><img src="https://lh3.googleusercontent.com/-aHbSoht33GE/UIlmiGUhroI/AAAAAAAAMVs/…; style="width: 470px; " alt="" /><br /></p><p><br /></p><p>Put the pipe together and tape it off. But we have a problem now. Both ends of the pipe are flat and no end is crimped.</p><p><img src="https://lh5.googleusercontent.com/-9TQQWr5vTPE/UIlmie3mwAI/AAAAAAAAMVk/…; alt="" style="width: 470px; " /><br /></p><p><br /></p><p>So out comes a crimper, basically just a fancy pair of tin snips (ie metal scissors) </p><p><img src="https://lh4.googleusercontent.com/-JNhG4u2jGMQ/UIlmkCE-EYI/AAAAAAAAMV0/…; alt="" style="font: inherit; width: 470px; " /><br /></p><p><br /></p><p>And the pipe end just gets crimped.</p><p><br /></p><p><img src="https://lh5.googleusercontent.com/-9lZc6dQncT8/UIlmbjMdCKI/AAAAAAAAMU8/…; style="width: 470px; " alt="" /><br /></p><p><br /></p><p>That'll work!</p><p><br /></p><p><img src="https://lh6.googleusercontent.com/-iFM5KCgrImw/UIlmlYYH3NI/AAAAAAAAMWE/…; style="width: 470px; " alt="" /><br /></p><p><br /></p><p>Outside, vent cover kits are used to transition the pipe to the outside of the Momplex. Air can only go one way - out - through these vents.</p><p><br /></p><p><img src="https://lh6.googleusercontent.com/-j_tvZAmLbe0/UIlmnFpMY5I/AAAAAAAAMWQ/…; style="width: 470px; " alt="" /><br /></p><p><br /></p><p>Bye bye moisture!</p><p><br /></p>
Comments
JoAnn (not verified)
Thu, 10/25/2012 - 15:06
My book is on its way!!
birdsandsoap
Thu, 10/25/2012 - 15:36
So glad the next installment
S J (not verified)
Thu, 10/25/2012 - 15:43
Thanks for the Momplex Fix!
Chris McG (not verified)
Thu, 10/25/2012 - 17:09
Pointers
James (not verified)
Fri, 10/26/2012 - 05:45
You never, ever can have too
Chris McG (not verified)
Thu, 10/25/2012 - 17:09
Pointers
In reply to Pointers by Chris McG (not verified)
Ana White
Thu, 10/25/2012 - 21:07
Great Pointers!
Guerrina
Thu, 10/25/2012 - 19:06
Wonderful!
Juanita_r
Thu, 10/25/2012 - 23:30
venting!
logangb345
Fri, 10/26/2012 - 01:29
I'm so glad to see a Momplex
Matt_the_guest (not verified)
Fri, 10/26/2012 - 07:17
Holes
Alberta (not verified)
Fri, 10/26/2012 - 08:33
Gable end venting?
Trevor (not verified)
Fri, 10/26/2012 - 10:06
Welcome Back!
Kelly G (not verified)
Fri, 10/26/2012 - 14:13
I was totally having
tracysmith
Sat, 10/27/2012 - 00:48
YAY!!!
jeannette (not verified)
Sat, 10/27/2012 - 09:18
congrats on your book, so
jeannette (not verified)
Sat, 10/27/2012 - 09:18
congrats on your book, so
Anonymous Coward (not verified)
Thu, 11/01/2012 - 10:32
Bath Vents Automatic?
Jenn Hoff (not verified)
Fri, 11/02/2012 - 11:08
Ha! The picture at the end
AnovasoztasialoSp
Sun, 01/27/2013 - 21:15
Marlborough Locksmith