
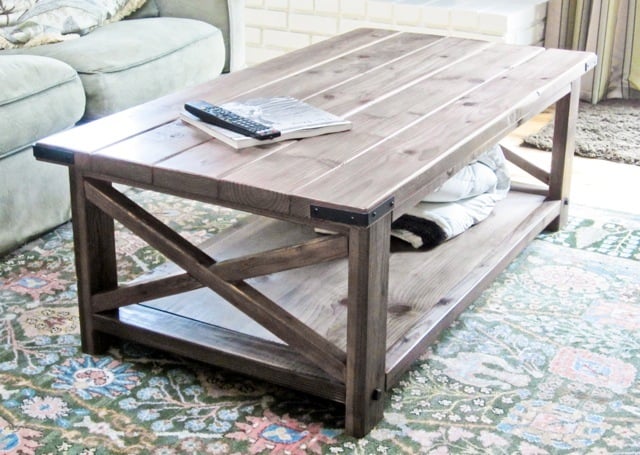
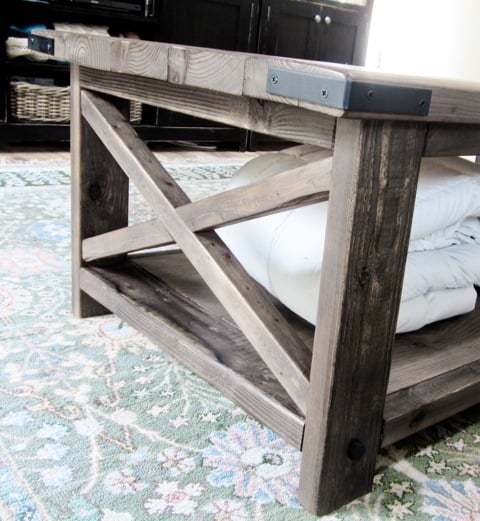
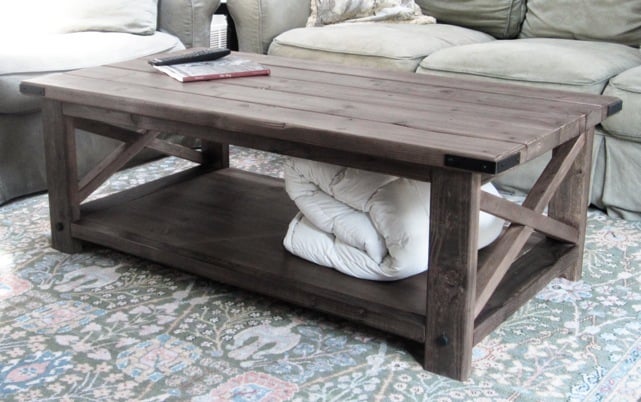
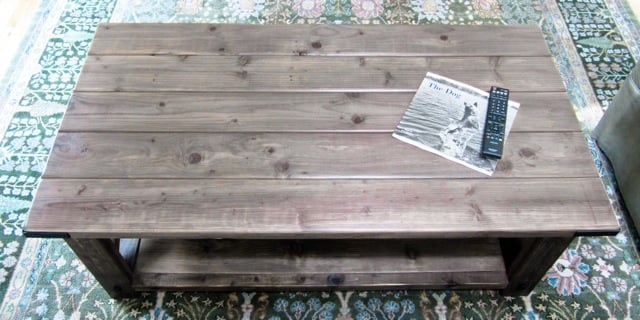
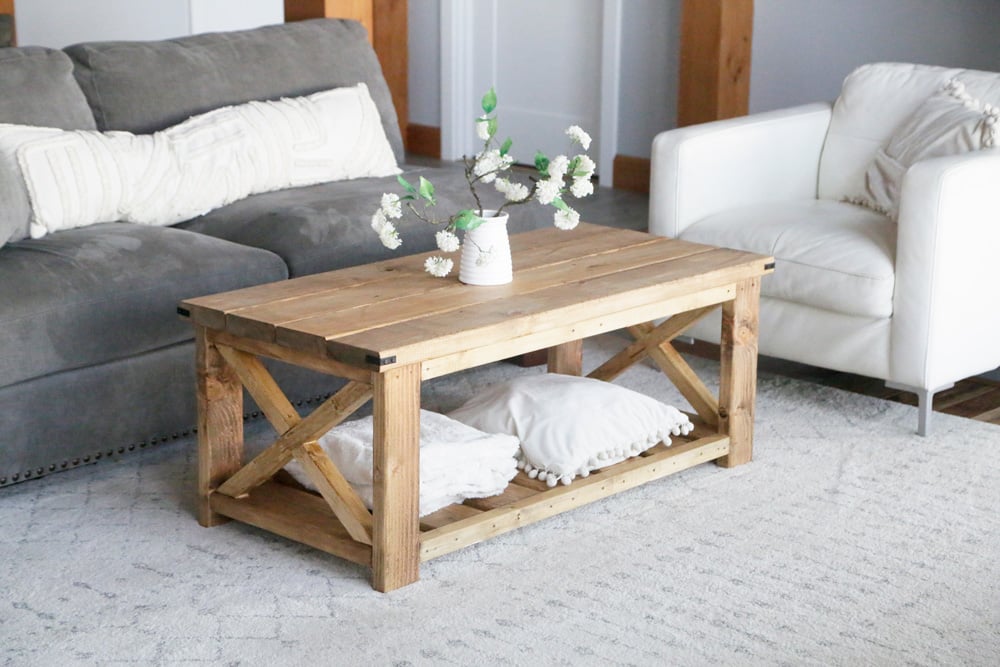
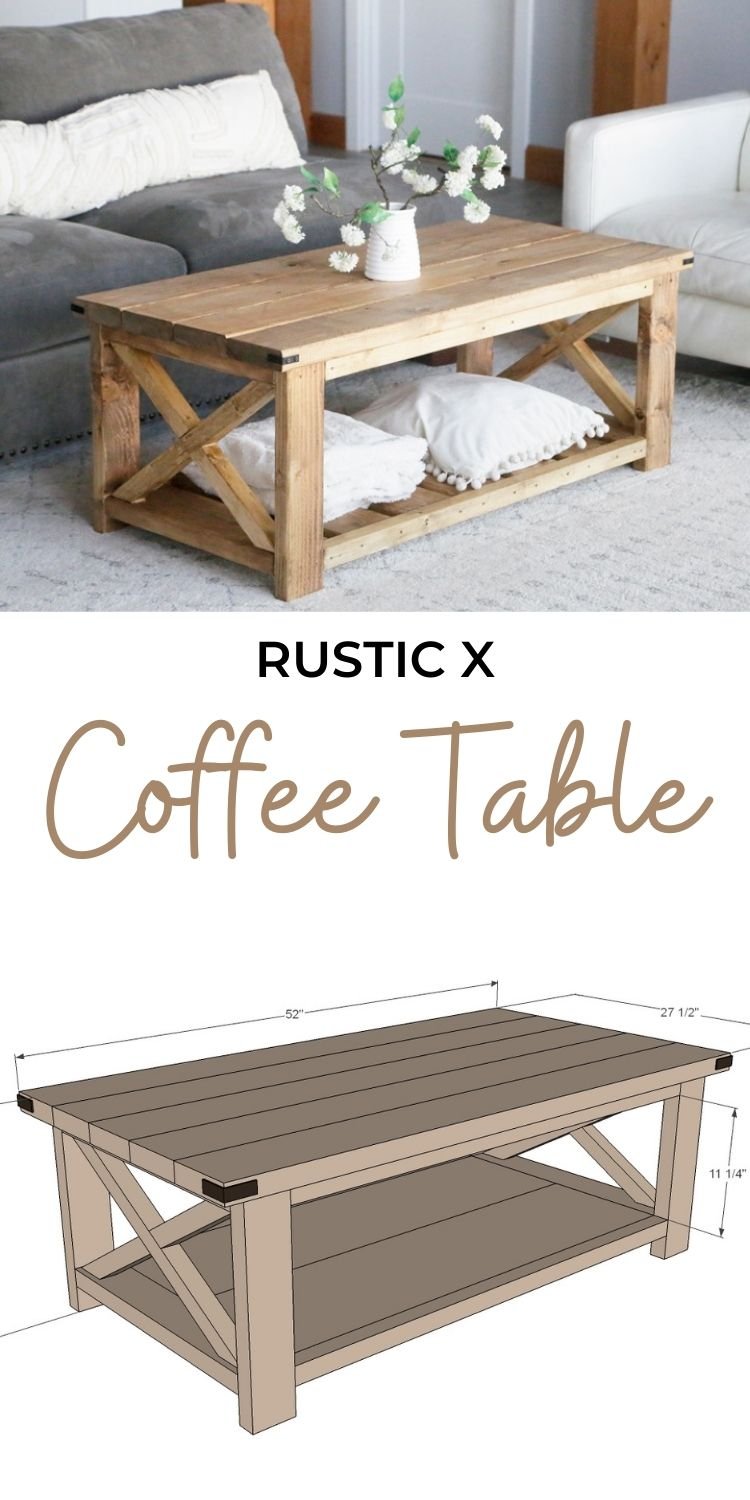
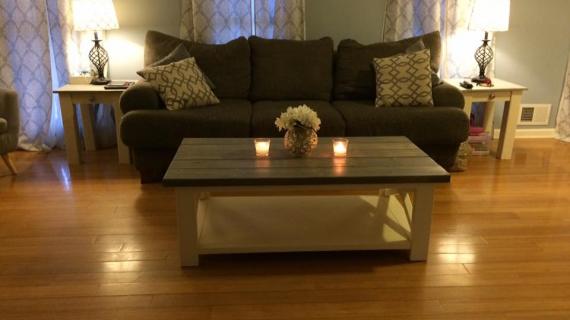
You can build a beautiful coffee table out of lumber! For about $50 in materials, this solid wood coffee table with it's X detailing could be yours. Our free plans include step by step diagrams, shopping lists and cut list - everything you need to get started.
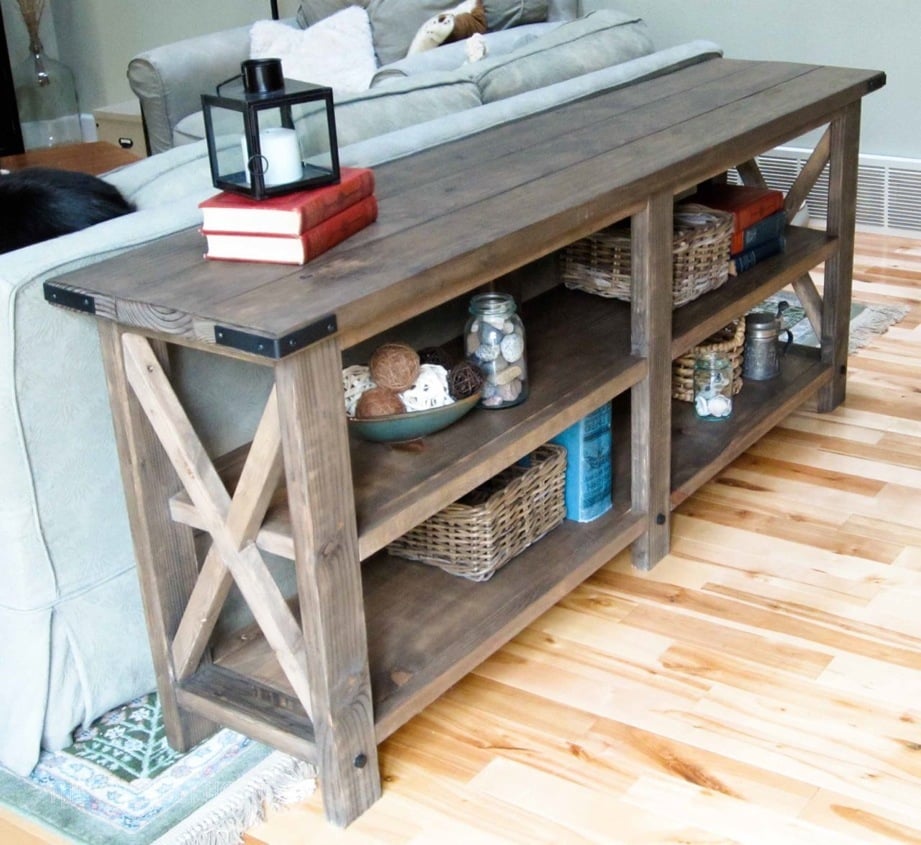
Also in this collection: Rustic X Console Table, Rustic X End Table, and Rustic X Bench Plans
Pin For Later!

Preparation
- 2 – 2x4 – 8 feet or stud length
- 4 – 2x2 – 8 feet
- 1 – 1x12 – 8 feet long
- 5 – 2x6 – stud length
- 1 ¼” and 2 ½” Pocket Hole screws
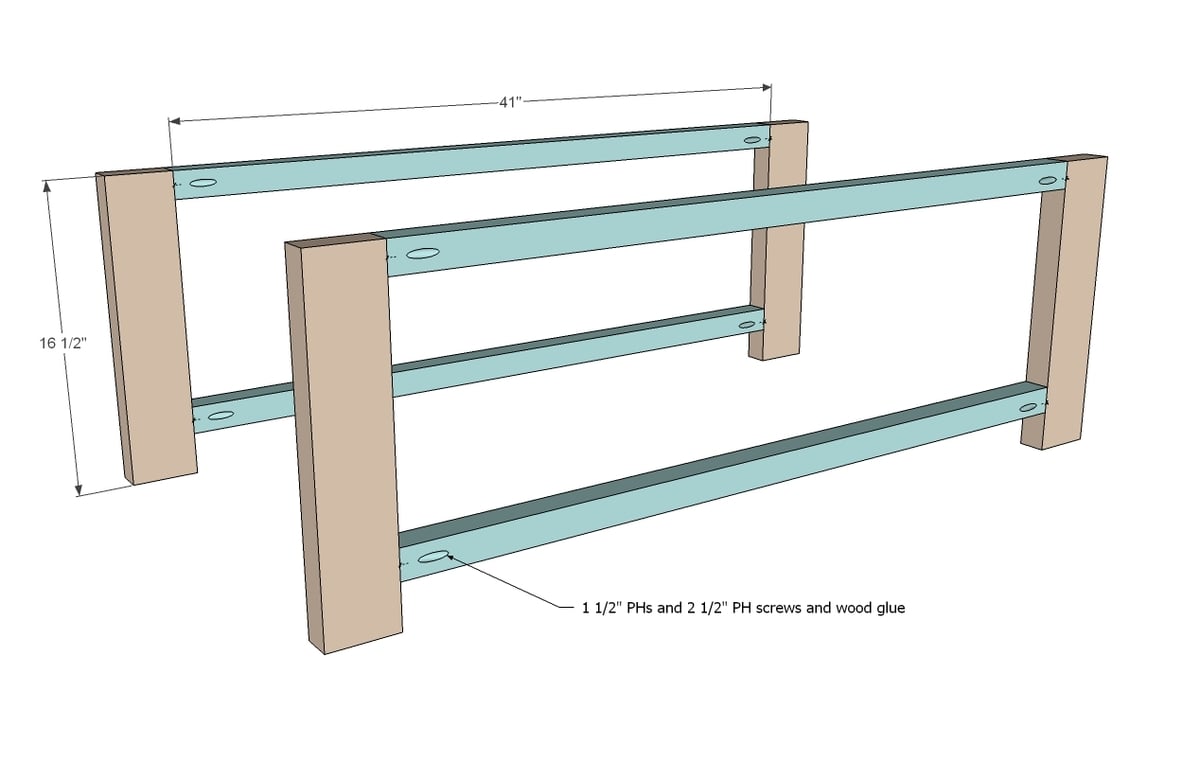
- 4 – 2x4 @ 16 ½” (legs)
- 4 – 2x2 @ 41” (side trim)
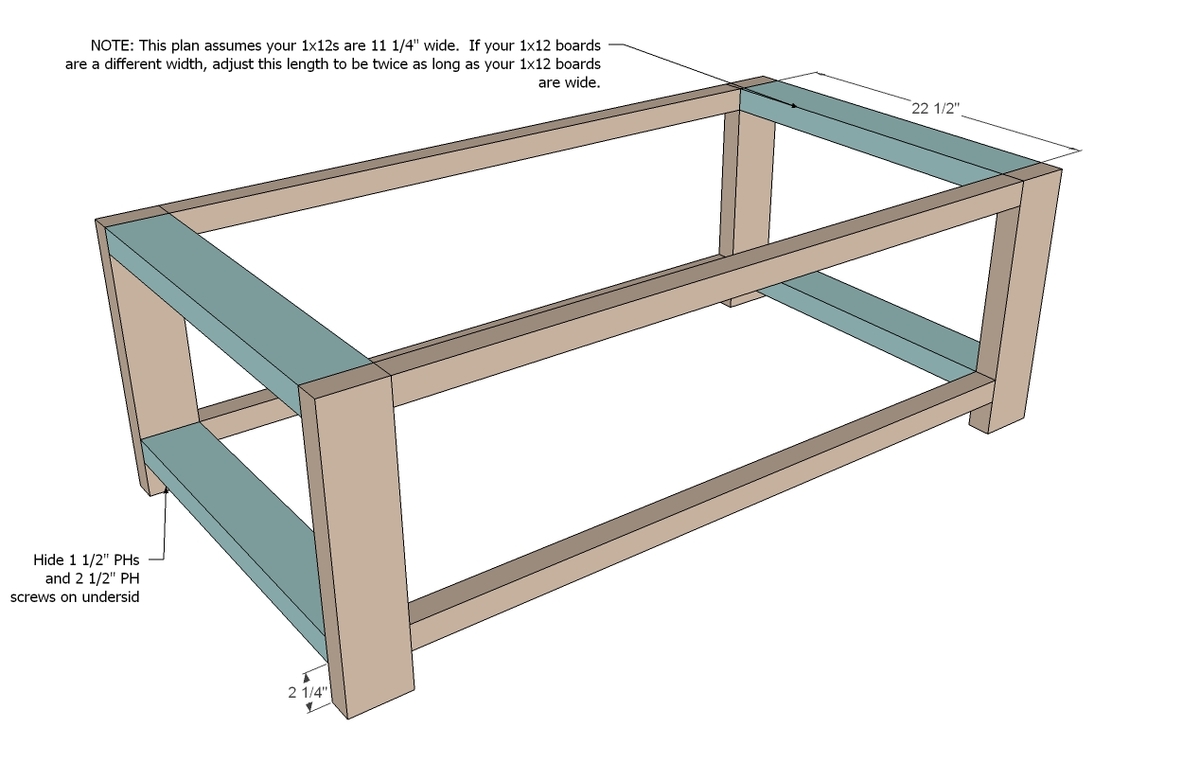
- 4 – 2x4 @ 22 ½” (end trim)
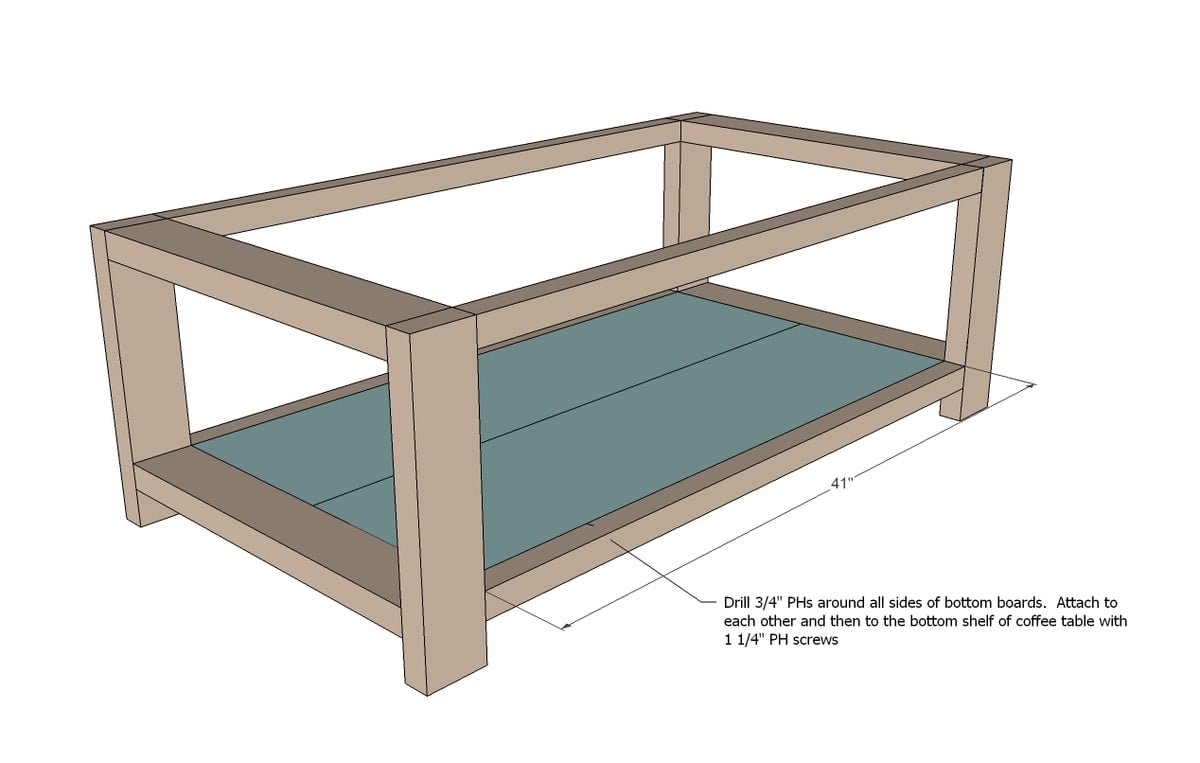
- 2 – 1x12 @ 41” (bottom shelf)
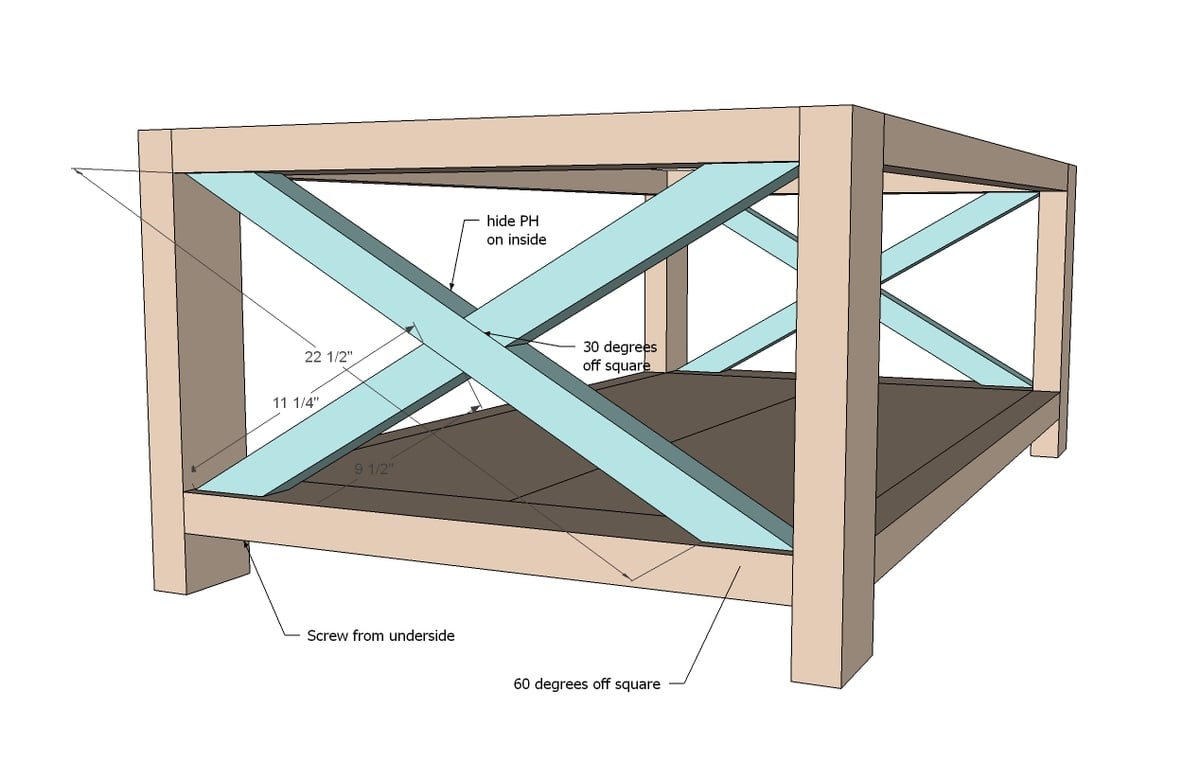
- 2 – 2x2 @ 22 ½” (both ends cut at 60 degrees off square, long point to short point, ends are parallel)
- 4 – 2x2 @ 11 ¼” (long point to short point, one end cut at 60 degrees off square, other end cut at 30 degrees off square, ends are not parallel but are cut in same direction)
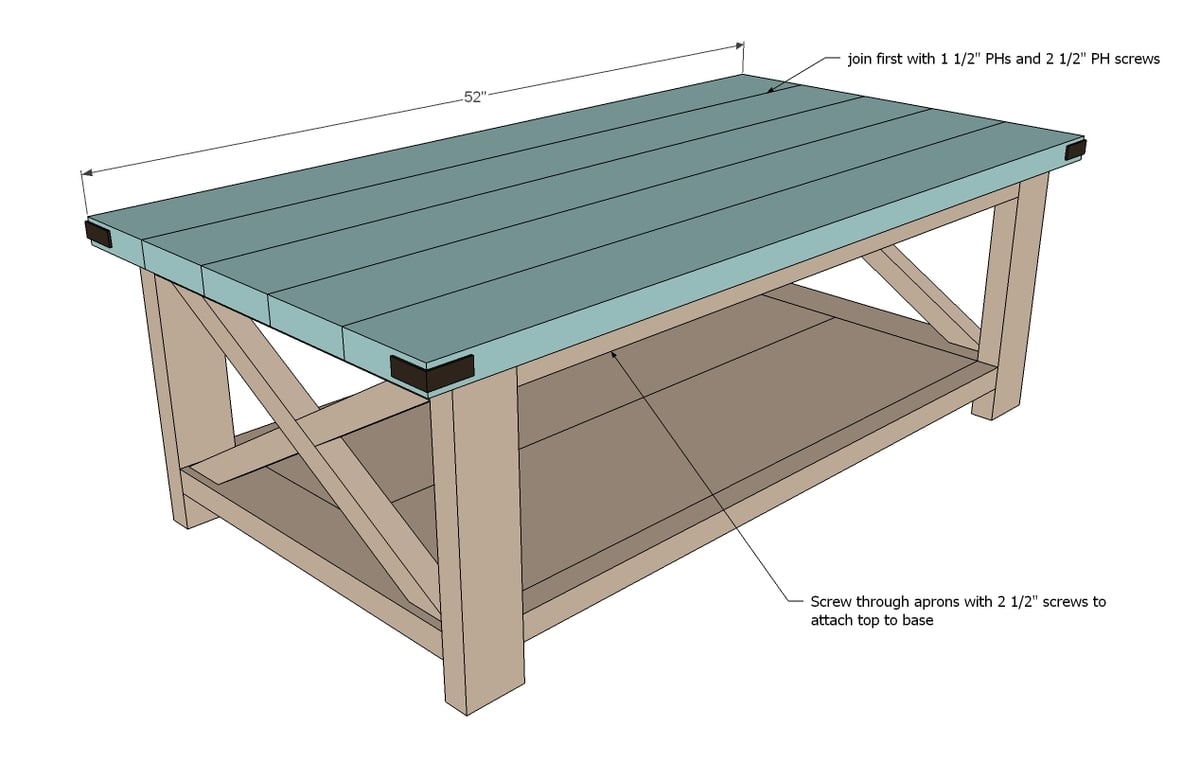
- 5 – 2x6 @ 52” (tabletop boards)
Please read through the entire plan and all comments before beginning this project. It is also advisable to review the Getting Started Section. Take all necessary precautions to build safely and smartly. Work on a clean level surface, free of imperfections or debris. Always use straight boards. Check for square after each step. Always predrill holes before attaching with screws. Use glue with finish nails for a stronger hold. Wipe excess glue off bare wood for stained projects, as dried glue will not take stain. Be safe, have fun, and ask for help if you need it. Good luck!
Instructions
Step 2
Step 3
Step 4
It is always recommended to apply a test coat on a hidden area or scrap piece to ensure color evenness and adhesion. Use primer or wood conditioner as needed.






Comments
Angel Rose
Thu, 06/27/2013 - 14:01
Need help with the "X"
This darn X gets me every time. I tried it with the X bench . . . couldn't get it. Just kept it off . . . . It is getting me again. I modified the size to fit my living room. The whole darn thing is built . . . . minus the dastardly X. So my first question for any math minded people is how do I get the right measurement for my cuts. My second hang up is that my cool miter saw doesn't go to 60 degrees so I will have to do it by hand . . . . :S
But REALLY need help just figuring out how to measure the length . . . is it the measurement from corner to corner long end or short end . . . . or something entirely different. HELP!
JRuth09
Sat, 08/03/2013 - 05:47
Mine ended up not even being
Mine ended up not even being a 60 degree angle. I just got a level and put it corner to corner for the x part, got my measurements, and cut it. I think for the solid 2x2 that goes on the x part, my angle was like 26 degrees (both cuts are the same way). And the cut is corner to corner, long to long. After that, the others are simple. Hope this helps
Angel Rose
Sat, 08/03/2013 - 13:20
Clarify
can you give me a few more details? How did you find the angle on the solid 2x2? I have gone through quite a few 2x2s with the wrong measurements . . .:S You said you measured long end to long end . . .
AHHHHHH so frustrated with this part :(
JRuth09
Sat, 08/03/2013 - 13:58
Measure corner to corner.
Measure corner to corner. Then cut ur 2x2 at that length. Then cut both ends off at a 26 degree angle. Might have to trim some off but that should do it for the long piece. Let me know if it doesn't and maybe I can do some step by step pics and email them to u!
JRuth09
Wed, 07/31/2013 - 18:59
Had to have 3 2x2's instead
Had to have 3 2x2's instead of 2. So I would definitely suggest doing the same if you plan to do this project. But instructions were very clear and mine turned out awesome! Stain is drying tonight and will post pics tomm! Planning on building the end tables soon!!
j13913r
Thu, 08/29/2013 - 12:35
More Detailed
First, I'm new to the site and I love it. I just got the kreg jig and I'm looking to familiarize myself with it tomorrow, however, is there a more detailed instructions on how to build this? I feel like it's hard to understand where to put the pilot holes, how to secure the 1x12's together or to the base.
Thanks again!
Justin
j13913r
Thu, 08/29/2013 - 12:26
In addition...
Everything fits great minus the bottom shelf...I'm having a lot of issues with that
Lindelium18
Thu, 09/12/2013 - 05:47
My opinion on this build
I'm going to build this table this weekend. That being said, I'd like to address a few of the comments left by others.
1) you do need 3-2x2's. At first I didn't think you did but then I realized you needed 4 of the long pieces. So, yes, you will need 3 of the 2x2's.
2)if your saw does not go to 60 degrees, use a shim. Set your saw to the 45 degree setting. Then, instead of putting your board directly against the back wall of the saw, you will need a shim or spacer in there. If you make a shim, it should be 3-3/4" long, 1" thick and taper down to zero. Or, you can take a 1" thick piece of lumber and put it against the wall of the saw. Then, clamp your piece you're cutting against that and the back wall. This will give you a 15 degree angle plus your saw is 45 degrees so this will equal a 60 degree cut. Make sure all of your lumber is on the same side as the blade.
EDIT: I still ran into an issue of my 10" Miter not cutting deep enough with this shim in there. This one might just be easier with a line drawn and a circular saw...your choice.
3) As for the strength of the bottom shelf, I'm not overly confident it will be super strong... I haven't decided what I'm going to do yet, but here are a few suggestions:
A) glue the seam together and use a couple of clamps to hold it tight over night. Pocket screws won't hurt here either, but the glue will actually hold pretty well as long as its clamped tight and the entire area was covered in glue very well.
B) buy a sheet of plywood instead of the 1x12's. all the edges are covered by your trim pieces, so you won't have to worry about hiding the edge. If looks are important, get a piece of plywood with a veneer top that you like.
EDIT: this is what I choose. It was much easier than the other alternatives.
C) buy 2 of the 8' 1x12's and stack them. This is probably the most complicated and probably over-kill, but it'll definitely be strong. Instead of 2- 1x12's cut 41" you will cut 4 of them. Then, take of of them, and cut it in half, long ways. You should then have 3- 1x12's 41" long and 2- 1x6's 41" long. Take your first 2 1x12's and place them together on a flat surface. Then, take your third 1x12 and stack it right in the middle, like a pyramid. Finally, place your 2-1x6's on the left and right. Every seam gets glued along with the bottom boards getting glued to the tops ones. Clamp it all together and let it set over night. This will take a lot of time, effort, glue and clamps, but essentially what your are creating is a 2x24" board, and it'll be solid!
Also, it may be worth looking into the usual methods of mounting a table top. Since it is 5 separate pieces and not that big, it may not be a big deal; but lumber tends to shrink and expand with humidity. So, normally, tops are not screwed down, but rather, floated on with brackets. Just something to possibly look into.
If you've read this far, I applaud you. I may shoot a video of my build, but I haven't decided yet... Time will tell! :). Good luck!
rains99
Mon, 09/30/2013 - 06:13
This posting inspiring
Hai..
I love this content.
I have an ide for my work at painting
Thank you Ana
Choirun Sholeh - lukisan pemandangan
maryg4
Sat, 10/05/2013 - 19:25
What type of wood do you all use?
First of all, I sincerely love this site and the step by step instructions! My hubby is having a blast with me searching on your site! I know this is somewhat of a silly question, as we've done a few projects from this site, however our costs tend to be higher than what's projected. I assume it's because we are using higher quality wood, maybe? For this particular project, what type of wood do you recommend using? Thanks!
erincushman
Thu, 10/24/2013 - 13:02
wood filler help!?
So this was my first time building a good quality piece of furniture, and I've never worked with wood filler before. I didn't realize how careful you needed to be with it - some (okay, a lot) dried outside of the holes. I did sand, but it didn't get all the way out before I oxidized; now I have big white blotches where the wood filler was. Is there any way to fix this? Should I sand it ALL out and restart- should I paint the piece a different color?
The oxidizing would've been perfect (and the table is great!) if I hadn't messed it up with the wood filler. I'm hoping I can somehow salvage???
chaps
Wed, 12/11/2013 - 09:54
Wood Filler and Oxidizing
Will the wood filler take oxidizing? I am nervous to fill a few spots in fear it wont take on the same color.
cfugle
Thu, 02/06/2014 - 05:05
X Coffee Table Inspiration
Hi Ana and gang!
Slowly i have been building things using many of your plans. I stumbled across your coffee table plan and decides to make a few revisions to better suit my home and two wood chewing dogs. I really liked the X-design but wanted to prevent 2 over 70lb dogs from walking through the large opening so I made big "V"s instead of smaller "X"s.
http://flic.kr/p/jNGyZw
MBuckson
Wed, 02/26/2014 - 10:44
Coffee table design
Hello,
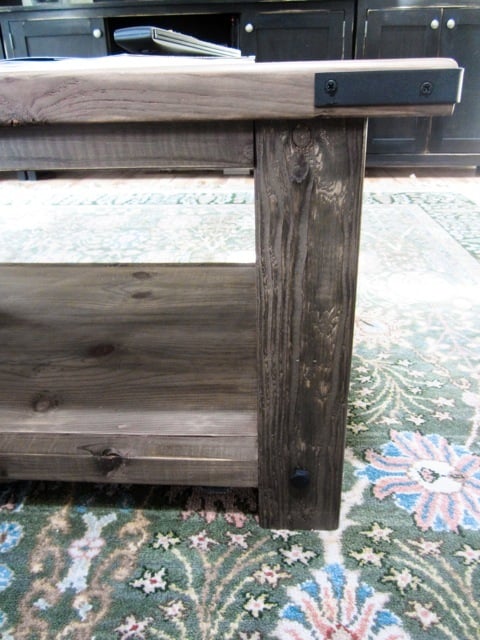
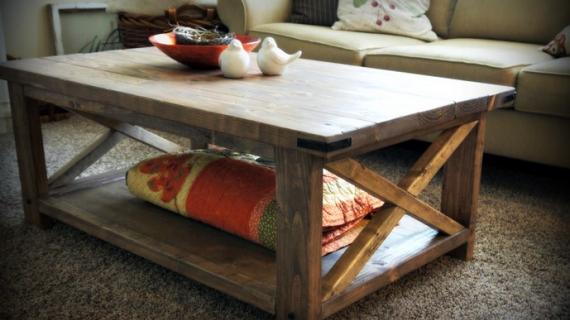
I'm in the middle of building this, but have one quick question...what are the black bracket things on the corners of the tabletop? I have no idea what they're called or used for, but they look really good on the table. Thanks!
briankalwat
Tue, 04/29/2014 - 14:57
Hardware Painting
Hey Ana!
I'm wondering if you can share how you painted the decorative hardware. Did you just spray paint it? Any special prep to ensure it sticks/doesn't chip?
Thanks so much!
ChillyBaker
Fri, 05/02/2014 - 10:51
Converting to Square Shape
Hi there,
Do you happen to have any way of making plans for this coffee table in a square design? If not, do you have any suggestions? Love your designs and your ideas... thank you so much for sharing all of them!
Thanks so much!
ChillyBaker
P.s. I am super amazed that you have kids, a husband, a house to keep and you still get all of this done. When I'm working on building something, the cleanliness of my house quickly goes downhill. It seems I can either have one or the other, but yet I keep on coming back for more! I've come to the conclusion that you must have a cleaning lady. That is the way I rationalize my inability to keep up with both... shhh, don't ruin it for me. ;o)
Sarah Martina
Sat, 07/19/2014 - 23:48
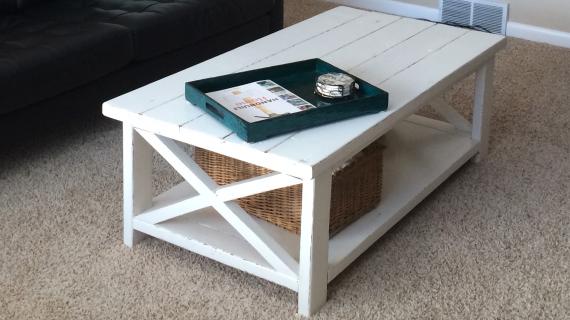
Baskets
Has anyone found a basket (or set of baskets) that fit well with the suggested measurements of this table?
Hubby built this table before I could find baskets, and now I can't find anything that doesn't seem to be "swallowed" by the width of the table.
Otherwise we LOVE it. It is sturdy and withstands my two young boys plopping down on it throughout the day. ;)
smitty46962
Wed, 10/29/2014 - 03:12
Decorative Corner Hardware
Hi Ana,
Building this Rustic X Coffee Table this weekend. My first furniture project ... Curious where you found the decorative corners for this piece? After looking through a lot of your different ideas and projects, I need to find a supplier for this type of material...
Thanks
Smitty
ccarter
Sat, 12/06/2014 - 07:51
I had the same problem as you
I had the same problem as you. I went to several hardware stores and I was unable to find them. What I ended up having to do was purchase some metallic ones and sand them with fine grit sand paper. After doing this I spray painted them with a flat black (non-glossy) color. It worked for me.
april_swafford
Mon, 11/24/2014 - 13:29
square coffee table
I am wanting to do a coffee table exactly in this style family, but I do not see the plans for the square size coffee table of this style. Am I missing it?
Bmrdiver
Fri, 11/28/2014 - 21:47
PH Screws
Several sections in the instructions say to use 1 1/4" and 2 1/2" PH screws.
Example:
So my question is, which screw length do I use in these sections? 1 1/4" or 2 1/2"?
ccarter
Sat, 12/06/2014 - 07:48
Plan question
I am currently building this table for my wife for our 5 year anniversary. I noticed a difference between the table and the plans. For some reason the X cross on either end of the table do not match the picture Ana put up of the table. I wonder why she chose to do this?
Aesimpson
Tue, 01/27/2015 - 11:53
Cost
What is the approximate cost of this project? Thanks for the help!
Ana White Admin
Tue, 01/27/2015 - 12:12
Cost
Approximately $75
Sarafox
Mon, 02/09/2015 - 13:49
Change Shape!
I looooove this!!!!! I'm gonna make it all! Console table, end tables and coffee table! However... I want to modify it to be a square! I'm sure I can easily just change the measurements, but before I get wood, is there anything specific you can recommended for me to do? Or any tips on making it square? Thank you! So thankful that you exist <3
Ana White Admin
Mon, 02/09/2015 - 18:17
square
Take a look at this for inspiration. Either Douglas Fir or Pine would be fine. http://ana-white.com/node/12998
Hbjerken
Mon, 03/02/2015 - 11:34
Cutting the "x"
I can't figure out this x!?! I cut the length and the angles I think we're cut at to much of an angle, but I think the length would still be short?? What can I set my miter saw to so that the angles and length are correct? Help please!!
bmstrain
Sat, 03/14/2015 - 22:40
cutting the"x"
The x cut the easy the plans are drawn I'd tricky because not very many miter saw cut at 60deg. This is probable the reason the picture shows the x attached to the side instead of the top. To cut a 60 deg will either need to put the 2x2 perpendicular to the miter fence and make a 30 deg cut. This can be dangerous because it's hard to clamp the stock. I chose to make a jig at 45deg and cut at 15. Matching up miter cuts can be tricky and I have alot of scraps to prove it. To do the length, make your first miter cut. Measure from the outside edge of the cut you just made to the point where you want the inside of your other miter. By outside I mean thinner or longest part of tg miter cut. If you made a 60deg cut, the outside would be the 30 deg angle. When you start cutting at your inside miter mark, your outside edge should be longer. It works itself out. All that being said, measure from the corner of wherever you want your 60 deg to be, to where you want the inside edge of your other miter cut to be. It sounds complicated, but it's easier when you look at it.
bmstrain
Sun, 03/15/2015 - 03:41
x cut
Meant to say: to cut the x the way the plans are written is tricky
Angel Rose
Sun, 04/12/2015 - 16:36
help
Built the base of the table perfectly square(wellmaybe not perfect,but close) my top warped a bit as the boards dried. When I screwed them together, it pulls my base up to the warped top and it is now terribly teeter-y. How do I fix this!?!?
tylerrankin90
Fri, 07/17/2015 - 10:37
Im not sure, I am having the
Im not sure, I am having the exact same issue as you are.
Mlas570
Tue, 05/05/2015 - 08:54
New builder
Trying to build this for my gf. How do you select straight enough boards? My lowes doesn't seem to have many. Is there a way to make a pretty close one straight
PaulaRuggiero
Wed, 05/13/2015 - 08:21
Hardware!
Hey there! I just built this table this past weekend- my first build!! I'll do a brag post after I stain it. I found some clavos on ebay, but I'm curious about the corner hardware. Are those just L brackets spray painted black? Thanks!
In reply to Hardware! by PaulaRuggiero
Ana White
Thu, 05/14/2015 - 00:30
Exactly!
Exactly!
bootchie
Wed, 07/01/2015 - 10:14
Brad Nailer
When does this come in to play? I don't see any nailing in the directions? And what size nails?
In reply to Brad Nailer by bootchie
Ana White
Thu, 07/02/2015 - 13:00
You are correct, no nailer
You are correct, no nailer needed.
Margaret_Sartori
Sun, 07/05/2015 - 09:55
I see on the supply list
I see on the supply list countersink drill is needed. What size bits?
Thank you! So excited to make this table with my father this summer
tylerrankin90
Fri, 07/17/2015 - 10:22
Table is not level
Hello all,
I am almost finished with this project and either the top was not all the way flat or the base wasn't exactly square. Either way, the table is not completely flat. I could obviously just sand down 1 or two of the legs to make it sit flat, but it still won't be square. Any tips that I could try?
Thanks guys.
larosemore
Tue, 07/21/2015 - 14:17
Stain
Hi!
I just completed all of the building but I am wanting to know what kind of stain you used.
Thank you!
C56sera
Tue, 08/04/2015 - 20:27
attaching the lower shelf
I am new to furniture building and to using the kreg jig... I am at the point of putting the lower shelf together.. after I join the two 1x12 pieces together, are the pocket holes made on outer edges of the shelf piece and then screwed into the frame?? step 3 reads:
Build your bottom shelf with 3/4" PHs 1/14 PH screws down the center.Then drill 3/4" PHs around all outside edges and attach to the bottom shelf. Was not sure if it was meant to read attach to the bottom frame.. since it would be difficult to drill pocket holes after the frame has been already assembled.... Just need some clarification. and advice as to how best to hold the shelf in position as i attach it... Thank you for your help:)
In reply to attaching the lower shelf by C56sera
Ana White
Wed, 08/05/2015 - 11:30
Yes, you need to place all
Yes, you need to place all pocket holes prior to assembly. The PH all
around the outside edges will be screwed into the frame. Flip table upside
down and clamp boards into place while placing screws. Hope this helps!
C56sera
Fri, 08/07/2015 - 22:05
attaching the lower shelf
Thanks Ana.. I was able to put it in no problem . Now on to the X pieces.. I was able to cut them.
I cut them as shown in the photo which is different from your plans. Can you tell me what the best way would be to attach them.. One of my long pieces is pretty snug so I think wood glue will work but my short pieces are not as snug and needs a little more to hold them in place. Can you do ph's on an angled end???one comment said something about toenailing a nail but I dont know how to do that.. what do you suggest??
Thanks again !
nibeck
Fri, 08/28/2015 - 10:21
Brackets
Lots of sites online to find the brackets. I just googled "decorative table edge corner brackets"
Here is one example site - http://www.wildwesthardware.com/brackets/brackets.htm
caralinedomb
Sat, 09/12/2015 - 12:51
Hardware
Can you please tell me where you found the decorative braces and bolts for this coffee table? I love it but am having trouble finding something similar. Thank you!
Ana White Admin
Mon, 09/14/2015 - 11:16
Hardware
Those are just L brackets and hex bolts spray painted black.
Babs1702
Sat, 09/19/2015 - 12:19
What colour / type of stain have you used
What a beautiful table! Can you tell me how you got the colour effect? What type of stain / finishing have you used? Thanks!
ajkorcek
Mon, 09/21/2015 - 19:43
Hardware
Hi, I am going to make this table for my wife, any suggestions where to buy the corner braces and hex bolts in black?
In reply to Hardware by ajkorcek
Ana White
Tue, 09/22/2015 - 10:30
Great! Just spray paint them
Great! Just spray paint them black. Hope this helps!
DougD
Wed, 09/30/2015 - 08:14
Finish color
Hi - I made the coffee table and it came out great. For the finish I used black tea, then the vinegar/steel wool mixture and really liked the result. It oxidized the wood well and came out with a greyish tint. I finished the table with a wipe-on poly which changed the color of the table to a rustic brown with no more greyish tint. Is there anyway to regain the coloring of the wood back to having a little grey in it? Thanks for your help.
brandonnorris
Sat, 10/10/2015 - 10:03
Corn brackets?
I'm trying to find them but having trouble what is the product so I can find it online?