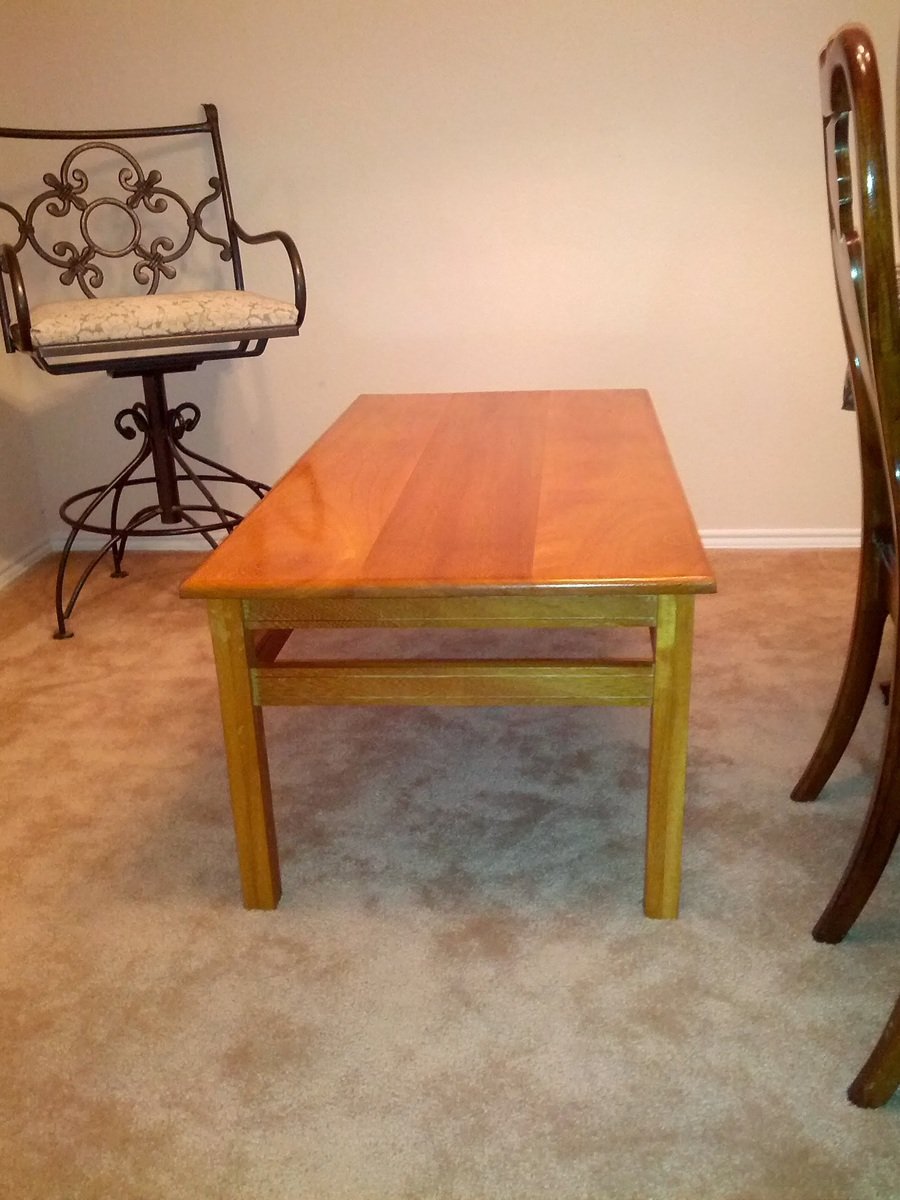


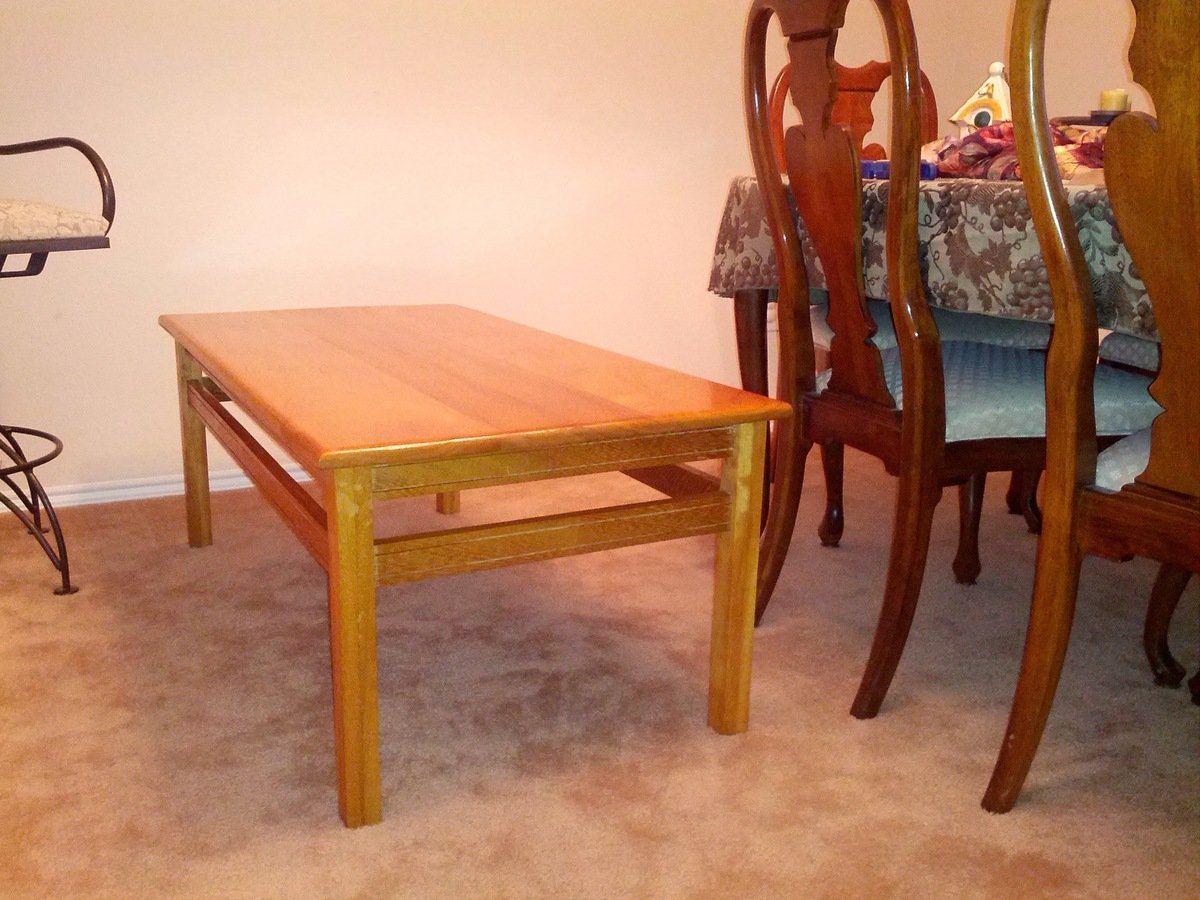
This is my first project I designed and made for someone else. Everything was designed using Sketchup. This particular project was built to replace my parents coffee table that had fallen apart over the years. The table it replaces was made out of MDF with a Teak veneer. My parents were adamant about building it out of solid teak. I found it difficult to find so I built this one out of solid Iroko “also known as African Teak” While I don’t have a planer or jointer I found that buying the wood presurfaced helped out a lot.

Preparation
1 -- 2 x 2 @ 6’
4 -- 1 x 10 @ 6’
50) 1 ¼” Kreg Screws (Only if using Kreg Jig)
Sandpaper
Stain,varnish, paint or other finishing product
Wood Putty
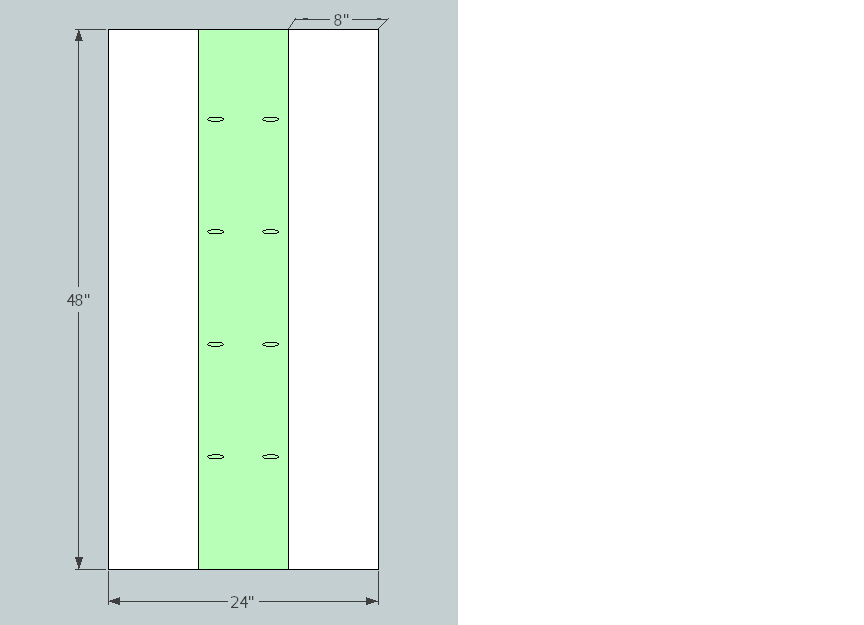
A) 3 - 1” X 8” @ 48” (Tabletop)
B) 4 - 1” X 2” @ 43” (Front and Back Aprons)
C) 4 - 1” X 2” @ 19” (Side Aprons)
D) 4 - 2" X 2" @ 17 1/4" (Legs)
Use a straight edge as a guide for making all cuts.


Please read through the entire plan and all comments before beginning this project. It is also advisable to review the Getting Started Section. Take all necessary precautions to build safely and smartly. Work on a clean level surface, free of imperfections or debris. Always use straight boards. Check for square after each step. Always predrill holes before attaching with screws. Use glue with finish nails for a stronger hold. Wipe excess glue off bare wood for stained projects, as dried glue will not take stain. Be safe, have fun, and ask for help if you need it. Good luck!
Instructions
Step 1
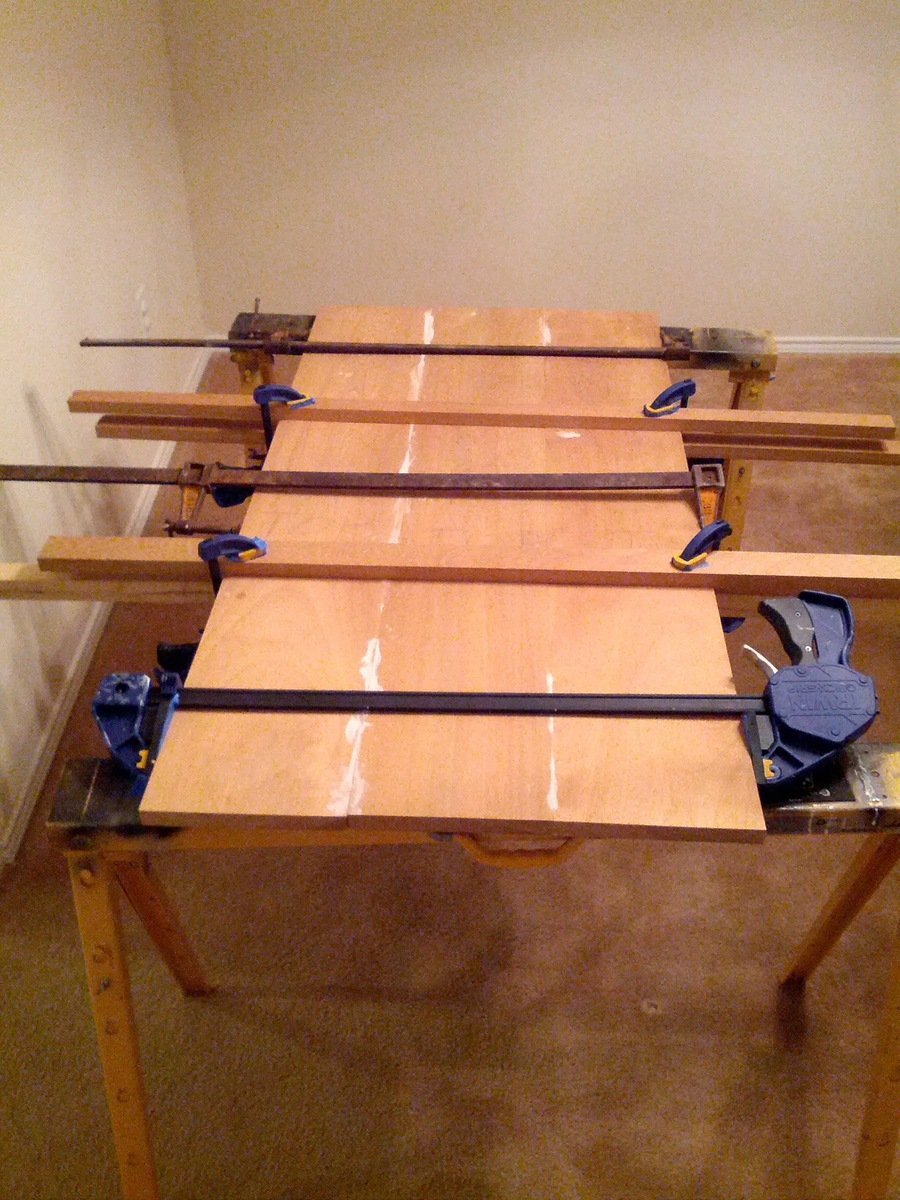
Once everything is cut from the cutlist start off with assembling the tabletop. If you are using a Kreg Jig just drill the pocket holes in the center piece. apply glue and screw the pieces together. Set it aside to dry while you assemble the rest of the project. You could optionally use glue and clamps.
Step 2
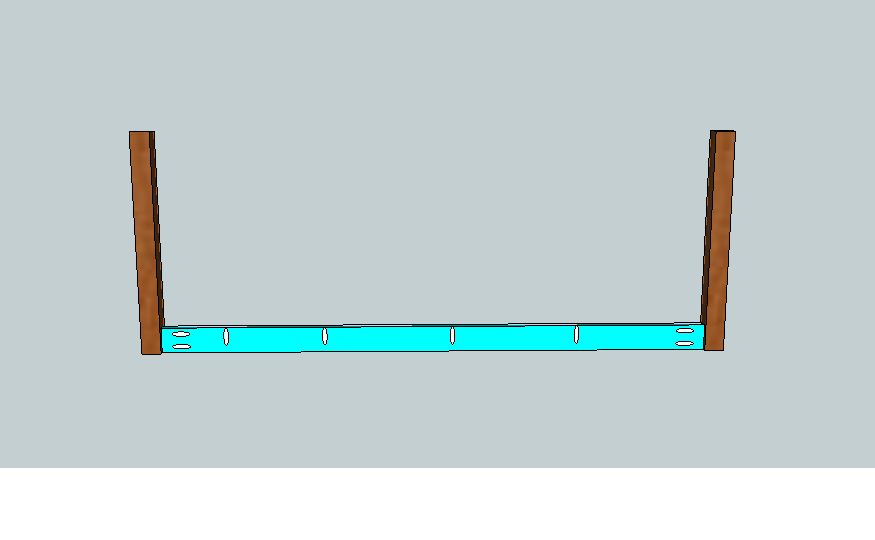
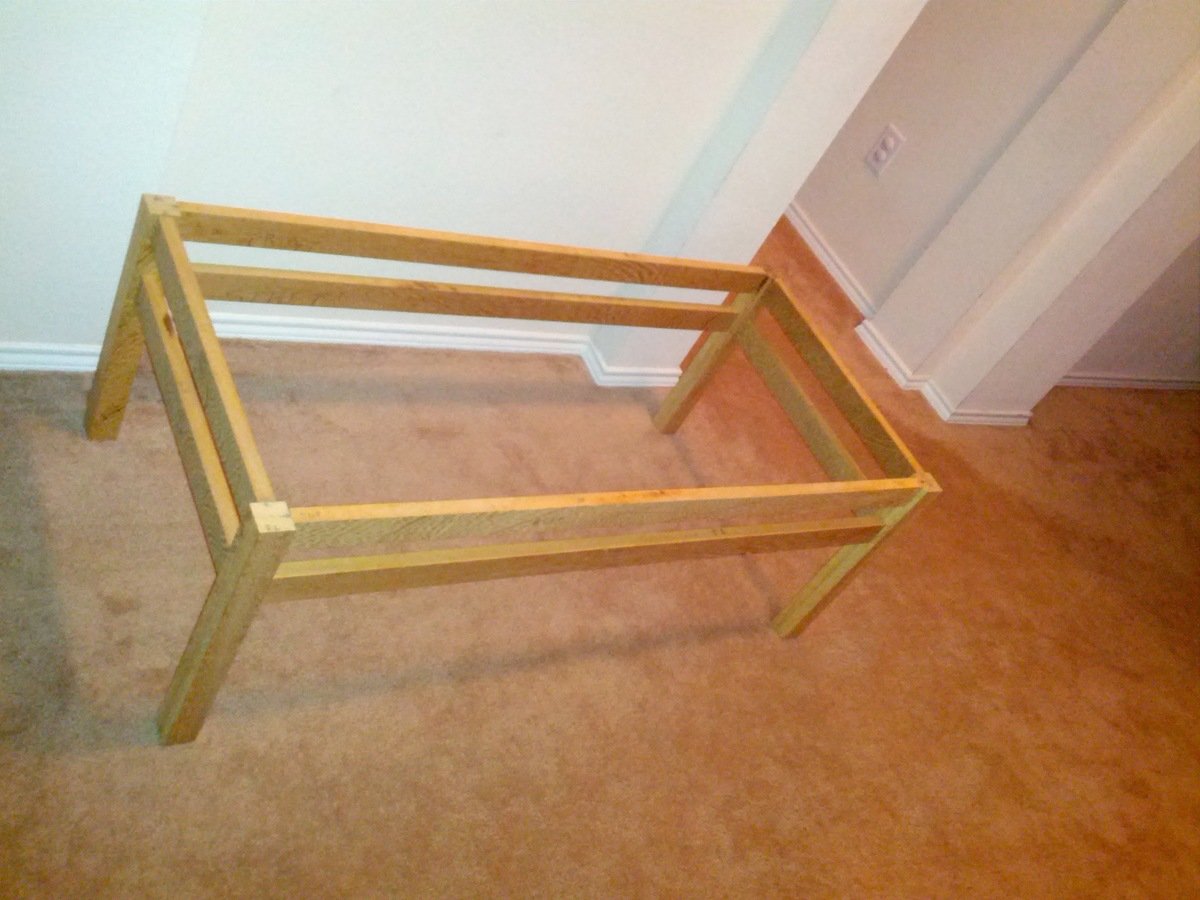
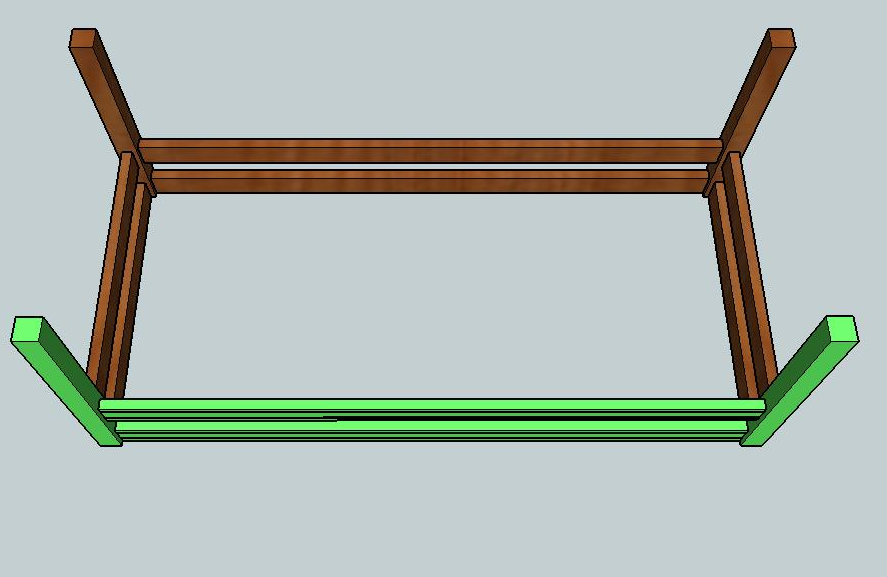
If using pocket holes place two on each side of the 8 aprons for attaching them to the table legs. Also add 3 pocket holes across the top 4 aprons to attach the tabletop to the base. Once All the pocket holes are drilled it is simple enough to assemble. Start off with assembly of the front and back of the table.
If you would like the aprons to be offeset from the front of the table legs just use a spacer to accomplish this. The table I built has 3/8" offset. This is optional and can be just placed flush to the front
Step 3
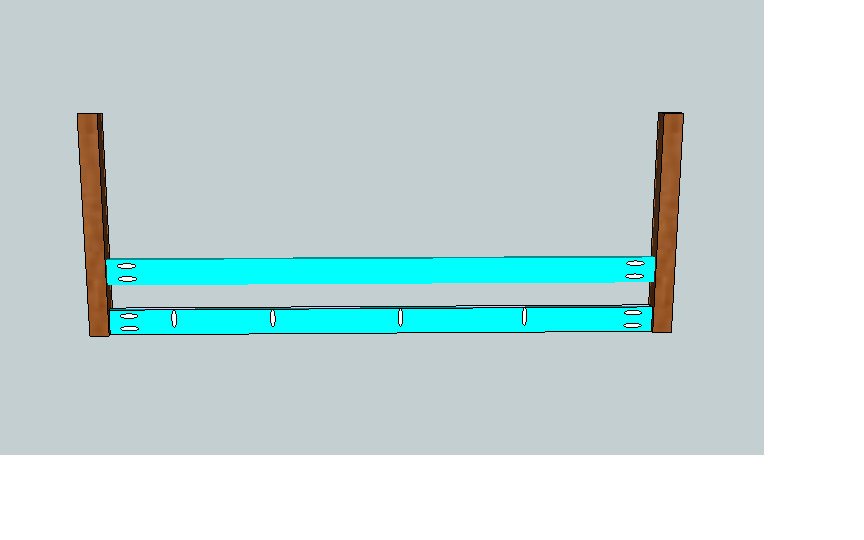
Now use a 2" spacer and attach the second lower apron to the table leg.
Step 4
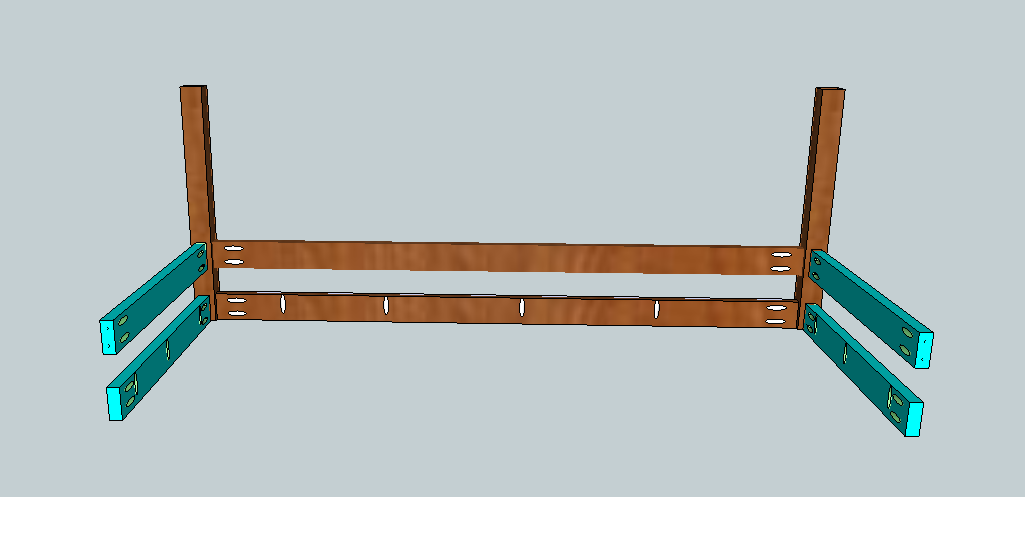
Attach the side aprons in the same fashion.
Step 5
Step 6
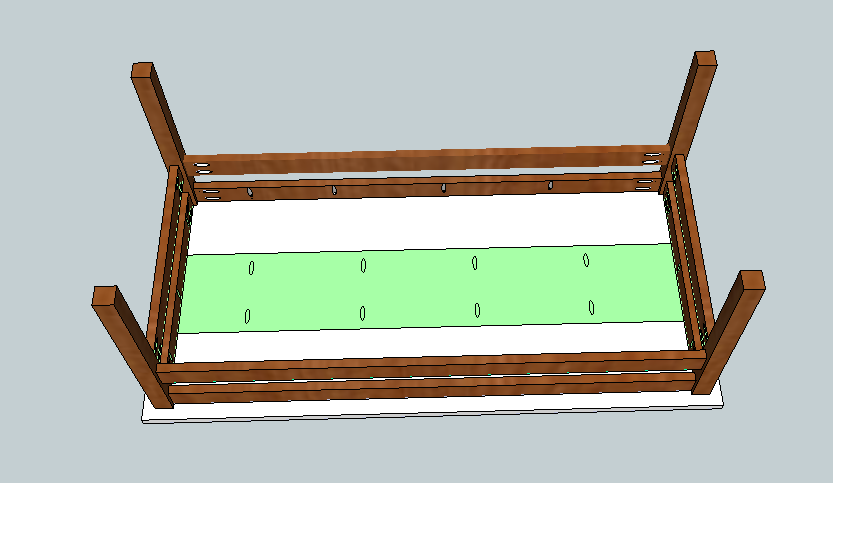
The final step would be to attach the tabletop to the base. Choose which side you prefer as the top and attach place it face down. Center the base on top of it and attach it with the pocket hole screws.
Step 7

The table top should have a 1" overhang. This is determined from the legs and not the aprons.
Step 8

CUT Sheet for the Aprons.
It is always recommended to apply a test coat on a hidden area or scrap piece to ensure color evenness and adhesion. Use primer or wood conditioner as needed.
Comments
opnwid
Thu, 01/09/2014 - 05:55
measurements
Hi Ana. Thank you for sharing your knowledge. I'm a newbie with a question about the cuts for this coffee table.
The tabletop cuts are 8" and the apron cuts are 2". Doesn't the saw blade make the 10" board too narrow?
Thanks,
Alan
opnwid
Thu, 01/09/2014 - 09:03
need help with measurement
Hi Ana. Thank you for sharing your knowledge. I'm a newbie with a question about the cuts for this coffee table.
The tabletop cuts are 8" and the apron cuts are 2". Doesn't the saw blade make the 10" board too narrow?
Thanks,
Alan
jleakey
Fri, 01/10/2014 - 10:02
Measurement
Alan,
I am the one that submitted the document. Since a 1 x 10 board is actually only going to be 9.25" wide you would use 3) of the 6' boards for the tabletop. The 4th 6 ft board would contain all the 2" apron cuts. basically you could rip the last board into 2" strips along the 6ft length and than cross cut the 2" pieces that are left a 48" and 19". I have added the cut diagram in step 8 above.
Jim
opnwid
Sat, 01/11/2014 - 04:18
another question
Right. Not sure how I missed the obvious. Another thing... the finished tabletop appears to have tapered and somewhat rounded edges, which adds to its beauty. If it's not an optical illusion, how would I do that and at what point in the process? What tool(s)? Thanks so much for your patience.
Alan
jleakey
Sat, 01/11/2014 - 12:20
Alan, I used a router with a
Alan,
I used a router with a 3/4 inch round over bit to add the detail to the table top. You can also use a circular saw to add a chamfered edge by tilting the blade at about 15 degrees clamping a straight edge to the table top and taking of about 1/8 inch or 1/4 inch.
opnwid
Sat, 01/11/2014 - 12:37
Thanks again.
Thanks again.