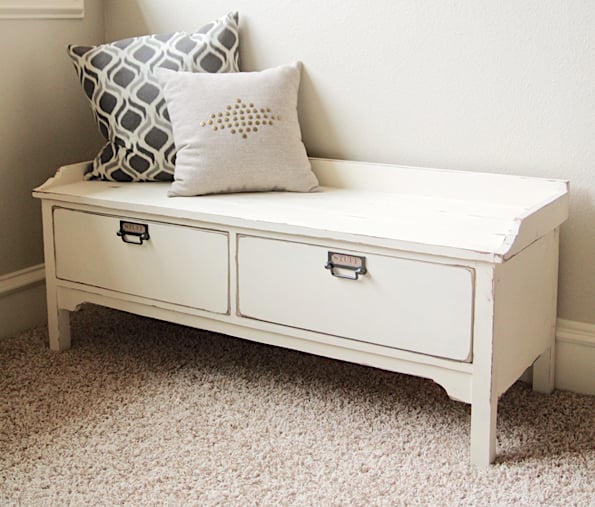


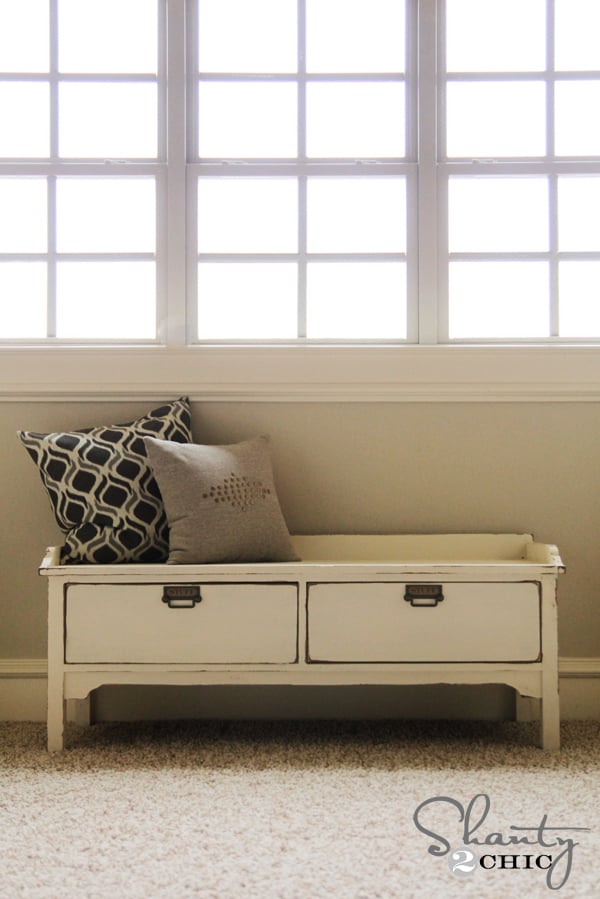
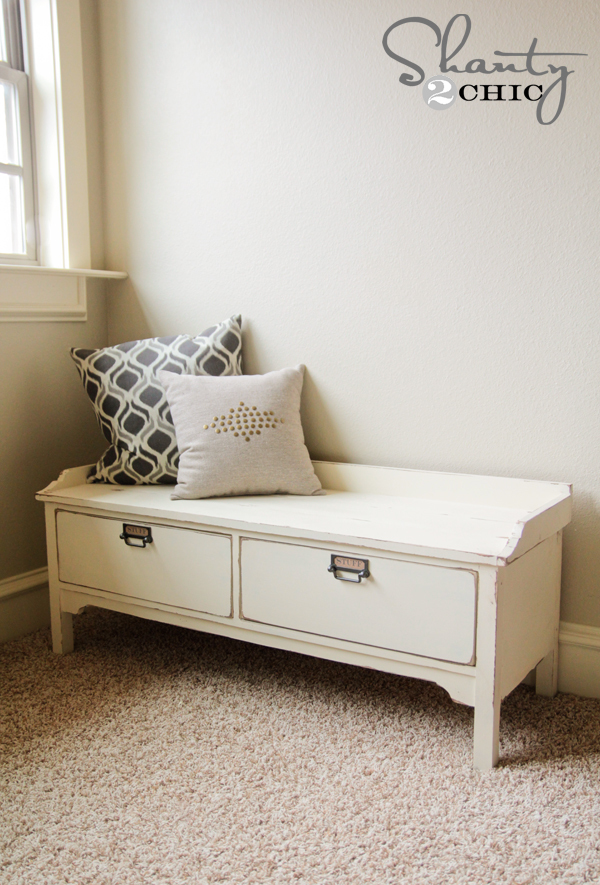
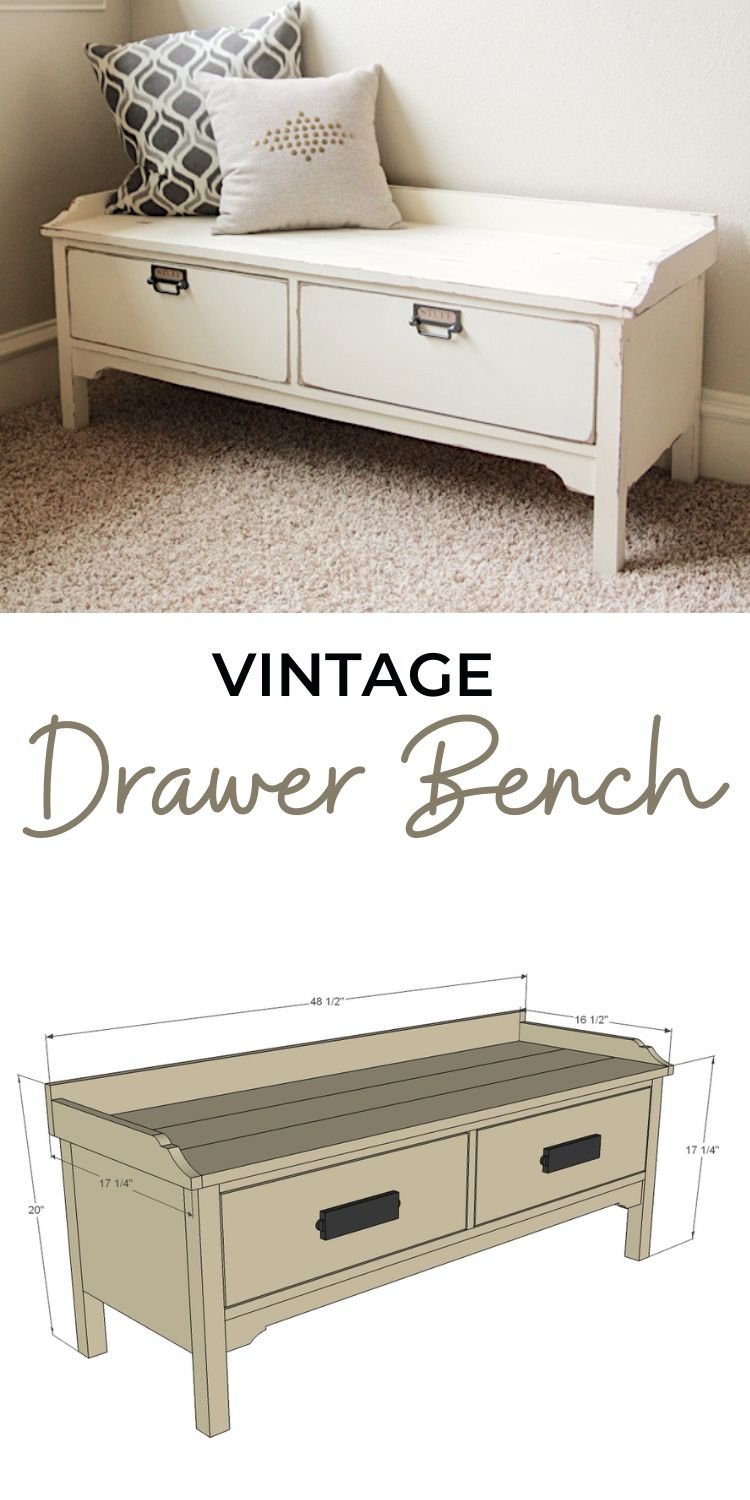
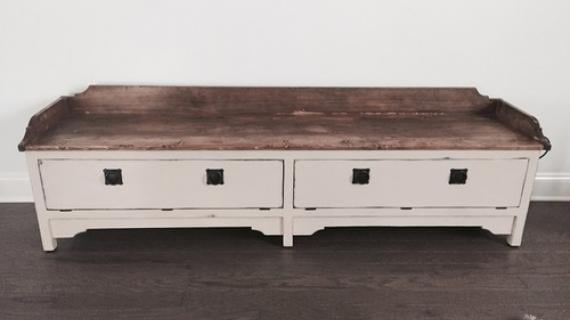
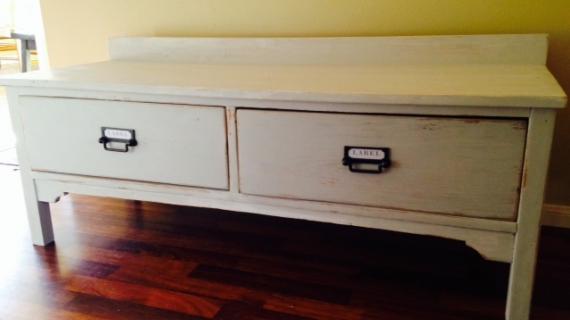
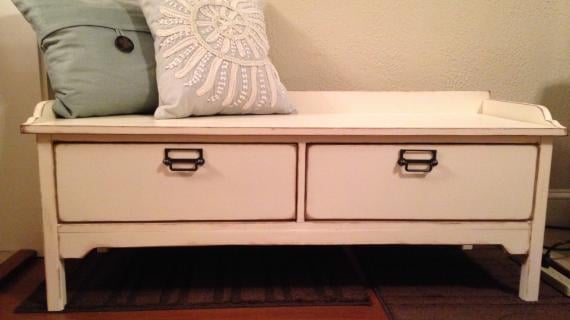
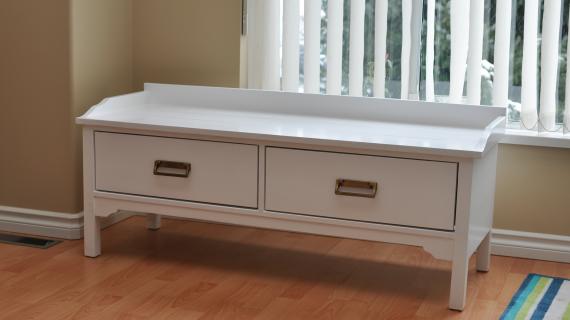
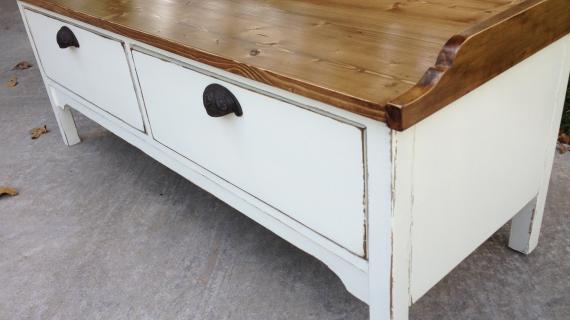
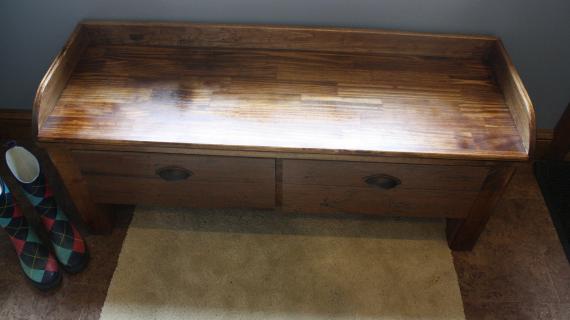
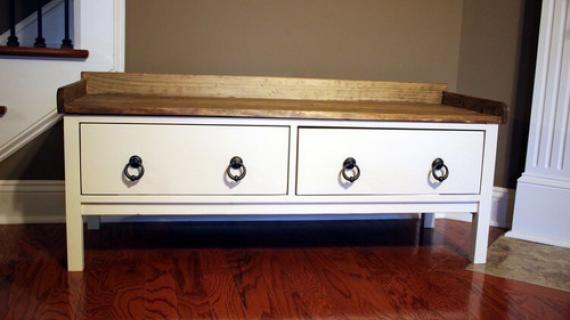
This beautiful vintage style drawer bench is made out of pine whitewood boards. It features two drawers and a nice, wide seat top. Pair with a pretty shelf or hooks to create a functional and charming entryway. Free plans from Ana-White.com

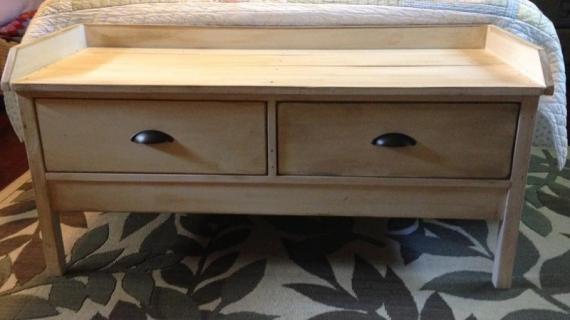
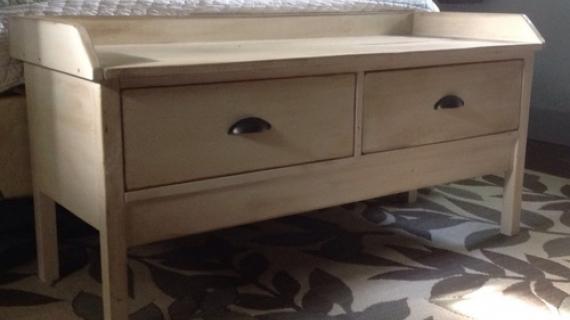
Built by Whitney from Shanty2Chic

Isn't it just darling? It would be cute on the end of a bed too!
Here's from Whitney:
I loved making this cute little bench! The drawers are perfect storage, and it's also a great project if you are new to making drawers and attaching drawer slides. I gave some more tips on how I attach my drawer slides in my post... Really they are much easier than they look! The whole thing cost me around $125 to build, which is much better than the $600 Pottery Barn wants for theirs before shipping. I like our version better anyway ;-)! And, I think it's perfect for any room in the house!
Modifications and More
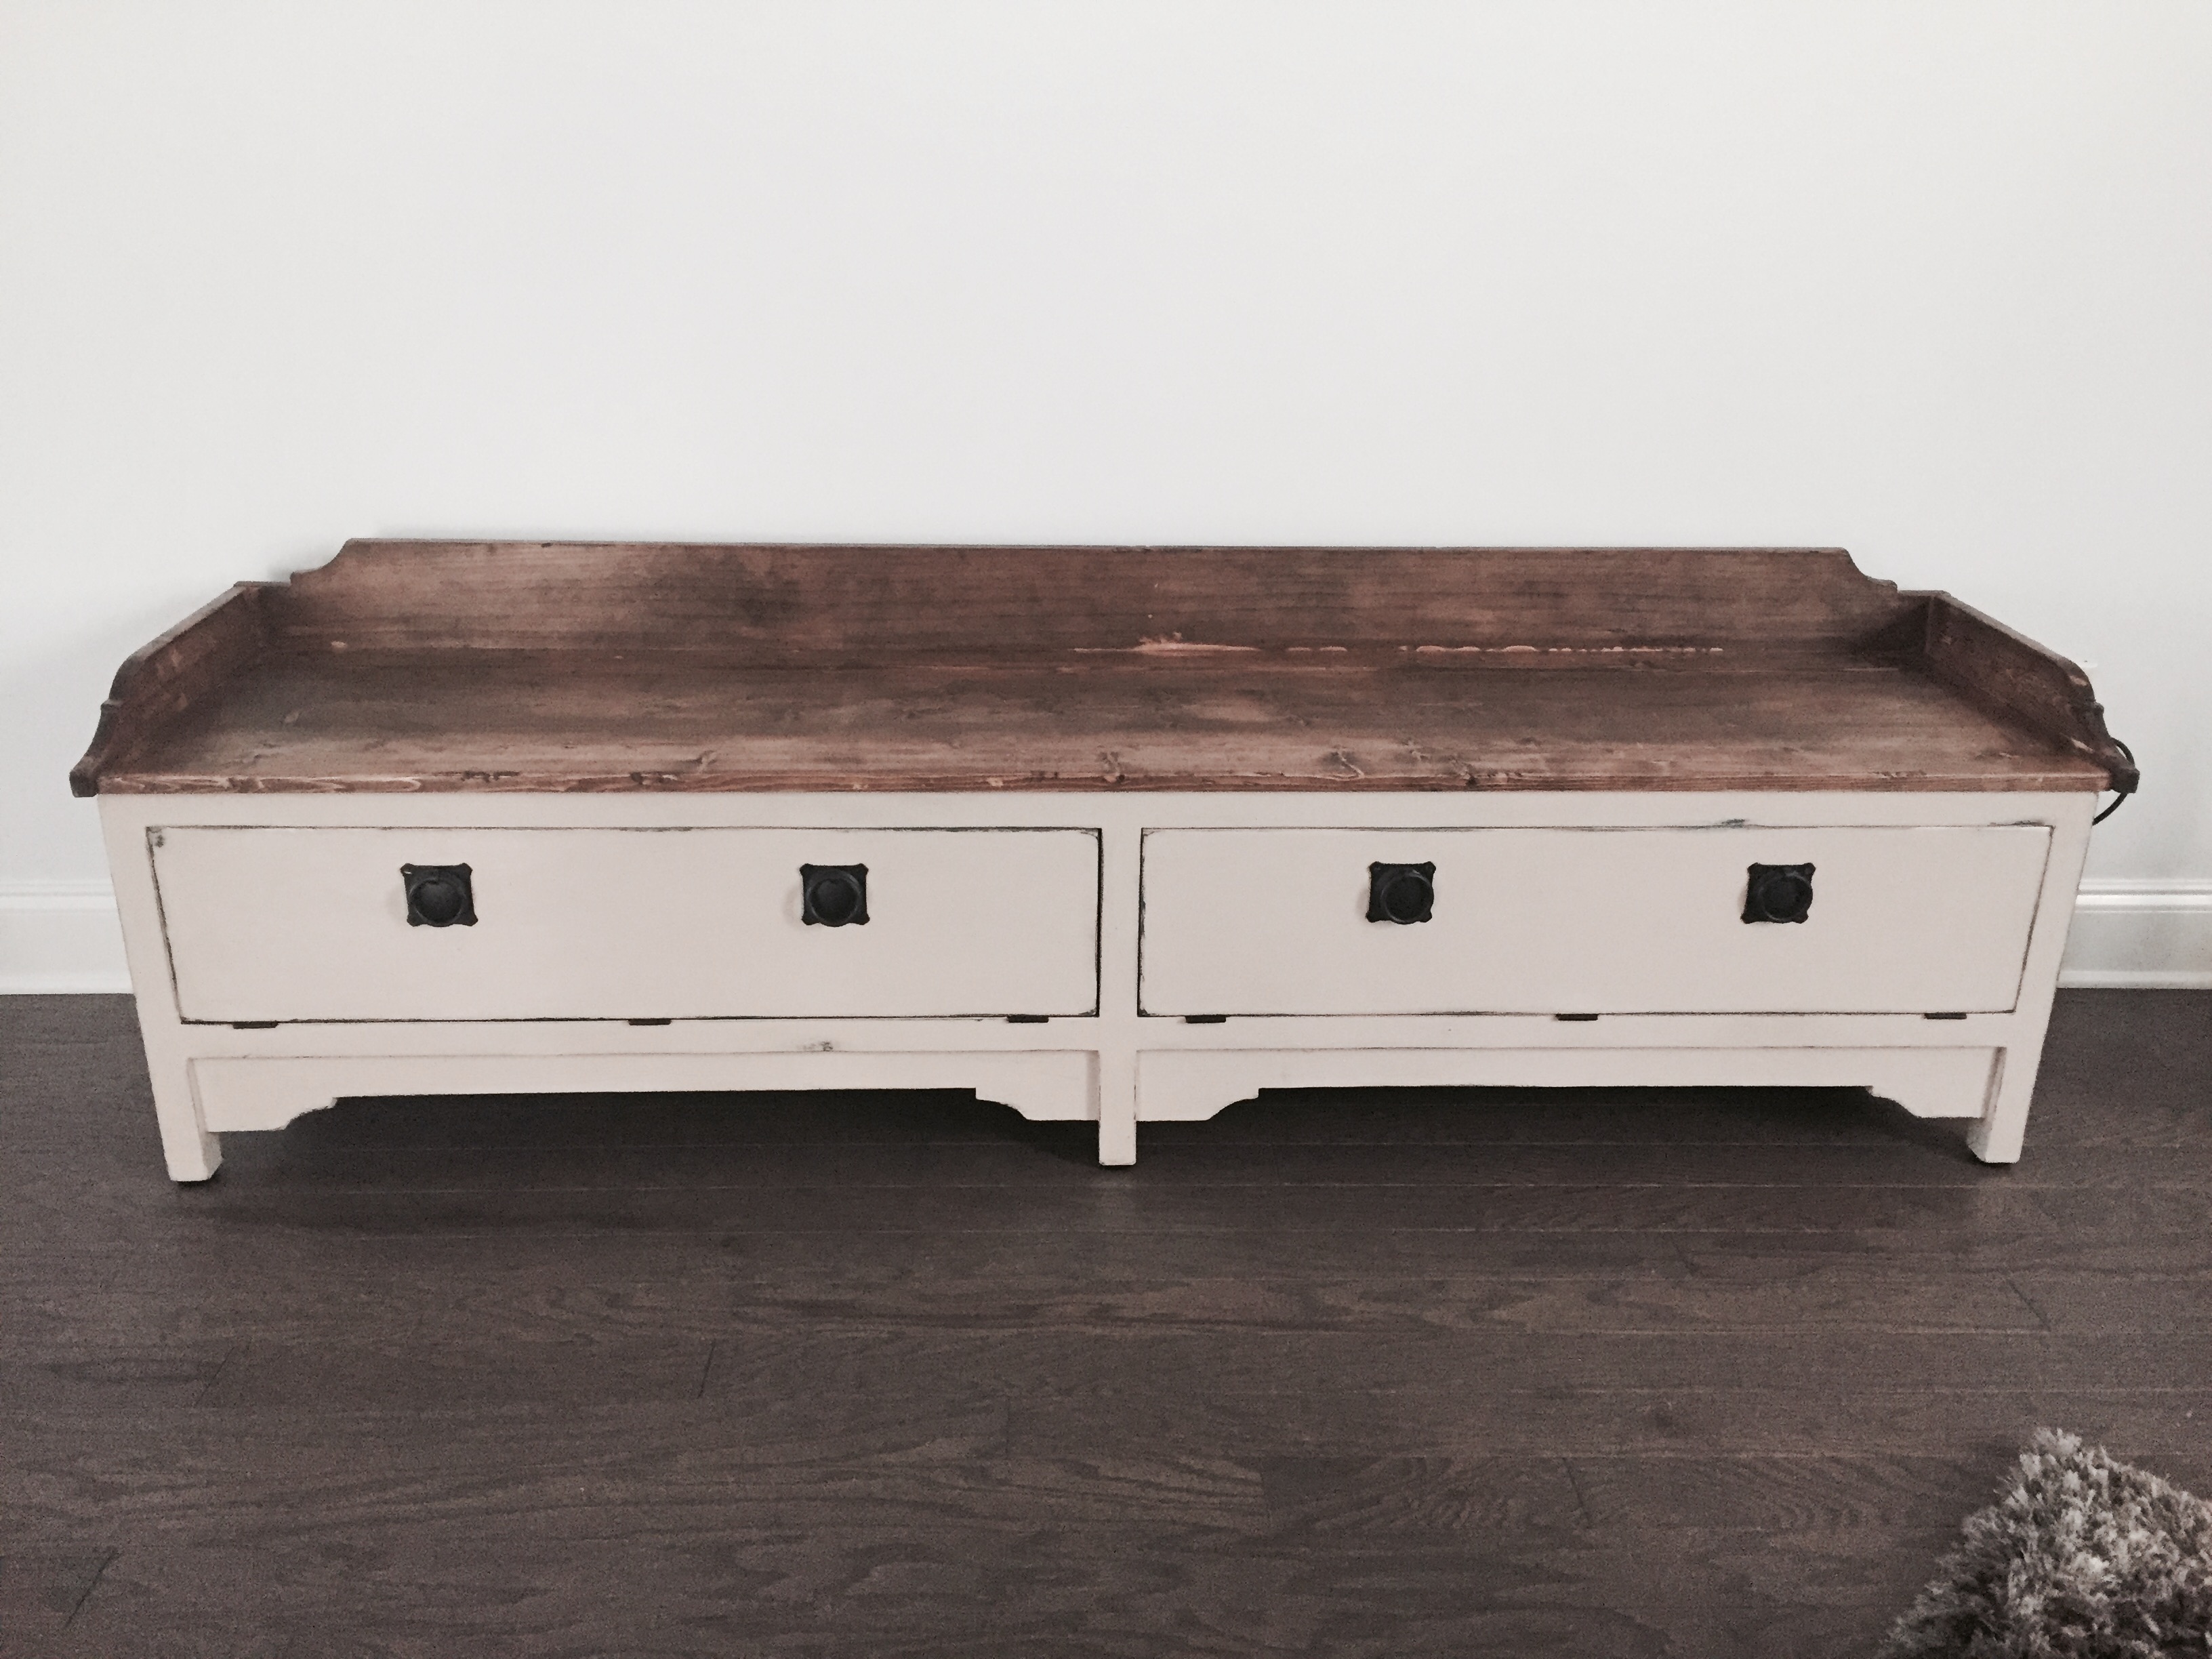
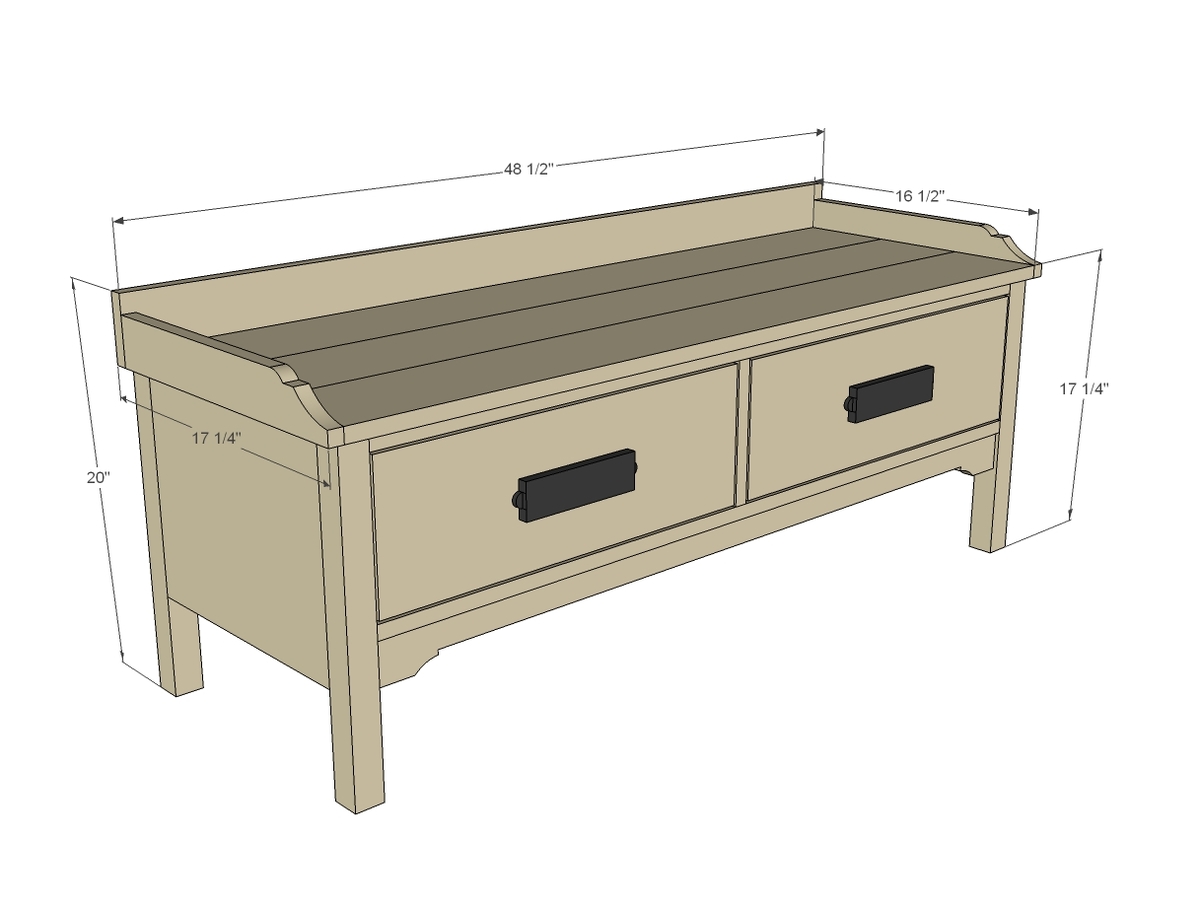
This is a great project and fairly easy to modify for different sizes. We love this extra wide bench, with the center leg for added support.
Pin For Later!
Preparation
- 1 - 2x2 @ 6 feet long
- 1 - 1x12 @ 6 feet long
- 1 - 1x2 @ 6 feet long
- 2 - 1x3 @ 10 feet long
- 3 - 1x6 @ 8 feet long
- 1 - 1x4 @ 6 feet long
- 1 - 1x8 @ 4 feet long
- 2'x4' sheet of 1/4” plywood for drawer bottoms
- 2 sets of 15” drawer slides (euro bottom corner mounts) - can be 14" drawer slides
- 2 knobs or handles
FRAME
- 4 - 2x2 @ 16-1/2” (legs)
- 2 - 1x12 @ 13-3/4” (sides)
- 1 - 1x12 @ 44” (back)
- 2 - 1x2 @ 44” (front trim)
- 1 - 1x2 @ 7-1/2” (front center trim)
- 1 - 1x3 @ 44” (front base trim)
- 1 - 1x3 @ 14 1/2” (center drawer cleat)
- 2 - 1x3 @ 13 3/4” (side drawer cleats)
DRAWER
- 4 - 1x6 @ 15”
- 4 - 1x6 @ 19-1/8” (cut to fit!)
- 2 - 1/4” plywood @ 20 5/8” x 15” (cut to fit!)
- 2 - 1x8 @ 21 3/8” (cut to fit!)
TOP
- 3 - 1x6 @ 47”
- 2 - 1x3 @ 16 1/2”
- 1 - 1x4 @ 48 1/2”


Please read through the entire plan and all comments before beginning this project. It is also advisable to review the Getting Started Section. Take all necessary precautions to build safely and smartly. Work on a clean level surface, free of imperfections or debris. Always use straight boards. Check for square after each step. Always predrill holes before attaching with screws. Use glue with finish nails for a stronger hold. Wipe excess glue off bare wood for stained projects, as dried glue will not take stain. Be safe, have fun, and ask for help if you need it. Good luck!
Instructions
Step 1
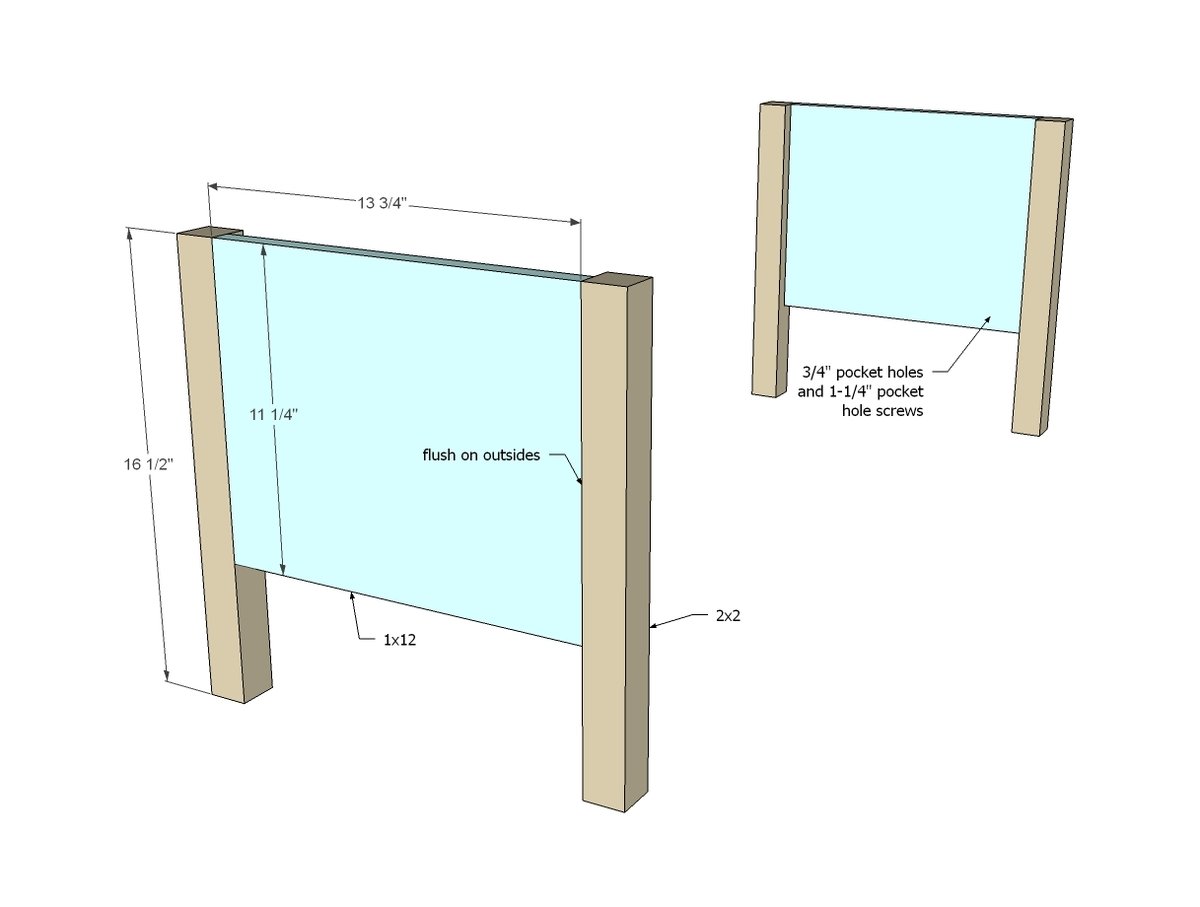
Start by building the two sides. Note that the 1x12 boards are expected to be 11-1/4" wide - measure yours and confirm - if not, adjust plans as necessary. NOTE: You may wish to drill 3/4" pocket holes facing upward on the 1x12s for attaching the bench top in later steps.
Step 2

Add the back to the bench, same as you did the side panels. NOTE: You may wish to drill 3/4" pocket holes facing upward on the 1x12s for attaching the bench top in later steps.
Step 3
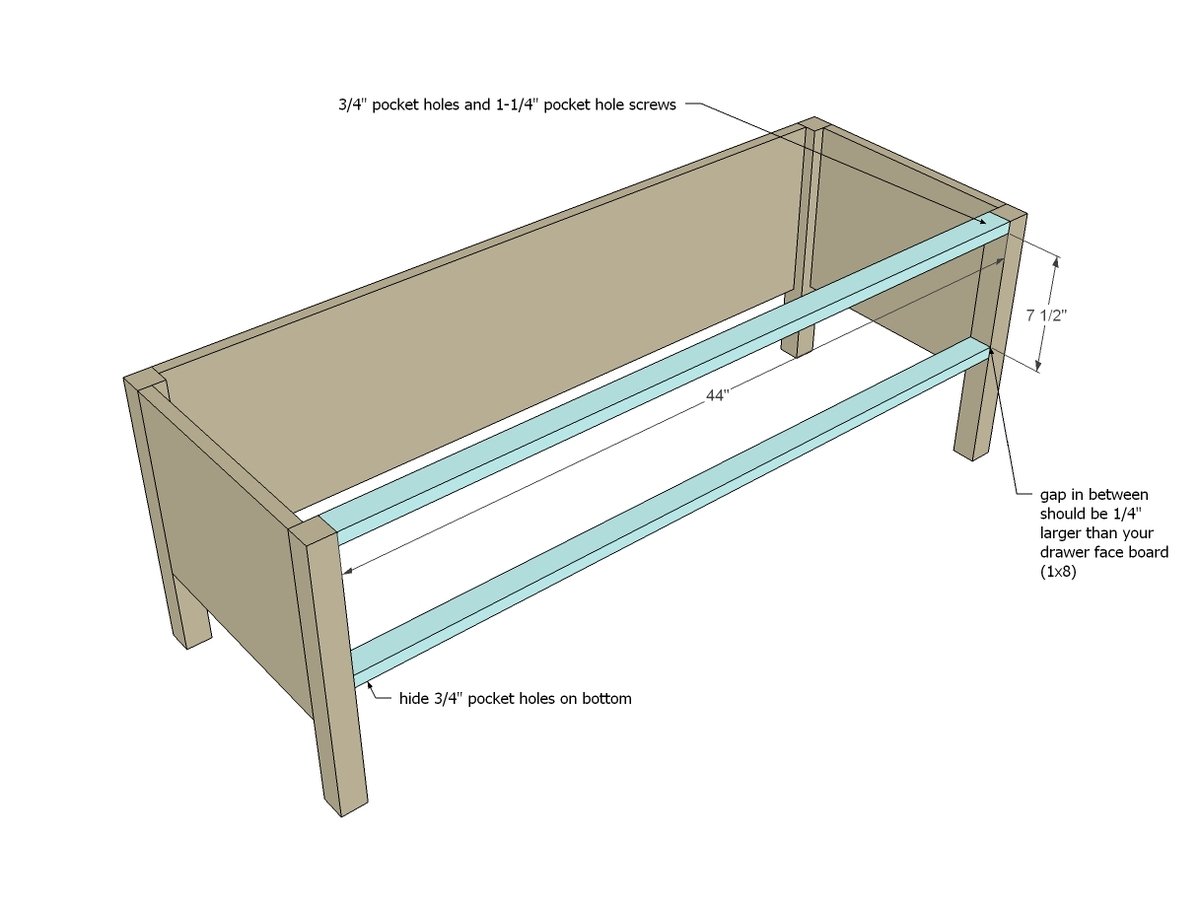
Attach the two 1x2 front trim pieces to the bench legs. Note that the drawer faces (1x8s) are expected to be 7-1/4" wide - measure and confirm - the spacing between these 1x2s should be 1/4" more in with than your 1x8 drawer faces.
Step 4

Add the center divider between the drawers.
Step 5
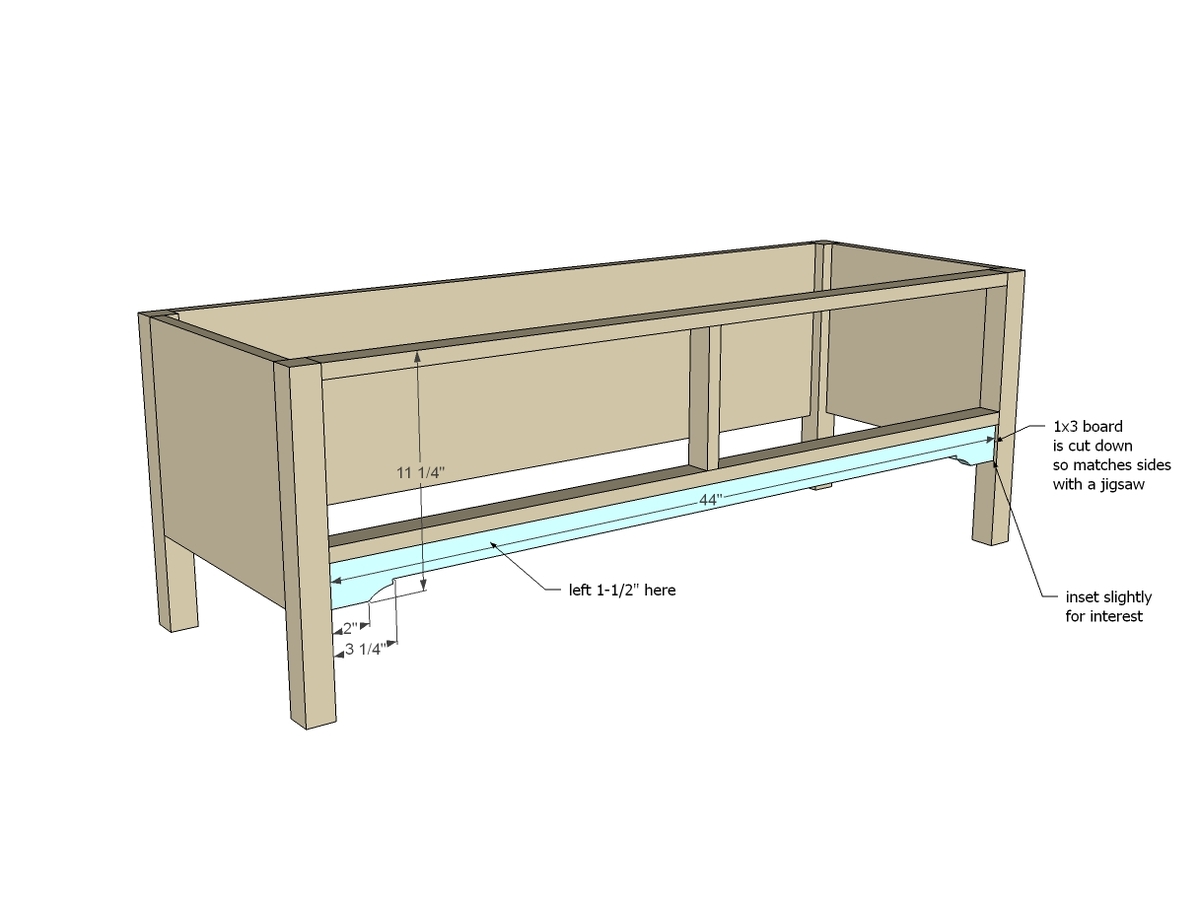
Attach the bottom trim piece with glue and nails.
Step 6

These cleats are for attaching drawer slides. Use pocket holes for attaching center cleat and 1-1/4" finish nails for attaching side cleats. NOTE: you can also add a 5th leg to the center under the center cleat if you find it necessary for heavier loads.
Step 7
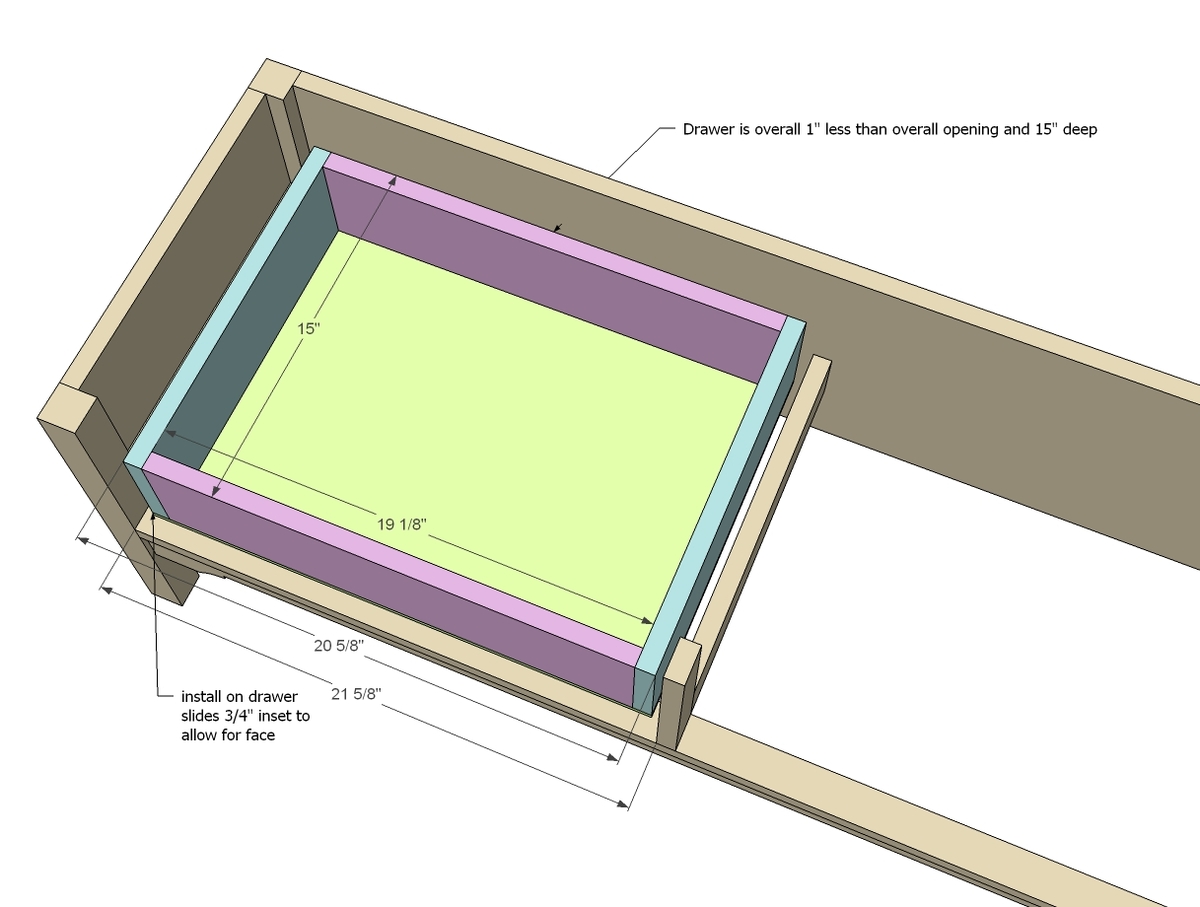
Drawers should always be build to the dimensions of the opening and also the drawer slides you are using. Make sure you install the drawer inset 3/4" to allow for the drawer face (next step).
Step 8

The drawer face can be nailed on from outside or screwed on (1-1/4" fastners) from inside. It may be easier to attach your knob or handle before attaching the face to the drawer. Leave an 1/8" gap around all sides of the drawer face.
Step 9

For the bench top, use 3/4" pocket holes to attach the 1x6s together. Then add the end pieces, and finally the back piece. Attach to top of bench by either using pocket holes drilled facing upward in the 1x12 sides and back, or through the top.
It is always recommended to apply a test coat on a hidden area or scrap piece to ensure color evenness and adhesion. Use primer or wood conditioner as needed.

Comments
Lisa_Ann_B
Fri, 01/10/2014 - 12:47
Is it wrong that I like this
Is it wrong that I like this one better? Awesome work girls!
JoanneS
Fri, 01/10/2014 - 13:14
I like it better too!
I agree! This one is lovely and elegant, and I much prefer the lines and finish on this one. Better than the inspiration piece!
DecorSanity
Fri, 01/10/2014 - 14:47
Gorgeous piece....
Whitney your skills are shining in this bench....look how beautifully those drawers are sitting!
freefromburdens
Fri, 01/10/2014 - 15:25
Just checked out the
Just checked out the original, but I LIKE this one better. Great job...
bhoppy
Tue, 01/21/2014 - 07:01
drawer slides
Do you know where I can find 15' drawer slides?? The guy at Lowe's said they only sell them in even numbers like 14', 16" and 18". I bought the 16" ones but after looking at all the pictures I think I need shorter ones or I'll have to adjust the plan, and that just makes my head hurt thinking about it:-)
In reply to drawer slides by bhoppy
JoanneS
Tue, 01/21/2014 - 11:21
Drawer slides for bench
Hi Bhoppy,
I think you would be fine with the 14" drawer slides. In Whitney's post, it looks like the slides were slightly shorter than the drawer length - I'd go with 14".
:)
Joanne
jeromygrimm
Sat, 01/25/2014 - 14:05
Corrections to shopping list
I'm attempting this beautiful bench myself. I did run into a few issues with the shopping list. You need 8' of 1x2 and 12' of 1x3. Hope this helps anyone in the future.
DrMikeS
Sun, 11/16/2014 - 16:07
Few things to know about this plan...
I'm in the process of building this bench. A couple of issues with these plans you should know. First, the shopping list is wrong, you need to buy two 1x2 6' boards, not one. Second, if you pocket screw the sides to the legs flush, the screws will split through the legs. Recess the side panels by a 1/4 inch and the screws will burrow in properly. Lastly, the plans tell you how to cut the apron details, but not the top rails...it took me a while to figure it out. I'll post pictures when I'm done.
In reply to Few things to know about this plan... by DrMikeS
BrunaRangel
Sun, 11/16/2014 - 17:32
Hi DrMikeS, I am starting
Hi DrMikeS, I am starting this plan, thank you for the tips. Please share some pictures when you can!
jwells1
Tue, 02/07/2017 - 14:39
what are your thoughts?
Could i just buy a 3/4" sheet of ply and get all but my 2x2 cuts from that?
StevenDavisPhoto
Mon, 02/03/2020 - 16:42
So are all these meant to be…
So are all these meant to be done with boards without cutting them down to hard corners? My 2x2's are essentially 1.5x1.5 and have round corners.