

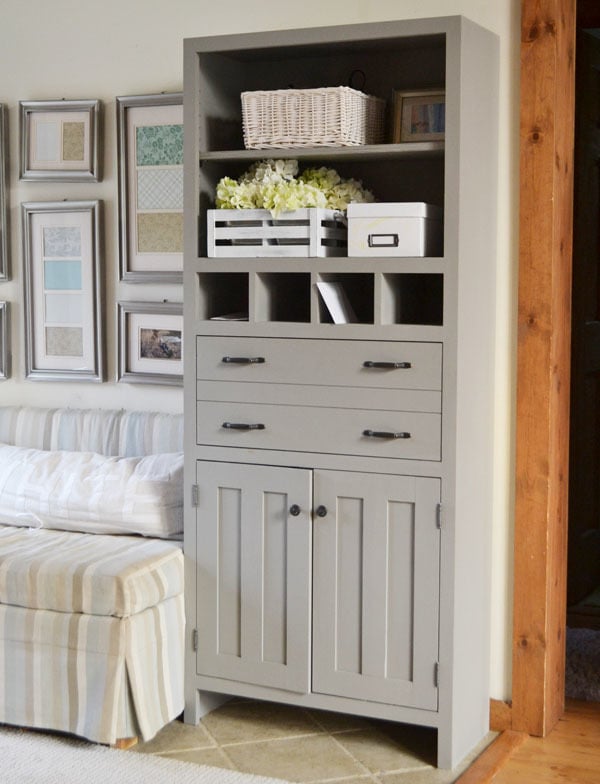
Free plans to build secretary cabinet with mail slots from Ana-White.com


What the heck happens to time when you have kids???
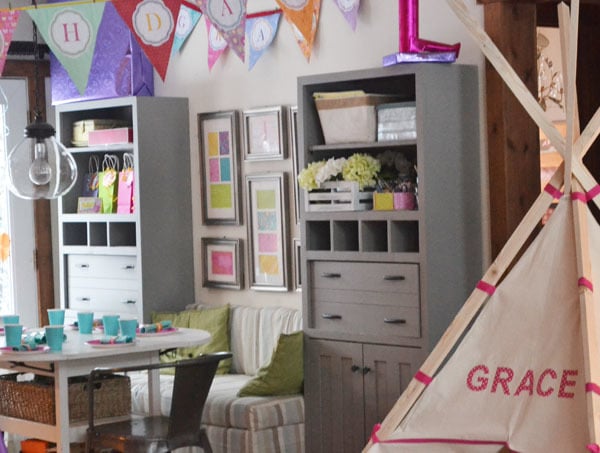
Table plans Upholstered Banquette Plans Teepee plans
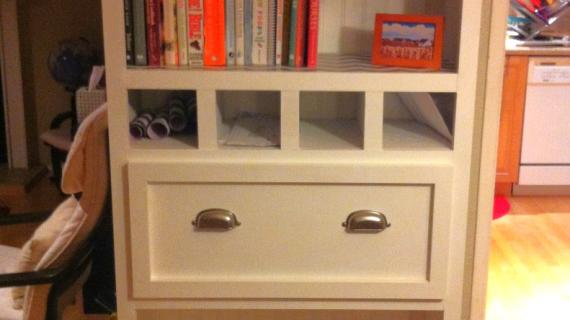
Seems like just yesterday, it was December and you spotted brand new gray cabinets in the background of Grace's 6th Birthday party.
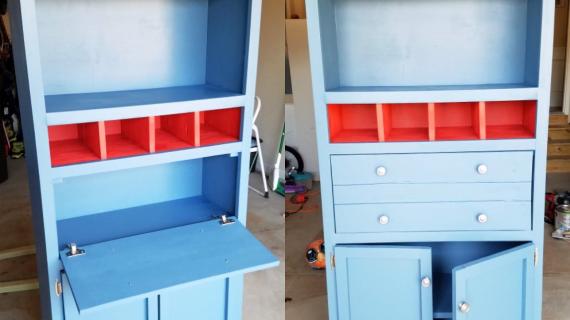
With hinges not attached to doors.

It's pretty embarrassing that it took us several months to screw a few hinges on these cabinets.

And STILL haven't gotten around to adding magnetic clasps.
Tsk. Tsk.
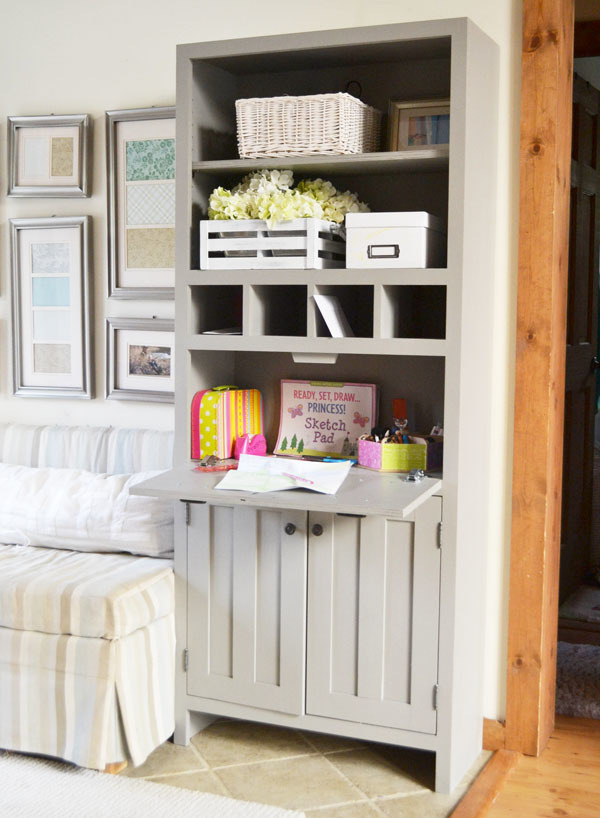
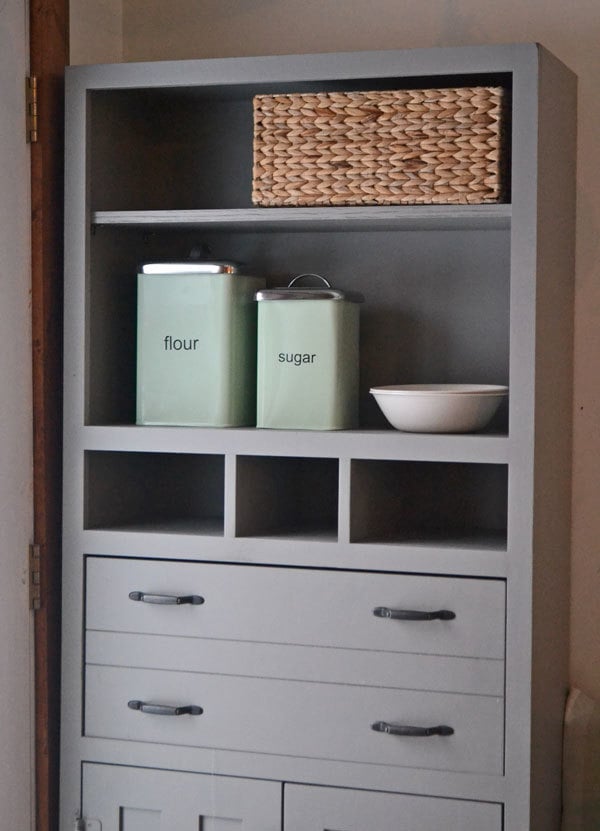
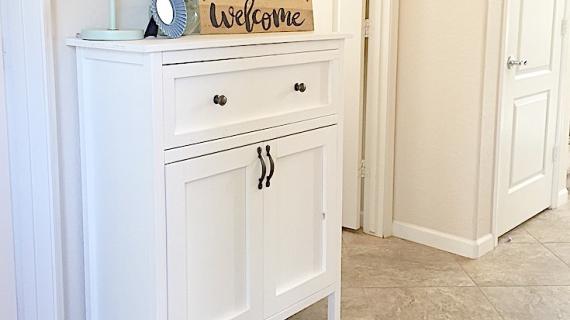
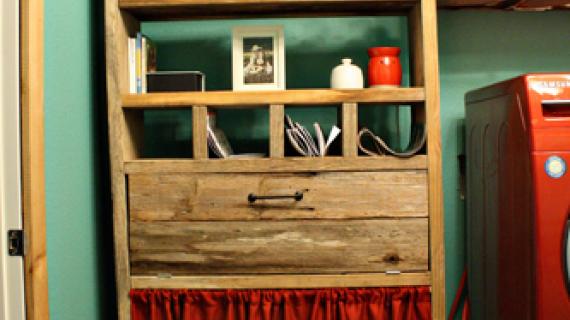
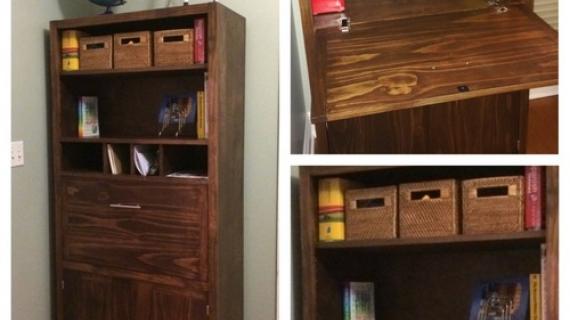
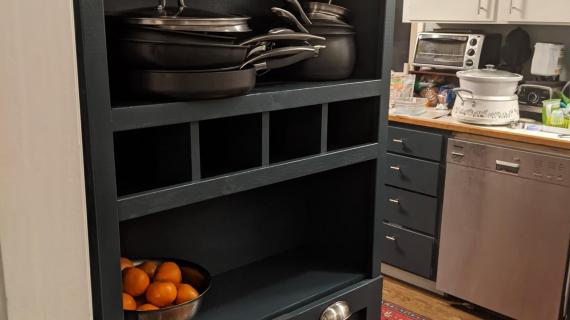
But that doesn't mean we haven't been using the cabinets regardless. Grace has turned one of the flip down secretary desks into her own private little craft station.
We use the other flip down secretary as a food wrapping station. Pretty sweet having a plastic wrapping roll just a flip down away!

We built these guys out of PureBond Formaldehyde Free Plywood, ripped into strips 11 1/4" wide (basically, we made our own 1x12s). Then we attached face frames made of poplar to the fronts.
Sad sad sad that the room called for paint ....

But we do love the gray!
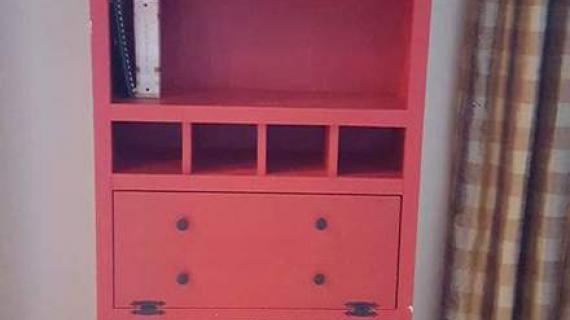
You can make these cabinets too - enjoy the plans following!
XO Ana
PS - Thank you for being so patient with us on this one!
Preparation
5 - 1x12 @ 8 feet long OR 1 1/4 sheets of 3/4" plywood cut into strips 11 1/4" wide (referred to as 1x12s in this plan)
1 - sheet 1/4" plywood (we used Purebond here too)
2 - 1x2 @ 6 feet long
4 - 1x2 @ 8 feet long
1 - 1x2 @ 4 feet long
12 feet of 1x3s minimum for doors
2 sets of inset hinges for face framed cabinets:
1 set of euro style inset hinges for flip down secretary (we used these):

We constructed the box and face frame with 1 1/4" pocket hole screws, and also attached the face frame and back with 1 1/4" finish nails and wood glue.
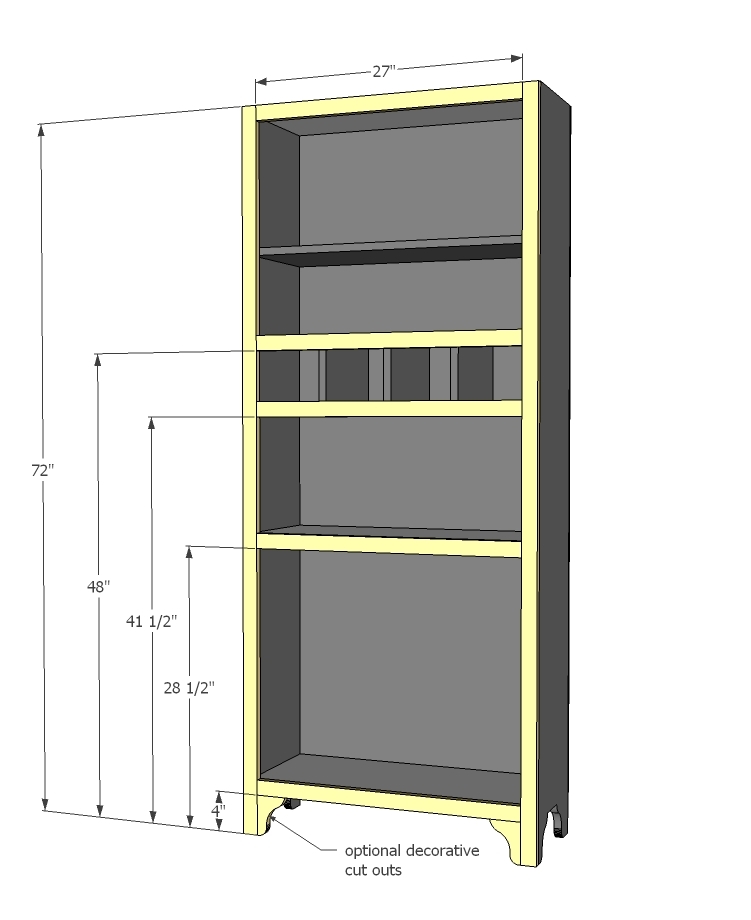
BOX
3 - 1x12 @ 5 3/4" (dividers for mail slots)
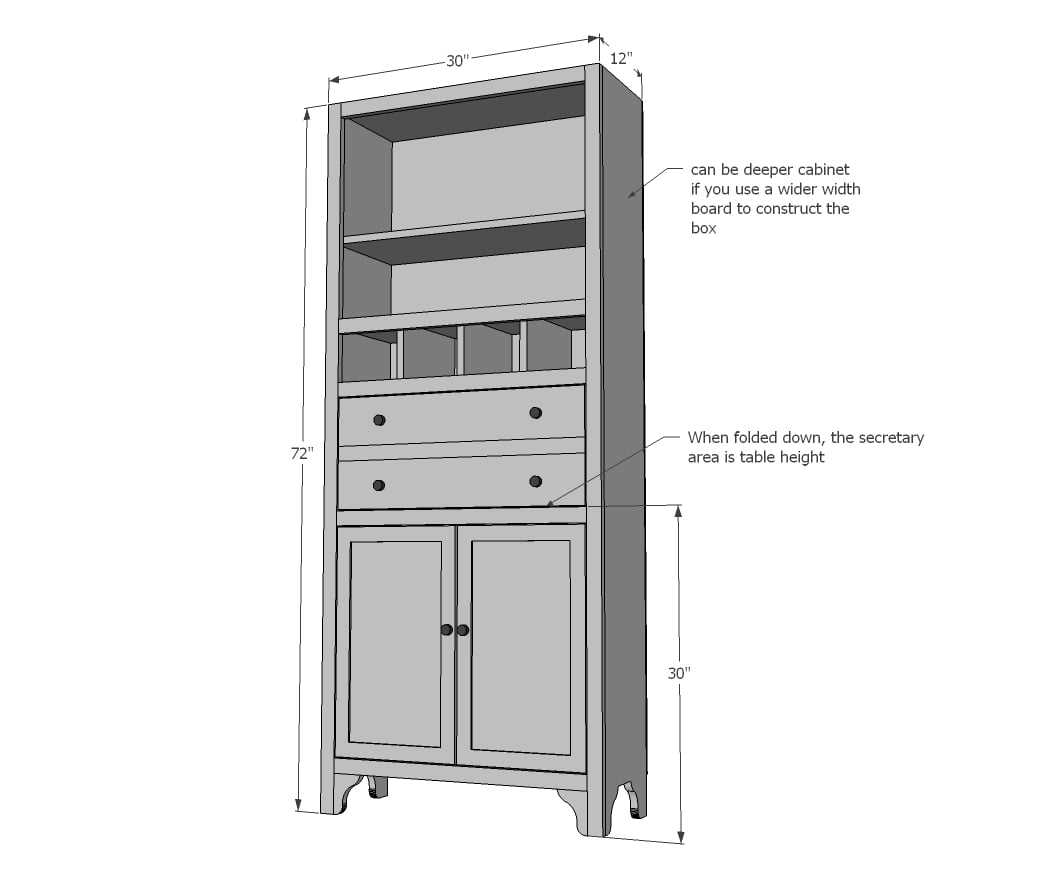
7 - 1x12 @ 28 1/2" (shelves)
2 - 1x12 @ 72" (sides)
1 - 1/4" plywood @ 30" x 68"
FACE FRAME
2 - 1x2 @ 72"
5 - 1x2 @ 48"
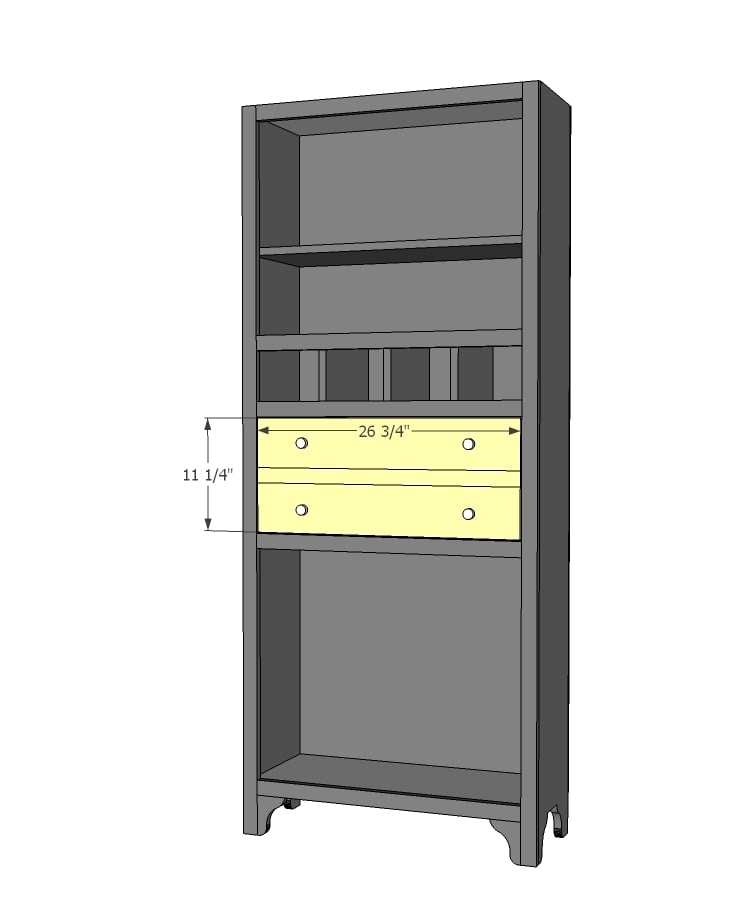
DOOR
1 - 1x12 @ 26 3/4"
Cut bottom doors to fit


Please read through the entire plan and all comments before beginning this project. It is also advisable to review the Getting Started Section. Take all necessary precautions to build safely and smartly. Work on a clean level surface, free of imperfections or debris. Always use straight boards. Check for square after each step. Always predrill holes before attaching with screws. Use glue with finish nails for a stronger hold. Wipe excess glue off bare wood for stained projects, as dried glue will not take stain. Be safe, have fun, and ask for help if you need it. Good luck!
Instructions
Step 1
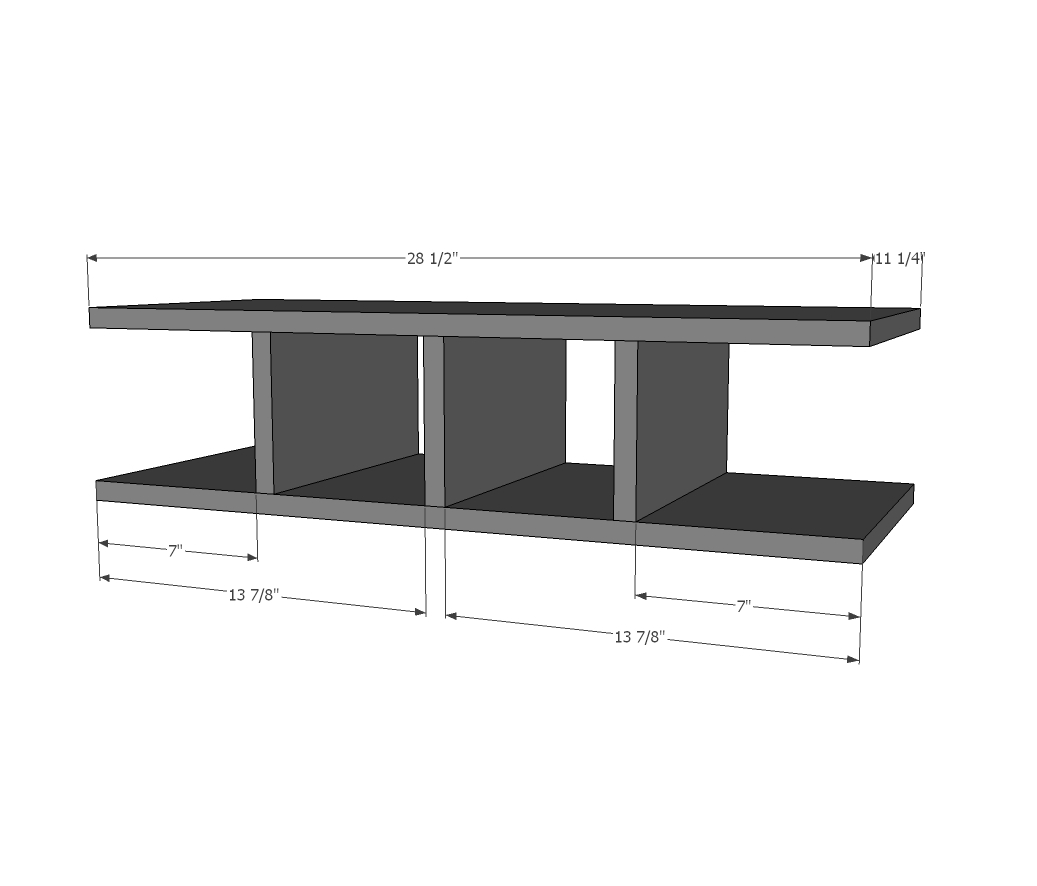
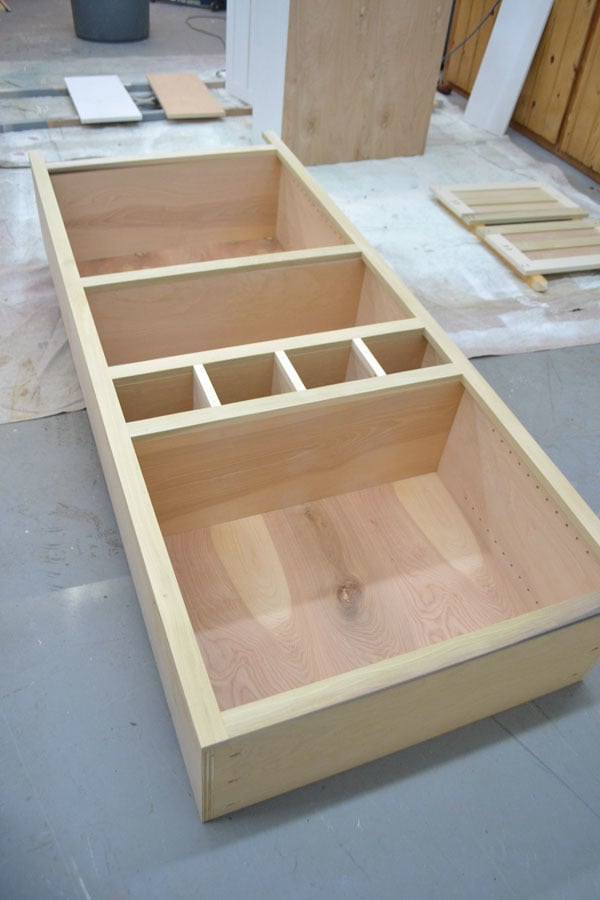
You'll want to build the divider area first because it will be super difficult to reach in later and add them. We nailed the divider boards to the shelves.
NOTE: If you are using pocket holes, drill first on ends of shelves.
Step 2

Then we attached all shelves to the sides.
NOTE: we used a shelf pin jig (see below) to attach the top shelf and shelves (not shown) behind cupboard doors.
Step 3
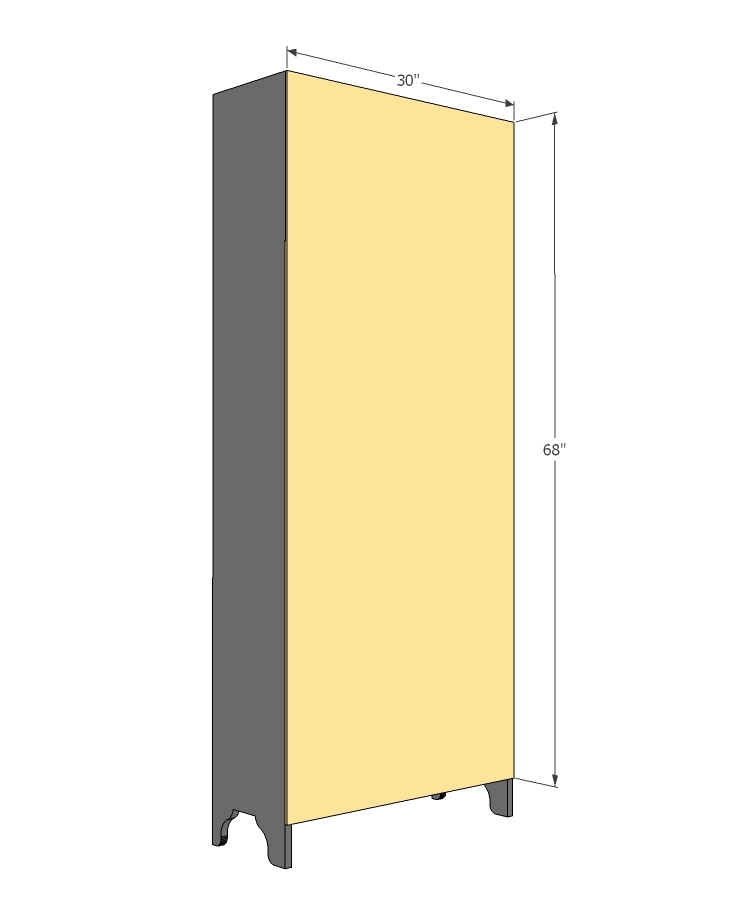
And checked for square and attached back with 1 1/4" finish nails and glue to all fixed shelves.
Step 4
We built the face frame seperately, and then attached the completed face frame to the front of the cabinet.
Step 5
Step 6
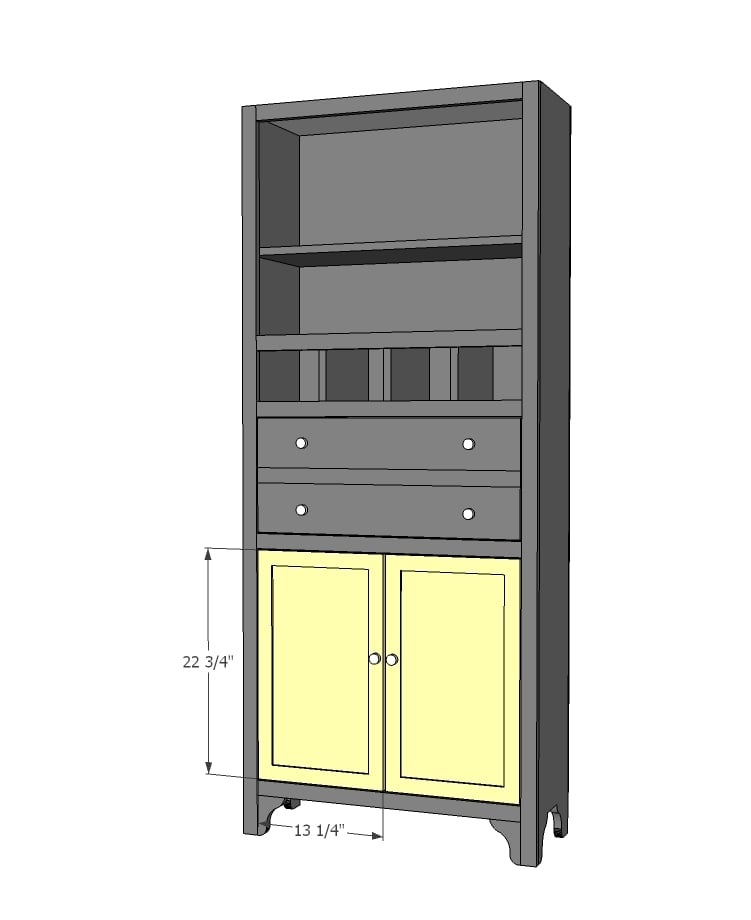
Doors should be cut to fit, leaving about 1/8" (depends on your hinges) around all sides.
Step 7

We actually built our doors with 1x3 for the frame and center, with 1/4" plywood panels leftover from the back as panels.
It is always recommended to apply a test coat on a hidden area or scrap piece to ensure color evenness and adhesion. Use primer or wood conditioner as needed.

Comments
birdsandsoap
Thu, 08/15/2013 - 14:15
These are beautiful. I've
These are beautiful. I've been admiring them for months! Someday, I will make a cabinet door!
kategirl
Thu, 08/15/2013 - 14:51
That looks great!!! Now I'm
That looks great!!! Now I'm kind of sad that I recently bought an Ikea secretary for cheap off of Craigslist, I could have built this! Oh well, there are enough other things on my list to build...
yurra-bazain
Thu, 08/15/2013 - 19:05
Beauteous!
These are lovely AND so incredibly functional. Also, there's something about mail slots that I find gripping. =D
spiceylg
Fri, 08/16/2013 - 05:19
Embarrassed?
Seriously? You guys have so much going on. You are building the Momplex and now very pregnant; totally understandable! Another great build Miss Ana! :)
BLAW124
Fri, 11/08/2013 - 13:08
Face Frame Issues
This is my first build and I'm loving and hating it at the same time. Once you put the face frame together (I used pocket holes on the backs of the 27 inch pieces). How do you attach the face frame to the main piece? I'm trying to avoid using exposed screws?
xkl208
Thu, 07/03/2014 - 09:09
PDF
REALLY LOVE THIS! ;)
Can't open PDF link, suggestions??
Kelly105
Wed, 08/13/2014 - 17:52
Hello Gorgeous!!!
I absolutely love these. Would it be too ambitious as a first build?
mcwb01
Thu, 05/07/2020 - 07:07
Where is the .pdf?
Cant find the .pdf. to download.
martje9
Sun, 01/10/2021 - 03:48
the free PDF will not…
the free PDF will not Download for this project. Is it available somewhere to purchase?