


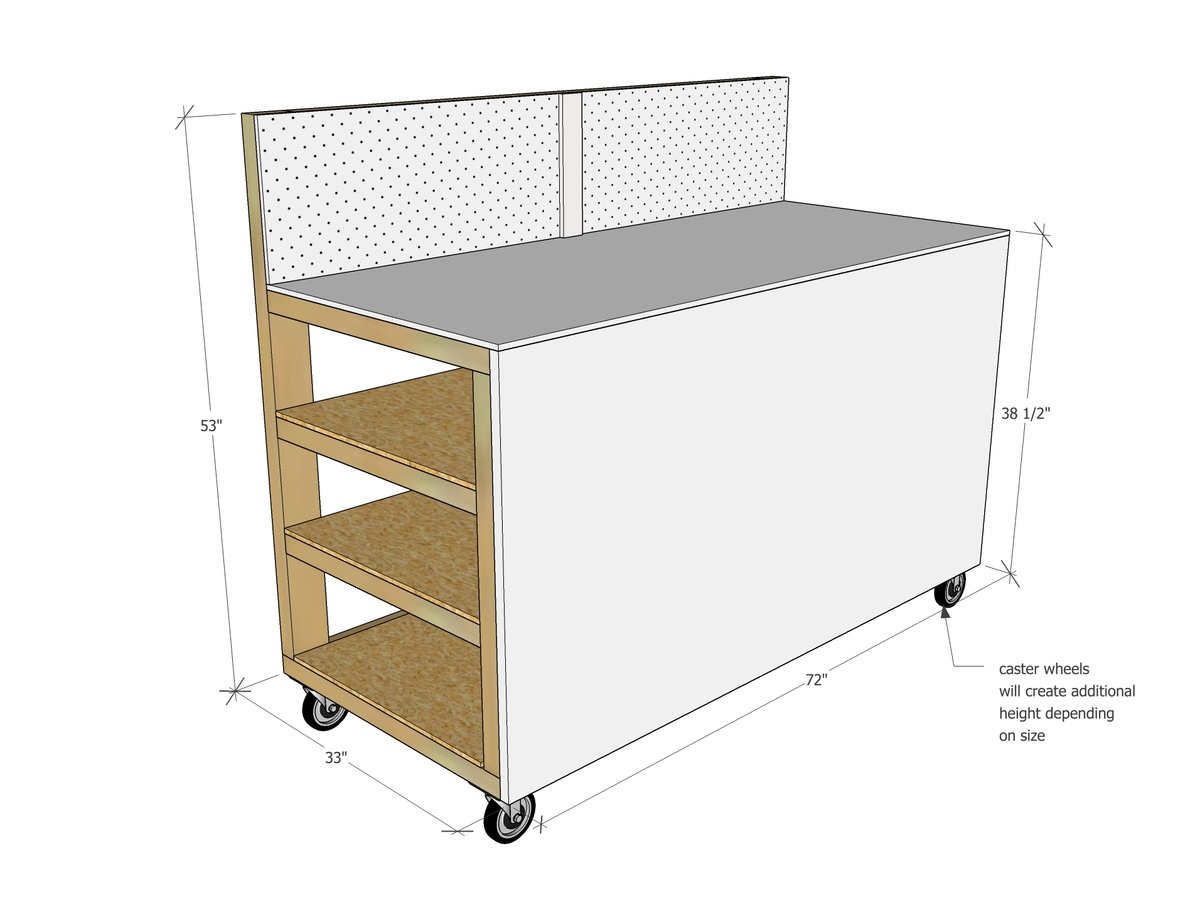
Build your own workbench with wood storage! This free plan features side storage for wood, to keep your space looking tidy. The top is great for bench tools or working. With an added back, this is a great addition to any workshop.
Free step by step plans with diagrams, shopping and cut list from Ana-White.com
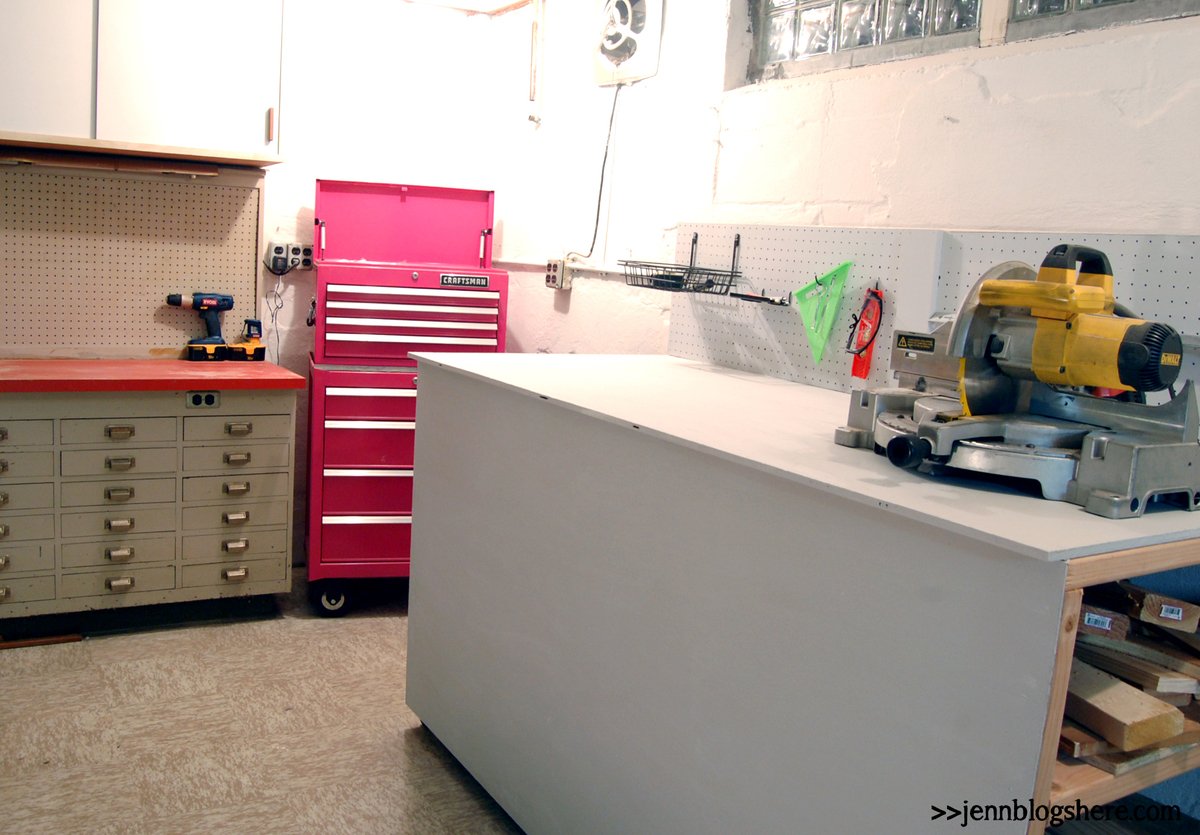
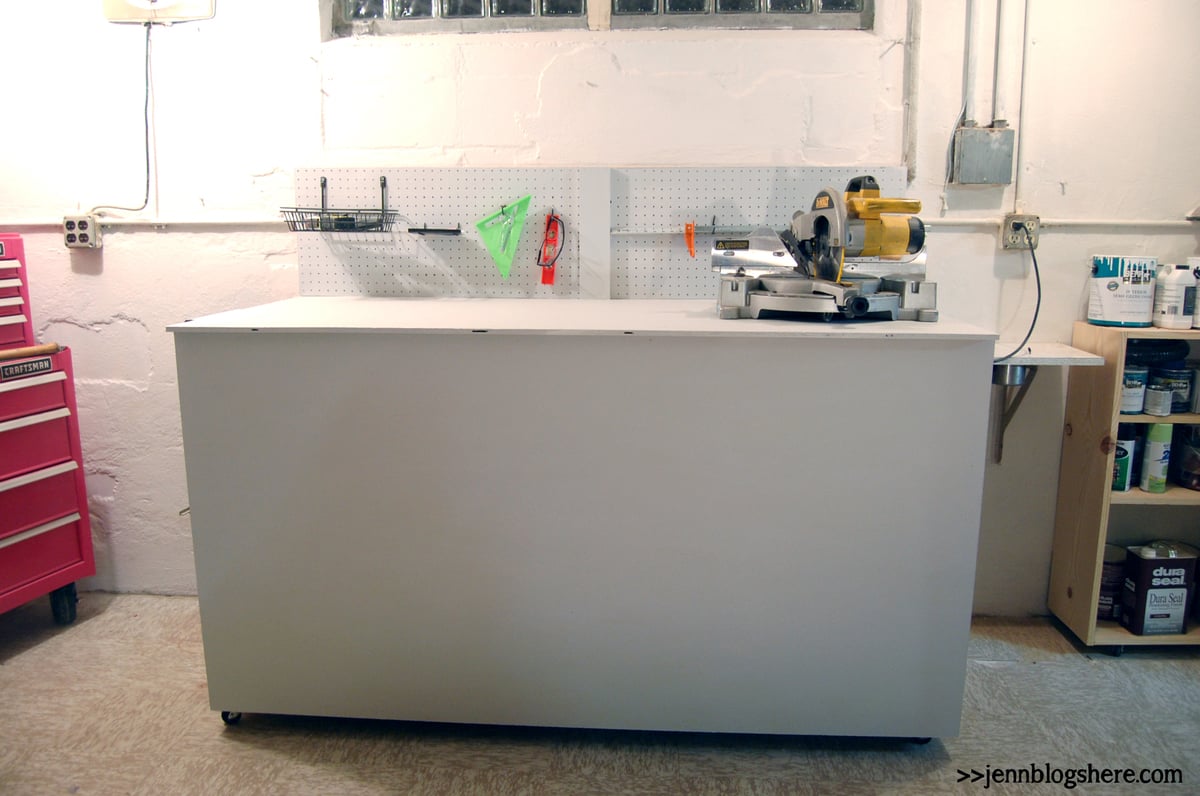
Built by Jenn, from Rock, Paper, Scissors, Shoot! (jennblogshere.com

There is an awesome workroom in the basement of my house, which unfortunately had some water damage. After fixing that up, I needed to organize the room a bit more – there’s nothing more frustrating than fixing up a house and constantly loosing tools! I needed a good place to store wood scraps, and house my miter saw – which I use SO often. This solution solved both problems while allowing me to store commonly-used items to be readily available!
Preparation
- 8 - 2x4 @ 8 feet long
- 2 - sheets of 1/2" plywood (can also use 1x3 boards for shelving)
- 1 - sheet of 1/4" plywood (optional front, can be omitted for open front shelving)
- 1 - 3/4" plywood for tabletop
- 4 caster wheels
- 2 - 2x4 @ 51"
- 2 - 2x4 @ 30"
- 2 - 2x4 @ 32"
- 2 - 2x4 @ 34"
- 4 - 2x4 @ 28"
- 6 - 2x4 @ 64"
- 3 - 1/2" plywood or OSB @ 72" x 28" (shelving, could be 24" wide to conserve plywood or you could also slat shelves with 1x3 or similar boards cut 72" long)
- 1 - 1/4" plywood @ 72"x38" (front - optional, shelving can be exposed as well)
- 1 - 3/4" plywood @ 72" x 31" (tabletop)
- 1 - pegboard or plywood scrap 72" x 14-1/2" (back splash)


Please read through the entire plan and all comments before beginning this project. It is also advisable to review the Getting Started Section. Take all necessary precautions to build safely and smartly. Work on a clean level surface, free of imperfections or debris. Always use straight boards. Check for square after each step. Always predrill holes before attaching with screws. Use glue with finish nails for a stronger hold. Wipe excess glue off bare wood for stained projects, as dried glue will not take stain. Be safe, have fun, and ask for help if you need it. Good luck!
Instructions
Step 1
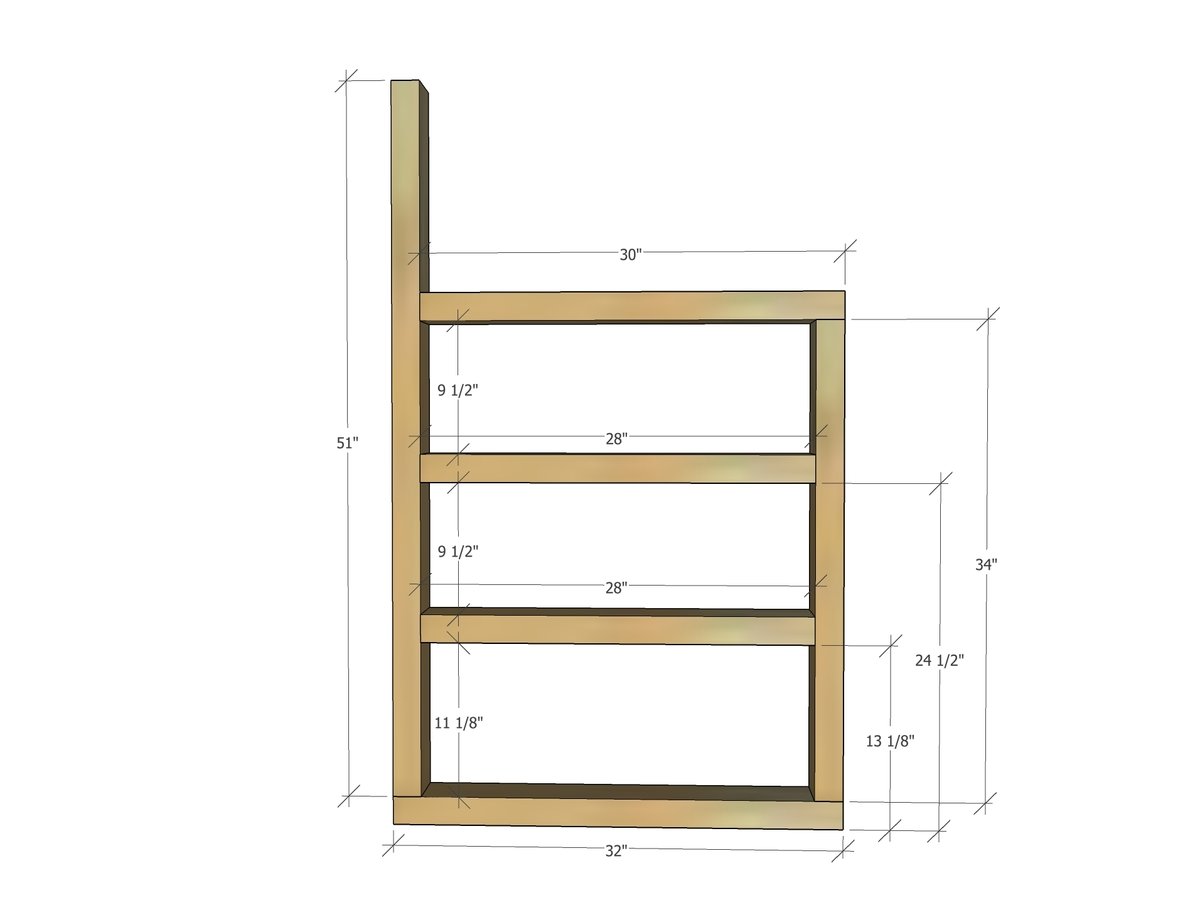
Start by building two of the side pieces. I recommend using your Kreg Jig here to attach these boards together with 1-1/2" pocket holes and 2-1/2" pocket hole screws.
Step 2
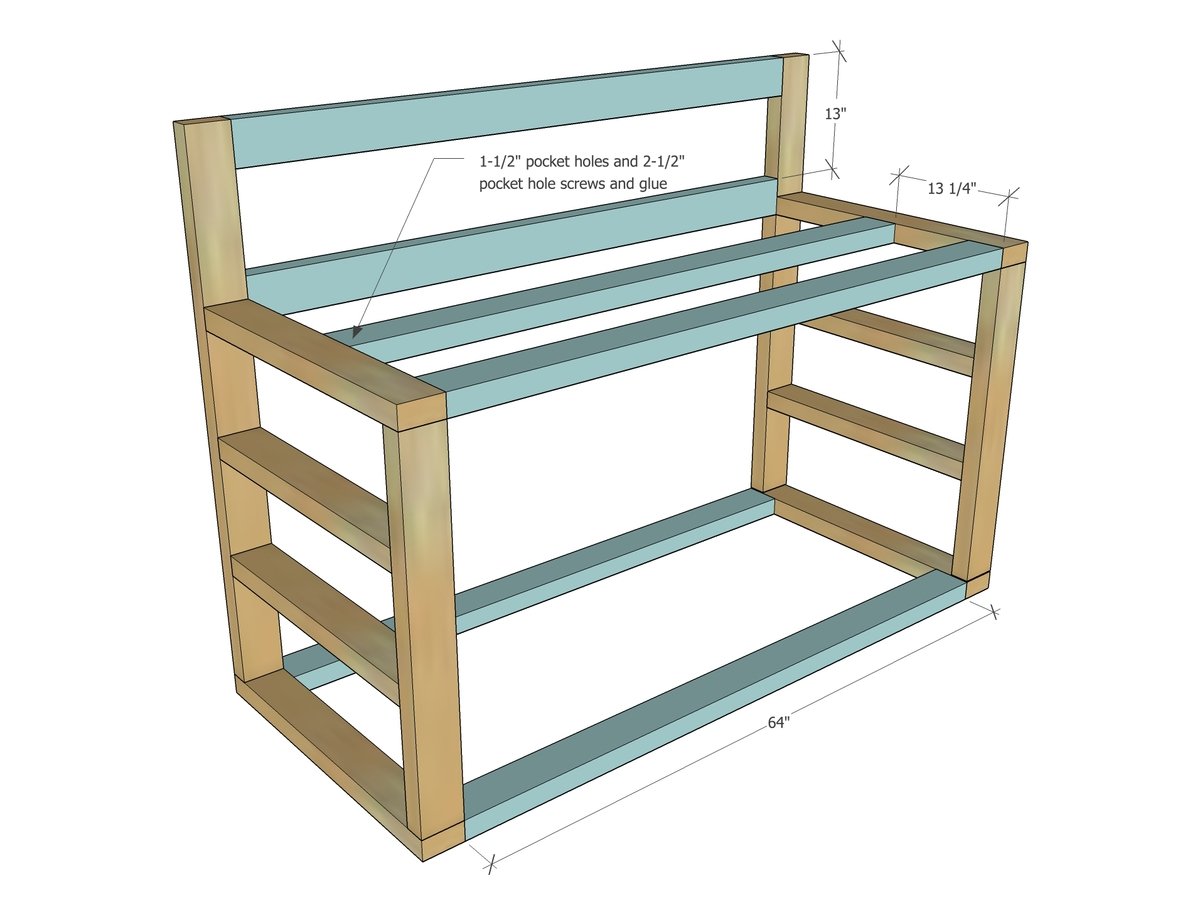
Create the overall frame of the project by adding the longer 2x4s cross wise. Use your pocket hole jig to attach with 1-1/2" setting, 2-1/2" pocket hole screws.
If your shelves will need additional support, add it now. If you will be storing long pieces of lumber, they won't need additional support underneath.
Step 3

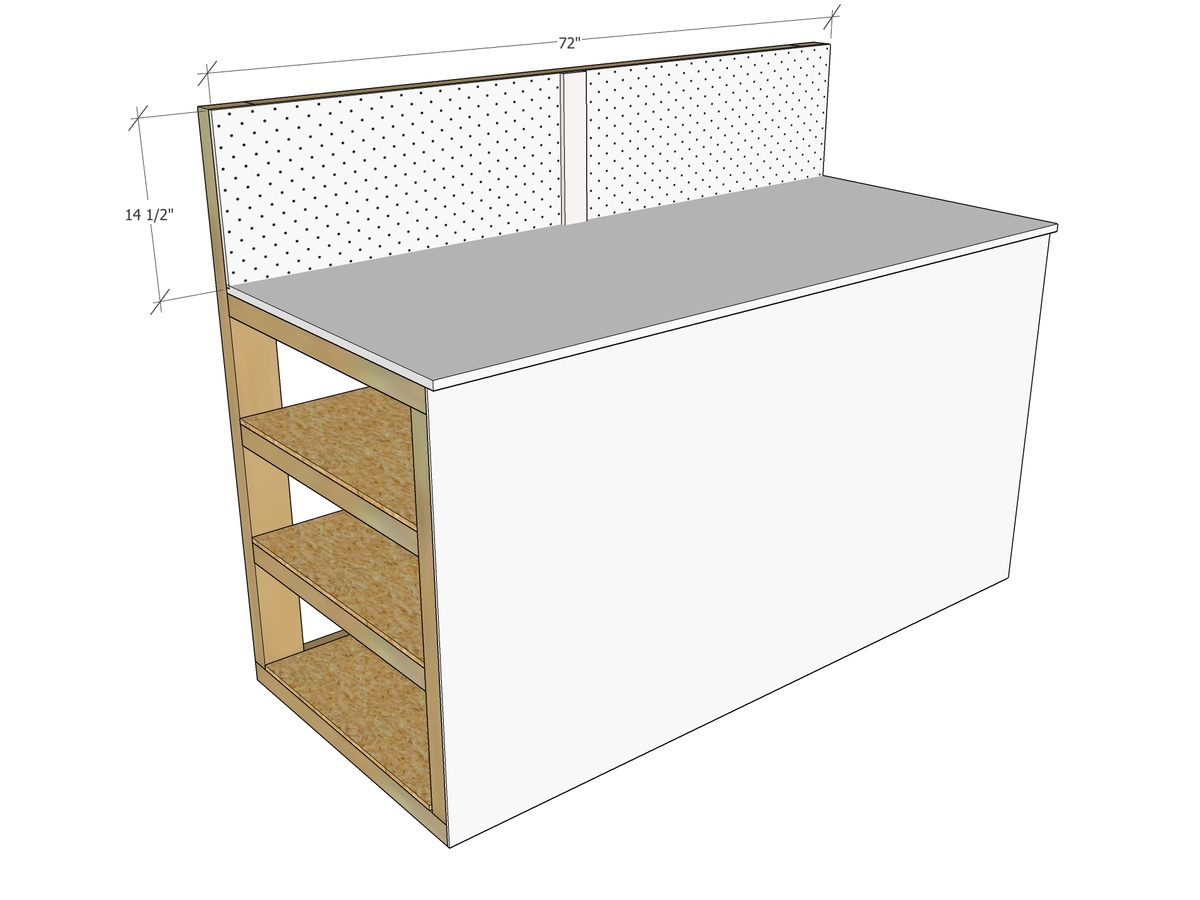
Lay shelving pieces on top and nail down with glue. Use 1-1/4" brad nails.
Step 4

If you are adding 1/4" plywood to front, screw or nail down with glue. If you omit this piece, you may need to add some cross bracing to prevent racking to the front.
Attach countertop with glue and screws (2").
Step 5
Step 6

Attach caster wheels to base of cabinet with screws.
It is always recommended to apply a test coat on a hidden area or scrap piece to ensure color evenness and adhesion. Use primer or wood conditioner as needed.

Comments
Brandon8282
Sun, 11/16/2014 - 21:07
Finally, I'm able to pick the Lumber up off the ground!
I made this Saturday morning, but ONLY the framing and added 3" swivel casters each with a locking brake. I was more interested in storing the lumber. And since I use the lumber so frequently, it's easier for me to be able to see my inventory from a distance. The only problem I came across was the 28" pieces where the shelving would rest should be a tad longer to 29"? Otherwise, everything went smooth! Just less than 2 hours for everything! I DO plan on adding the peg board to the top and a 3/4" plywood piece for the top. Thanks for this tutorial!
Amanda Anne
Thu, 11/20/2014 - 10:24
An inch can make all the difference in the world.
I made the same mistake as Brandon8282, cut the boards at 28" when they should have been 29. Grrr!!! Hoping to finish it up today, but mine will be housing chickens, not lumber =)