


Simple DIY dollhouse wall shelf plans from ANA-WHITE.com
Happy Friday!!!
Of course, that means it's Handmade Holiday time!

This holiday season, my dear friend Jaime from That's My Letter and I are teaming up to bring you a new gift plan every Friday until Christmas! Make sure you check out all of our previous projects here.
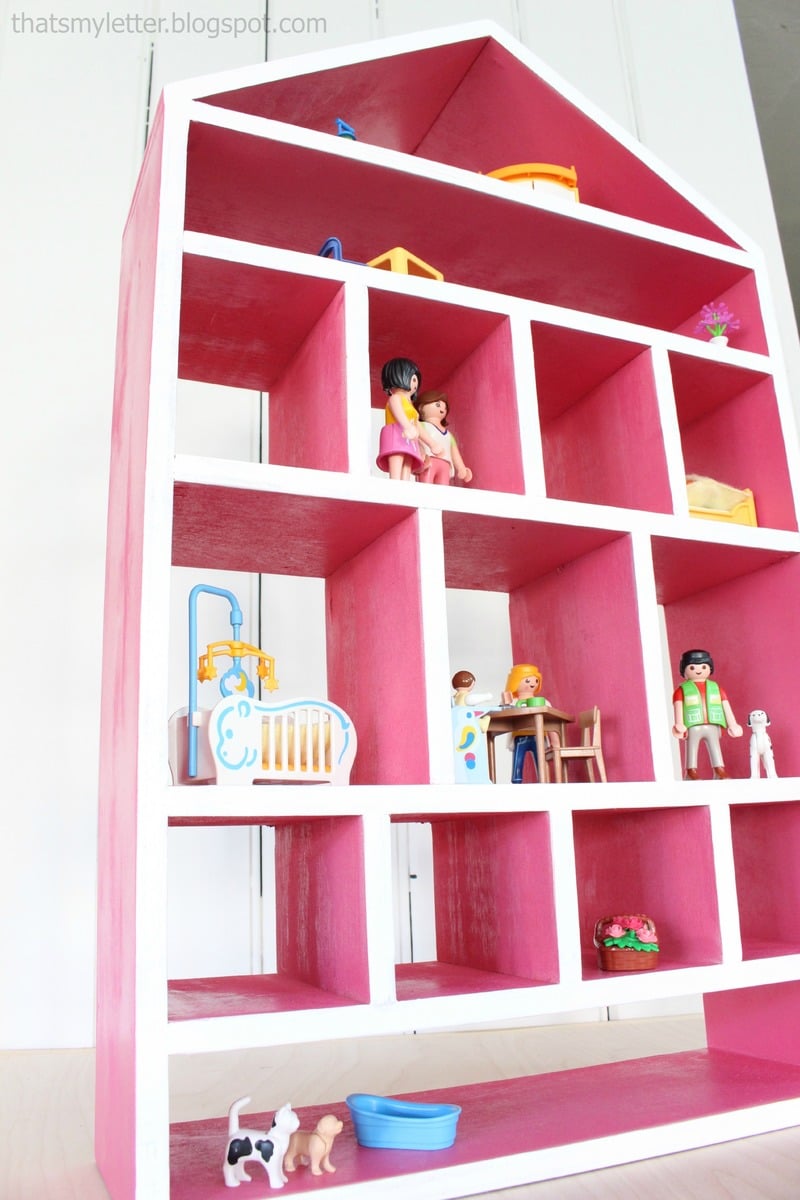
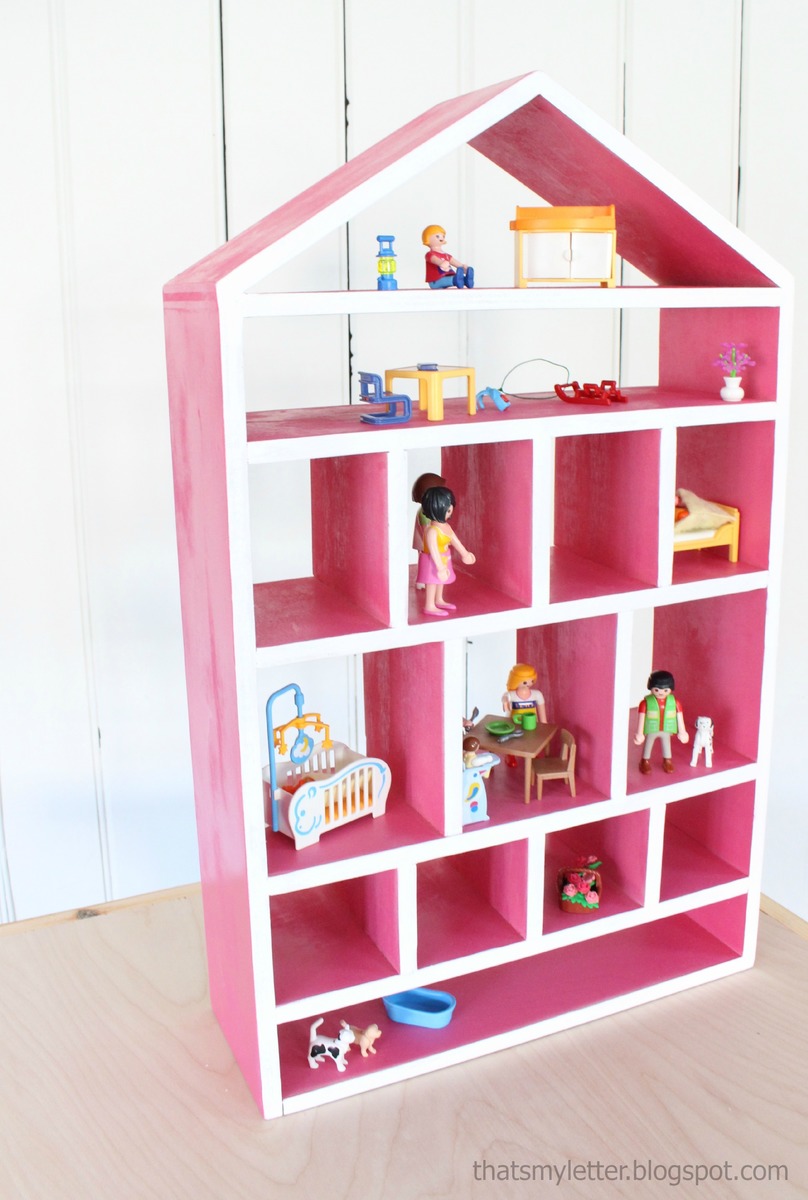
Today we are delighted to share with you plans for a wood dollhouse wall shelf!

Perfect for all those little trinkets and treasures!

Make sure you check out Jaime's building tips and lots more photos here - she's full of bright ideas and clever techniques!
Enjoy the plans following!
XO Ana + Family
Preparation
1 sheet of 1/2" thick plywood, ripped into strips 5" wide x 48" long
Trim screws (about 1-1/2" length) or brad nails or staples (1")
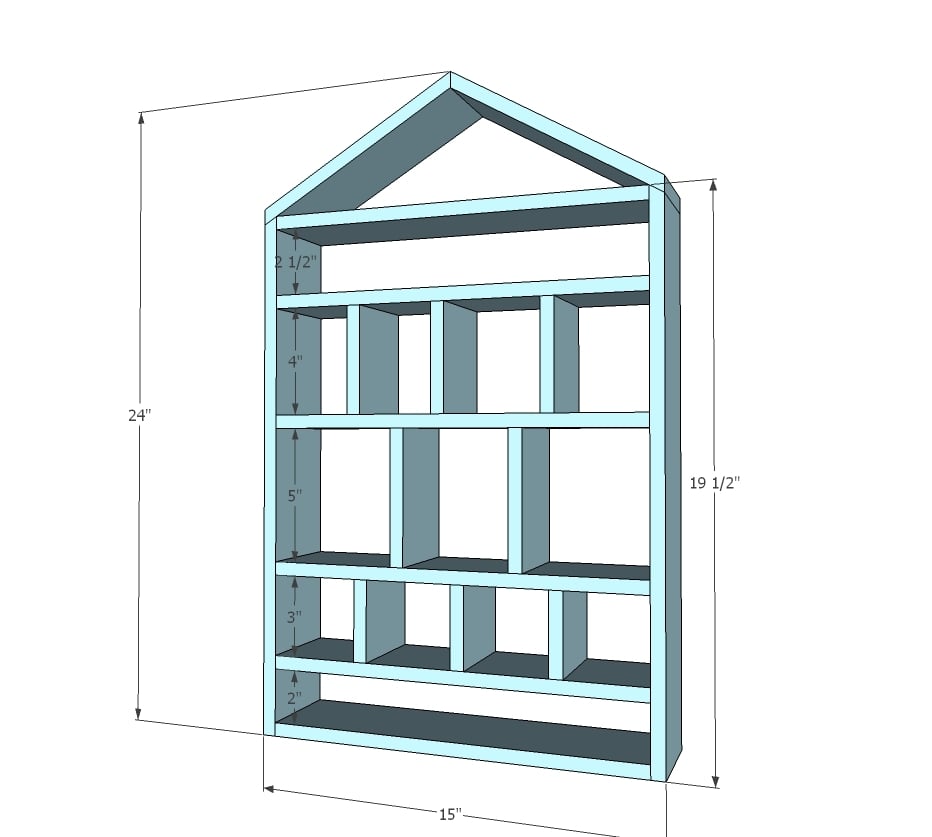
2 - 1/2" plywood @ 5" x 19-1/2" - longest point measurement, one end cut at 30 degrees off square
2 - 1/2" plywood @ 5" x 8-11/16" - long point to short point measurement, both ends cut at 30 degrees off square PARALLEL
6 - 1/2" plywood @ 5" x 14"
3 - 1/2" plywood @ 5" x 3"
2 - 1/2" plywood @ 5" x 5"
3 - 1/2" plywood @ 5" x 4"


Please read through the entire plan and all comments before beginning this project. It is also advisable to review the Getting Started Section. Take all necessary precautions to build safely and smartly. Work on a clean level surface, free of imperfections or debris. Always use straight boards. Check for square after each step. Always predrill holes before attaching with screws. Use glue with finish nails for a stronger hold. Wipe excess glue off bare wood for stained projects, as dried glue will not take stain. Be safe, have fun, and ask for help if you need it. Good luck!
Instructions
Step 1

Build the outer frame of the dollhouse shelf.
Step 2
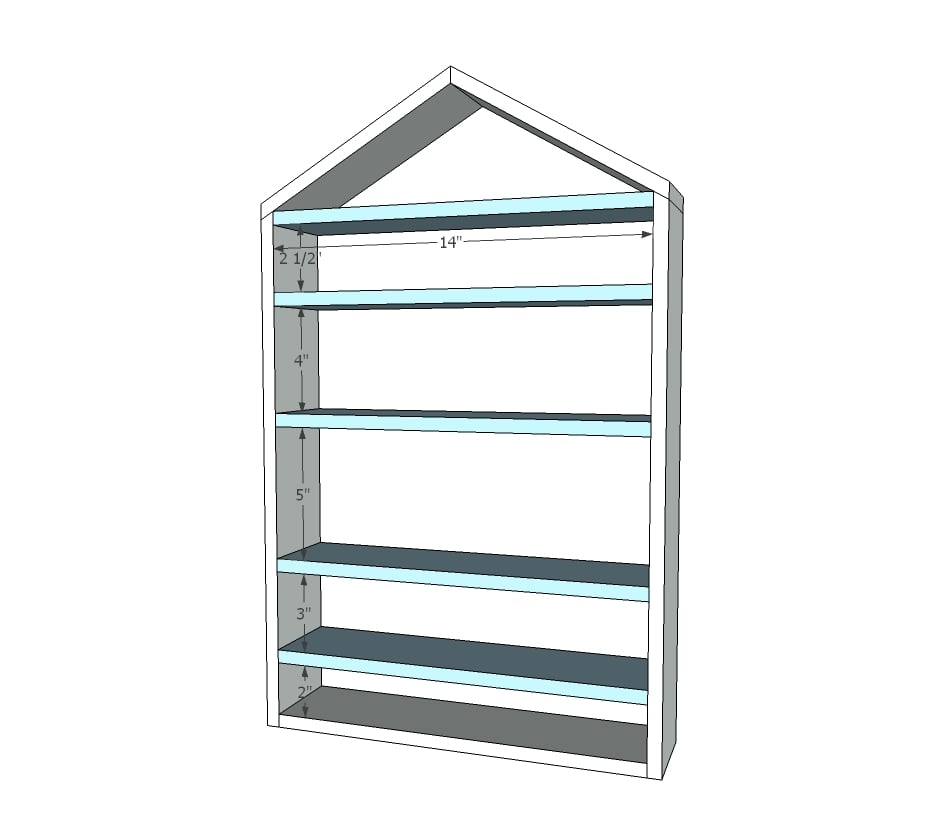
Add shelves. Use the shelf dividers as spacers to help you place the shelves.
NOTE: Jaime actually attached her dividers first - that worked better for her.
Step 3
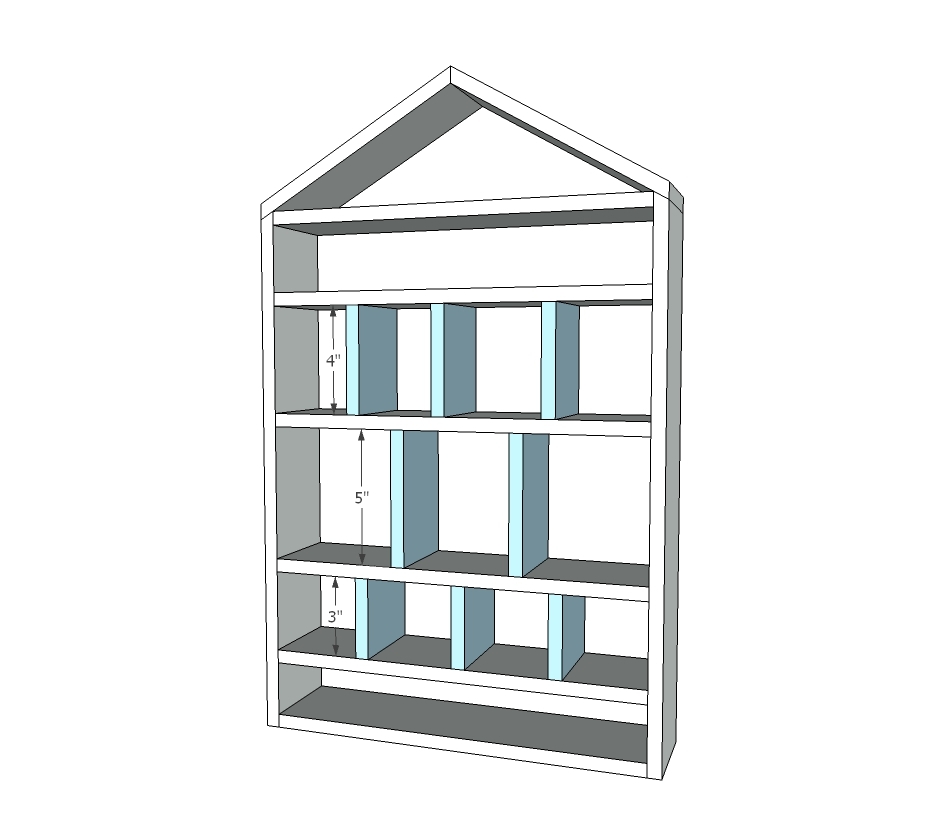
Attach dividers with brad nailer at front and back (you should be able to fit the nose of your nailer in there).
Step 4

Optional - add a back.
It is always recommended to apply a test coat on a hidden area or scrap piece to ensure color evenness and adhesion. Use primer or wood conditioner as needed.

Comments
KaoticKrafter
Fri, 12/05/2014 - 20:26
Great Doll House, Barn or Garage!
I have a kiddo that is obsessed with horses and if I were to paint this to resemble a barn she would be thrilled! It would also look cute painted to resemble a garage to make any car collector happy.
Thanks for the great gift idea, off to check out the rest!
harbermama
Fri, 12/05/2014 - 21:29
Shopping List correction
On the shopping list, it says 1/4" plywood. I believe it is supposed to be 1/2". Just wanted to save someone a trip back to the lumber store! I love this plan; I will be building for my granddaughters!
carongirls
Sat, 12/06/2014 - 06:04
How much?
Your tweet says 1/4 sheet of plywood but the shopping list says a full sheet?
Skiziks
Sat, 12/06/2014 - 07:50
¼ or ½ inch?
Shopping list says 1/4 inc but the cut list says 1/2 inch.
Ana White
Mon, 12/08/2014 - 11:02
So sorry for the shopping
So sorry for the shopping list error, you are correct it should be 1/2" plywood. Thanks for catching, it's much appreciated! Ana
Ana White
Mon, 12/08/2014 - 11:02
So sorry for the shopping
So sorry for the shopping list error, you are correct it should be 1/2" plywood. Thanks for catching, it's much appreciated! Ana