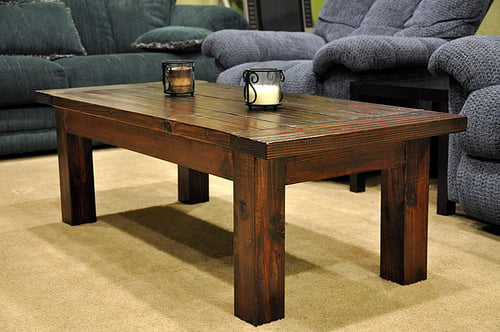
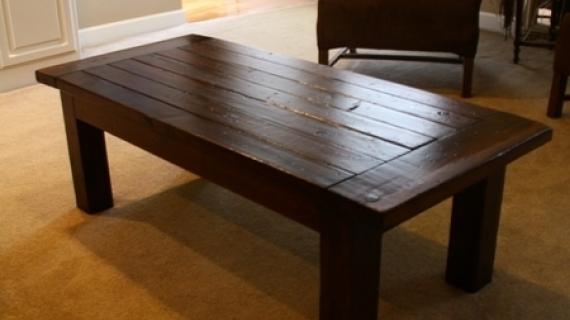
Build your own coffee table - this free plan uses basic tools and simple techniques and framing lumber to create a gorgeous coffee table! With lots of reader submitted photos, cut lists and shopping lists, make this your next project! Free step by step plans from Ana-White.com
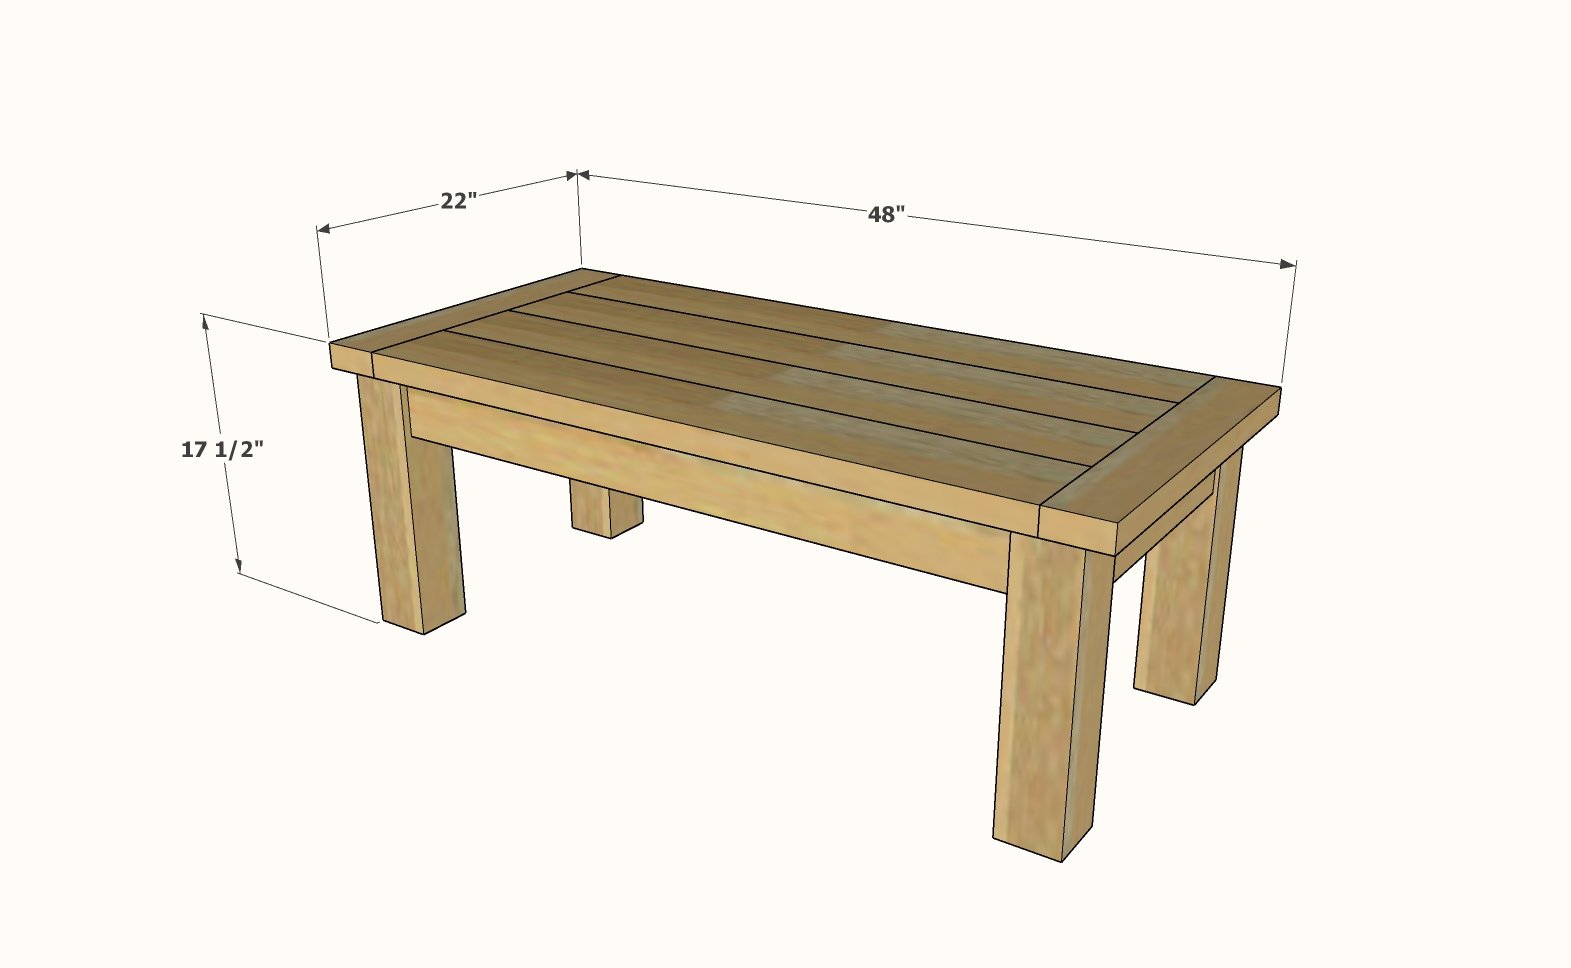
Preparation
- 2 - 2x6 @ 8 feet long
- 1 - 4x4 @ 6 feet long
- 2 - 2x4 @ 8 feet long
- About 75 2-1/2" long self tapping star bit screws
- wood glue
- 4 - 2x6 @ 41" - tabletop Atta
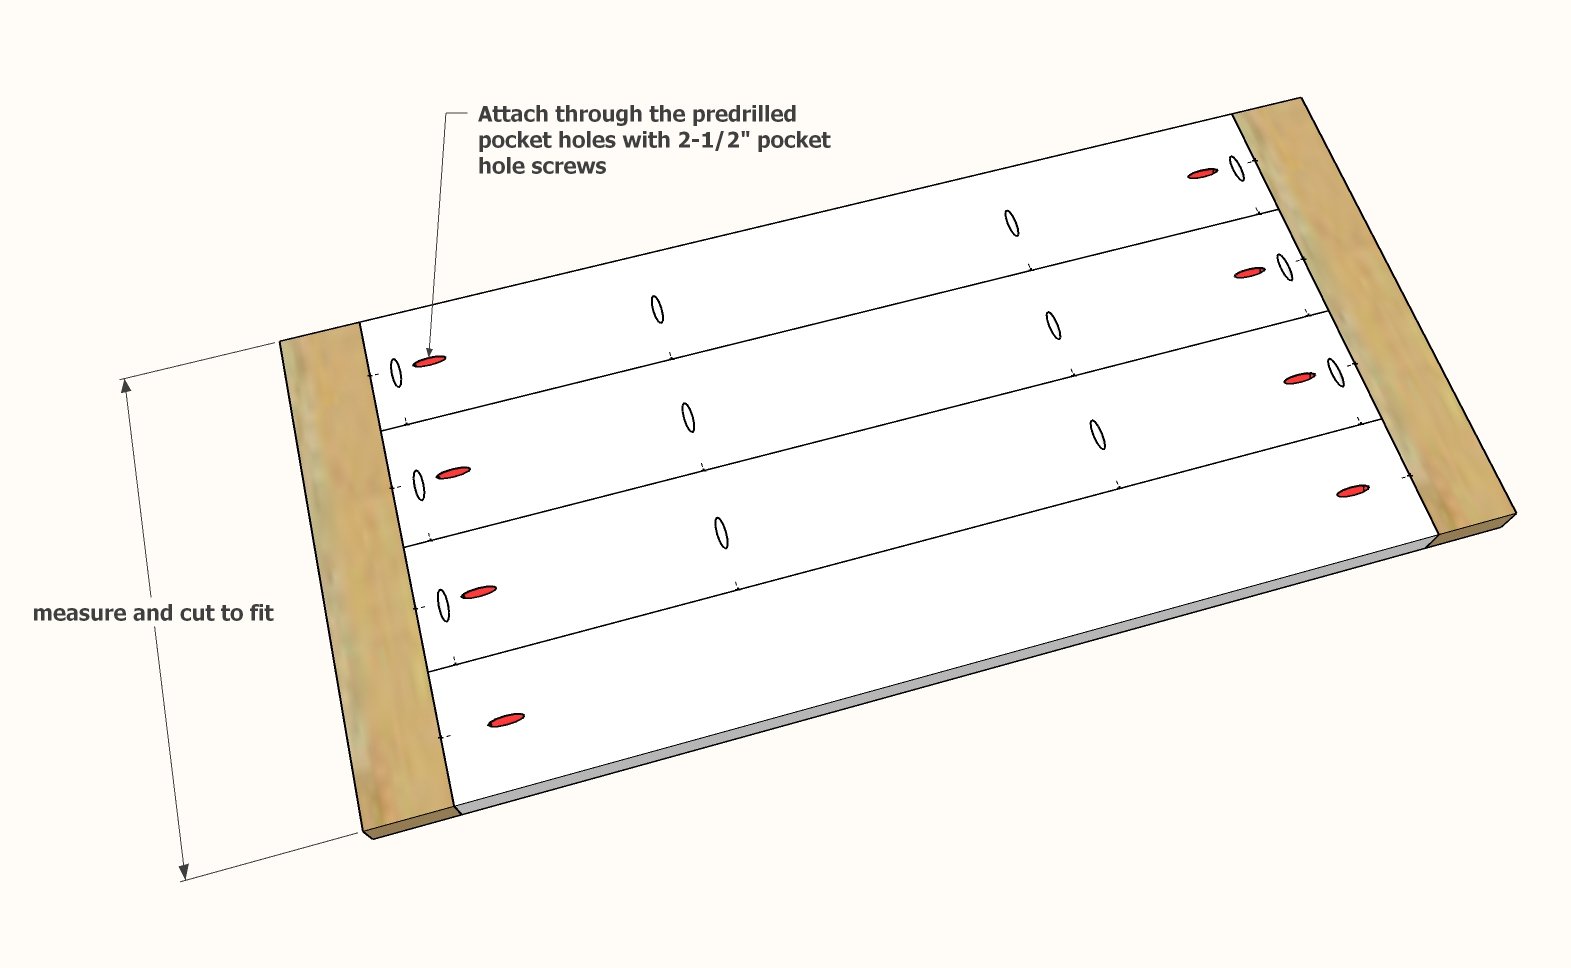
- 2 - 2x4 @ About 22" - breadboard ends, cut to fit
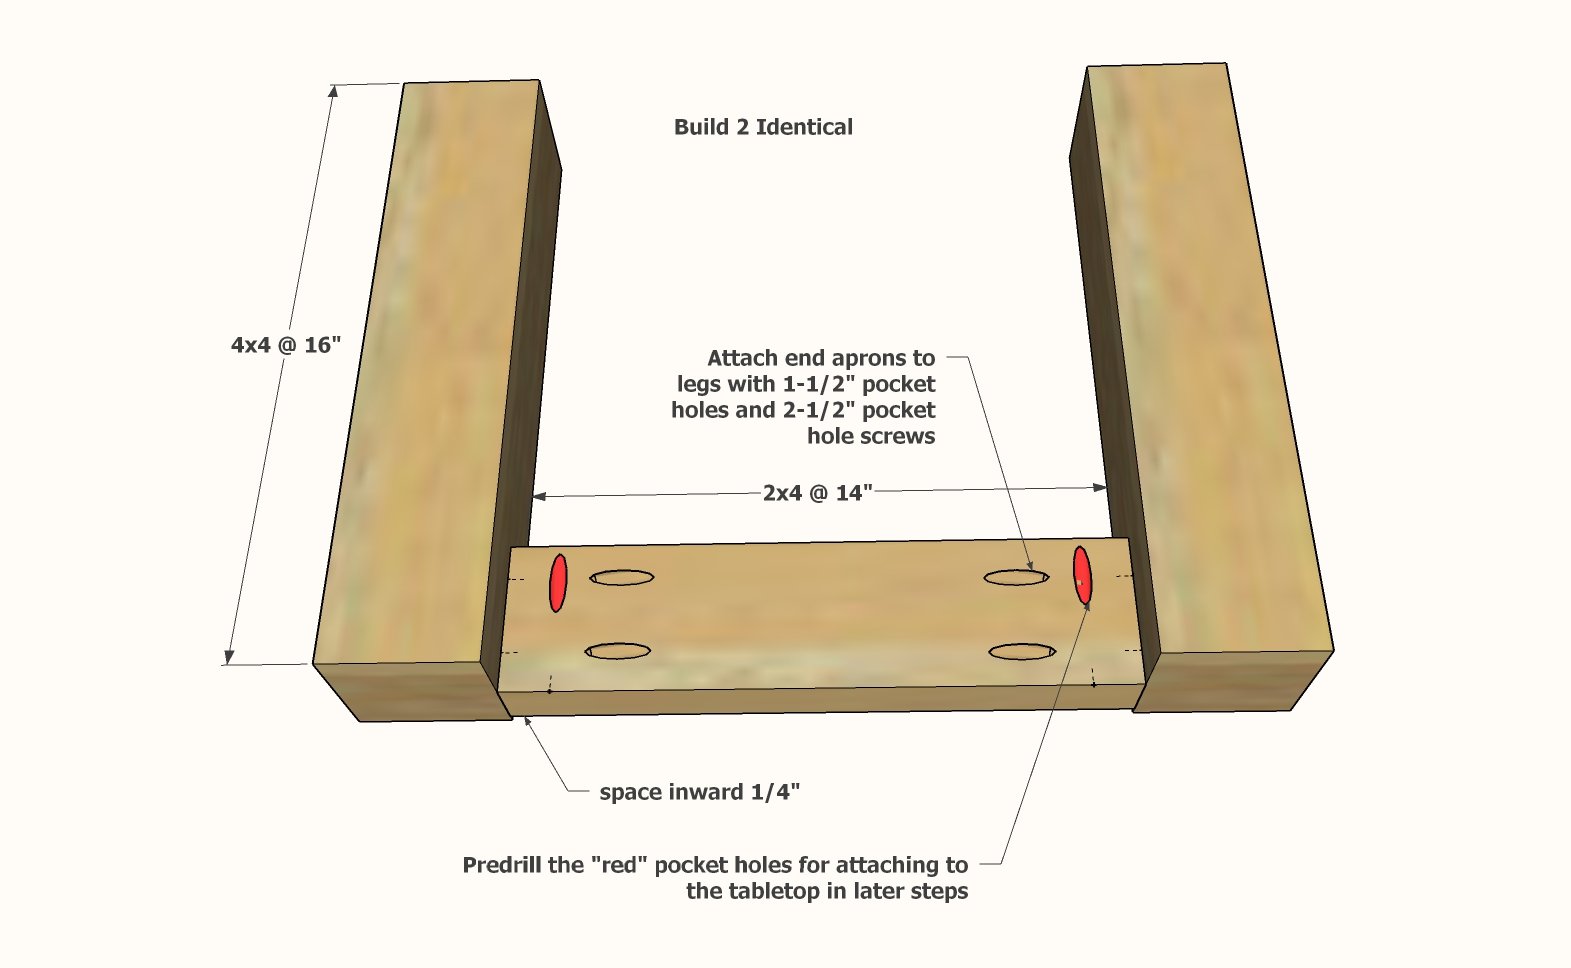
- 2 - 2x4 @ 14" - end aprons
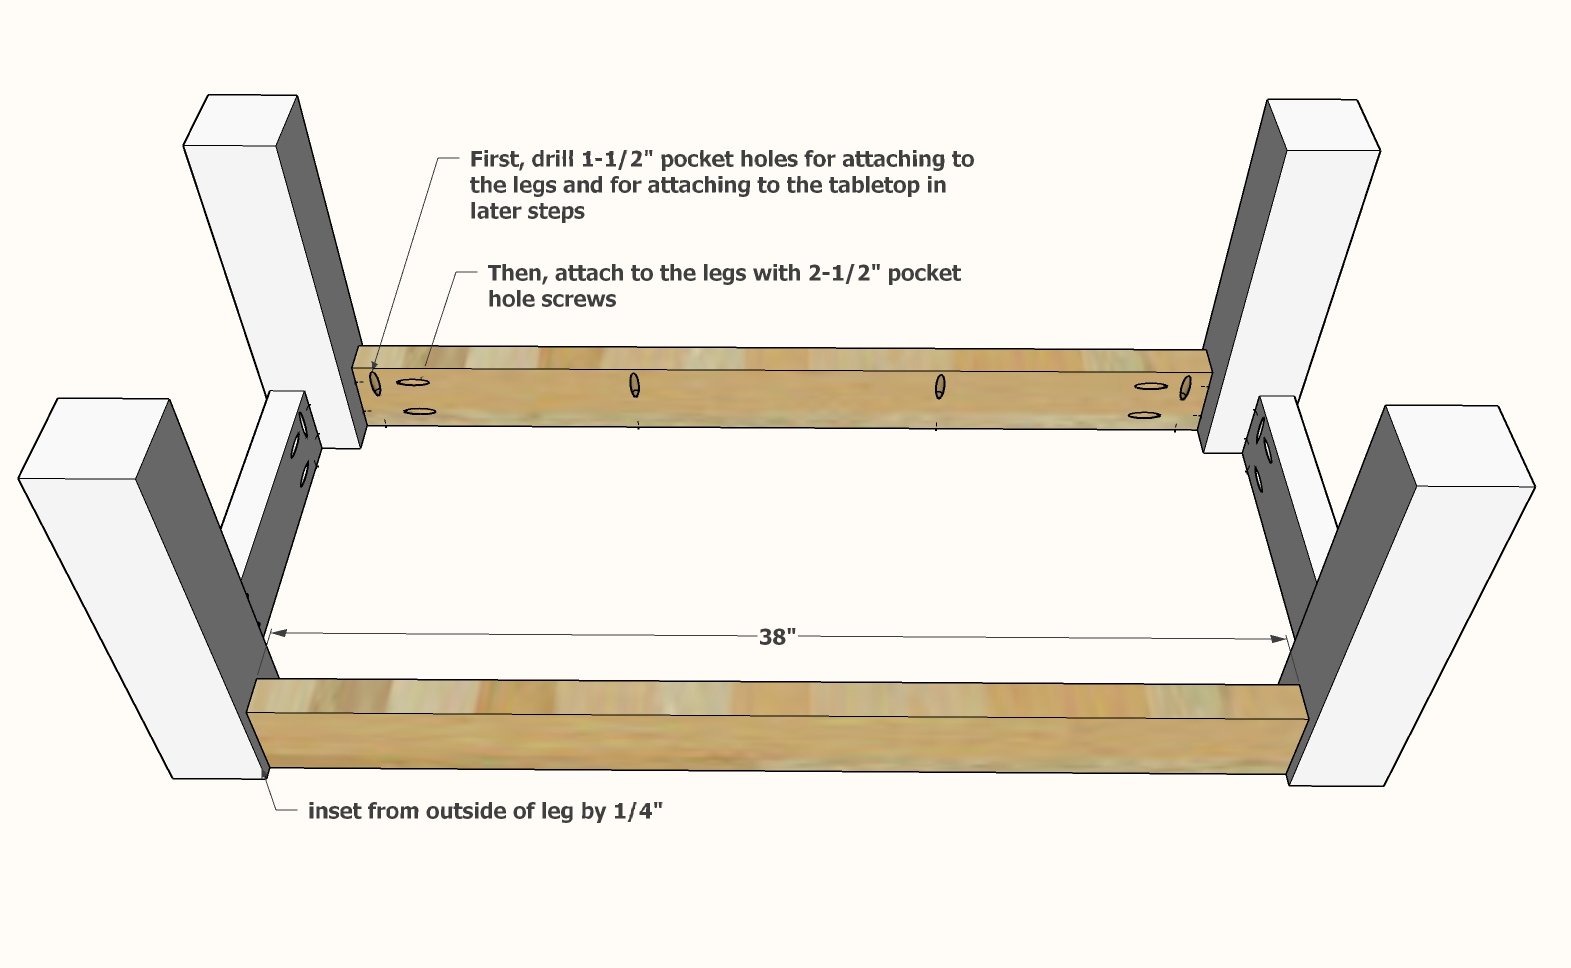
- 4 - 4x4 @ 16" - legs
- 2 - 2x4 @ 38" - side aprons
For long term durability and more professional results, I recommend using a pocket hole joinery system for wood joints. Here is a video with tips for using a pocket hole jig:
Instructions
Step 1
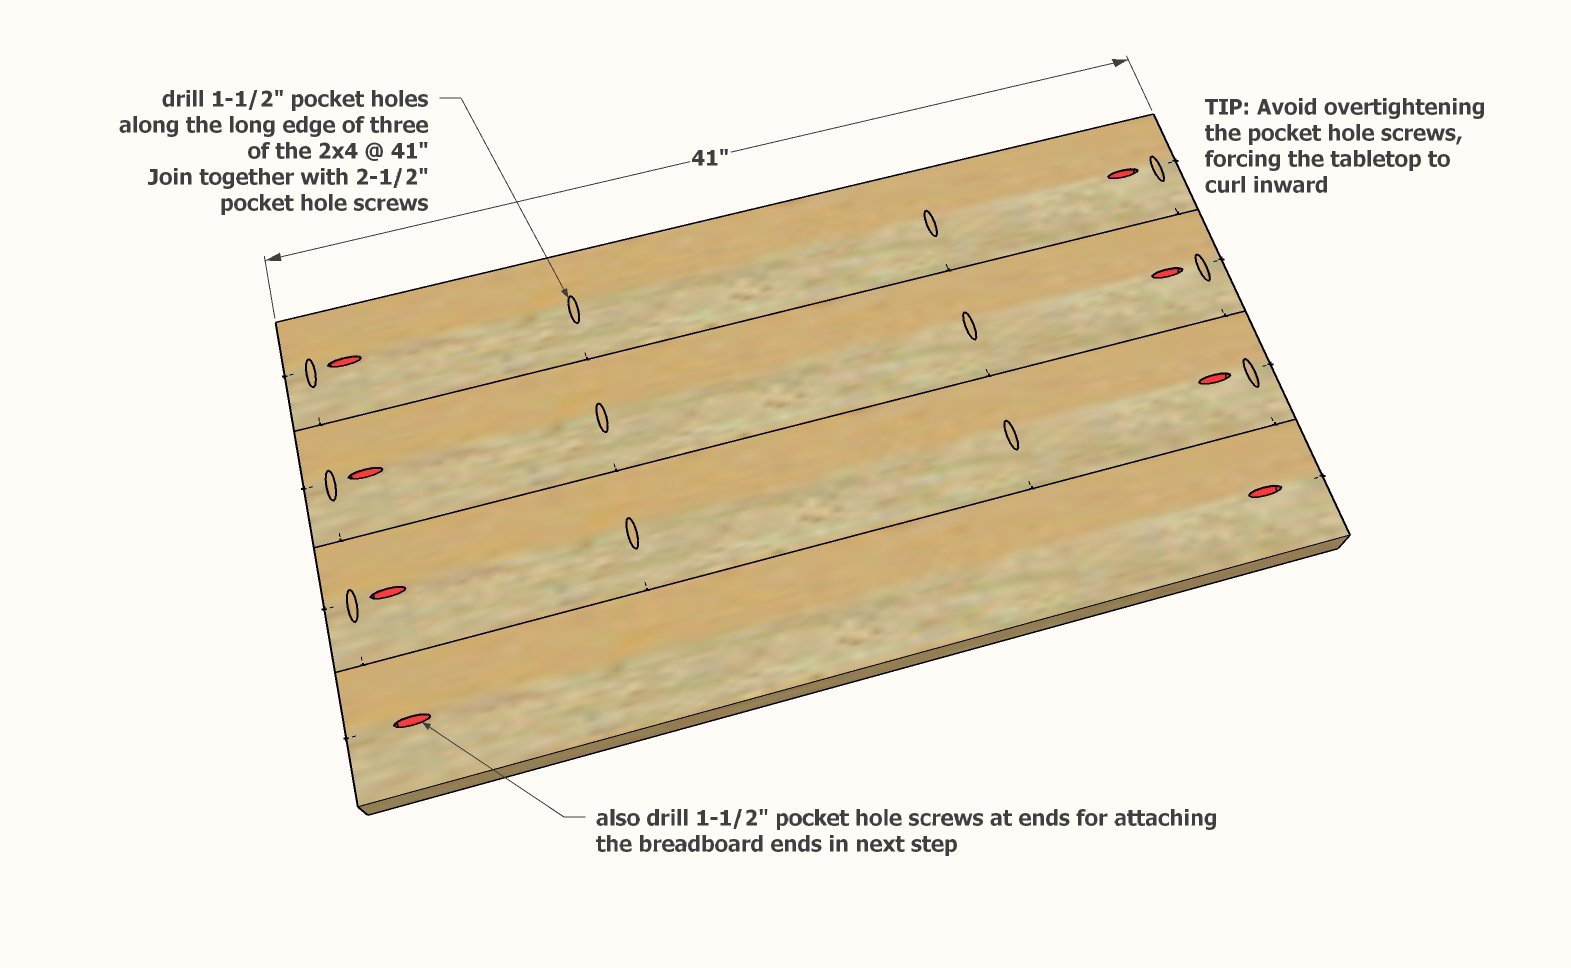
Cut the 2x6 boards to exactly match in length.
Drill pocket holes on the ends of all the 2x6 boards.
On three of the 2x6 boards, drill pocket holes to attach together edge to edge.
Attach with 2-1/2" pocket hole screws and glue.
Avoid overtightening the pocket hole screws as this can make the tabletop curve inward.
Step 2
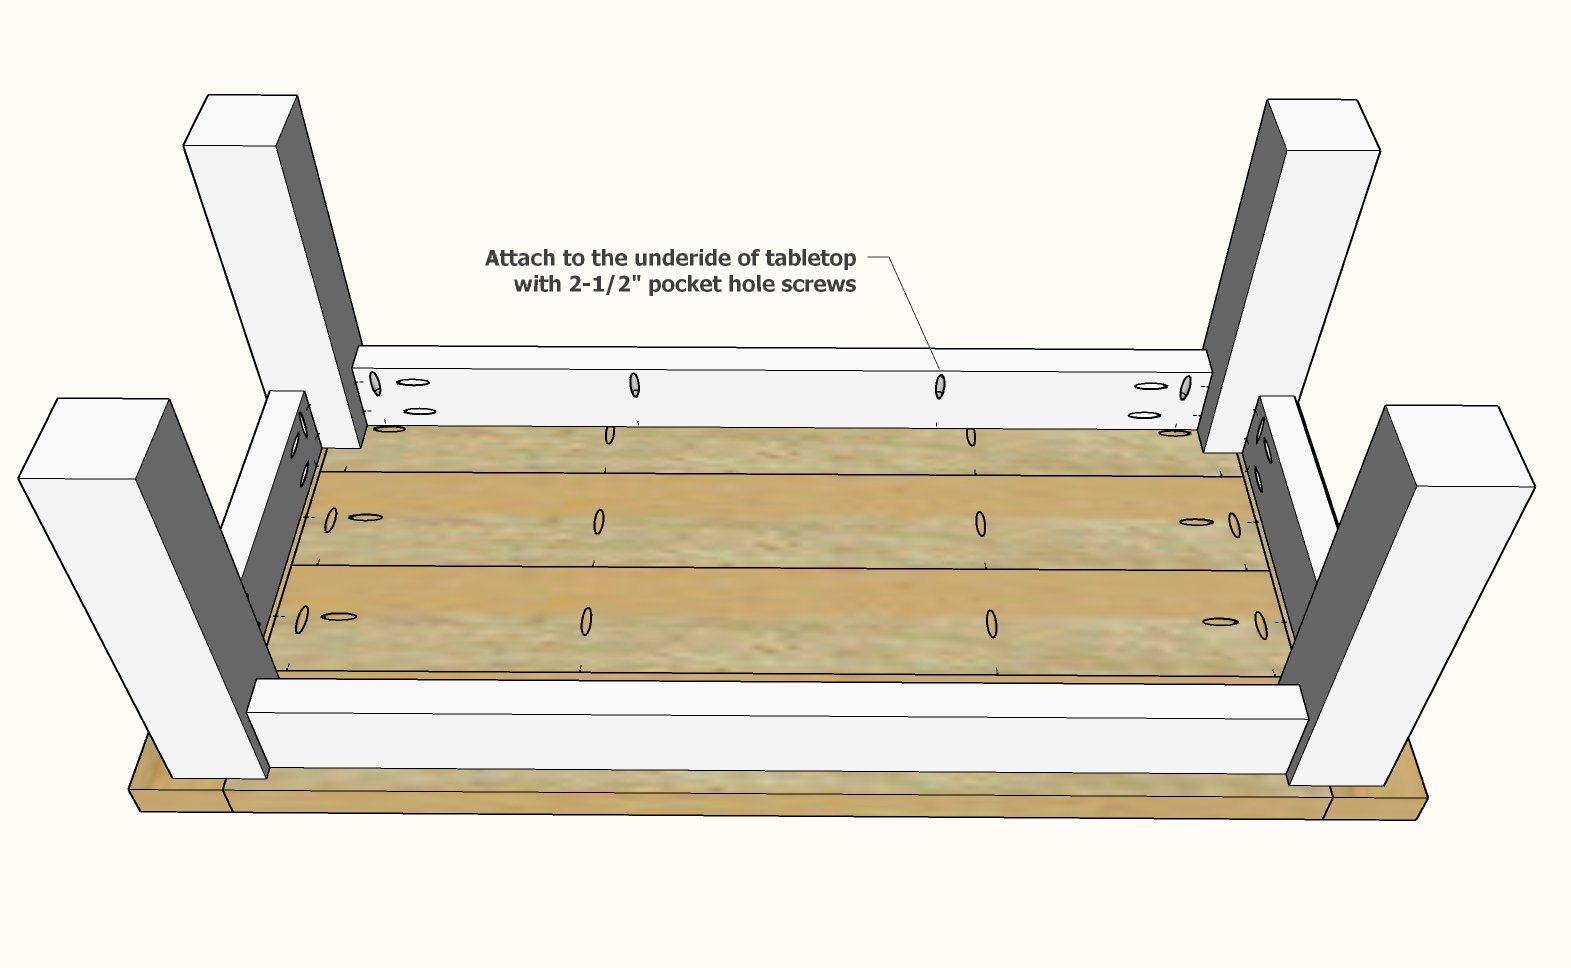
Step 3
Remove sanding residue.
Apply clear poly topcoat to seal.


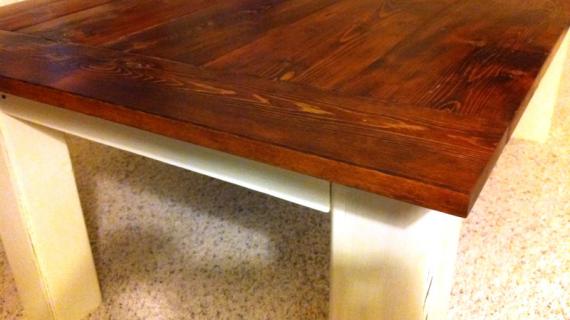
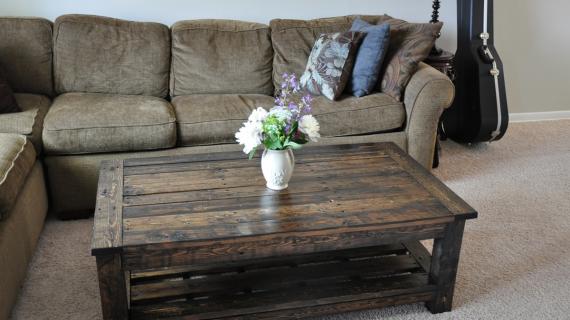
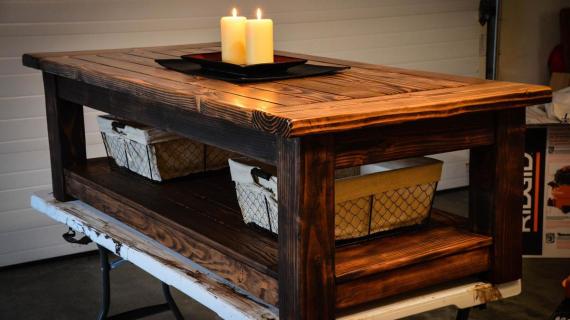
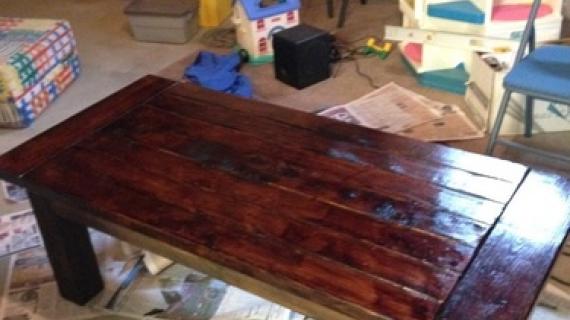
Comments
Belen (not verified)
Sat, 11/26/2011 - 18:45
HELP!
Hi Ana (or anyone that can help)!
We're sitting here with the pieces of wood and there's something we're not understanding about the very first step. According to the picture of Step 1, we should leave a 3/4" space on each side, but we don't get how the 1" thick C side aprons are going to fit in that spot (they stick out 1/4"??). Are we missing something?
Same thing for step 3 and 4, shouldn't the spacing be 1 inch?
Help!
Katmar (not verified)
Sat, 11/26/2011 - 21:37
Most 1X lumber is not truly
Most 1X lumber is not truly an inch thick. It's more like 3/4 inch due to the process of cutting and planning boards. Check the thickness of your lumber and adjust the space you leave accordingly.
claydowling
Sun, 11/27/2011 - 03:02
Actual Measurements
The final dimension of wood is not assured. 1x stock started off roughly 1" thick while it was still rough. Surfacing typically takes it down 1/4". Wood at a home improvement store may lose more like 5/16", because they tend to start out with an inferior grade of wood and more needs to be taken off.
Since the 3/4" thickness is never assured, during stock breakdown you should only cut to rough size, leaving a bit over, and then trim to final size based on actual measurements taken as you build. A lesson learned the hard way, and one I need to occasionally remind myself.
Belen (not verified)
Sun, 11/27/2011 - 09:23
Thank you! That makes a lot
Thank you! That makes a lot of sense actually.
I have another question: how do you work around wood not being perfectly straight or perfectly cut? We don't have access to cut it/perfect it ourselves. This is out first project and we had all the wood cut at Home Depot.
Thanks again!
In reply to Thank you! That makes a lot by Belen (not verified)
claydowling
Sun, 01/29/2012 - 20:06
Imperfect Wood
No such thing as perfect wood. It's a natural product with all the variation that implies. That's okay, there's beauty in the imperfection. When I'm at a lumber dealer, it's the woods with the imperfections in grain and coloring that I buy on impluse.
That said, there are some steps you can take to get better wood for your next project. The first is don't let the people at the home center cut it, even if they ask nicely. If they do the cuts correctly for building your furniture, it will be entirely by chance. They aren't set up to do that. If you're going to build furniture you need to be able to cut it and work it yourself.
The good news for you is that the tools can be purchased quite cheaply. I'd recommend picking up a book like Hand Tool Essentials which talks about how to use hand tools and how to buy good quality used ones without breaking the bank. It also talks about how to sharpen them.
It would be a very rare thing for wood to show up perfectly flat and straight. I generally make use of hand planes to fix that problem. If you know how to use them, practice a bit on some scrap, and keep them sharp, an inexpensive used plane can do a lot for you.
I also buy used saws from ebay, and I've had good luck. If you can pick up a used Diston D-23 crosscut saw, you'll have a saw that will last you the rest of your life. I've bought two of them, and paid less than $30 for each, after shipping.
claydowling
Sun, 11/27/2011 - 18:15
Wood handling
First, I won't buy wood that isn't straight. I avoid buying wood from Home Depot or Lowes because they mostly have firewood at lumber prices. If you're willing to spend a lot of time hunting you can find straight wood there, but it's easier, faster and cheaper to go to a real lumber yard. If you're in southeast Michigan I can't recommend Chelsea Lumber strongly enough. Good prices, good service and good product.
As for the problem of wood cut by the store, I have a very simple solution: I don't let those hacks near my lumber with a saw. If it wasn't firewood before it certainly will be afterward.
Ana's Getting Started list is a bit pricey. It sounds like you already have a drill, which is good. Those are useful. But skip buying the powered saws for now. Instead, buy two hand saws (and go to Lowes to do it).
The first is commonly called a panel saw. It may have a different name at Lowes, but it will be a little over 20 inches long, with a tapered blade, and will look exactly like what you're picturing when you think of a hand saw.
The other saw is a back saw. It's maybe a little over a foot long, the same height from end to end, and has a thicker metal spine on the back of the blade.
You'll also need some instruction on how to use them, and how to build a couple of tools to use them effectively. I like the book "Hand Tool Essentials," which covers a lot of other tools as well. There's also a good video by Chris Schwarz on building a saw bench. He shows how to use these saws properly, and how to build the additional tools you'll need. There's also a good video blog called "Logan Cabinet Shoppe" that covers the fundamentals of using these saws really well.
The tools seem crude, but I just build a really nice coffee table for a friend using the two hand saws mentioned, some planes, and some chisels. Simple and inexpensive tools can do beautiful work if given the chance. You can see it here: http://claydowling.com/articles/11122011-2038/ariels-table
Belen (not verified)
Mon, 11/28/2011 - 14:23
Thanks for all the info. Very
Thanks for all the info. Very much appreciated!
CoreyS
Sat, 12/17/2011 - 22:52
What stain?
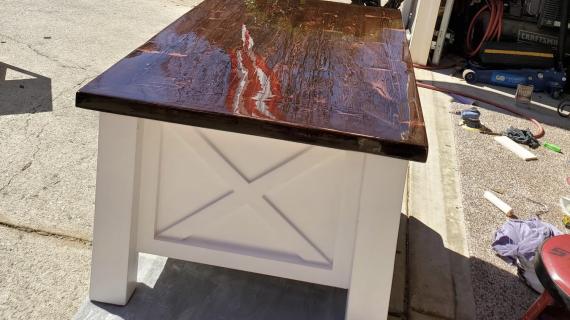
I love this table i just built one slightly shorter in length and now im ready to stain. I really love the colour stain in the first picture under additional photos. Does anyone know what the name of that stain colour??
Dee22
Tue, 12/27/2011 - 17:30
Tryed coffee table
Thanks for this plan! We made it as a wedding present for my daughter & son-in-law. It turned out beautifully.
Emilysuzann (not verified)
Sat, 01/07/2012 - 23:50
LOVE IT
I recently built a coffee table using these plans and I absolutely LOVE it to view it visit my blog @ www.emilysuzann.blogspot.com
Elle (not verified)
Tue, 01/10/2012 - 08:09
Want to Try This
I love these plans and this table. I have a funny dimension in my living room and have not found anything that fits right. So, I am thinking about modifying these plans and making this table this weekend.
But, I don't want to screw in from the top. Can I get away with just using the bottom screws. Any other suggestions? I see that some of your plans call for using the Kreg Jig. Is that something I can use here?
Thanks! Absolutely love this site!
claydowling
Tue, 01/10/2012 - 08:12
Kreg jig
The kreg jig is ideal for securing the top to the supports from underneath. In fact pocket holes are a traditional method for securing a table top to its frame.
Ellen (not verified)
Tue, 01/10/2012 - 09:29
Thanks
Thanks for the quick response! I am off to buy some lumber.
Ilay (not verified)
Wed, 06/13/2012 - 15:59
How exactly would you do that
How exactly would you do that ?
Thanks!
Greg Rodgers (not verified)
Sun, 09/09/2012 - 23:44
Do you have any tips to use
Do you have any tips to use the kreg jig to avoid any screws visible from the outside?
Cecilia Figueroa (not verified)
Wed, 01/18/2012 - 08:14
I love it!
I love it!
Guest (not verified)
Fri, 01/27/2012 - 20:09
smoothe top?
Im new to carpentry and building stuff with wood this was the first thing ive ever made. I made it and it looks great is very sturdy and cost me $30 in materials. my question is since im new is how can i get the table top smothe between each board? some are a hair higher than others and one is about an eight inch higher oops. I dont want to dissasseble the whole thing but would a belt sander do the trick? great website yall keep it up ill probably be making some night stands soon also once i find one the wife might like from here. any help would be great thank you!
claydowling
Fri, 01/27/2012 - 20:54
Getting a smooth top
Getting a smooth top will be very labor intensive. A belt sander is definitely one way to do it. A hand plane is the route I would recommend though, because it will be cheaper, faster and more assured of a good result. There are quite a few good videos out there about flattening slabs and panels, and I would recommend looking those up.
I have to warn you that the first time you try this, no matter what method you use, is going to take a long time, be strenuous, and getting the desired result is going to take a long time.
If you use the hand planes (which, again, is the faster, cheaper and easier route), first learn how to sharpen well. The final shape of the blade is a mater of personal preference, but the one consistent factor is that the straight edge the maker put on it doesn't work well for panel flattening.
Guest (not verified)
Sun, 01/29/2012 - 19:42
Thank you for the tips. I was
Thank you for the tips. I was going to rent a belt sander from the local hardware store and have a go at it. The wife says she dont mind it so idk if i will or not. it kinda bugs me but oh well we will see what happens maybe next weekend ill bee bored enough. it turned out great I just need to sand it down so its smoothe i keep getting slivers. then stain it.
jacoop (not verified)
Sun, 01/29/2012 - 11:30
Thanks for this gift
Am new to woodworking, and this project is good path to start.
thnks again
slidingstairs (not verified)
Tue, 02/14/2012 - 18:26
Need advice
I'm in the middle of building this table, and am running into a couple of problems. This is my first time building something of this size and complexity, and I'd love to get some advice from anyone who has run into something similar.
I've modified the plans a bit to turn this into a desk, making it taller and slightly wider. I've built the frame, up through step 4, and the whole thing seems quite a bit wobbly, especially long ways. It is level. I've checked for square, and I'm about 1/2-inch off. I checked the width of the frame at both ends and the length at both sides, and those are the same.
I know that adding the rest will help a bit with stability, but I'm worried it won't be enough. It's wobbly length-wise, rather than width-wise, so I don't know if the tabletop supports will help that issue. Is my 1/2-inch off square the cause of the problem? Is there anything I can do at this point other than ripping it apart and starting over?
claydowling
Tue, 02/14/2012 - 18:57
Stability
The top will not improve stability. Usually when a structure is wobbly it's because the joints aren't tight.
It may be as simple as tightening down fasteners, but it might be more involved, requiring you to replace miscut pieces or change the way you attach something.
Without being hands-on with your project I can't really troubleshoot this for you. But you can go over it and look for the spots that are loose. If the instability is in the length, chances are that your problem is in pieces that run lengthwise, or the joints attaching them to your structure.
Look for what's loose, what doesn't meet solidly, look for where there are gaps. That will show you what needs to be fixed.
And don't feel bad. We've all messed things up. They key to being a successful woodworker is being able to fix these problems and adjust your plans to match.
Guest (not verified)
Sun, 02/19/2012 - 09:41
where did you find
where did you find 4x4's???
what other ways would you do it if you didn't have 4x4's??
Elishia82
Sun, 04/08/2012 - 10:57
stain?
I have this table built, and started to stain it, but HATED the color stain I bought (minwax gun something). What is the color of stain that is used on the main picture above? Thanks!
Ilay (not verified)
Wed, 06/13/2012 - 15:57
Hi, Great site! Can you
Hi, Great site!
Can you explain how to this project with a Kreg Jig and without drilling from the outside ?
Thank You
Ilay (not verified)
Wed, 06/13/2012 - 16:10
Can you explain how to build
Can you explain how to build this project with Kreg Jig and without drilling from the outside ?
Thanks!
Great site!
Jason_Gallagher (not verified)
Wed, 07/18/2012 - 10:53
I second that. Any Kreg jig
I second that. Any Kreg jig tips on this project? Which Jig should i get for future projects? Is the 30$ one good for most projects on this site?
Travis Sanders (not verified)
Thu, 08/30/2012 - 14:16
table
I really like the design of this table and am going to make one for our living room. One suggestion - I really love using my Kreg Jig for building projects out of wood. It will allow me to join all of the pieces together without any screws showing. Just an idea. Keep up the good work!
guess (not verified)
Sat, 09/15/2012 - 15:48
Im so happy to have found
Im so happy to have found your site Ana......i have a question, I have a 38"x49" plywood board that i want to use as the table top. I am new at this and want to know what measurement should i use for the leg joiners and side aprons. Please help, im new at this...thank you in advance
Landie
srp4444 (not verified)
Sat, 12/01/2012 - 19:12
Finish?
love this! How do I get the beautiful dark finish you have here? Could you give specific recommendations on what to buy for the stain/varnish/paint etc? Thanks!
Ryan Liden (not verified)
Fri, 12/14/2012 - 21:29
Type of wood and stain?
Hi there, my wife directed me to your website hinting that I try my hand at making one of these beautiful tables. The build itself looks very straight forward, but I'm wondering what kind of wood and stain were used on the table in the first picture (because it looks great!). Looking forward to your reply and getting started on my own set soon!
Brent P (not verified)
Fri, 12/28/2012 - 22:01
PDF
I have really enjoyed looking through the site and have found several projects that I will be doing in the near future. I Had a little problem when trying to open the PDF. Is there something that can be done about that.
JennG
Mon, 03/04/2013 - 16:31
Wobbly ends and sides
This was my first project, so I can definitely use some pointers. The butcher-block ends are really wobbly (like if you put your feet up on the table, they bend downward), as are the two 2x4 side pieces on the top. Any suggestions on how to make them more sturdy if I were to do this again?
Thanks!
cwest
Wed, 01/01/2014 - 13:44
Wobbly ends
Jenn,
My suggestion would be to build the tabletop first. This way you can drill pocket screws from each 2x4 into the 2x6s. You can also pocket screw the 2x4s together. Then build the base and pocket screw the tabletop to the base. This is how I did it and it is extremely sturdy. Good luck!
GK
Tue, 07/30/2013 - 04:54
The Stain in the Photo
Ana,
Love your site. Could you tell me what kind of stain is used for this coffee table shown in the picture? Thanks so much.
Regards,
GK
chris76
Sat, 11/01/2014 - 15:11
4x4 wood
hey, the only 4x4's i could get in my area look like they have a little mildew staining. I am planning on painting the table. But should i use a mildew resistant primer under the regular paint? Also they seem a little damp. Should i keep them in the house for a week or so and dry them out?
https://plus.google.com/110923203026331442506/posts/SdZ2up4Qsea
LYoung26
Fri, 02/20/2015 - 15:17
What is the screw pattern on the end pieces?
This table looks awesome! I am wondering what is the best way to screw in the end caps on the table?
jamesm
Fri, 02/20/2015 - 21:00
I used pocket screws for the
I used pocket screws for the whole top 2X4's and the end caps. Be sure to check out this table plan updated with pocket screws (http://ana-white.com/2012/10/plans/updated-tryde-coffee-table-pocket-ho…). If you haven't already bought the lumber, you might want to build the updated plans for more strength.
DIY Meggs
Sun, 09/20/2015 - 16:25
Kreg Jig
I'll be making this table this weekend - any pointers for modifying the plan to use my Kreg Jig?
TIA!
JoanneS
Mon, 09/21/2015 - 13:54
Tryde coffee table pocket hole plans link
Hi DIY Meggs,This is the link to Ana's updated plan for the table, using pocket holes:
http://ana-white.com/2012/10/plans/updated-tryde-coffee-table-pocket-holes
RJONES115
Sat, 01/02/2016 - 11:53
SIZE
IF YOU USED 7 2X4 SIDE BY SIDE WOULDNT IT BE 28 INCHES WIDE?
jkread
Sat, 01/02/2016 - 17:41
Lumber Nominal vs Actual Dimensions
You have to remember that lumber dimensions are nominal versus the actual dimensions. A 2x4 is actually around 1.5x3.5 so 7 of them side by side would be 24.5.
Bobaloouie
Mon, 02/29/2016 - 23:01
Strength
Hi Anna, Thanks for a simple, yet good looking table design. As an Engineer and a Woodworker, I hope you don't mind if I offer a coment? Step 2 Instructions say "Screw the side aprons, C, into the ends of the leg joiners, B ". This connection is quite weak as the end grain does not hold screws well, nor will glue help. A solution is to lengthen the apron spacers and fasten the side apron to the face of the 4X4 leg (as you did with the leg braces). An alternate is to notch the 4x4 leg and rest the side apron of the ledge of this notch. This will provide greater strength and a longer lasting table. Thanks again for this site and keep up the good work
mikers
Mon, 01/29/2018 - 09:22
assembly and finish
I am not clear, do the H boards get screwed straight down from the top? and what color wood putty is used.
hawkingbrandy
Wed, 05/22/2019 - 00:29
I love that. I'll try to…
I love that. I'll try to make it with mine plans
johnnyonthegreen
Sun, 03/08/2020 - 07:28
Tryde coffee table
Since each board is screwed don’t wouldn’t it be prone to cupping?
TheDrizzle
Tue, 06/16/2020 - 12:14
Modify?
Thinking about modifying this a bit to include hinges or shocks on one side and a storage bin under the table. The idea would be that you could lift the table top to expose a small space under it for a laptop, remotes, etc.. I would build the table top using pocket holes as well. Any thoughts or concerns around trying it this way?
mmathis60
Mon, 12/07/2020 - 11:55
Anna, Could you modify the…
Anna,
Could you modify the cut list for the Hyde coffee table. I want to use it for a stretching table that would be 6 feet x 3 feet?
ValM
Fri, 07/30/2021 - 08:37
HI, love love this table but…
HI, love love this table but we can't get 4 x 4's here in Canada except for pressure treated ones. Any ideas to substitute the legs? Any feedback would be greatly appreciated. Love your work and inspiration!