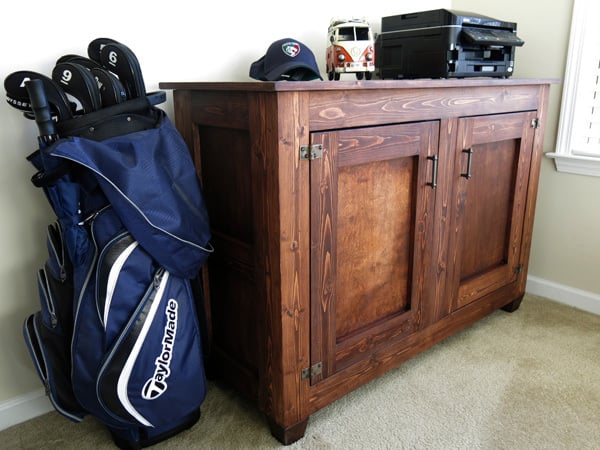


Office Cabinet made primarily from 1 by 4's
Preparation
11 8ft - 1 by 4 boards 1 6ft - 1 by 4 board. 3/4 inch plywood for sides
Size Length (inches) Quantity Used For 1 by 4 10.5 4 Side horizontals 1 by 4 33 4 Side Verticals 1 by 4 45 4 Front and back top and bottom rails 1 by 4 33 4 Front and back vertical outer rails 1 by 4 26 2 Front and back vertical middle rails 1 by 4 25.75 4 Doors 1 by 4 13.5 4 Doors 1 by 4 54 2 Top 1 by 4 47 4 Top 1 by 4 21 2 Top ¾ inch plywood 17.5 by 33 2 For side inserts ¼ inch plywood 14.5 by 26.75 2 Door backs ¼ inch plywood 22.75 by 28 2 Cabinet backs
I have included a full cutting list in the plan downloadable from http://www.andrewharriswoodwork.com/free-plans/


Please read through the entire plan and all comments before beginning this project. It is also advisable to review the Getting Started Section. Take all necessary precautions to build safely and smartly. Work on a clean level surface, free of imperfections or debris. Always use straight boards. Check for square after each step. Always predrill holes before attaching with screws. Use glue with finish nails for a stronger hold. Wipe excess glue off bare wood for stained projects, as dried glue will not take stain. Be safe, have fun, and ask for help if you need it. Good luck!
Instructions
Step 1
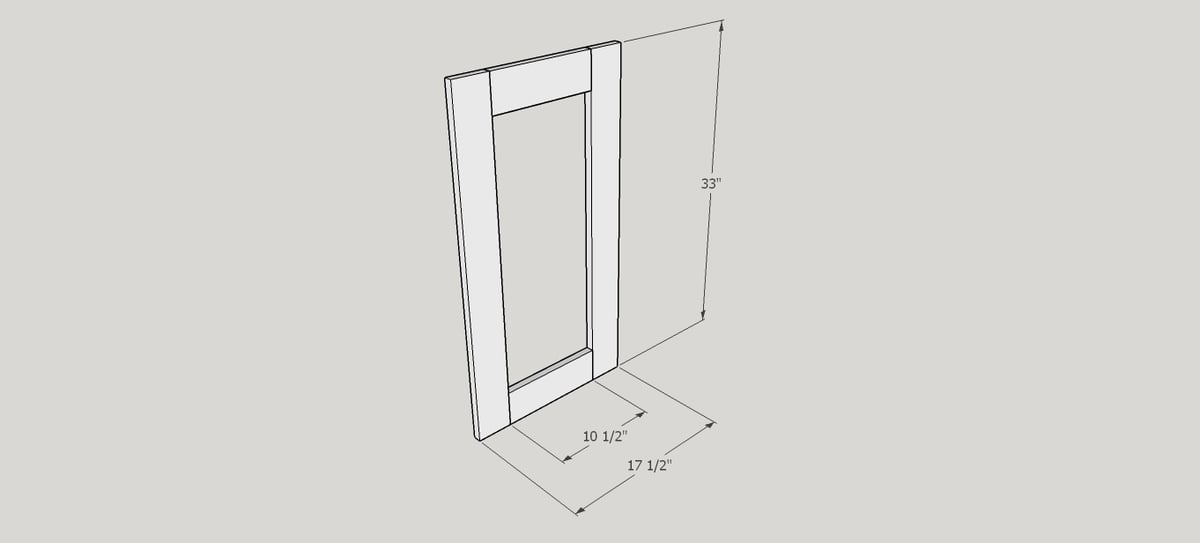
Make the Sides
Make each side using two of the 33 inch length pieces and two of the 10 ½ inch pieces.
Place your pocket holes in the ends of the two shorter pieces.
Step 2
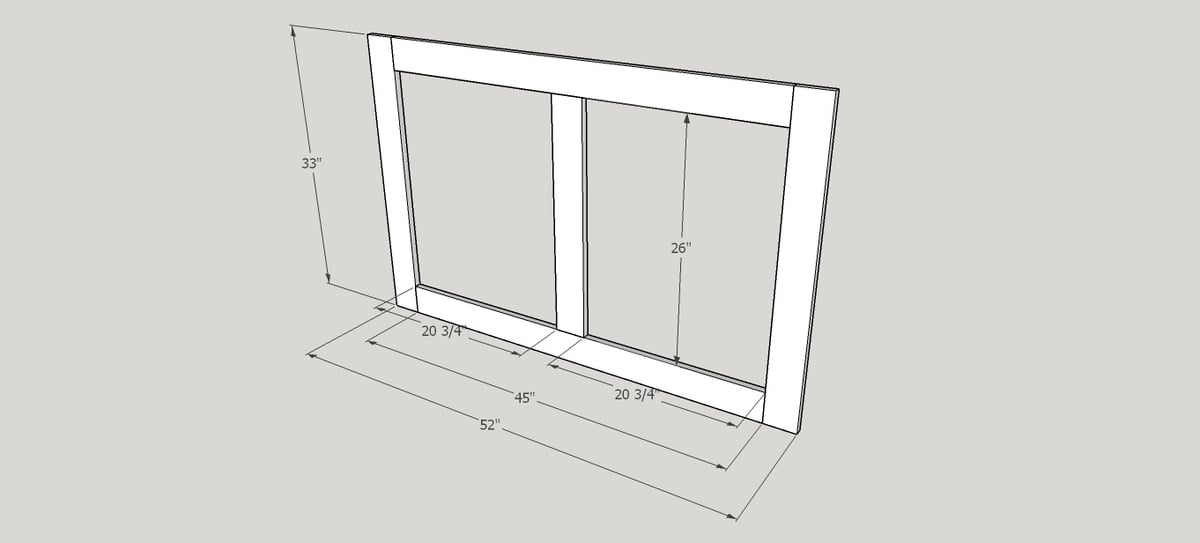
Make the front and back frames
Make the front and back frames as shown below.
Make the front and back frames
Place your pocket holes in the ends of the two long 45 inch pieces.
I suggest you cut the 26 inch piece once the outer frame is done and cut it to fit.
Step 3

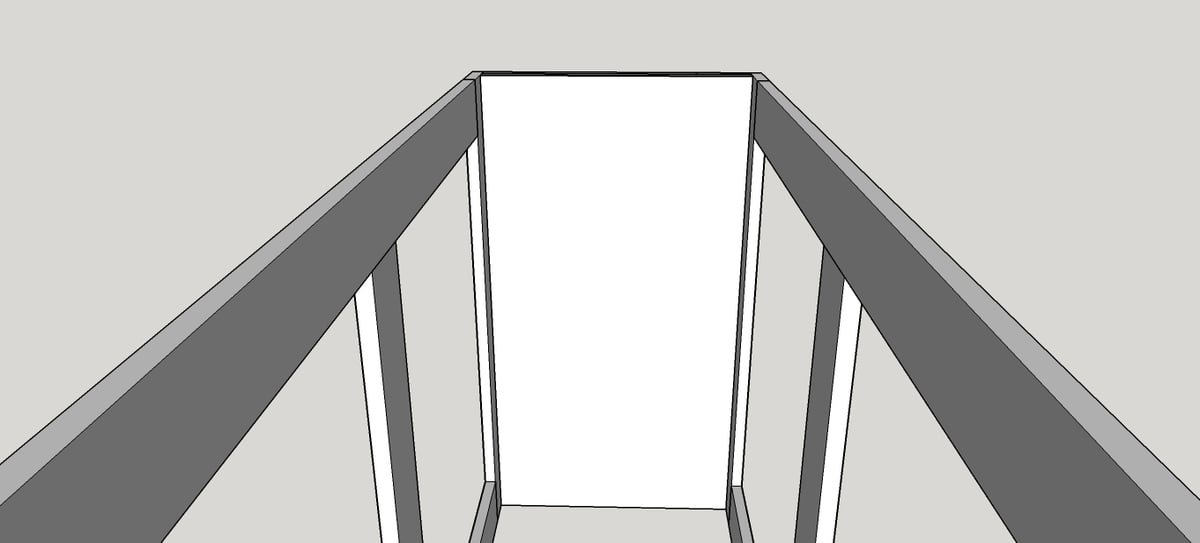
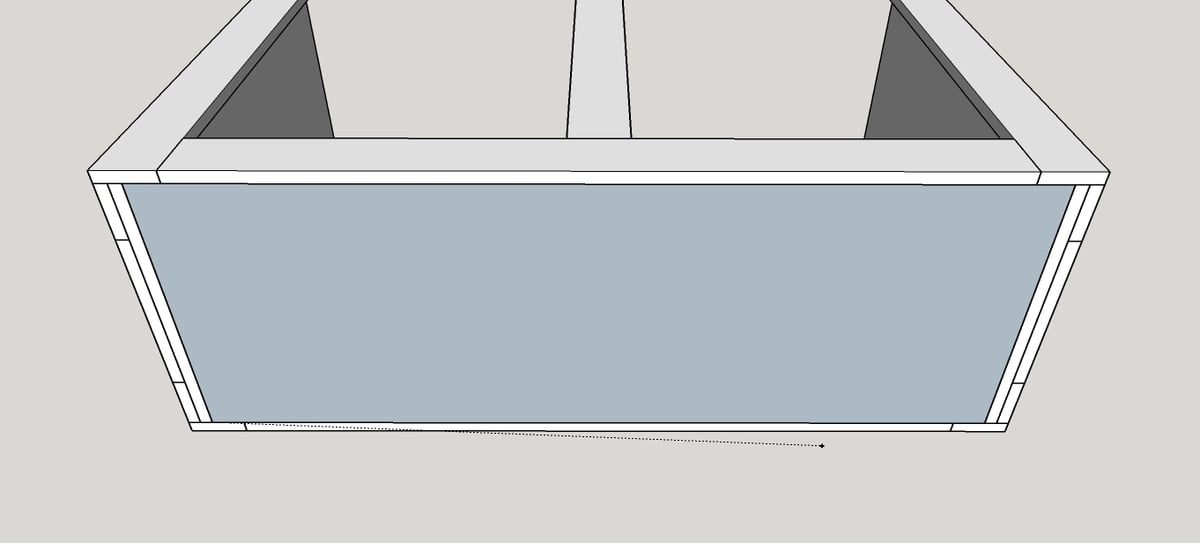
Make the main cabinet frame
Drill pocket holes in the sides of the two end frames.
Attach the two sides to the front frame and then the back frame as well. The front and back frames will overlap the edges of the sides as shown.
Step 4
Add side inserts
Add the two 33 by 17.5 inch pieces of ¾ inch play as the side inserts using 1.25 inch finish nails and glue if desired
Step 5
Step 6
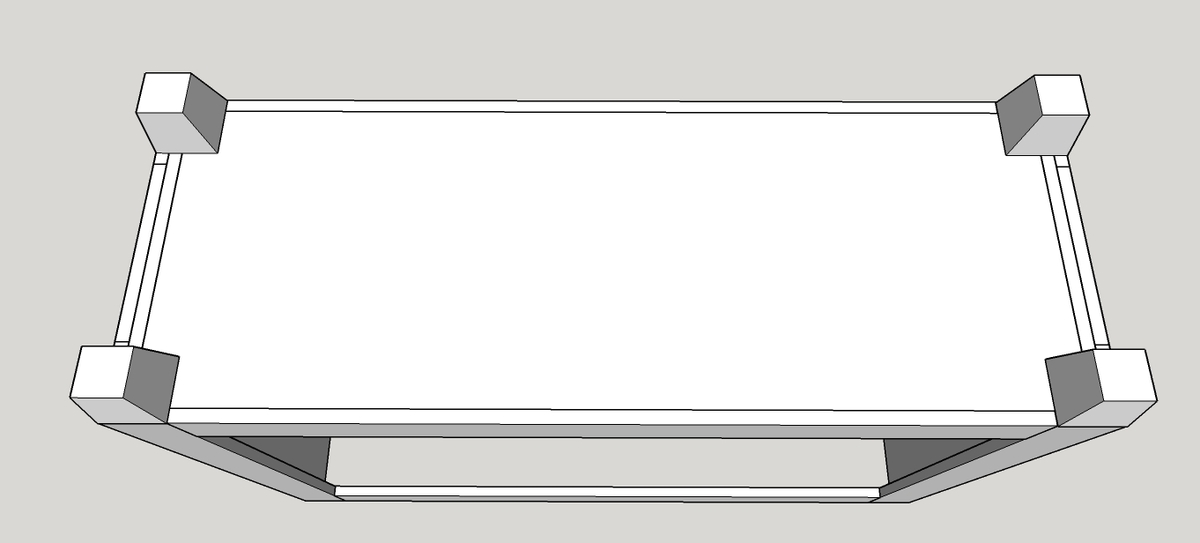
Attach the feet.
I used 3.5 inch tapered ones from Home Depot.
Depending on which ones you get, measure out where the screw for the feet needs to go, drill a pilot hole and screw the feet in.
Step 7

Make the Doors
Drill pocket holes at both ends of the two shorter pieces and make the doors as shown below.
Remember the total width of the door should be ¼ inch less than the width of the opening for the door.
Same applies to the height of the door and the height of the opening for.
Step 8
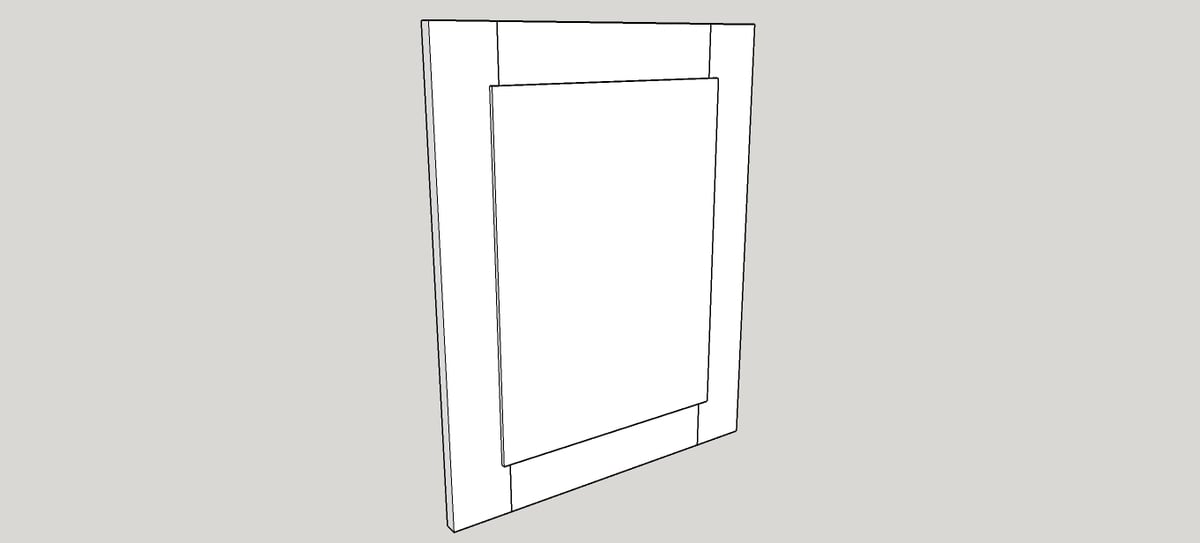
Door Insert
Fix ¼ inch thick ply to the back of the door overlapping the frame by at least ½ inch on each side to allow fixing.
I like to overlap sufficiently to try to cover the pocket holes and then add 1 ½ inch trim around the edge of the back just to tidy it up but the diagram below shows the minimum size you would need.
Step 9
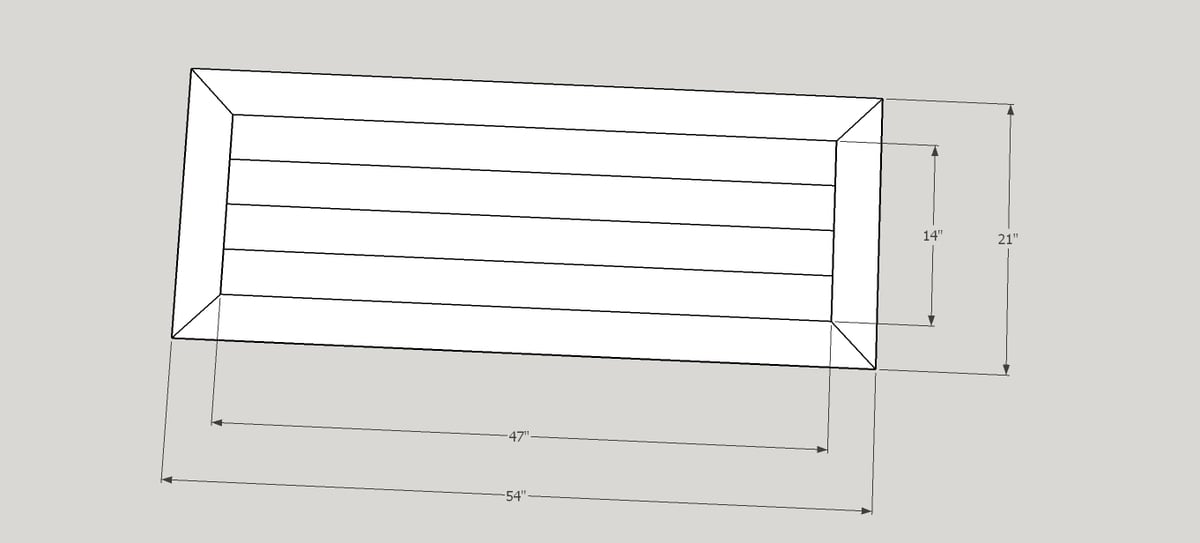
Make the Top
I wanted a top with mitered corners but you could just make a plank top from 6 pieces of 1 by 4 at 54 inches long each.
If making the mitered top like below I would suggest making the four middle pieces first. Then cut and fit the outer mitered pieces to give a snug fit.
The reason is that sometimes the planks are not exactly 3.5 inches wide and so if you make the outer mitered frame first, then when you fit the four inner pieces they may be slightly narrower.
I roughly sanded the edge of piece so that when joined together the joins were obvious and gave some interest to the top.
Step 10
Drilling holes to fix the top
On the sides and front and back rails drill pocket hole screws facing upwards to use to fit the top.
Step 11
Fit the doors
Fit the doors ensuring an equal gap around each edge.
Step 12

Fit the back panels
Cut two pieces of ¼ inch plywood at least 22 ¾ by 28 inches and use ¼ inch finishing nails to nail them to the back of the cabinet from the inside.
Step 13
Fit the Top
Place the top with the good side down and then place the upturned cabinet on top.
Make sure you have equal gap all around and then fix with 1 ¼ inch pocket hole screws.
Step 14
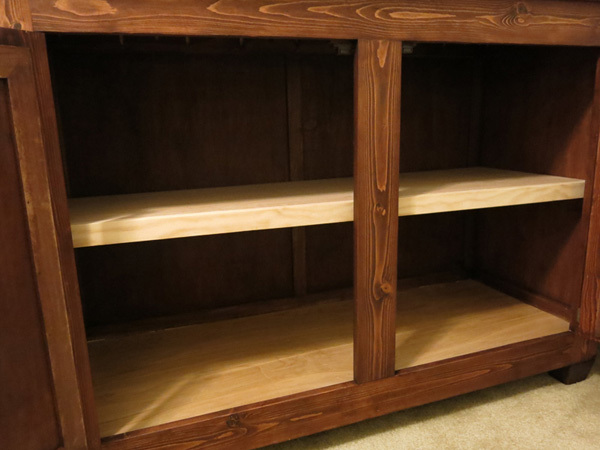
Optional Shelf
A shelf can also be added. If you use plywood you may want to add a 1 by 2 piece of trim on the edge to hide the plywood front.
If you want to add shelf then you will need 4 lengths of 1 by 4 at 49 inches long each or a piece of plywood measuring 14 by 49 inches.
Join them with pocket holes.
Then either fix side rails as supports at desired location or use a shelf pin jig to drill holes where you want the shelf and support it with shelf pins.
If using shelf pins then I suggest you cut the boards ¼ inch shorter as some shelf pins have a lip on them.
Step 15
Finish
Sand all joints smooth.
Apply Pre stain and your choice of color or paint as desired.
Step 16
Hardware
Add hardware of your choice.
I also fit magnetic latches to the inside of the doors to stop them going inside the cabinet.
It is always recommended to apply a test coat on a hidden area or scrap piece to ensure color evenness and adhesion. Use primer or wood conditioner as needed.

Comments
Seamagnolia
Tue, 03/10/2015 - 19:38
That is beautiful. I love
That is beautiful. I love the finish.
Ana White Admin
Tue, 03/10/2015 - 22:49
Very Nice!
That is great, thanks for sharing your plans!