
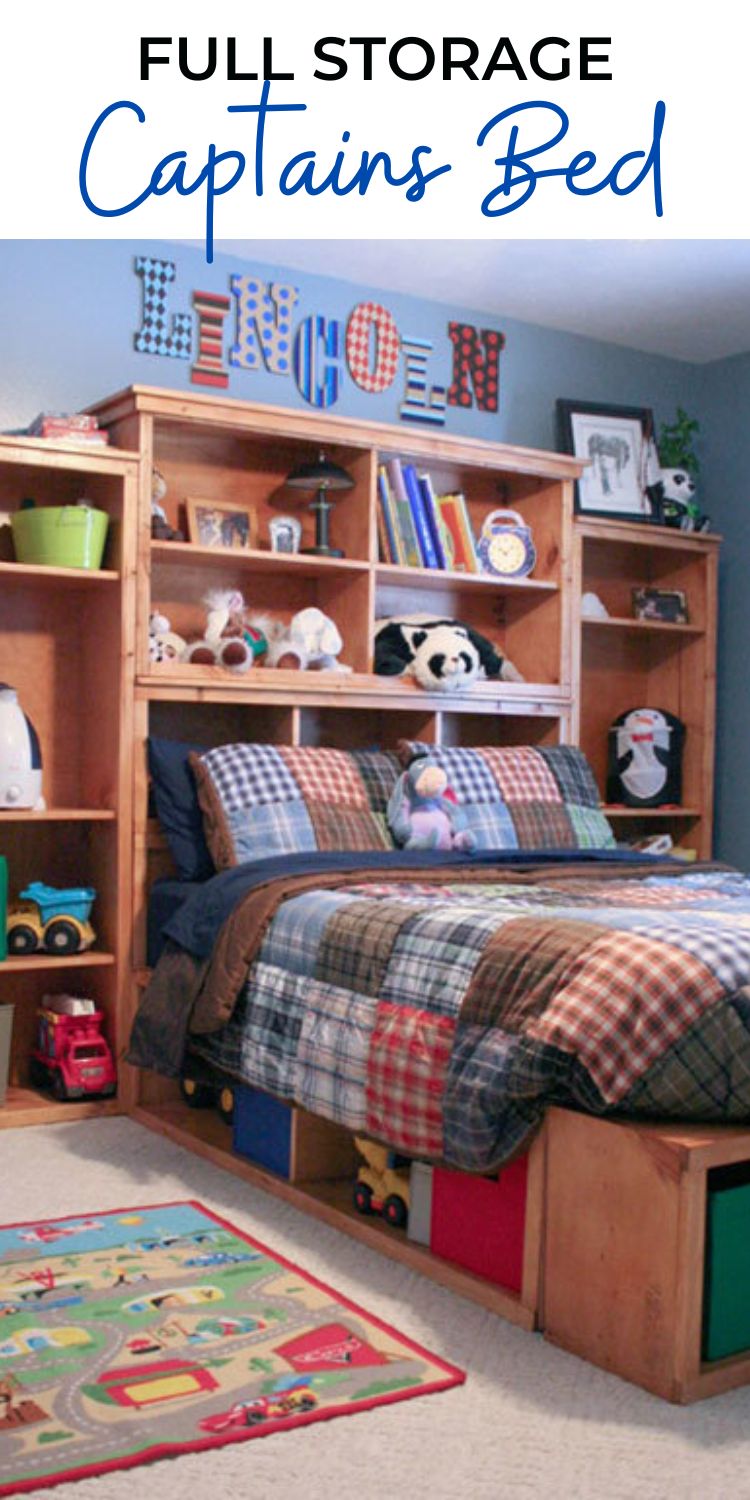
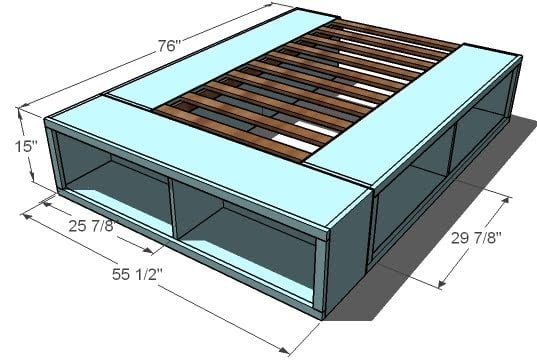
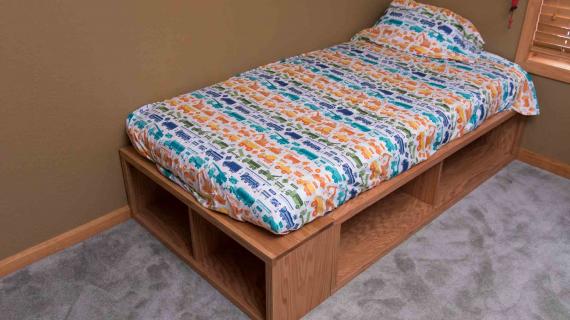
You can build a simple storage bed to elevate a mattress and provide extra storage with these simple plans. Featuring six large, wide cubbies, perfect for fabric bins, toys, or even books and games. This bed has a cubby depth of 12".
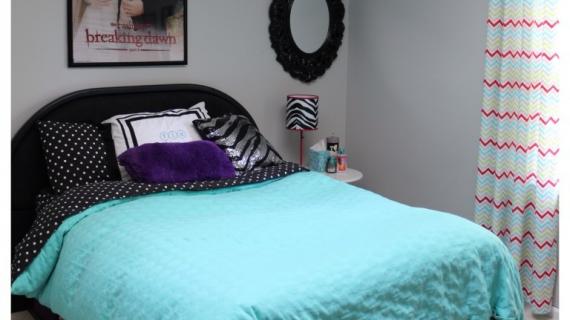
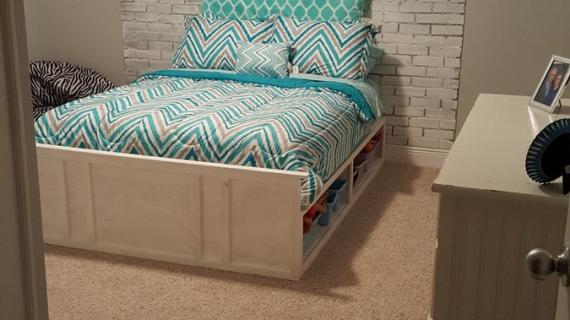
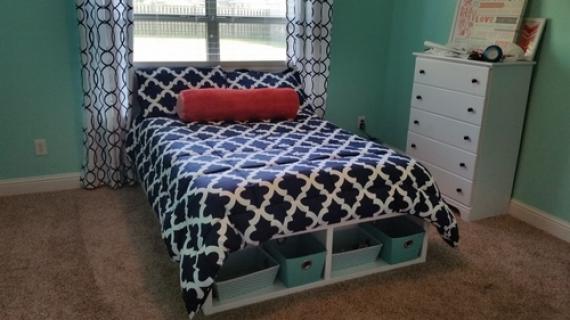
This plan is also the base plan for the twin sized modification. You can see all the project plans in this collection here. Special thanks to Amy and Steve for sharing their amazing photos with us.
Pin For Later!
Preparation
- 6 – 1×12 Boards, 8′ Long (Most economical for stain grade is pine (like the PBTEEN stained bed, and also would work great for painting. You could also use sheets of MDF cut into 1x12s, but you would need to purchase two whole sheets of plywood and only use up 1 1/2 sheets)
- 1 – Sheet of 1/4″ Plywood cut into 15″ wide strips, 8′ long
- 6 – 1×2 Boards, 8′ Long (For paint grade, 1×2 Pine Furring Strips would work for about $1.00 each)
- 5 – 1×3 Boards, 8′ Long (1×3 Pine Furring Strips are about $1.50 Each and would work perfect)
- 2″ Screws
- 1 1/4″ Screws
- 1 1/4″ Nails (optional if you have a nailer handy)
- 2″ Nails (optional if you have a nailer handy)
- Wood Glue
- Wood Filler
CUT LIST FOR THE BOXES
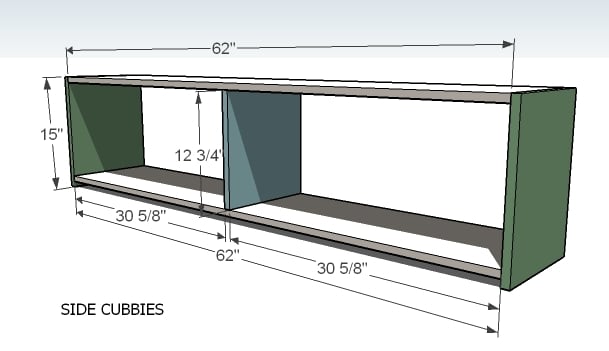
- 6 – 1×12 @ 15″ (Cubby Sides)
- 3 – 1×12 @ 12 3/4″ (Cubby Dividers)
- 2 – 1×12 @ 54″ (End Cubby Top and Bottoms)
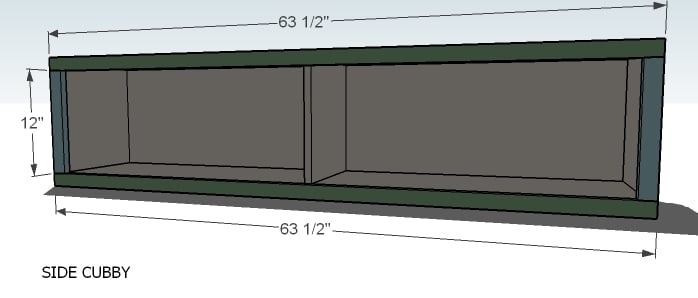
- 4 – 1×12 @ 62″ (Side Cubby Top and Bottoms)
CUT LISTS FOR THE TRIM
- 6 – 1×2 @ 12″ (Vertical Trim)
- 2 – 1×2 @ 55 1/2″ (End Top and Bottom Trim)
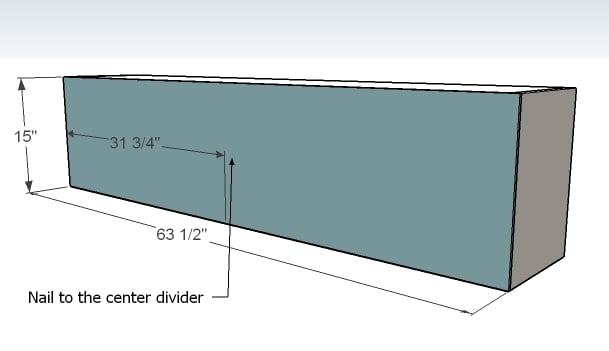
- 4 – 1×2 @ 63 1/2″ (Side Top and Bottom Trim)
CUT LIST FOR THE CENTER SUPPORT
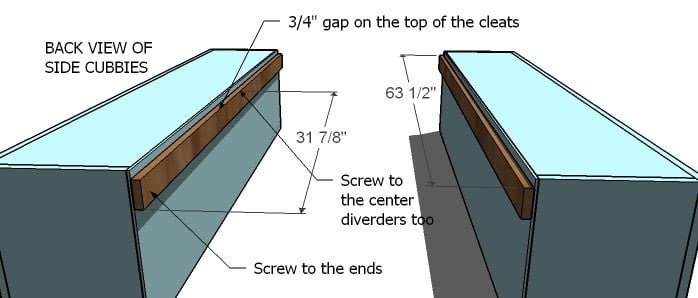
- 2 – 1×3 @ 63 1/2″ (Cleats)
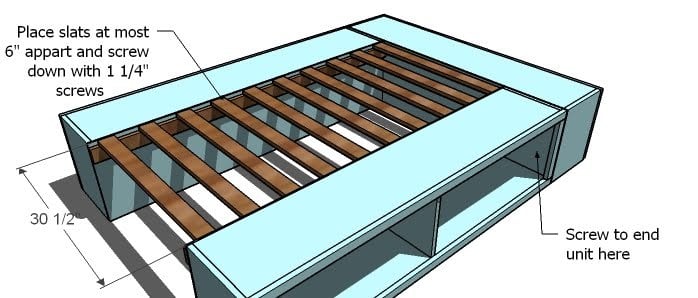
- 11 – 1×3 @ 30 1/2″ (Slats)
So if you read my blog long enough, you already know that to get a square project, you gotta work on a square surface with square boards. And you also need to check for square after each step. Predrill and countersink your screws. If you are working with MDF, use drywall screws and make sure you drill a pilot hole the entire length of your screw hole to keep your MDF from blowing apart. Be safe, have fun!
Instructions
Step 3
Put the back on the end cubby with nails and glue. Don't forget to nail into the center partition as well.
For both backs: You can have the lumber store “rip” your 1/4″ plywood into 15″ wide strips so they are easier to manage, can be hauled in a car, and all you have to do is make a single chop. Have the plywood ripped into 3 – 15″ wide x 8′ long strips. Then cut your plywood for the backs of the end and two for the side cubbies. Use 1 1/4″ nails and glue to fasten in place.
Step 8
SLATS
Lay the slats on top of the cleats, as shown above. Screw in place. Don’t use glue so dissemblance will be a cinch. Also screw the end cubby to the side cubbies ( a couple of blots with washers and nuts would be your best option to keep everything together over time (and make dissemblance a cinch)




Comments
Guest (not verified)
Sun, 03/25/2012 - 11:49
I clicked on the link for the
I clicked on the link for the queen plans, but it told me the page was not found. I am REALLY interested in this project, could someone please help me with the queen size? Thanks so much!!
sandrabees
Mon, 04/16/2012 - 19:14
These look to be the plans
These look to be the plans for queen size here... minus the drawers...
http://ana-white.com/2009/11/queen-sized-storage-bed
Wanda in TX (not verified)
Sun, 05/13/2012 - 11:53
I also can't find the plan
I also can't find the plan for what the hutch is sitting on. I would love to build this for my daughter.
Deb Elshoff (not verified)
Sat, 12/15/2012 - 15:05
I like these plans. I think
I like these plans. I think this will make perfect beds for my teenagers!! Thank you!
tlk1990
Wed, 01/30/2013 - 19:54
just what we were looking for...
This is perfect, look like we can attach existing head & footboard to the framework. Most likely wont use cubbies on both sides as bed is against the wall but may still build just in case we rearrange furniture.
LAgrrrl
Tue, 10/08/2013 - 23:34
Hardware
Thanks so much for this! I am going to use oak for this. Can you please advise what kind of screws to use? And how? (Self-tapping, etc). Also, how many when you're constructing the individual "bookshelves" when attaching each part to another? Thanks!
theboxfamily
Thu, 02/20/2014 - 10:54
Love this bed
We are going to do this bed this summer. Do you have the instructions for the shelves behind the bed? Love your work!
Jass
Wed, 03/05/2014 - 01:05
Storage bed
What are the measurements for a cal king bed? and will it work on a cal king?
Jass
Wed, 03/05/2014 - 01:05
Storage bed
What are the measurements for a cal king bed? and will it work on a cal king?
Stevecastillo1
Mon, 04/28/2014 - 11:37
Question
Is this held together with pocket holes? or are the screws countersunk from the side?
Thanks
Tekkboi
Sun, 06/21/2015 - 08:44
Re: Question
I used pocket holes for mine, 3 sets of two, on each end, per side. (12 screws per side, top and bottom total) In between the pocket holes I added biscuit plate joints for strength (four biscuits and slots per side). Strong enough to hold a mattress, box springs and two people I'm sure.
This will be a seldom used bed in a guest room/hobby room so, while strength is an issue, I don't expect there to be any pillow fights on it. For a kids bed or one that will get heavy use, I would consider using a nail gun and brads.
Tiana_14
Fri, 01/16/2015 - 13:57
Price of project
Hello, I actually designed a very similar platform bed with minor differences. What was the total cost of supplies for your version? If you don't mind me asking.. Thank you for your feed back!
Mcberg0
Sun, 02/08/2015 - 11:03
How do you modify plans to be next to wall?
Hi,
I'm going to be using these plans to put two beds in a corner. How do I modify plans for this? Since the beds will be next to wall, the storage against the wall will be unnecessary. Any help appreciated. Thanks!
mariec77
Sat, 06/27/2015 - 10:04
I don't believe modification
I don't believe modification would be necessary, they just won't have access to the side cubby that is against the wall. For strength/stability you would likely still be creating the side box the same way.
mariec77
Sat, 06/27/2015 - 10:02
clarification for attaching the end cubby please
"Also screw the end cubby to the side cubbies ( a couple of blots with washers and nuts would be your best option to keep everything together over time (and make dissemblance a cinch)"
this is the first time i've built any furniture. the direction above for attaching the end cubby to the side cubbies, to me, is vague. could you provide more detail or even a photo of what you did to attach it when you made yours? i would love to hear from others that have completed this step as well.
thanks!!
Jessie44_2007
Sat, 09/12/2015 - 08:52
Queen storage bed??
Do you have the dimensions for wood and everything for a queen size storage bed with the cubbies but no drawers?? I'm hoping to make this project on my next weekend off!! :)
In reply to Queen storage bed?? by Jessie44_2007
Ana White
Sat, 09/12/2015 - 11:00
Take a look at this posthttp:
Take a look at this post
http://ana-white.com/2009/11/queen-sized-storage-bed
Hasman
Fri, 11/20/2015 - 13:22
Side cubbies
The more I think about this plan, the more I like it. It's easy to modify, since changing key dimensions does not require recalculating a dozen other cuts. I would suggest two modifiations though:
1. For the side cubbies, the top piece does not rest on the 15" high sides. Any reason for that? It would be stronger for vertical loads if the top shelf rests on the sides at the ends, just like it rests on the middle piece.
2. You didn't mention how to connect the cubby sides to the top. Screws? I don't like the idea of the entire top being supported by sideways screws, since I had a bad experience with an MDF bookshelf whose top was screwed to the sides this way...I was standing on it and the shelf broke, and the screws gave me a permanent scar on my legs. An all-wood joint like dowels, biscuits and glue would be safer if the whole thing collapsed. Or at least the screws should all be pointy-end downwards.
Nonetheless, this is the best, simplest and most elegant storage bed plan I have seen. It's modular, and the major cuts can be done at the big-box store, and it's easy to substitute other materials for it! Thank you Ana.
SamanthaKay
Thu, 09/22/2016 - 18:01
what would the mesurments be
what would the mesurments be if i was to make this as a californa king sized bed?
moonprysm
Sat, 10/08/2016 - 14:10
Bins?
What size bins is everyone using for this and where did you get them? I'd greatly prefer the drawers but can't afford the extra wood at the moment. I'm getting frustrated with a lack of ability to search websites for storage containers by dimensions at all
Shayg
Wed, 11/02/2016 - 21:32
Modification Question
This bed would go up against a wall and to maximize storage I was wondering about two modifications:
If I want to leave the slats unscrewed in order to access under the mattress for off- season storage would this cause a problem? Also, the side that will be up against the wall I am considering not putting a back on the cubby in order to maximize off season storage access by lifting the mattress and removing the slats.
jessica2726
Wed, 03/07/2018 - 04:53
newbie and confused
hi, i am looking at the modification for twin bed and the full bed size. can someone please give me a complete cut list for the twin bed. i am very new to this and i tried to make a list on my own but i am very confused if i did it right. thanks in advance!