
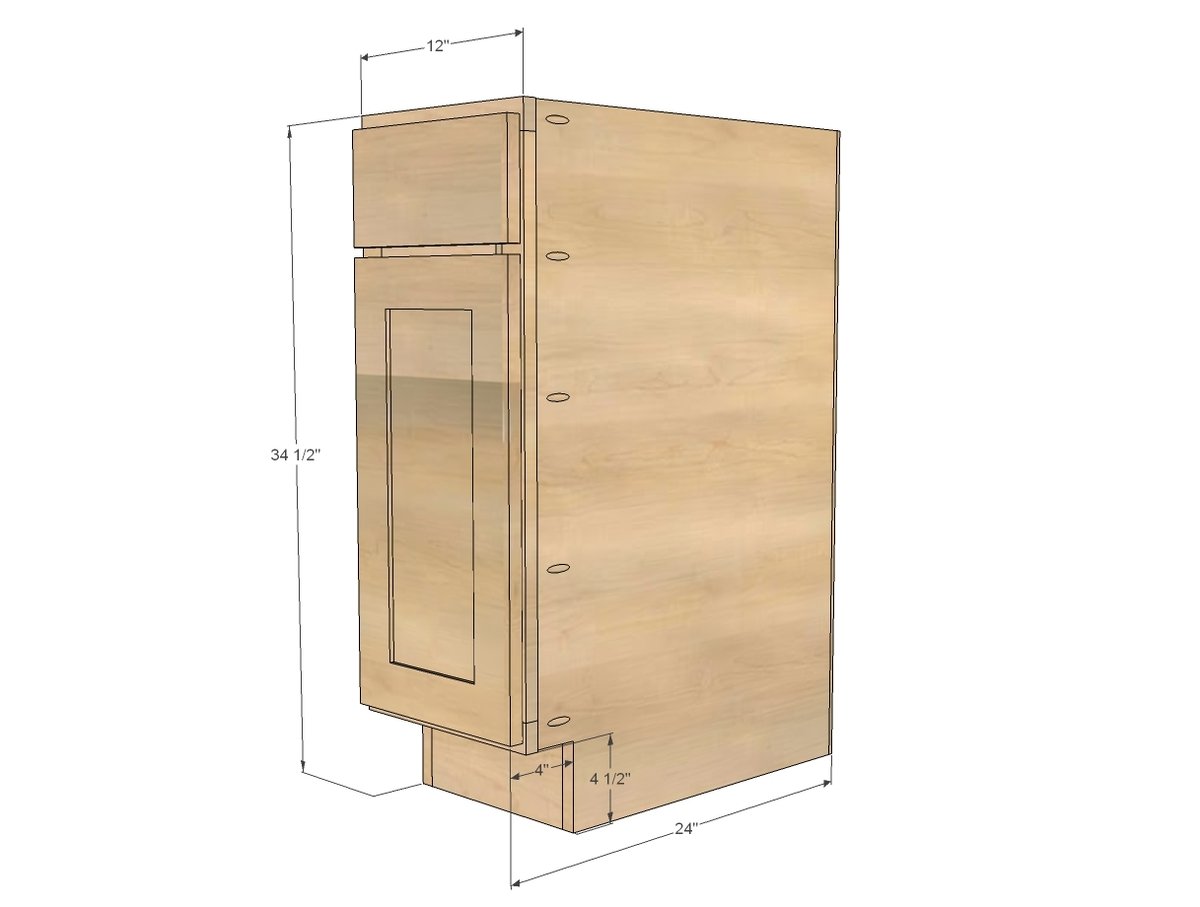
12" base cabinet full overlay door plans - Momplex White kitchen cabients.
Preparation
3/4" plywood ripped into strips 22 1/4" long (for sides and shelves)
3/4" plywood scrap from ripping sides and shelves (for top supports)
3/4" plywood ripped into strips 5" long (for base supports - use cheaper plywood here)
1x2s for face frames
1/4" plywood (for backs)
1-1/4" pocket hole screws
3/4" finish nails
edge banding for shelves
CARCASS
2 - 3/4" plywood @ 22 1/4" x 34 1/2" (side panels)
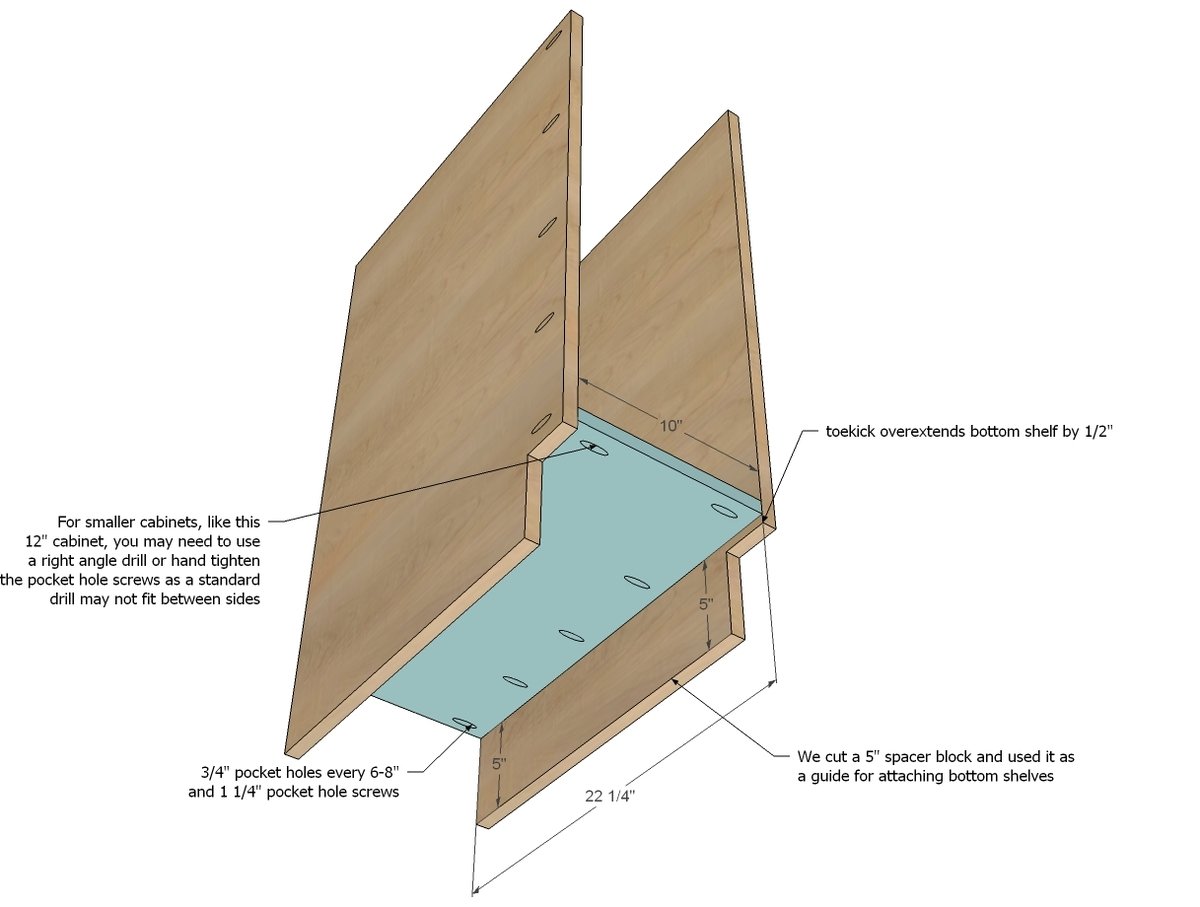
1 - 3/4" plywood @ 22 1/4" x 10" (bottom shelf)
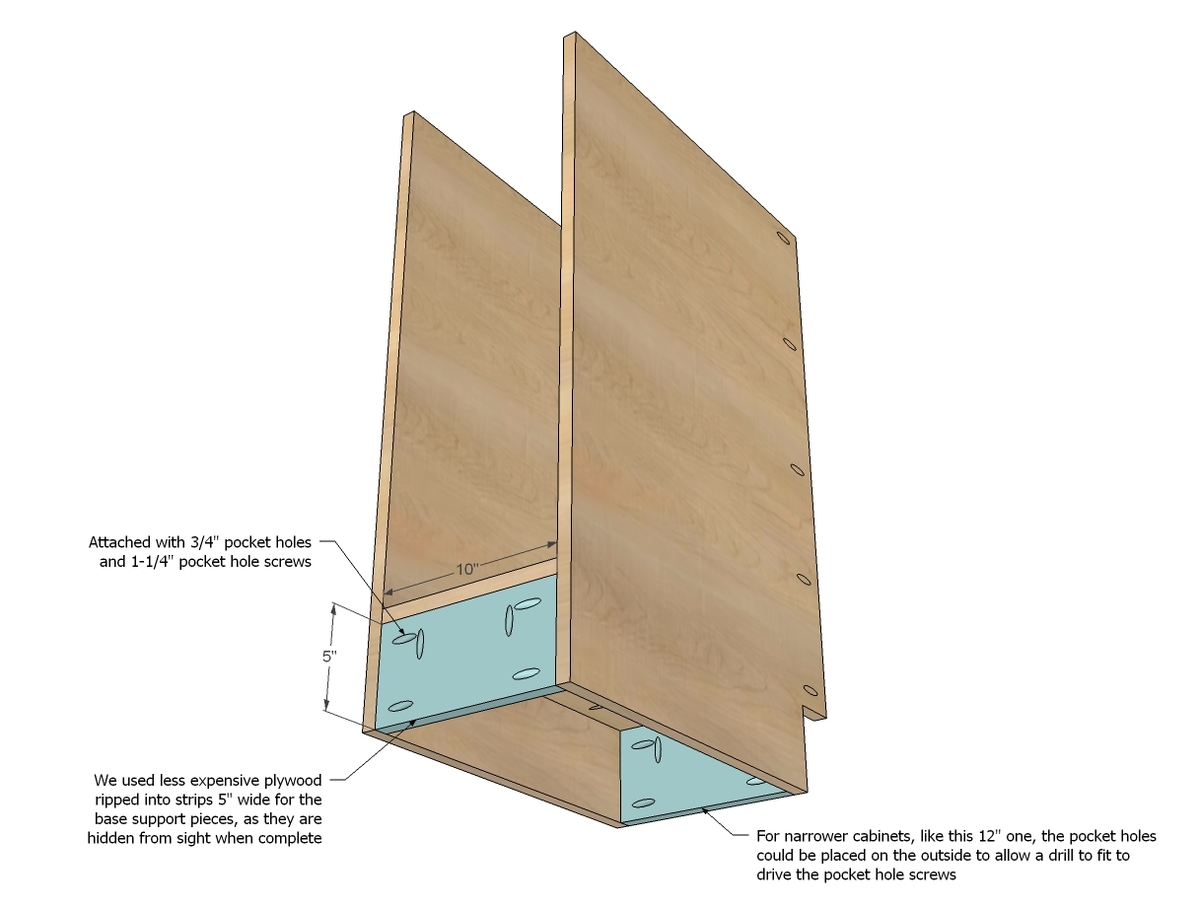
2 - 3/4" plywood @ 5" x 10" (bottom supports)
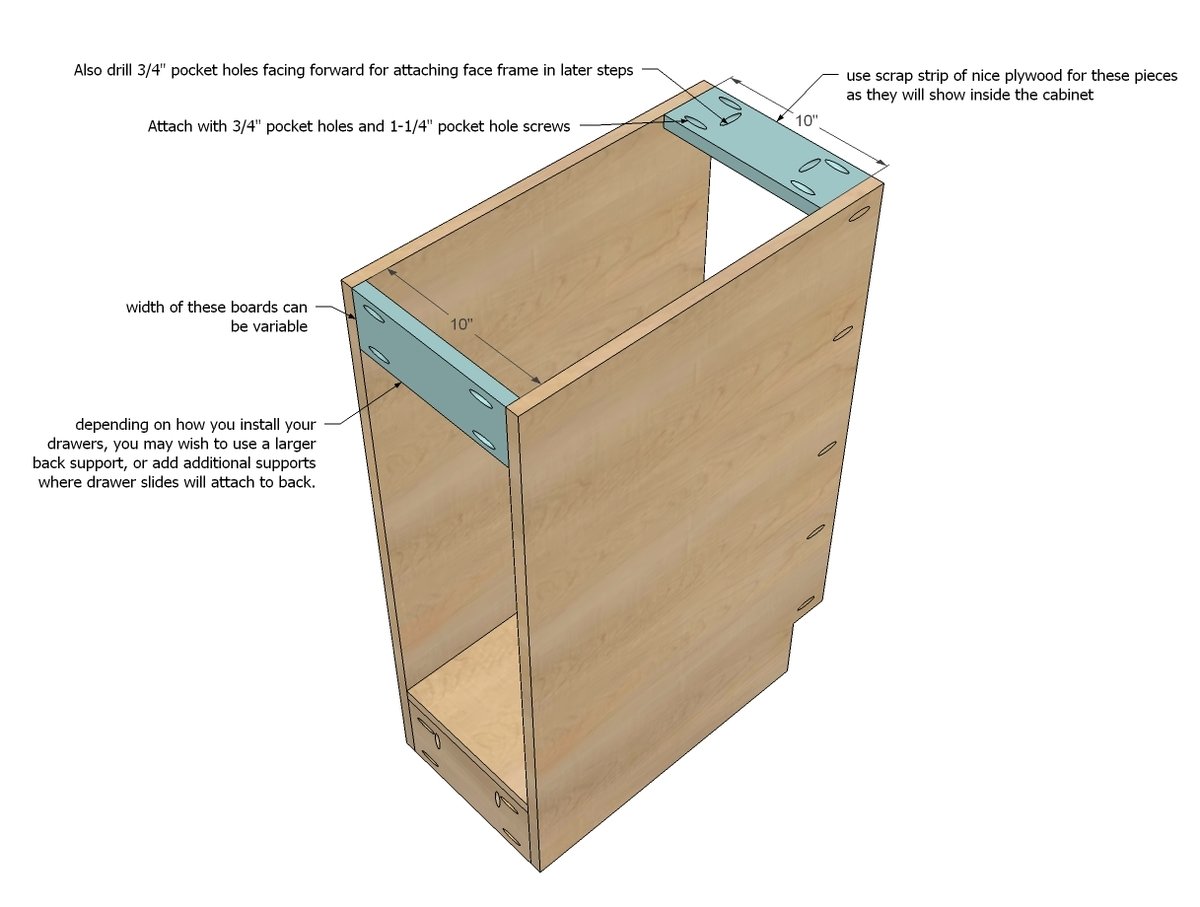
2 - 3/4" plywood @ 3 1/2" (can vary) x 10" (top supports)
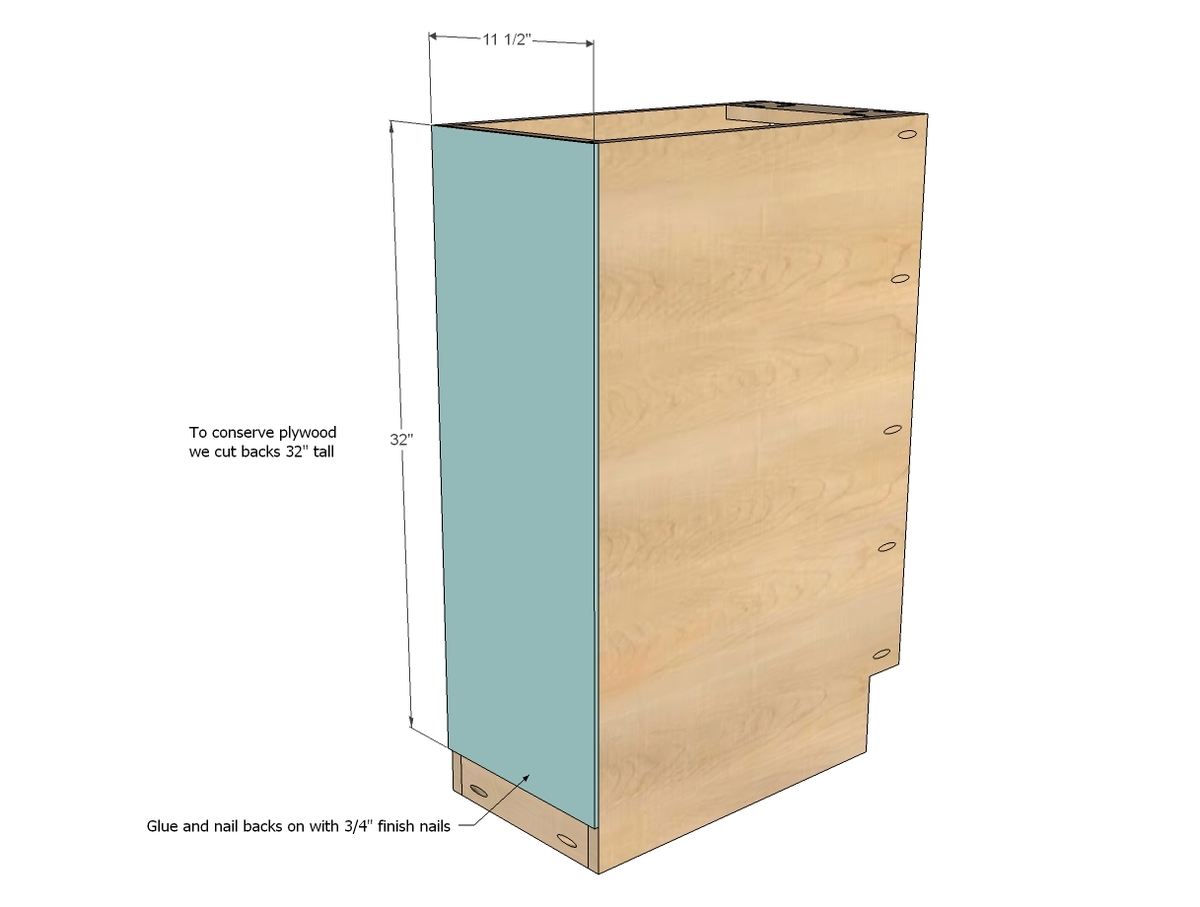
1 - 1/4" plywood @ 32" x 11 1/2" (back)
FACE FRAME
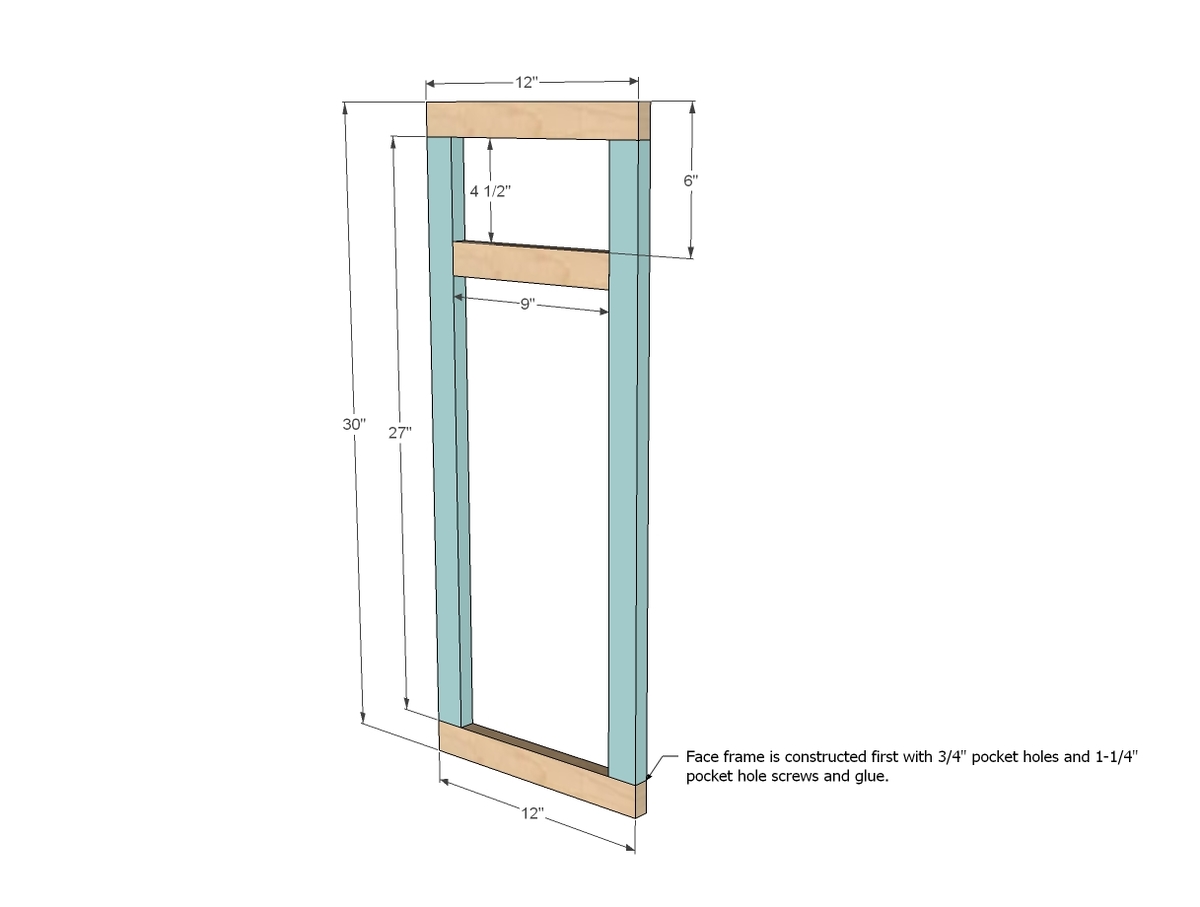
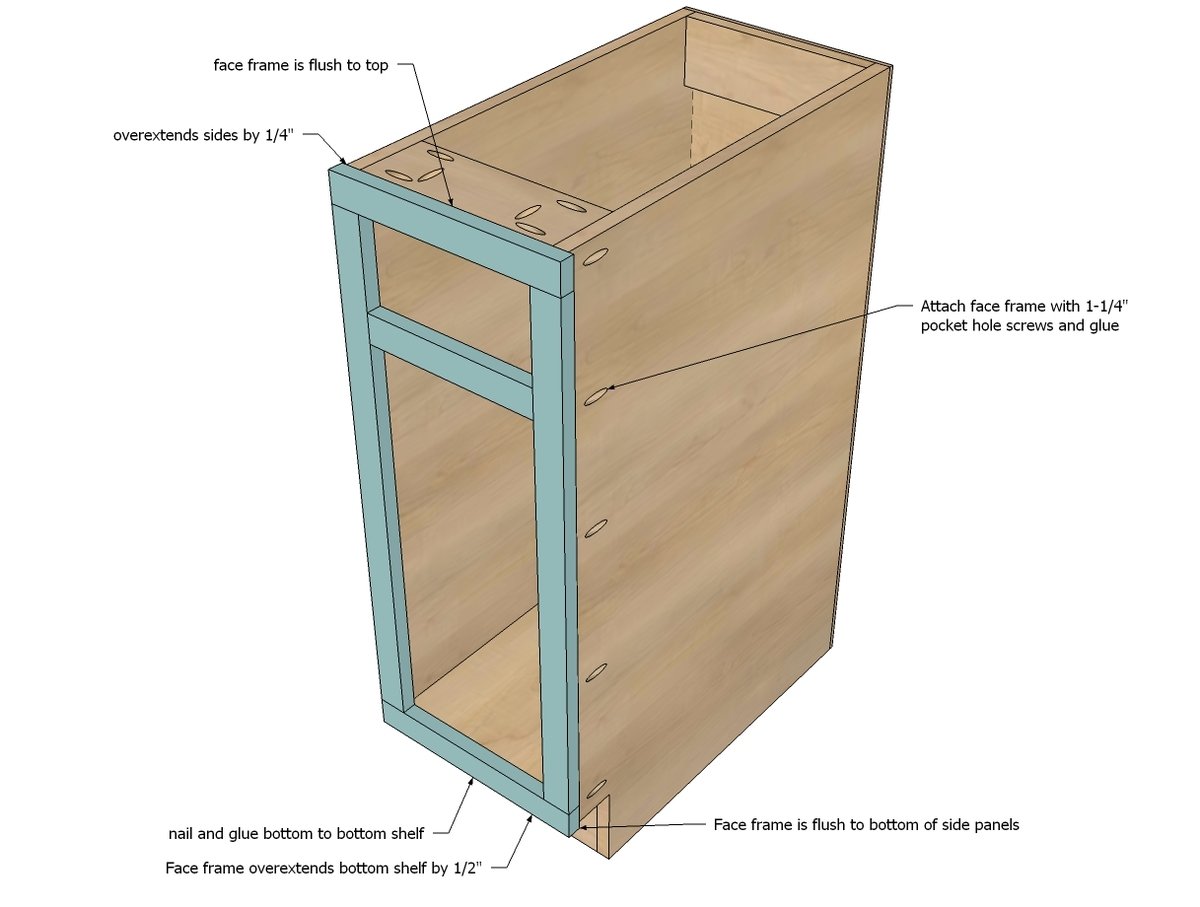
2 - 1x2 @ 27"
2 - 1x2 @ 12"
1 - 1x2 @ 9"
SHELVES
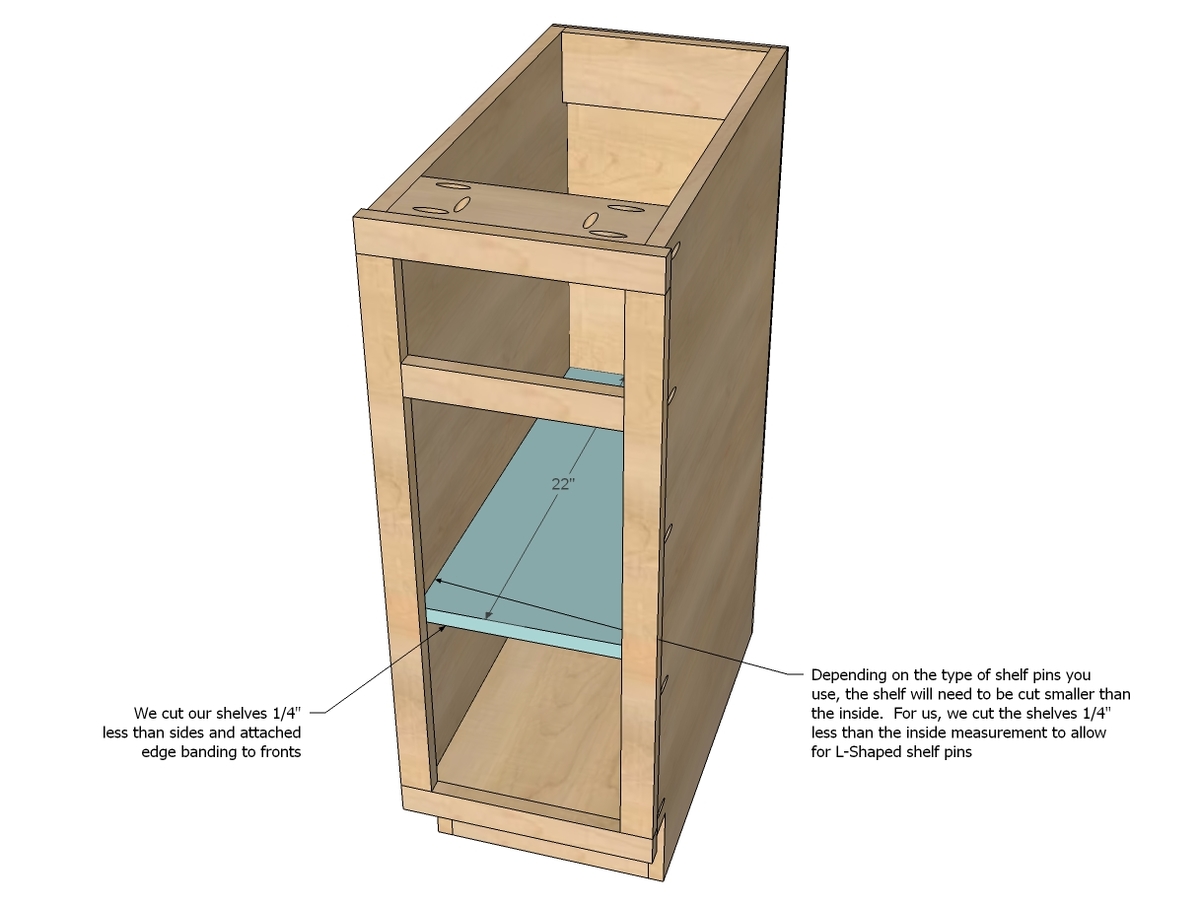
3/4" plywood @ 22" x 9 3/4" (measure and adjust to fit shelf pins)
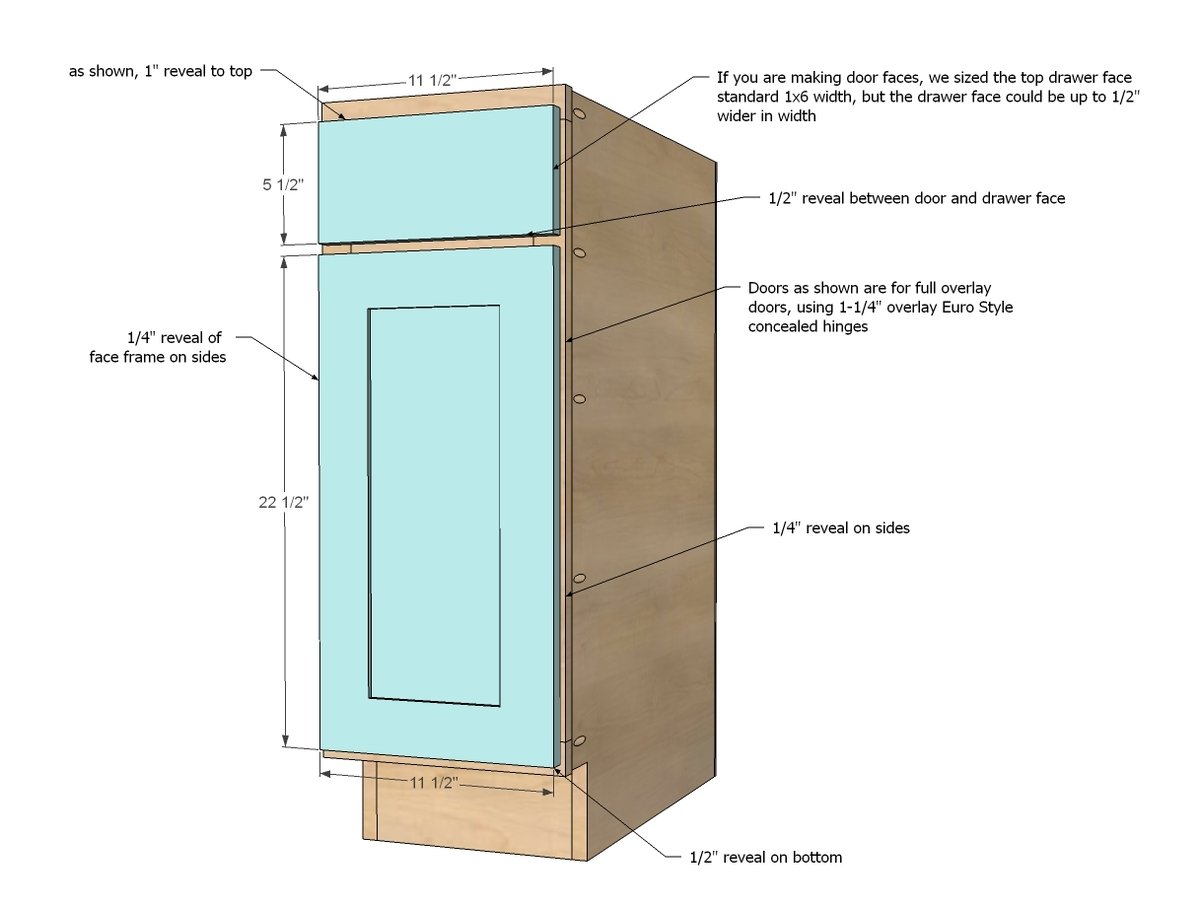
DOOR/DRAWER FACE for FULL OVERLAY (1-1/4")
5 1/2" x 11 1/2" (drawer face)
22-1/2" x 11-1/2" (door)
Please read through the entire plan and all comments before beginning this project. It is also advisable to review the Getting Started Section. Take all necessary precautions to build safely and smartly. Work on a clean level surface, free of imperfections or debris. Always use straight boards. Check for square after each step. Always predrill holes before attaching with screws. Use glue with finish nails for a stronger hold. Wipe excess glue off bare wood for stained projects, as dried glue will not take stain. Be safe, have fun, and ask for help if you need it. Good luck!
Instructions
Step 6
Step 7
Step 8
Step 9
Step 10
It is always recommended to apply a test coat on a hidden area or scrap piece to ensure color evenness and adhesion. Use primer or wood conditioner as needed.


Comments
DecorSanity
Mon, 11/18/2013 - 12:06
Interior Finish?
Hi Ana! You mentioned you finished the face frame before you attached it to the front of the cabinet. Do you finish the interiors with a sealant...and if yes do you do it before assembly? Wondering if you do finish after assembly if it is super difficult to apply sealant inside a small box like that. Thanks for these instructions, they are excellent!!
Ana White
Mon, 11/18/2013 - 17:56
Used Prefinished Plywood for Carcass
Hi - so sorry I didn't mention this is this post - we used Pre-Finished plywood (it's special order from PureBond) for the cabinet carcass itself, so the insides of the cabinets (with the exception of exposed front edge of shelves which we covered in edge banding) is fully finished upon completion. So the only finishing we had to do was paint the face frames - really too easy! Hope this makes sense! Thanks, Ana
DecorSanity
Tue, 11/19/2013 - 12:05
Oh, Awesome!
I didn't know Pre-finished plywood even existed, that is a great idea. Now if I could special-order a RAM to assist me on the assembly line, that would be great too. Hubs isn't a project lover! :-)
awomanwithahammer
Mon, 01/18/2016 - 07:35
Plywood grain direction
Your graphics indicate that the grain of the plywood runs horizontally on the sides of the cabinets, but it seems that it would be more aesthetically pleasing to run it vertically where it is visible on the inside. In addition, it would make layouts more economical on a 4x8 sheet of plywood. Or am I misunderstanding entirely?