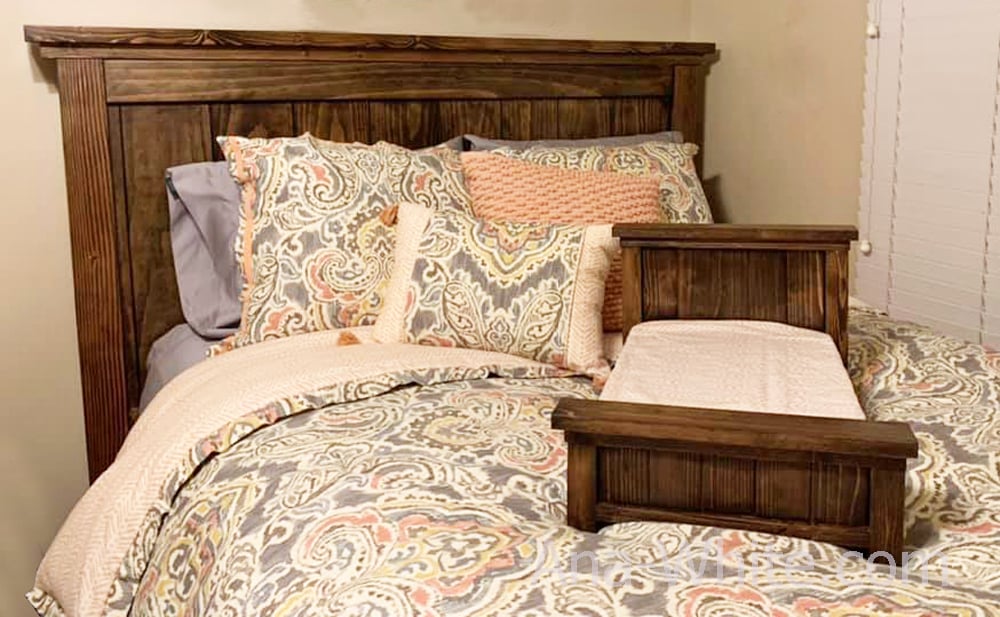
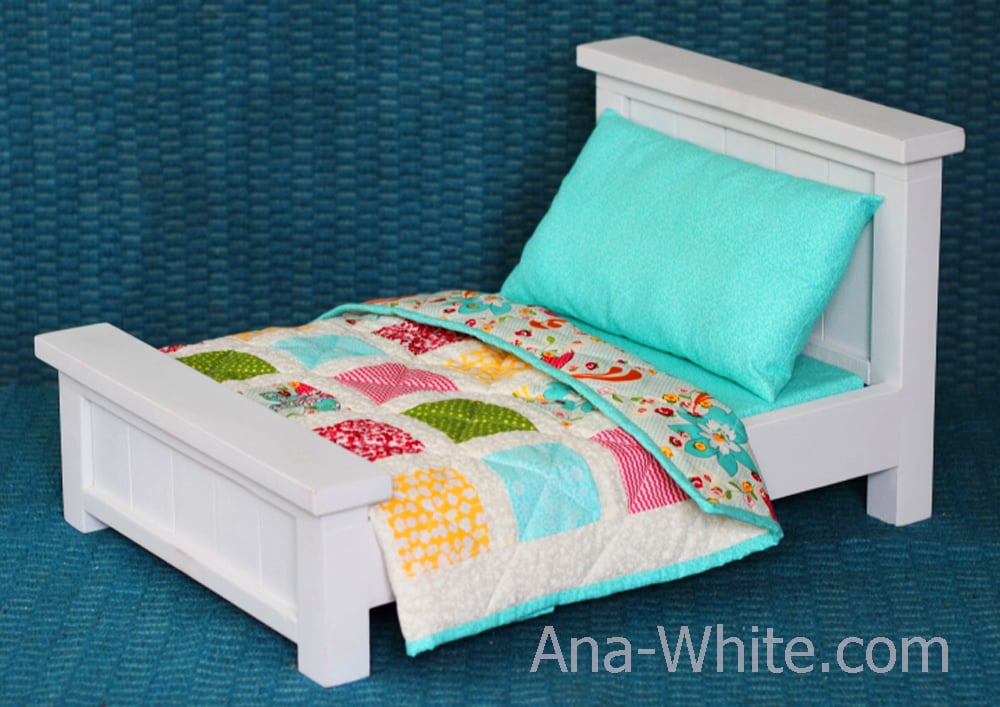
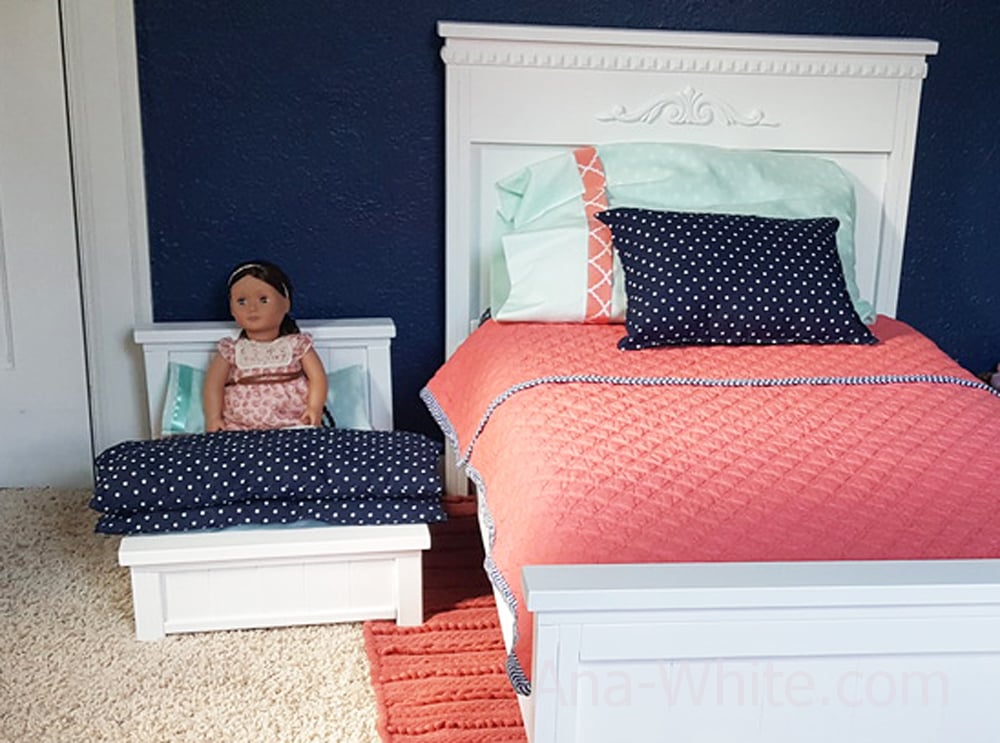
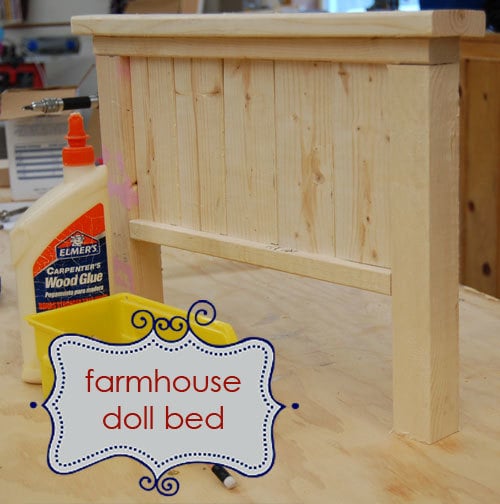
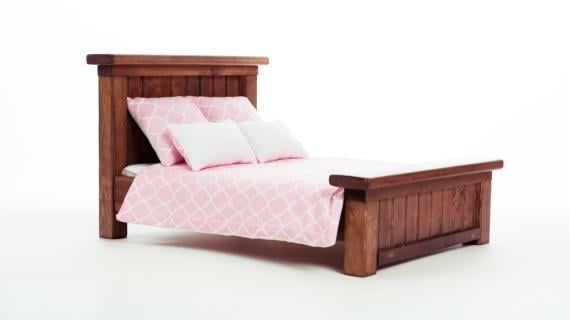
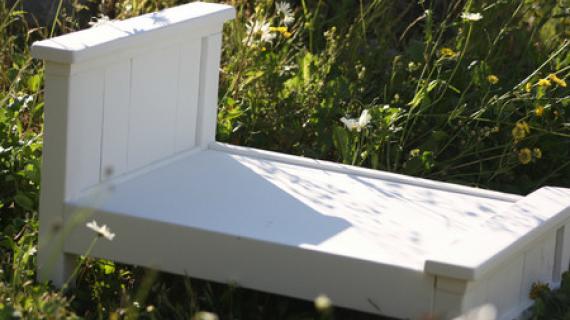
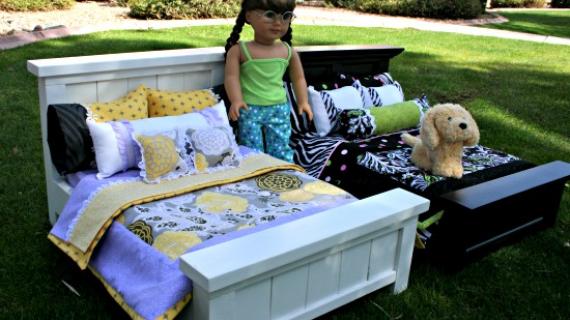
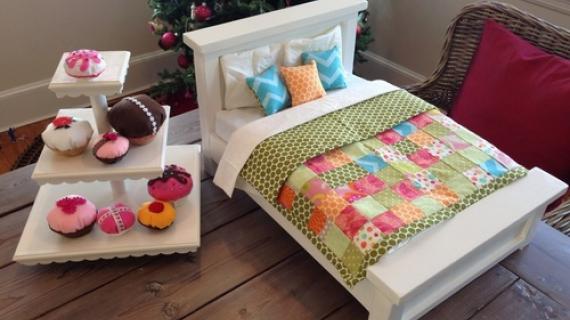
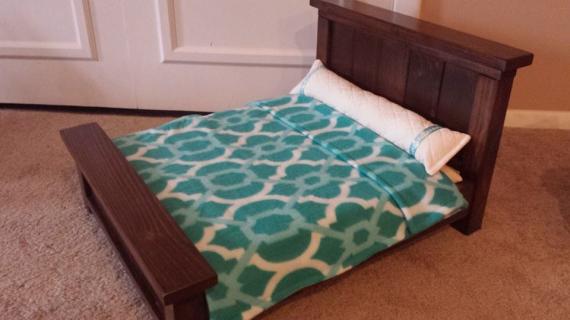
Build your own American Girl doll bed to match our Farmhouse Beds, suitable for 18" dolls. This bed is slightly wider than traditional doll beds, to look more like our Farmhouse Beds. Free step by step plans from Ana-White.com
Collections
Dimensions
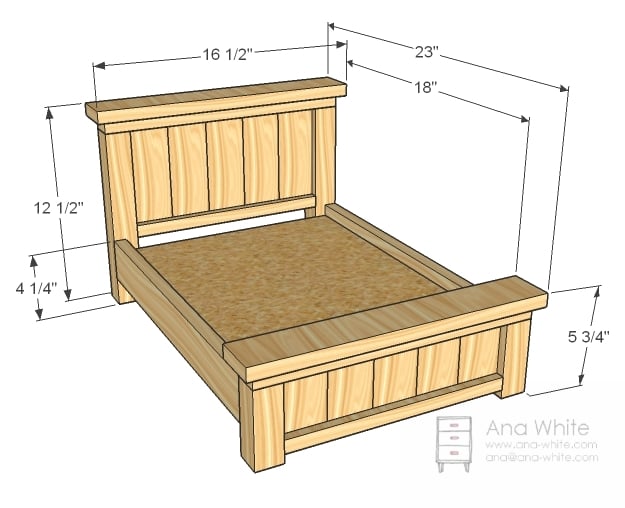
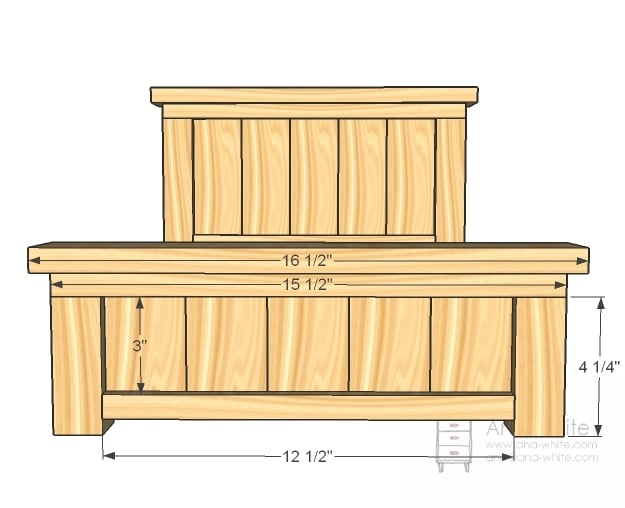
Dimensions are shown in diagram
Preparation
Shopping List
- 2×2 (3 feet total)
- 2 – 1x3s (10 feet total)
- 1 – 1×2 (8 feet total)
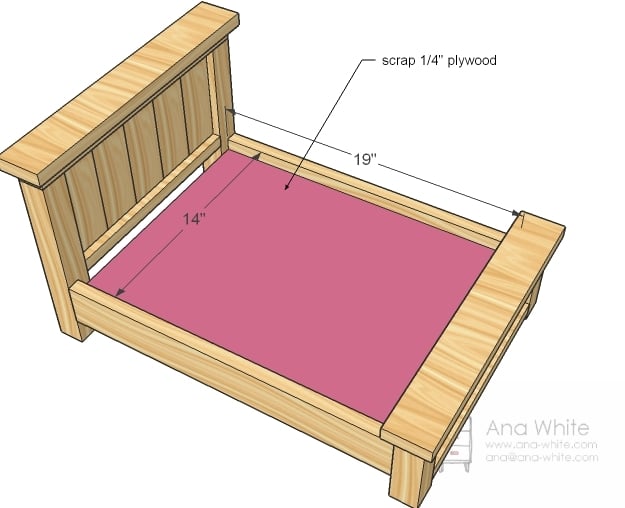
- scrap 1/4″ plywood (you could even use sturdy cardboard here)
- 1 1/4″ self tapping wood screws (SPAX brand or similar) OR brad nails (if you have a brad nailer)
- 2″ self tapping wood screws (SPAX brand or similar) OR brad nails (if you have a brad nailer)
- Wood Glue
Cut List
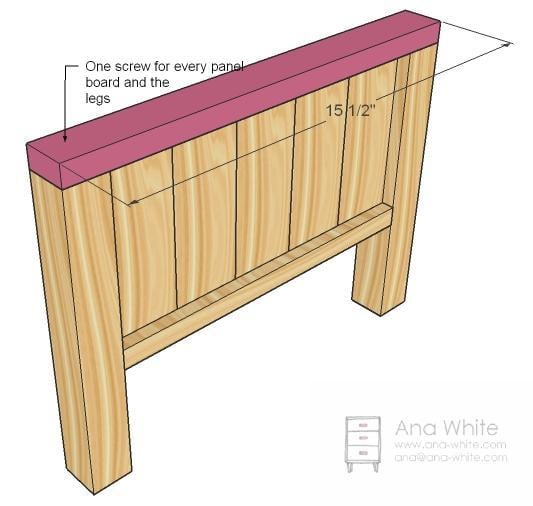
- 5 – 1×3 @ 6″ (Headboard Panel)
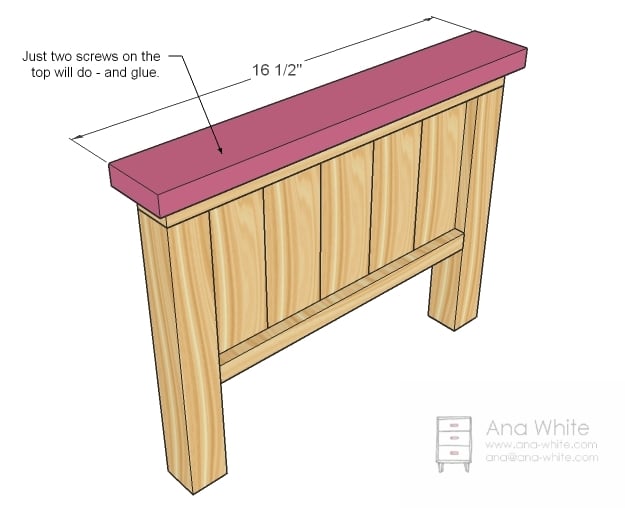
- 5 – 1×3 @ 3″ (Footboard Panel)
- 2 – 2×2 @ 4 1/4″ (Footboard Legs)
- 2 – 2×2 @ 11″ (Headboard Legs)
- 2 – 1×2 @ 12 1/2″ (Bottom of Panels)
- 2 – 1×2 @ 15 1/2″ (Top of Panels)
- 2 – 1×3 @ 16 1/2″ (Top of Headboard and Footboard)
- 2 – 1×3 @ 19″ (Siderails) 2 – 1×2 @ 14″ (Bed Frame)
Instructions
Step 1
Step 2
Step 4
Step 6
Step 9
Step 10
Finishing Instructions
Finish Used
I filled all my holes with wood filler and let dry. Then I sanded with 120 grit sandpaper. Then I brushed on primer and two coats of Antique White by Valspar in Satin.
Project Type
Room









Comments
Julie (not verified)
Wed, 11/17/2010 - 01:11
It's gorgeous! My two girls
It's gorgeous! My two girls got American Girl Dolls last year for Christmas and they have been wanting beds for them. I can't wait to make these adorable beds for them for Christmas! Thanks so much for posting this.
Lisa (not verified)
Wed, 11/17/2010 - 01:35
Ahhhh, I'm so disapointed
Ahhhh, I'm so disapointed that it's a doll's bed because I LOVE that blanket! It actually reminds me of my baby blanket (which I still use)! The whole thing is stinking adorable! Do you have any idea who made the fabrics?
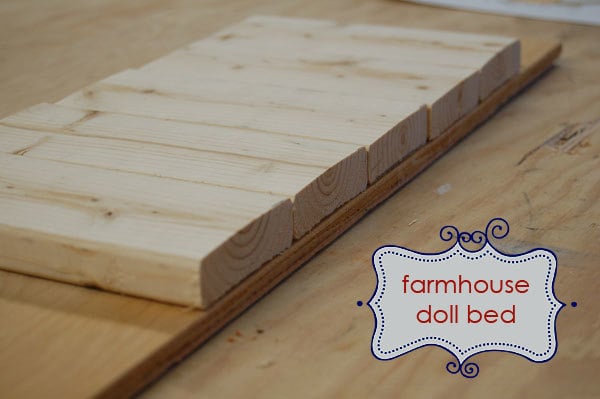
And thanks for the hit about laying out the boards!
Jaime (not verified)
Wed, 11/17/2010 - 01:52
Ana you read my mind!!!!
Ana you read my mind!!!! I've been trying to figure this out for weeks but I just couldn't get the dimensions small enough to make it look right. THANK YOU, THANK YOU, THANK YOU! I recently made a miniature quilt too (and was hoping to make the bed to go with it but I'm no furniture design genius like you) it's here on my blog. I'm off to the garage asap! You really are the best.
Jaime
http://thatsmyletter.blogspot.com/2010/11/t-is-for-trip.html
Amber (not verified)
Wed, 11/17/2010 - 02:09
That is about the cutest
That is about the cutest thing I've ever seen and I am absolutely inspired to make a quilt for my own bed. That is fabulous. I think I'll have to find a friend with a kid in need of a doll bed.
Tsu Dho Nimh (not verified)
Wed, 11/17/2010 - 02:25
The way that thing is
The way that thing is constructed (2" screws and GLUE!) Grace will be handing it over to her grandkids.
I love the quilt, too.
Tracie (not verified)
Wed, 11/17/2010 - 02:55
Super
Super cute!

Estela @ Weekly Bite (not verified)
Wed, 11/17/2010 - 03:04
This is just too cute!!! I
This is just too cute!!! I love this! The bedding is perfect! Thank you for such a great post!
dangitAnge (not verified)
Wed, 11/17/2010 - 03:10
Gorgeous!! My girls are big
Gorgeous!! My girls are big into American Girl dolls so I'm very eager to see what else you have planned! :)
Lori (not verified)
Wed, 11/17/2010 - 03:16
Ohh perfect. I am going to
Ohh perfect. I am going to make bunkbeds from this plan because we have two AG dolls. Can't wait.
Jena @ Involvi… (not verified)
Wed, 11/17/2010 - 03:34
I love this! You are so
I love this! You are so talented. What a cute idea
Melanie (not verified)
Wed, 11/17/2010 - 03:36
The universe is playing a
The universe is playing a cruel joke on me! I love this site, but knew you had no doll beds. So, I have been searching the Internet for easy plans for a doll bed for my niece. I got frustrated & ended up purchasing a kit on E-bay. Yesterday. I'm soooo bummed!!
Lisa RoomByRoom (not verified)
Wed, 11/17/2010 - 03:46
Gorgeous! We're adopting a
Gorgeous! We're adopting a baby girl soon, I think this will be on her Christmas list next year!
Bekah
Tue, 06/14/2011 - 19:37
Congratulations! :D
Congratulations! :D
Kristal (not verified)
Wed, 11/17/2010 - 03:48
This is so cute! What did you
This is so cute! What did you use for the mattress? A piece of foam or something? Did you just lay a piece of fabric over the mattress? We want directions for the bedding too! lol
April McCoid (not verified)
Wed, 11/17/2010 - 03:58
My 2-year-old has a hand me
My 2-year-old has a hand me down doll bed, which has worked just fine for the past few months, but after seeing this I don't think I can pass up such a beautiful project! Thank you SO MUCH for these plans!
Sophie (not verified)
Wed, 11/17/2010 - 04:20
Ana, you have a spy in my
Ana, you have a spy in my house! I cannot believe how perfect your timing is, I have been searching for something to do with my scrap wood. And this comes hot on the heels of the easel, posted the very day my kids begged me for one. Actually, they said "make one Mommy, you're good at building". Thanks to you :-)
Jamie M. (not verified)
Wed, 11/17/2010 - 04:21
My daughter would LOVE THIS!!
My daughter would LOVE THIS!! Thank you I think I have just found her Christmas present.
Jennifer E. (not verified)
Wed, 11/17/2010 - 04:54
I LOVE THIS!!!! My daughter
I LOVE THIS!!!! My daughter is only 2 years old and I want to make it for her... I don't think I can wait a few years until she's old enough to help me! =)
Amanda J (not verified)
Wed, 11/17/2010 - 04:54
I don't even have kids and I
I don't even have kids and I want to build this!! This would be such a wonderful gift to give. It is sooo cute! I'd love a tutorial on the mattress and quilt too. Thanks Ana!
Jody (not verified)
Wed, 11/17/2010 - 05:17
Hmm...do I have time to make
Hmm...do I have time to make the easel, finish the quilt for the neighbors and build this bed?? If not, this will be my niece's b-day present next year.
elizabeth (not verified)
Wed, 11/17/2010 - 05:19
Thankyou I am so glad you
Thankyou I am so glad you posted this I tried to design one myself and it was a mess , just in time for christmas.
Debbie (not verified)
Wed, 11/17/2010 - 05:21
My daughter was supposed to
My daughter was supposed to get an AG Bitty baby for Christmas (she got it early instead), any chance for a doll crib plans?
Stacy (not verified)
Wed, 11/17/2010 - 05:25
Instead of building this bed
Instead of building this bed with my daughter, I'm going to build it with my son. He begs all the time to build something and I think this would be a great gift for him to give to his little sisters! And his 3 girl cousins! Thank you so much!
Elankat (not verified)
Wed, 11/17/2010 - 05:30
That is completely adorable!
That is completely adorable!
jeanne (not verified)
Wed, 11/17/2010 - 05:33
I actually want to cry about
I actually want to cry about this post. I have 4 daughters and I feel so bad that I never attempted to make a crib for my now almost 12 year old's dolls. We bought a little pac'n play second hand one Christmas but I never made anything. However.... she does have a Build a Bear from Disneyland that might go nicely in there. But Little sisters 3 and 4 would have to have one too. Thanks for the plans. I hope that I can maybe get these in by their birthdays. :)
Libby (not verified)
Wed, 11/17/2010 - 05:33
If I can do this I will try
If I can do this I will try the twin farmhouse.... I'm excited.
Michelle (not verified)
Wed, 11/17/2010 - 05:39
What did you use for a
What did you use for a mattress?? I can't wait to build this. I just pulled out some material I've had stored for months that will be perfect for a sheet and comforter. Can't wait!!
Kelly (not verified)
Wed, 11/17/2010 - 05:45
I love this, thank you!! I
I love this, thank you!! I can't wait to make it for my daughter! She's only 7 months so she won't be helping but maybe her big brother who is Grace's age can help. You are the most amazingly talented and giving person to create these plans and give them to us for free, you could make a killing selling these! I love that you understand your reader's desire to have great style on a DIY budget. Your blog is at the top of my favorites bar and I check it as often as I check my email!!! Love you and your blog!
All8 (not verified)
Wed, 11/17/2010 - 06:13
This is just about the
This is just about the sweetest thing ever. I can't even imagine how many children will be thrilled to discover this under the tree Christmas morning. Ana, you're the best!
Marie (not verified)
Wed, 11/17/2010 - 06:26
I love this! What's the
I love this! What's the "mattress" made out of? It looks like the fabric you have on the "mattress" is above the 1/4" plywood for the frame. Another piece of wood? Some foam?
Tsu Dho Nimh (not verified)
Wed, 11/17/2010 - 06:59
This would be a great bed for
This would be a great bed for a small dog or a cat.
Robin (not verified)
Wed, 11/17/2010 - 07:00
This is amazing, I was just
This is amazing, I was just trying to figure out how to make my own but this is SO SO much nicer. I think I'm going to make the legs a little taller so I can put a trundle underneath for her to have her doll friends sleep over. If I can do this maybe I'll try the Queen Farmhouse bed for me!!
Anna (not verified)
Wed, 11/17/2010 - 07:00
So adorable! After ordering
So adorable! After ordering $150 of American Girl doll clothing, I wasn't looking forward to shopping for beds for the little people! I will be making three of these for under our tree this year.
Thank you!
Vanessa (not verified)
Wed, 11/17/2010 - 07:49
My daughter will be getting
My daughter will be getting her first American Girl doll for her birthday (from Grandma) and this will be the perfect thing to go with it! Thanks!
rachael (not verified)
Wed, 11/17/2010 - 07:58
Ana- This is SO cute! I love
Ana- This is SO cute! I love this, I also loved the readers comment about having my son help make it for his sisters, GREAT idea! I have a few questions, what did you use for the mattress? It looks like you made a sheet, did you make it like a pillow where you sewed three sides, added in the padding and sewed it closed, or did you sew it like an actual sheet that doesn't have a bottom? Would you mind adding measurements of the finished quilt and pad? I may have to start the quilt before I have the bed done to get it finished in time! Thanks for your site--it is AWESOME!!!
Gwenevere (not verified)
Wed, 11/17/2010 - 08:19
i love being able to start
i love being able to start small...it's like a prototype. any chance we could get the twin storage beds with corner hutch in miniature?
Meg (not verified)
Wed, 11/17/2010 - 09:00
I cant wait for my baby girl
I cant wait for my baby girl (3 1/2 months now) to be big enough to play dolls! I am saving this plan for 2 Christmases from now!
Ana White (not verified)
Wed, 11/17/2010 - 09:20
It is amazing how expensive
It is amazing how expensive accessories for American Girl dolls are - I would love to see pictures of the three beds!
Ana White (not verified)
Wed, 11/17/2010 - 09:24
Kristal (and Marie) I
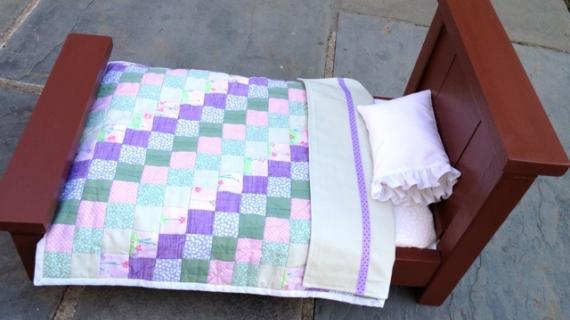
Kristal (and Marie) I actually used a leftover chair cushion pad cut down to size. It worked perfect, and the chair pads are 17 1/2" x 15", so I just cut the one side down an inch or two. The cheapest place to buy chair pads is walmart - about $5 each. Of course, you could simply sew a box cushion and stuff with foam as well.
Ana White (not verified)
Wed, 11/17/2010 - 09:26
Jody, this bed was a one hour
Jody, this bed was a one hour project. If you had a nailer handy, it would be even faster (I don't have a nailer right now). The bedding is what took all the time. You can do this!
Ana White (not verified)
Wed, 11/17/2010 - 09:26
Debbie, I will be posting
Debbie, I will be posting plans shortly from some other amazing sites!
Tami (not verified)
Wed, 11/17/2010 - 10:47
Oh, I so need to work on
Oh, I so need to work on figuring out bunk beds of this, my daughter has 2 dolls and has been living with 1 bed for the two of them for a while and really wants them to be bunks. I am thinking just doing a headboard on each end should give enough clearance for bunks.
Pam the Goatherd (not verified)
Wed, 11/17/2010 - 10:59
My daughter is a senior in
My daughter is a senior in college and would still be thrilled to get this bed for Christmas! Her grandpa, my father, built her a trunk for her American Girl doll several years ago, which is the only furniture she has for her doll. I'm looking forward to seeing some of the other things you are designing for those dolls. I may have Christmas presents for her covered for the next several years!
Jenn Hoff (not verified)
Wed, 11/17/2010 - 12:52
Oh my gosh that is the cutest
Oh my gosh that is the cutest thing I've ever seen! I LOVE IT!!! What a superb idea!
Kelly (not verified)
Wed, 11/17/2010 - 13:55
WHAT!!! That is incredible!!!
WHAT!!! That is incredible!!! SO cute! I hope you have more doll furniture coming! :)
Theresa (not verified)
Wed, 11/17/2010 - 15:49
Ana , I think this is the
Ana , I think this is the best plan yet. Think of all the children that will get a wonderful new doll bed. My favorite treasure was a doll cabinet . It was a place to store my dolls and hang my doll clothes on hangers. I still remember how much I enjoyd it . I dont know what happened to it. Maybe I should make another.
Michelle (not verified)
Thu, 11/18/2010 - 13:42
Ana, I just finished building
Ana, I just finished building this bed, it is too cute for words! I didn't see how far up (from the bottom) to attach the frame, so I rested it (the frame) on top of a couple of 2X4 scraps, and tacked it in place with 2" nails. I then predrilled and screwed hands free, yippee!
I used scraps I had lying around, so mine needs some wood filler and sanding before I paint, but will be posting pics soon. Thanks again for more FAB plans, you're helping me fill my home with amazing, GORGEOUS, handmade furniture!
PRETTY PLEASE share your sheet/mattress/pillow/quilt patterns with us, my daughter is DYING to get her hands on this bed!!
Alissa (not verified)
Thu, 11/18/2010 - 14:59
Wow, Ana, just... wow. You've
Wow, Ana, just... wow. You've outdone yourself with this plan (and that's saying a lot because all your plans are amazing)! This doll bed is SO cute! My two-year-old would go nuts having a bed this beautiful to tuck her "babies" into at night. I think I know what Santa will leave her under the tree this year... ;)
Bethany (not verified)
Thu, 11/18/2010 - 16:28
When I was a little girl, I
When I was a little girl, I wanted a dollhouse SO BAD. We couldn't afford one, so I made one out of cardboard boxes. I even remember my mom taking me to get samples of wallpaper from the home improvement store for the walls. I played with that thing until it fell apart! I hope to have a daughter someday and it makes me feel so happy to know I can make things for her like this! This is sooooo adorable! :) Thank you for sharing. And Oh, P.S. I ADORE the quilt. You did a great job lining the squares up - that's no easy task for anyone without experience sewing!! Lol, or for me, and I've been sewing regularly since last Christmas!
Leigh (not verified)
Thu, 11/18/2010 - 17:14
I totally jumped the gun! I
I totally jumped the gun! I built a farmhouse bed on Tuesday for my daughter's doll. I just made it up as I went and used some scrap bead board. Yours is way cuter though. I think I'll make it too, paint them both, and let my daughter decide which one she wants to keep and which one she wants to gift to her cousin.