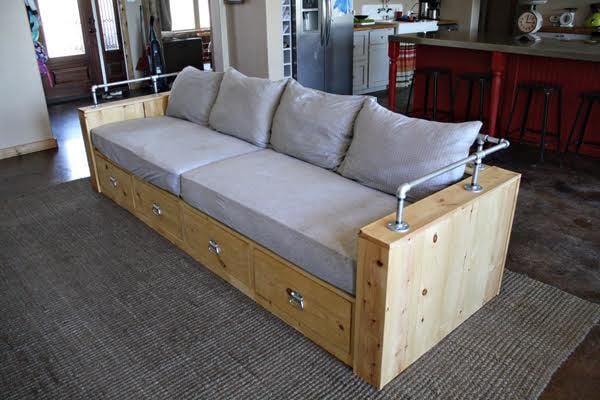
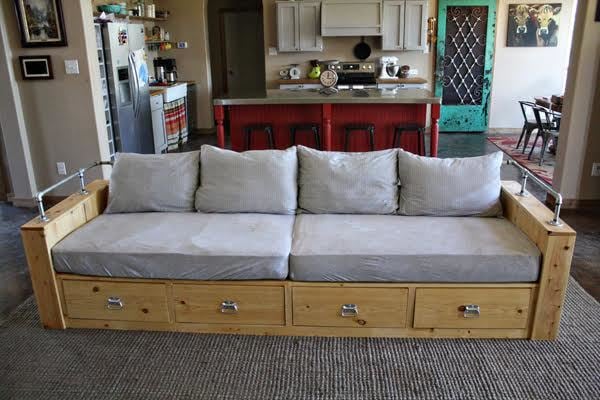
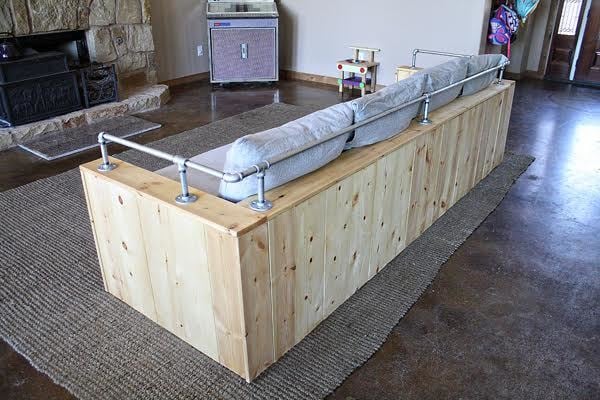
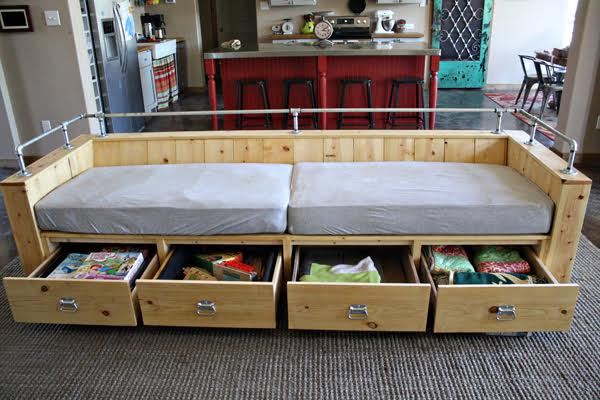
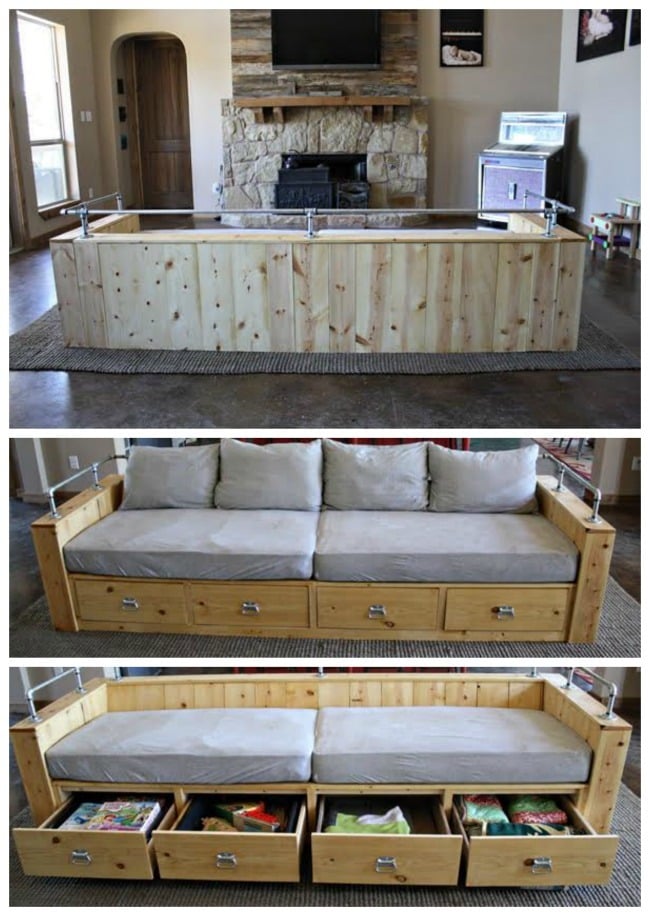
How to build a wood storage sofa with drawers using crib mattress cushions.
Dimensions
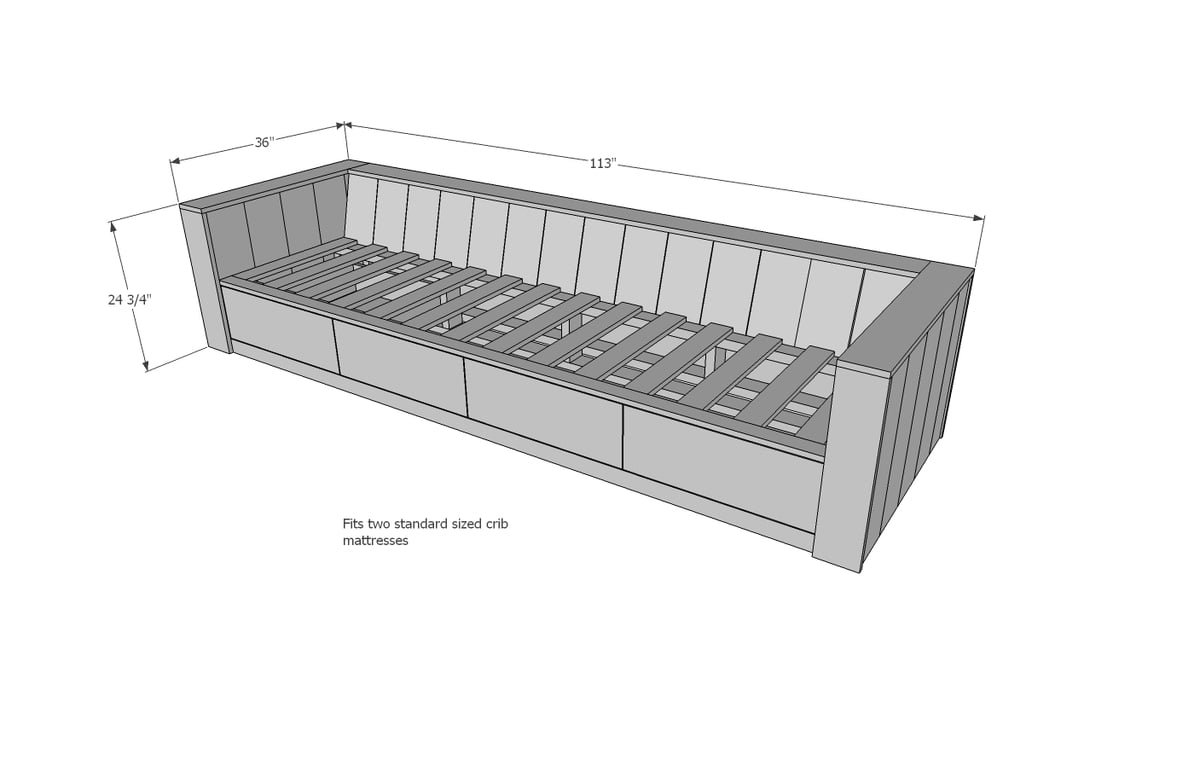
Dimensions shown above - uses two standard crib mattresses
Preparation
Shopping List
SOFA
- 2-1/2 or 2-3/4” SPAX Self tapping wood screws (use to build 2x4 frames)
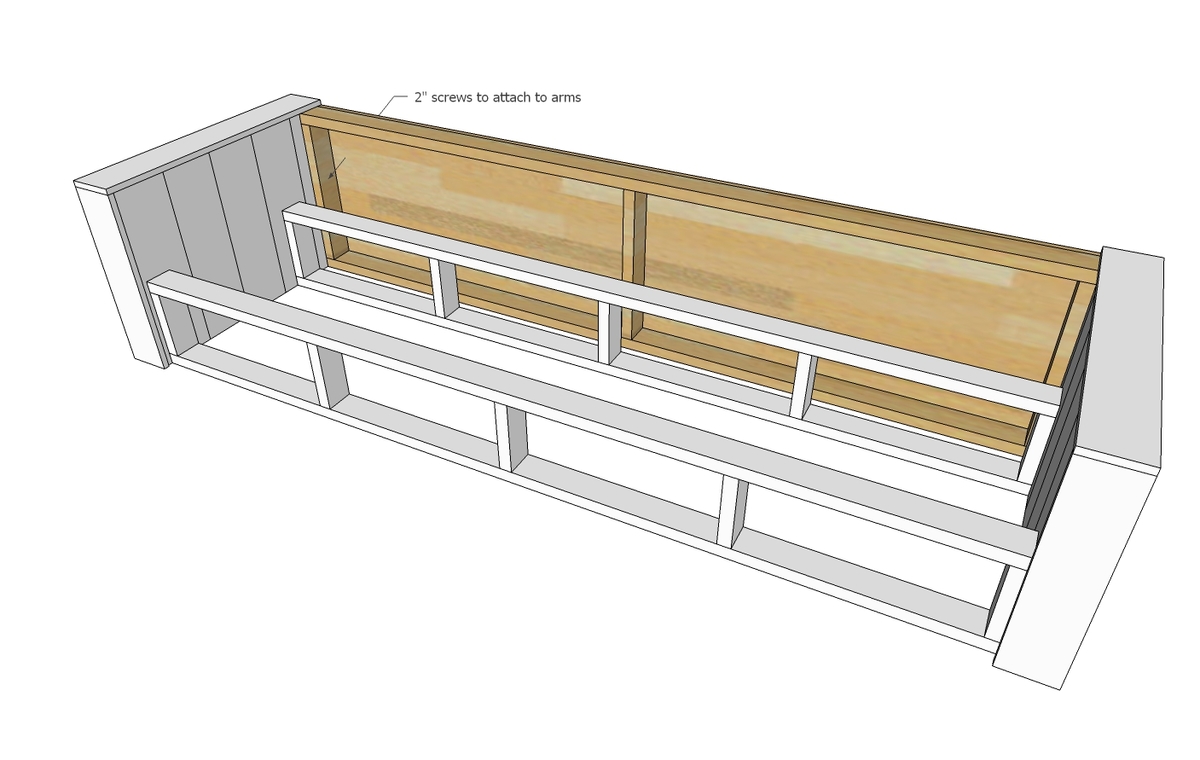
- 2” SPAX Self tapping wood screws (For attaching wood frames to arms/back)
- 1-1/4” brad nails
- Wood glue
- 4 – 26” long drawer slides
- 1 – 1x2 @ 10 feet long (can use smaller scrap pieces)
- 4 – 2x4 @ 8 feet long
- 6 – 2x4 @ 9 feet long or 9 foot stud length (cut 102-1/2” boards from these)
- 6 – 1x8 @ 8 feet long
- 9 – 1x6 boards @ 8 feet long
- 3 – 1x3 boards
- 1 – 1x10 @ 10 feet long
- 1 sheet of ¼” plywood or additional 1x boards for back if exposed 1x boards for seat slats or ripped ¾” plywood
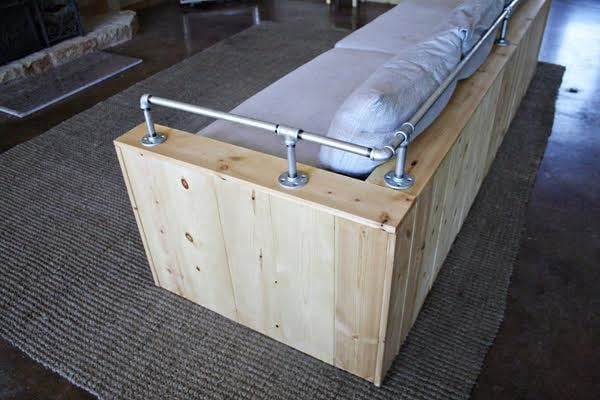
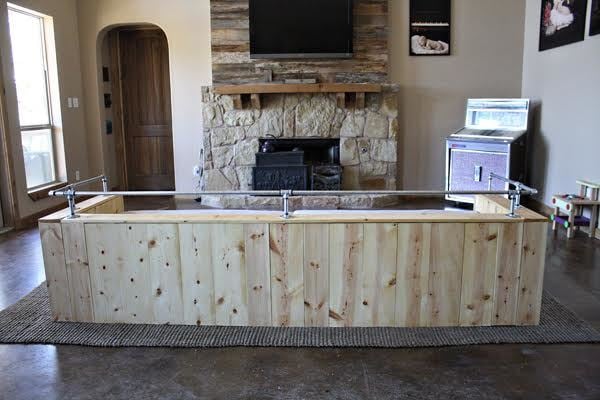
PIPE RAIL -
- 7 1/2" flanges - 7
- 6" long 1/2" pipes - 4
- 1/2" elbows - 5
- 1/2" tees - 2
- 48" long 1/2" pipes - 2
- 18" long 1/2" pipes - 2
- 8" long 1/2" pipes - 2
- 3.5" long 1/2" pipes
Common Materials
Cut List
ARMS
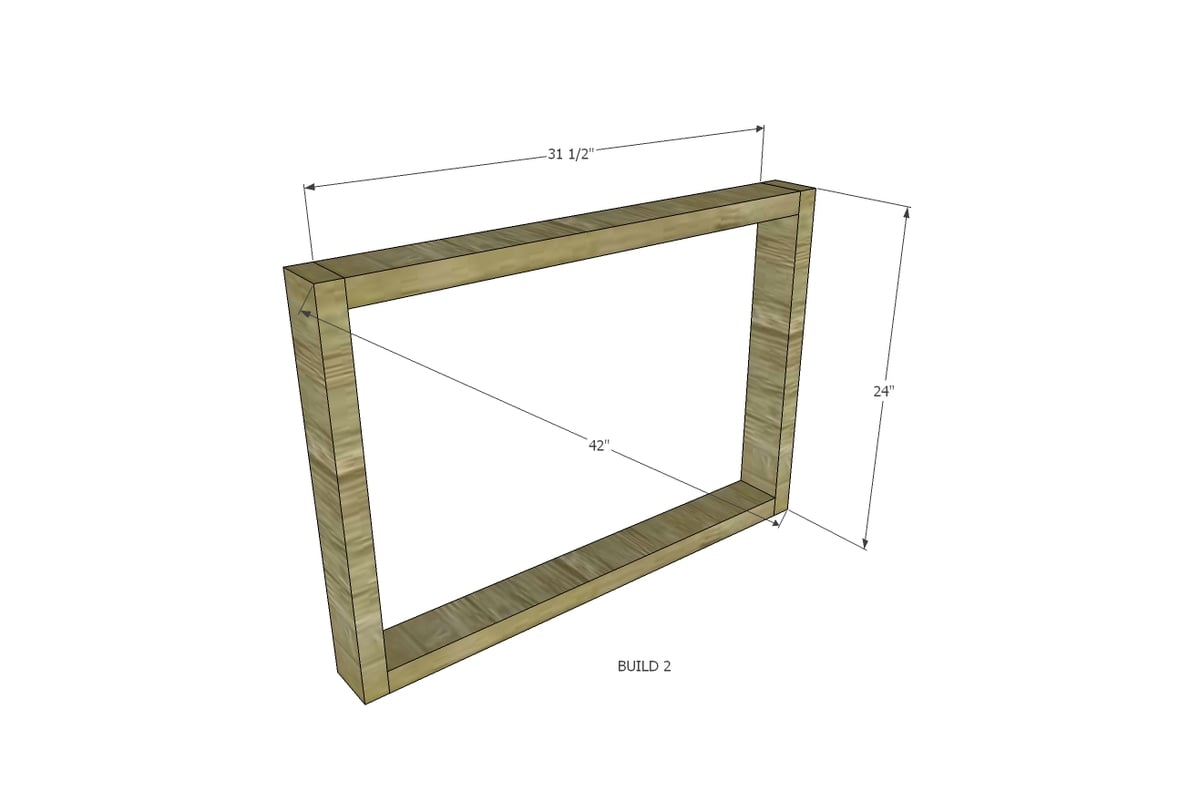
- 4 – 2x4 @ 24”
- 4 – 2x4 @ 31-1/2”
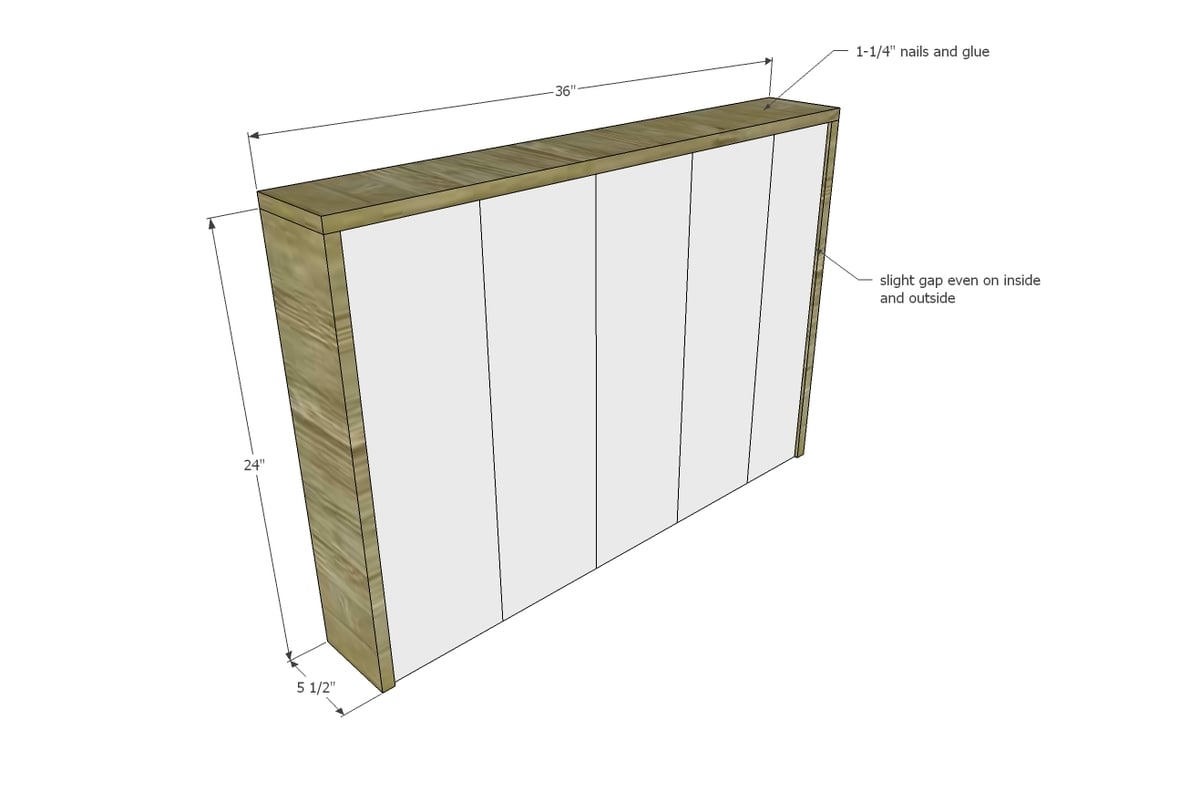
- 1x boards @ 24” to cover ends (16 – 1x8 @ 24” and 4 – 1x6 @ 24” as shown)
- 4 – 1x6 @ 24”
- 2 – 1x6 @ 36”
SEAT FRAMES
- 10 – 2x4 @ 9”
- 4 – 2x4 @ 102-1/2”
BACK
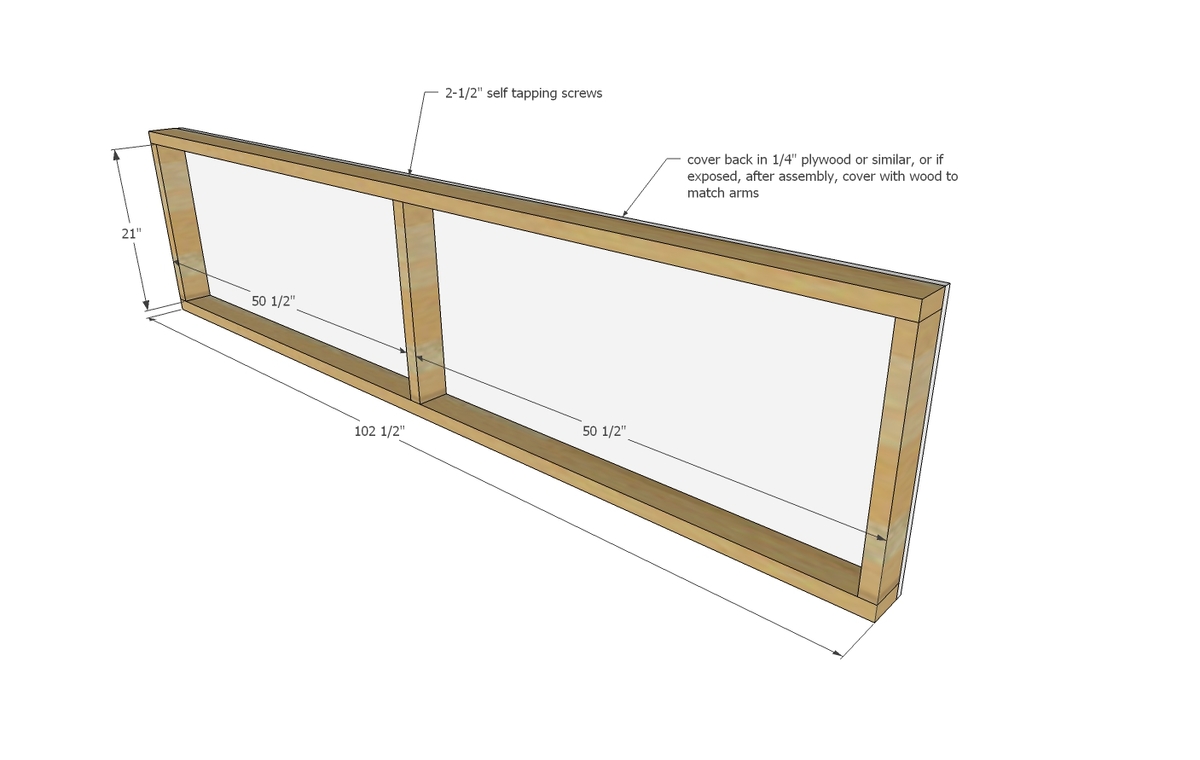
- 2 – 2x4 @ 102-1/2”
- 3 – 2x4 @ 21”
- 1 – ¼” plywood @ 102-1/2” x 24” (if exposed back add 1x material at later step)
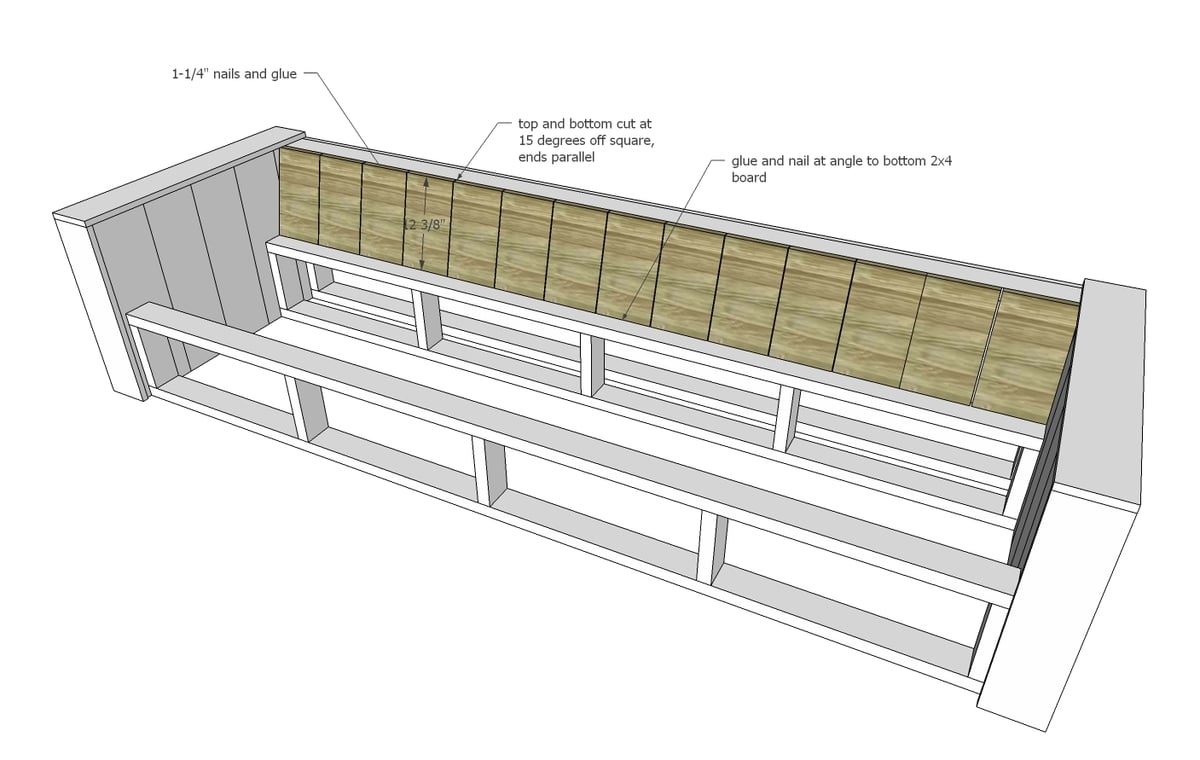
- 14 – 1x8 @ 12-3/4” both ends cut parallel at 15 degrees off square, long point to short point measurement (can use other 1x material)
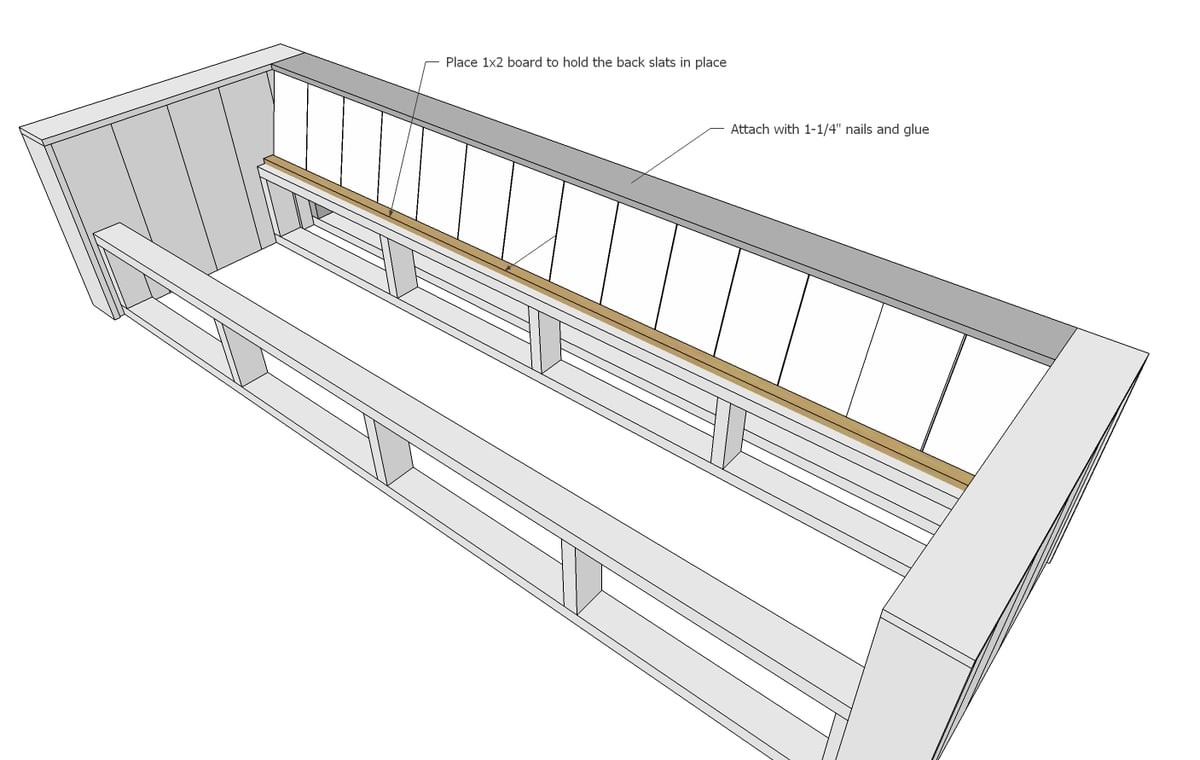
- 1 – 1x2 @ 102-1/2” (can be spliced if using 8’ long 1x2s)
TRIM
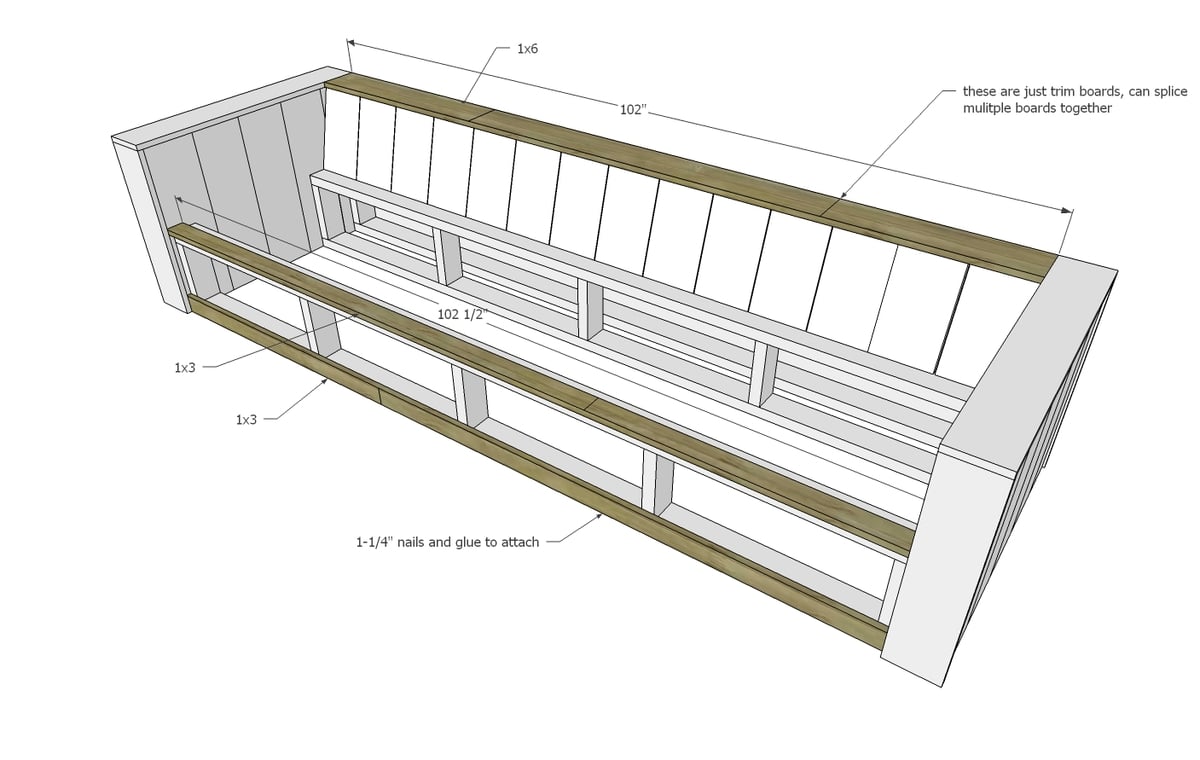
- 2 – 1x3 @ 102-1/2” (can splice shorter boards together)
- 1 – 1x6 @ 102” (can splice shorter boards together)
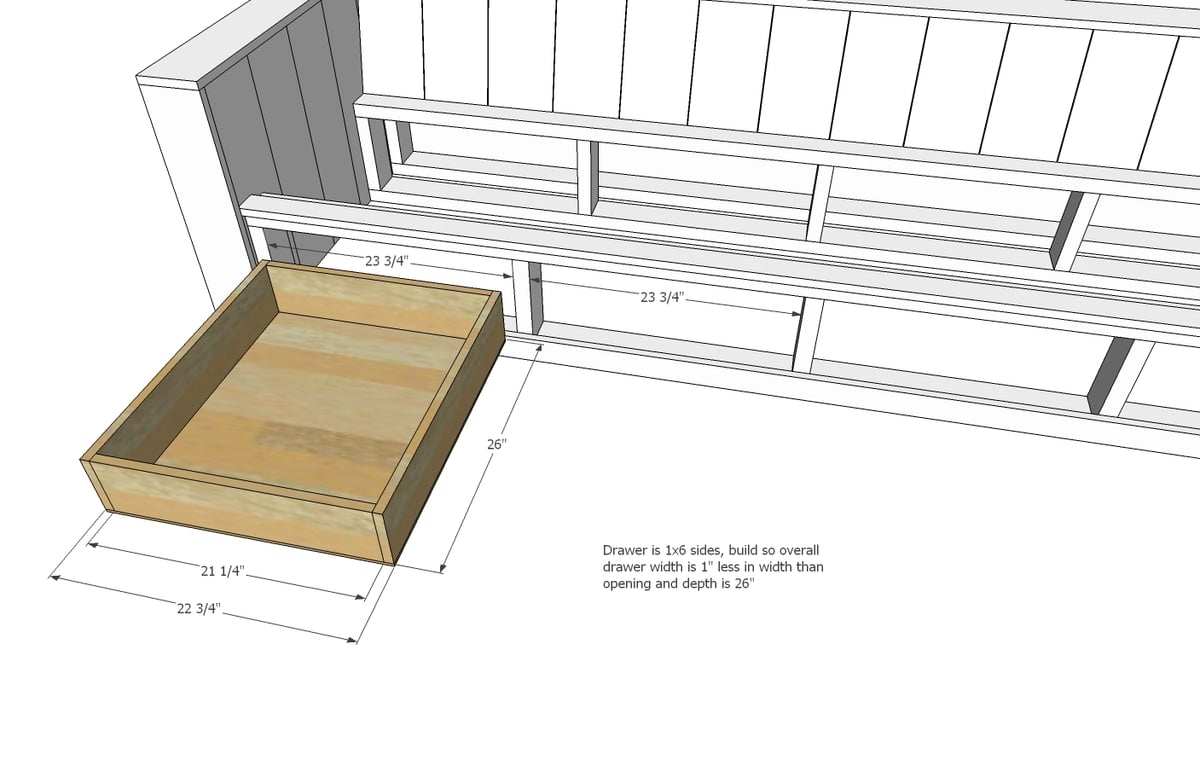
DRAWERS – Cut to fit openings
- 8 – 1x6 @ 23-3/4”
- 8 – 1x6 @ 26”
- 4 – ¼” plywood @ 23-3/4” x 26”
- 2 – 1x10 @ 25-5/8”
- 2 – 1x10 @ 25-1/8”
SLATS
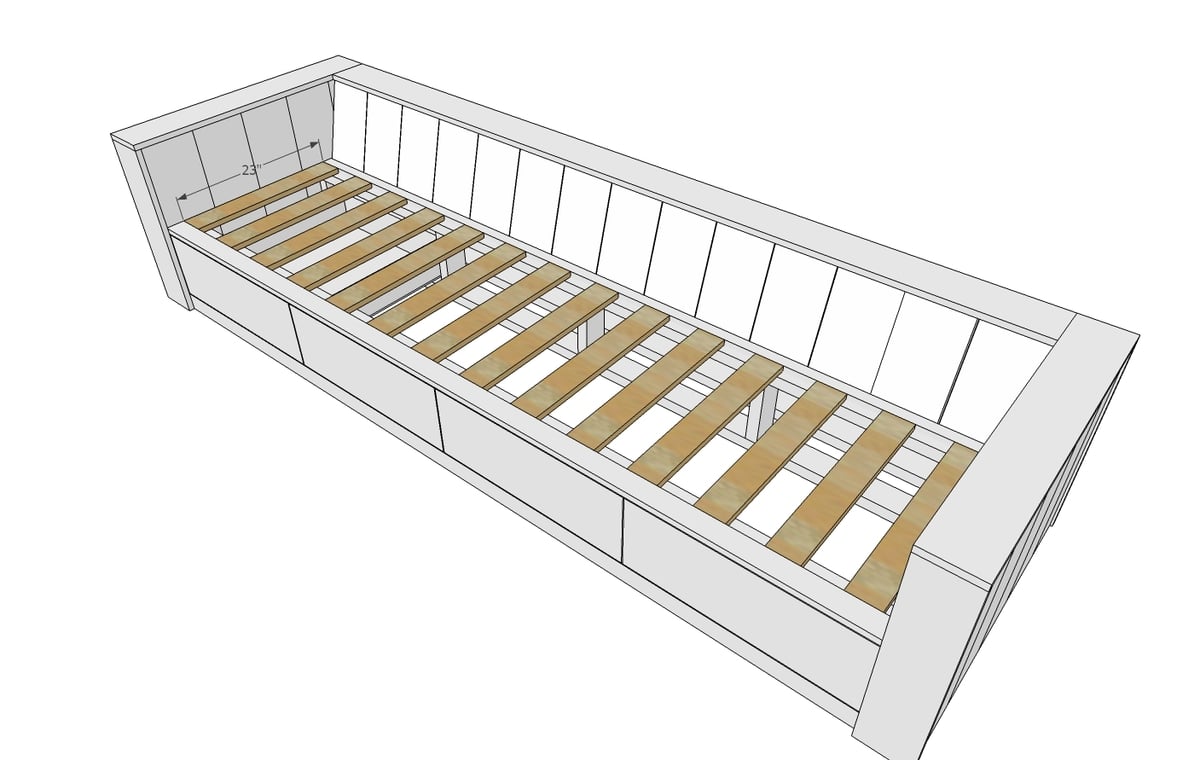
- 1x boards cut at about 23” long – should be able to use a bunch of scraps up here.
Instructions
Step 3
Step 4
Step 6
Build the back frame and adjust for square, using the longer self tapping screws and wood glue. If you are using plywood for the back, splice the plywood together over the stud in the middle (plywood cuts would be 24” x 51-1/4”. Attach plywood to the back with 1-1/4” nails and glue (or shorter nails will work too). If back of sofa will be exposed, don’t attach a back yet.
Step 7
Step 13
Step 14
Project Type
Room








Comments
Jo Foster
Wed, 04/06/2016 - 21:22
the pipe rail.
First of all steps 16 two-step 27 seems to be missing. So I tried Printing and it still wasn't there. I'm assuming that these are the steps for the pipe rail. I'm all ready to go with this couch, I have the base built , but I'm not understanding the pipe rail. It's not something that I'm used to using or have used before. I would really like to use it though because it seems to finish off the couch in a style that I would like. So what is this normally used for? Is it a galvanized pipe? I did try Home Depot online and they had some of the parts listed but none are available in our area. So I kinda need to know what I'm talking about so I can find a store or shop or some place that sells this. Also some of the lengths will be a little off from the pattern as I am building a different size in the couch. So is there something that you buy so you can thread these pipes to make them the right size? Is this difficult? Could somebody please give me some guidance and direction so I can complete this project. I'm the type that I need to understand it all before I start the next paŕt and have all the materials on hand so once I get going it's head on. Thank you very much for any and all assistance / guidance.
In reply to the pipe rail. by Jo Foster
joshuaaslocum15
Fri, 04/22/2016 - 05:43
home depot pipe shopping list.
http://www.homedepot.com/b/Plumbing-Pipes-Fittings-Galvanized-Pipe-Fitt… x7
http://www.homedepot.com/p/Mueller-Global-1-2-in-x-6-in-Galvanized-Stee… x7
http://www.homedepot.com/p/LDR-Industries-1-2-in-x-48-in-Galvanized-Ste… x2
http://www.homedepot.com/p/Mueller-Global-1-2-in-Galvanized-Malleable-I… x4
http://www.homedepot.com/p/1-2-in-Galvanized-Malleable-Iron-Tee-510-603… x5
http://www.homedepot.com/p/LDR-Industries-1-2-in-x-18-in-Black-Steel-Sc… x2 i could only find this in the color black.
http://www.homedepot.com/p/Mueller-Global-1-2-in-x-6-in-Galvanized-Stee… x2 the plan calls for 8’’ but I was only able to find 6’’
http://www.homedepot.com/p/Mueller-Global-1-2-in-x-3-in-Galvanized-Stee… x2 the plan calls for 3.5” but again I was only able to find 3”
Hope this helps!
M@cher1e
Sat, 12/08/2018 - 01:07
Great Sofa
I am currently building mine from pullets hopefully I will share the finished looks.
Loved the challenge, can't wait to finish..
M@cher1e
Sat, 12/08/2018 - 01:07
Great Sofa
I am currently building mine from pullets hopefully I will share the finished looks.
Loved the challenge, can't wait to finish..
Alex U
Wed, 08/07/2019 - 02:03
Very unusual and interesting…
Very unusual and interesting. A pipe can be done by a plumber.
Jnrbigler
Thu, 11/07/2019 - 12:09
Sectional
Hoping to make this but make it in to a sectional. Any suggestions how? And to turn the back and the arms into storage also. Looking for suggestions
ehrenzoner
Tue, 08/24/2021 - 11:16
Modded this design to make a kid's playhouse couch
I used these plans to make something about half as wide and 6" shallower, for using as a couch in my 10-year-old daughter's playhouse. Since the playhouse is very small (only about 6 feet by 7 feet), I needed to build something that would fit inside and still leave room for other activities. So this project wound up requiring lot of recalculating to make sure my cuts were correct (let's just say I have a lot of scrap lumber left over). Because the couch is flush against a wall, I did not need to worry about the rear looking good, or about any of the pipes along the top. The main challenge I had was finding a suitably sized cushion; I found some 18 x 48 inch cushions that fit perfectly, and built the couch to accommodate it.
So it's a nice small sofa that has drawers for stowing pillows, a throw, and some toys and stuff. It's perfect for a kid, and little bit small for a grownup--which is fine by my daughter!
Thanks for the fun design, Ana!