Bois Rouge Saint Paul Table

The free plans on this website are made possible with advertising and affiliate links.  Thank you for helping us keep plans free.


polycarbonate wood table
Difficulty
Intermediate
| Print this plan

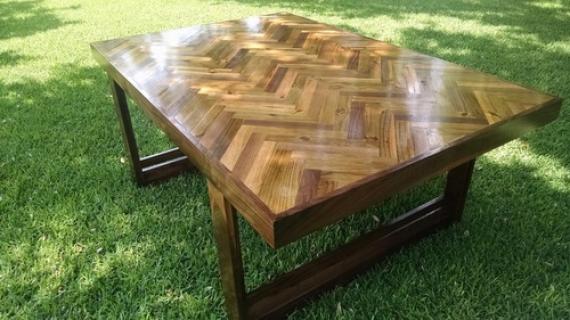
big table made from treated wood with a polycarbonate top, primed and painted

polycarbonate wood table

Sorry for the bad english
I hope you will understand what I mean.

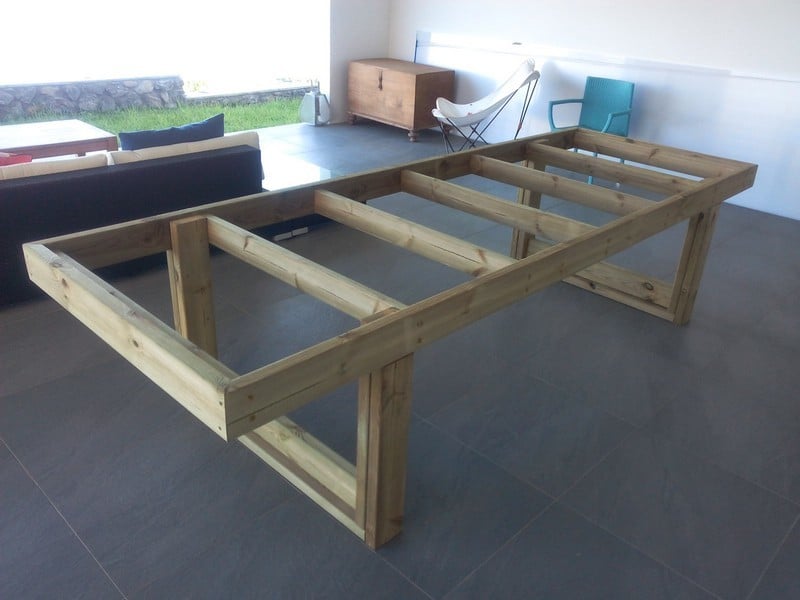
The table is built from two sizes of treated wood.

the whole structure use 12cm * 5cm treated pine lumber
the inside braces use smaller 9cm * 5cm treated pine lumber
But you can use what you have in your lumber store

the polycarbonate top must be choosen first and then the plans must be adapted to fit the width of the polycarbonate top.
the polycarbonate top can be cutted to size with a circular saw and a standard wood blade.
It is best to cut it only along the width because it is hard to have a straight long cut with the circular saw.
Use a straight edge and clamp it to the polycarbonate to guide the circular saw base.

the table must be built upside down.

Start by building the top rectangle of the table.
You must predrill the screw holes so it wont break the wood.
you must coutersink the screw holes so it will be possible to add some gap filler and hide the screws later.
You have to verify that the diagonals are equals so the rectangle is square.
It is important so that the polycarbonate top will fit inside this rectangle

Then find a scrap piece of wood with the same thickness of the polycarbonate.
Put it on the floor and put the braces on it before screwing them through the rectangle top. 2 screws per brace so it wnt flip.
This will serve to adjust the height of the braces so the polycarbonate top will be flush with the top of the table.
This will also make sure the top side of the braces are parallel to the floor.
Make sure you predrill and countersink the holes of the screws

Then screw the inside legs to the rectangle top from the inside. 4 screws per leg.
Use the same scrap piece of wood so they are flush with the braces.
Use a square to adust the verticality of the legs

Then screw the vertical piece of wood between the inside legs. 2 screws per leg so it wont flip.
Use a combination square to screw it in the middle of the inside legs

Then screw the bottom piece of wood that will be on contact with the floor

Then screw the outside legs from the inside
It is best to cut them to size at this time so they are flush with the bottom piece of wood. 4 screws.
Make sure the outside legs closely touch the rectangle so it will support the weight or the table.

Then flip the table upside down.

Measure the size of the inside rectangle top and cut the polycarbonate to the same siez less 2mm so it will ft closely.
then remove the polycarbonate and put it aside.

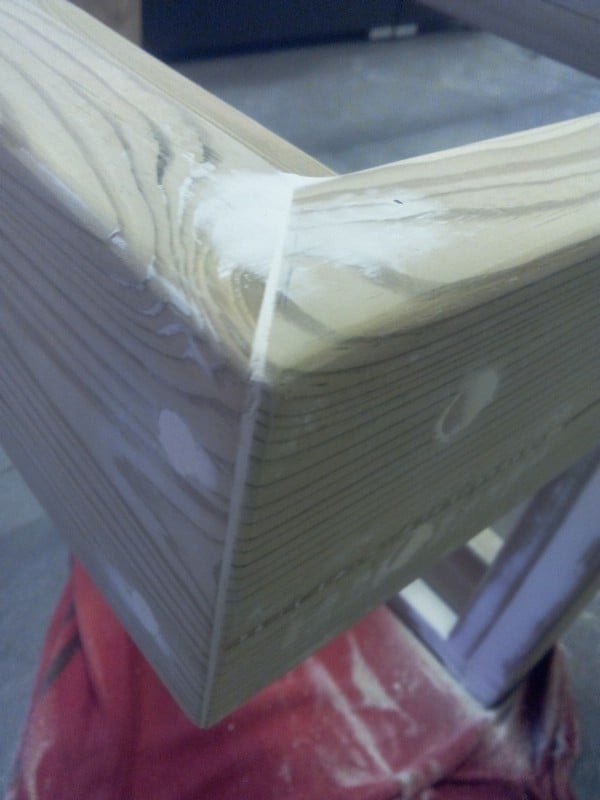
use wall filler to fill the screw holes and the rectangle corners.
make 2 passes if the holes exceed 3mm depth.

sand flush with 80 grit paper

put one coat of primer with a brush

sand flush with 150 grit paper

put one more coat of primer with a lacquer roler

lightly sand flush with 220 paper

put one coat of paint with lacquer roller

very lightly rub with 0000 steel wool where your hand find small dents

put a last coat of paint with a lacquer roller

finished!


Preparation

Common Materials
3 inch screws
120 grit sandpaper
primer
paint
Tools
Tape Measure
Speed Square
Pencil
Safety Glasses
Drill
Circular Saw
Miter Saw
Drill Bit Set
General Instructions

Please read through the entire plan and all comments before beginning this project. It is also advisable to review the Getting Started Section. Take all necessary precautions to build safely and smartly. Work on a clean level surface, free of imperfections or debris. Always use straight boards. Check for square after each step. Always predrill holes before attaching with screws. Use glue with finish nails for a stronger hold. Wipe excess glue off bare wood for stained projects, as dried glue will not take stain. Be safe, have fun, and ask for help if you need it. Good luck!

Finishing Instructions
Preparation Instructions
Fill all holes with wood filler and let dry. Apply additional coats of wood filler as needed. When wood filler is completely dry, sand the project in the direction of the wood grain with 120 grit sandpaper. Vacuum sanded project to remove sanding residue. Remove all sanding residue on work surfaces as well. Wipe project clean with damp cloth.

It is always recommended to apply a test coat on a hidden area or scrap piece to ensure color evenness and adhesion. Use primer or wood conditioner as needed.
Project Type
Room

Comments