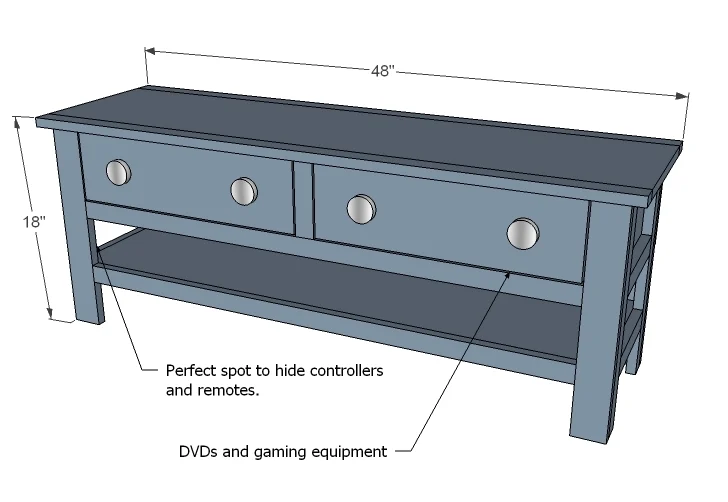
A simple console with two drawers perfect sized for CDs and DVDs. Large bottom shelf perfect for media consoles and books.
Related Plans to Make Matching Furniture:

End table or nightstand uses the same 1x3/1x2 leg
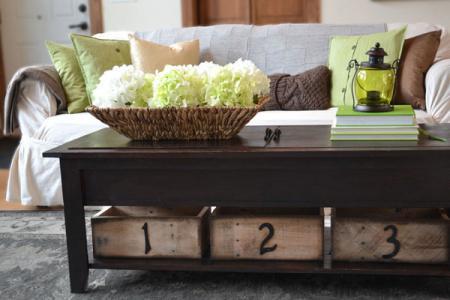
Coffee Table with Removeable top Panels

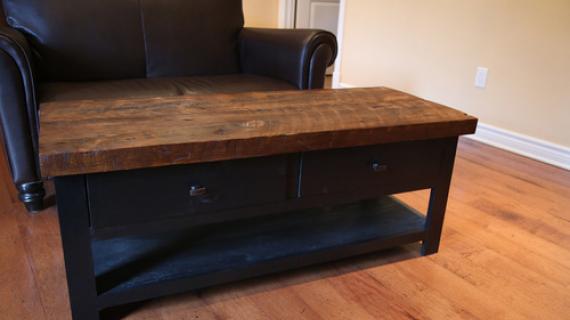
Coffee table with drawers (very similar to this project but wider and a planked wood top)
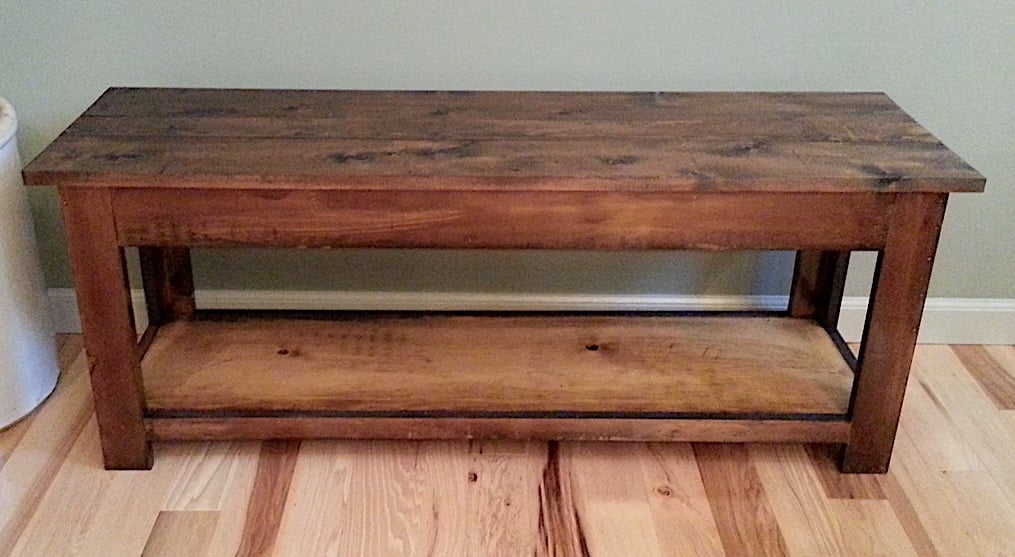
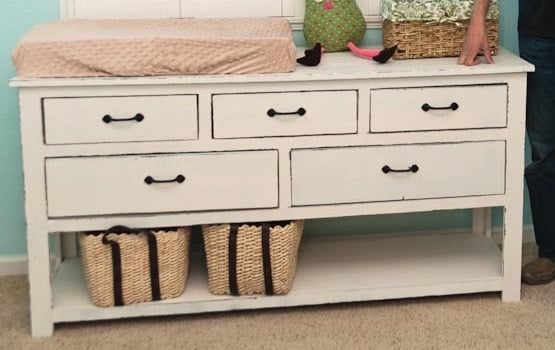

Preparation
- 2 – 8′ 1×12 board
- 5 – 1×2 boards, 8 feet long
- 1 – 1×3 board, 8 feet long
- 1 – 1×6, 12 feet long
- 1 1/4″ and 2″ brad nails
- 2″ self tapping wood screws or 1 1/4″ pocket hole screws
- wood glue and wood filler
- Sandpaper (120 grit)
- Paint, primer or stain and poly
- Knobs
- 2 – 1×12 @ 44 1/2″ (Shelves)
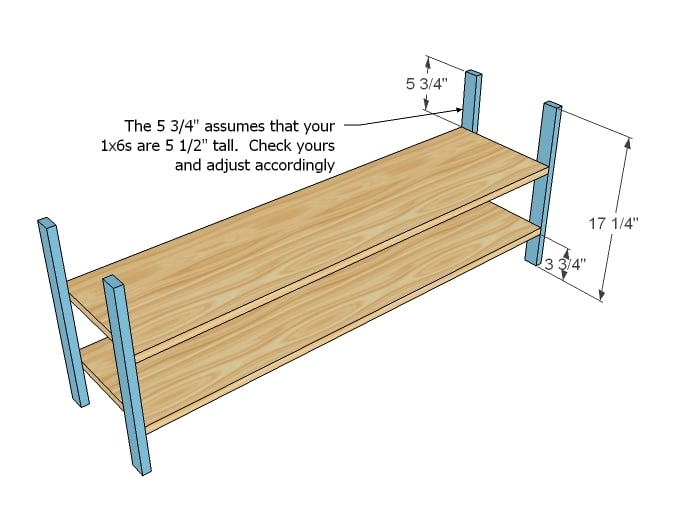
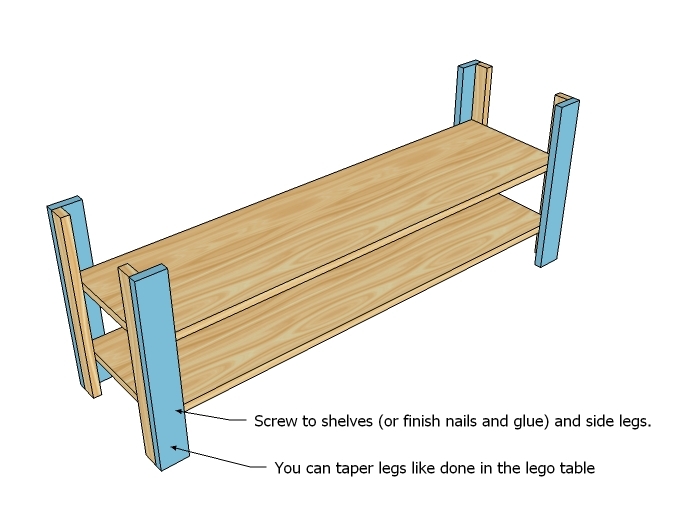
- 4 – 1×2 @ 17 1/4″ (Side Legs)
- 4 – 1×3 @ 17 1/4″ (Front/Back Legs)
- 4 – 1×2 @ 41″ (Shelf Trim)
- 4 – 1×2 @ 8 1/2″ (Side Shelf Trim – adjust to fit the width of your 1x12s minus 3″)
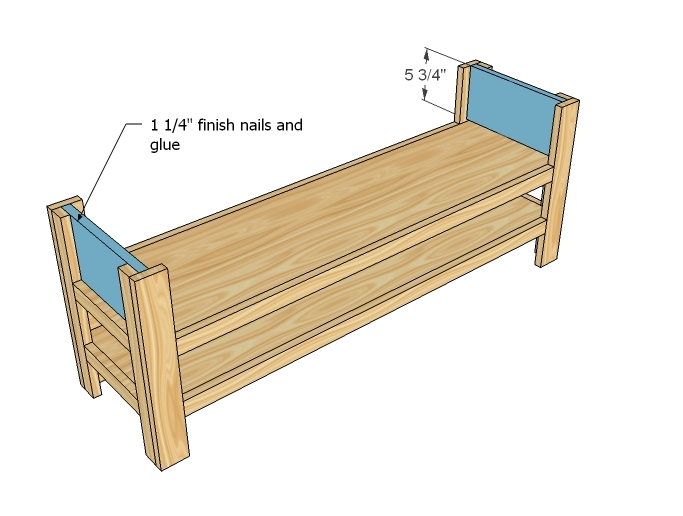
- 2 – 1×12 @ 5 3/4″ (Sides of Drawer Box)
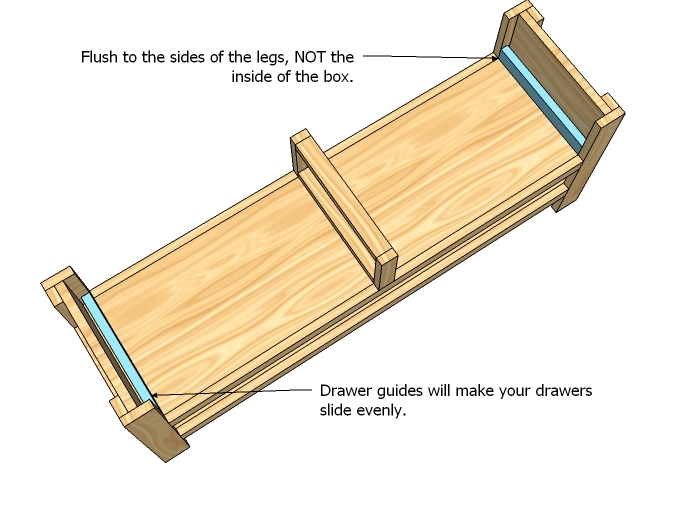
- 4 – 1×2 @ 11 1/2″ (Drawer Guides – match to width of 1x12s)
- 2 – 1×2 @ 5 3/4″ (Front/Back Trim for Center)
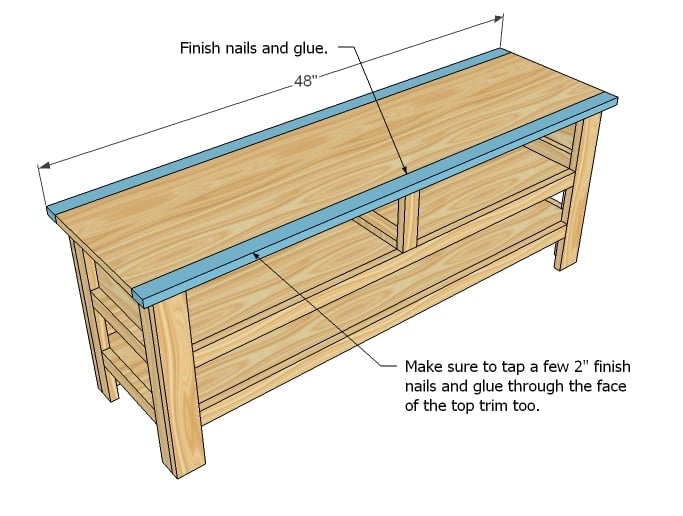
- 1 – 1×12 @ 48″ (Top)
- 2 – 1×2 @ 48″ (Top Trim)
- 1 – 1/4″ Plywood @ 7 1/4″ x 46″ (Back Plywood – Optional)
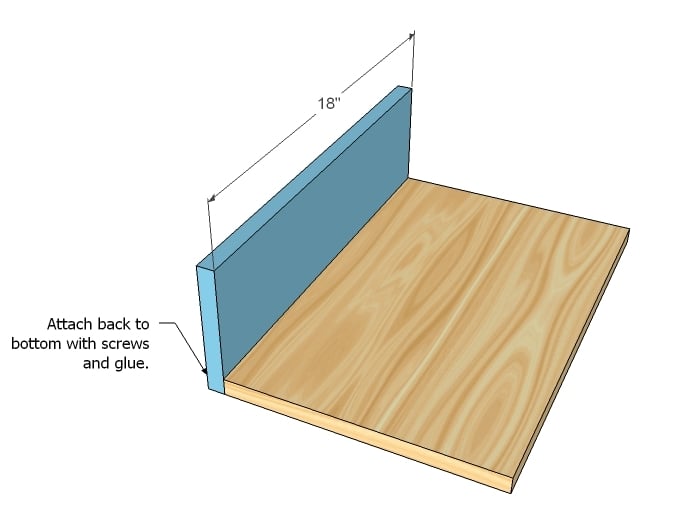
- 2 – 1×12 @ 18″ (Drawer Bottoms)
- 2 – 1×6 @ 18″ (Drawer Backs)
- 4 – 1×6 @ 12 1/4″ (Drawer Sides – adjust to fit the width of 1×12 boards plus 3/4″)
- 2 – 1×6 @ 19 1/2″ (Drawer Fronts)
This project has alot of pieces and drawers, which complicate the build. Please don’t attempt this as a first project. Always use safety equipment and precautions. Predrill all holes with a countersink bit or pocket hole system. Measure and mark all joints before attaching and cutting. Use glue. Be careful not to let glue dry one visible locations if you are staining. Measure the true widths of your boards first, and adjust as necessary to work with the plan. Be safe, have fun.
Instructions
Step 1
Step 2
Step 3
Step 6
Step 8
Step 9
Step 12
Step 13
Finishing To finish, remove drawers and fill all hole with wood filler. Do two coats, as wood filler tends to shrink as it dries. Then sand with 120 grit sandpaper. Clean all sanding residue and wipe down with a damp cloth. Prime and paint or stain as desired. Some tips: paint the insides first. Don’t paint the drawer box bottom, as the drawer opening and closing will just wear it off (opt for a stain). Add handles or knobs.








Comments
Rebecca (not verified)
Sun, 01/09/2011 - 19:16
That sounds like a fabulous
That sounds like a fabulous goal & I'm sure you will achieve it!
I am very excited about your banquette/storage for the dining room as I need something for my dining space.
AmyLynn (not verified)
Sun, 01/09/2011 - 19:28
I was going to build the
I was going to build the apothecary console for our living room and then decided it might require more space that I was willing to give up in my small living room. This may work much better at only a foot-ish deep.
And can I say how totally jazzed I am about the kitchen possibilities? Sounds heavenly! Guess I should get moving on my list so I'm ready when those plans arrive :)
Jess (not verified)
Sun, 01/09/2011 - 19:28
Hey Ana I have been
Hey Ana
I have been following yournblog for a few months. I love the work you do! I love all of the nursery items youbhave, but I am wondering if you could make plans for a crib in the style of the PB Kendall crib. I am in love with it, but I don't want to buy it:)
Thanks in advance!
Tanjia (not verified)
Sun, 01/09/2011 - 19:35
I want to make some goals,
I want to make some goals, too.
-Get the cupboards and kitchen painted
-get the baseboards on in the whole house
-build the lego coffee table
-build the sofa
-build my friend a picnic table
-build two side tables for my living room
-build the swedish planked bed in King size.
I would love to have all of those things done in 6 months.
Kathy (not verified)
Mon, 01/10/2011 - 01:37
I'm anxiously awaiting the
I'm anxiously awaiting the kitchen cabinet organizers. (and so are my disorganized cabinets!) The organizers are SO expensive that I can't wait for some DIY ideas!
Sharon Lambirth (not verified)
Mon, 01/10/2011 - 03:53
I flip flop. One for the
I flip flop. One for the house, one for someone else. Of course, I don't have a business to run :o)
carrie (not verified)
Mon, 01/10/2011 - 03:57
You are amazing!
You are amazing!
Stacy Reddy (not verified)
Mon, 01/10/2011 - 04:30
I think I would like this for
I think I would like this for my entry! Bench, storage for gloves and hats. Just put some hooks in for storage!
Dena (not verified)
Mon, 01/10/2011 - 04:40
I'd love to see this as an
I'd love to see this as an end table! I might actually use an end table plan as a nightstand as well.
I'm also wondering how difficult it would be to build kitchen cabinets. I'm guessing installing them in a safe way might be more of a challenge.
Melanie (not verified)
Mon, 01/10/2011 - 04:48
I love this! However I am
I love this! However I am looking for an end table and console table instead. Would love to see those plans also. Thanks Ana!
Vanessa (not verified)
Mon, 01/10/2011 - 05:39
Yay! I love setting goals for
Yay! I love setting goals for the year and I have a ton of furniture to build to achieve those goals :) We are also trying to do the same thing around here (finish our house). My husband is a carpenter and the saying is very true!
Can't wait to see some photos of your finished projects and I'll be sharing mine!
Susan (not verified)
Mon, 01/10/2011 - 06:25
Your comment about the
Your comment about the carpenter's house made me laugh! I am a seamstress, though you would never guess it to look at my windows :) Thank you for being such a great inspiration!
Ana White (not verified)
Mon, 01/10/2011 - 06:26
Dena, thank you. Kitchen
Dena, thank you. Kitchen cabinets aren't so much hard to build, but here's the thing. When you build a kitchen cabinet, and it get's tiled in and trimmed out, and worked on hourly for years, you must build the cabinets to a different standard. And because kitchen cabinets line up, you must build perfectly square to get all the cabinets to line up. I would love to put plans up, and will eventually (video too?) but want to make sure that if someone invests the time and money (not to mention the time it would take to uninstall poorly made cabinets) that they are building high quality lasting cabinets.
Thanks for asking. Ana
Katie (not verified)
Mon, 01/10/2011 - 06:52
Yeah Ana! You are the best.
Yeah Ana! You are the best. The kitchen builds sound very exciting, well it all does but I have been working on our little kitchen and have been thinking about tearing out the 1934 cabnits (very well built, but not my style) and putting farmhouse island in their place. So any kitchen builds would be WONDERFUL! Again, you are wonderful so anything you post is exciting. :) Happy New Year and good luck on your resolutions.
Hillary (not verified)
Mon, 01/10/2011 - 07:14
I'm looking forward to your
I'm looking forward to your Great Room Media Wall! We are feeling inspired by the RH Library Media System for our Great Room -- our walls in there are about 20 feet tall, so whatever we put in the room has to be huge and the Library System (145"W x 19"D x 95"H) seems to fit the bill. But now I think I'll wait to see what you build. :)
Nan Tovar (not verified)
Mon, 01/10/2011 - 07:55
Yes, Ana, I agree with
Yes, Ana, I agree with everything you want to do....I would like to see plans for a banquette, please :)
wendemdau (not verified)
Mon, 01/10/2011 - 12:14
Love this plan! Would love to
Love this plan! Would love to build a matching end table and console table as you suggested. So simple and elegant...you always have great ideas!
Christine (not verified)
Mon, 01/10/2011 - 13:45
I think I want to build this,
I think I want to build this, but I have one of the older heavy tvs. Is there a way to modify the legs to hold the weight? As in using 2x2s?
Jessica (not verified)
Mon, 01/10/2011 - 17:26
Yeah for goals!!! I would
Yeah for goals!!!
I would love, love, love to see an end table in this same collection ;-)
Ana White (not verified)
Mon, 01/10/2011 - 21:52
Christine, I'm not sure that
Christine, I'm not sure that the 2x2s would be much stronger. What you may consider doing is adding a 2x2 inside the open legs, especially on the foot part to "beef" things up without taking away style points. BTW How cute is your profile pic?