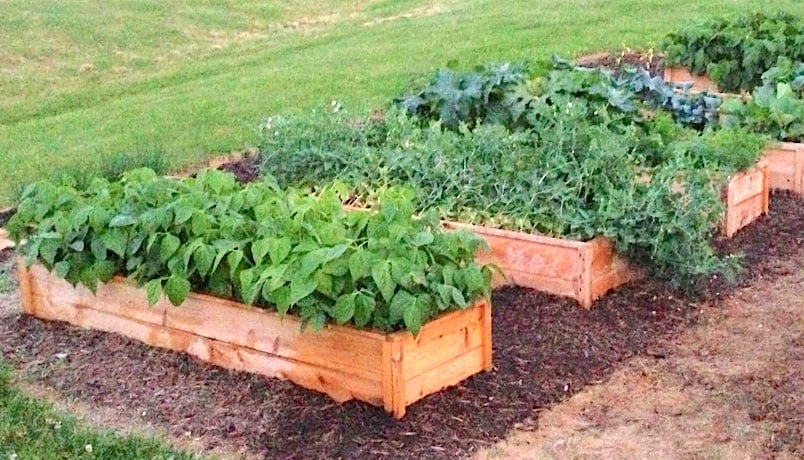
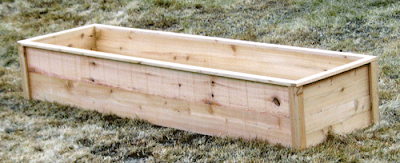
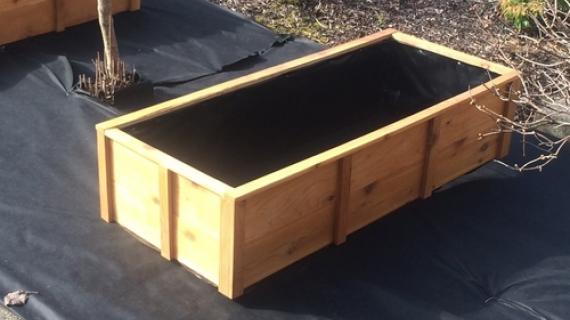
Easy and inexpensive DIY cedar rasied garden beds with free plans by Ana-White.com! Uses cedar fence pickets to keep costs low and basic tools. Beginner friendly.
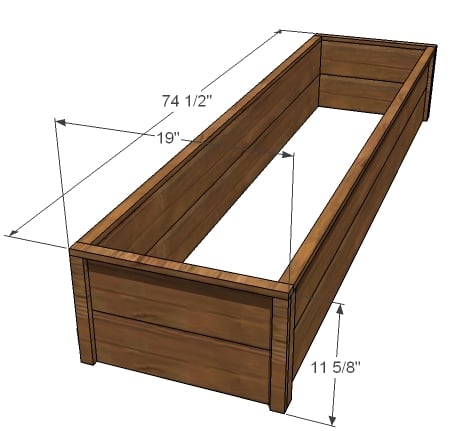
This plan is for a 6 foot long by 1-1/2 foot wide garden bed, suitable for a single row of plants. You can find the double width plans here.
Pin For Later!
Preparation
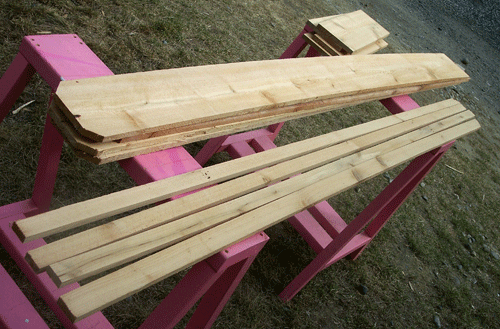
6 Cedar Fence Pickets
1x2 Cedar boards for corners (if you don't have a tablesaw)
1″ Screws
2″ Screws
Wood Glue
Finishing Supplies
Garden stakes or concrete stakes (we used a couple of stakes on each bed just to keep the bottoms in place)
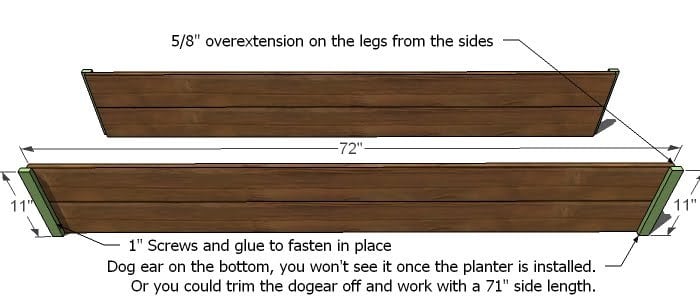
4 – 1×6 Fence Pickets @ 72″ (Side Panels, you can trim the dog ear off and work with a 71″ Fence post)
8 – 1×2 Fence Pickets @ 11″ (Corner Posts)
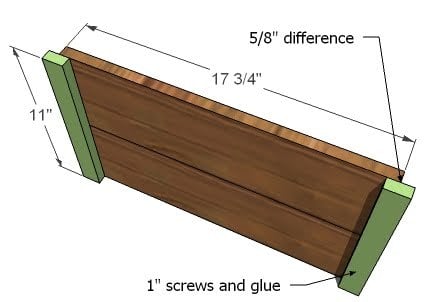
4 – 1×6 Fence Pickets @ 17 3/4″ (End Panels)
Optional Top Trim - CUT TO FIT
2 – 1×2 Fence Pickets @ 72″ (Top Trim, I used the non-dogeared ones from the center of the cuts)
2 – 1×2 Fence Pickets @ 19″ (Top Trim, Ends)
Considerations for Size Modifications
If you alter the dimensions of the cedar beds, work with your materials to make sure you have the least waste (and more cedar beds!) For example, make your end panels a fence picket cut in half for a 6 foot by 3 foot garden bed.
Instructions
Step 1
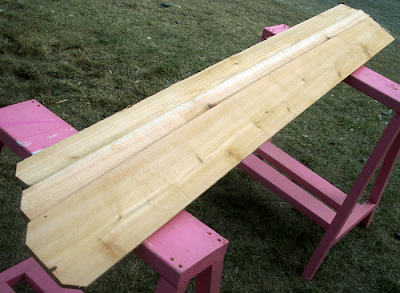
Optional: Rip your Corner Posts
I’ve done the math, and by ripping one fence post into 4 – 1 1/4″ wide strips, you are saving quite a bit of money (well, that is, if you intend to build a garden full of planters). So set your tablesaw to 1 1/4″ and rip one of the fence posts to 1 1/4″ wide, as shown above.
Or Use 1x2 Cedar Boards
If you don’t have a table saw, you can use 1×2 cedar boards.
Step 2
Side Panels
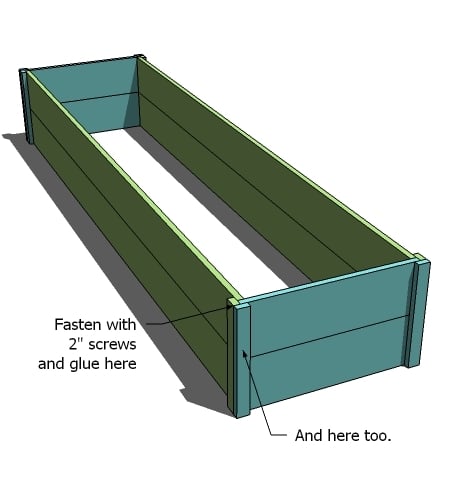
Use your 1″ screws and glue to put together your side panels as shown above. The post will overextend the sides by 5/8″ as shown above.
I also used my Kreg Jig™ to join the boards together in the center (optional) or you can use a 1x2 in the center.





Comments
In reply to i want to make this by johnnguyen81
Ana White
Sun, 09/25/2016 - 21:30
Take a look at this planhttp:
Take a look at this plan
http://www.ana-white.com/2012/11/plans/counter-height-garden-boxes-2-fe…
johnnguyen81
Sun, 09/25/2016 - 00:13
PDF download
I forgot to mention that the PDF download link does not work. Anyone have a problem?
kathabby
Thu, 03/02/2017 - 20:15
You. Are. A. Genius! Need to
You. Are. A. Genius! Need to make some raised beds for my 94 year-old mother, who will probably spend her last summer at her home. I looked for cheap wood, but didn't think of cedar fencing - you are right! Is is the cheapest wood available, and cedar, to boot! Plan is simple, qick to assemble and easy to transport. Thank you!
In reply to You. Are. A. Genius! Need to by kathabby
Ana White
Fri, 03/03/2017 - 11:30
PERFECT!
PERFECT!
saomkinar
Sat, 12/08/2018 - 10:48
Kreg jig mini settings for 5/8”
I can’t find anywhere on the web for the setup for joining 5/8” depth boards. What is the placement of the mini kreg jig on the board, the collar settings, and screw length?
EeeeeBs
Mon, 03/16/2020 - 12:51
Finishing Cedar?
Super beginner here!
Do you need to finish cedar for outdoor use or can you leave it natural? If you need to finish it, what is the easiest option that holds-up well?
Thanks!
boettg33
Tue, 05/05/2020 - 06:09
Love the Design and your overall site.
Ana
I've been building my raised beds out of composite decking from Home Depot. This year I am switching to cedar. While I have not seen any data on whether or not the composite decking leeches poisons into the dirt or not, I don't want to take that chance. We are adding two new boxes this year. A 6' X 2' long box and a corner 4' X 4' box.
This is the design we are working off, https://www.google.com/imgres?imgurl=https%3A%2F%2Fi.pinimg.com%2F736x%…. Each year we are adding two or three new boxes to the layout. We restarted this new layout last year with three boxes. This year is two new boxes. Next year might be 3 or 4 to complete the outer layout. The following year would be the internal multi-tier flower box to attract bees. The flowers will be designed to pollinate throughout the summer at different times to keep the bees coming back as different vegetables pollinate. I'll also replace the three boxes that I made out of composite with cedar. Most likely this fall, or next fall. Just depends on how bad I think the chances of toxins leeching out of the composite.
The box design I was using puts the 4" X 4" pine posts inside. Your design is much more elegant, and I'll be using your design this weekend when I build the two new boxes. I'll need to change the dimensions and cut list to suit my needs, but the overall design is what I am shooting for here.
Thank you
Jason from RI