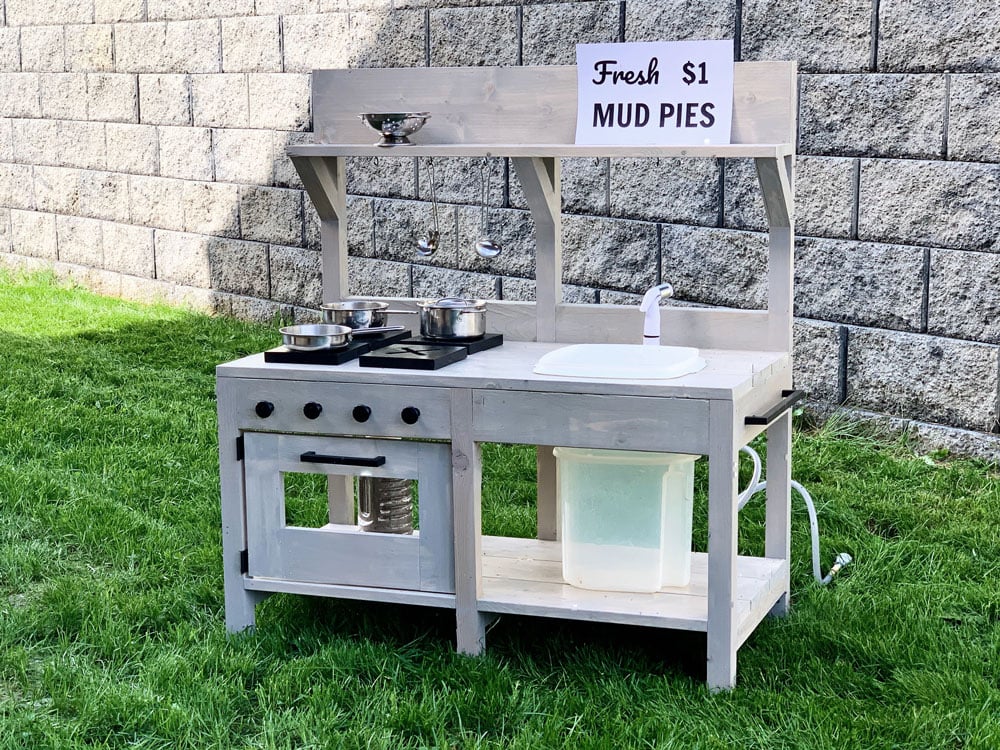


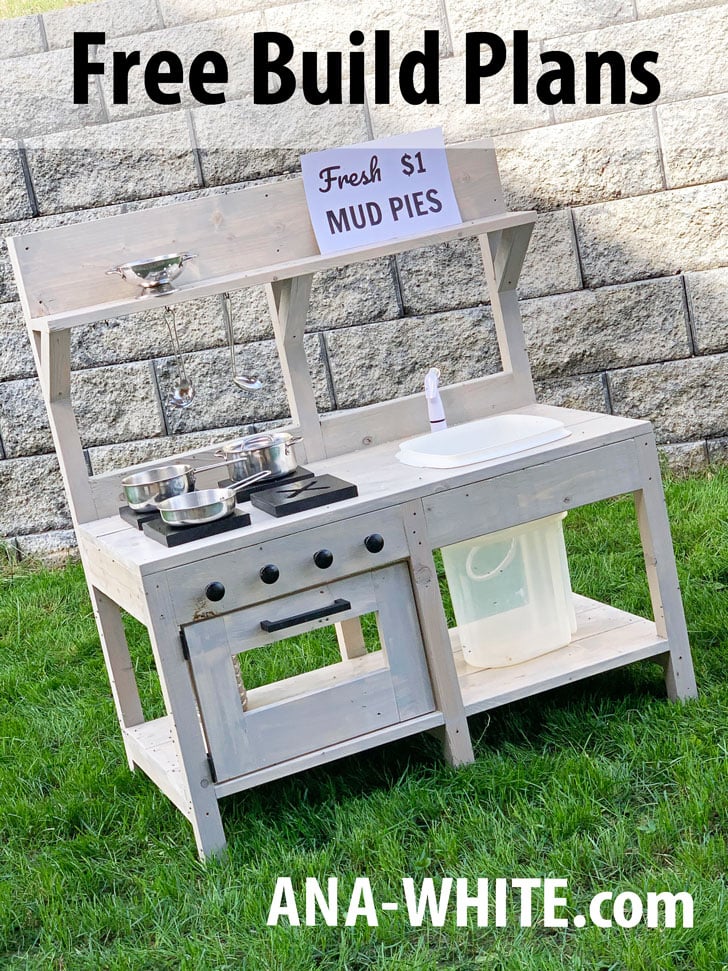
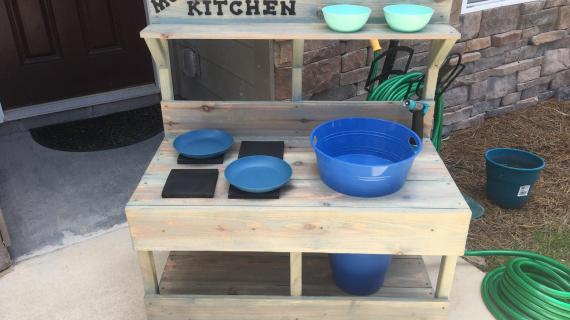
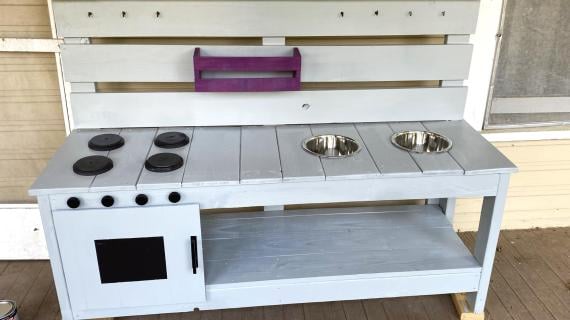
For about $50 you can build a mud kitchen with a REAL WORKING SINK for your child! Free plans from Ana-White.com
The best part of the kitchen is the sink! Right?
My kids have always loved play kitchens, and I've built many. But not having a working sink with real running water always required alot of imagination.
Then I discovered the MUD KITCHEN!!!
Mud Kitchen Features
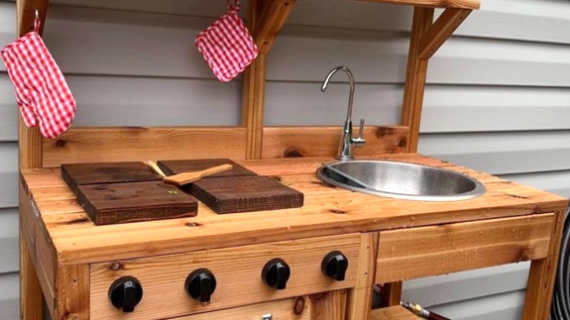
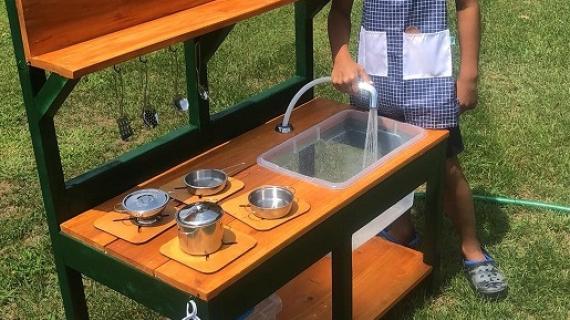
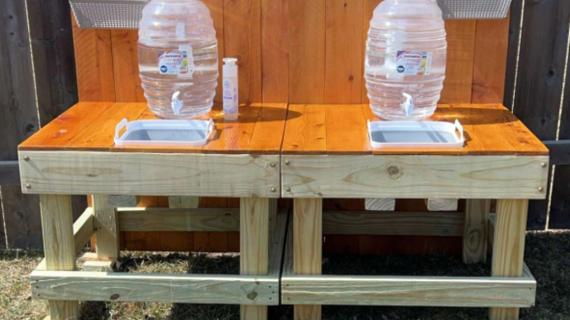
- Real working sink that hooks up to a garden hose
- Faucet cannot be left on - automatically turns off when not actively in use
- Drain water can be reused
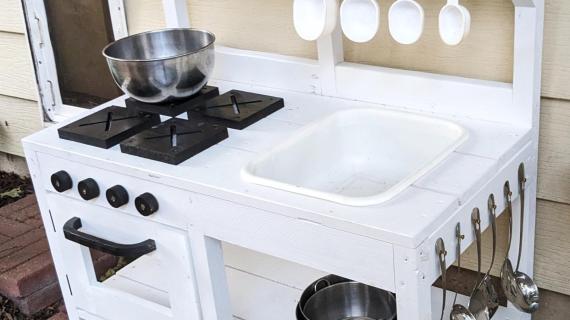
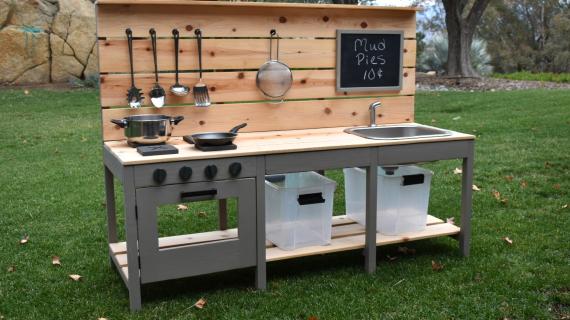
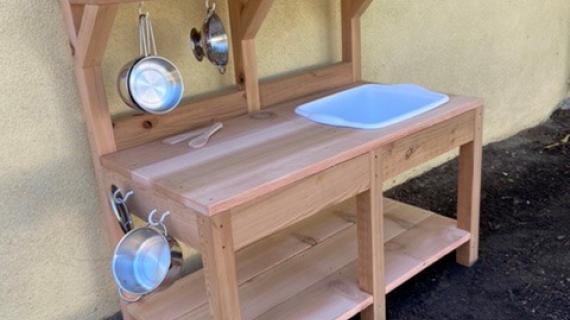
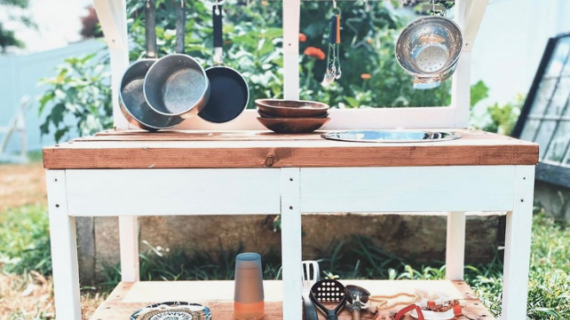
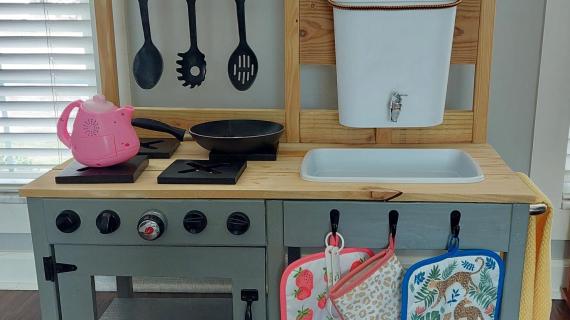
- Hooks for storing pots, pans and utensils
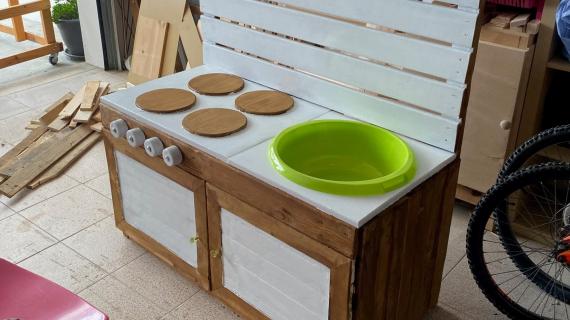
- Removeable "stove" pieces to customize use (ie use as a potting bench or rock cleaning and paint station)
- Storage shelf
- Easy to customize and decorate
- Sturdy construction using time tested methods suitable for outdoor use
- Cedar flat surfaces will last longer
- About $50 in new materials to build
- Simple construction that most anyone can tackle with a few tools
We LOVE this mud kitchen as is, but I did want to mention my six year old son thought it would make a fantastic fish cleaning station. He also is washing rocks and painting them. I could also see this used as a child's potting bench, serving area for kids, lemonade stand, or wildflower florist station. The options are endless!
Video Tutorial
I did a video tutorial of this build, please take a moment to watch before you tackle this project:
Mud Kitchen Plans
The mud kitchen plans follow, please share a photo if you build - we love seeing your projects.
Preparation
3 - 2x2 @ 8 feet long
1 - 2x4 @ 10 feet long
4 - 5-1/2" wide cedar fence pickets, 6 feet long, prefer NOT dogeared
40 - 2-1/2" long self tapping trim screws
50 - 1-1/2" long self tapping trim screws
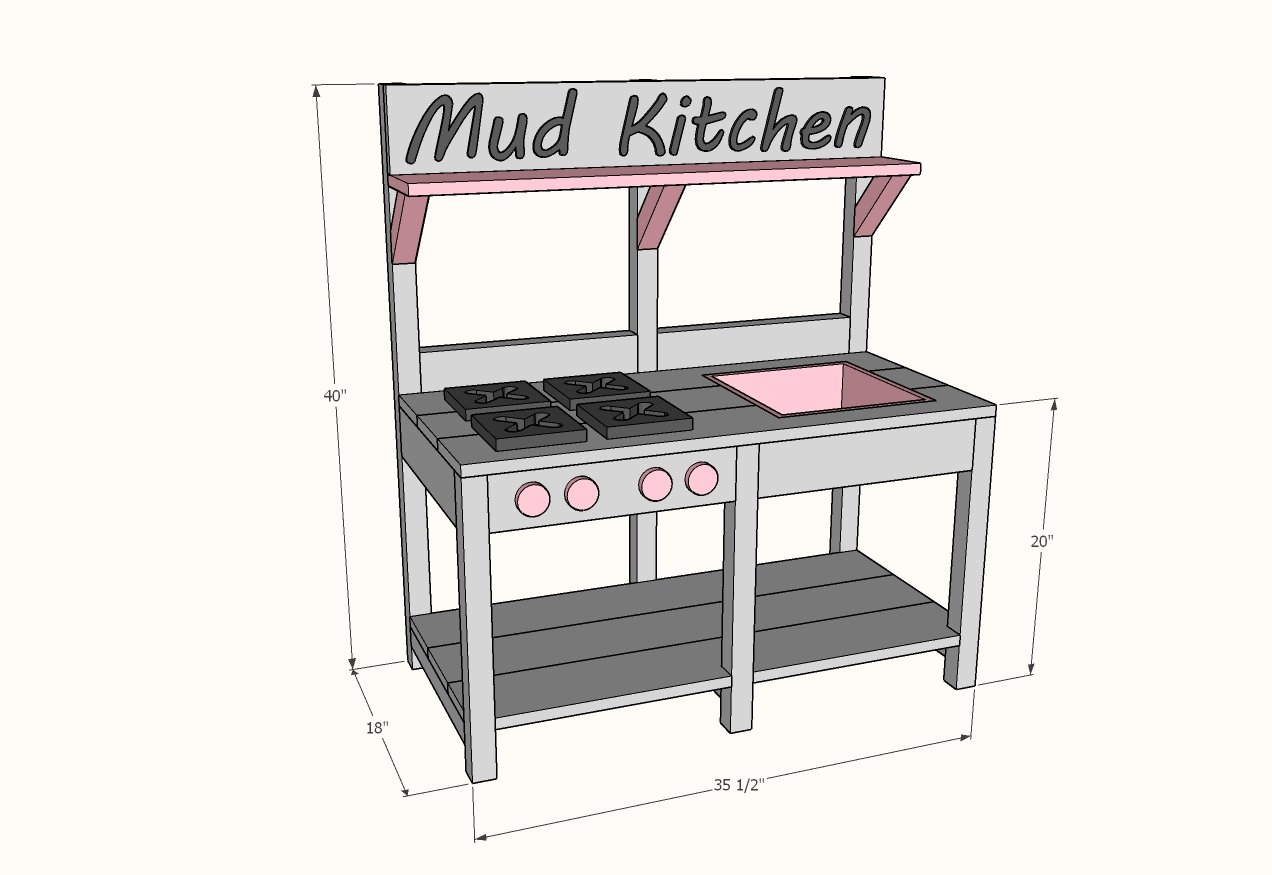
3 - 2x2 @ 40" - back legs
3 - 2x2 @ 19-1/4" - front legs
3 - 2x2 @ 15-1/2" - bottom shelf support
7 - 2x4 @ 15-1/2" - top shelf supports and back splash
8 - 5-1/2" wide cedar fence pickets @ 35-1/2" long
3 - 2x2 @ 7" - long point to long point measurement, both ends cut at 45 degrees, ends NOT parallel*
*DO NOT cut from small pieces of wood. Always clamp when cutting.


NOTE: The cedar fence pickets may be rough and have splinters. Sand first.
Instructions
Step 1

Build three leg sets the same as shown in diagram. I used two screws to attach the 2x4s, and one 2x2 to attach the 2x2s to the 2x2s.
Step 2
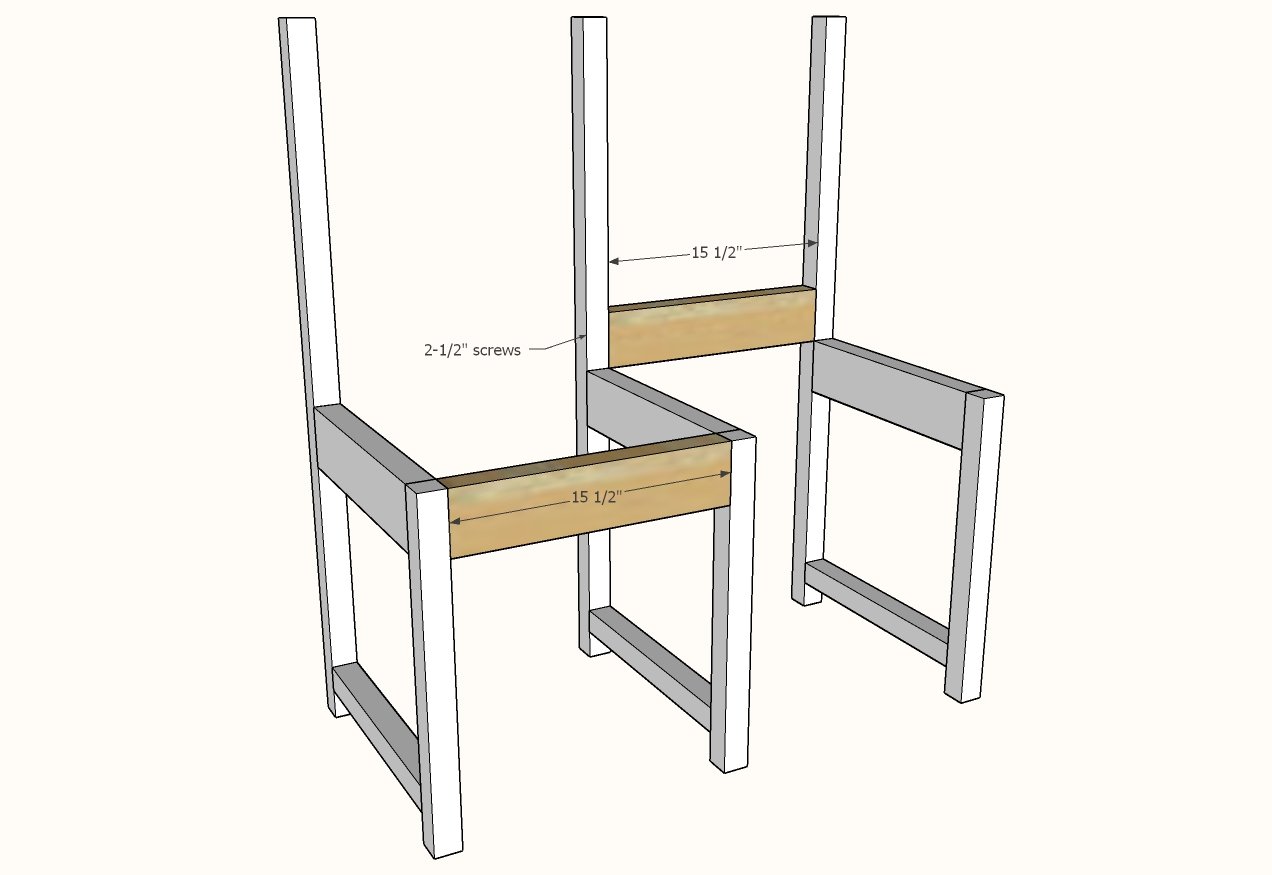
Attach the three leg sets together with one front and one back with two screws per joint.
Step 3
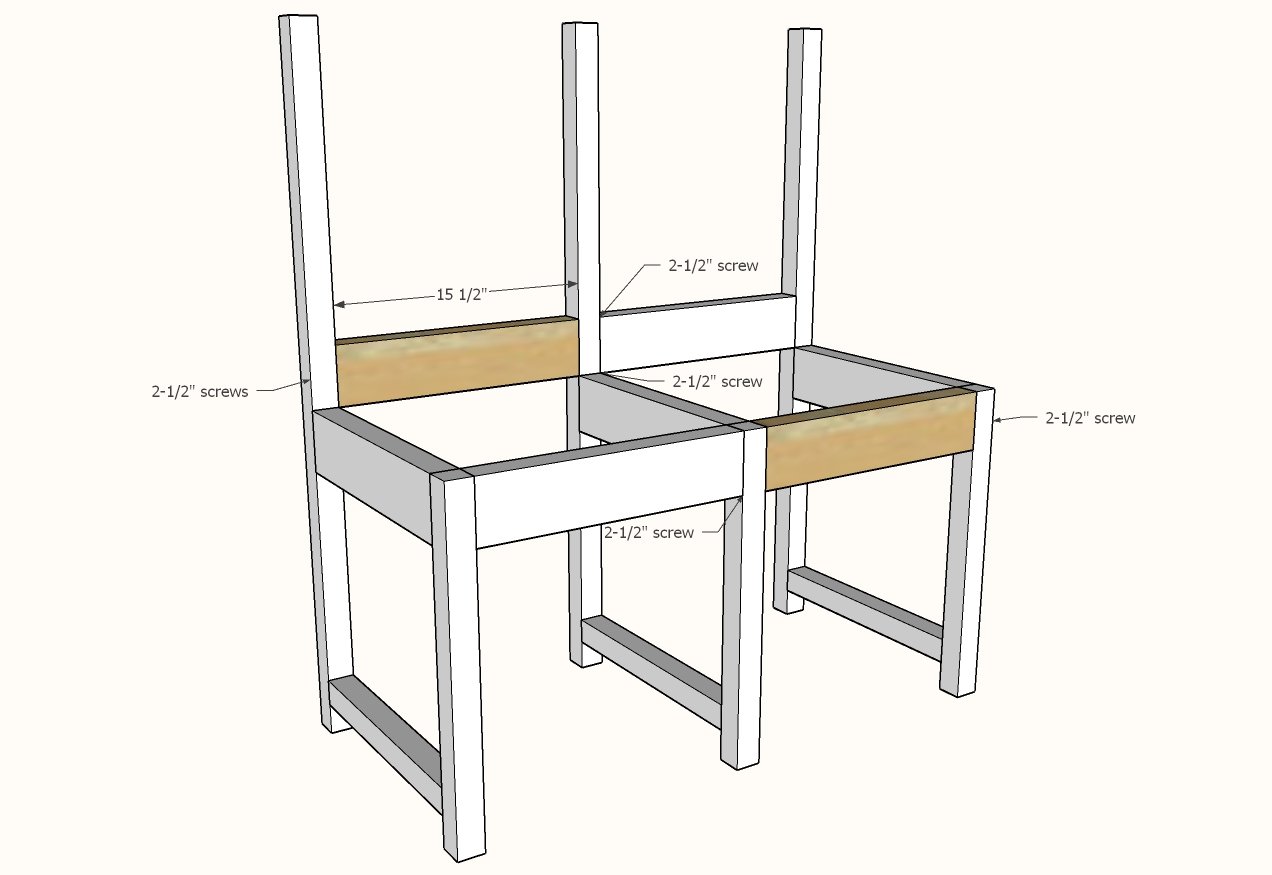
Add remaining supports to finish the frame for the mud kitchen.
Step 4
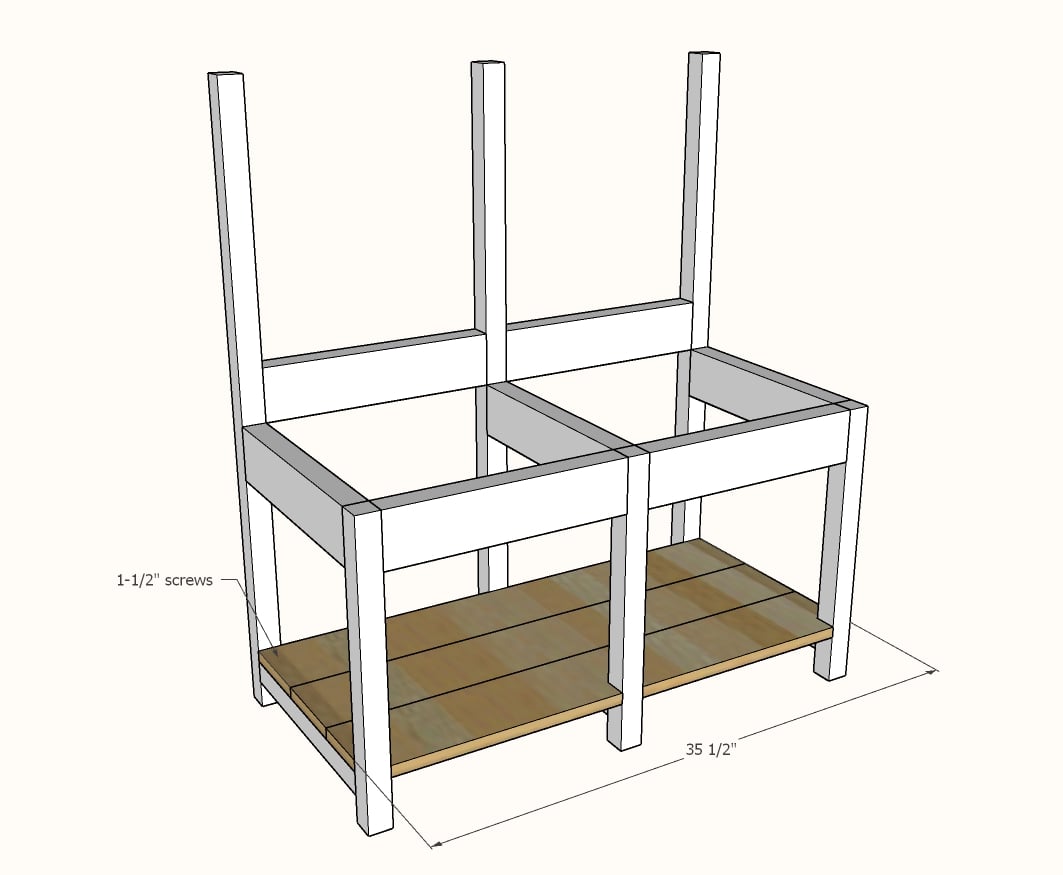
Layout the bottom shelf 1x6 boards and notch out the front one around the 2x2 legs.
Screw down, leaving even gaps for water drainage in between.
Step 5
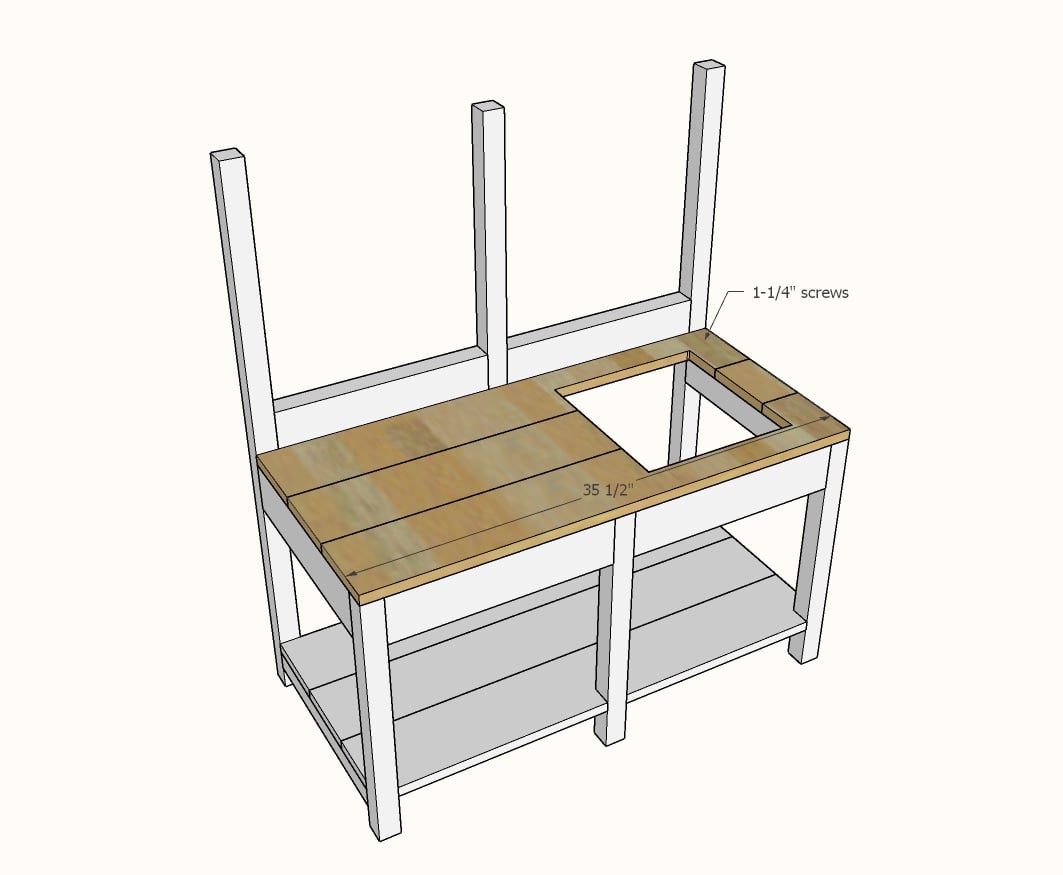
Layout top boards with even gaps in between and screw down.
Cut sink out.
Step 6

Attach top shelf back board to 2x2 legs, flush to top.
Step 7

Attach top shelf shelf board to bottom of the back board.
Step 8

Attach shelf support brackets to the underside of the top shelf.
Step 9
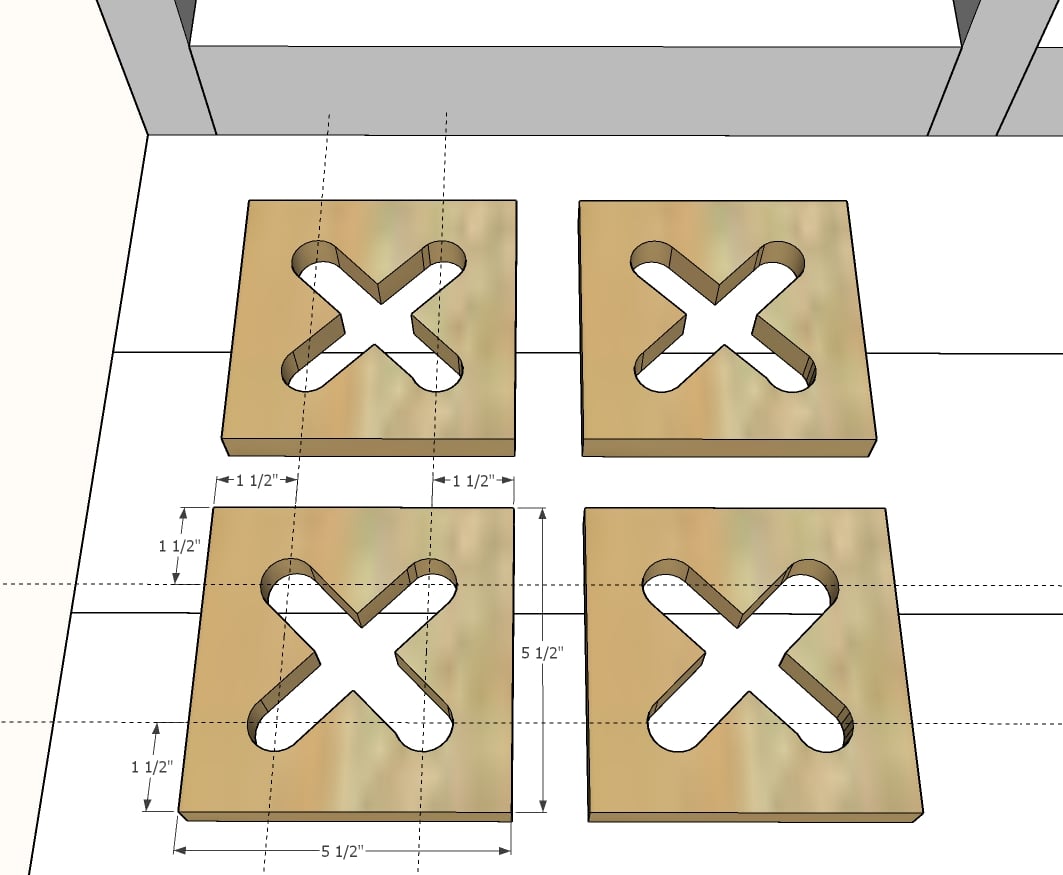
If desired, cut out stovetop pieces from 1x6 scraps. As shown, a 1/2" hole is drilled and the holes are connected with a jigsaw.


Comments
Ana White
Sun, 06/21/2020 - 14:15
I also added the hinged door…
I also added the hinged door made from 1x3s. If you do the door, leave about 1/4" all the way around the door to prevent finger pinching hazards.
hroossien
Mon, 06/22/2020 - 12:04
I was just here a few days…
I was just here a few days ago looking for plans for a mud kitchen! I am SO EXCITED!!!!
manofpants
Mon, 06/22/2020 - 14:05
Untreated wood?
Would untreated 2x4s work outside for long? Wouldn't you go with treated or something else that will survive?
gretaWEBB
Mon, 09/07/2020 - 09:38
I wouldn't want the children…
I wouldn't want the children playing with the treated lumber
akkaaraaus
Sun, 06/28/2020 - 23:52
Pretty amazing. I was…
Pretty amazing. I was looking for a plan wherein I could cook sometimes in my calm and breezy outdoors and have a great family dining in my garden space. This is the best one that I would want to try. Thanks for sharing.
In reply to Pretty amazing. I was… by akkaaraaus
Noyehx4
Mon, 07/06/2020 - 08:08
I'm not Ana, but she did address this in the video
During the video she says that she ended up taking the spray with her to home depot and they helped her find the adapters to make it connect to the hose.
In reply to I'm not Ana, but she did address this in the video by Noyehx4
Noyehx4
Mon, 07/20/2020 - 13:27
We purchased a kit at home…
We purchased a kit at home depot and still had to get two adapters, however once we were on our way home, my husband remembered that we had a quick connect on end of our hose, so we went back in and they were able to tell us exactly what we needed, and everything connected easily! We needed a Nipple 1/4, HEX Bushing 1/2, and Swivel 3/4, again everything connected and it worked perfectly! I hope this helps :)
tiffanytackett12
Fri, 07/03/2020 - 15:49
Mud kitchen sprayer
Ana!! How did you do the sprayer part and connect it to the hose? My husband and I walked around home depot for an hour and couldn't figure it out. Please help!
In reply to Mud kitchen sprayer by tiffanytackett12
Noyehx4
Mon, 07/20/2020 - 13:27
HI! tiffanytackett12 I am…
HI! tiffanytackett12 I am not Ana, however I just posted a brag post, and added a photo of what we needed to get our hose hooked up to the garden hose. I suggest taking the kitchen hose in with you. We purchased a kit at home depot and still had to get two adapters, however once we were on our way home, my husband remembered that we had a quick connect on end of our hose, so we went back in and they were able to tell us exactly what we needed, and everything connected easily! We needed a Nipple 1/4, HEX Bushing 1/2, and Swivel 3/4, again everything connected and it worked perfectly! I hope this helps :)
mamabuilds
Sun, 07/19/2020 - 23:40
can't find the fitting at the hardware store.
Same issue as others finding a fitting. Can you please let us know exactly what you used? It looks like I have an identical sprayer. Walking around the hardware store isn't working. I can kinda see the fitting in your picture, but not well enough to really tell. The hardware store doesn't seem to have anything.
In reply to can't find the fitting at the hardware store. by mamabuilds
Noyehx4
Mon, 07/20/2020 - 13:29
HI! Mamabuilds I am not Ana,…
HI! Mamabuilds I am not Ana, however I just posted a brag post, and added a photo of what we needed to get our hose hooked up to the garden hose. We needed a Nipple 1/4, HEX Bushing 1/2, and Swivel 3/4, again everything connected and it worked perfectly! I hope this helps :)
asteiselboin
Tue, 04/27/2021 - 09:04
Attaching the Kitchen Sprayer to the Garden Hose (Fittings List)
For all the inquiring minds that need to know. To connect the Kitchen Sprayer to a garden hose you will need the following fittings...
1. 1/2" x 1/4" Brass Hex Bushing
2. 3/4" x 1/2 Female Swivel adapter
3. 1/4" Brass Close Nipple
Hopefully this helps
Darrenfarrell
Fri, 05/21/2021 - 13:08
What are the 7 - 2x4 @ 15-1/2" for?
Hi all, can anyone tell me what the 7 - 2x4 @ 15-1/2" ? I know it says top shelf supports and back splash but I don’t see that anywhere in the plans or on the video
SarahMilner
Mon, 06/21/2021 - 21:08
They are the backsplash,…
They are the backsplash, supports under the counter, and the front holding the 2x2’s together