I bought an unfinished dresser from a local furniture refinisher - on clearance. It was intended as a changing table as I was preparing the nursery for our first child (about 5 1/2 year ago). Finally, 5 years and another baby (who is now 3) later, I finally decided to do something with it. So, please note that I did NOT build this piece from scratch. Rather, it was more a finishing project. It was unfinished pine. I failed to capture the "before" photo. Inspired by the Farmhouse Console and the Antique White project, I decided to tackle a distressed look.
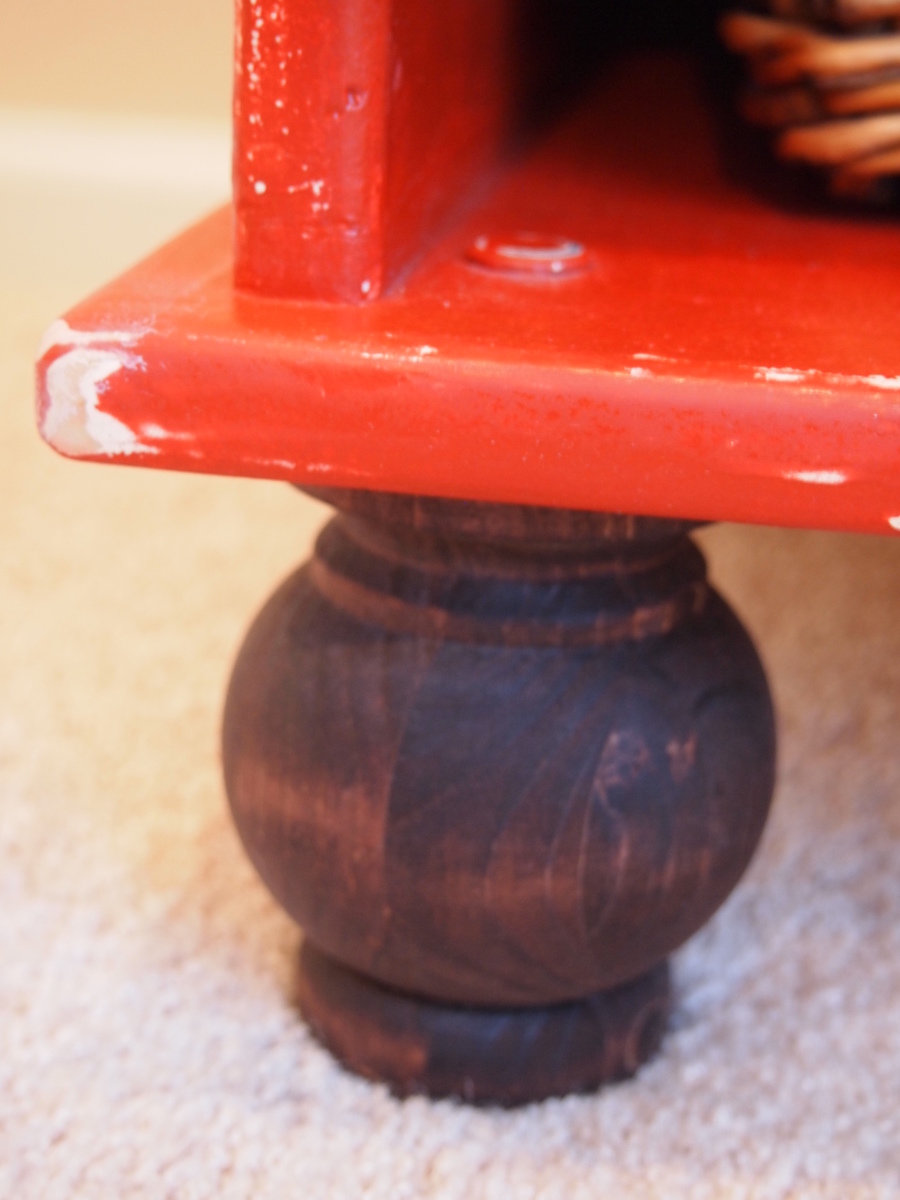
I sanded between each coat, and focused on areas that would naturally be worn. The end result was essentially some areas of bare wood showing through, and other areas where the base color shows through.
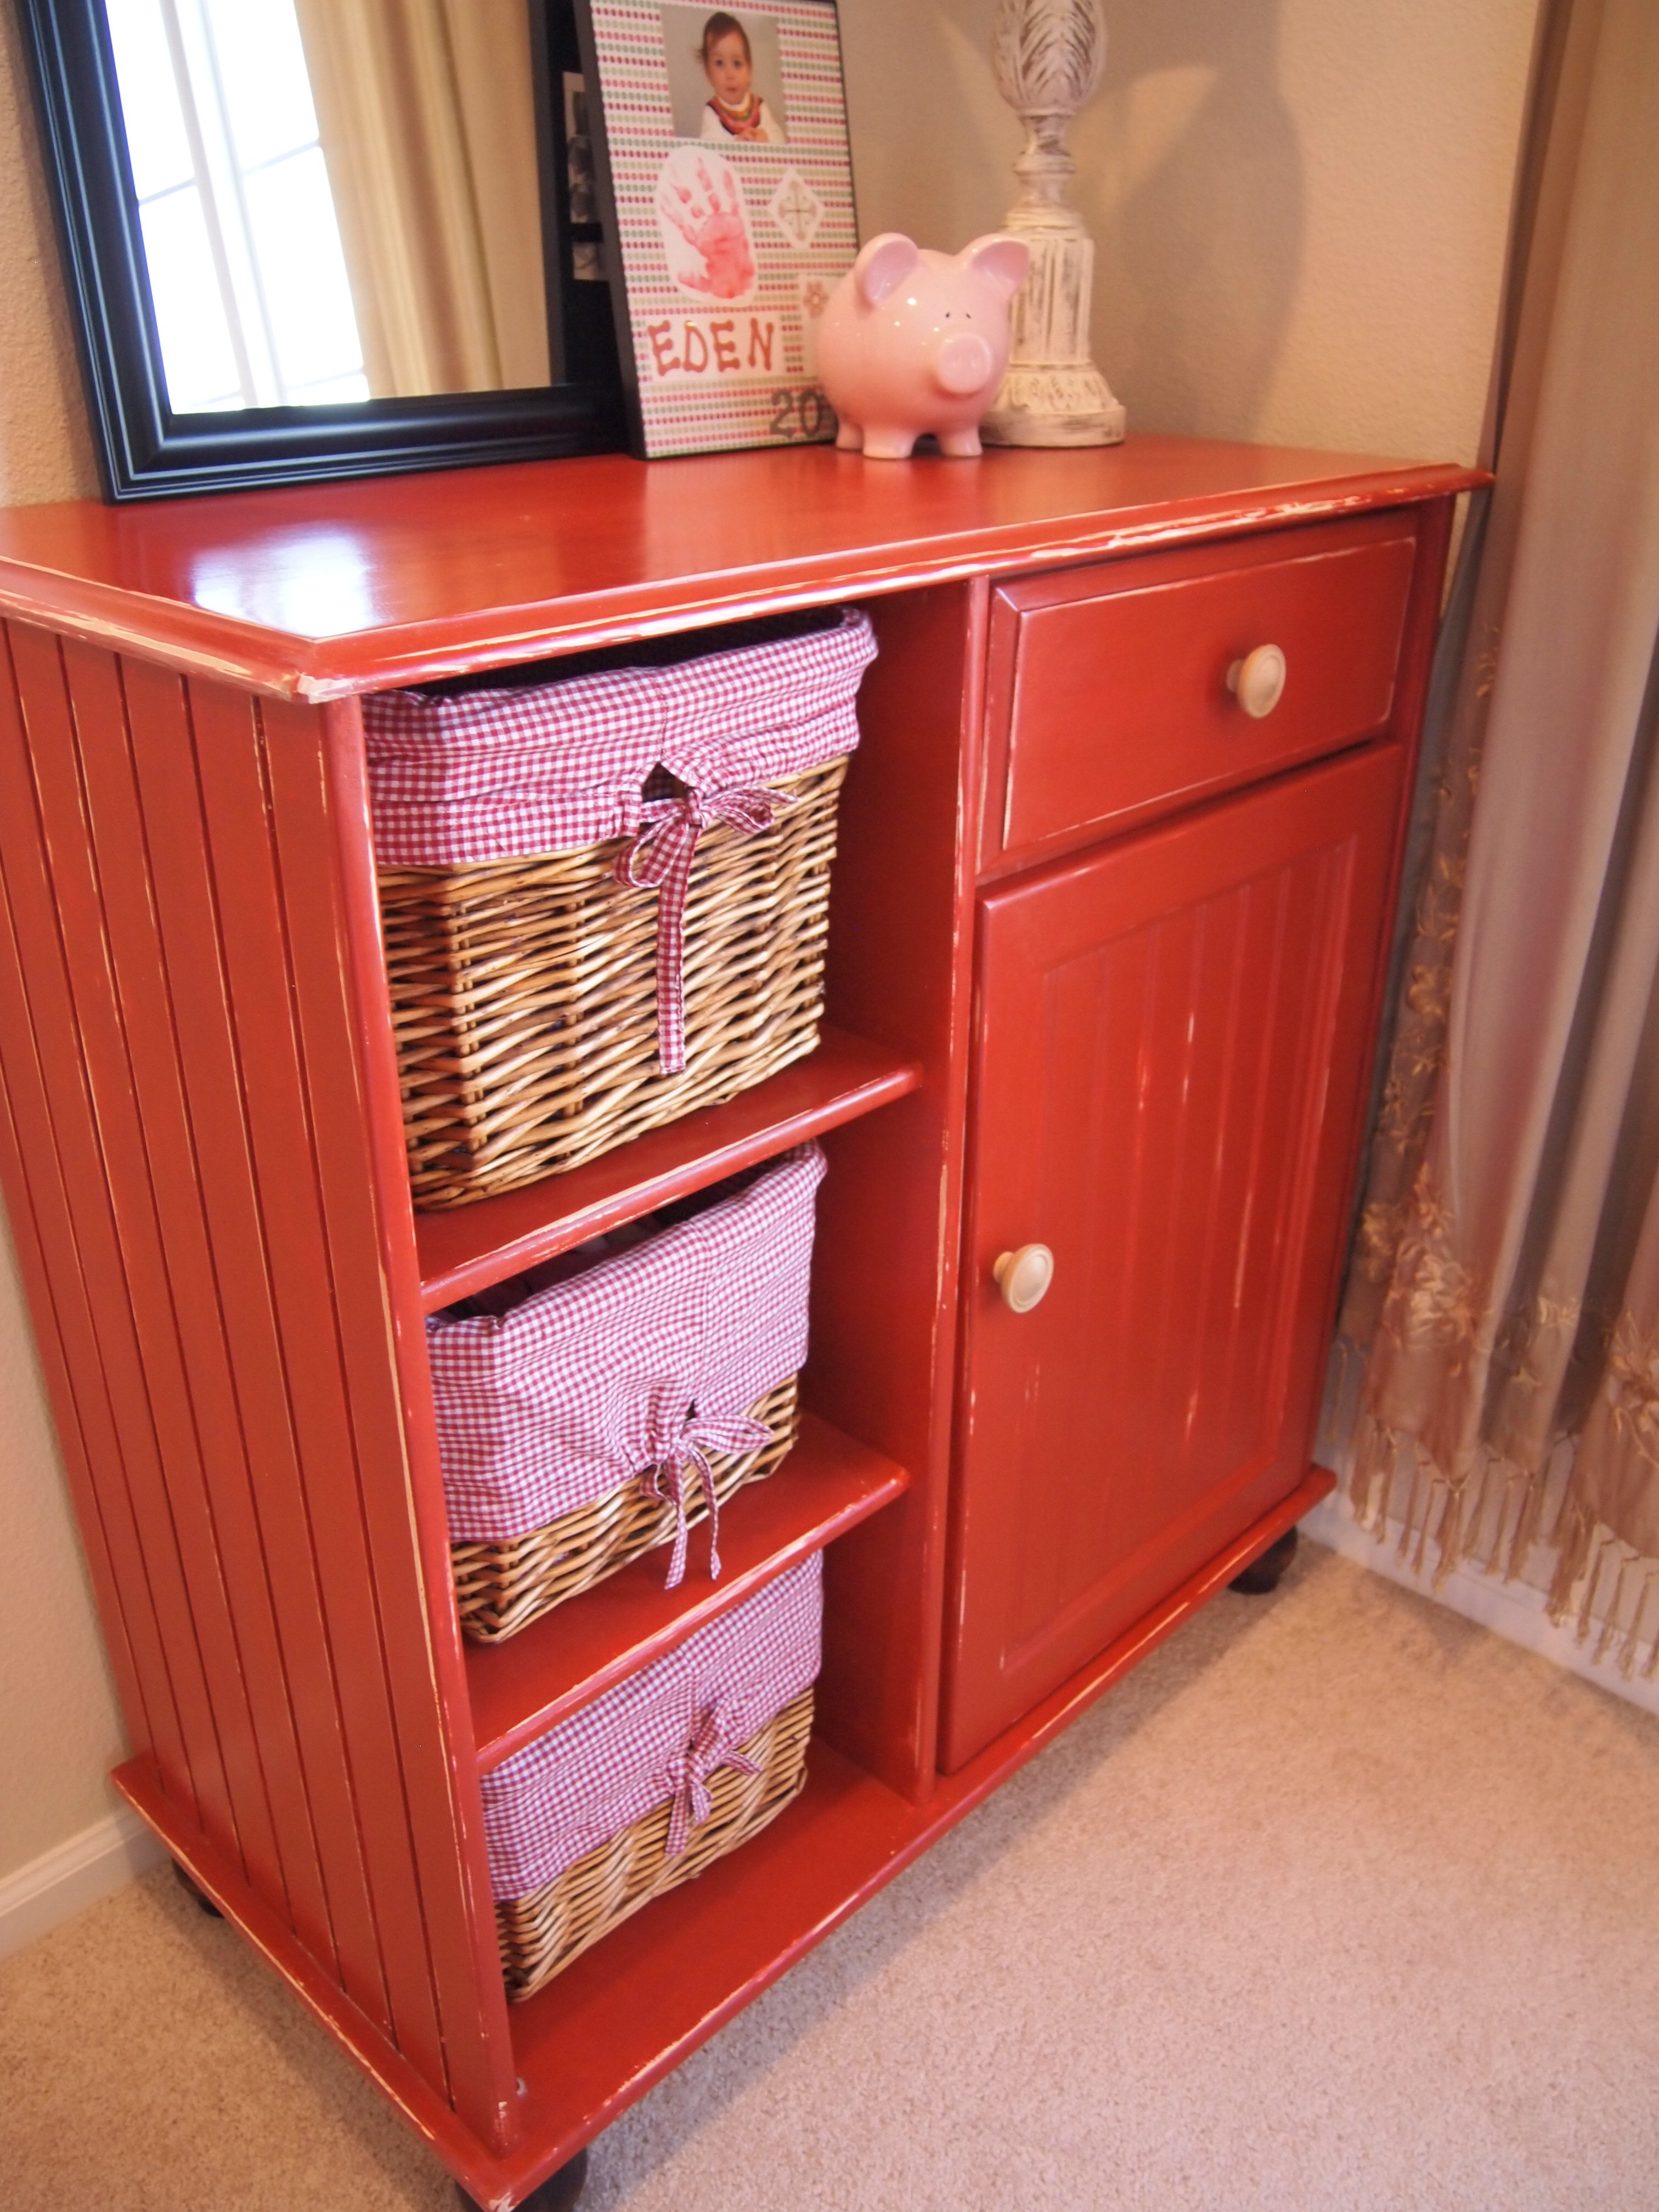
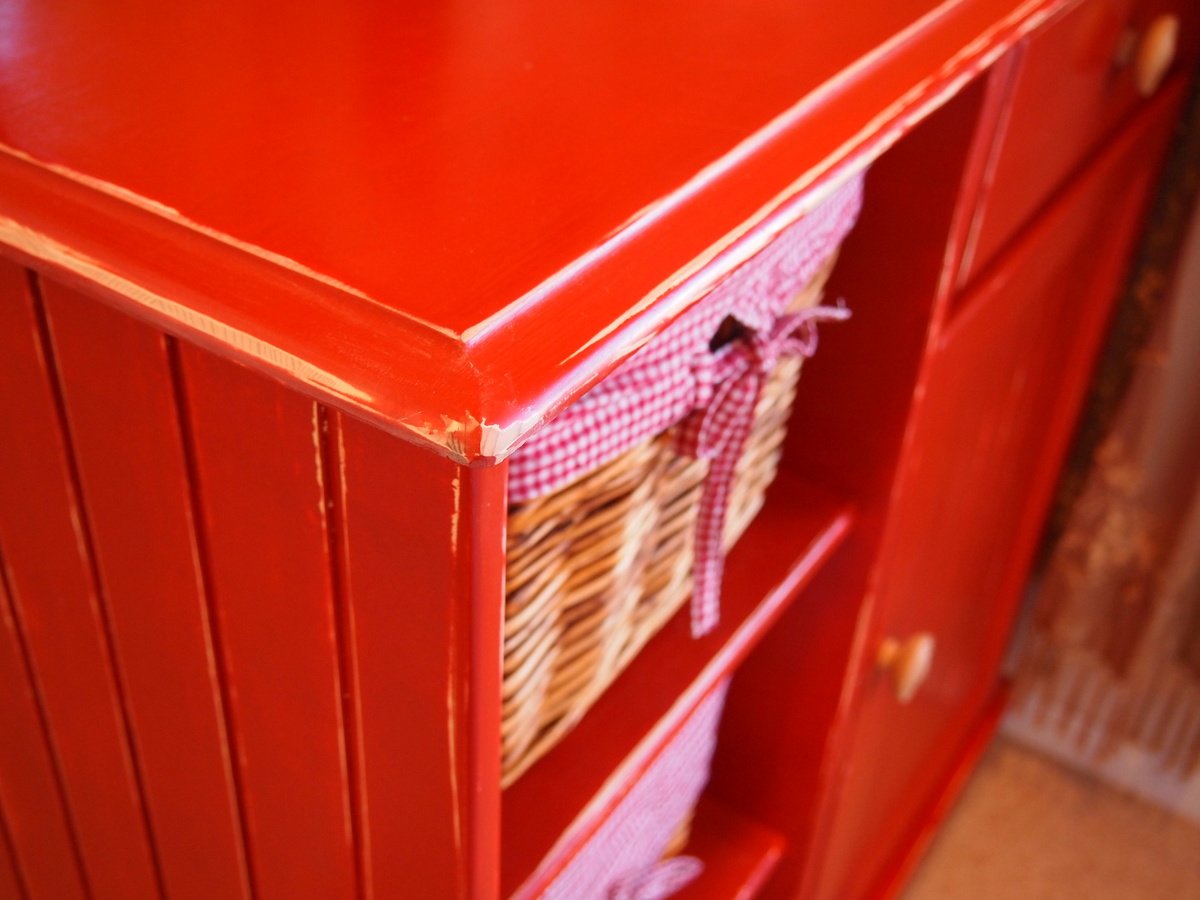
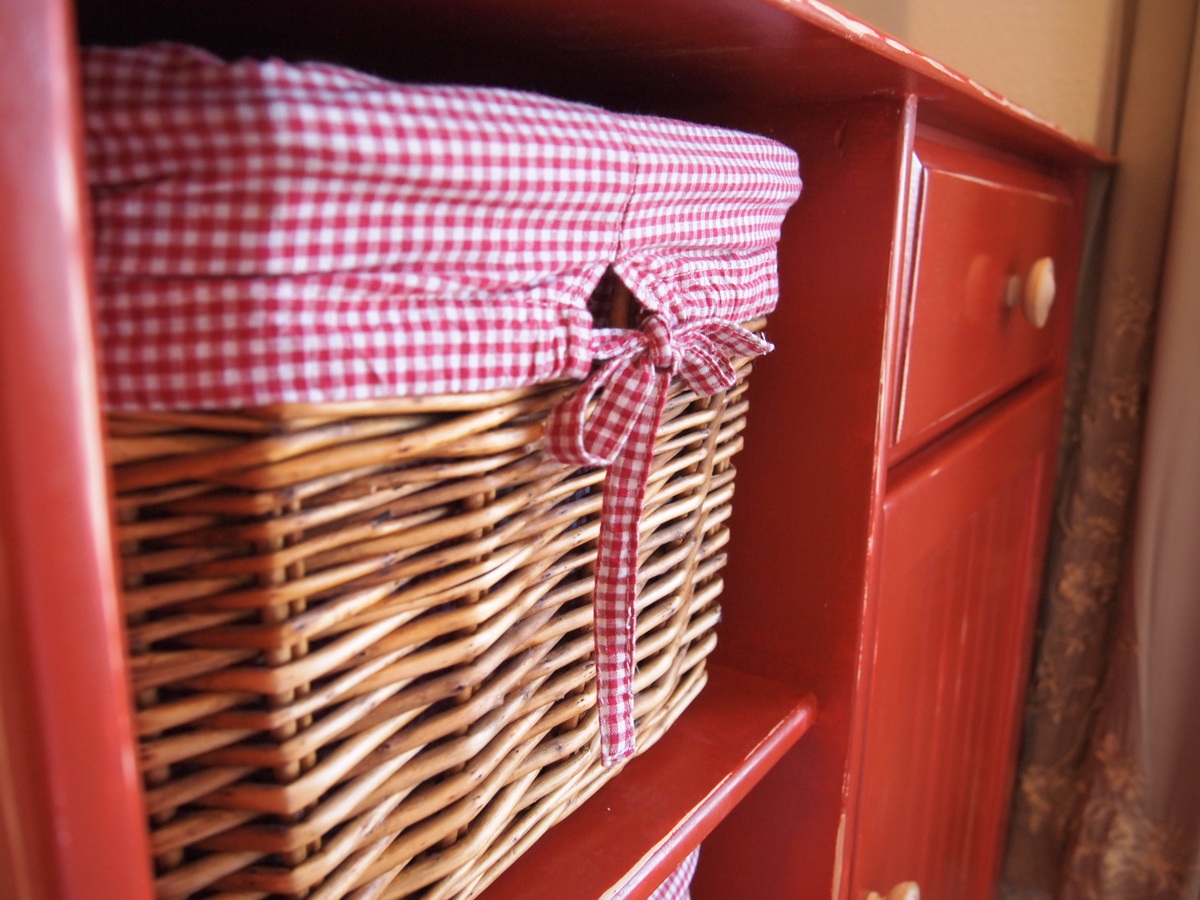
I don't remember where the baskets came from, but they fit perfectly and the red-checkered pattern matched nicely. It turned out to be such a cute addition to my daughter's room, and I think it will be a piece that will grow with her.
Sandpaper in 60, 120 and 320
Behr enamal paint (in Buttercup and Antique Red)
Behr Glaze (not necessary)
Minwax Finishing Wax paste
small paint roller
small paint brush
cotton rags (which I made from old 100% cotton t-shirts)
I sanded... and sanded... and sanded. I have a little handheld Porter Cable sander that works brilliantly, except that it doesn't get into the little cracks and crevices, so I did that by hand. I started with 60 grain, then 120.
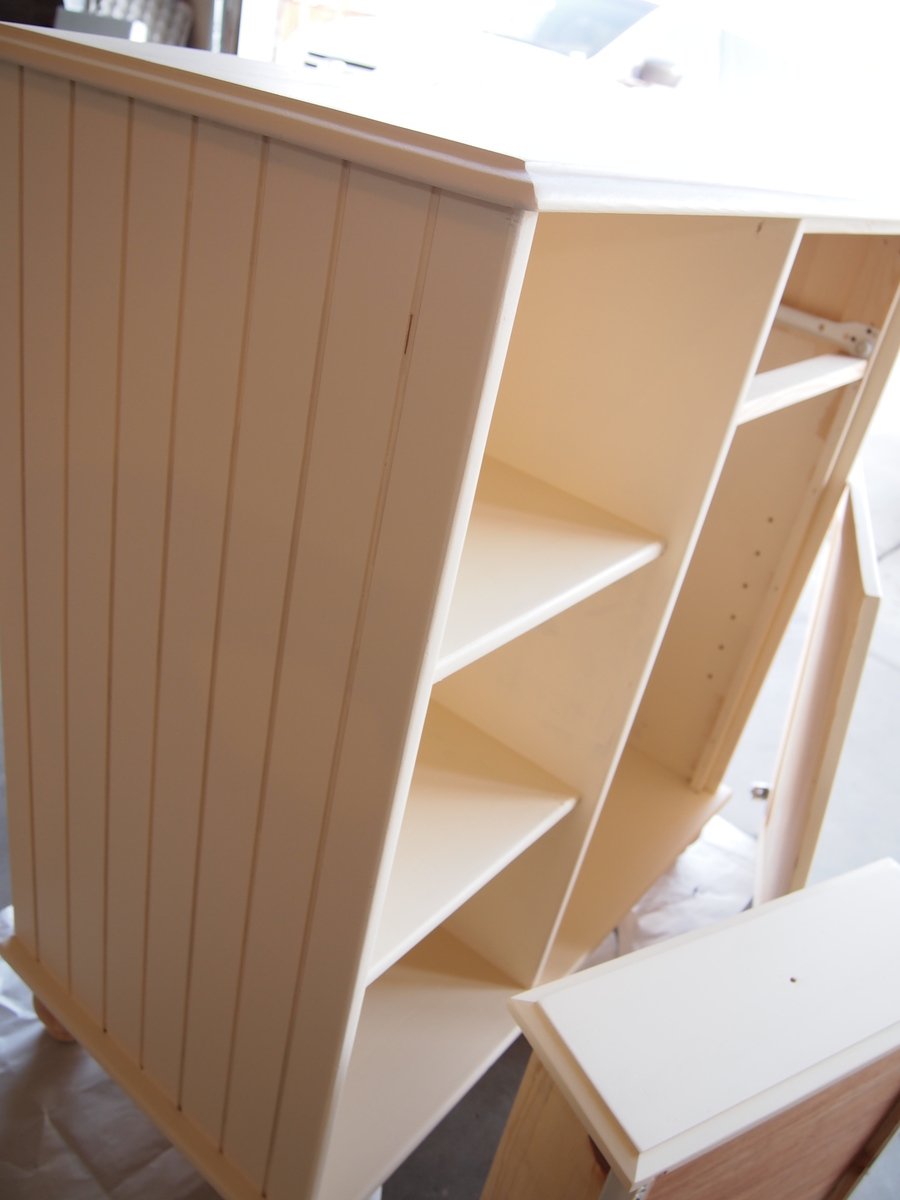
I painted 2 coats of Behr interior flat enamel in Buttercup, sanding with 120 in between coats, sanding through to bare wood where it would naturally be worn. Here is where it got interesting and frustrating. When I originally purchased paint, the very nice gentleman at the paint counter asked me what I was doing. I explained that I was doing a faux distressed finish on a dresser. I ordered a pint of the red paint, and he then explained to me that I should go with the Behr glaze. So, he gave me the glaze and that little sample of the red to mix into the glaze.
Glaze fail. I actually liked the look, but it was so not the look I was going for. Nevermind the fact that the glaze dries very quickly and soon became a sticky mess.
So, I left the project for about a week to ensure that the glaze was completely dry.
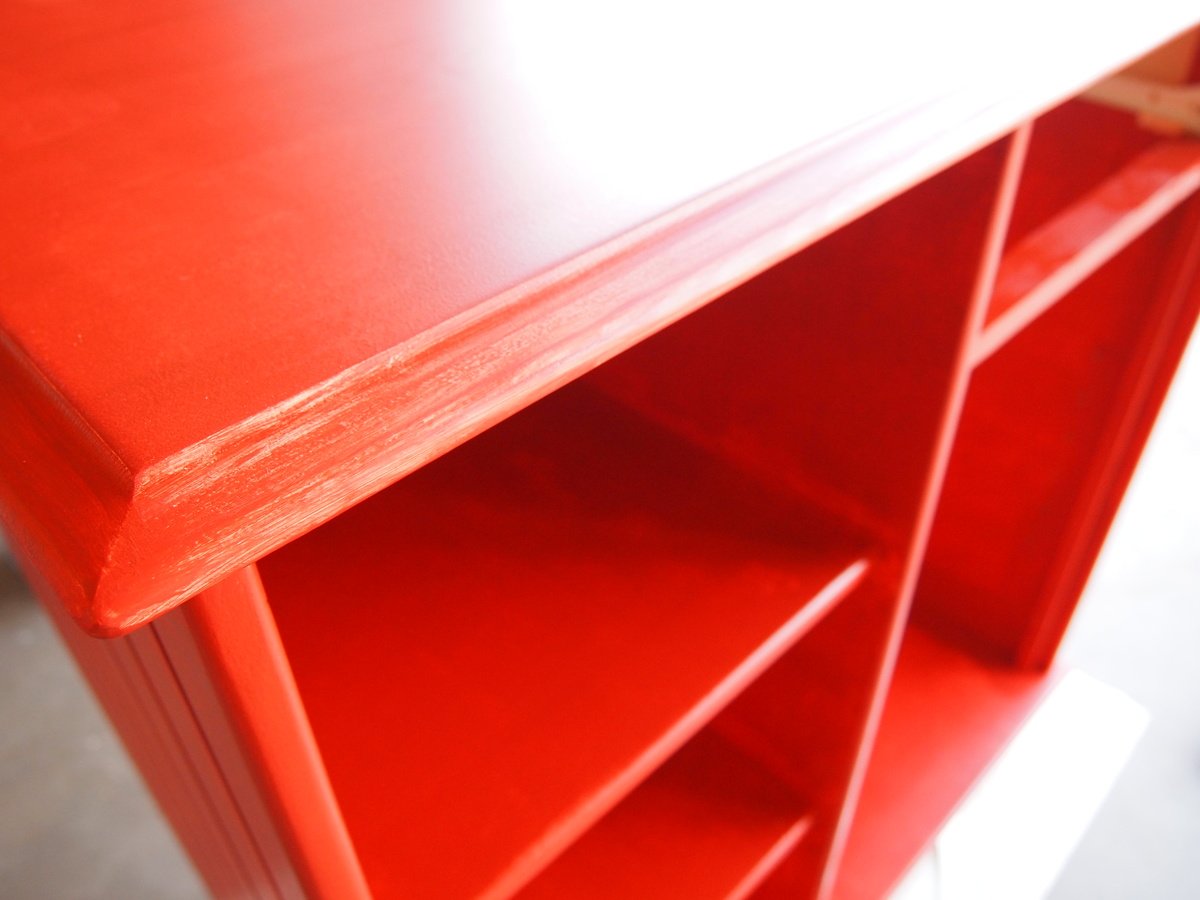
Then, I sanded with 60 and 120 again. The intention wasn't to get the glaze off, but rather treat it like a base coat. I then painted the entire piece with the red (no glaze). Then sanded with 120 in areas that would naturally be worn. The end result was essentially some areas of bare wood showing through, and other areas where the buttercup color shows through.
I sanded one final time with the 320 grain. I then used 2 coats of Minwax wax, resulting in a very silky, shiny finish. (It seriously is SO soft to the touch!)
Comments
Linda7
Mon, 11/12/2012 - 11:06
I'm very impressed with your
I'm very impressed with your recycled changing table--beautiful finish on a piece that will indeed grow with your daughter. The piece itself reminded me of the recycling console (pp. 86-91) in Ana's new book. Your finish would look awesome on that plan, too.