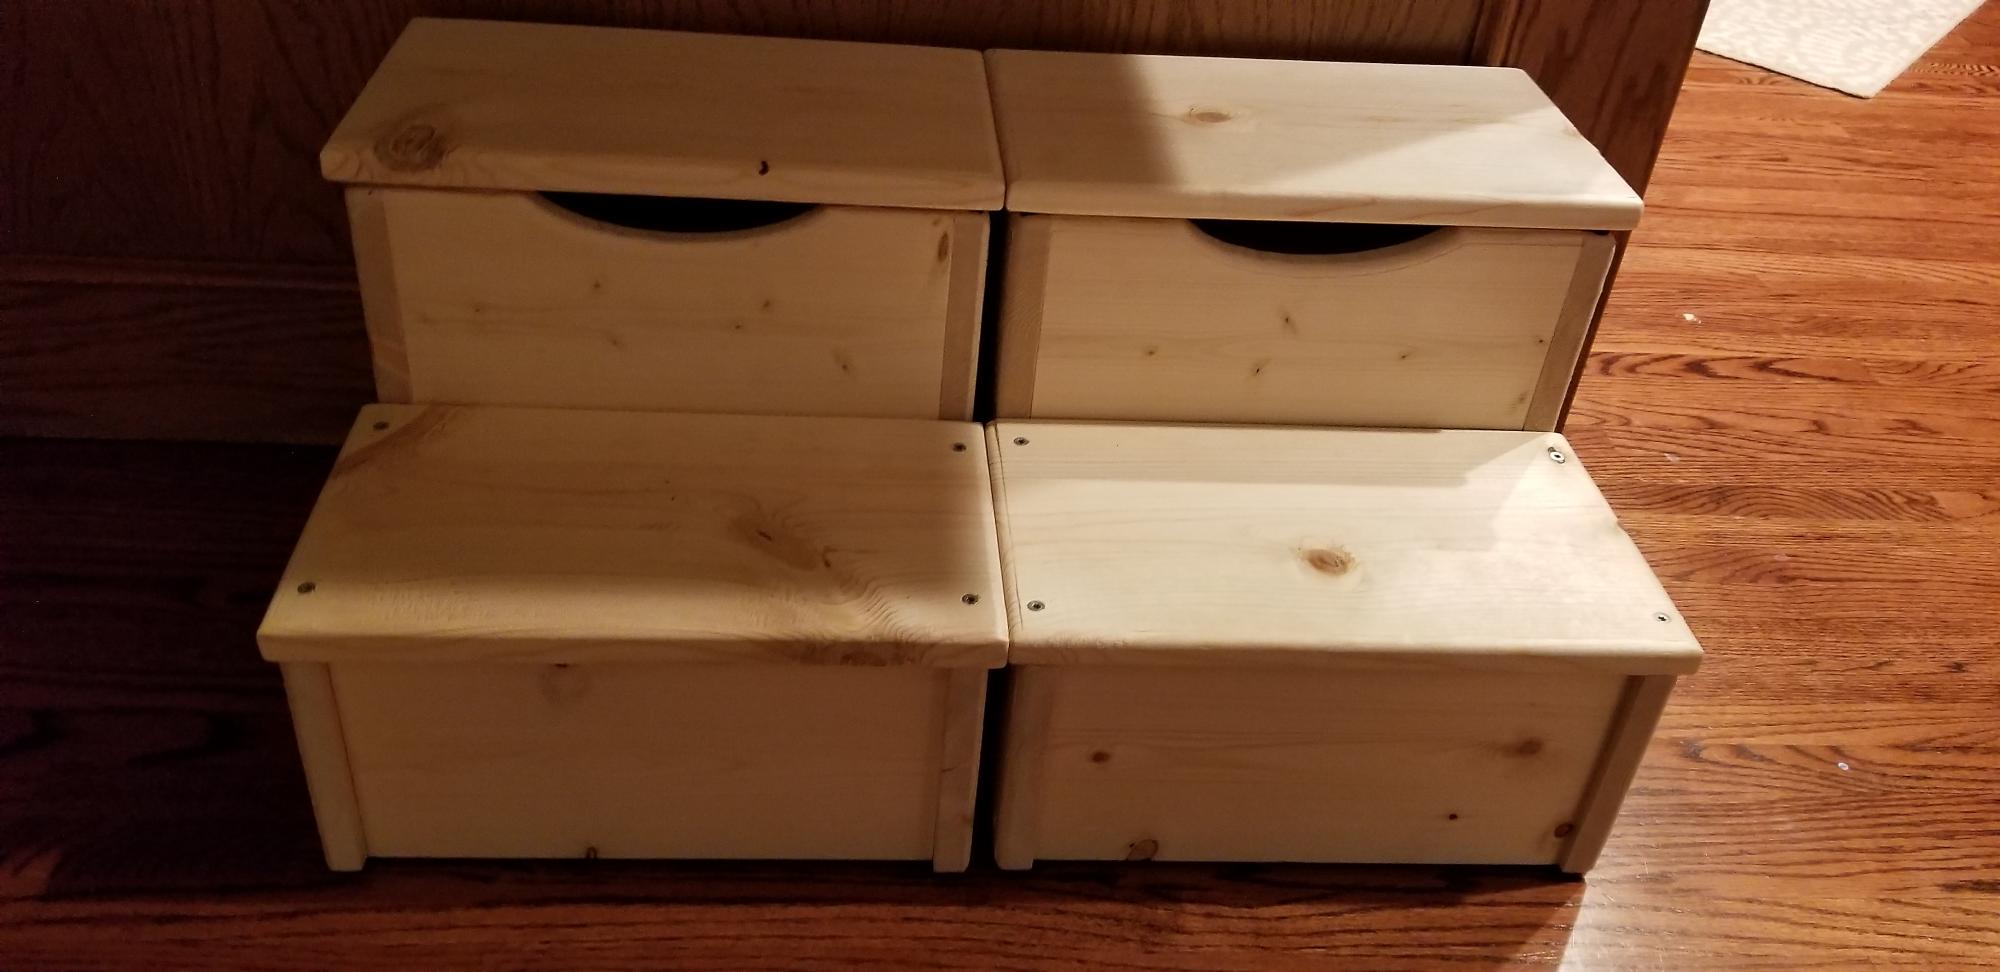
I'm a beginning wood worker enthusiast. I've been slowly collecting plans, tools, supplies and I'm certainly not efficient when it comes to projects- even "beginner" projects like this.
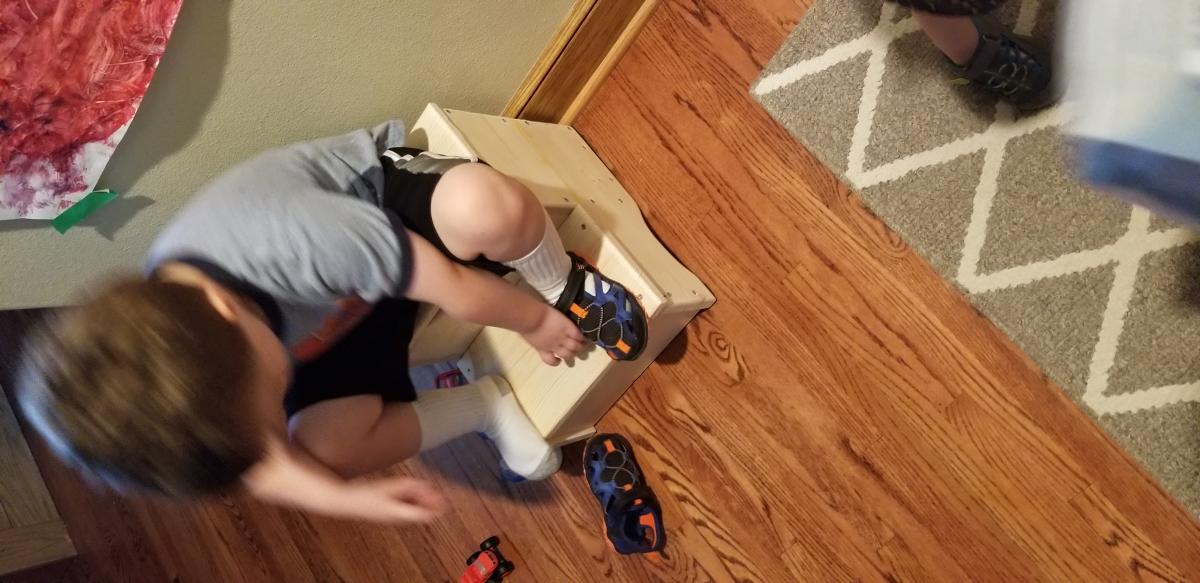
While there's still more finishing to do, I cranked these out over the weekend with a myriad of interruptions - so it's hard to say how long these would really take. I didn't have 12" boards, so glued 1 x 6" pieces together into the shape I needed. Then assembled each with 1 1/4" screws, routed the sides, sanded and cleaned them. The kids will paint them their favorite colors and then I'll put a clear coat on top to finish them up. Once painted and ready, I'll add hands to each side as well as rubber runners to the bottom for stability. These are really nice for toddlers to use while they put on or take off their shoes and put into the storage bin.
1) Assembly of the stool- I assembled mine by fitting them together and using 24" clamps to hold them in place, adjusting each part so it was square to the other parts (sides to front/back pieces, etc. then pre-drilled and assembled with 1 1/4" screws placed at even intervals. Many of the brag posts look like people glued them together. Wood gluing is great which is often stronger than screws- the wood itself will give way before the glue does, I've seen proof of it. At the time of my construction, I needed to assemble them and use them right away so I opted for screws instead.
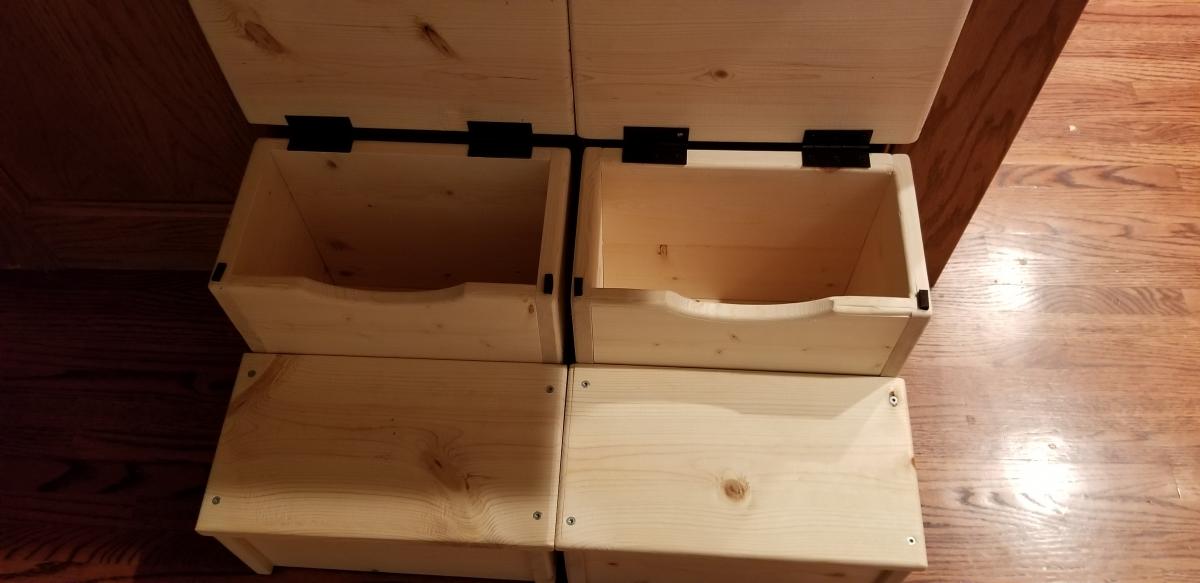
2) Adding the hinge- Duct-taping it to test out the best fit works really well, but there are at least 3 ways to attach this:
a) hinge on the inside of both the stool and top step
i) non-flush - allows for a felt stopper to minimize wood to wood noise when closing.
ii) flush - mortise or rout out the 1/8" (or whatever the depth of your hinge is) space for the hinge by tracing the hinge location and using a short depth mortise bit OR using a set of wood chisels- not everyone has a router (I had to borrow one from the in-laws...)
b) hinge on the back side- no mortise needed, but be aware of how far back you want the step lid to be able to go, full or 90 degrees from the start.
c) hinge on the inside of one side- i.e.: have the hinge on the outside of the stool and the inside of the step or vice versa.
3) The finish- Mine is still a work in progress- My kids are going to do a family project day with me and paint them their favorite colors. Once they finish painting (with touch-ups by Dad) I'll finish it with a top coat to seal/protect the paint.