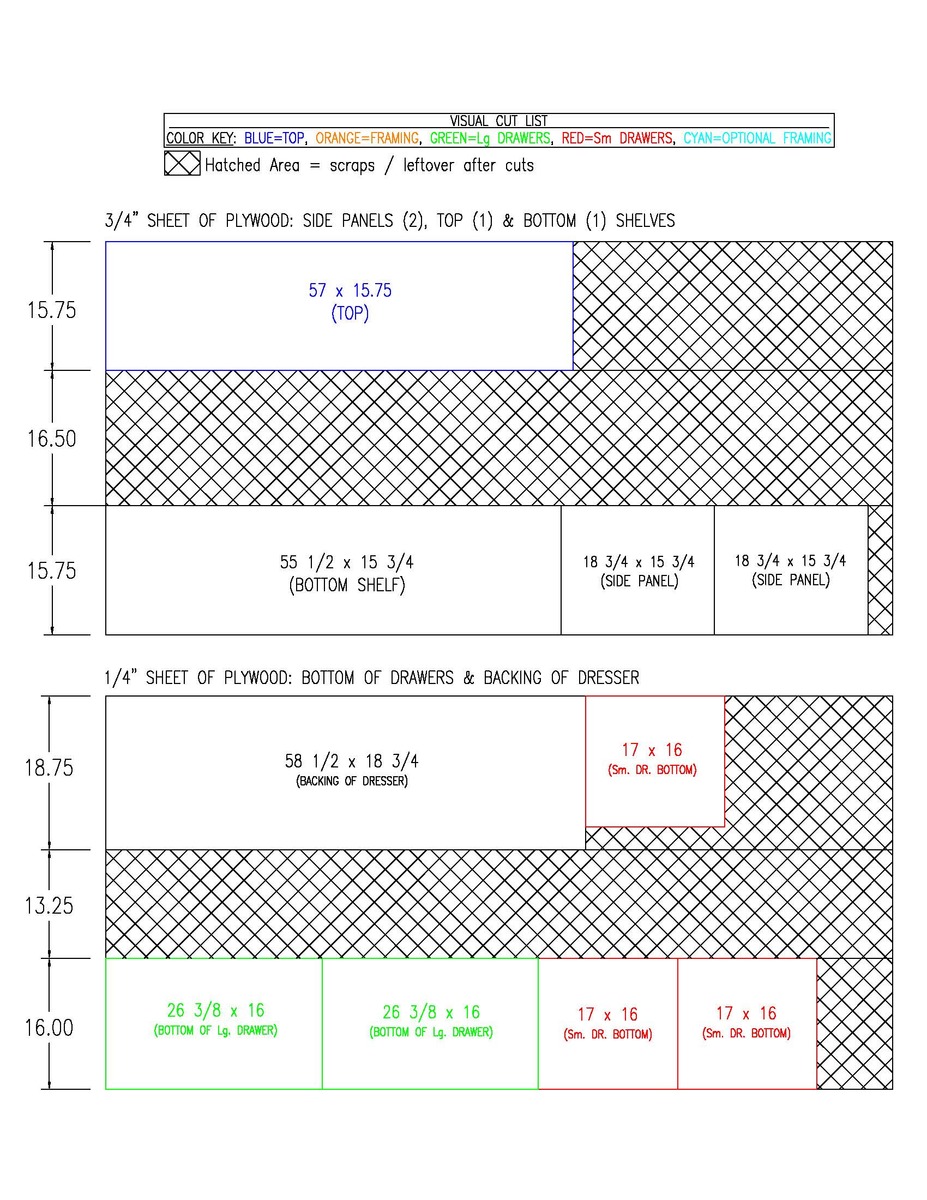
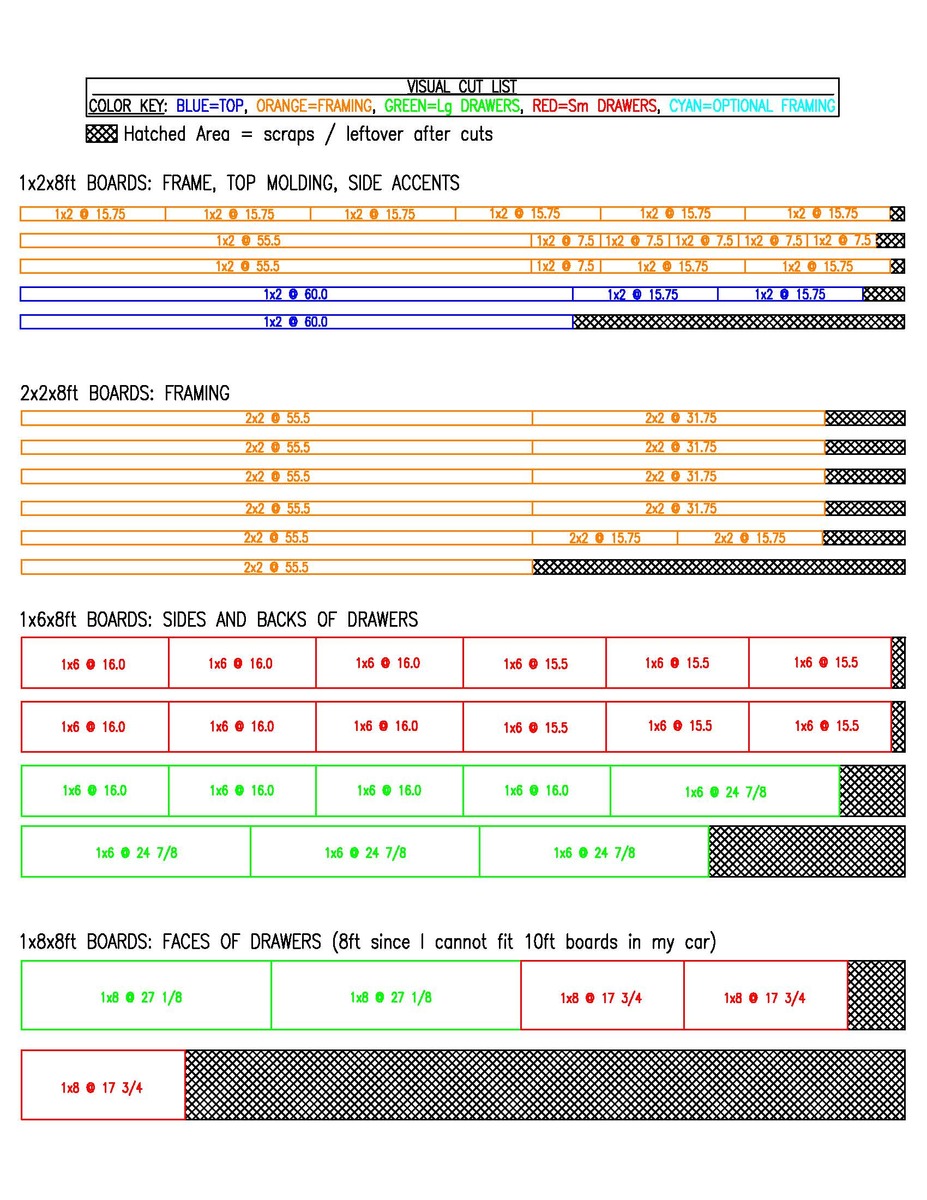
Since I am a very visual person when it comes to drawings and 2D/3D renderings, I have included pictures of the cut list shown on the boards you will need to use. I hope this helps some people! Keep in mind, if you use side mount drawer slides like I did, you need 3 extra 15.75" pieces for the slides to mount to. I just used extra 1x3 boards I had hanging around.
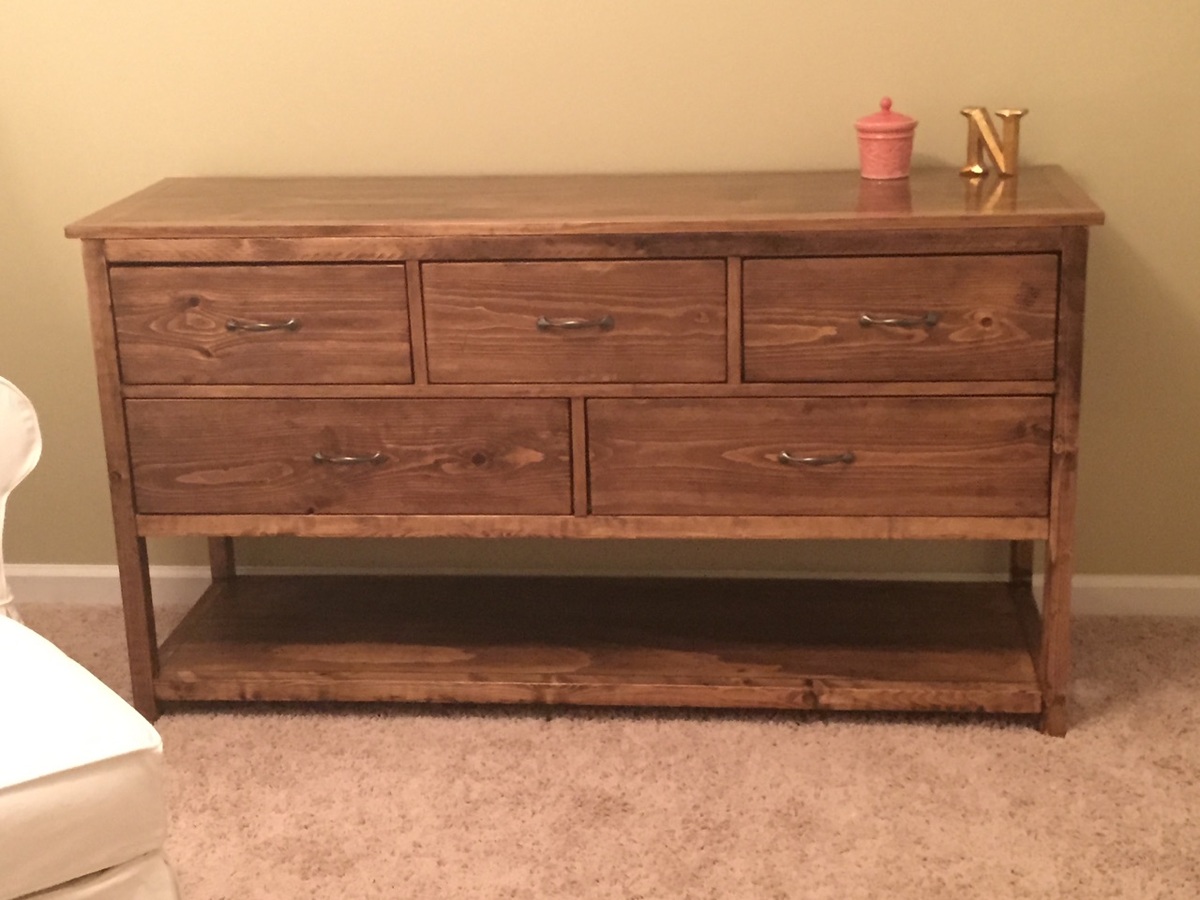
We built this dresser plan to be used as a dresser / change table combo. The guy at the home improvement store said to use oil based polyurethane so that it was more resistant to change table spills and traffic/wear over the years. The oil based poly also added a nice amber color to the stained wood which I really liked.
This is the most complicated project I've made so far (because I've never made a plan with drawers), but after a couple tables and a desk from Ana's site (and referencing Shanty-2-chic also) I was confident that it would turn out well.
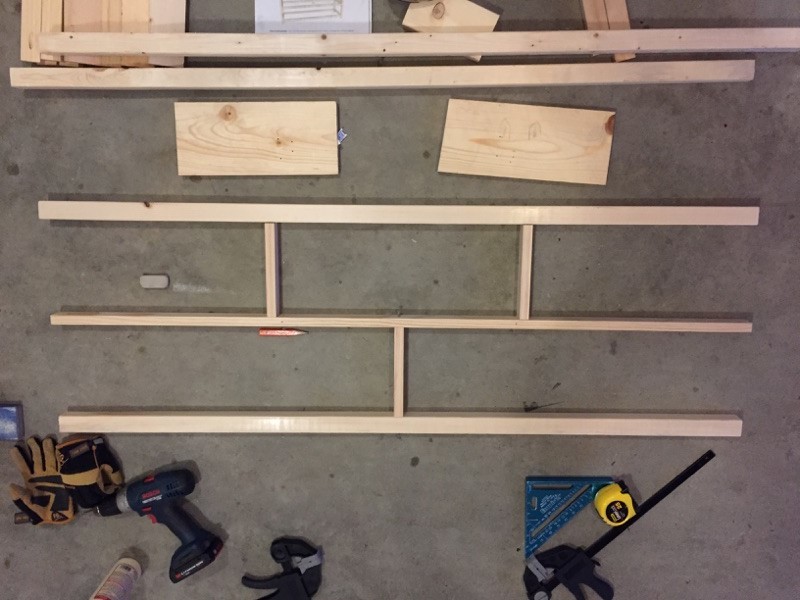
Change from the original plans --> We used 16in ball bearing "soft close" side-mount drawer slides instead of the euro style bottom corner mount ones mentioned in the plans. This requires adding the supports shaded in blue on the plans near step #7 pictures. Getting the exact spacing width for those slides was a bit tricky and the drawer boxes had to be within 1/16" for them to work, so if you want simple you might want to stick to the euro style ones. They allow for more "play" in the operation.
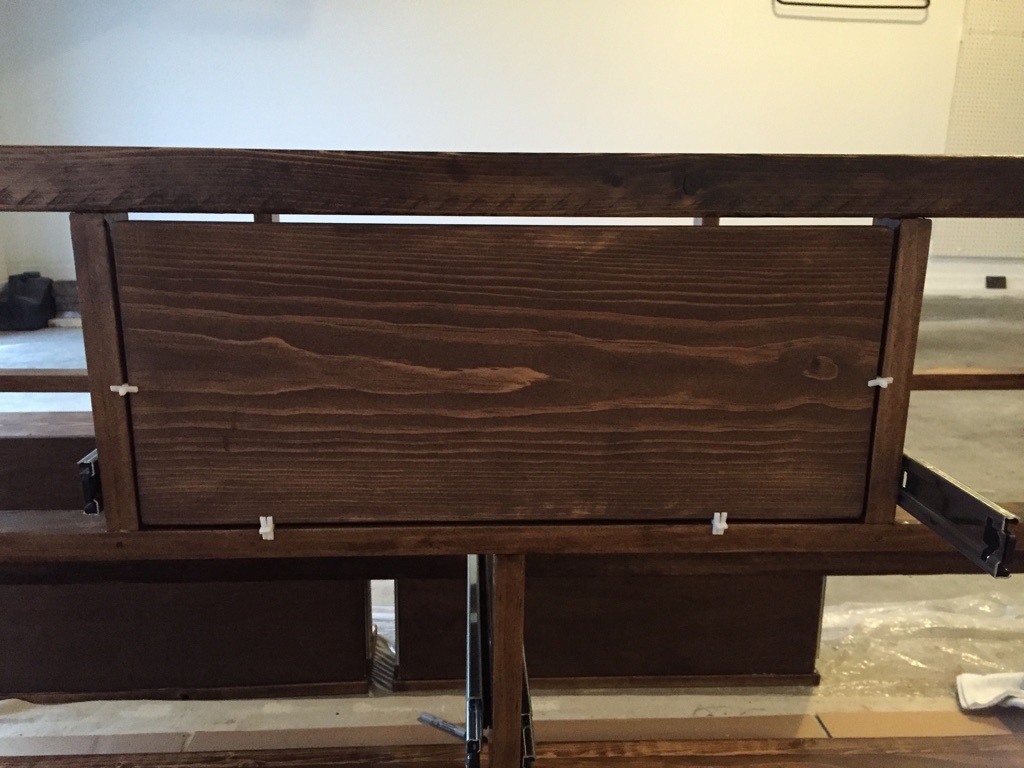
Tip for attaching drawer faces: For one thing, make the attahcment of the top and back of the dresser the LAST two steps you do on the whole project since it makes installing drawer slides and drawer faces a breeze. That said, when it cam time for attached the front of the drawers I used 1/8" tile spacers all around the sides to make sure that gap was uniform and correct (see pic #4). It was the simplest way I thought about of going about it. Mounting the drawer boxes to the slides needed to be done before attaching the face boards for me. And instead of nailing the faces on from the front and then screwing from behind; I put glue on the drawer box, put the face board in place using the tile spacers, and then added screws from the inside of the frame side. It was a breeze.
As the plans stated, I attached the top with PH screws through the side panels and six countersunk screws in the 2x2s along the width of the top using 2" screws. It would have been a lot simpler to install the countersunk ones if I had a right angle drill or short handles screw driver, but I did not, so I made a normal one work.
If you have any more specific questions about my version of this project please let me know. I was hoping to get to share more than 5 pictures, but that seems to be all the posts let you put up so I tried to included the most helpful ones.
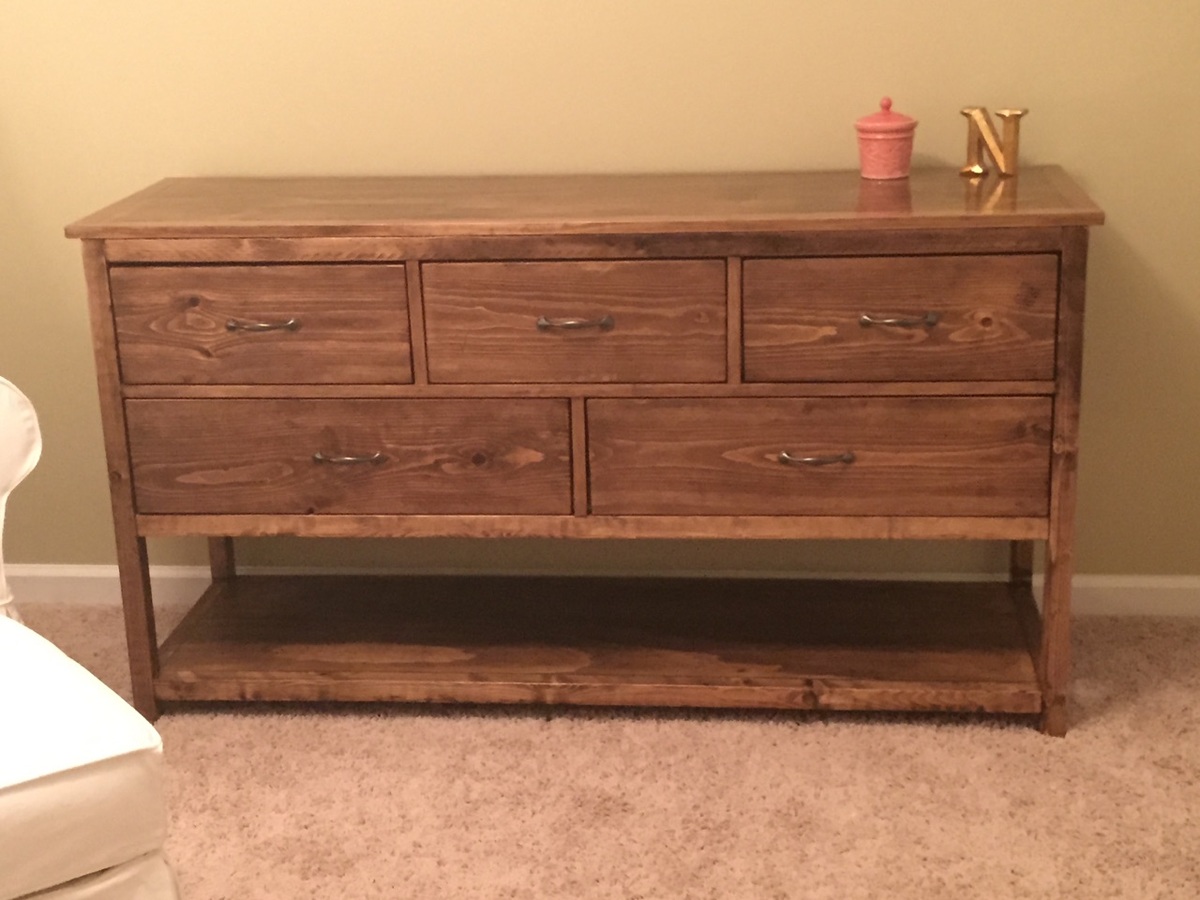
Break down: $166 (lumber) + $80 (5 - ball bearing drawer slides, $16/pair) + finishing materials if you don't have (sand paper, wood filler, stain & polyurethane) + drawer handles ($8)
•Minwax "dark walnut" stain
•Oil-based Polyurethane -- better for our application since ours will double as a change table. The man as the home improvement store said oil based was better against wear and tear and the chemicals/fluids a change table might encounter.