Community Brag Posts

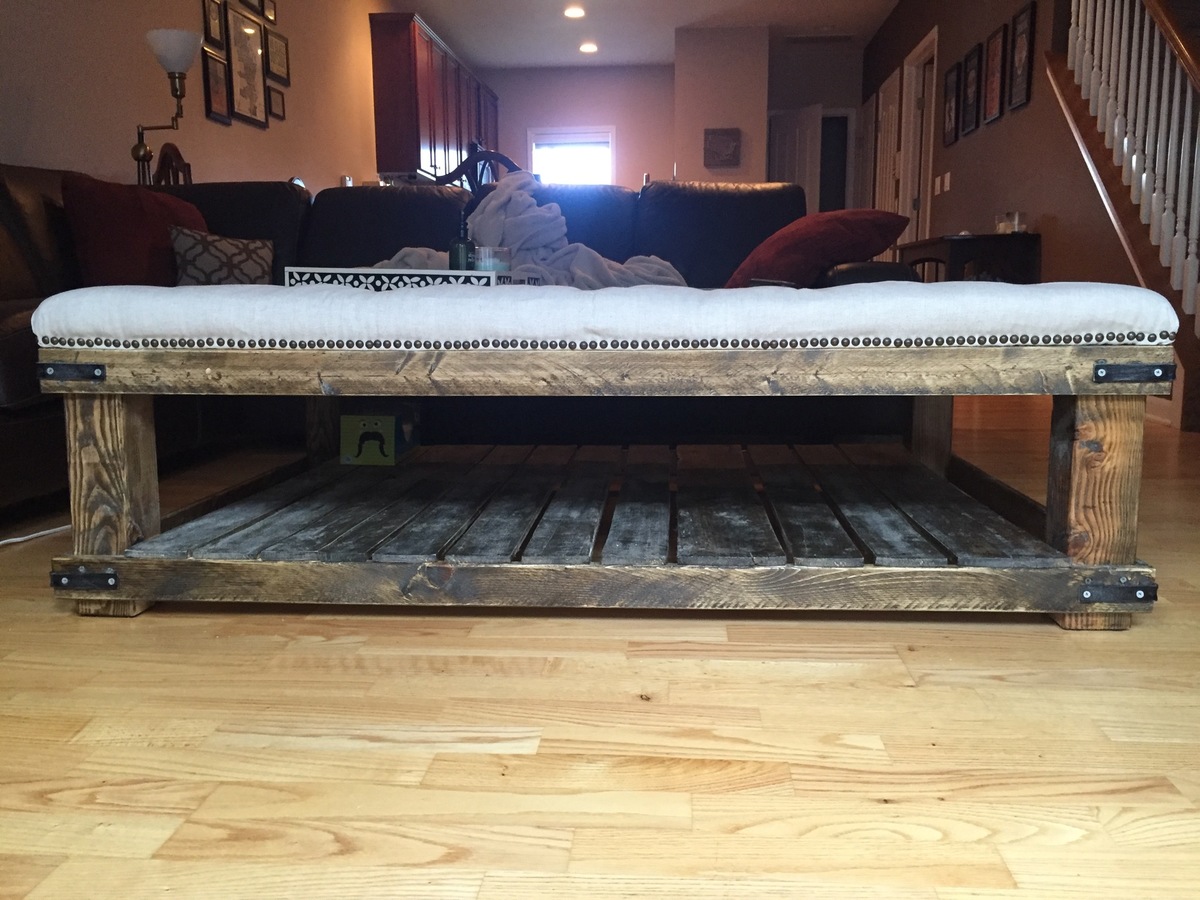
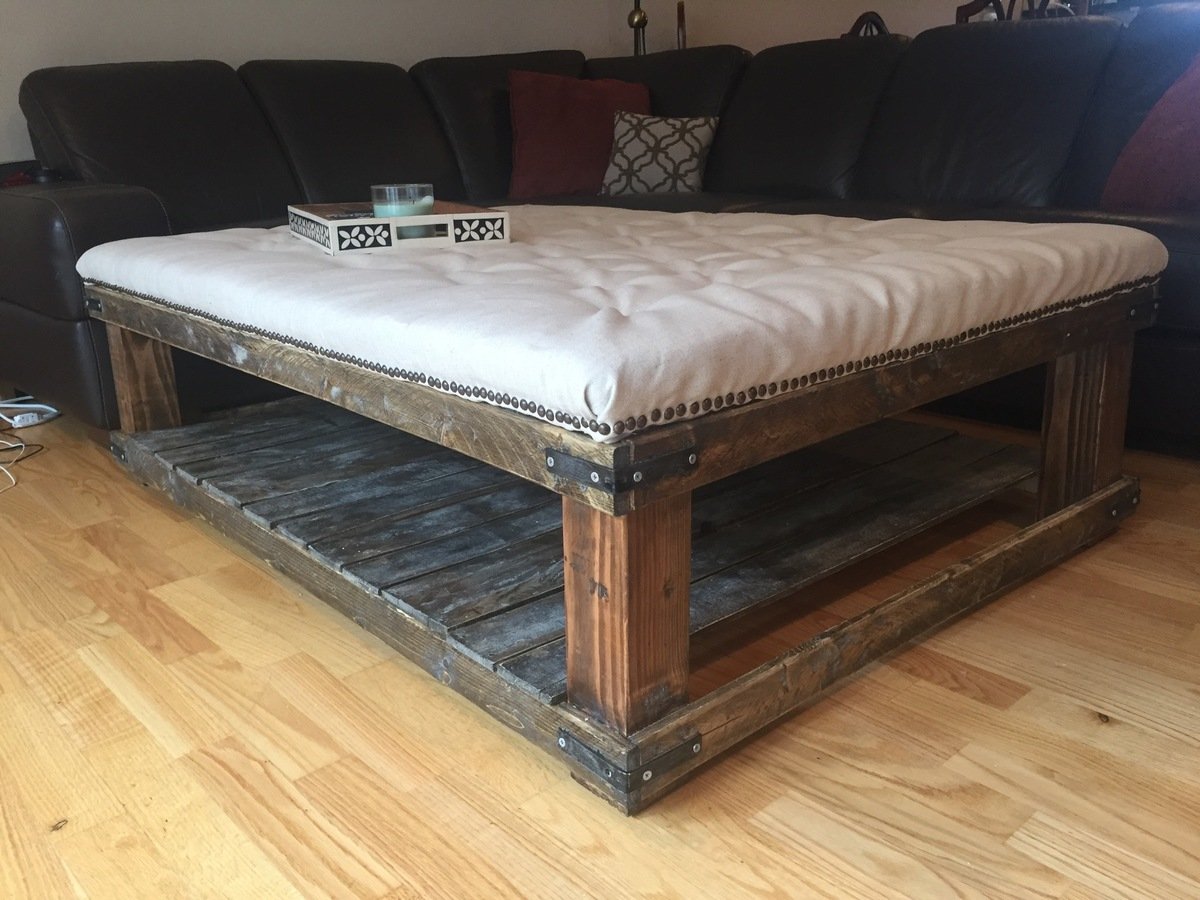
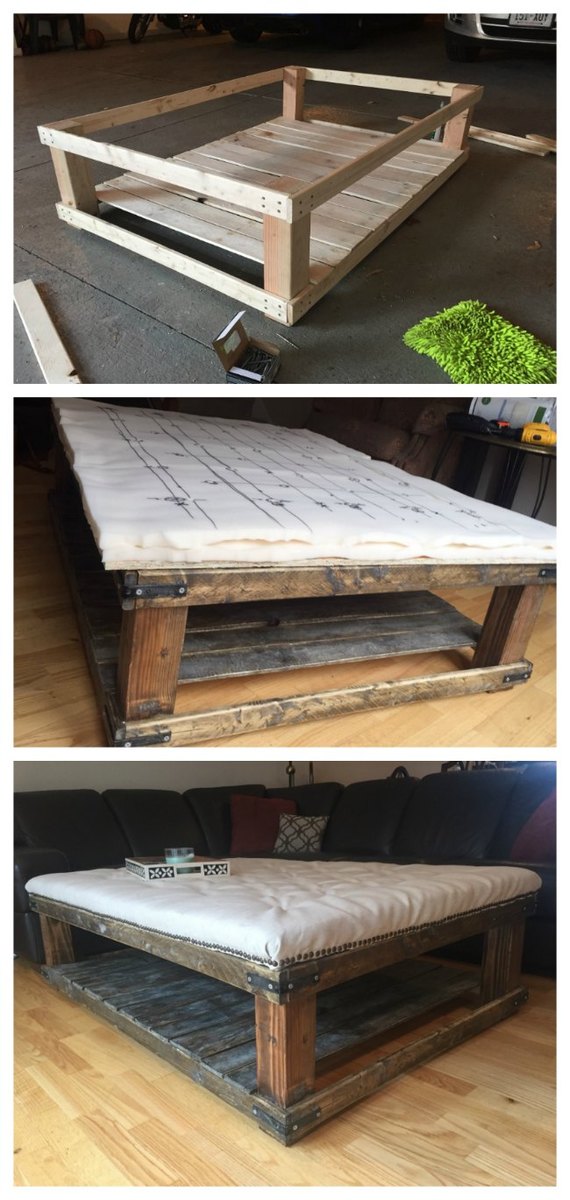
Oversized Tufted Ottoman

Submitted by Kegusho on Fri, 07/08/2016 - 09:53

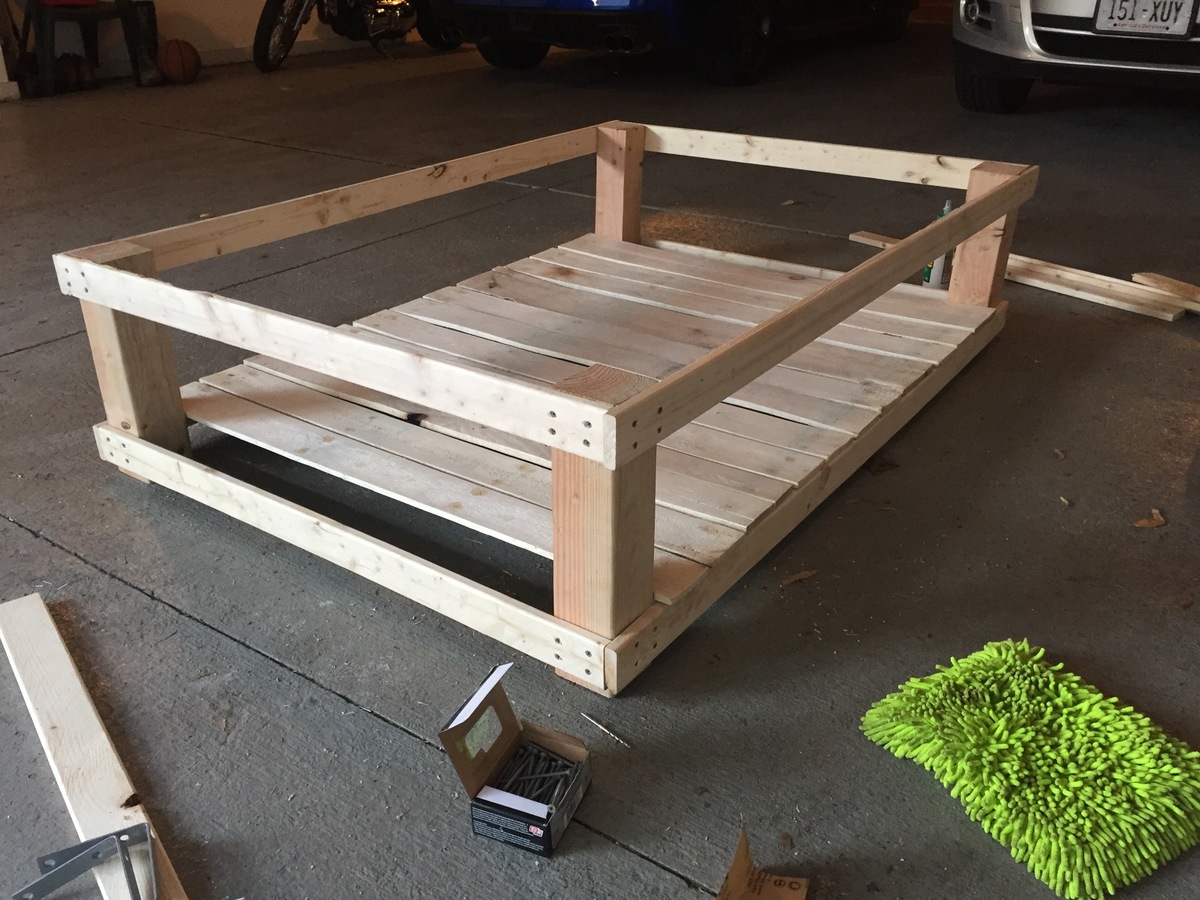
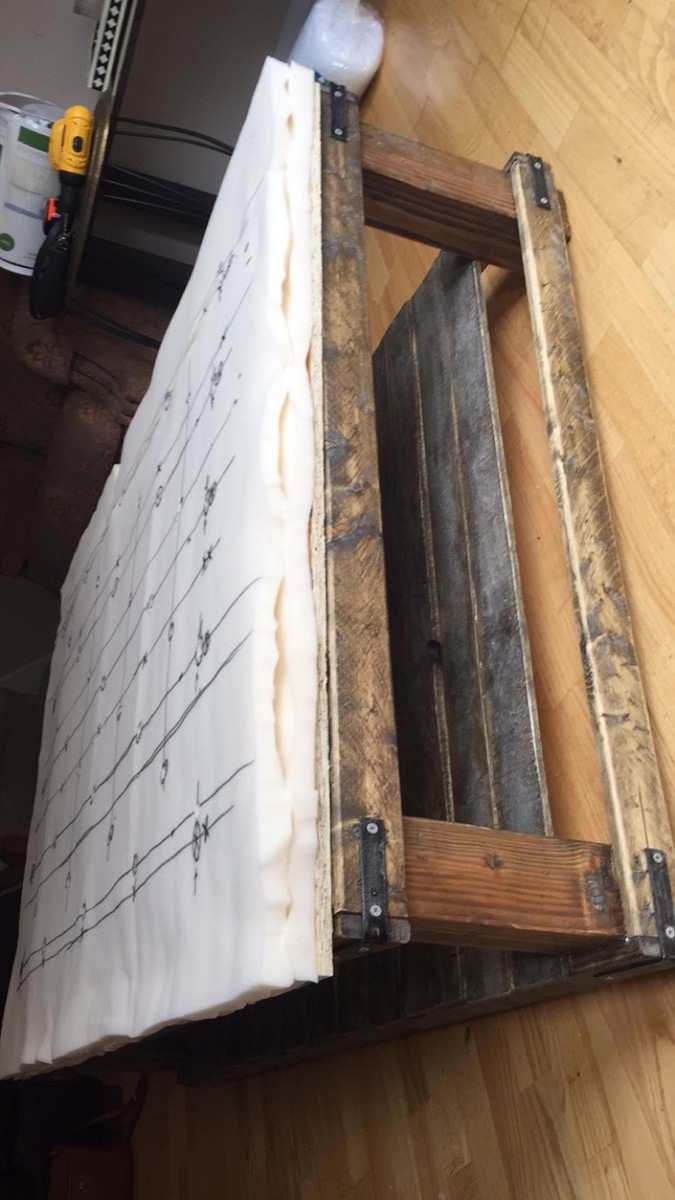
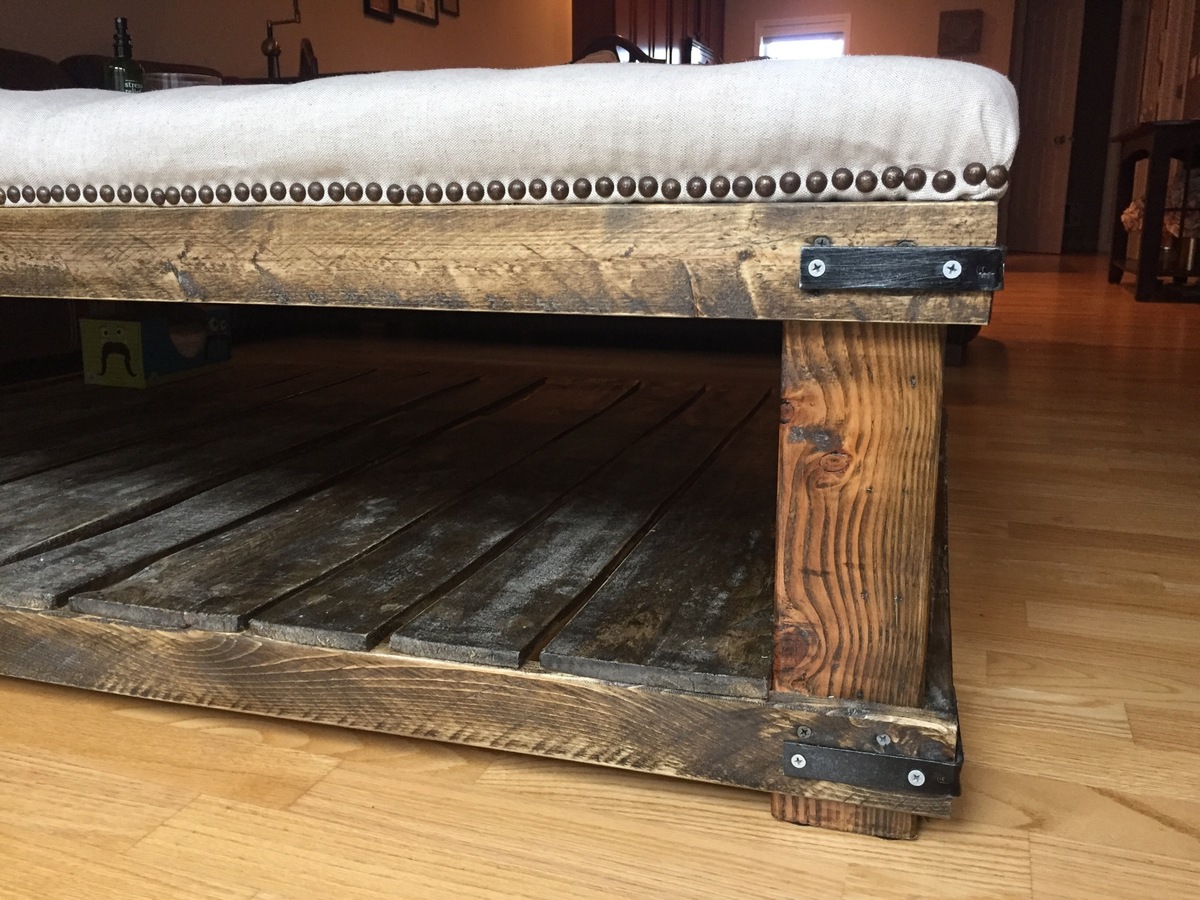
This project was inspired by the featured Diamond Tufted Ottoman plan. I combined the top with a customized plan inspired by the Cameron Coffee Table from World Market and Ana White's tutorial on how to create a weathered stain look like Restoration Hardware. 


Built from Plan(s)
Estimated Cost
$250
Estimated Time Investment
Week Long Project (20 Hours or More)
Finish Used
Combination of Minwax Special Oak and Weathered Oak, followed by two thin coats of polyurethane (lightly sanded afterward for smooth finish).
Recommended Skill Level
Beginner

Comments

Simple Bunk Bed

Submitted by rogers99 on Sat, 05/23/2020 - 10:42

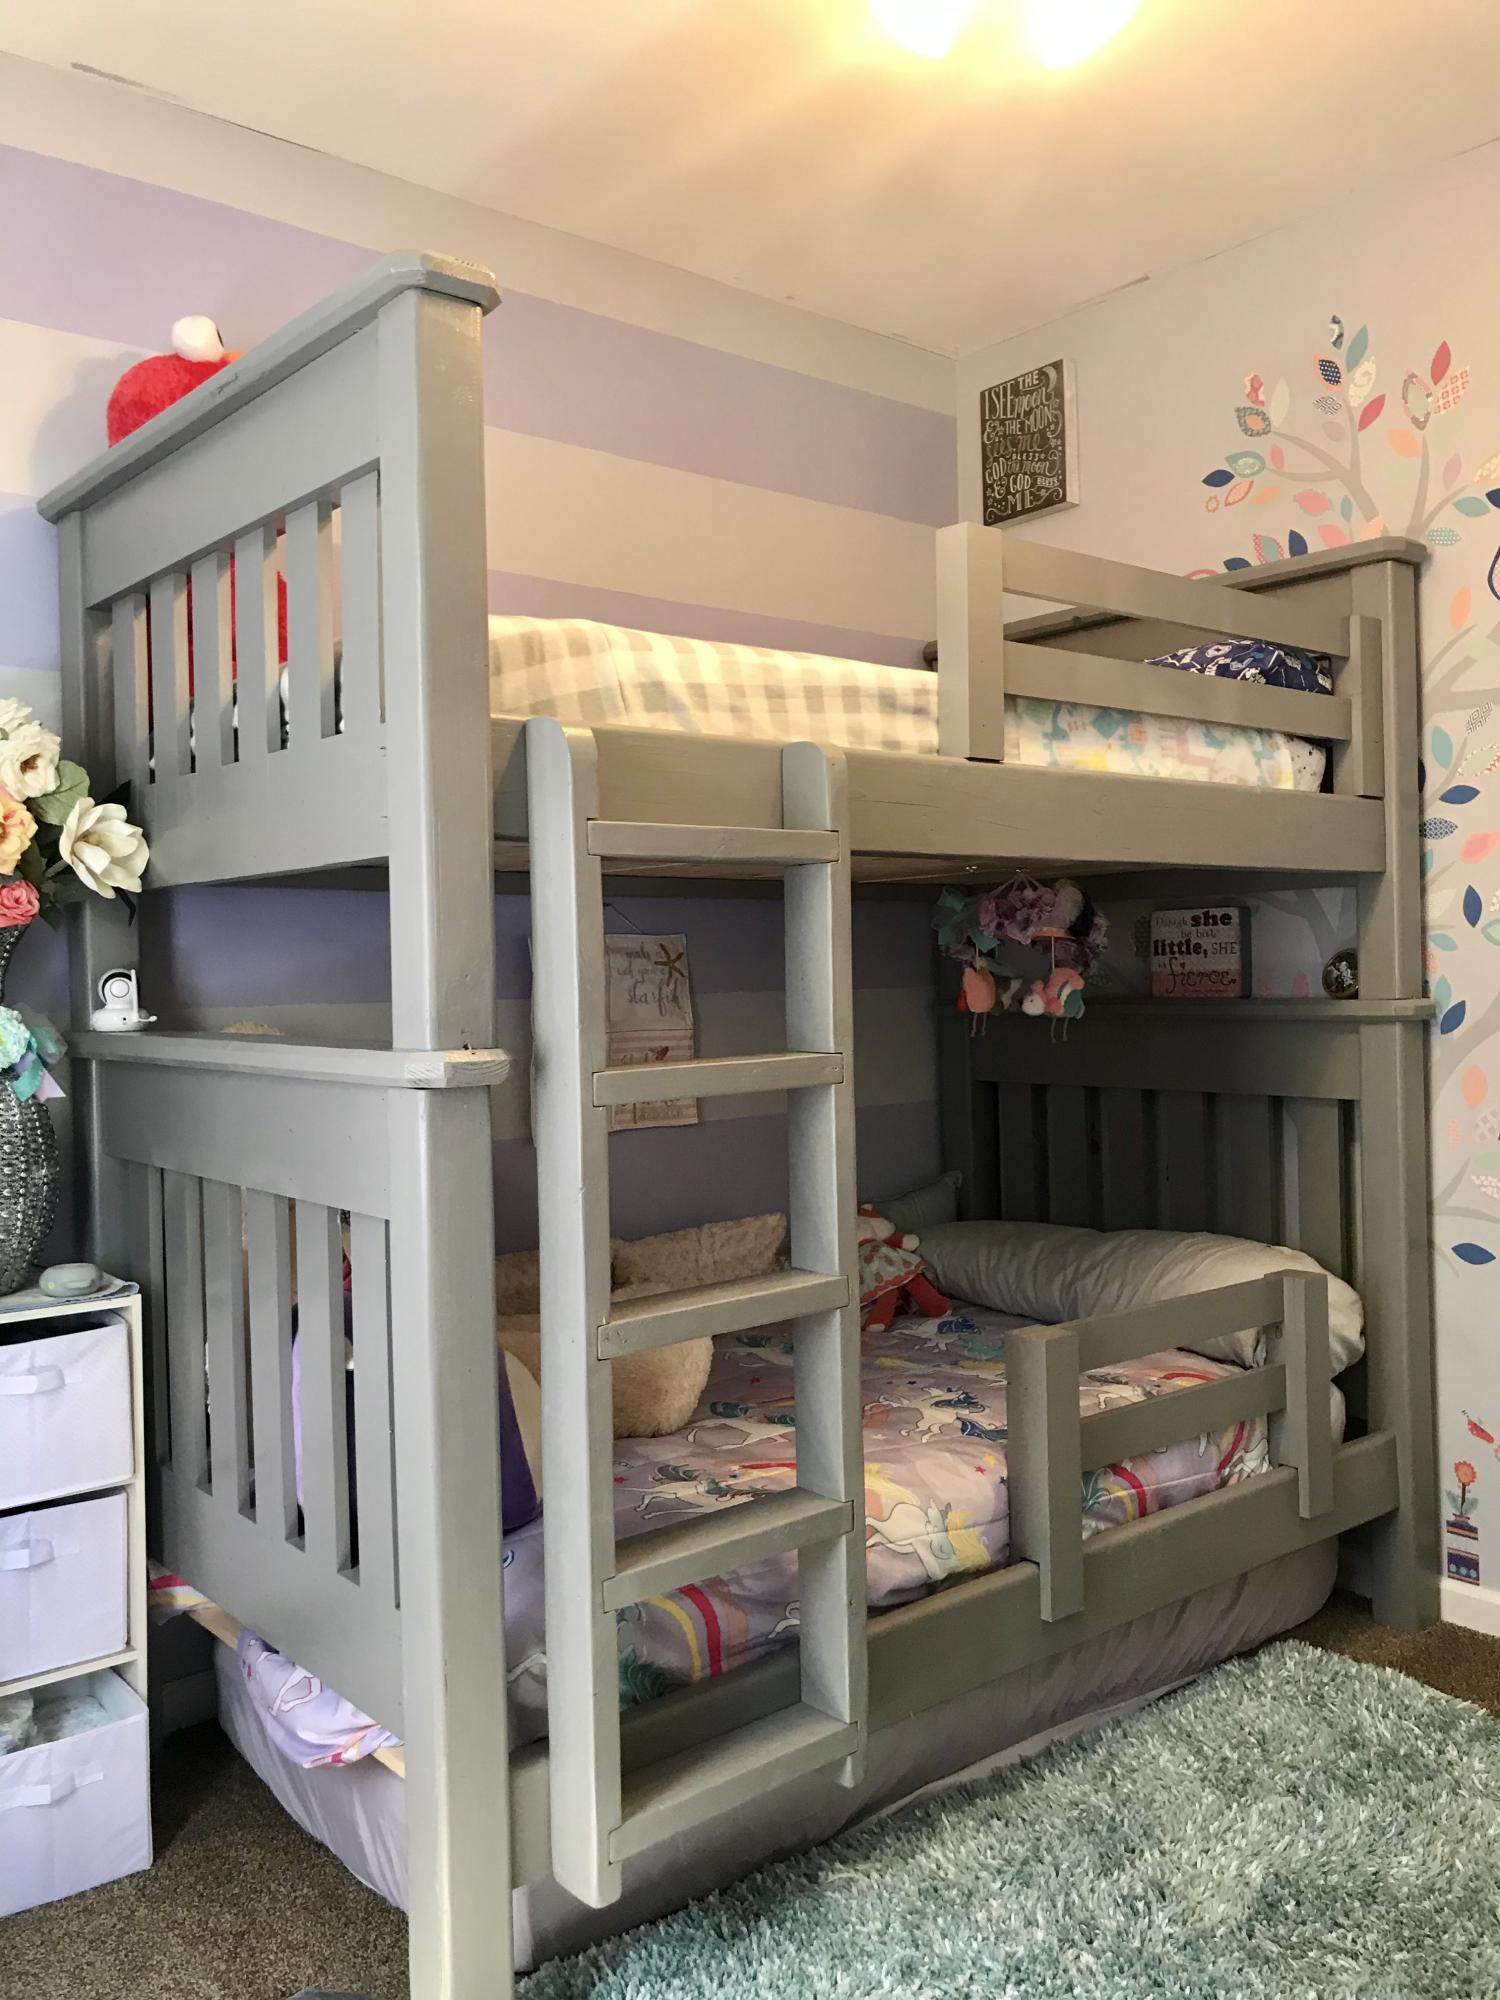
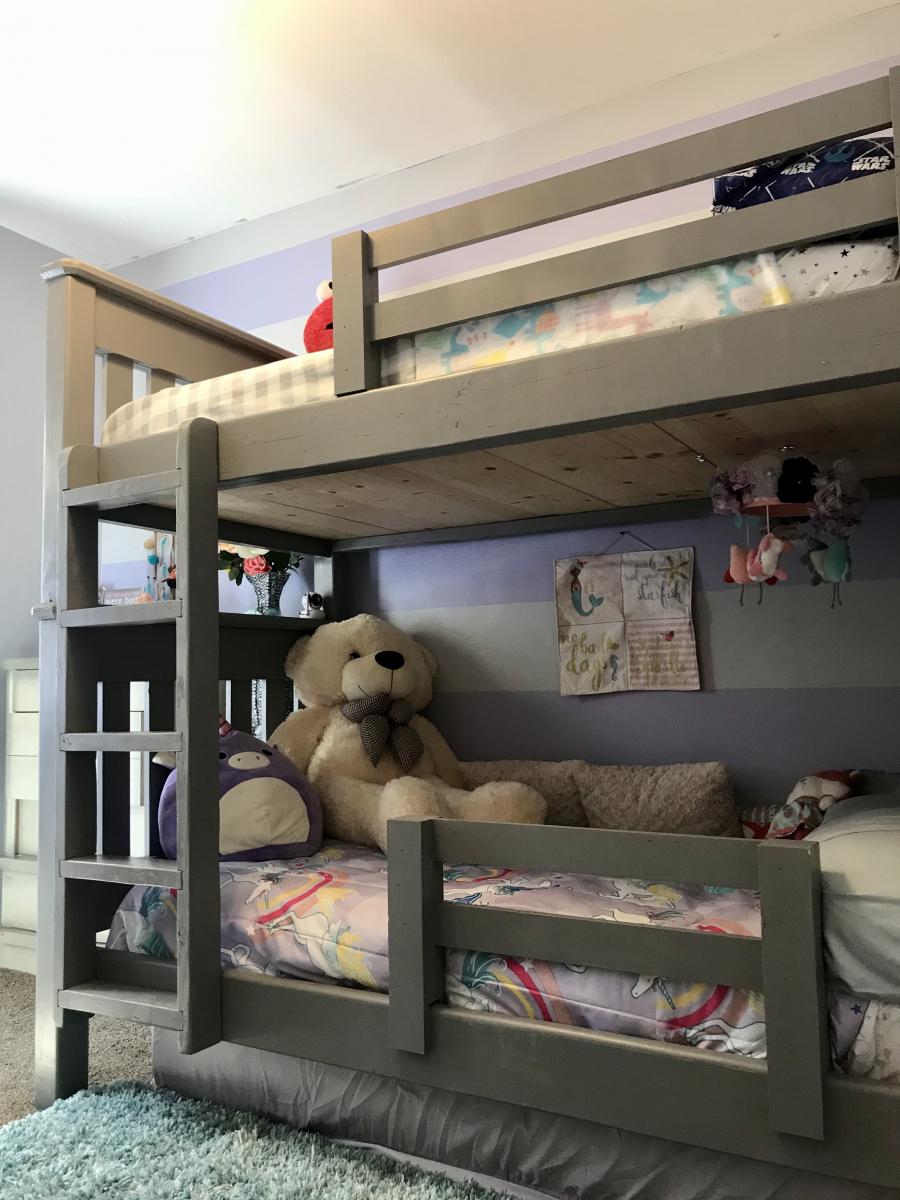
Built mostly from the Simple Bunk Bed plans on this site with a couple of modifications. Namely: made a vertical ladder, used Rockler Bed rail fasteners, increased bed height to fit 3rd twin mattress underneath for when my moms visits, and made a removable bottom safety rail that slides on when my daughter goes to sleep. Overall it was a fun project to do and they kids are really enjoying it.

Estimated Cost
380
Estimated Time Investment
Week Long Project (20 Hours or More)
Recommended Skill Level
Intermediate

Comments

Distressed Farmhouse Storage Bed

Submitted by atphelan on Thu, 05/08/2014 - 11:33

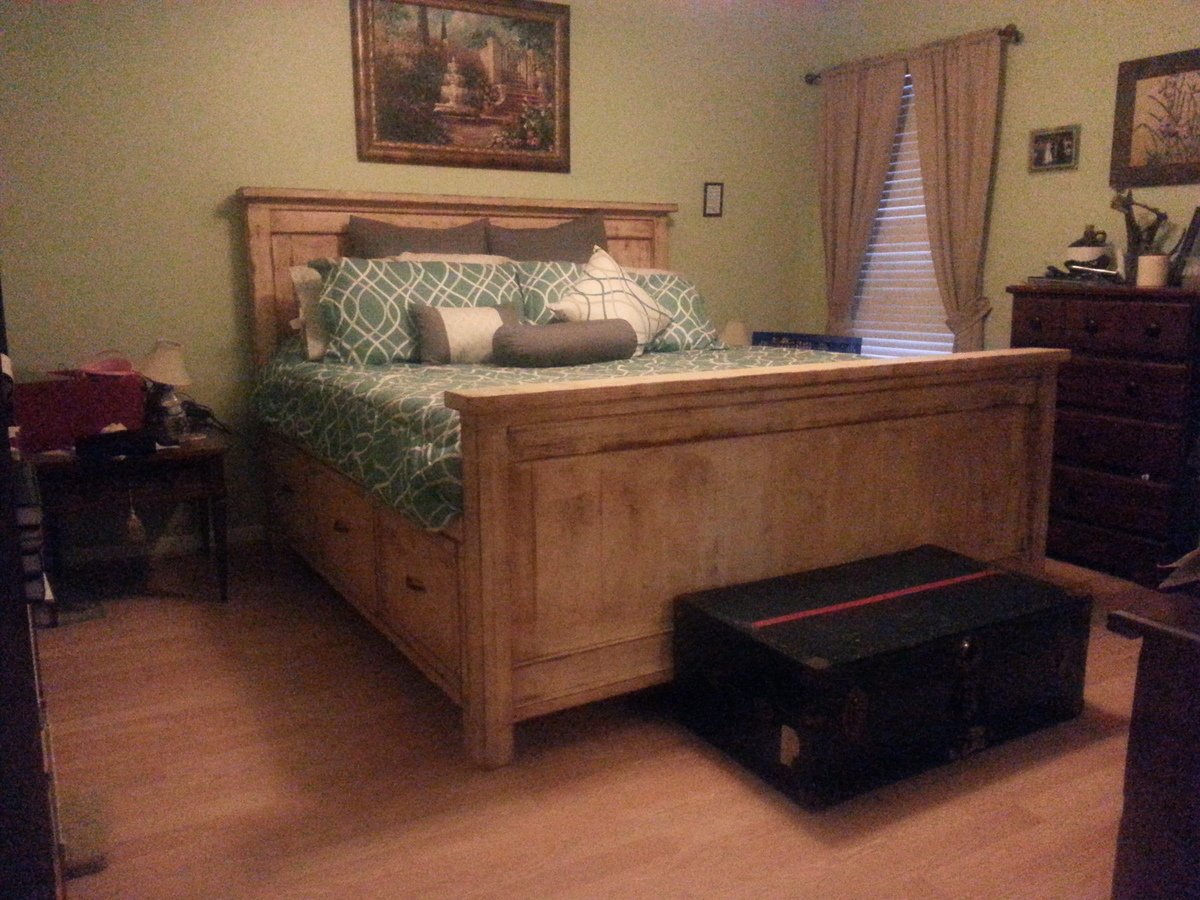
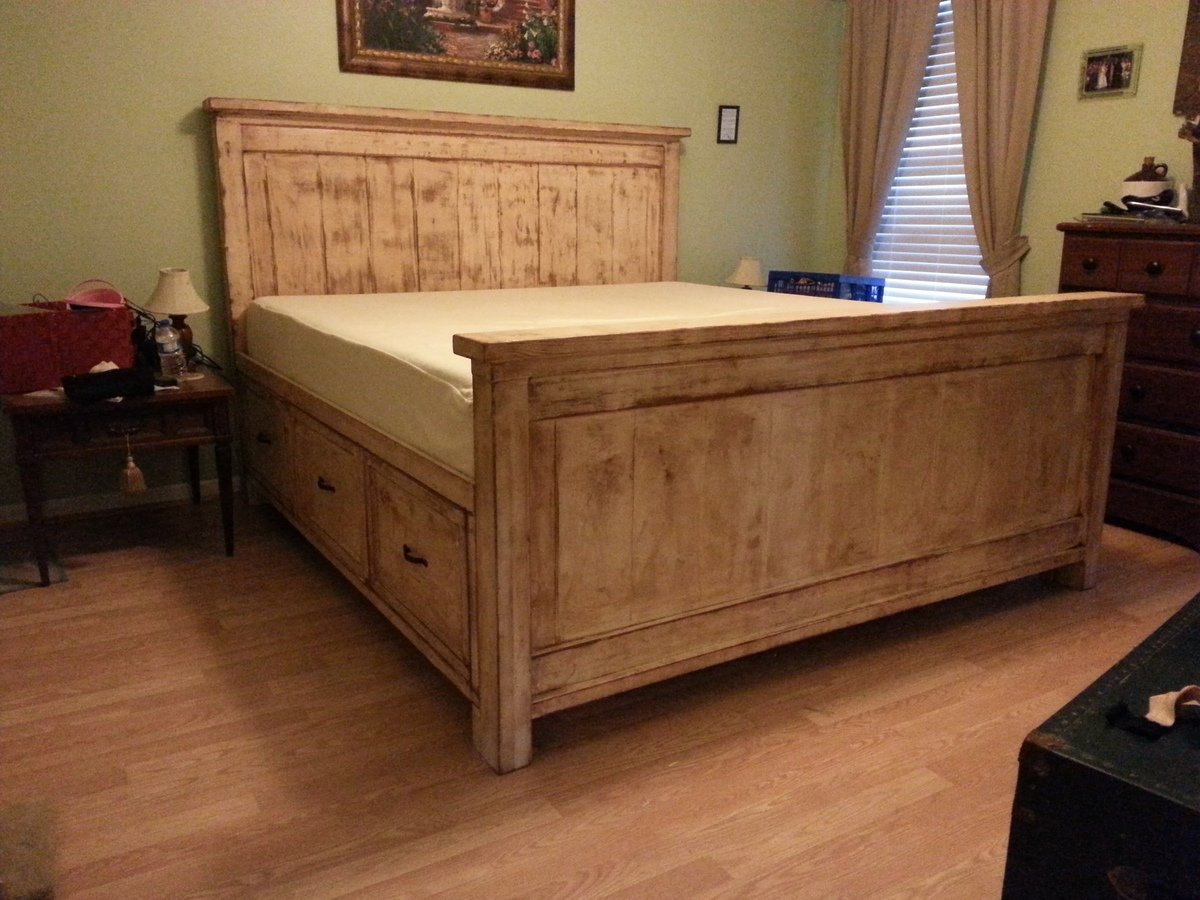
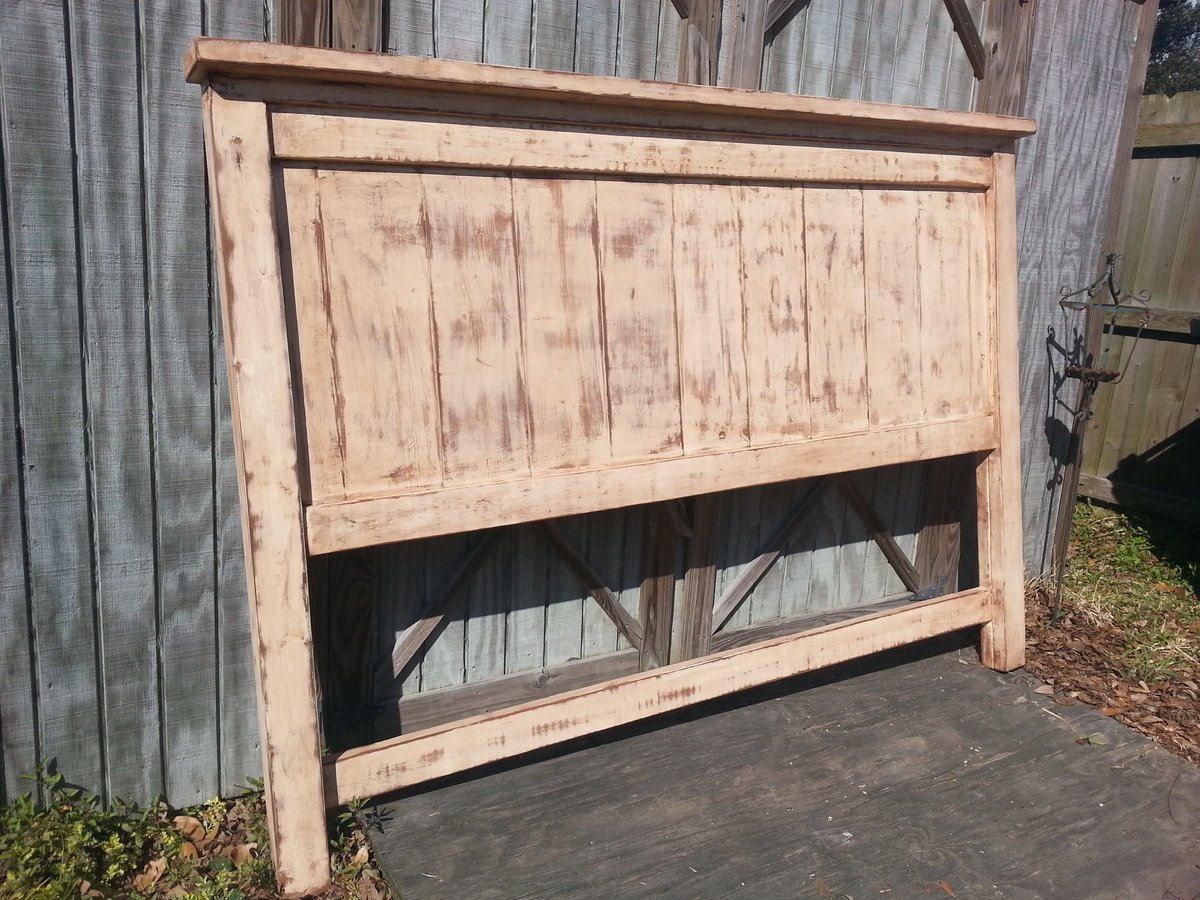
This is my biggest project to date; I put it together with a few modifications to the plans on this website (as I'm sure everyone does!) It will be my wife and my bed for quite some time and hopefully I can pass it along in the future. Seems sturdy as a rock and the additional storage will benefit us as our home has minimal closet space. The finish is a waxed-stained-sanded painted surface.

I broke this project into 3 phases: headboard, benches, and footboard. Juggling two kids and a wife, its hard to be able focus completely on a project without some (often welcome) interruptions.

One final note: this website introduced me to and this project confirmed that my favorite tool in my tool shed is the Kreg Pocket hole Jig; bought it thinking I would use it on a buffett table I built and have used it on every project since!

Estimated Cost
$350
Estimated Time Investment
Week Long Project (20 Hours or More)
Finish Used
waxed-stained-sanded painted surface
Recommended Skill Level
Intermediate

Comments

Modern Outdoor Bench

Submitted by Anonymous (not verified) on Tue, 08/09/2016 - 16:29

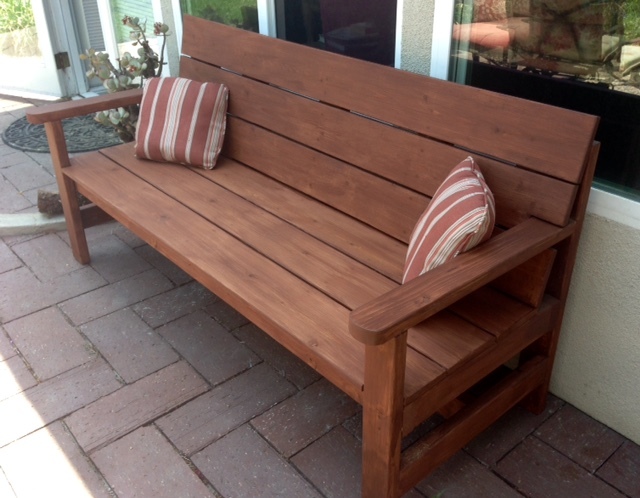
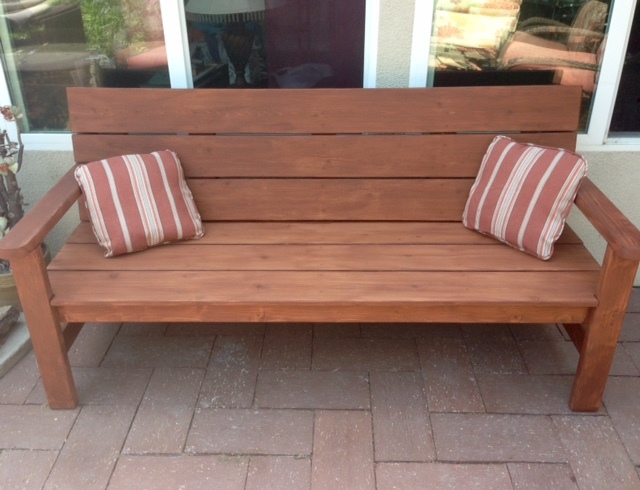
Great plans!  I modified the bench by adding a slanted back (which enabled me to put the slats closer together), extending and curving the front of the arms and extended the seat to the outside of the legs.


Recommended Skill Level
Intermediate

Comments

My Outdoor Sectional Couch

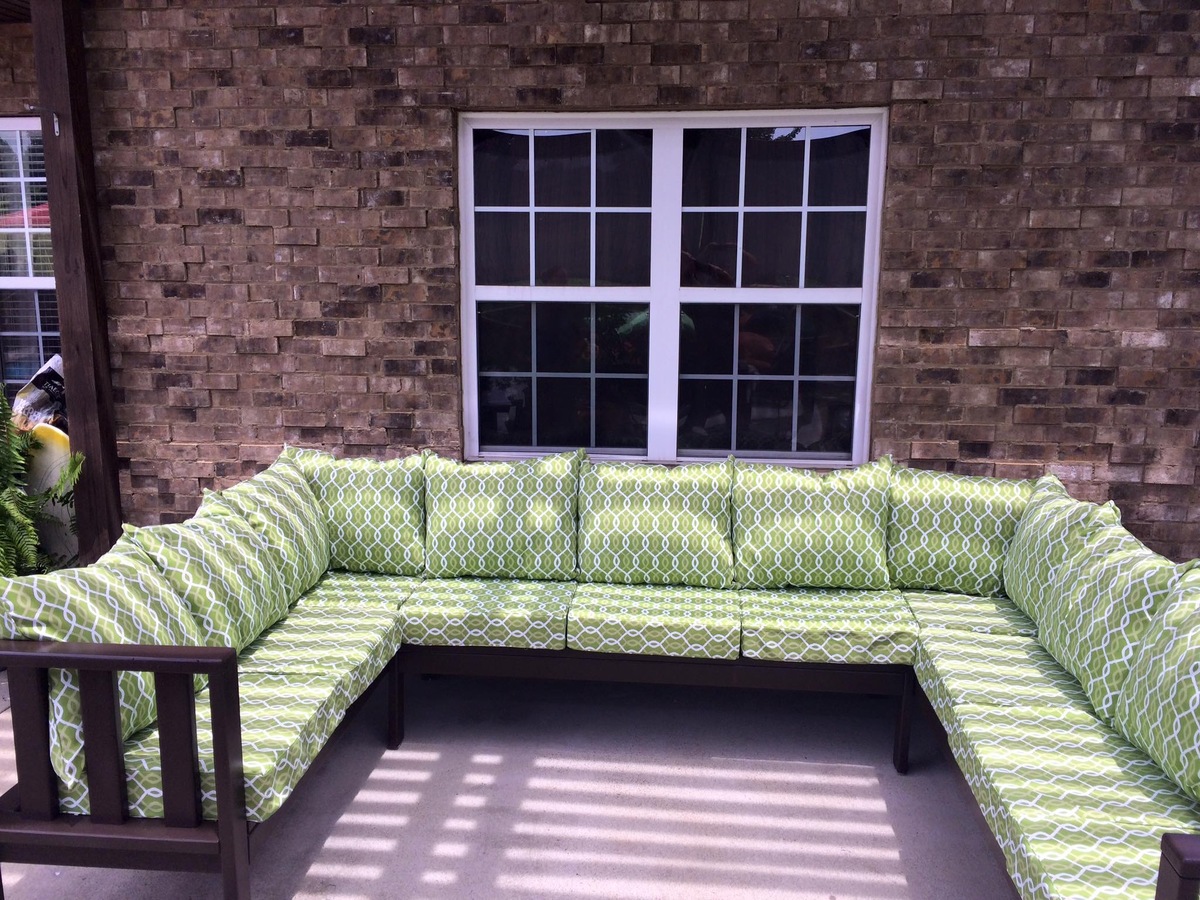
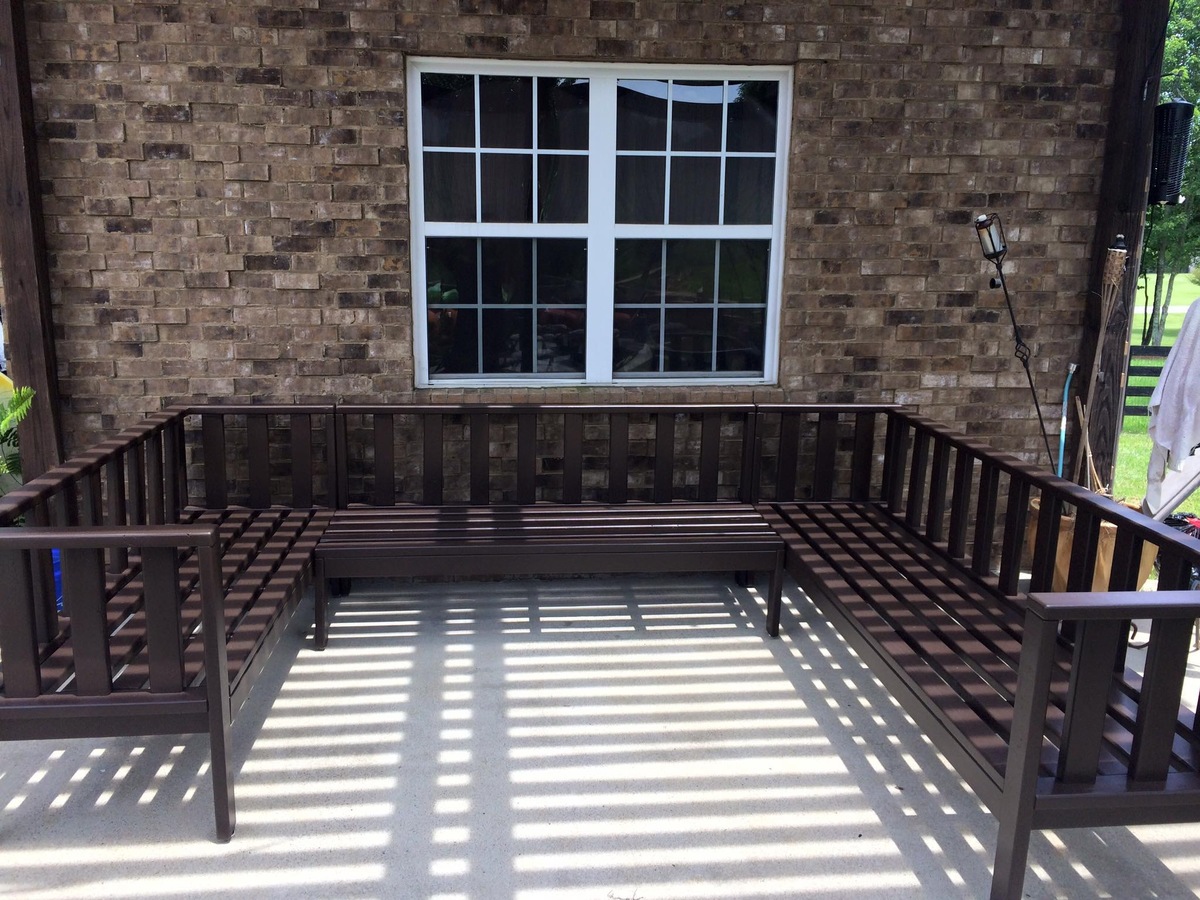
This was built off Ana's Outdoor Couch plans.  I just made some additional things to it and made it larger.

I added the vertical back supports so the cushions don't slip out the back.  I raised the seat height to 17". 

Estimated Cost
$600-$800 including the cushions.
Estimated Time Investment
Week Long Project (20 Hours or More)
Finish Used
Oil primer and Latex Paint.
Recommended Skill Level
Intermediate

Comments

Codding58

Mon, 08/22/2016 - 13:57

Great job!    I really like the way that your set came out!    This had been on my list to do, but a broken foot put a damper on it this summer!    Great Job!

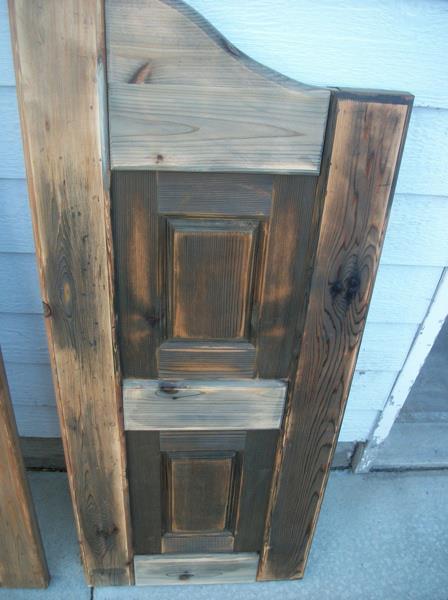
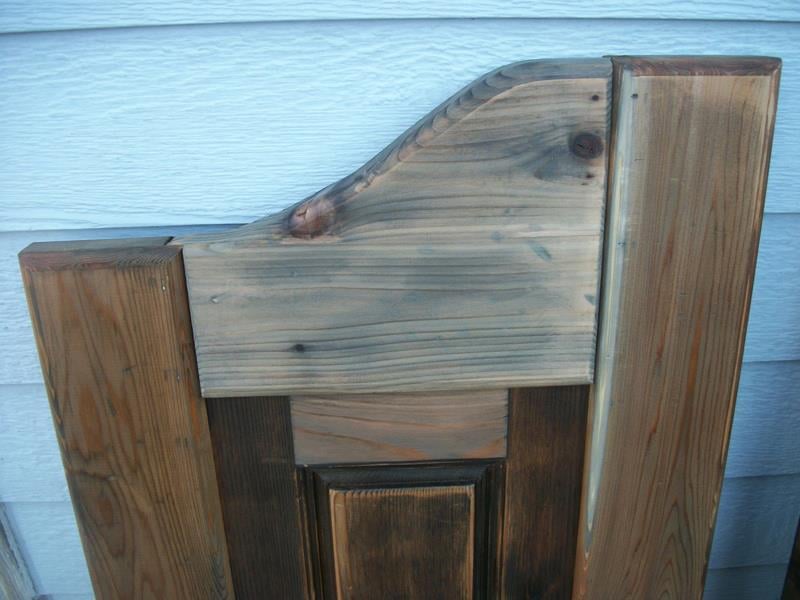
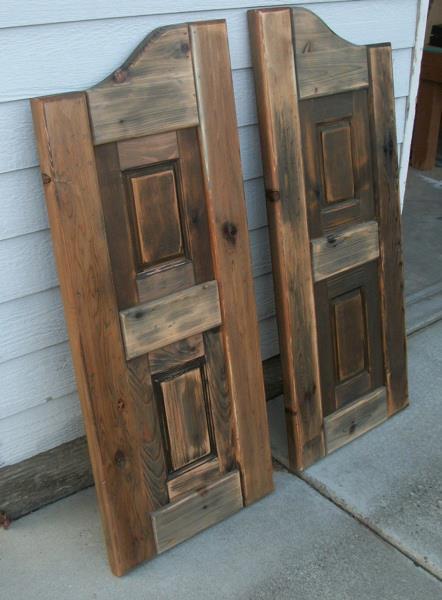
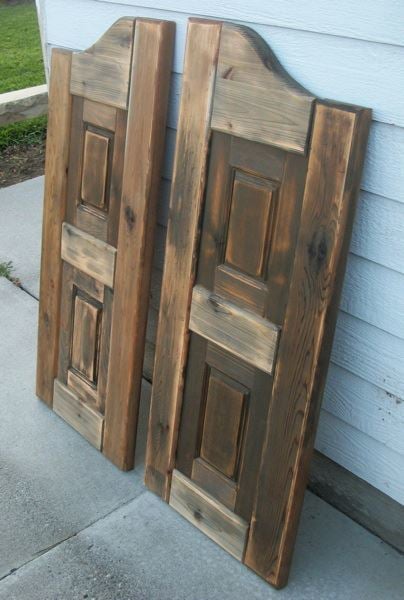
Western Saloon doors

Submitted by tracysmith on Thu, 08/02/2012 - 00:44

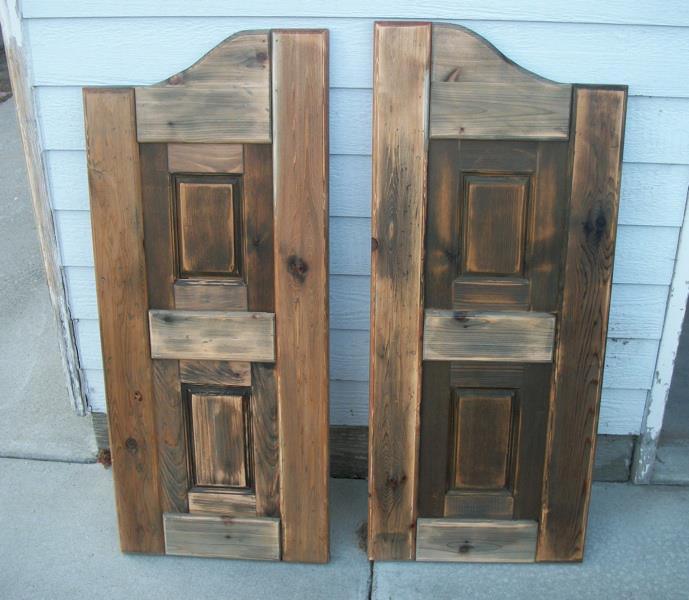
I built these doors for a very good friend of mine who actually helped me get started turning my new love for building (after finding Ana's site) into a way for our family to make some extra money.

It took me a little while to wrap my brain around building something without using my Kreg Jig. I used a router table set up with some raised panels bits and put the whole thing together with glue and nails! Wonderful experience!

For the finish, I used a vinegar solution to give the cedar wood an old barn look. I think the final result turned out great and the final step was a clear coat sprayed on out of a rattle can.

Estimated Cost
Lumber cost was about $80
Estimated Time Investment
Week Long Project (20 Hours or More)
Finish Used
Vinegar solution and a clear coat put on.
Recommended Skill Level
Advanced

Comments

birdsandsoap

Thu, 08/02/2012 - 10:51

These turned out great! I haven't seen this style of door in forever! They used to be really popular, I remember my Aunt and Uncle having these in the entry to their kitchen. They were the coolest thing ever when I was a kid! Maybe they are a making a comeback?
I'm really impressed with your routing skills, that's a task I have yet to tackle, but I've got the bits laying around waiting.

Nice job!

tracysmith

Thu, 08/02/2012 - 21:10

Thanks a bunch! My friend is replacing an old set of louvered doors that went into her laundry room. Her family are farmers and rodeo people so the western decor really fits in their house. Great western stuff there. They made a chandelier out of a wagon wheel! Really cool!

This was my first attempt at routing so I really appreciate your compliment! It's really simple if you can get the basics of it. I'm sure you'll do just fine when you get to that point. If I can do it, anyone can do it! Thanks again!!

laneal1987

Mon, 01/23/2017 - 09:32

I really want to try and build this for a closet.  Are there any instructions for this?  This is the first door of this style that I have come across that I absolutely love.

Inspiring First Woodworking Project

Submitted by WomanPower on Sat, 06/27/2020 - 21:52

**From a Woodworker First Project Perspective**

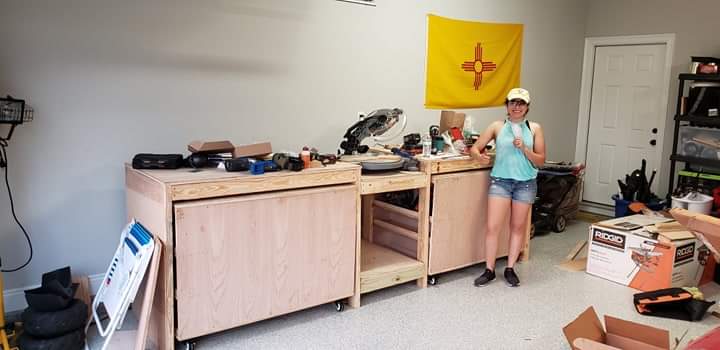
Power Tools: I used a circular saw (Ridgid, lifetime warranty) for all of my cutting because it was the easiest tool to use once I got into a rythem for cutting plywood and other materials.

Other helpful tools: I had 2 height adjusting saw horses that made it easy on my back made by Kobalt. There were some mistakes in the beggining with keeping the lines straigt but a circular saw track (kreg) easily fixed that problem for most of the cutting. After awhile it got easier to steadily cut following a drawn line with no track (hubby was impressed). Overall, this project was a process of trial and error but I learned from every hiccup along the way. Next up, chicken coop... :D

**How It All Started**
While deployed I had a lot of time to imagine my very own personal workspace to complete DIY projects and when I saw this design I could not wait to get home and begin my new hobby. This project inspired me to really get serious about woodworking. Never in my life had I ever built anything from plywood and 2x4s, much less had I ever used a circular saw. I'm proud of myself for completing this from start to finish as a first project. Thank you Ana!

Peace and Blessings,
WP

Estimated Cost
420
Estimated Time Investment
Week Long Project (20 Hours or More)
Recommended Skill Level
Beginner

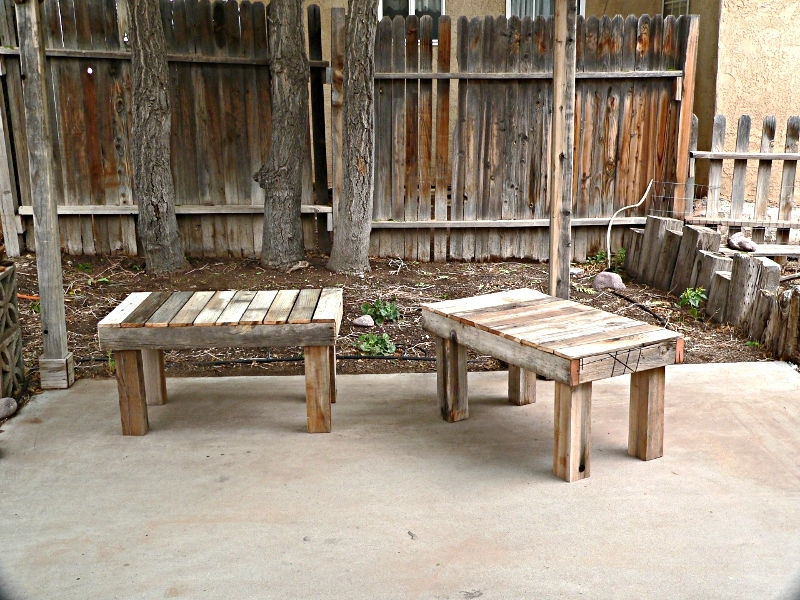
Reclaimed Fence = Free Benches

These are made from the 4x4 posts, 2x4 rails, and slats from an old wooden fence that weren't good enough to re-use when we repaired the fence.

It's close to the Simple outdoor bench, but I simplified the plan even more to take advantage of the pile of free lumber. Or maybe it's the Simple Outdoor Dining Table ... but a lot shorter.

CAUTION: Be careful to remove ALL nails, screws and bolts from the lumber you are reusing. If you can't get the metal out, mark that area and figure out a cut that won't hit it.

TIPS FOR RECLAIMED LUMBER:
* Trim the ends of the lumber square before you measure.
* Don't try to salvage split or rotted wood. Trim it off and see what you can do with the good bits.
* Plan your cuts so you have the least waste.

TOOLS:
10" Miter saw
Wood glue
Nail gun, with 2 1/2 and 1 1/4 inch 16gauge nails for gun (You could use deck screws if you have them)
Surform Pocket plane (wood rasp from Stanley tools)

CUT LIST:
For one bench, 21x36

NOTE: To cut a 4x4 cleanly with the 10" miter saw, put a thin shim behind each side of the 4x4

4 4x4 post scraps, 18 inches long (legs)
2 2x4 18 inches long (sides)
2 2x4 36 inches long (front and back rail)
10 fence slat pieces, 21 inches long (cut to fit the top after it is assembled)

ASSEMBLY:
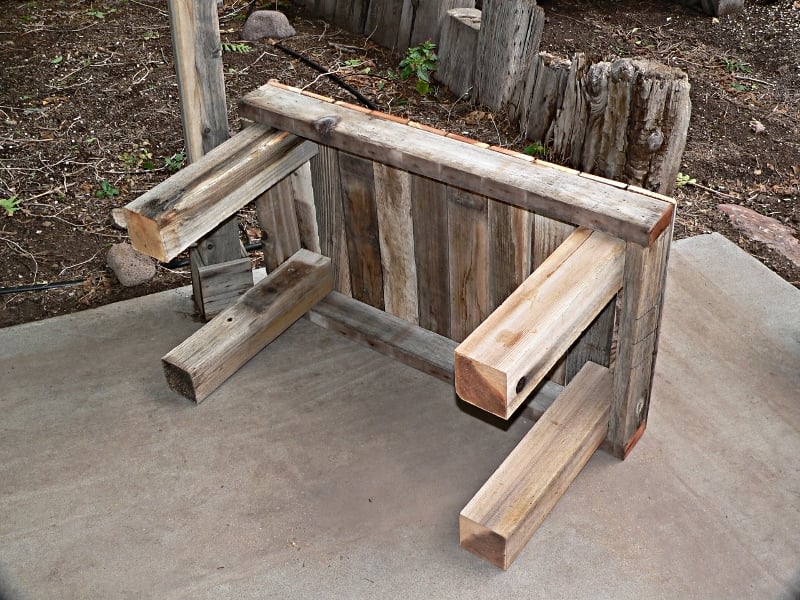
See the picture of the underside of the bench:
1 - Square up the legs with the end pieces, glue and nail.
2 - Square the sides with the legs, so the legs are inside the 2x4 apron, glue and nail.
3 - Align the 2 end slats with the edges of the bench and nail through them into the 2x4 apron
4 - Space the rest of the slats on the top, leaving 1/8 inch or so etween the boards for drainage. Nail them to the 2x4 apron.

FINISH: Use the wood rasp to round the cut ends of the slats and 2x4s. Rasp with the grain to avoid raising splinters. Lightly rasp the tops of the slats to smooth any really rough spots.

A table or maybe a buffet is planned, with the same construction method, but a bit taller. Tables are 26-29 inches, most buffets are 36". It depends on what will make best use of the remaining bits.
Estimated Cost
$0
Estimated Time Investment
Afternoon Project (3-6 Hours)
Finish Used
none
Recommended Skill Level
Beginner

My first woodworking project

Submitted by Anonymous (not verified) on Wed, 09/21/2016 - 11:38

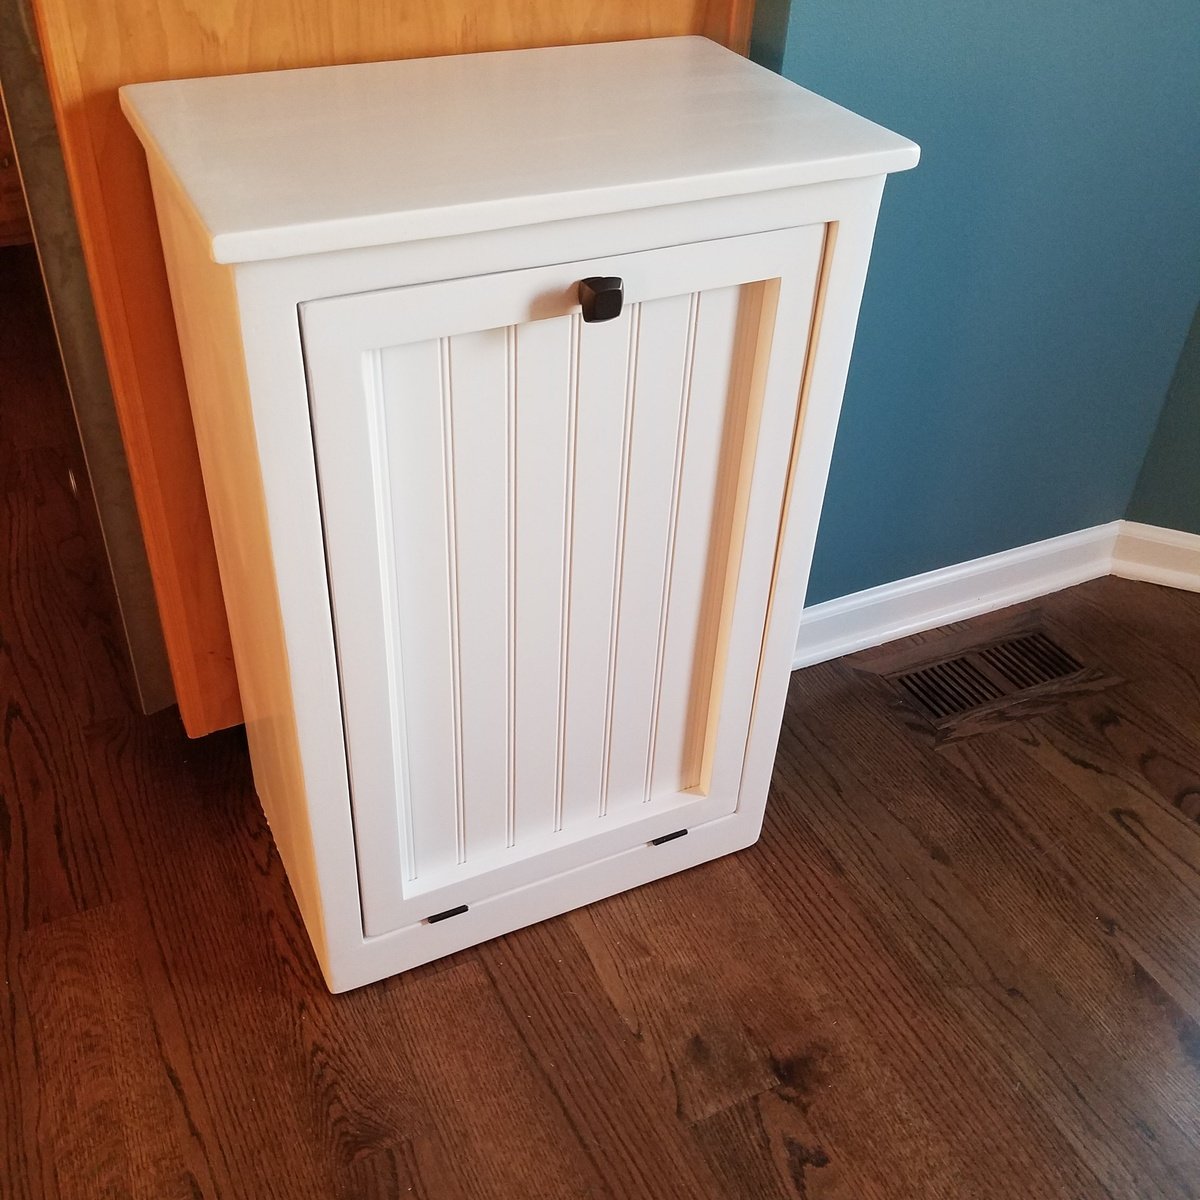
Our Australian Shepard will no longer be digging the trash out all over the floor!  I did change the plans up a bit because I wanted a hangover off the sides as well as the front. And we used bead board instead of the solid panel. Thanks for the great plans Ana!

Estimated Time Investment
Weekend Project (10-20 Hours)
Finish Used
2 coats of extreme and primer and 2 coats of White paint. I lightly sanded in between each coat. I applied the primer and first coat of pai t qith a roller and the final coat was applied with a paint brush.
Recommended Skill Level
Beginner

Comments

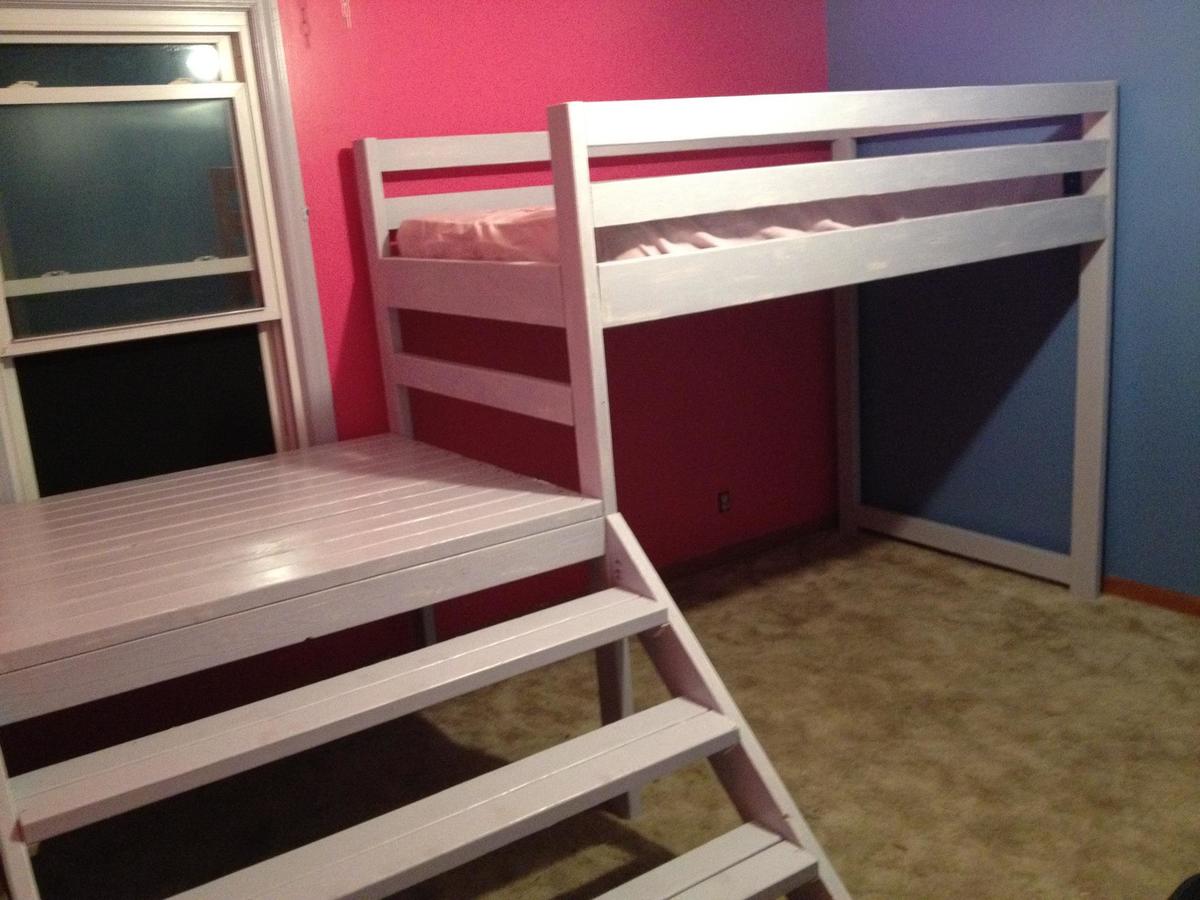
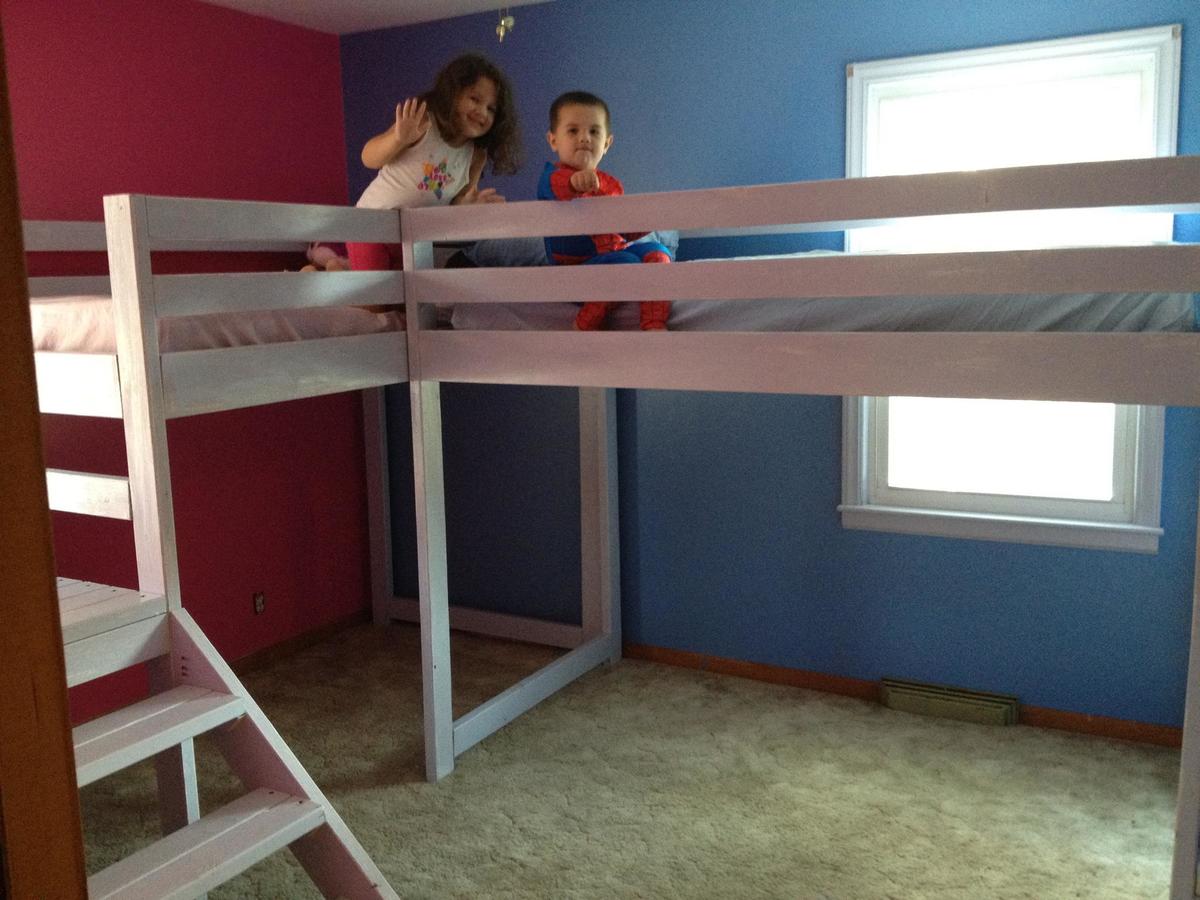
Twin loft beds with platform

Found this on Pinterest and FELL IN LOVE! I have 2 kids that are inseperable, ages 3 & 4, a boy & a girl. I had been toying with ideas for them about bunk beds or maybe some PVC forts. But when I found this, it was like everything in one. Let me also start off by saying, although I am artistic I have never used a single tool or built ANYTHING in my life. EVER.
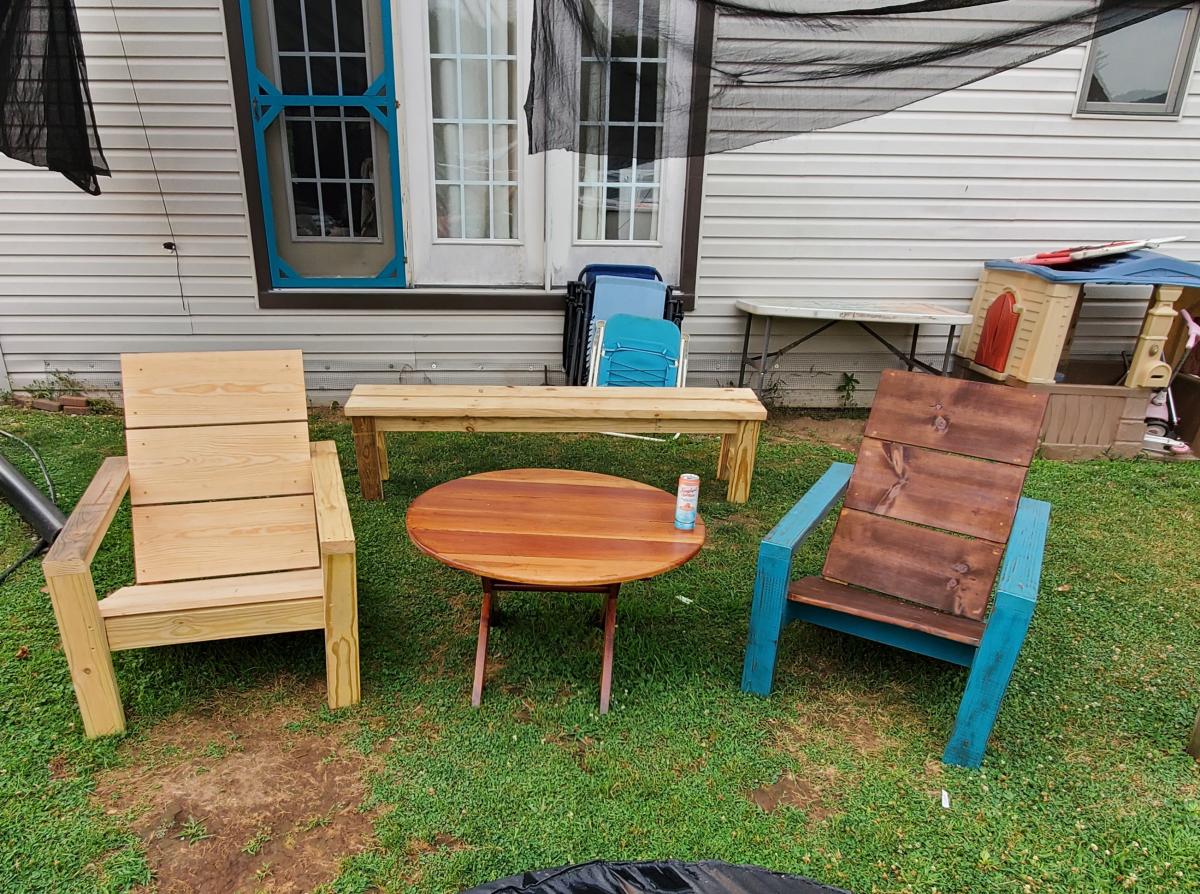
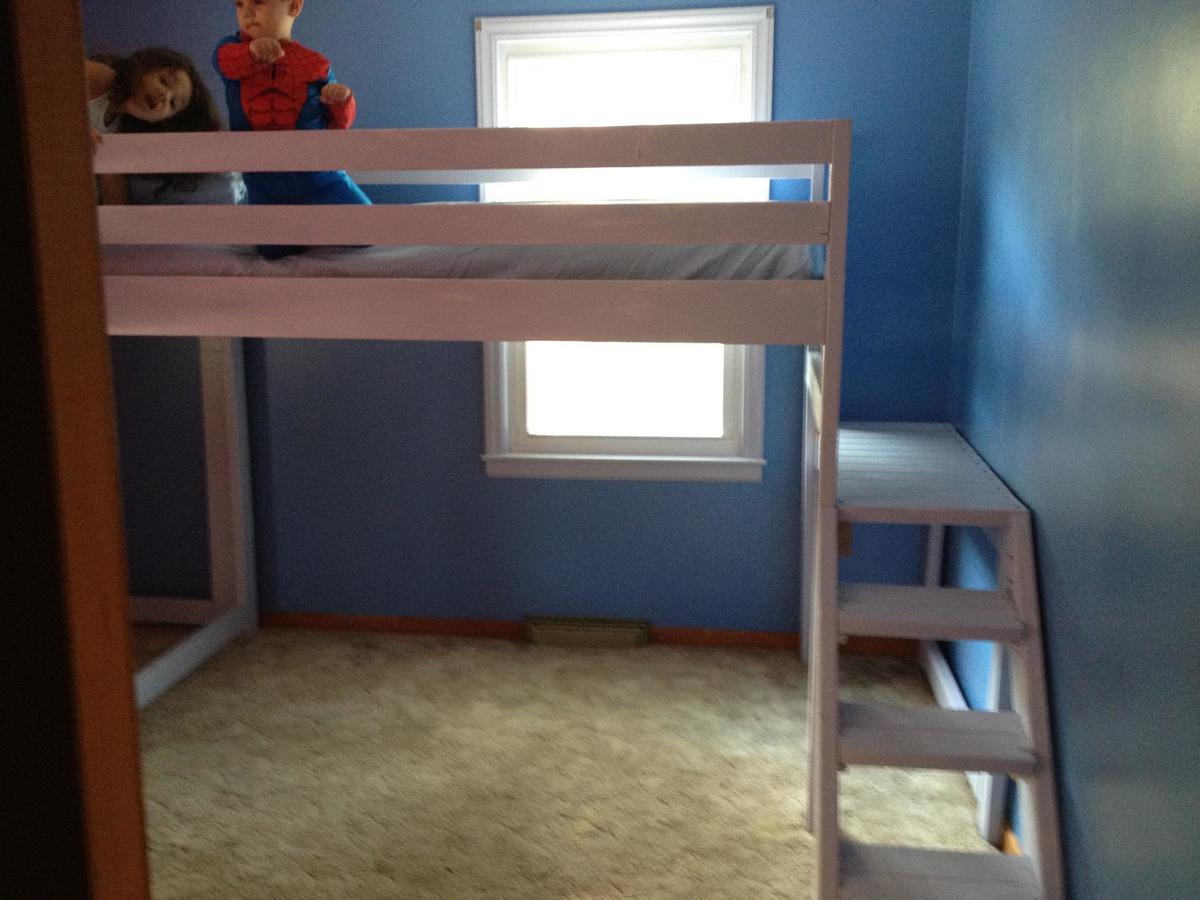
The beds were surprisingly easy to build and are incredibly sturdy & strong. I followed the plan exactly except for the platforms. I made my daughter's huge. (The plan calls for 22", I made hers 50") My son's I made smaller b/c that wall is shorter & there wasn't enough space. So his is only 16" but it's still plenty of room to climb up & get into bed. They use her platform as a stage to perform on or a small play area.
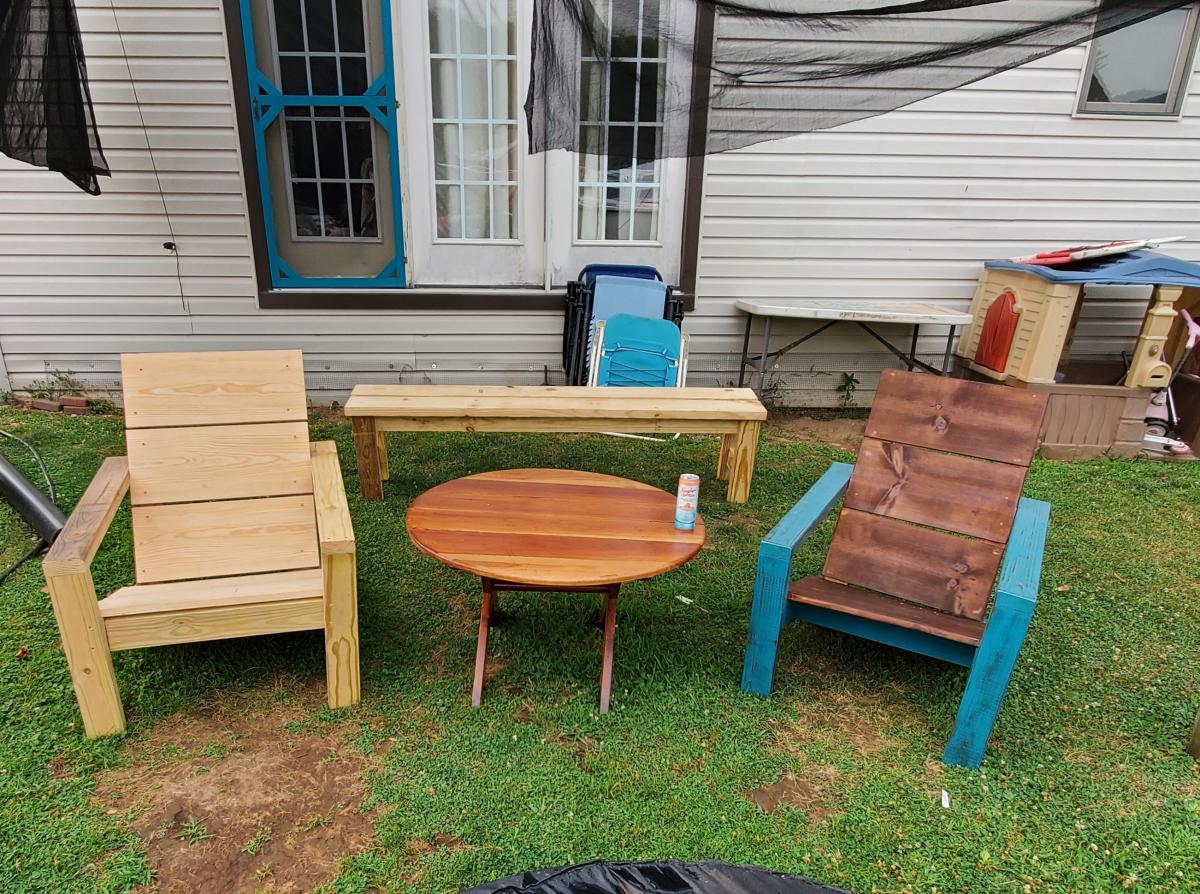
I'm going to glue down padding to cover both platforms and all the stairs b/c my kids are small but rough & tumble and I can already see the hospital bills. But the bed is EXCELLENT! Surprised to see no one else has posted a brag for it!

Make this immediately! The priming, painting & building for each only took one day. ONE DAY! I painted the room, the trim, and made both beds over the holiday weekend (Labor Day, Friday-Monday). My kids are now the envy of every child (and adult) that we know LOL!

Estimated Cost
75.00 for the bed w/the smaller platform, about 150.00 for the bed with the giant platform (I already had the paint & tools)
Estimated Time Investment
Day Project (6-9 Hours)
Finish Used
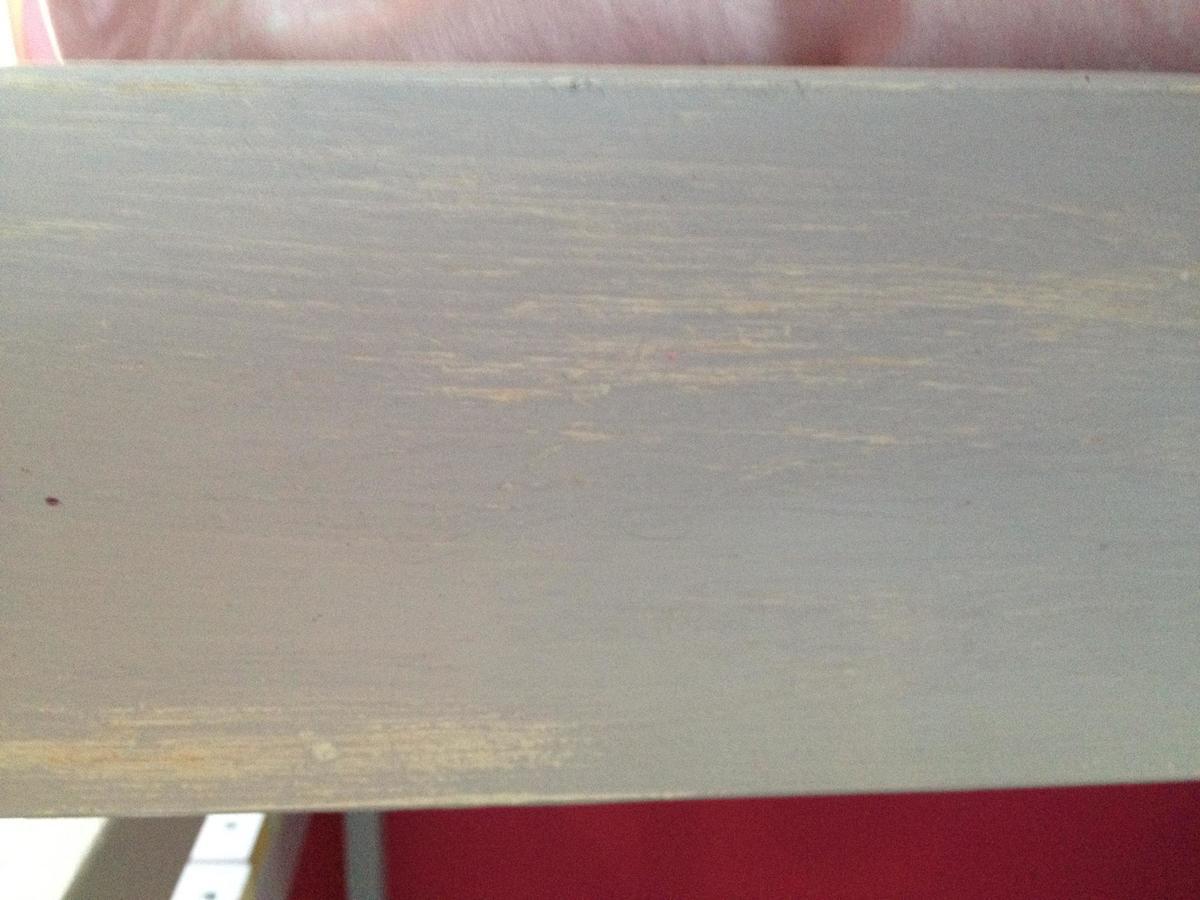
First coat- Killz: White oil based primer.
Second coat- Glidden: Pewter, Semi-Gloss finish (same as the trim)
Distressed with medium grit sandpaper all over.
I opted not to go with a third gloss coat. The wood is soft from me sanding it all over and I figured the gloss coat would take away from the distressed look & make it look new which isn't what I was going for. It's beautiful as is.
Recommended Skill Level
Starter Project

Small Rolling Island

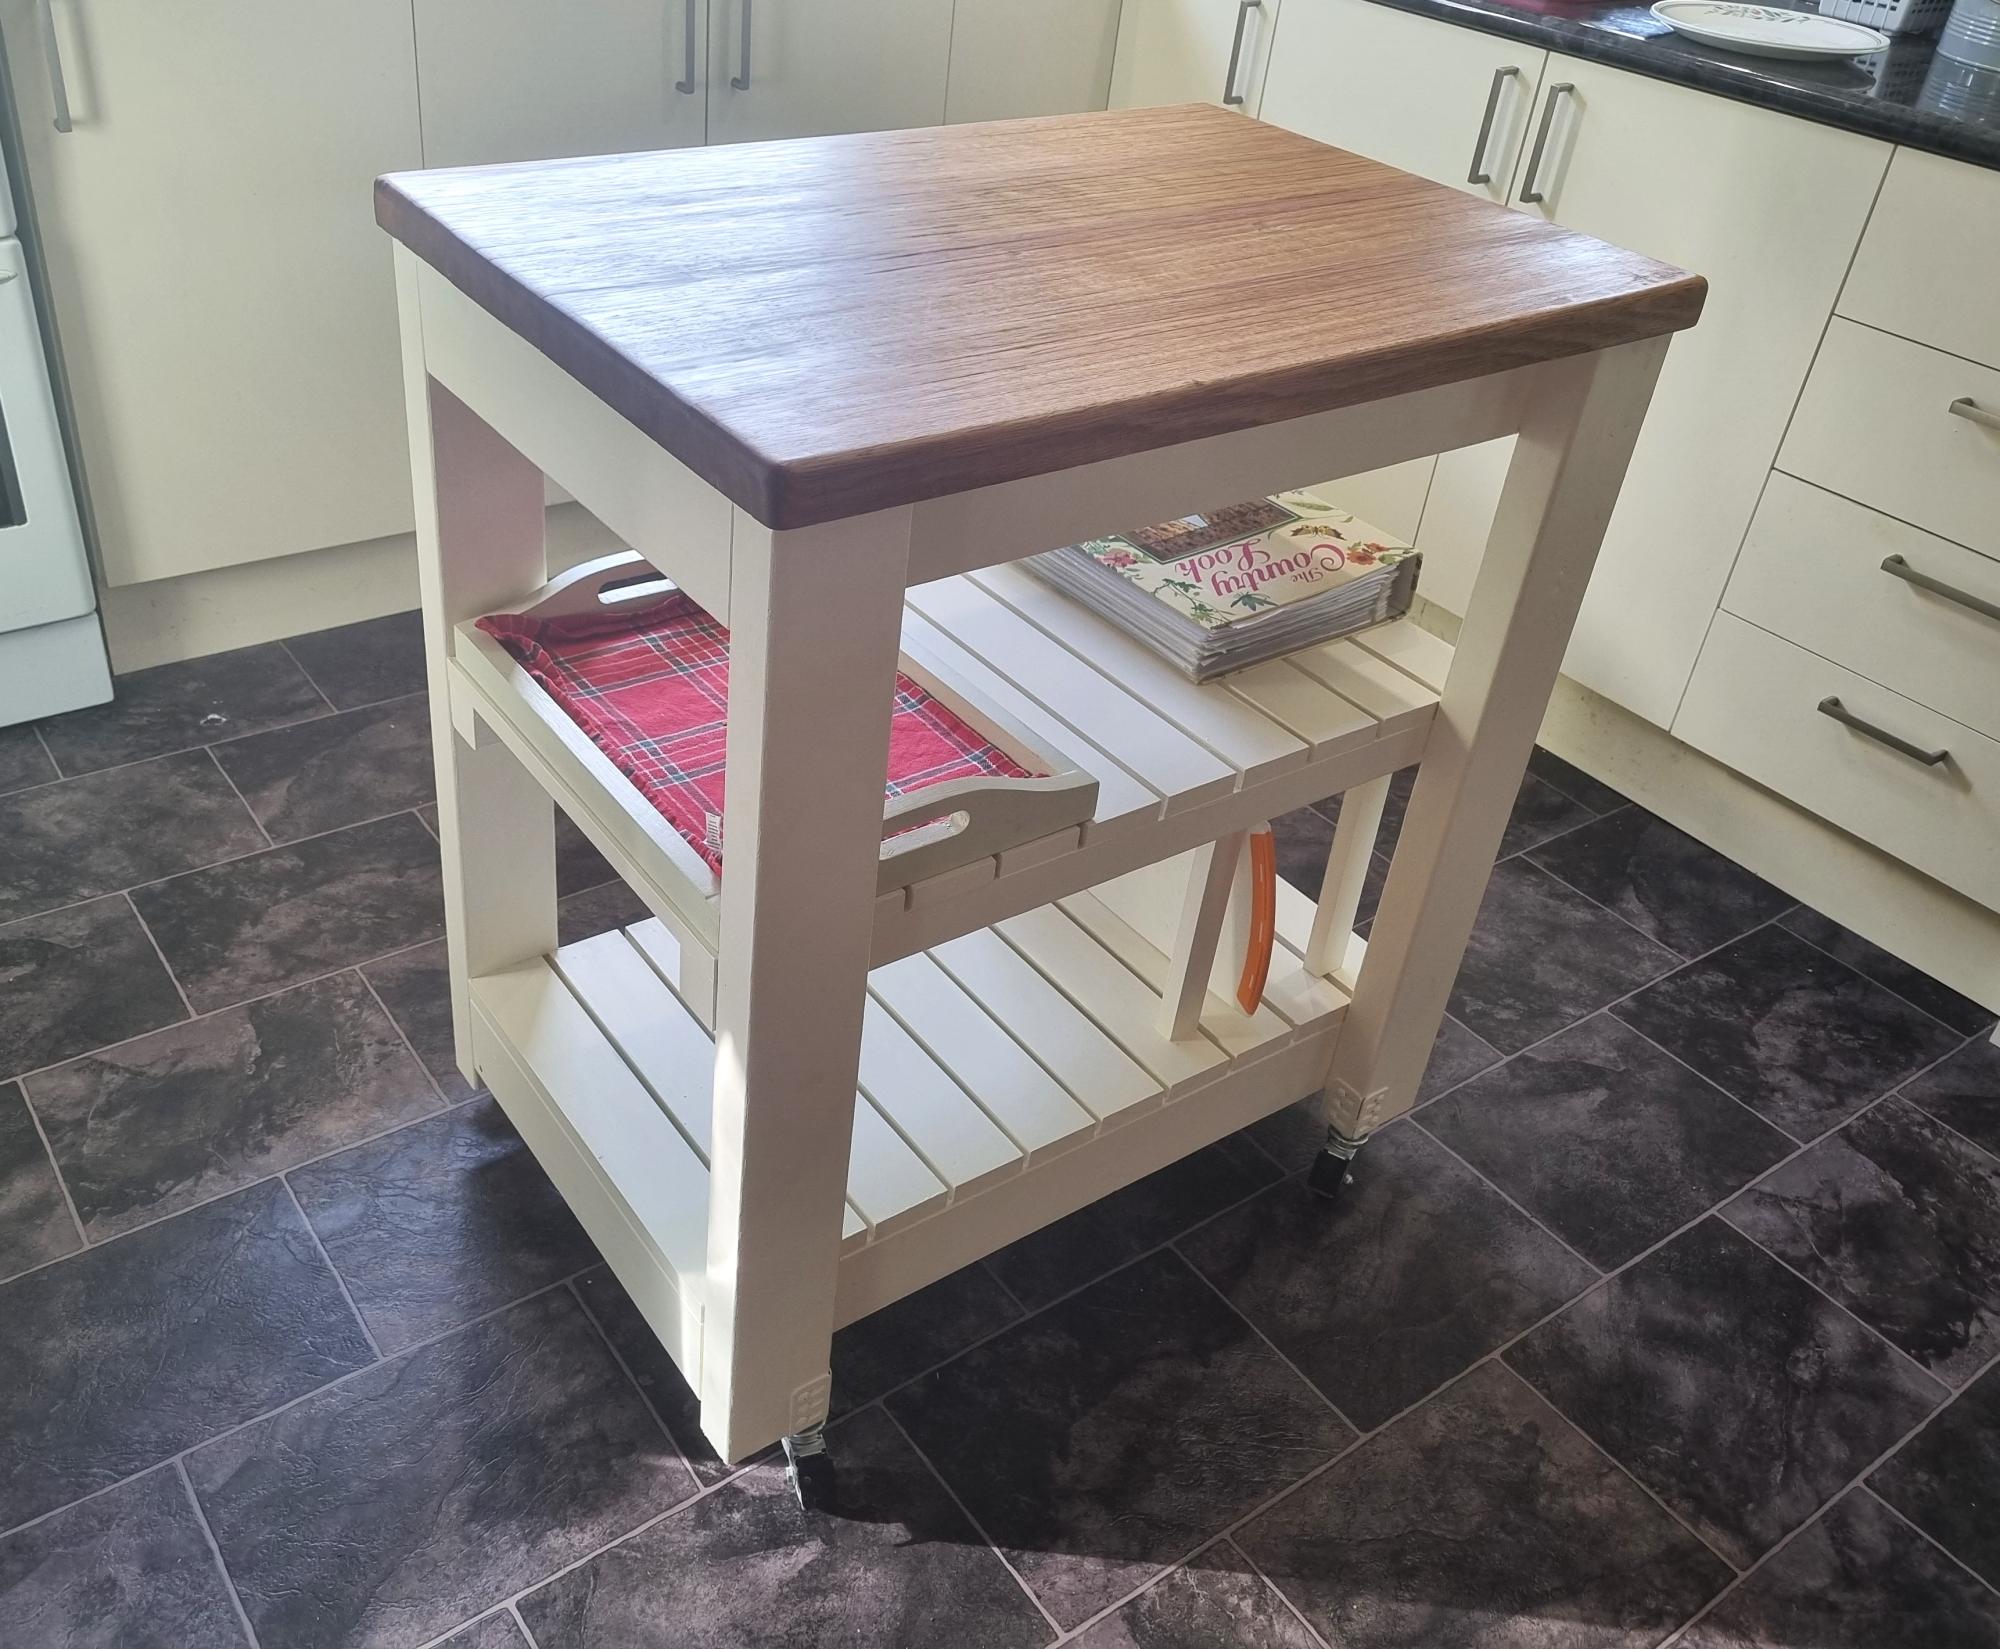
Submitted by Anonymous (not verified) on Mon, 06/03/2024 - 08:47

I made this one from 90 x 45mm pine with 70 x 19 slats for the shelves. The top I made from 4 pieces 35mm thick Tasmanian Oak glued together using biscuit joints.

Built from Plan(s)

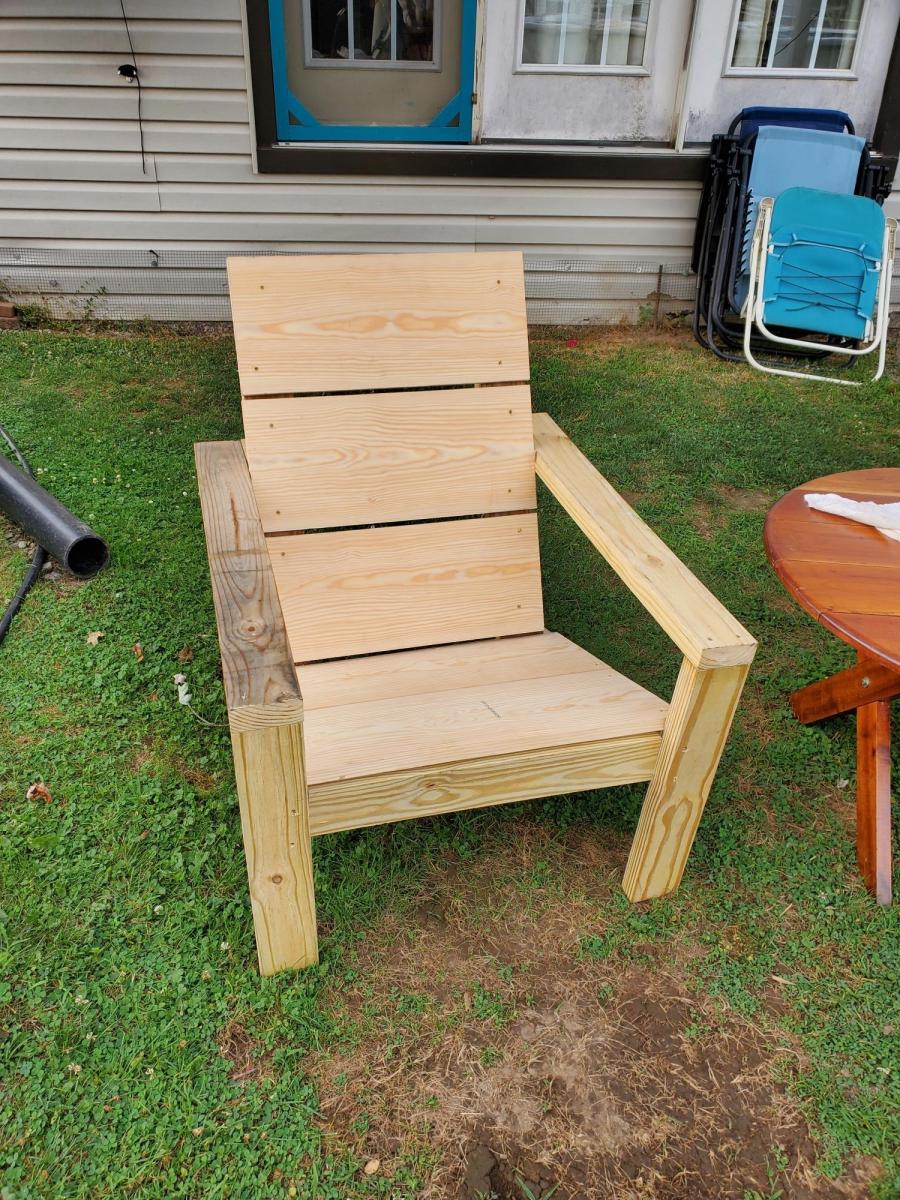
2x4 Modern Adirondack Chair ❤

I LOVE this project!!!! Great directions! Amazing results. It makes a very comfortable, and sturdy chair. So far, I have made two. Three more to go. 😄

Estimated Time Investment
Afternoon Project (3-6 Hours)
Finish Used
the first one, I painted and used an aging process on the seat. Then sealed with outdoor poly. The second one still needs finished. Not sure what color to make it.
Recommended Skill Level
Intermediate

X Farmhouse Table

Submitted by Joshman010 on Sun, 10/30/2016 - 18:36

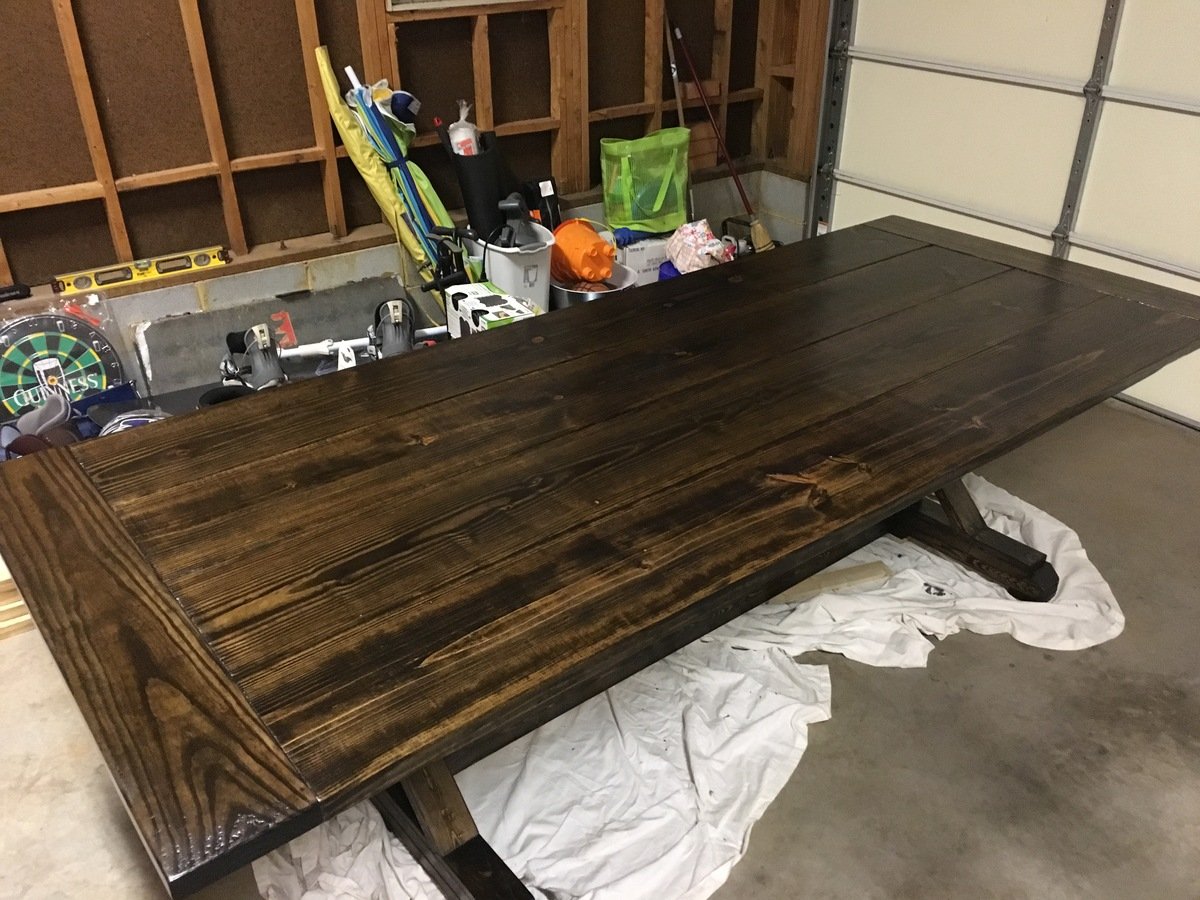
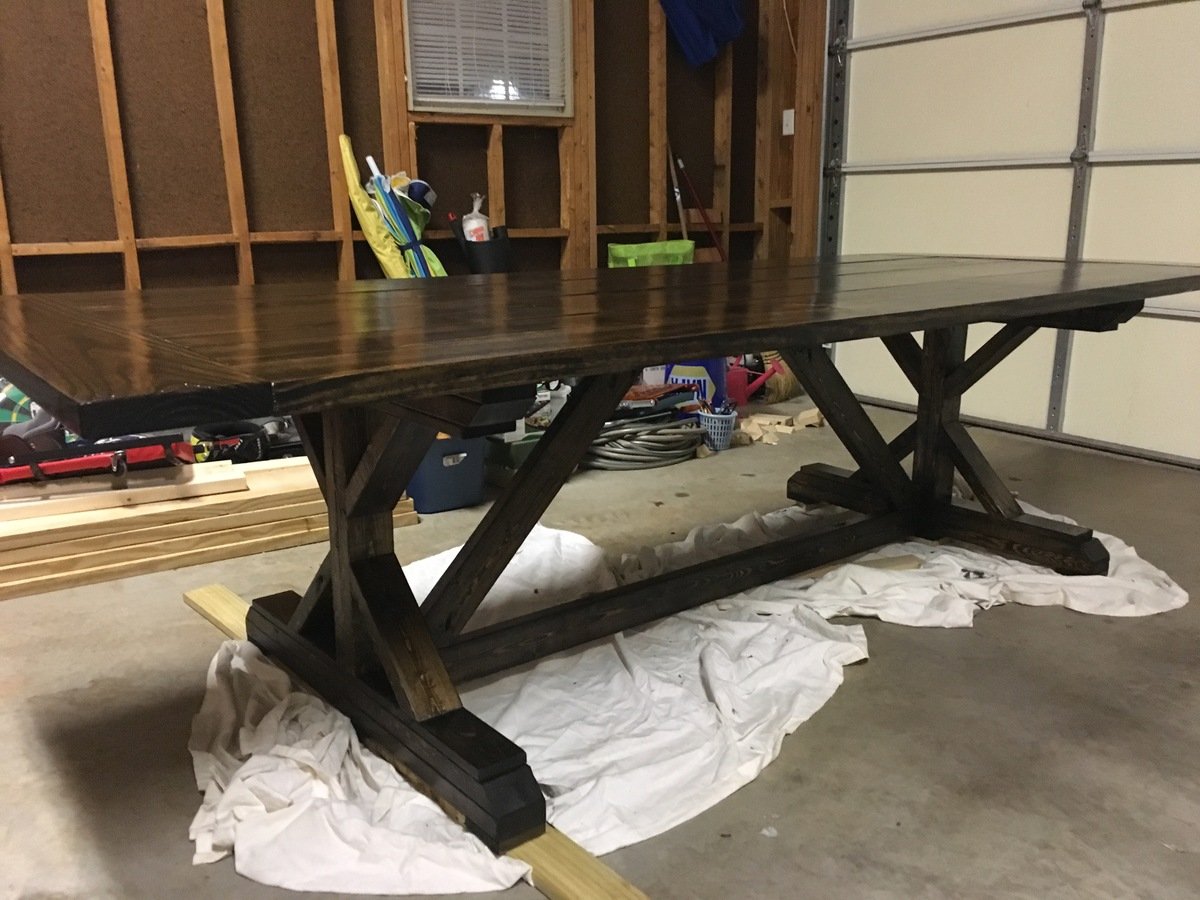
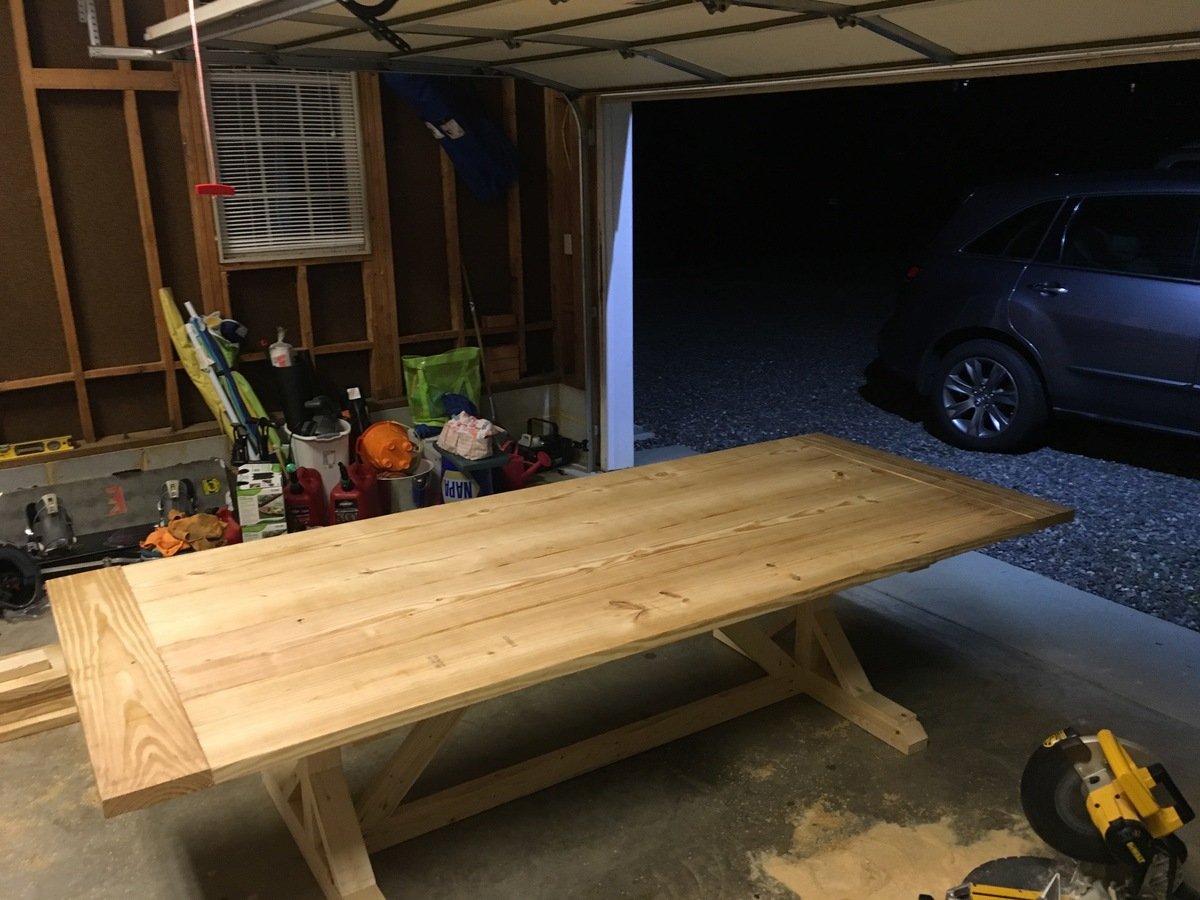
First piece of furinture I've tried to build, went surprisingly smooth. Raw table only took 5 hours to construct; an hour or two to sand; and then the waiting game after two coats of stain and 4 coats of poly. Used southern yellow pine for the top, dark walnut stain, and spar pro series semi-gloss poly.

Built from Plan(s)
Estimated Cost
$85
Estimated Time Investment
Weekend Project (10-20 Hours)
Finish Used
Dark Walnut and Minwax Spar Pro Semi-Gloss Poly
Recommended Skill Level
Beginner

Comments

Karl B

Tue, 11/22/2016 - 05:18

How did you attach the top to the base?

There is only 1 support board.

Joshman010

Mon, 01/16/2017 - 19:16

I used the pocket hole jig to drill pocket hold along the center support that runs parallel to the top boards and also drilled pocket holes on the top supports of the legs that run perpendicular to the top boards. Alternating pocket holes on both inside and outside faces of the top support boards gives it some added strength.

btw, sorry for such a delayed response. 

Olivia's Doll Crib and High Chair sets

Submitted by Linda7 on Fri, 09/28/2012 - 16:15

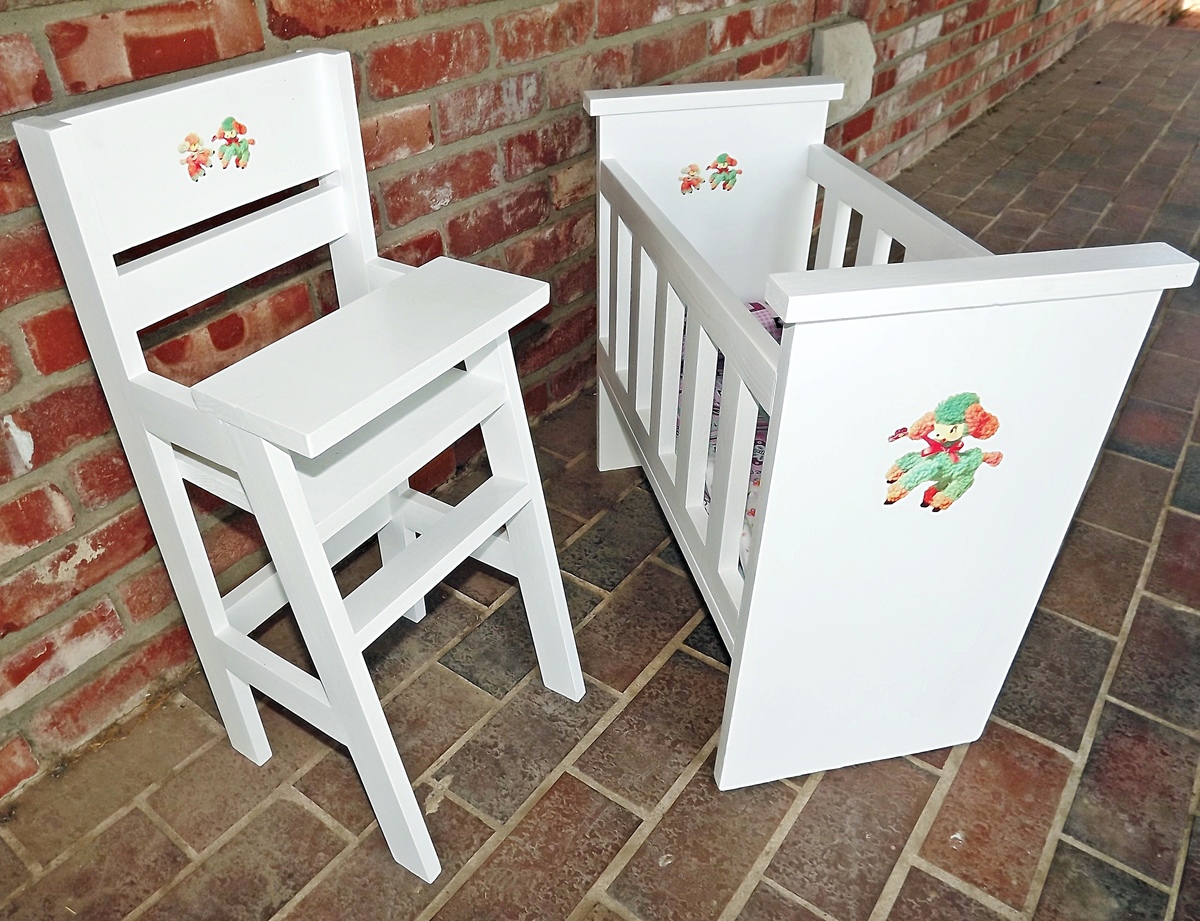
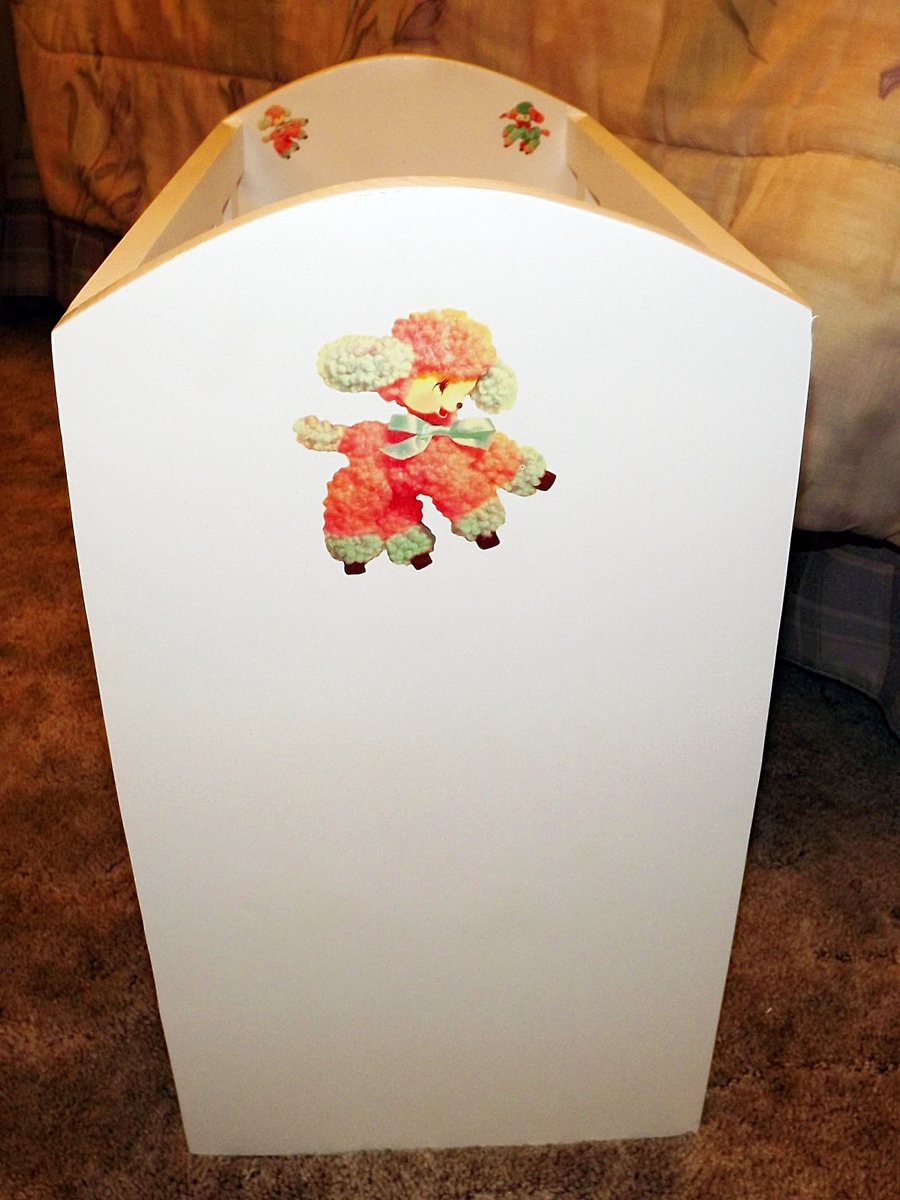
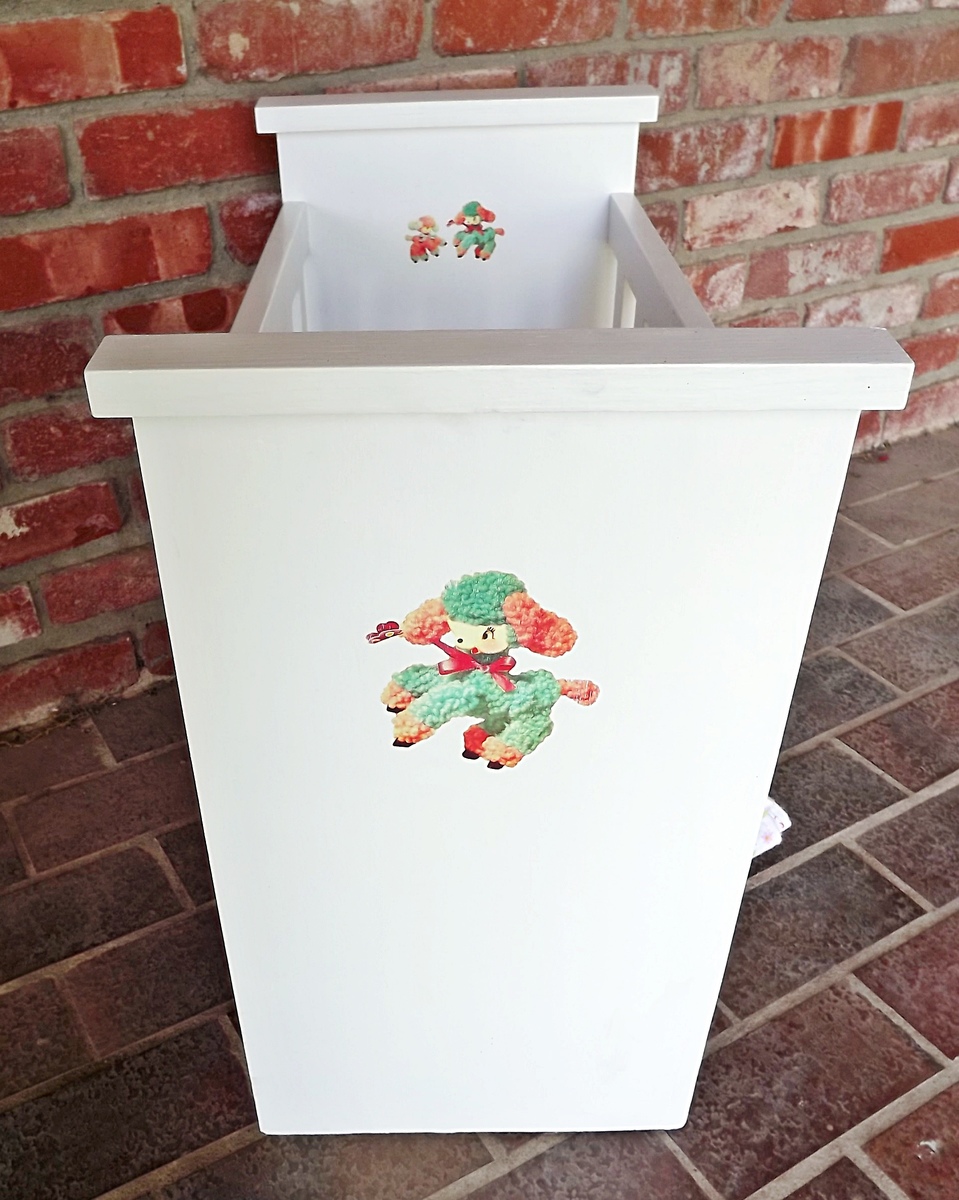
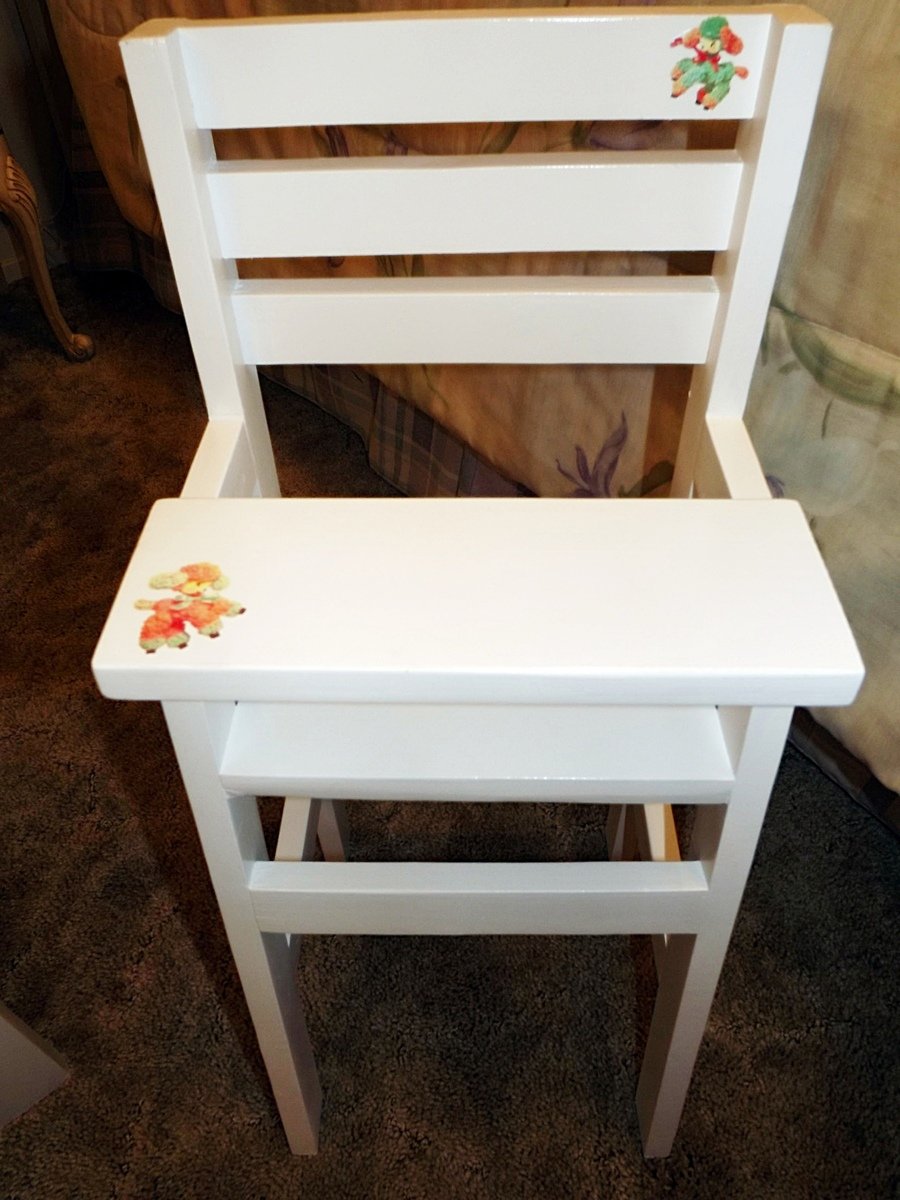
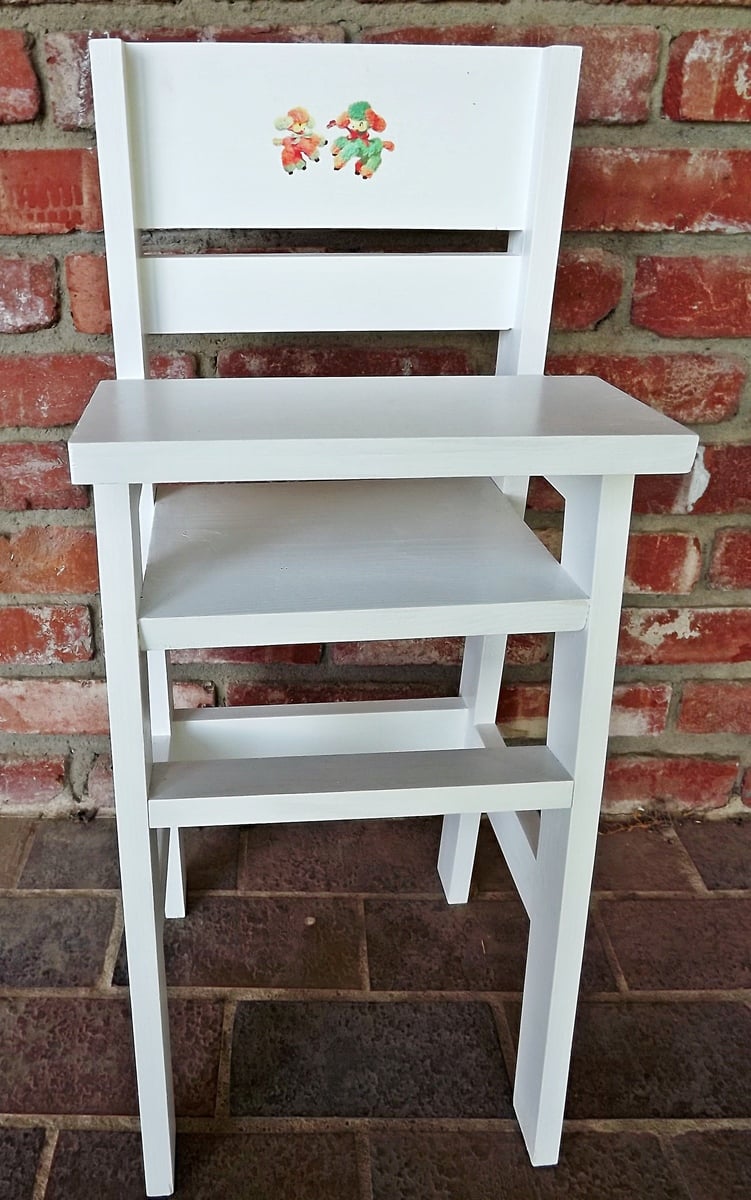
I have three granddaughters and four great-nieces. I was able to find vintage 50's baby doll cribs for the older two, but not for my youngest granddaughter. I was so excited when I found Ana's doll crib, realizing that I could make the beds and high chair sets for all of the girls. I wanted to use water-slip decals to make the beds look vintage like the older g'daughters', and I found this great website: www.decalcottage.com. I wanted each set to be slightly different, so for the first two sets for sisters, I followed Ana's plans exactly for one, and using the idea from another brag post, used just a rectangle for the ends.The high chair backs are also slightly different. I have since made two more sets which I'll post later, but they all have vintage lambs on the beds and high chairs. It has been so much fun!

Built from Plan(s)
Estimated Cost
About $20 per set for the lumber. I already had the paint and pocket hole screws.
Estimated Time Investment
Day Project (6-9 Hours)
Finish Used
I first primed with one coat of Kilz, then used Olympic brand white gloss spray paint and the clear spray finish.
Recommended Skill Level
Beginner

Beginner Farm Table and benches

Submitted by Anonymous (not verified) on Sat, 07/25/2020 - 21:02

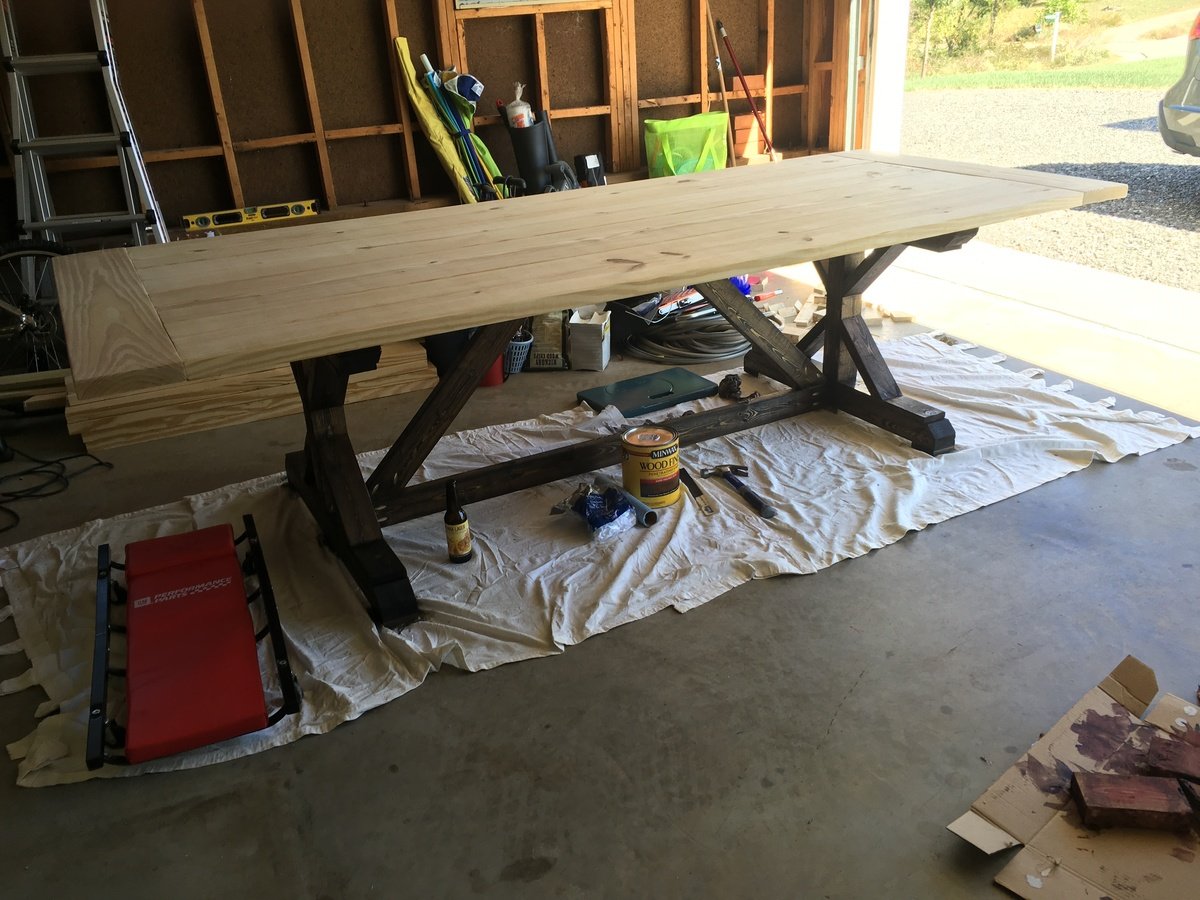
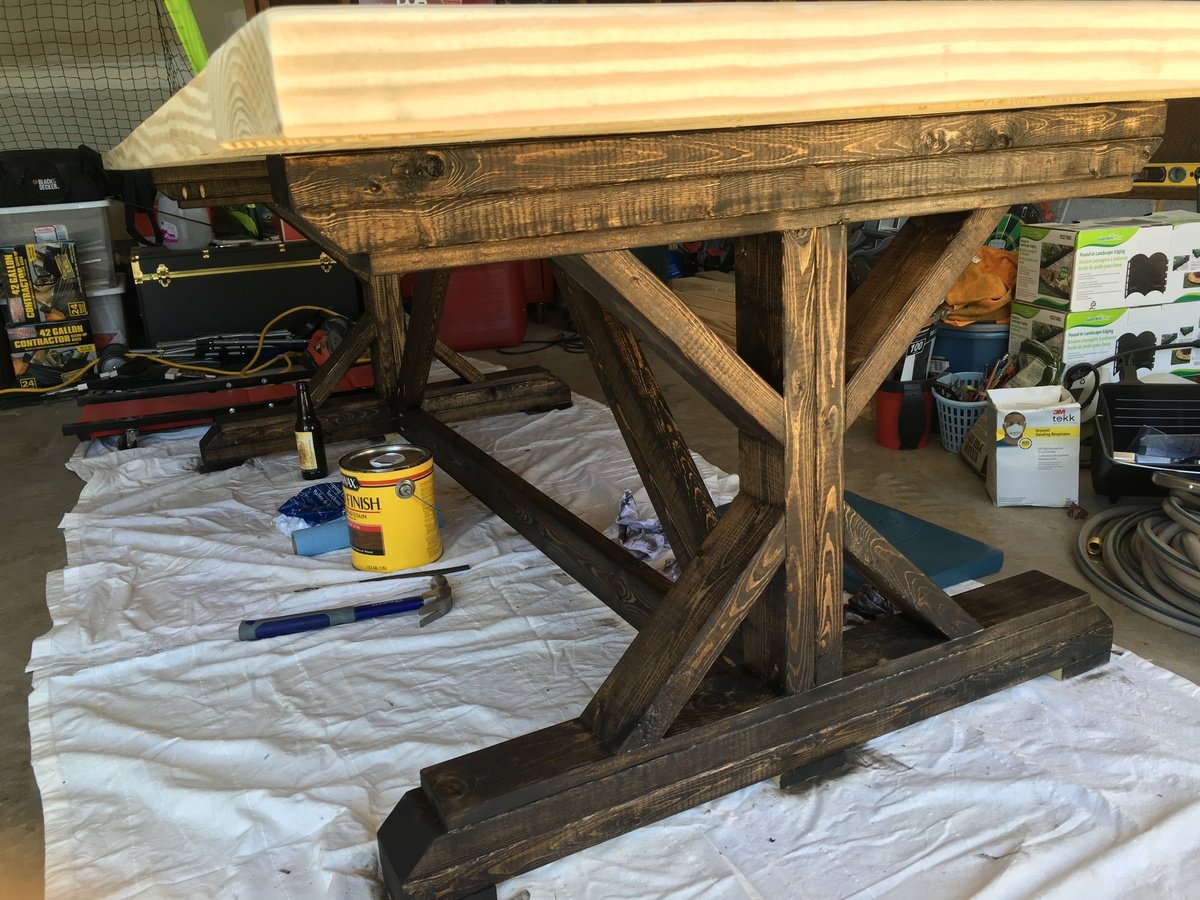
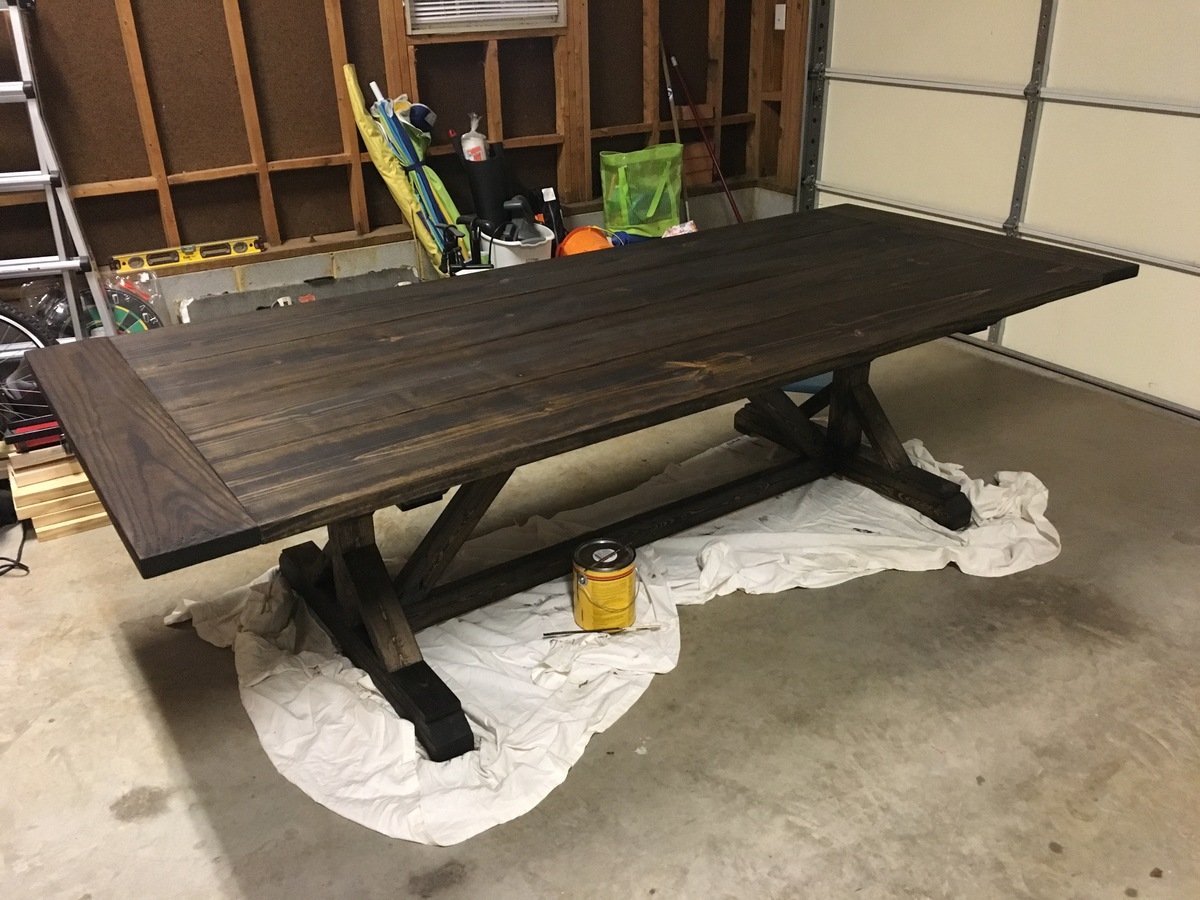
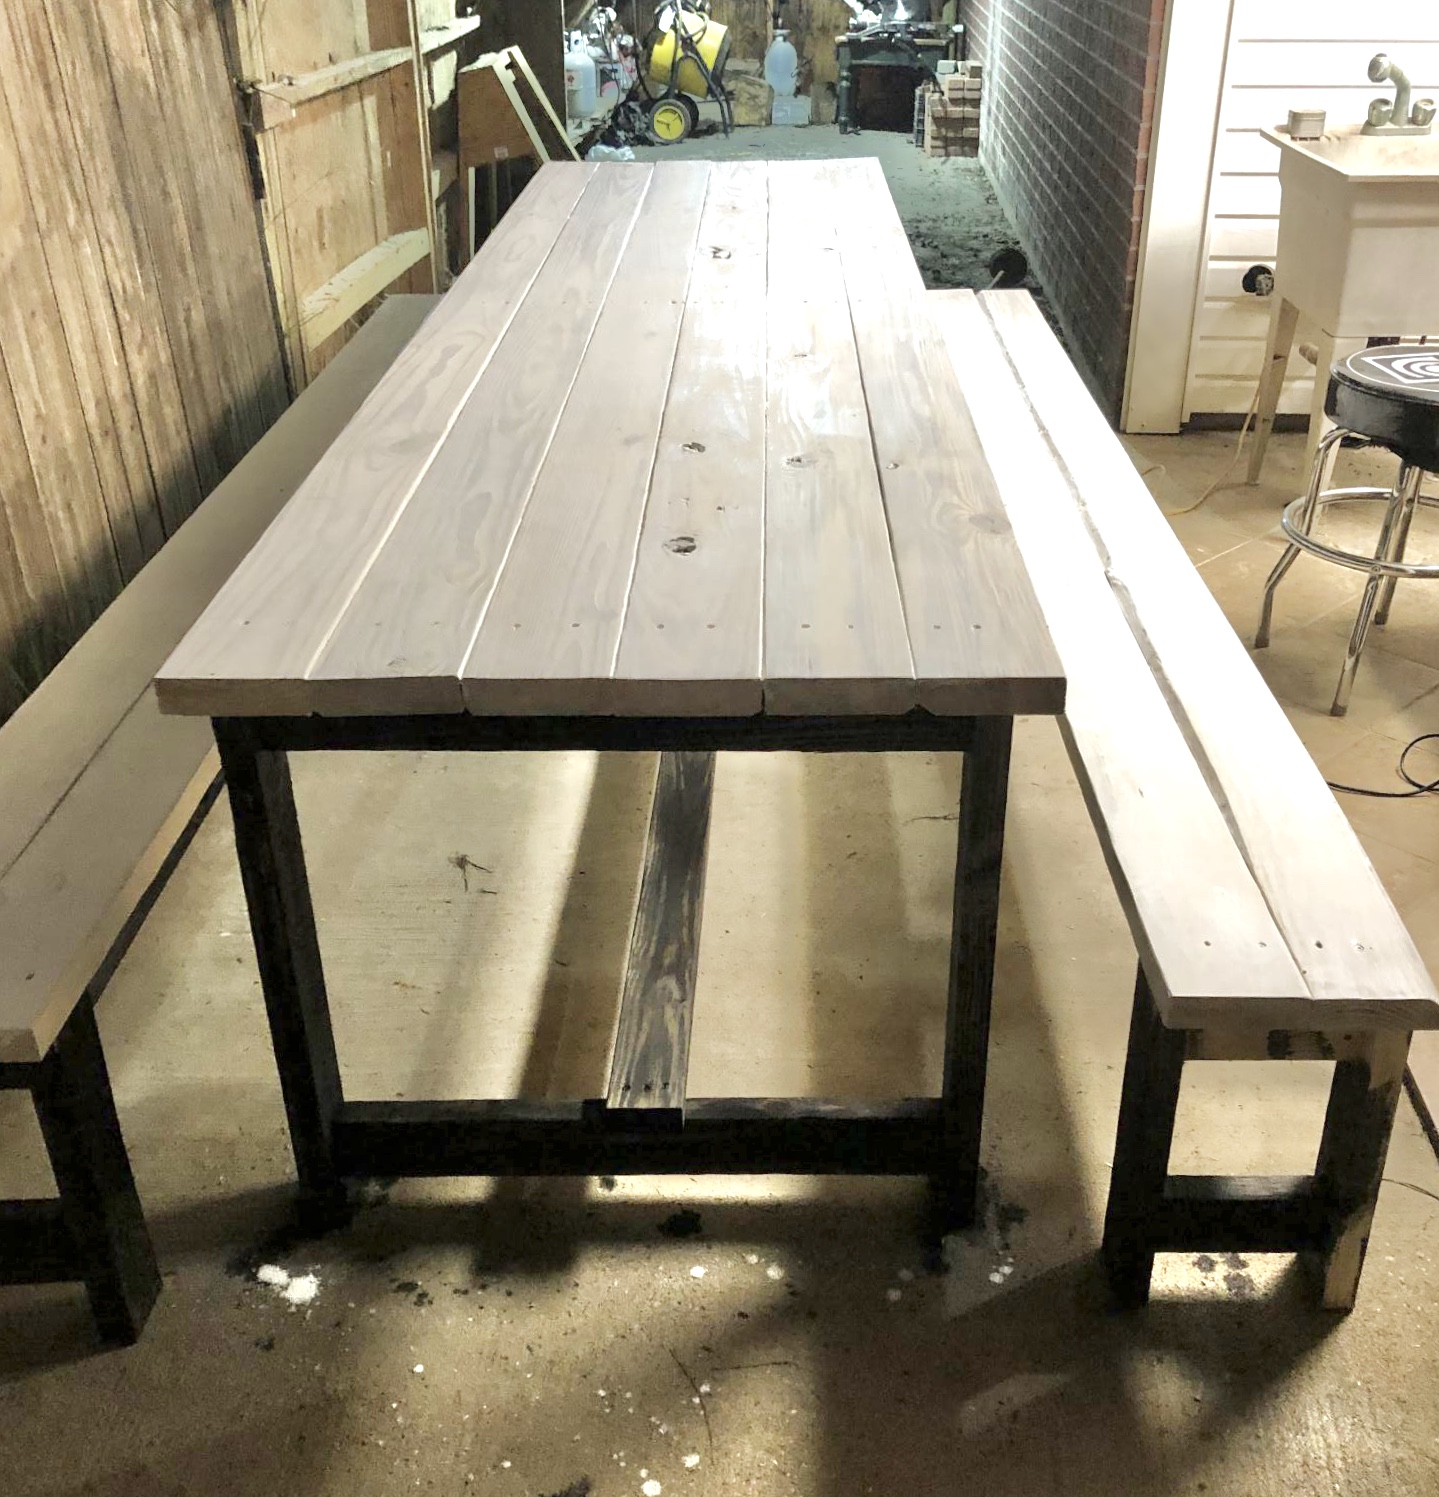
We built a larger version of the farmhouse table. It’s always been a dream to have a massive table for family dinners. I loved the look of the table and have wanted to attempt it for a couple of years. I finally got the courage up. We kept the legs the same size and just used 10 ft 2x6 and stretchers. It’s extremely solid and heavy! We are exhausted, it took all day! But we are so proud of ourselves. It’s definitely not perfect but it was our first and we love it!

Estimated Cost
150
Estimated Time Investment
Day Project (6-9 Hours)
Finish Used
Weathered burn effect stain For the legs and runners and an antique white for the top.
Recommended Skill Level
Starter Project

Barn Project

Submitted by Hookster on Mon, 11/07/2016 - 12:10

 Hi Ana & Hubby

 Completed the shelving unit this past summer in my Barn, great plan and really easy to put together,

Thank's for the plan and step by step instructions, Going to build another unit in the barn come spring time here in Upstate New York.  I made mine only eight feet wide by eight feet high givin the space I had 

it's eight feet between 4x4 upright polls. I went with a center 2x4 for added strength to avoid possible sagging from heavy weighted items I will be storing. I left room inderneath as you can see, I store my saw horses and my push mower under it well.  

Warmest Regards

 Steve

Estimated Cost
$50.00
Estimated Time Investment
Afternoon Project (3-6 Hours)
Finish Used
bare wood
Recommended Skill Level
Beginner

Comments

Mini Farmhouse Bedside Table

Submitted by Anonymous (not verified) on Mon, 11/21/2016 - 18:35

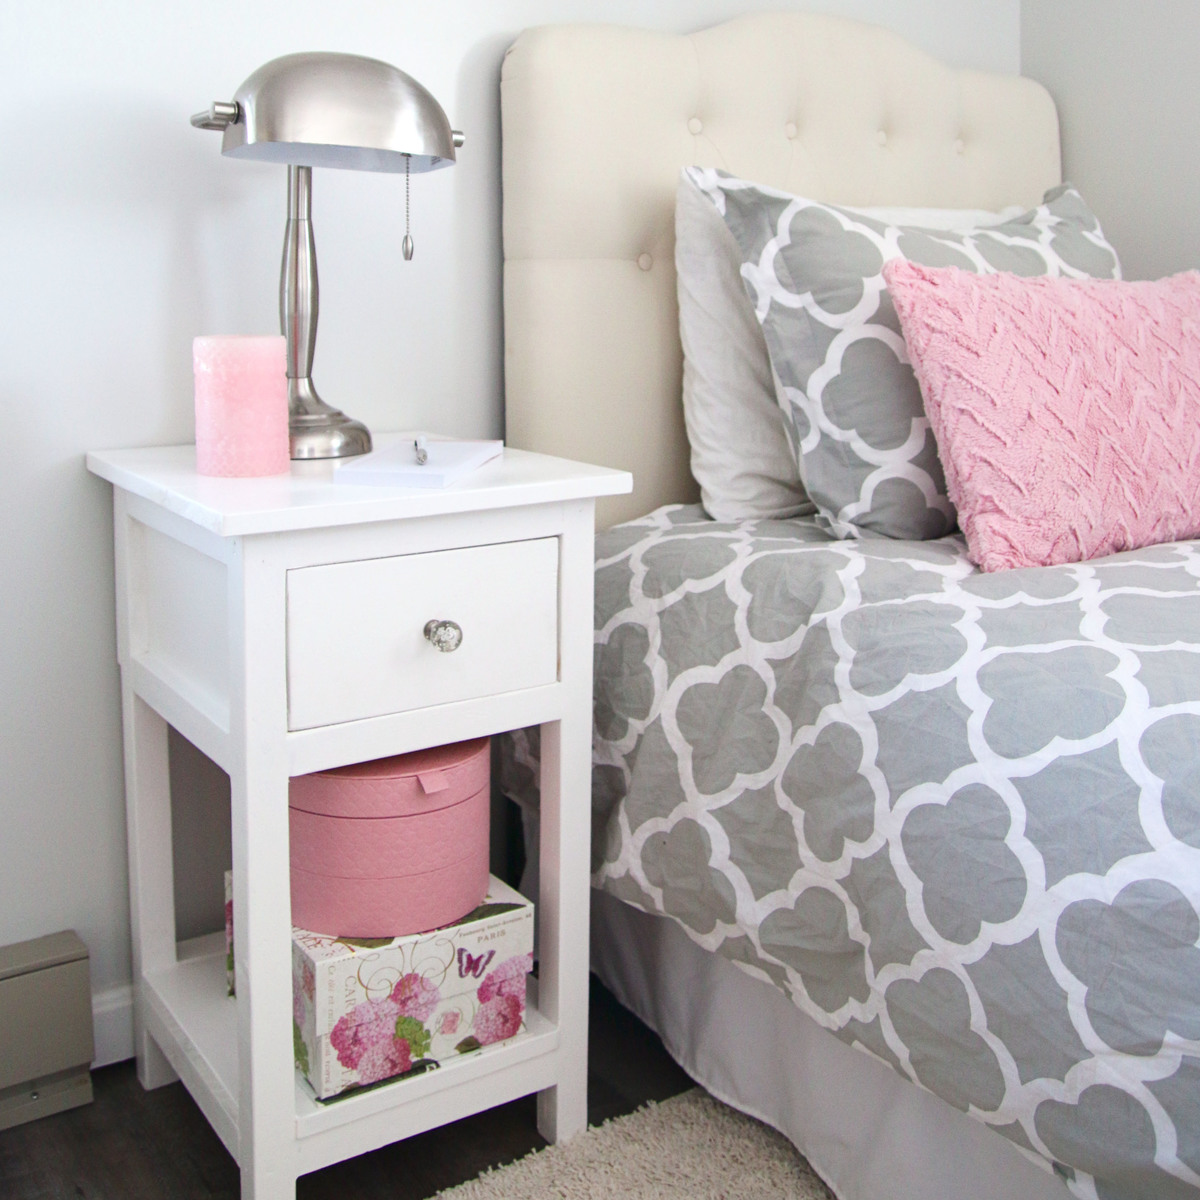
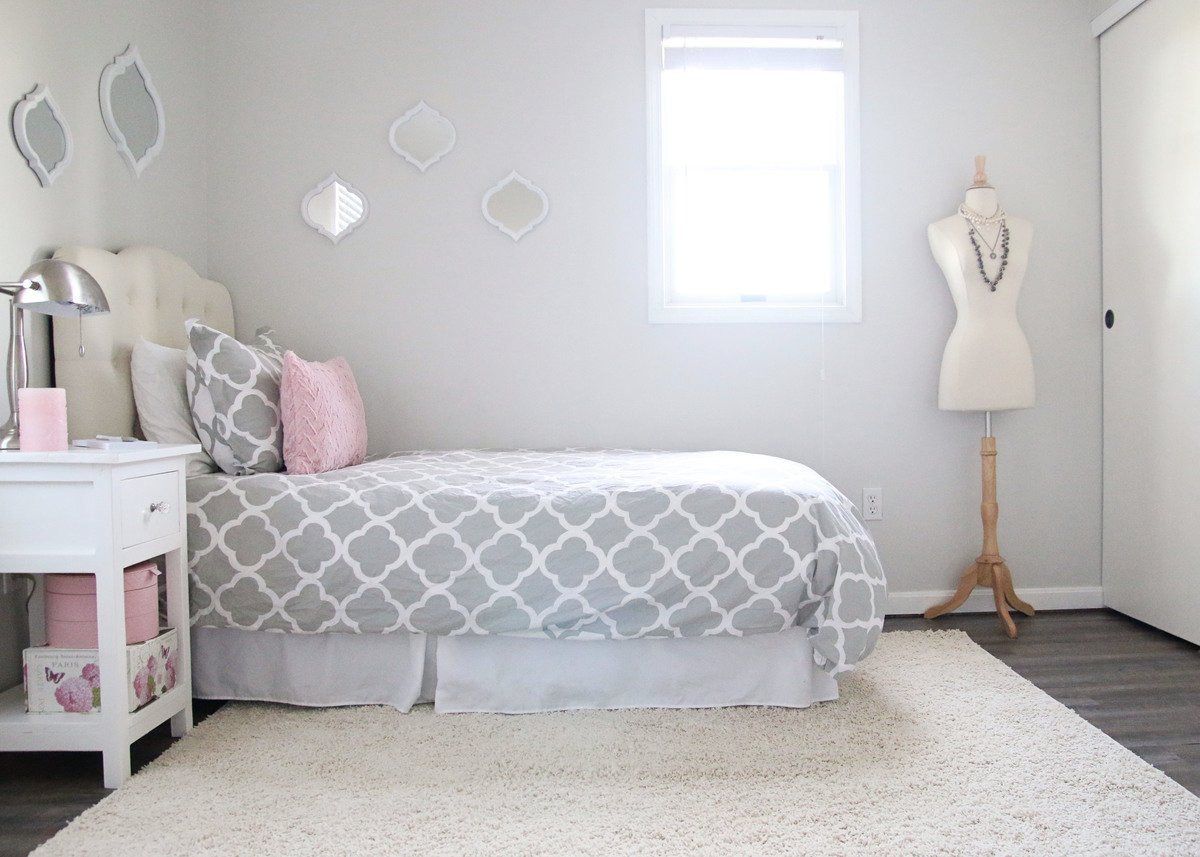
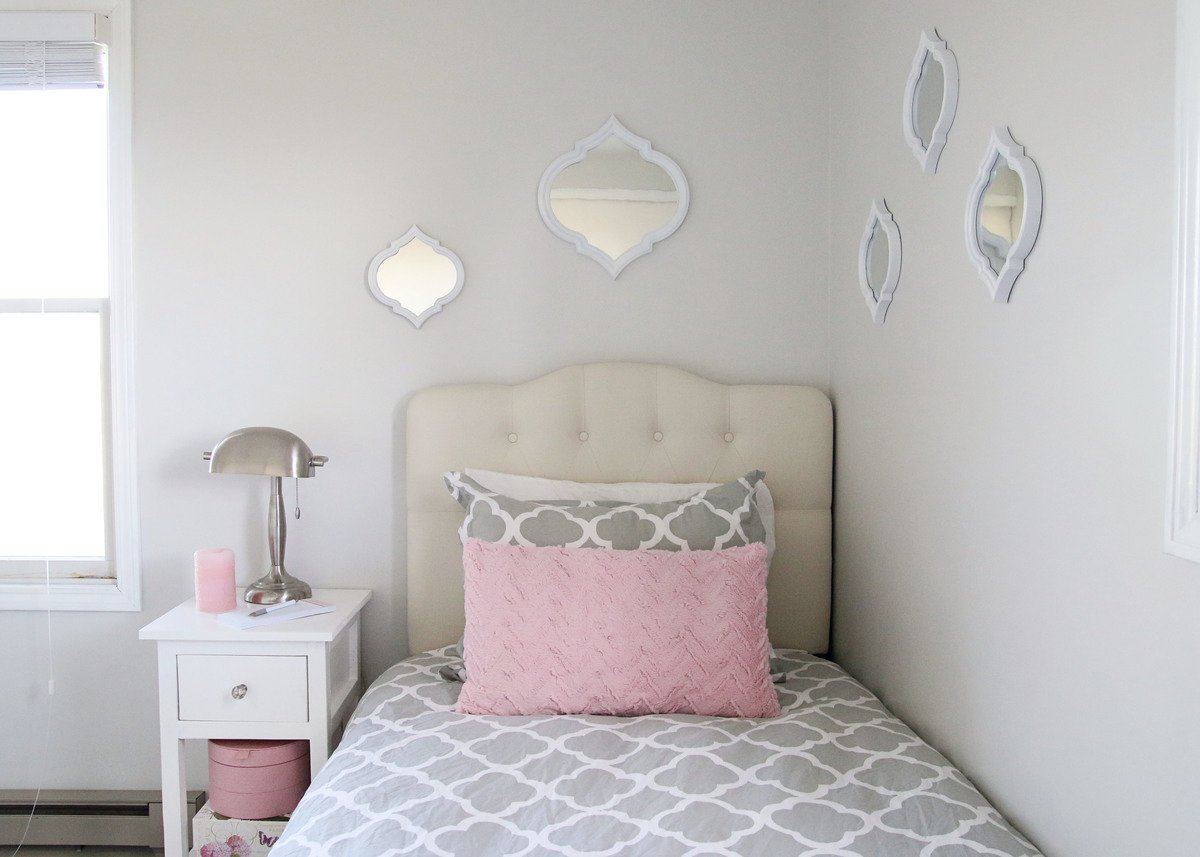
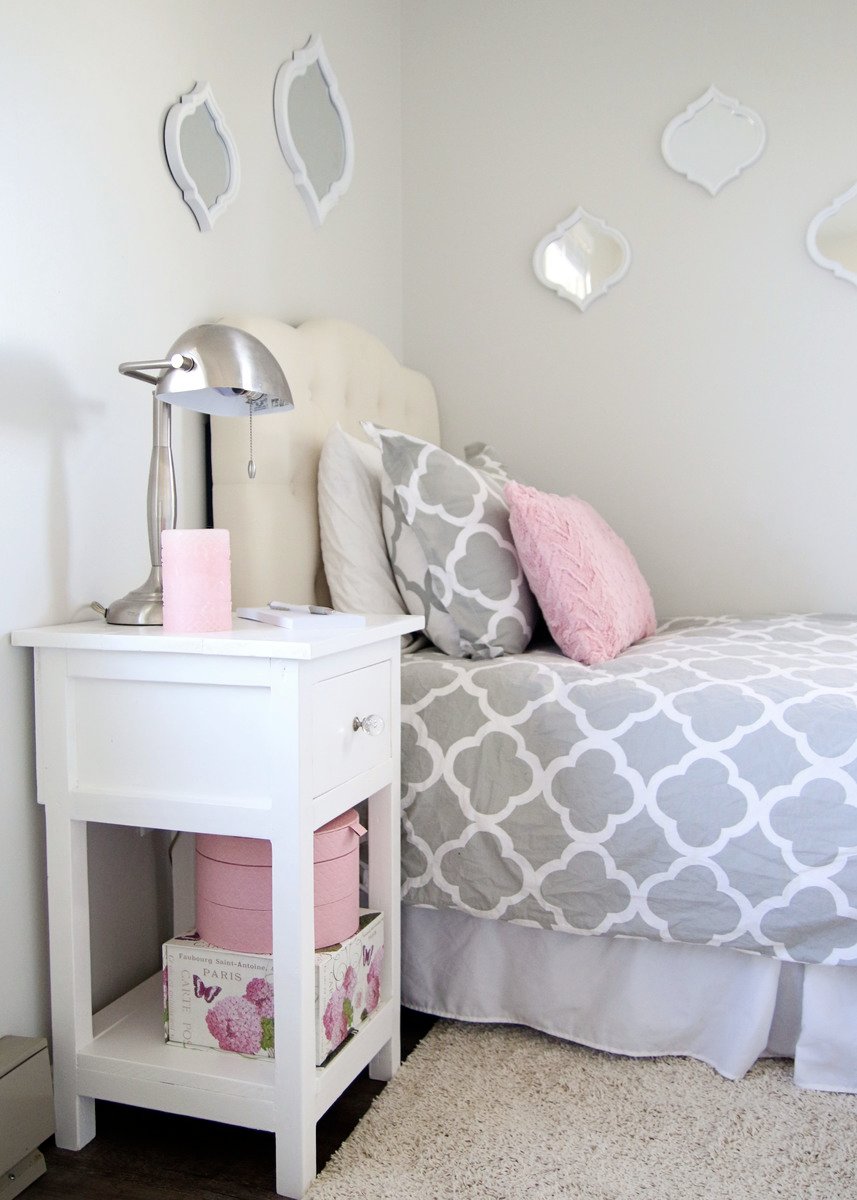
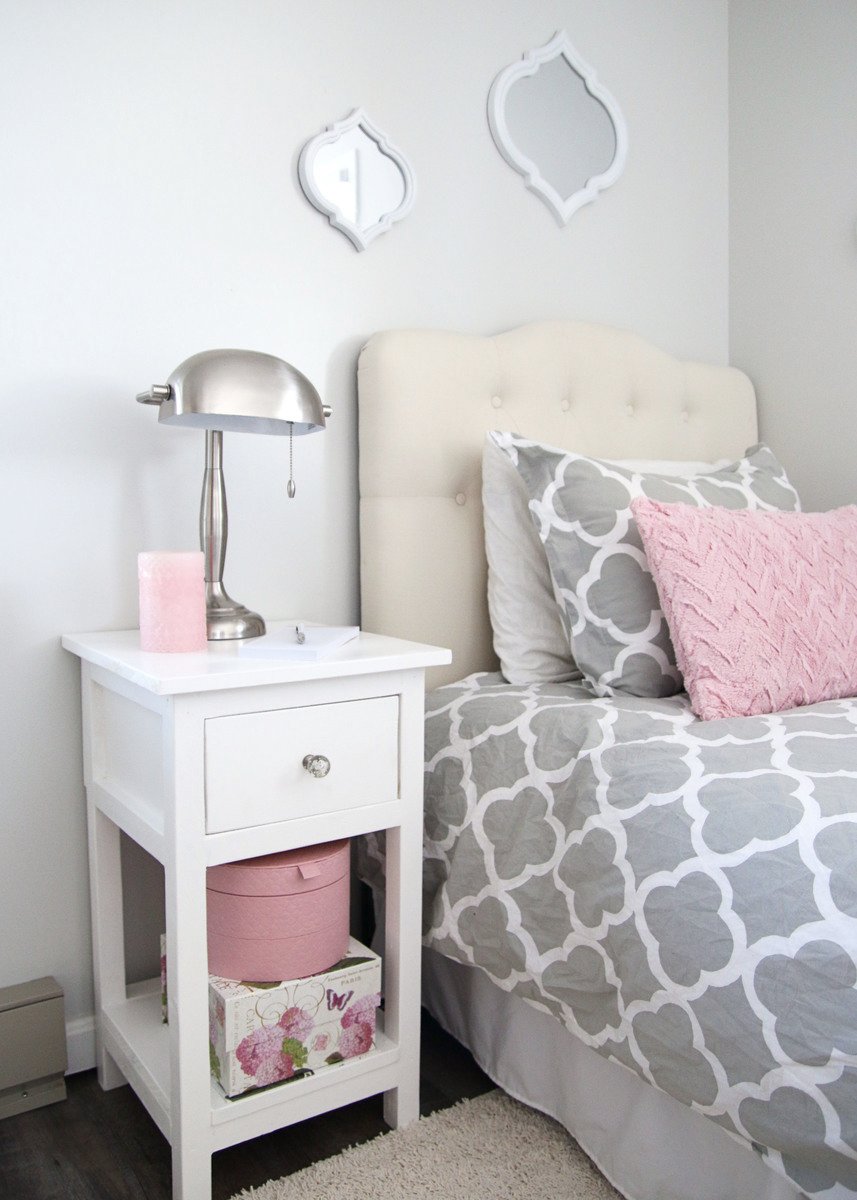
We (my husband and I) recently gave our tween daughter's bedroom a complete overhaul and needed an affordable and pretty nightstand for the room. After searching online and in stores, we could not find one that we liked for a price we wanted to pay, so we opted to build.  These plans were very easy to follow and allowed us to create a functional bedside table that was just right for the space.

Estimated Time Investment
Weekend Project (10-20 Hours)
Finish Used
Two coats of Behr Premium Plus Ultra Interior Paint & Primer, Sheen: Satin, Color: Polar Bear. 2 coats of Minwax Polycrylic Protective Finish Clear, Sheen: Satin
Recommended Skill Level
Beginner

Sewing Table with ironing board leaf

Submitted by tink32784 on Mon, 10/22/2012 - 12:49

I followed Ana's plans as written. However, I couldn't find a locking hinge the comments suggested. I will keep on the look-out for this though. I used 3/4" hardwood and had Blue do all the cuts for me. Easy-peasy. I painted the whole thing with left-over paint and then randomly taped off stripes using more leftovers and then protected everything with a coat of poly. Finally, I used a double layer of quilt batting and 100% cotton fabric to upholster one of the leaves for use as an ironing board. Literally finished this today, so I haven't had a chance to use it, but I'm so excited with how it turned out!

Built from Plan(s)
Estimated Cost
$60
Estimated Time Investment
Weekend Project (10-20 Hours)
Finish Used
Paint with polyurethane top coat
Recommended Skill Level
Beginner

Comments

Back