Community Brag Posts

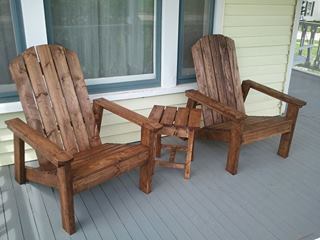
Modern Adirondack chair
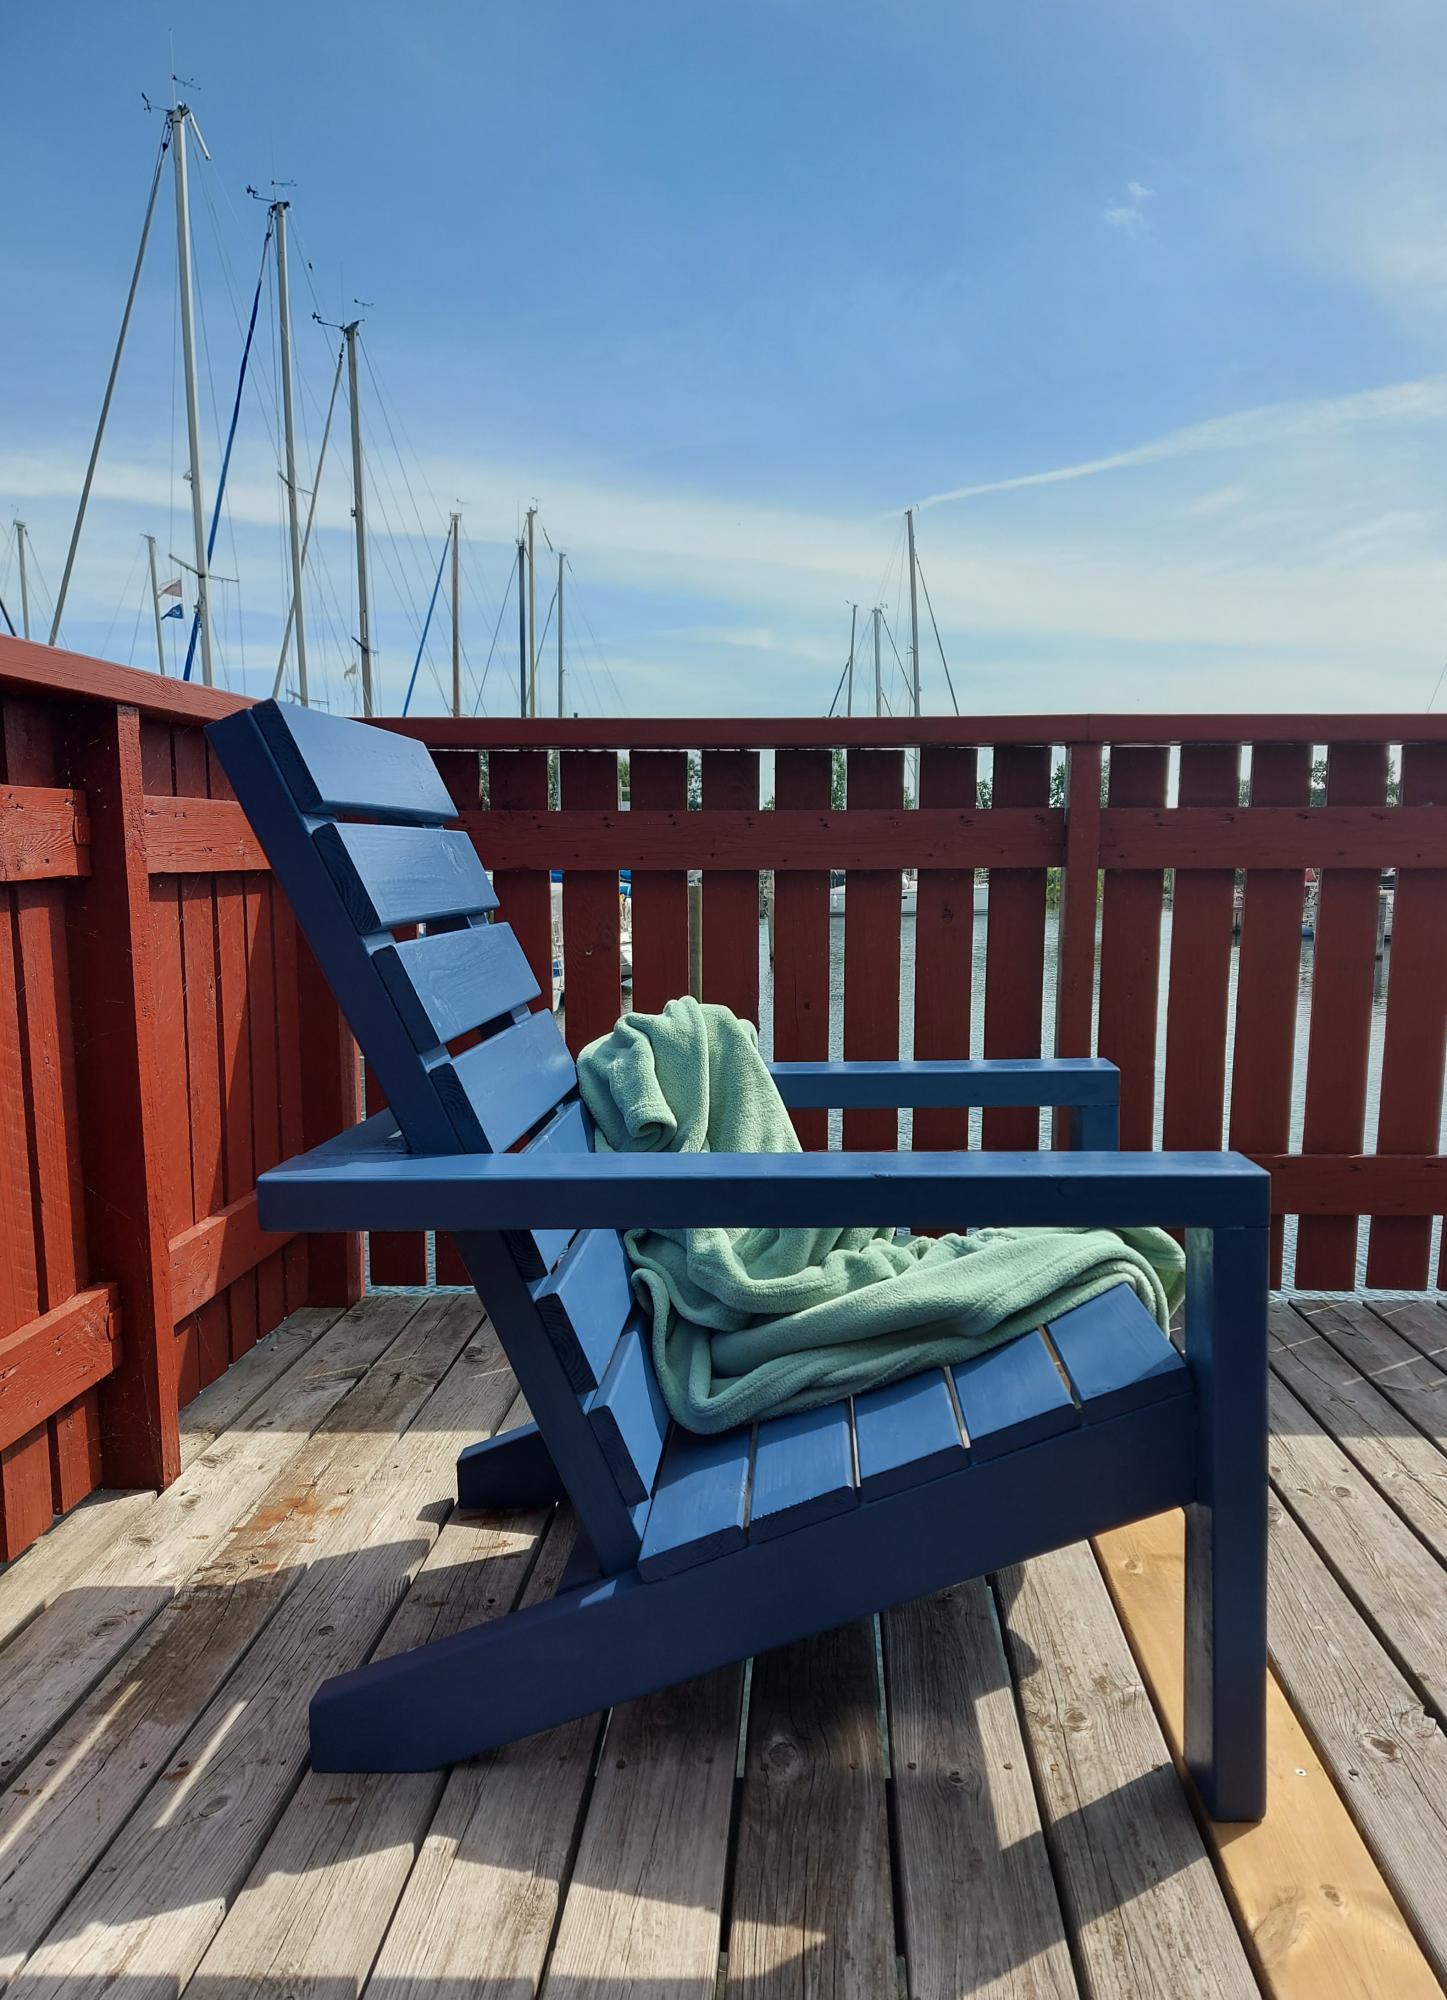
A slightly modified version of the Modern Adirondack chair. A neighbor walked by and commented that it was a cool new chair. I replied that it had been surprisingly easy to build. He was clearly surprised and asked, "YOU built it?" He's a carpenter and I'm a psychologist, so he obviously did not expect me to be able to build anything that looked even half decent. When he recovered from his surprise, he pointed out all the imperfections and offered advice on how I could do a better job next time... :-D
Built from Plan(s)
Comments
Mon, 11/22/2021 - 09:27
LOL, love it!
Great job, love the story behind it too! Thanks for sharing and great finish choice~
Sausha's Washer/Dryer Pedestal plus a Bench
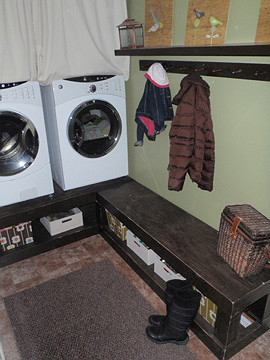
I love the height of this pedestal. We also wanted a bench for the kids so we just extended the pedestal around. It works great and looks awesome. I put a floating shelf above the hangers and some of my art.
Estimated Cost
$250.00
Estimated Time Investment
Weekend Project (10-20 Hours)
Finish Used
Berh Ultra Espresso Beans, semi gloss
Recommended Skill Level
Beginner
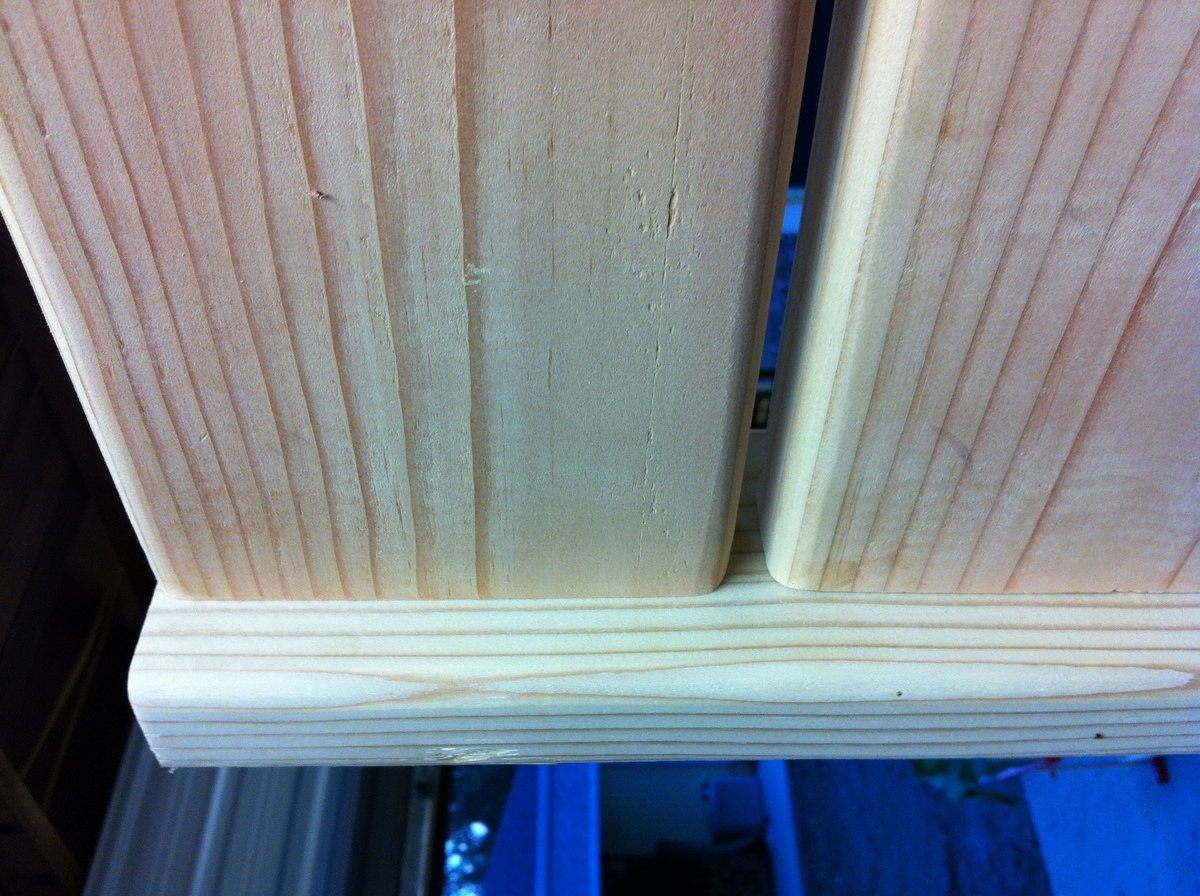
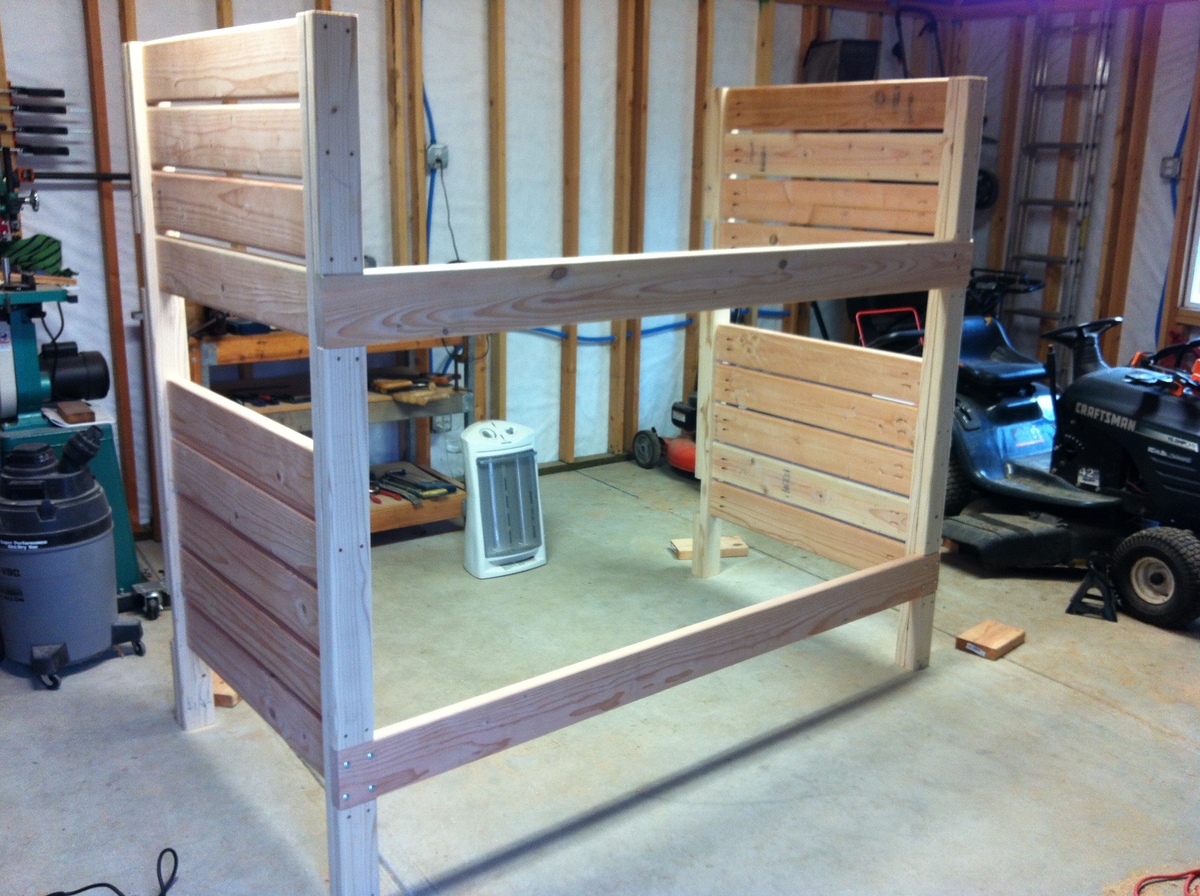
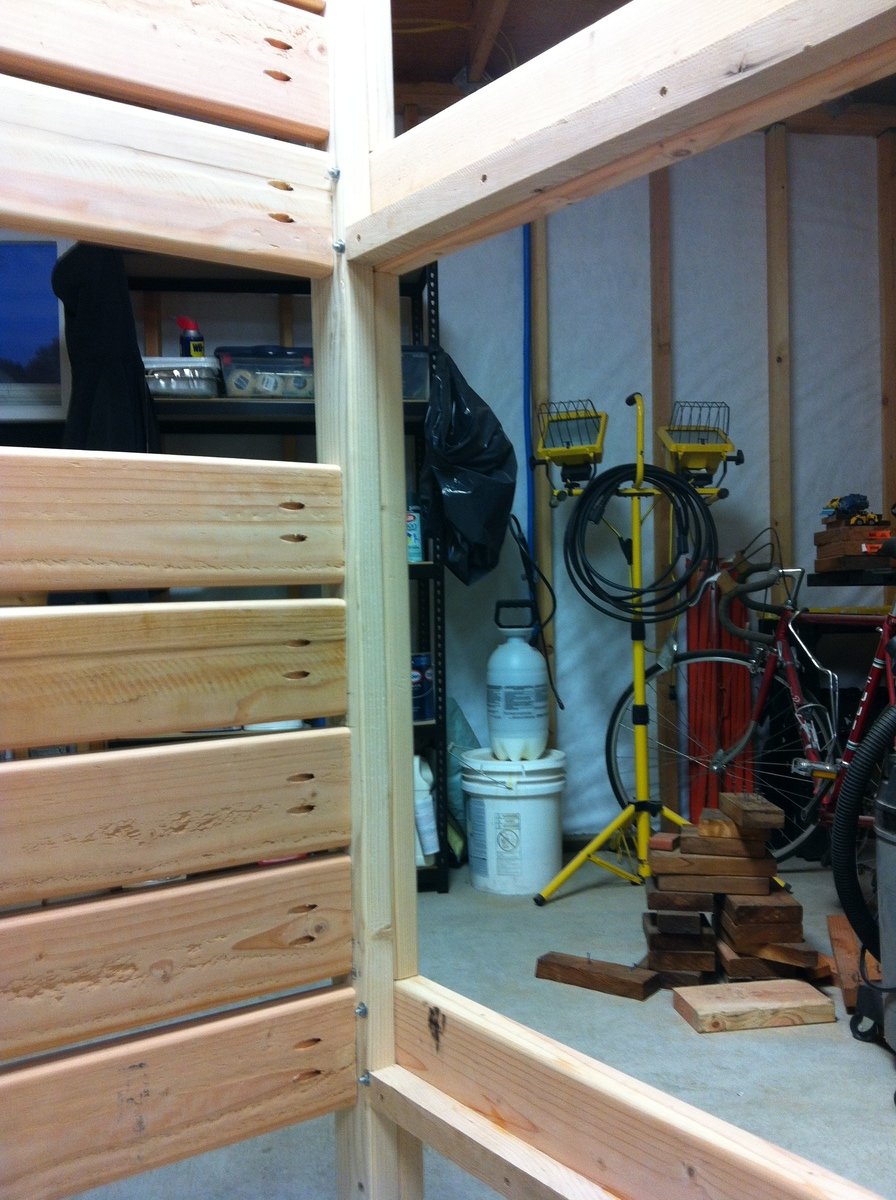
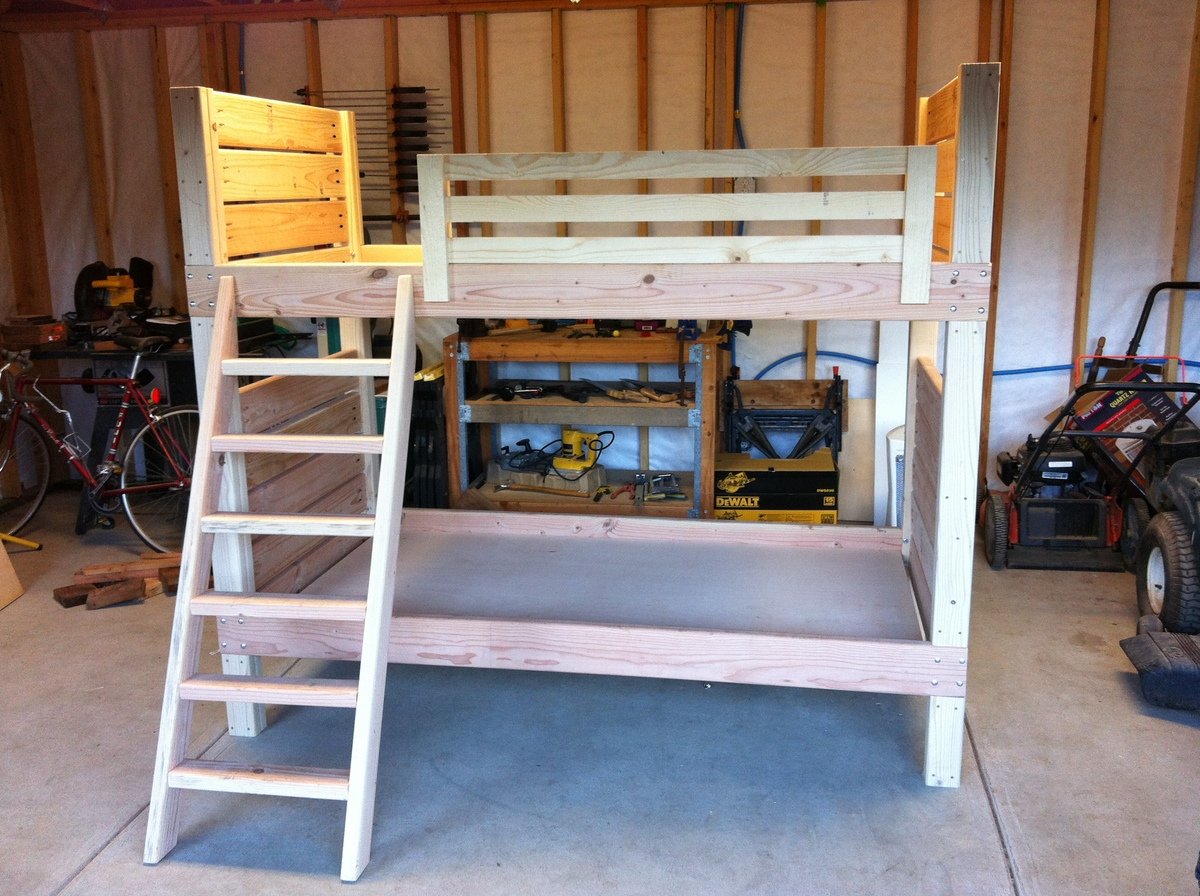
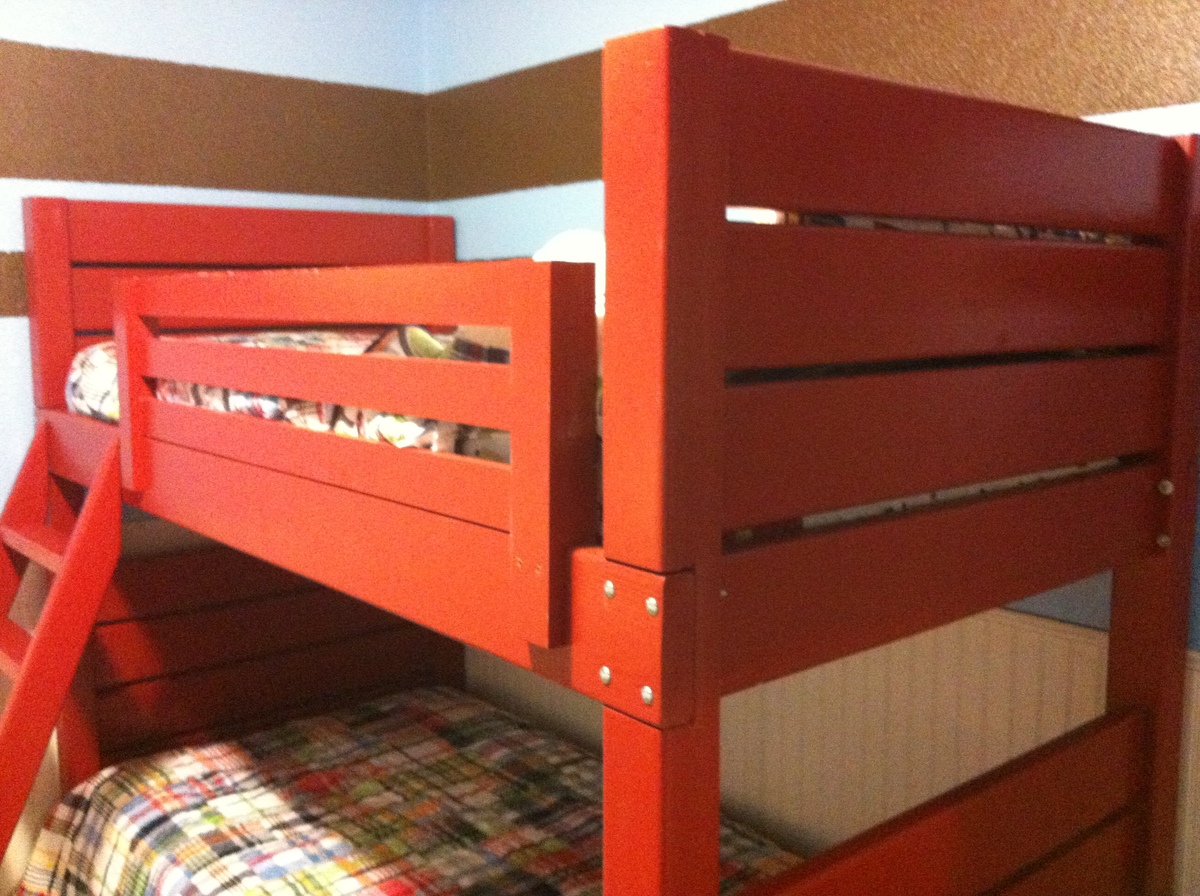
Side Street Bunk Beds
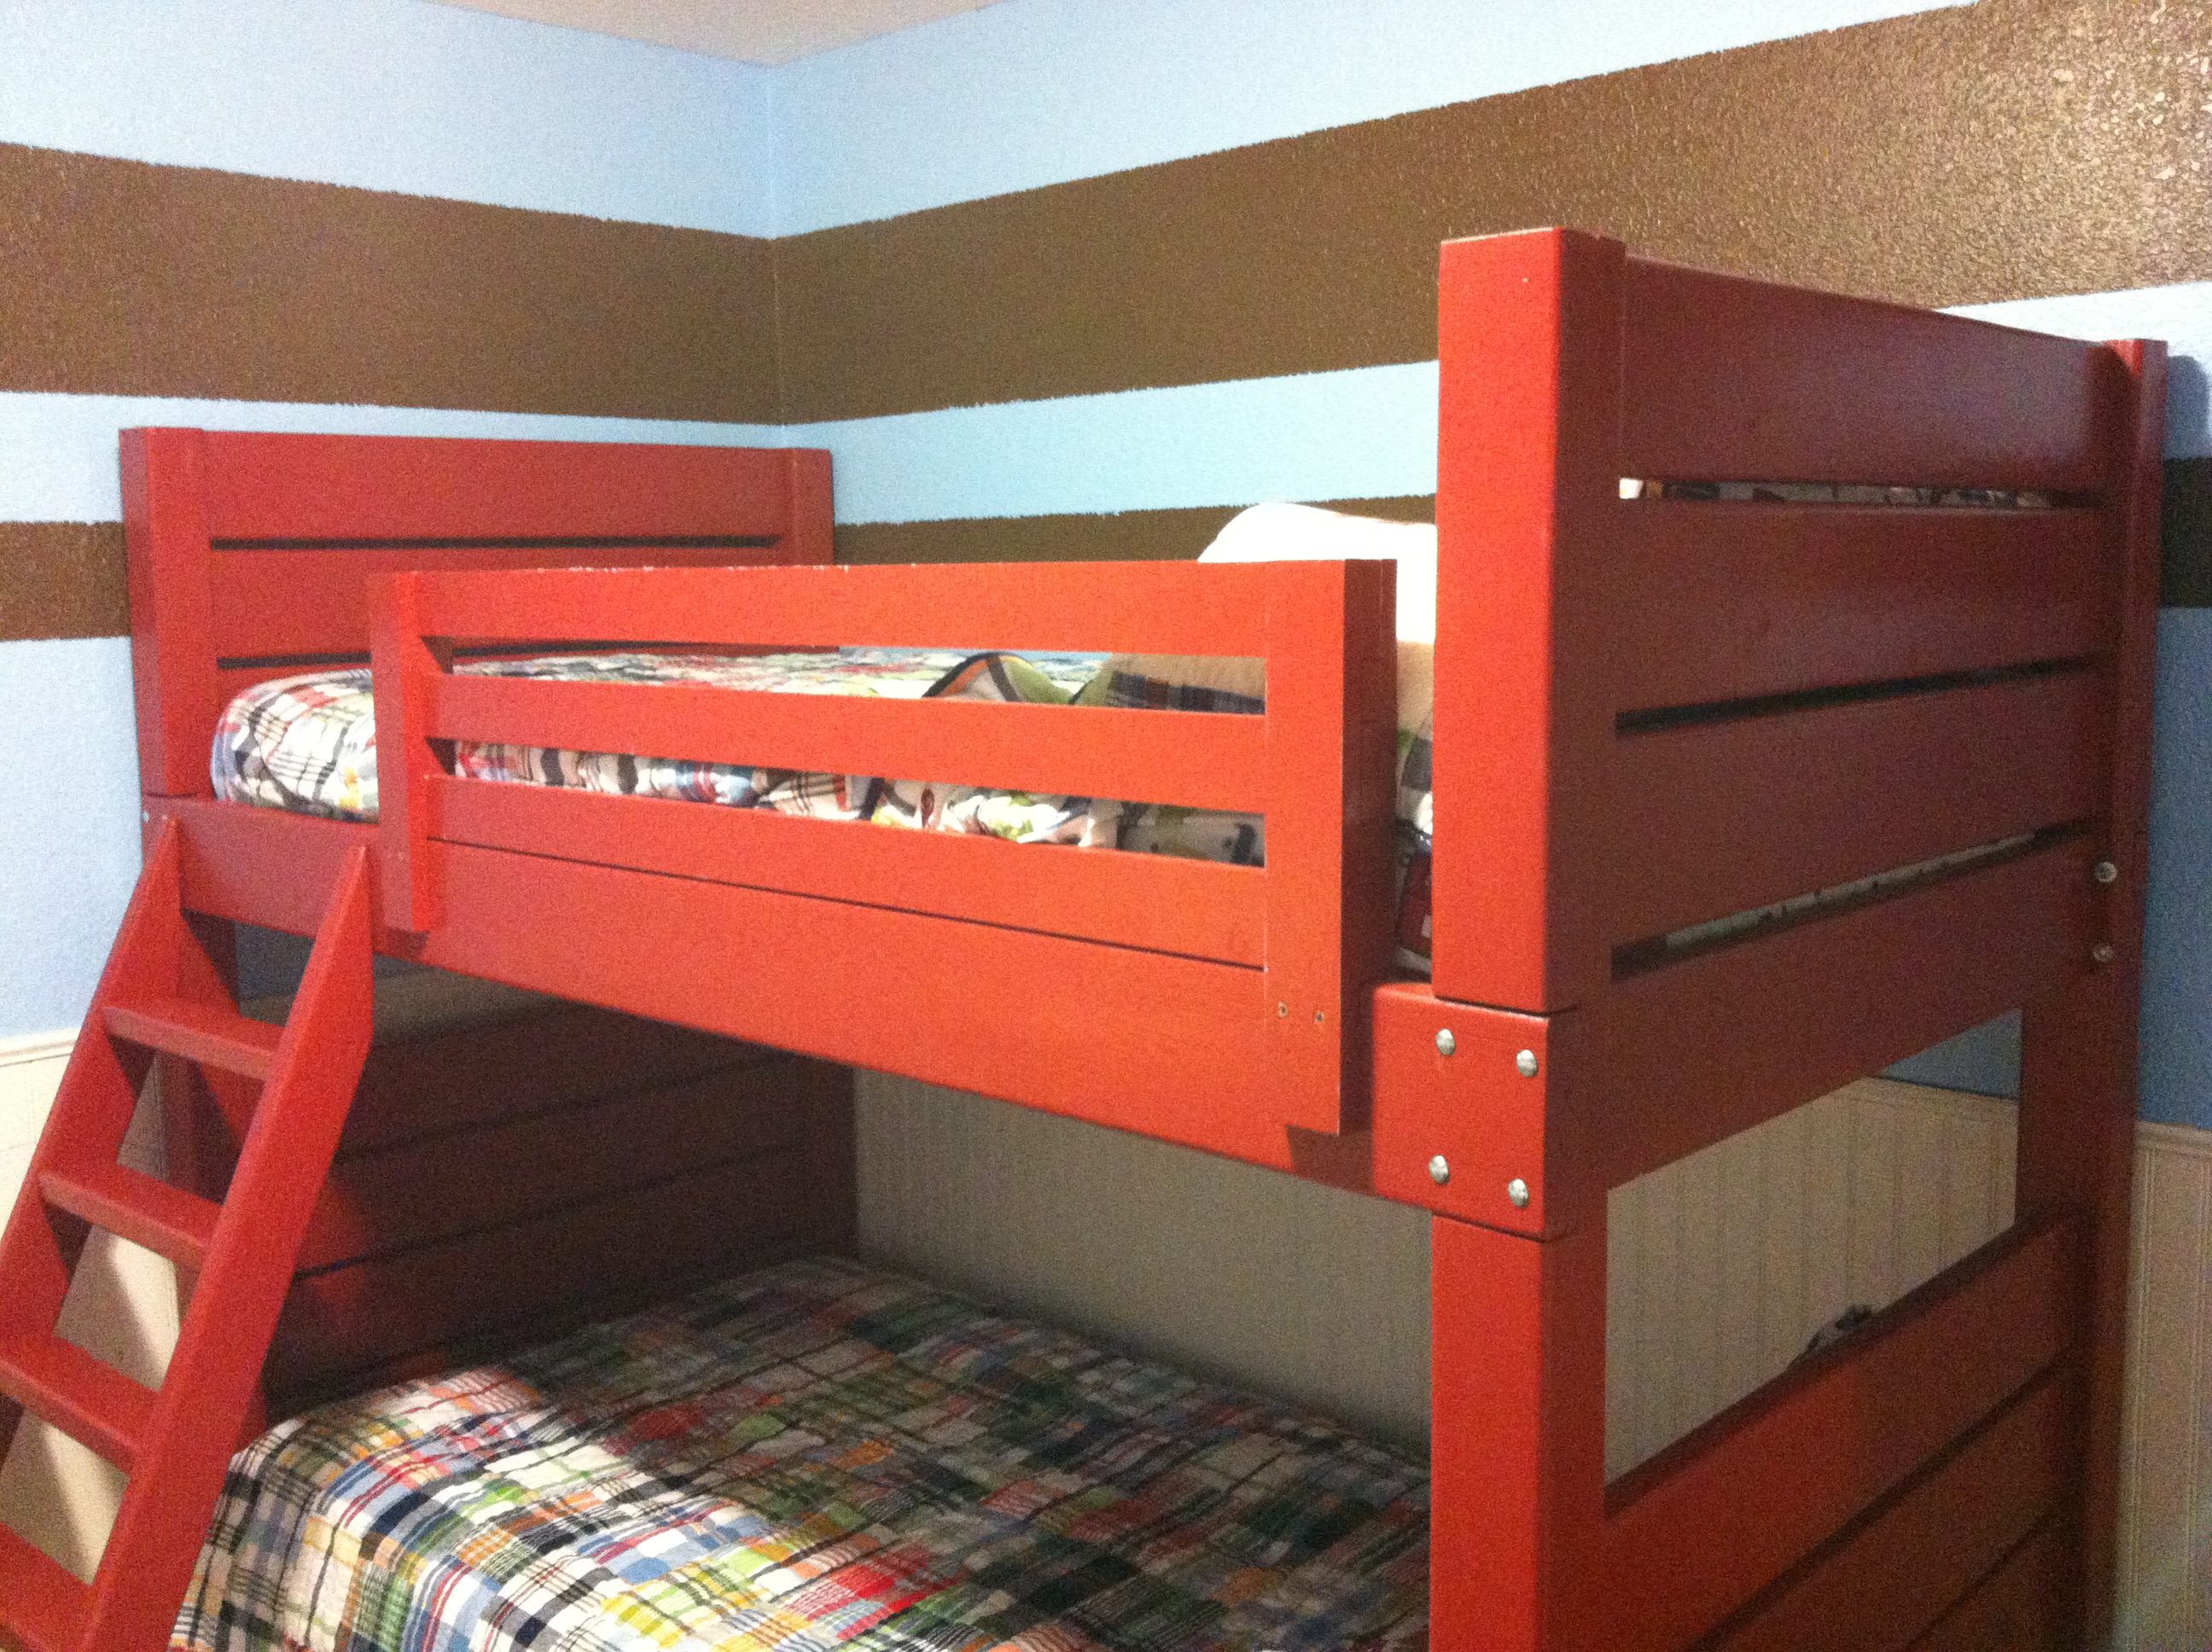
Our two oldest (both boys) had been needing bunk beds for some time. I came across the Side-Street Bunk Beds and LOVED the design; simple, easy, and most importantly, sturdy!
I used standard framing lumber from Home Depot and picked out the cleanest, straightest boards I could find. For safety (because boys will be boys...), I routed all of the edges of any part they could come in contact with using a 3/8" curved router bit. Along with tremendous amounts of sanding, that was the most labor-intensive part of the project. The Kreg Jig made short work of everything else, and eventually sprayed on the paint (I used Kelly-Moore brand paint, but the color is Behr Cinnabar Red).
Although I could have built the beds for cheaper (I spent upwards of $350+), I wanted to make sure the project didn't look like it was built out of framing lumber. A lot of sandpaper, wood-filler, and extra coats of paint could have been reduced, but at close look you can't even tell the main posts are laminated 2x4's.
For some reason, and I still have to find out, the paint still remained tacky long after drying, but that hasn't kept our boys from loving their new beds! Great design and a fantastic first project!!
Built from Plan(s)
Estimated Cost
$300 - $375
Estimated Time Investment
Week Long Project (20 Hours or More)
Finish Used
Behr Cinnabar Red with Zinsser tinted primer
Recommended Skill Level
Starter Project
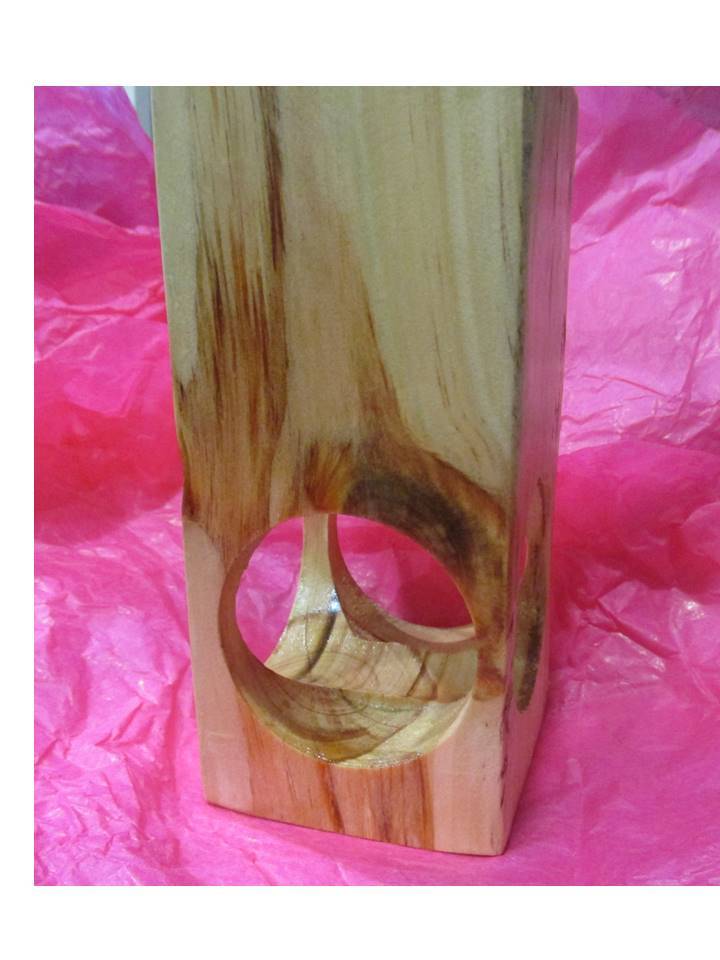
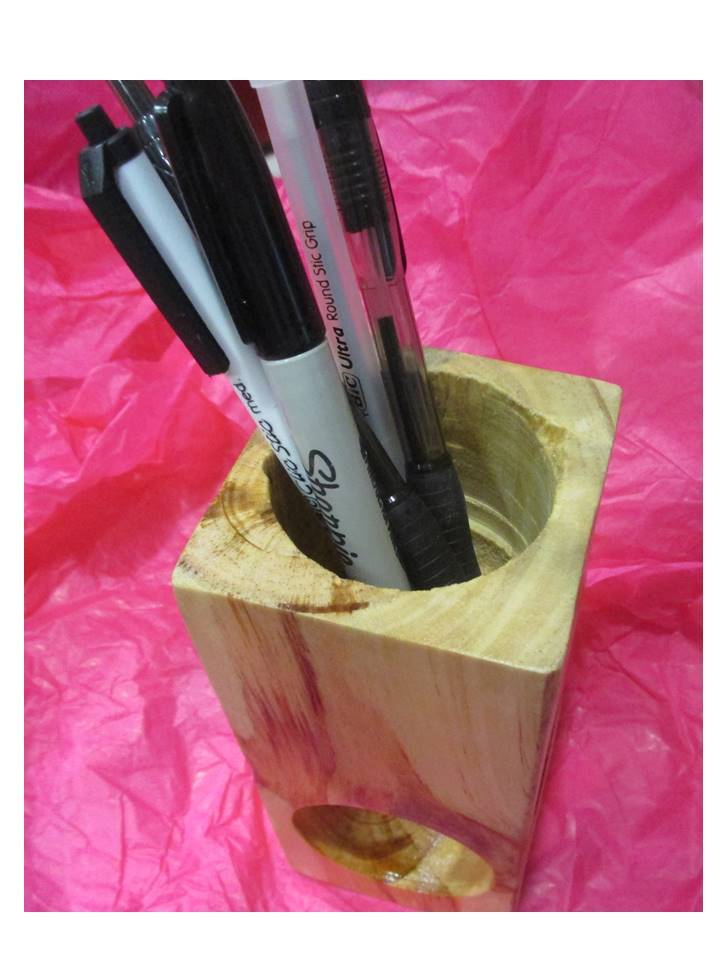
Super-Cool Pencil Holder

Isn't this the coolest pencil holder EVER?! Hubby made this from a landscape timber with the drill press. Love how you can see through the holes in the bottom!
He used a hole saw attachment on the drill press, after cutting the block of wood down with the miter saw. This one is the prototype, from scrap wood. I'm thinking this would be absolutely gorgeous in Cedar! This received a quick sanding and 2 coats of clear water based poly.
As soon as he teaches me how he did this, I'm going to post the plan for 'Dan's Super-Cool Pencil Holder!' Thanks Honey! :)
Estimated Cost
0
Estimated Time Investment
An Hour or Two (0-2 Hours)
Finish Used
sanded with fine grit sandpaper, 2 coats of clear poly, sanded between coats.
Recommended Skill Level
Beginner
Comments

Thu, 06/04/2015 - 10:46
Really cool! Now to find a
Really cool! Now to find a big thick hunk of wood...

Thu, 06/04/2015 - 15:10
Thank you!
Thanks! I'm looking forward to trying this on my own too. Hubby came up with another technique that I think will be easier for me - using a 2" forstner bit and a regular drill. Hopefully I'll get to experiment with that this weekend, and I'll be sure to post process pictures. :)
Outdoor Sofa Finished!
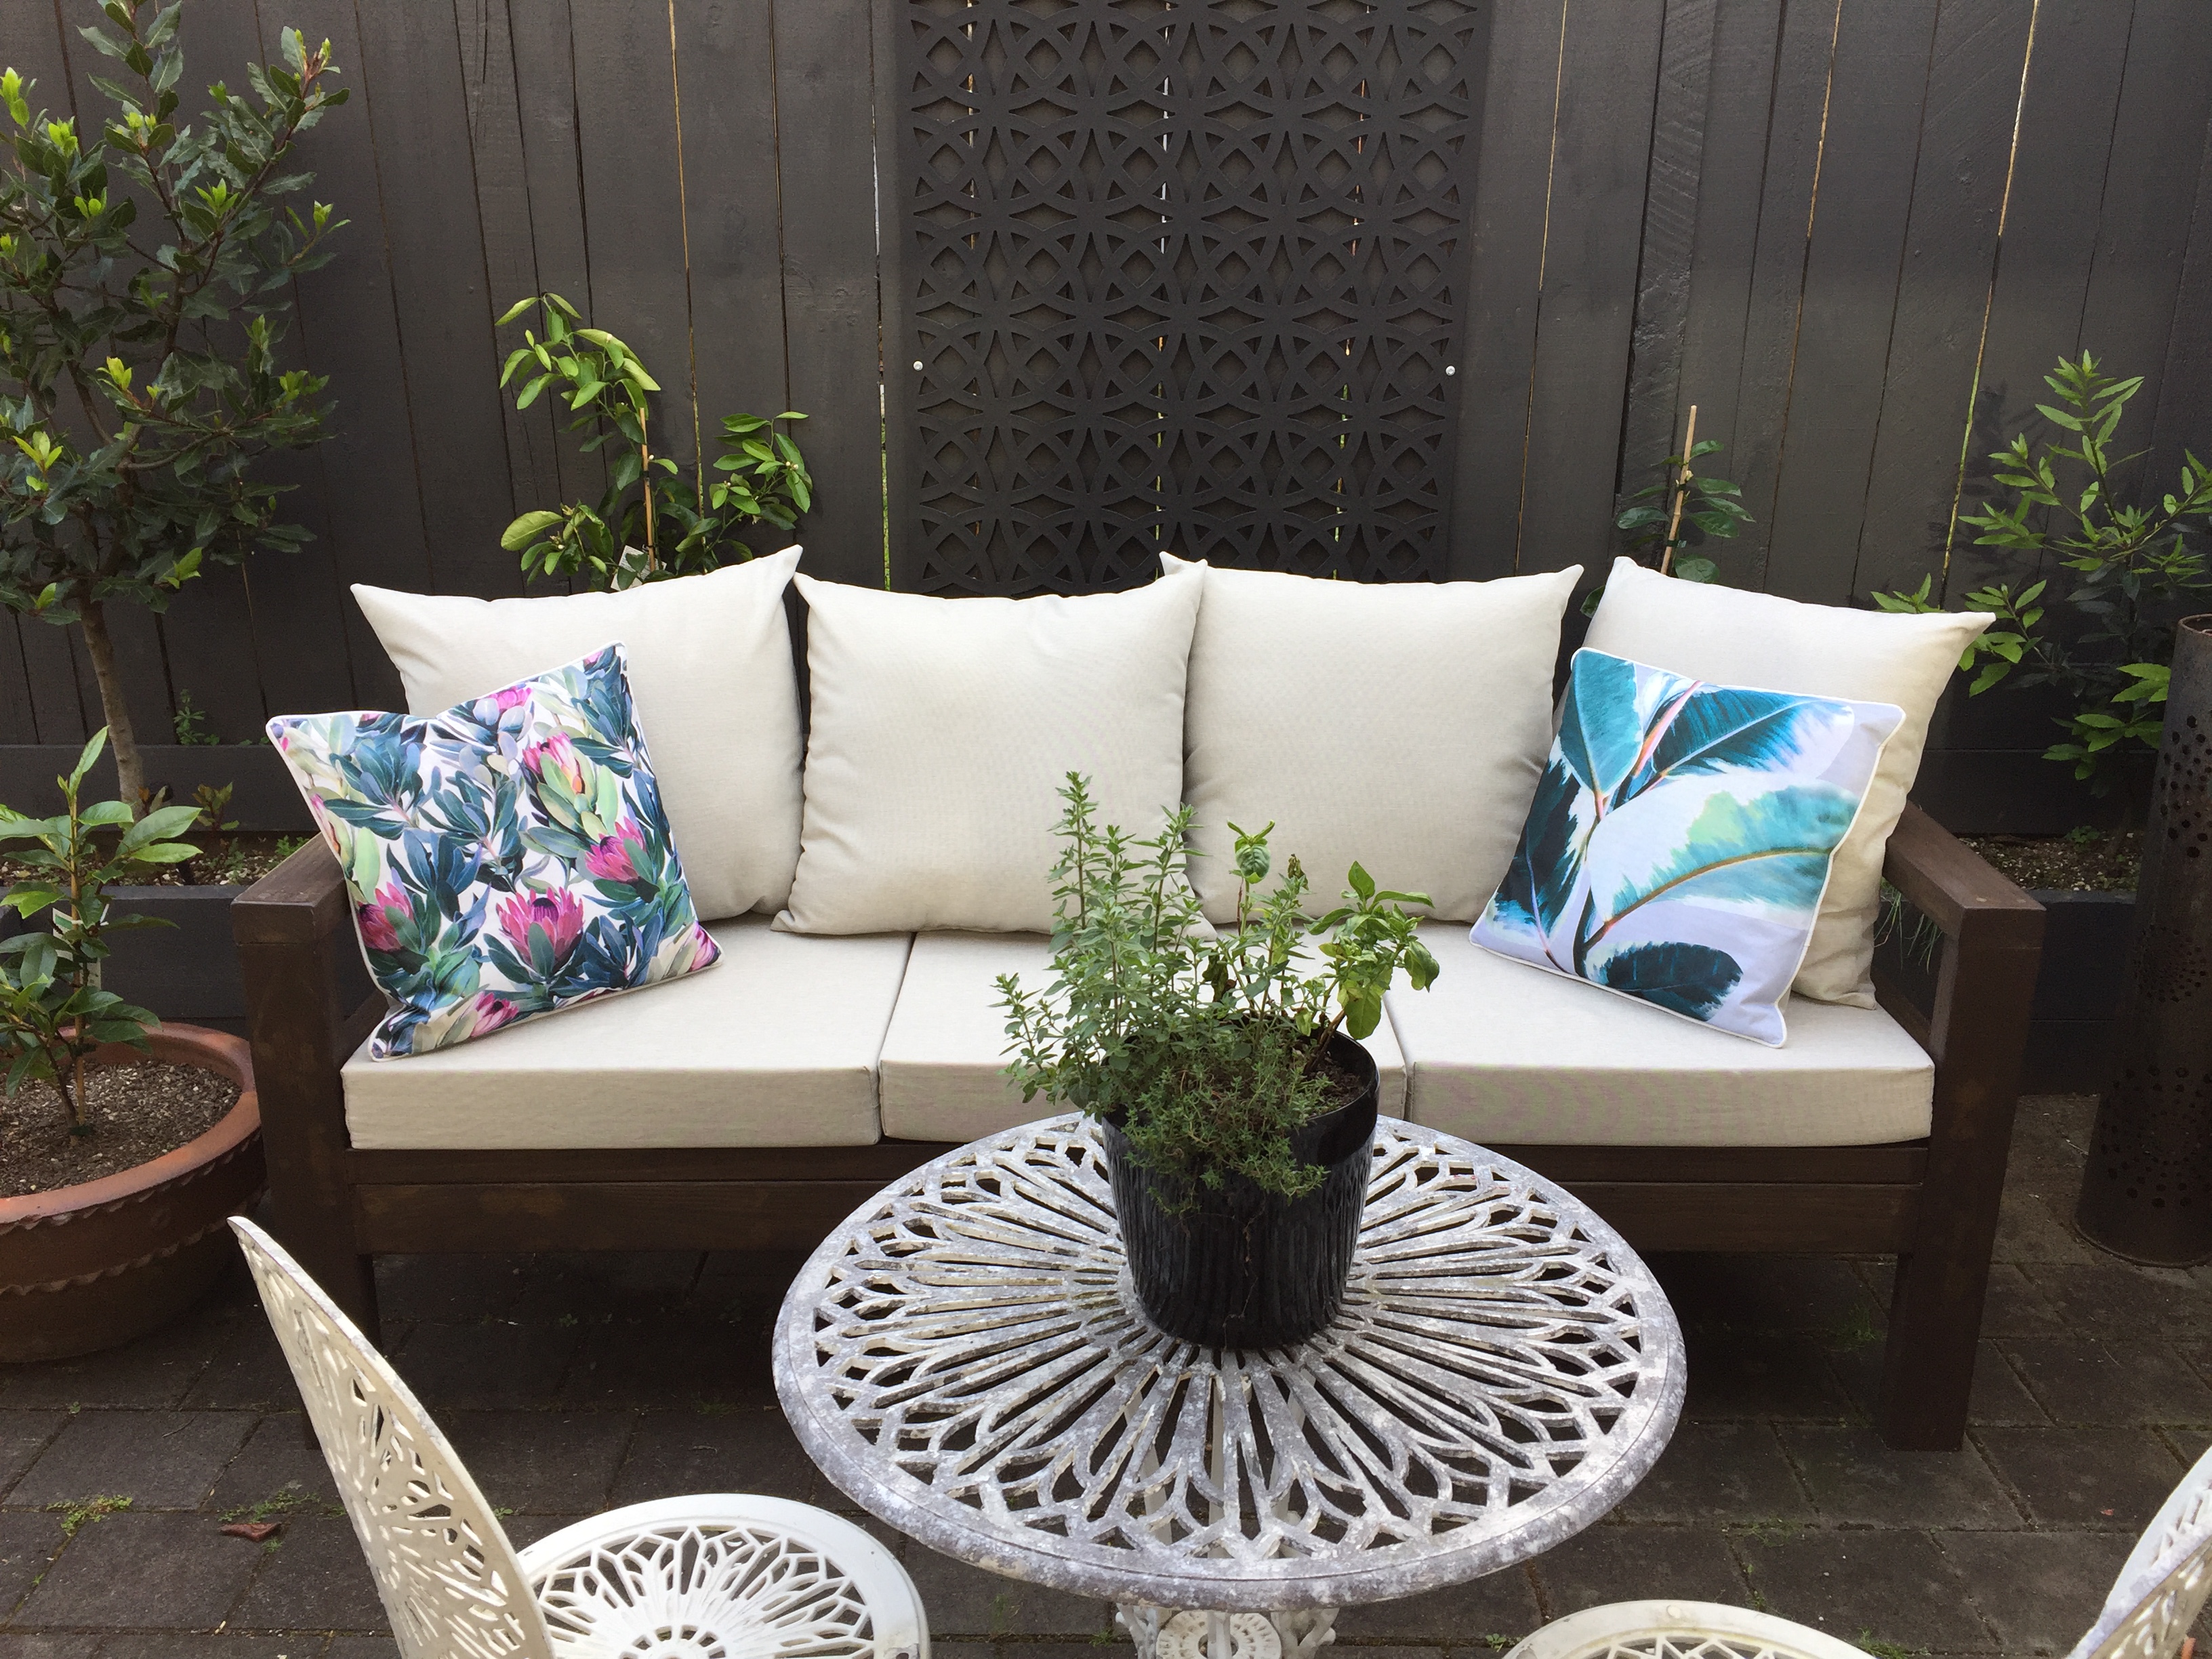
My first furniture building project!
Built from Plan(s)
Estimated Cost
$800NZ (including cushions)
Estimated Time Investment
Weekend Project (10-20 Hours)
Finish Used
Stain
Recommended Skill Level
Starter Project
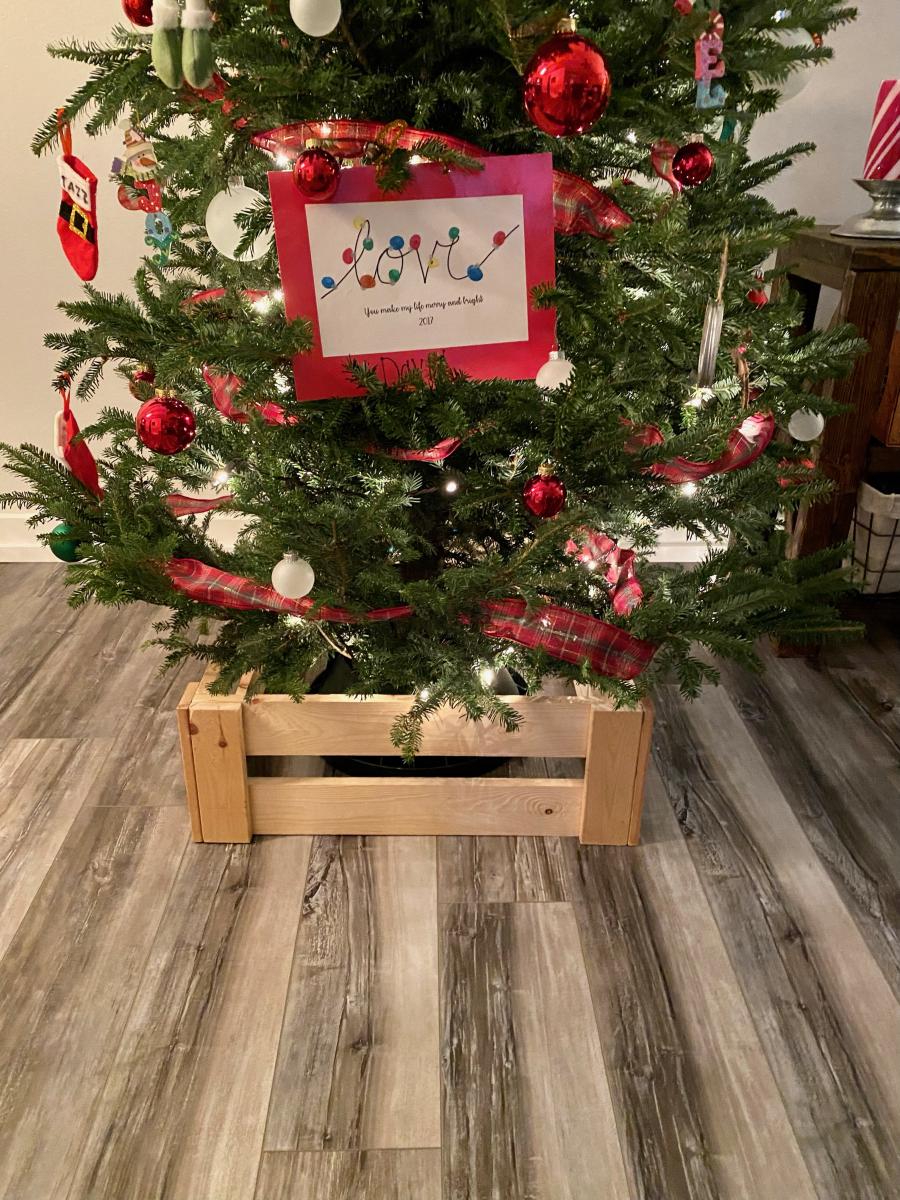
Christmas Tree Crate
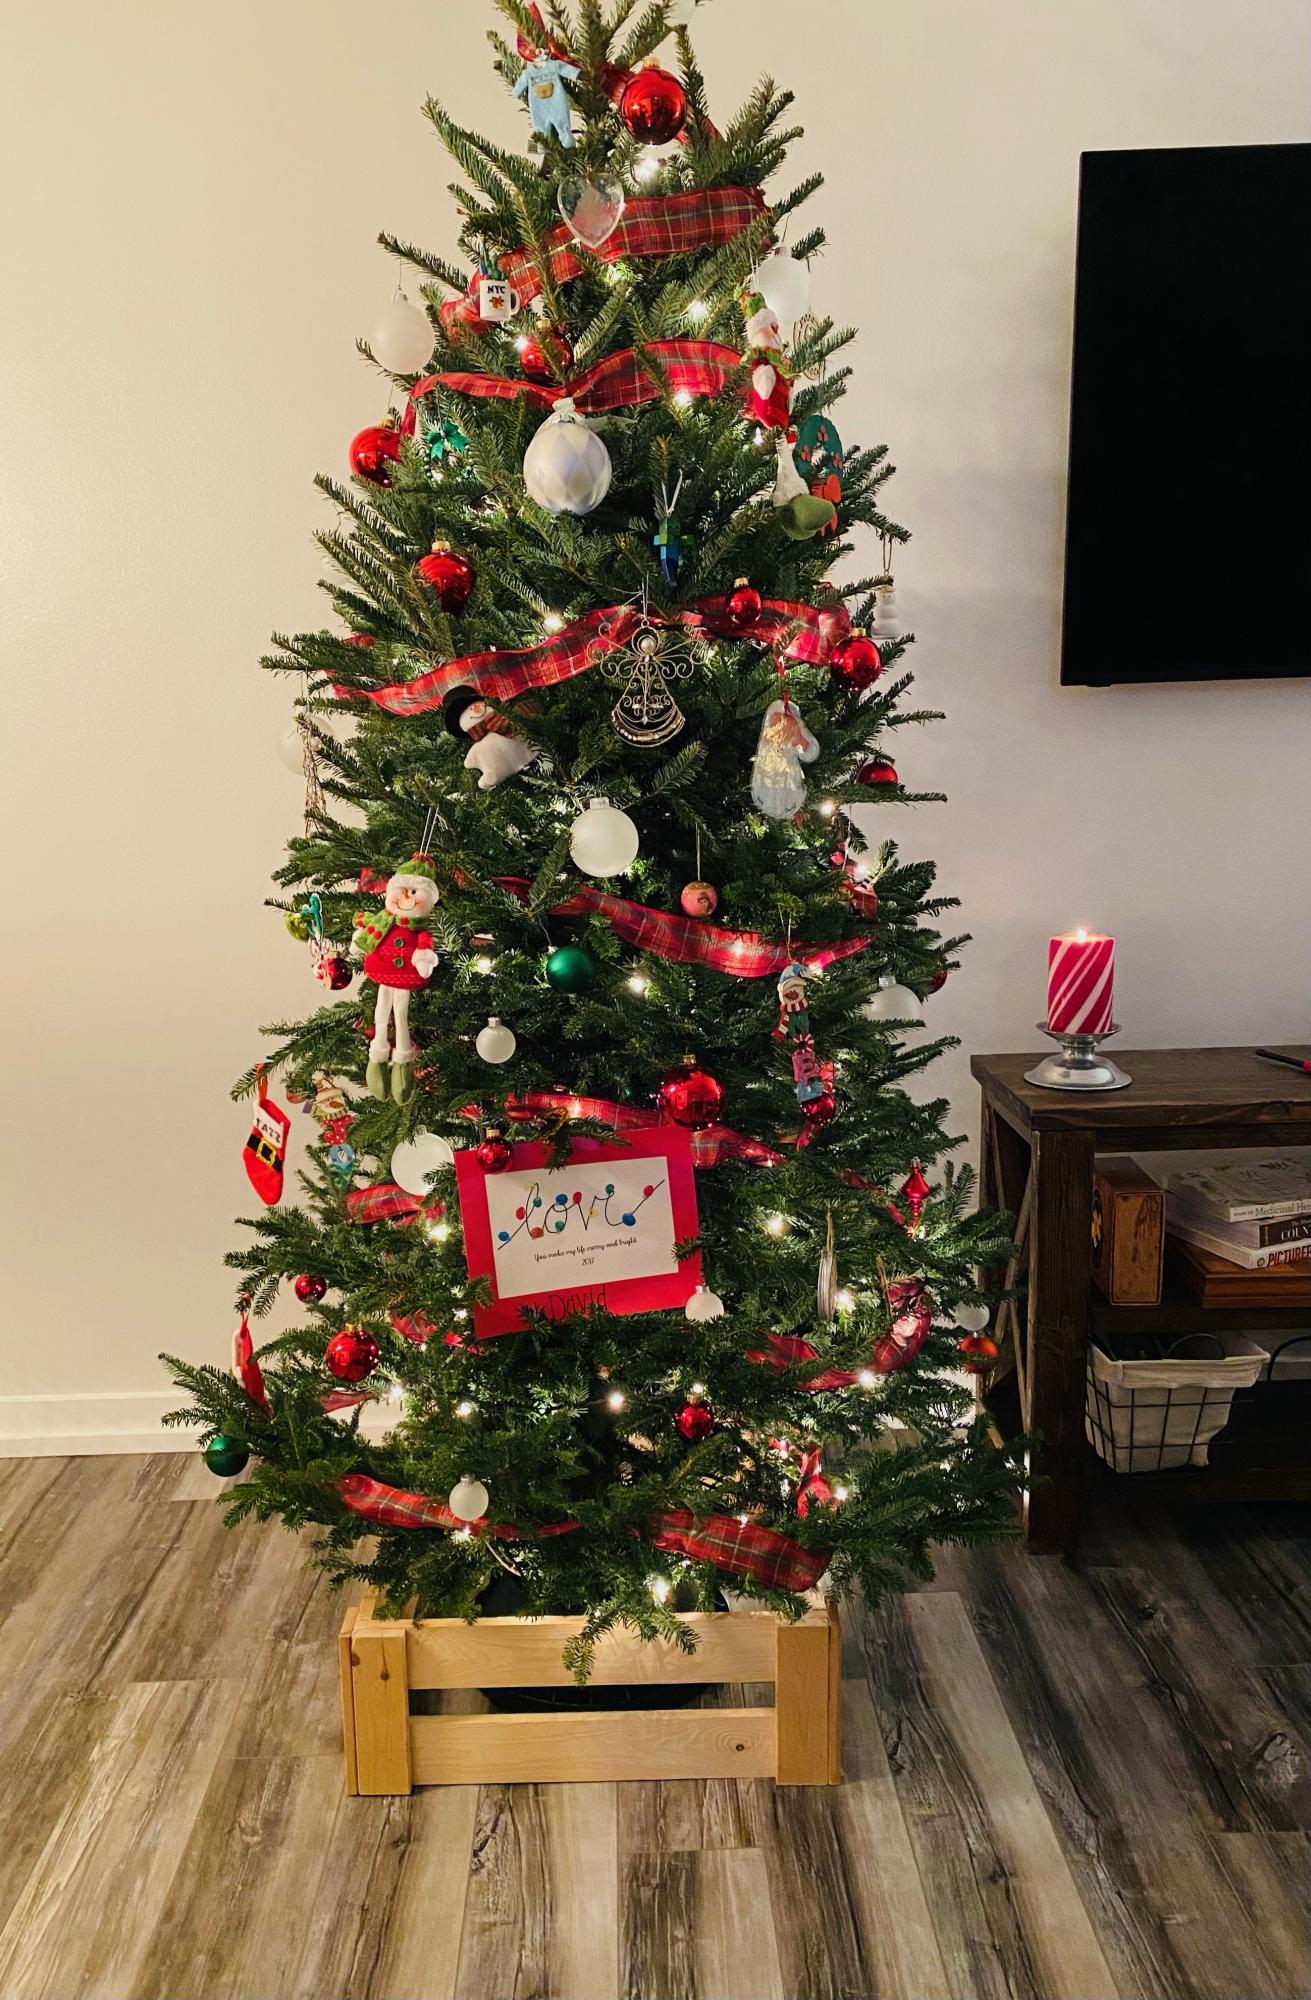
Ana, thanks for sharing this project.
I saw this crate and I decided to build it this year.
I changed it up a bit to accommodate my tree size. Mine measures 24".
I left it natural wood color, I think it brings up rustic look that I was going for. :)
It is very easy to build and it looks fantastic!
Thanks,
Merry Christmas!
Built from Plan(s)
Comments
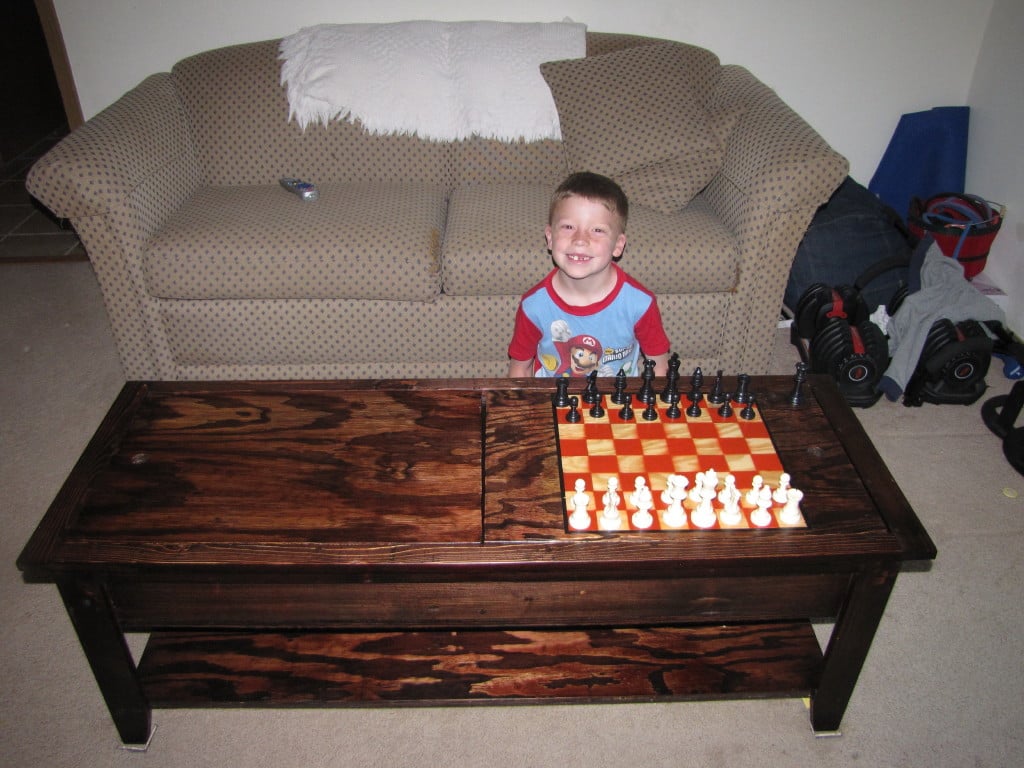
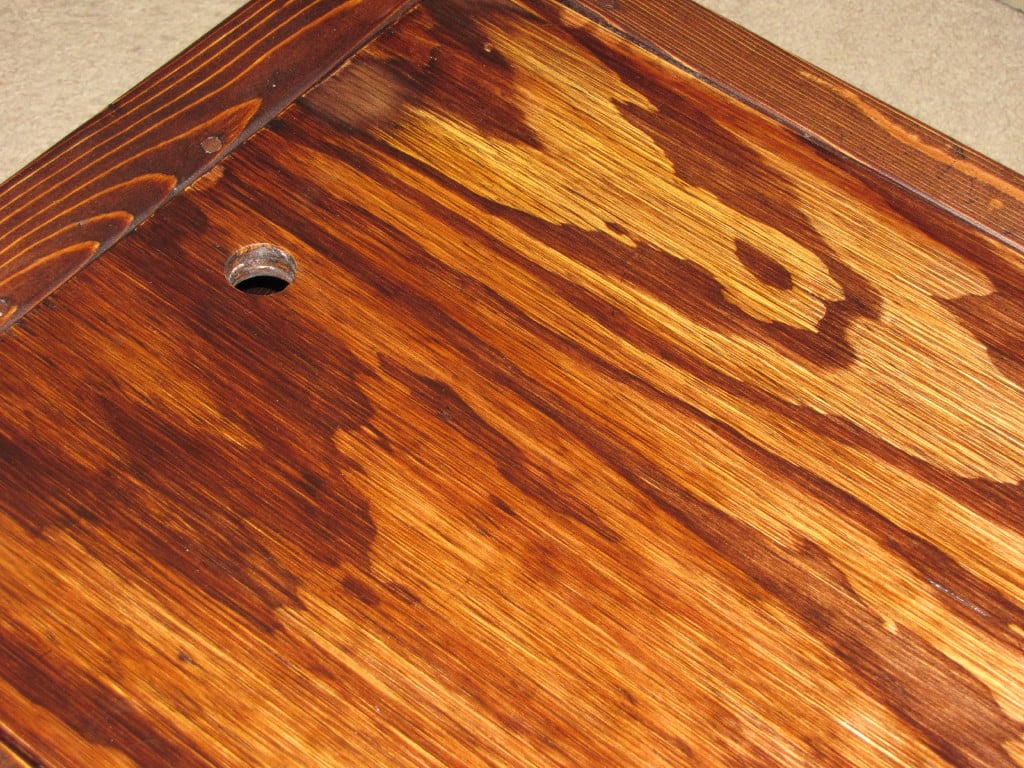
Mom's Lego Table (with chess board)
This is the Mom's Lego Table everything went according to plan until, I cut and tried to place the table tops in ... Ooops. Was not square, with the help of my father-in-law we got them to fit. So, as Ana says ..CHECK FOR SQUARE!!! The other part that took awhile was the chess board but was worth it my son loves chess!
Built from Plan(s)
Estimated Cost
$50.00 (had extra wood.)
Finish Used
Minwax Red Mahogany stain and Clear Satin Rub on poly.
Recommended Skill Level
Beginner

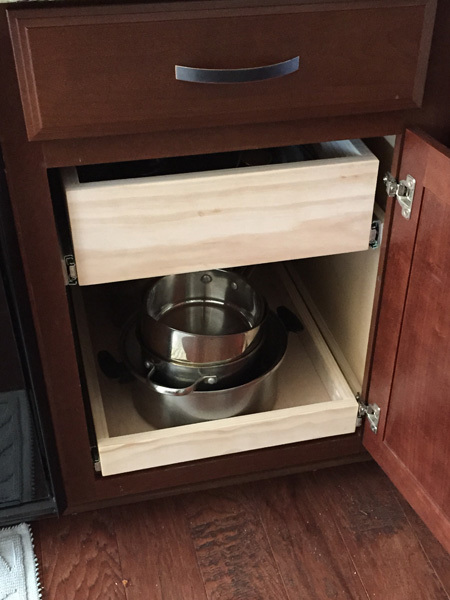
Kitchen Cupboard Pull Out Drawers

Made four pull out drawers with full extension soft close drawer slides.
Two shallow ones to store large items in and two deep ones to help hold pan lids and frying pans.
I used select pine for the sides and routed a slot for a 1/4 inch plywood base.
I put the pocket holes on the inside so less visible.


Estimated Cost
$30 to $40 per drawer (slides alone cost $19)
Estimated Time Investment
Weekend Project (10-20 Hours)
Finish Used
Matte poly
Recommended Skill Level
Beginner
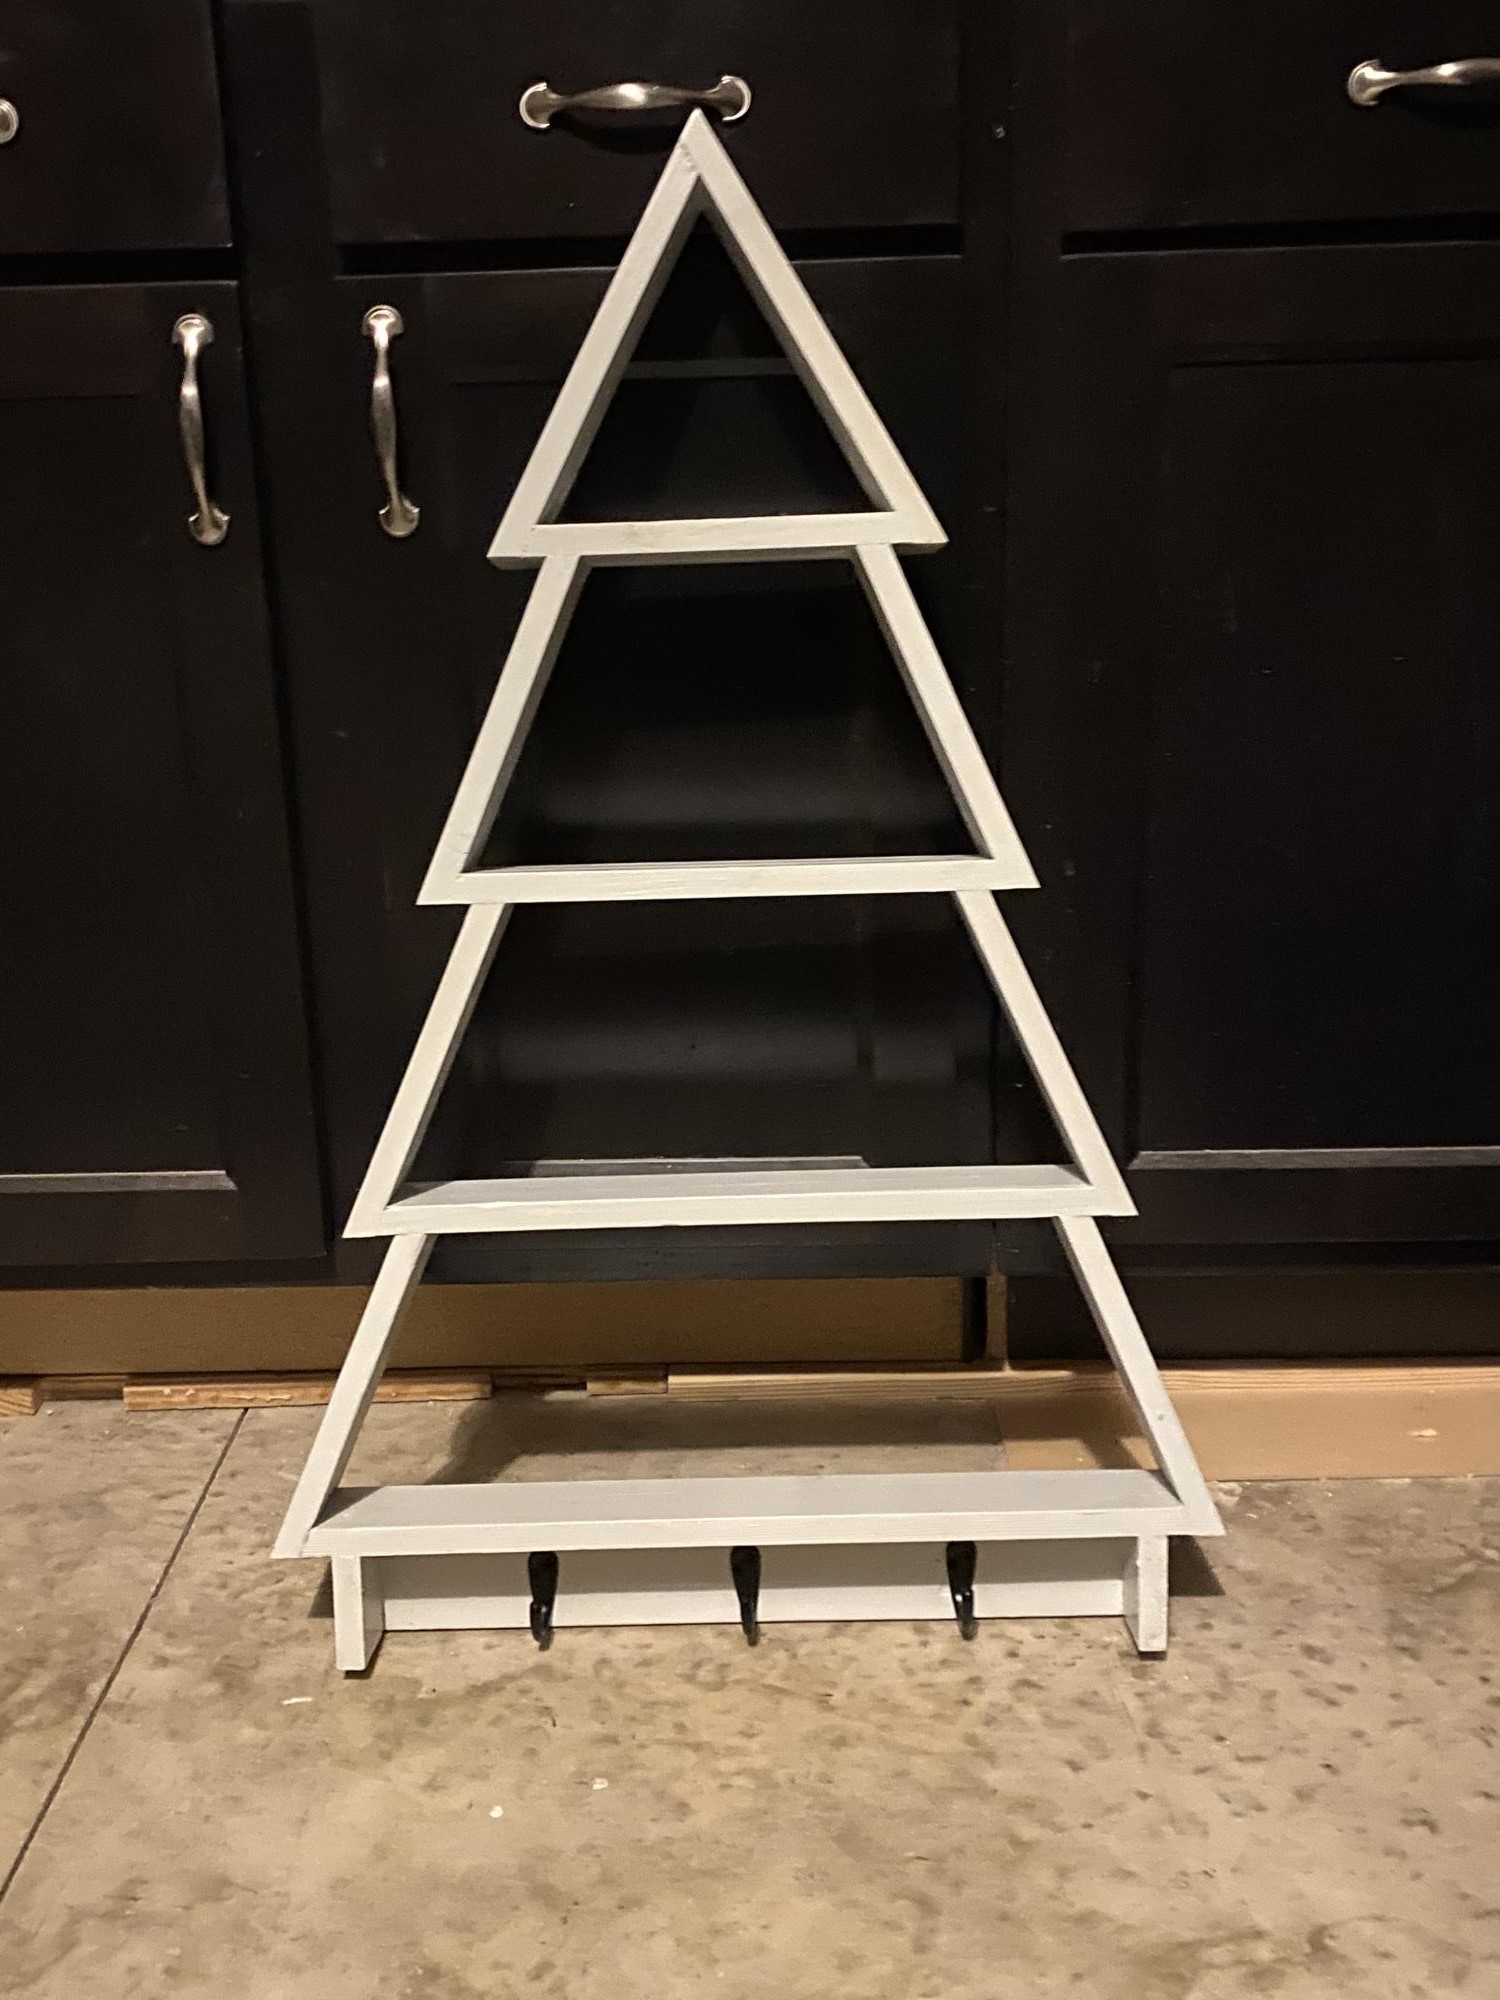
Tree Wall Shelf with lights
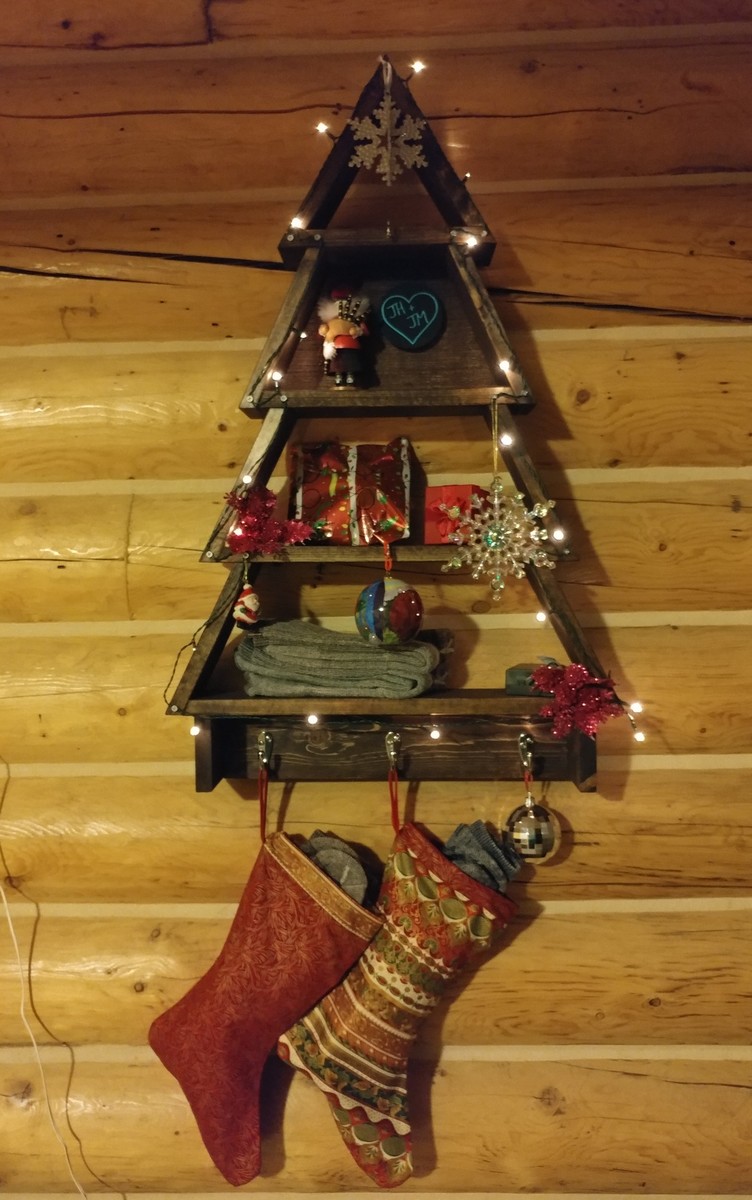
Quick, easy and inexpensive build... I opted not to do the rounded corners at the base of the tree as I was in a hurry.
Built from Plan(s)
Estimated Cost
$25
Estimated Time Investment
An Hour or Two (0-2 Hours)
Finish Used
Minwax espresso
Recommended Skill Level
Beginner
Rustic Bathroom Vanity
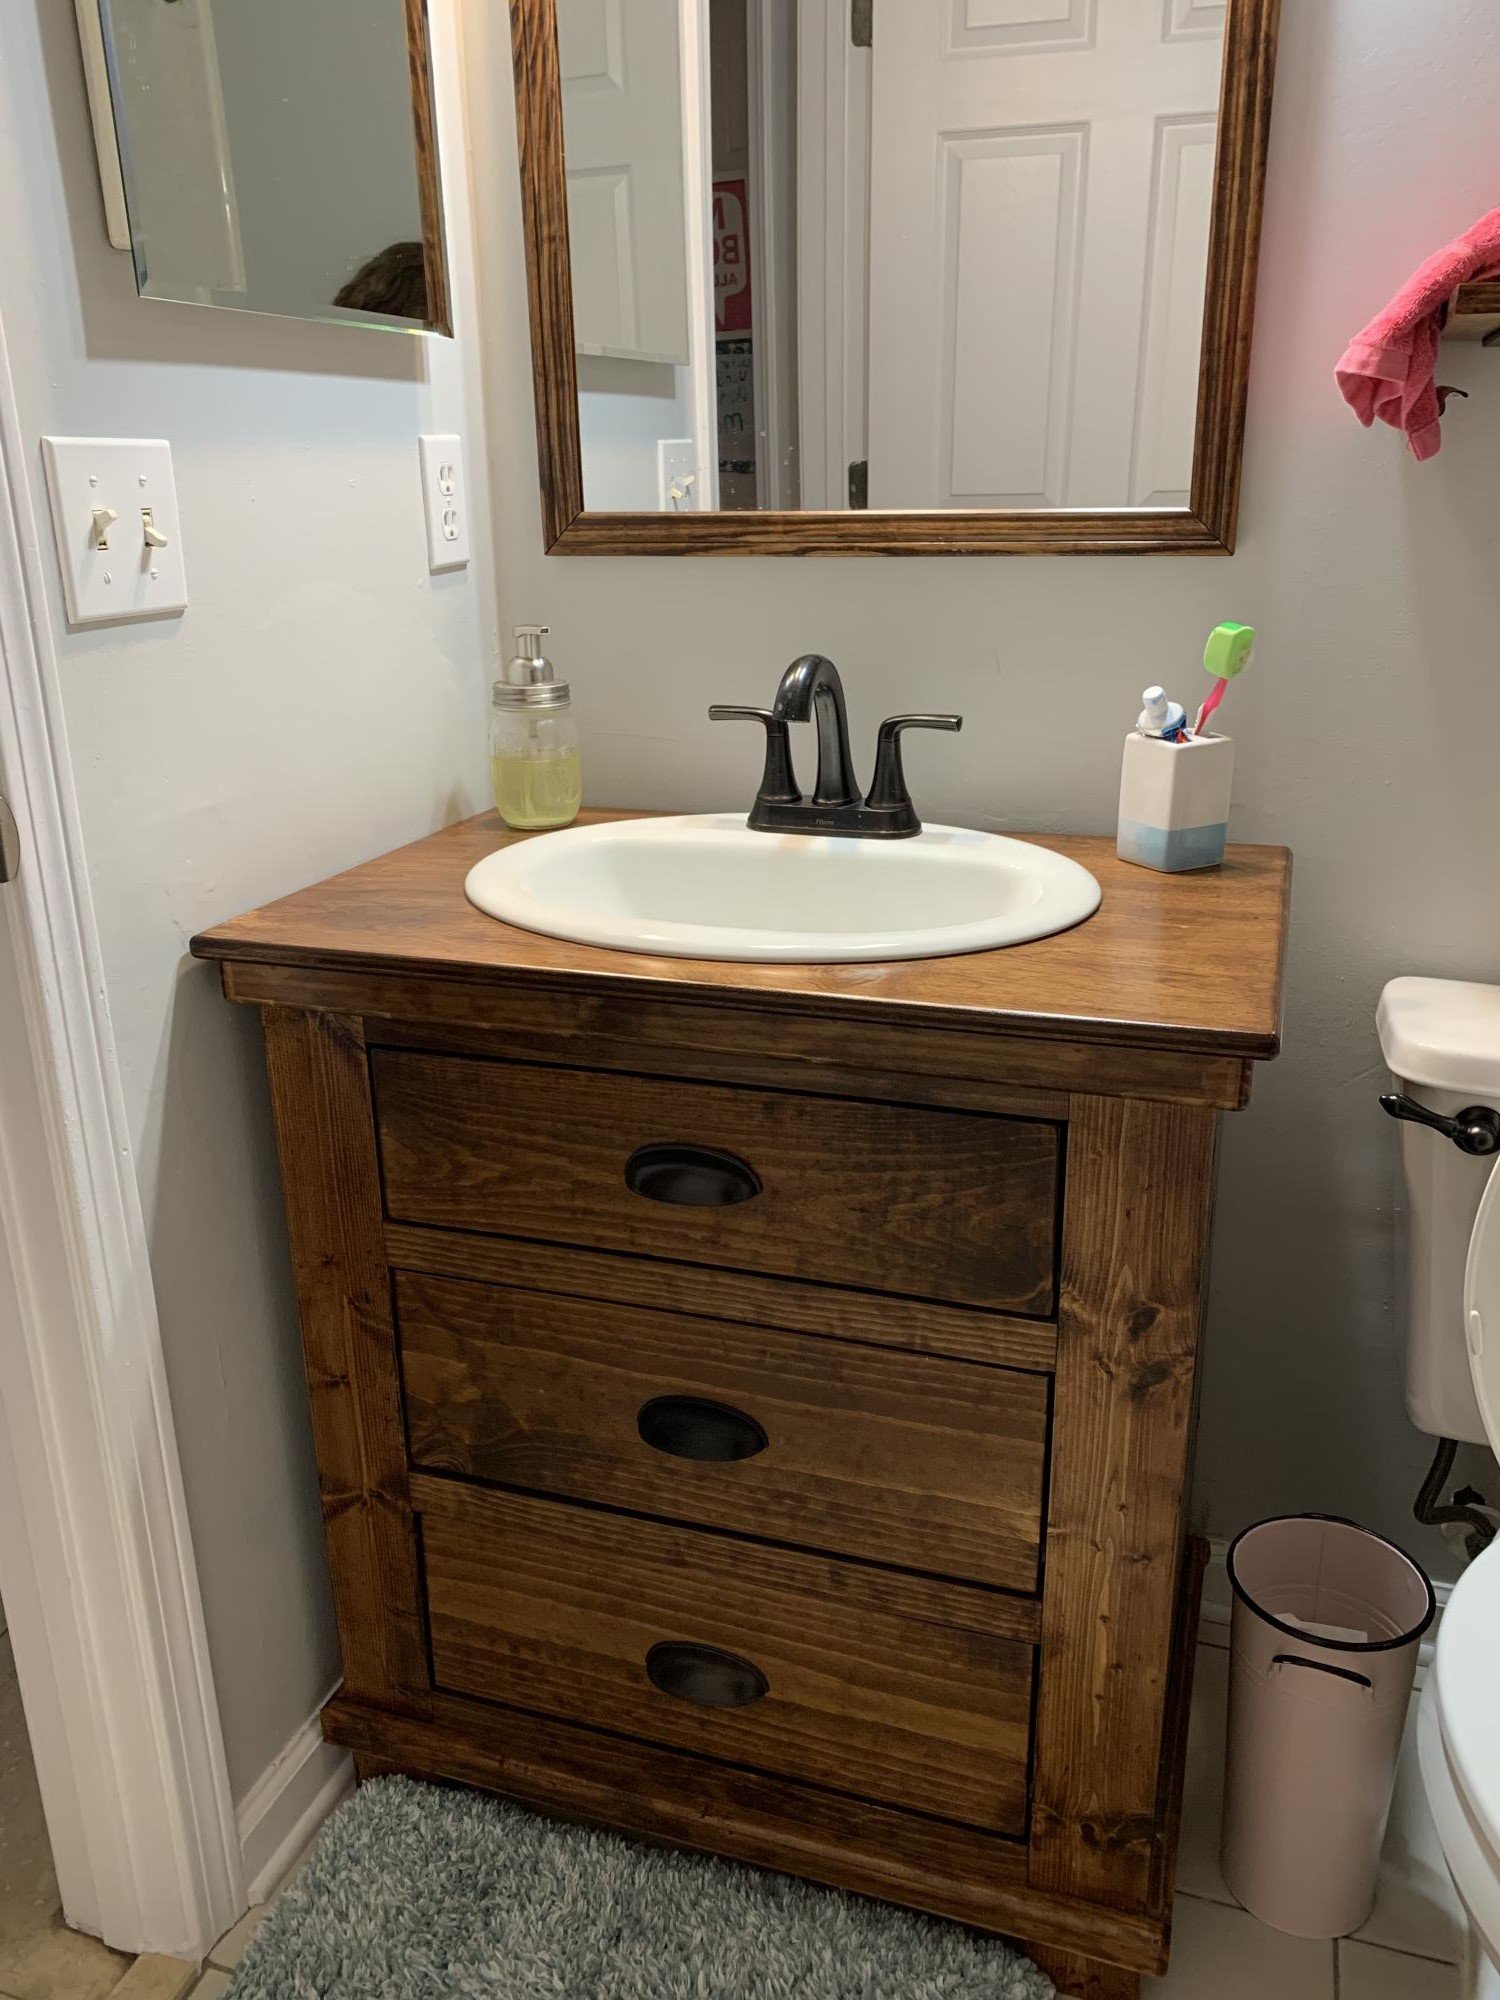
I built Ana Whites Bathroom vanity with drawers. I love how easy the plans are to follow and even adjust. I tweaked the measurements to fit the space I had. After supplies, I spent a bit less than a store bough vanity, and it is solid wood rather than the cheap materials the less expensive store bought one. It turned out beautiful! I also built the mirror frame and the shelves to match. Thank you, Ana, for your amazing website, plans, videos, and confidence to tackle the projects myself. My daughter chose the mahogany stain because she loved the way it sounds..."It's Mahogany!"
Built from Plan(s)
Comments
Thu, 12/16/2021 - 13:44
Beautiful vanity build!
Way to go, love the finish and the matching mirror! Thank you for sharing:)
First Project: Storage Bench
I finally got around to building the first project on my list. I needed more storage in my room so I built the storage bench from the plans. I did tweak it a little to make it a bit wider so that it will neatly match the width of my bed. I may get around to making a cushion for it but right now it serves as a nice tray to hold my wallet and other various sundries.
I had the guy at Lowe's cut the wood for me. Next time I'm borrowing a friend's saw, because the cuts were less than accurate.
Built from Plan(s)
Estimated Cost
30
Estimated Time Investment
An Hour or Two (0-2 Hours)
Finish Used
Minwax PolyShades [combo polyurethane and stain] in the Mission Oak color. I used two coats and rubbed it down with 00 steel wool between coats.
Recommended Skill Level
Beginner
Custom bunkbeds (FREE PLANS!)

I designed (in Sketchup) and built some bunk beds for my boys. They're made out of all common sized lumber, SUPER sturdy, and have no exposed nails or screws! The kids LOVE them and I'm really happy with how they turned out!
This portion of the build is just for 2 bunks, but the design allows for a third, lofted bunk to be added (I'll build that next year)
I've got the full step-by-step build at
http://www.iliketomakestuff.com/iltms-project-bunk-beds-part-1/
http://www.iliketomakestuff.com/iltms-project-bunk-beds-part-2/
Estimated Cost
$170
Estimated Time Investment
Weekend Project (10-20 Hours)
Finish Used
Black paint
Recommended Skill Level
Intermediate

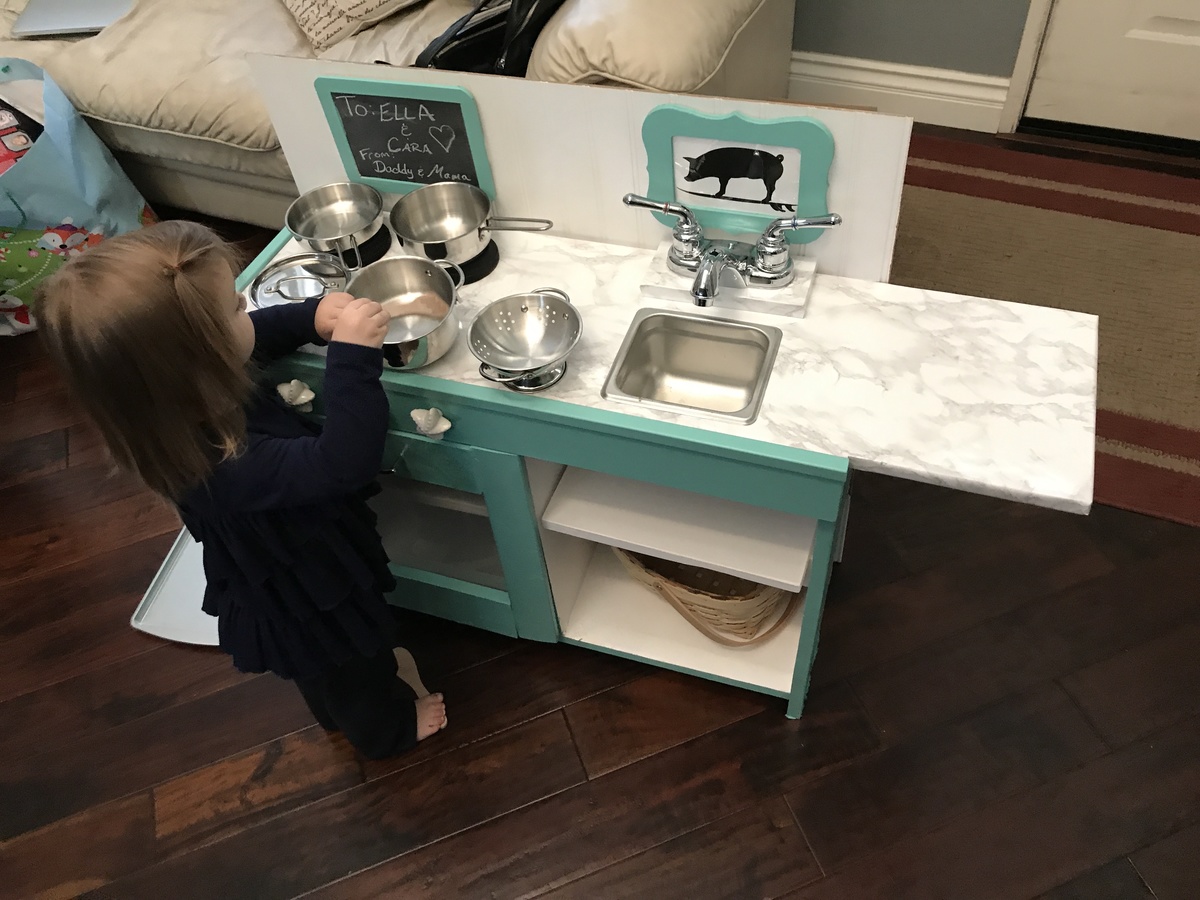
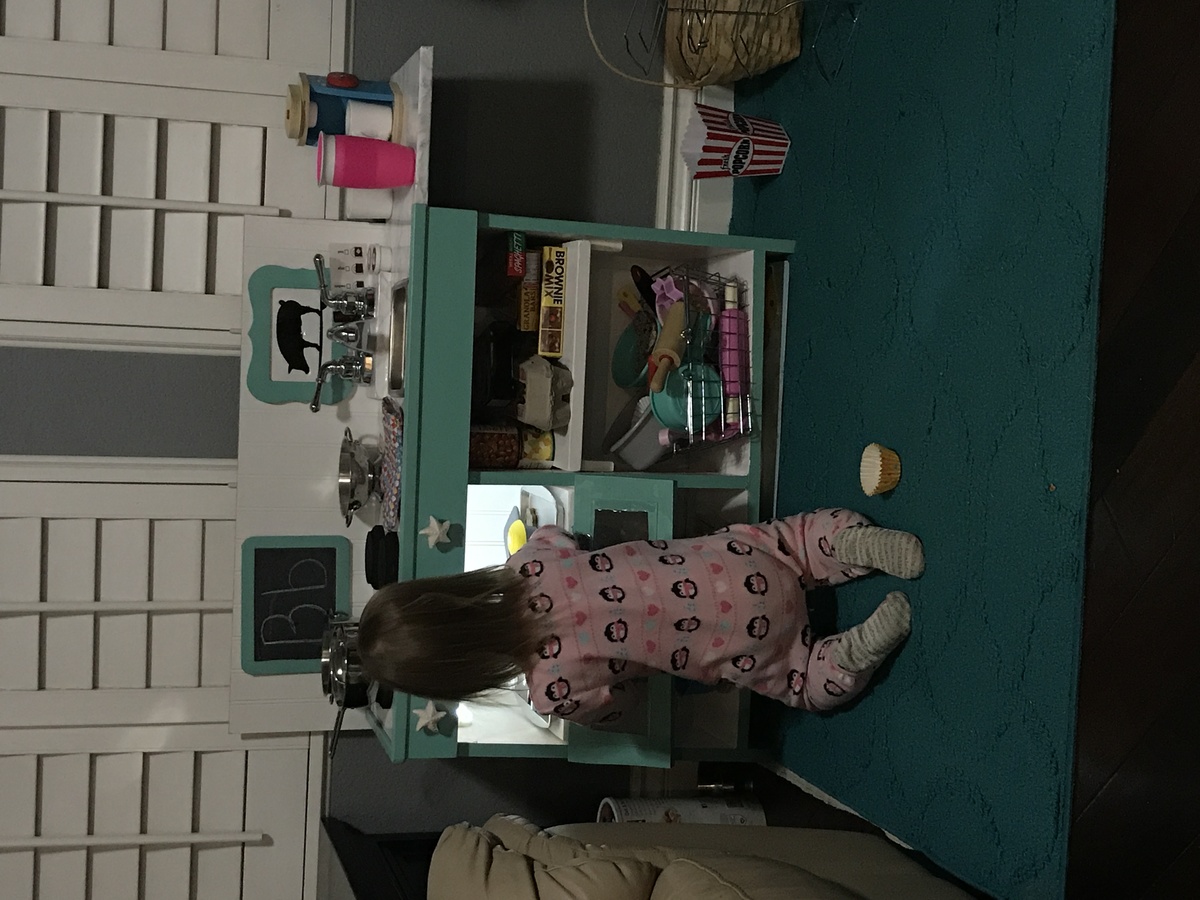
Play kitchen
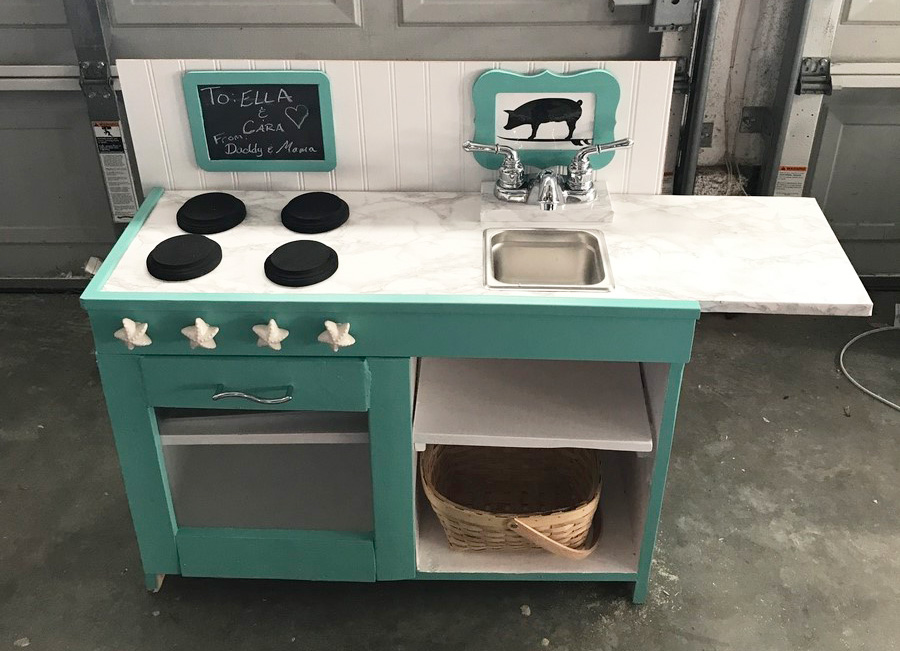
This was my first major build and while not perfect and I was little clunky building along the way, I’m happy with how it turned out and I think the girls will love it for Christmas. We are beach dwellers and surfers, but I’m also a former (always) a farm girl as well, so we put a surfing pig on it too. I wanted to keep it whimsical a bit so put starfish knobs for the burners. Took me a long time and more money than average probably because of learning curve as well as having to sneak work on it between working, toddler and infant. I got a Kreg and more tools for Christmas, so I am looking forward to more building!
update: My little destroyer broke the door within 10 minutes because it was too big for her to work around. So I “remodeled” it and made the door just the top half so that is her oven. MUCH BETTER. Now she can use it far easier and it isn’t dropping to the floor.
Built from Plan(s)
Estimated Cost
for actual used materials, somewhere around 125
Estimated Time Investment
Weekend Project (10-20 Hours)
Finish Used
Paint and contact paper
Recommended Skill Level
Beginner
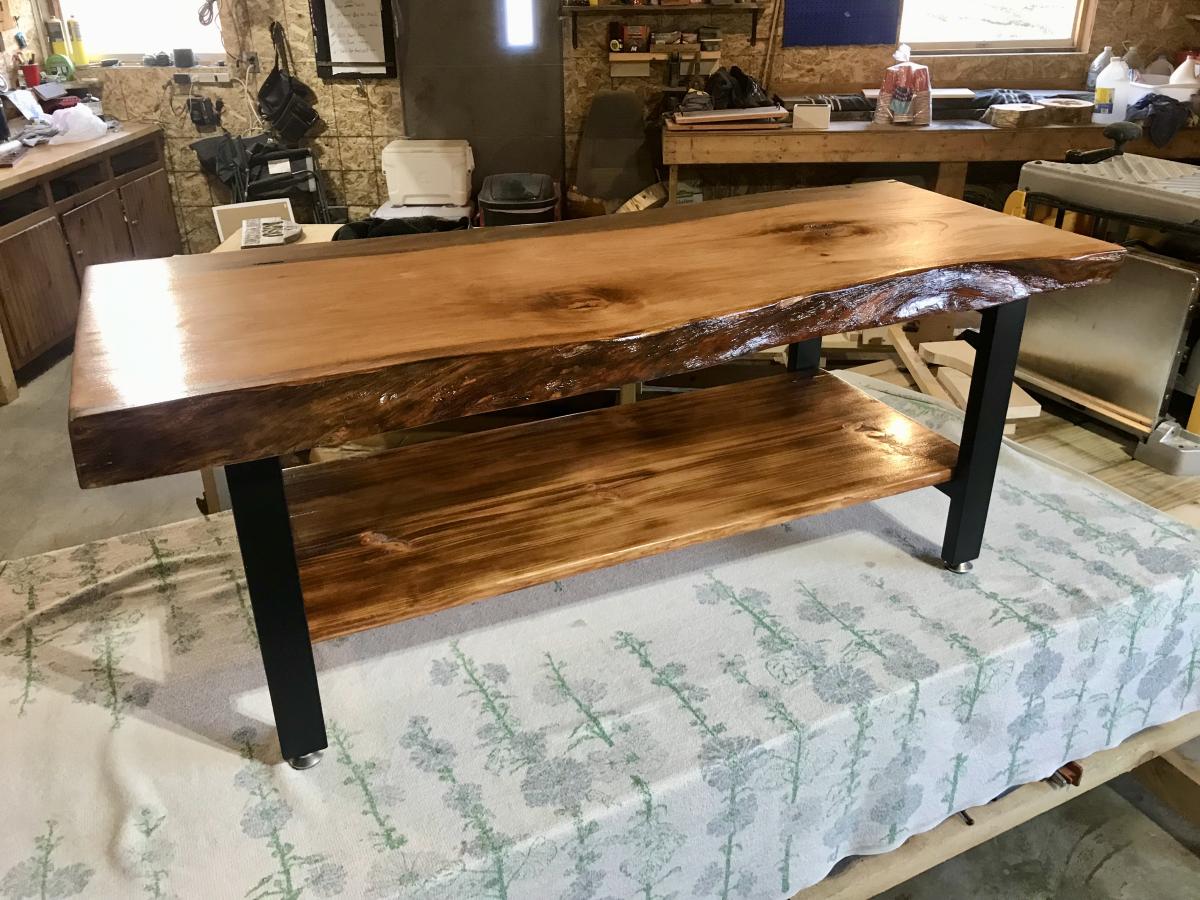
Live-Edge Coffee Table
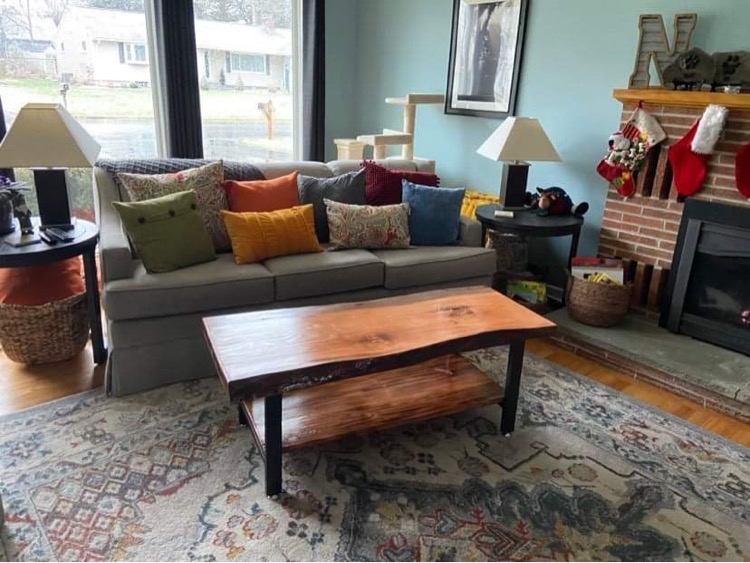
This is a special order for a life-long friend. This beautiful coffee table features a live-edge pine slab with metal legs and a removable lower shelf. The finish has a light burn and pecan stain and finish. It fits in nicely in its new home and compliments the other side table with metal legs. Love having my creations in the homes of friends and family!
Comments
Tue, 12/21/2021 - 12:53
Beautiful!
OOOH YES! Love the live edge and industrial modern feel, very raw and beautiful!
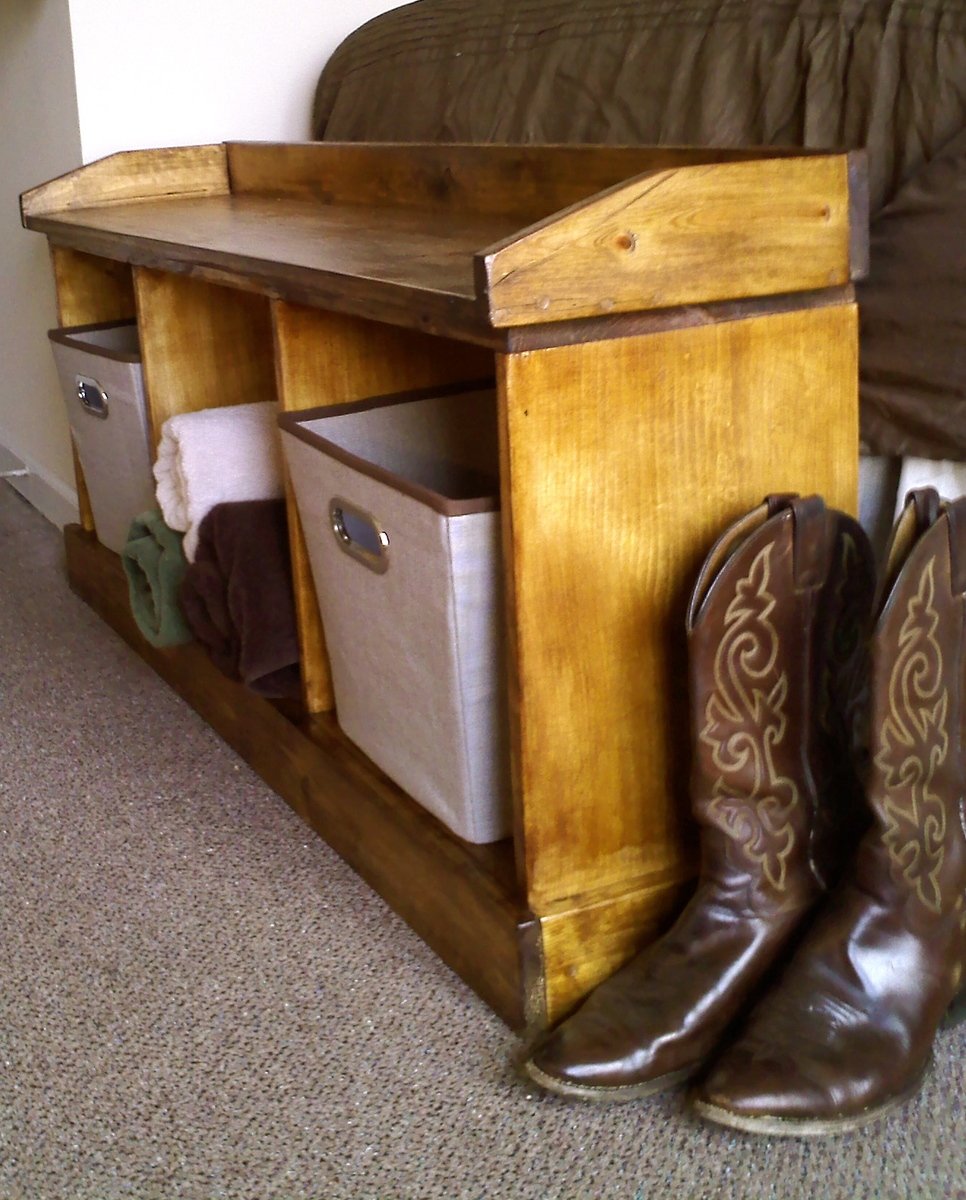
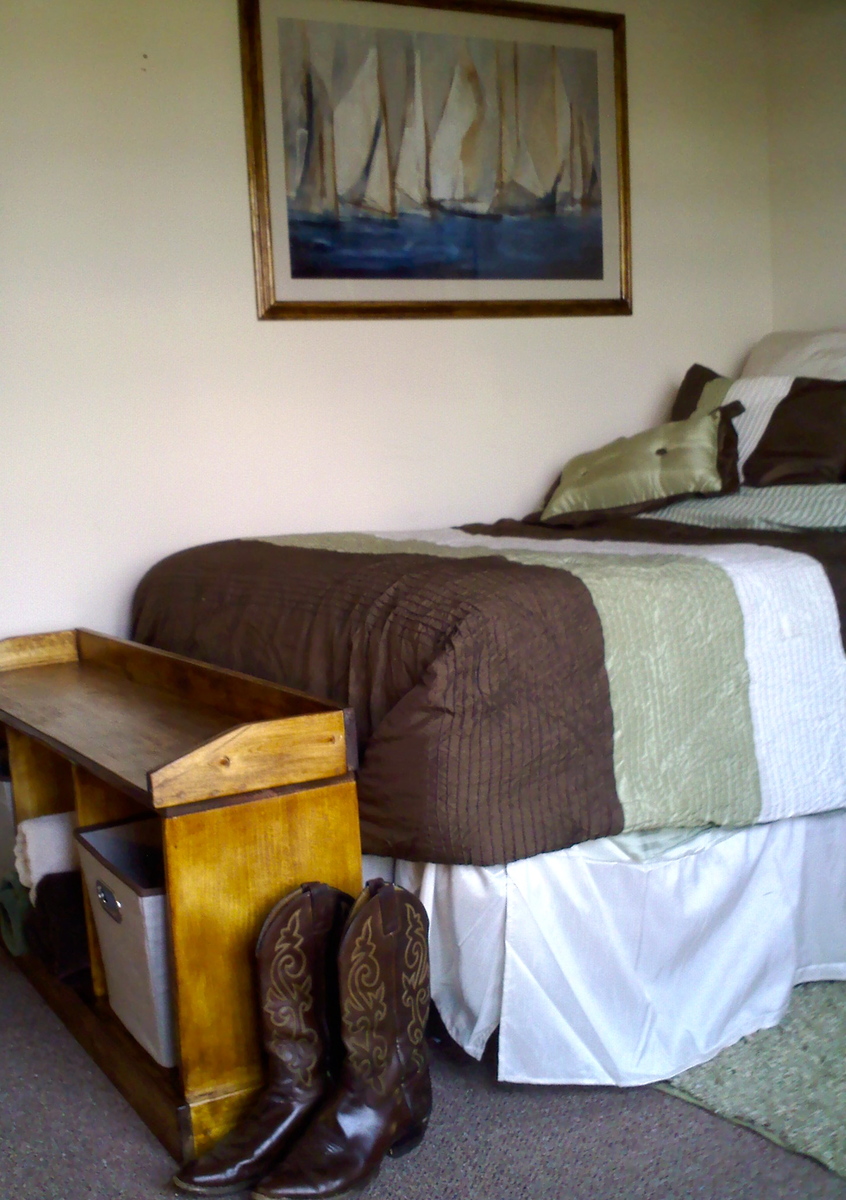
Western Upholstered Bench
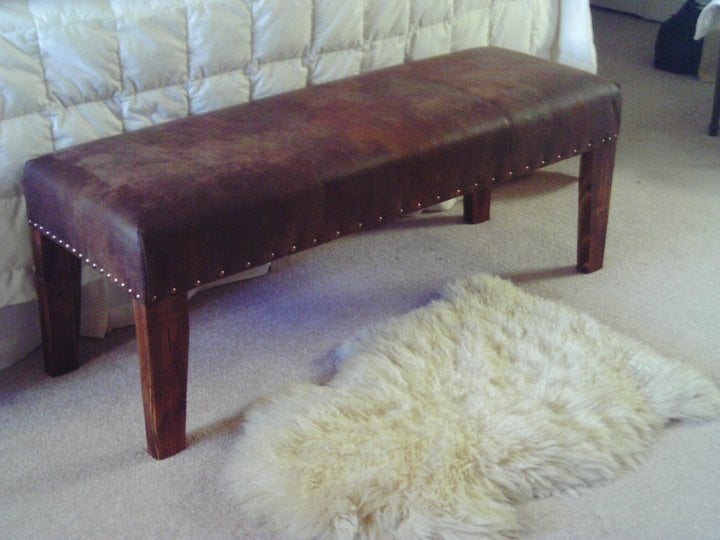
I've been wanting a bench for the foot of my bed for a long time, but could not find one I wanted at a price I wanted to pay. When I saw Ana's Upholstered Bench, it was just what I'd been looking for! I went out to the barn and scrounged some lumber, and then, because I am not comfortable using a circle cut saw, but I am comfortable using a table saw, I went online and found some videos on how to make a taper cut jig for a table saw and used that method to cut the tapers on the legs. I finished cutting out the frame and then sanded, stained and tung oiled the legs. My husband helped me assemble the frame and then I upholstered it. I am redoing my bedroom in a 'western' theme, and I used the remnant of the same faux suede fabric we used on the headboard. I added the nailheads but apparently I chose some that are only carried in one store in the area, so I'm having to wait a week for them to restock since I bought all they had! Then I'll add the rest to the front.
I am delighted with how it turned out! It not only looks good, it's really sturdy, and since I have less than $20 in out-of-pocket expenses, it sure beats those high priced benches! Thanks, Ana, you are a real inspiration to this 61-year-old grandma!
Built from Plan(s)
Estimated Cost
$20.00
Finish Used
Minwax Walnut, Tung Oil Satin
Recommended Skill Level
Intermediate
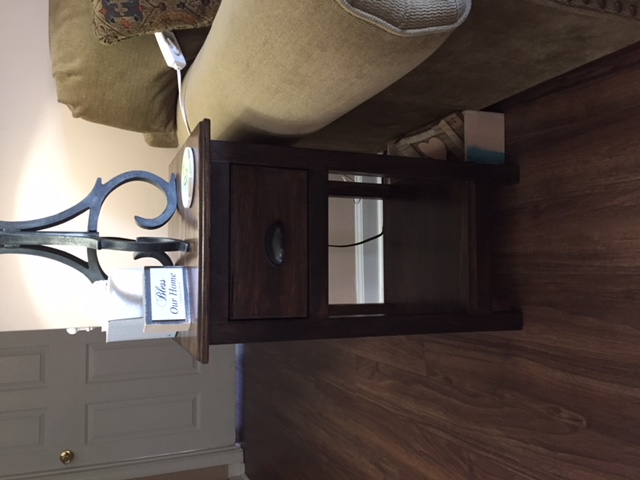
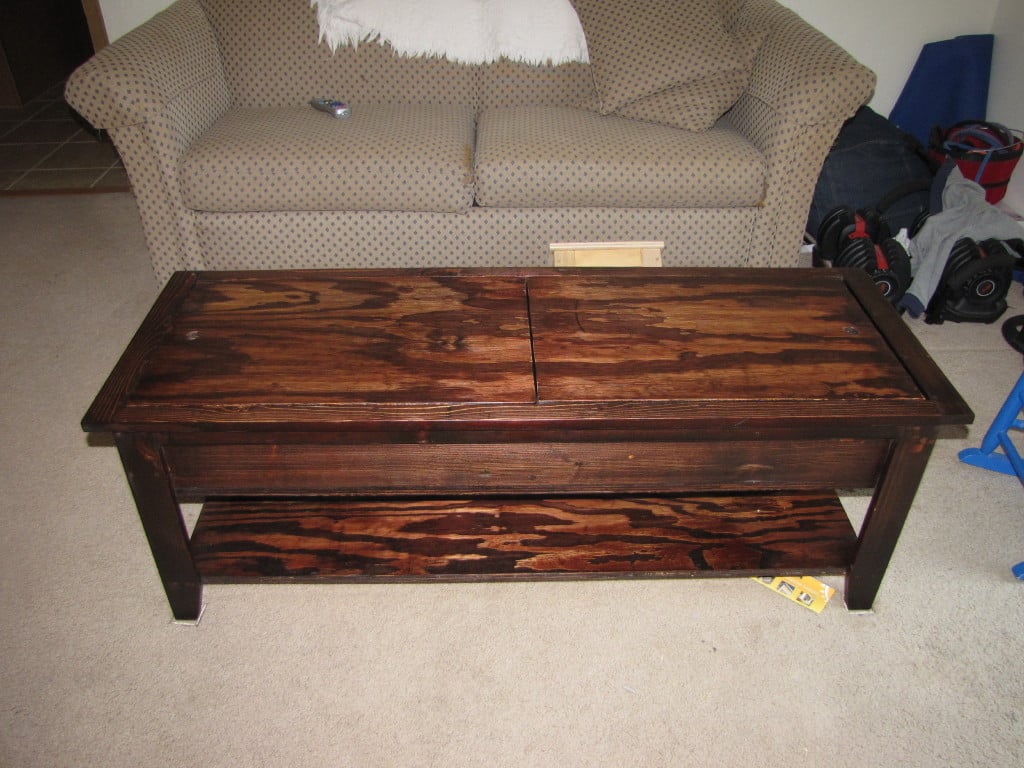
Rustic X end table to cover up dog kennel
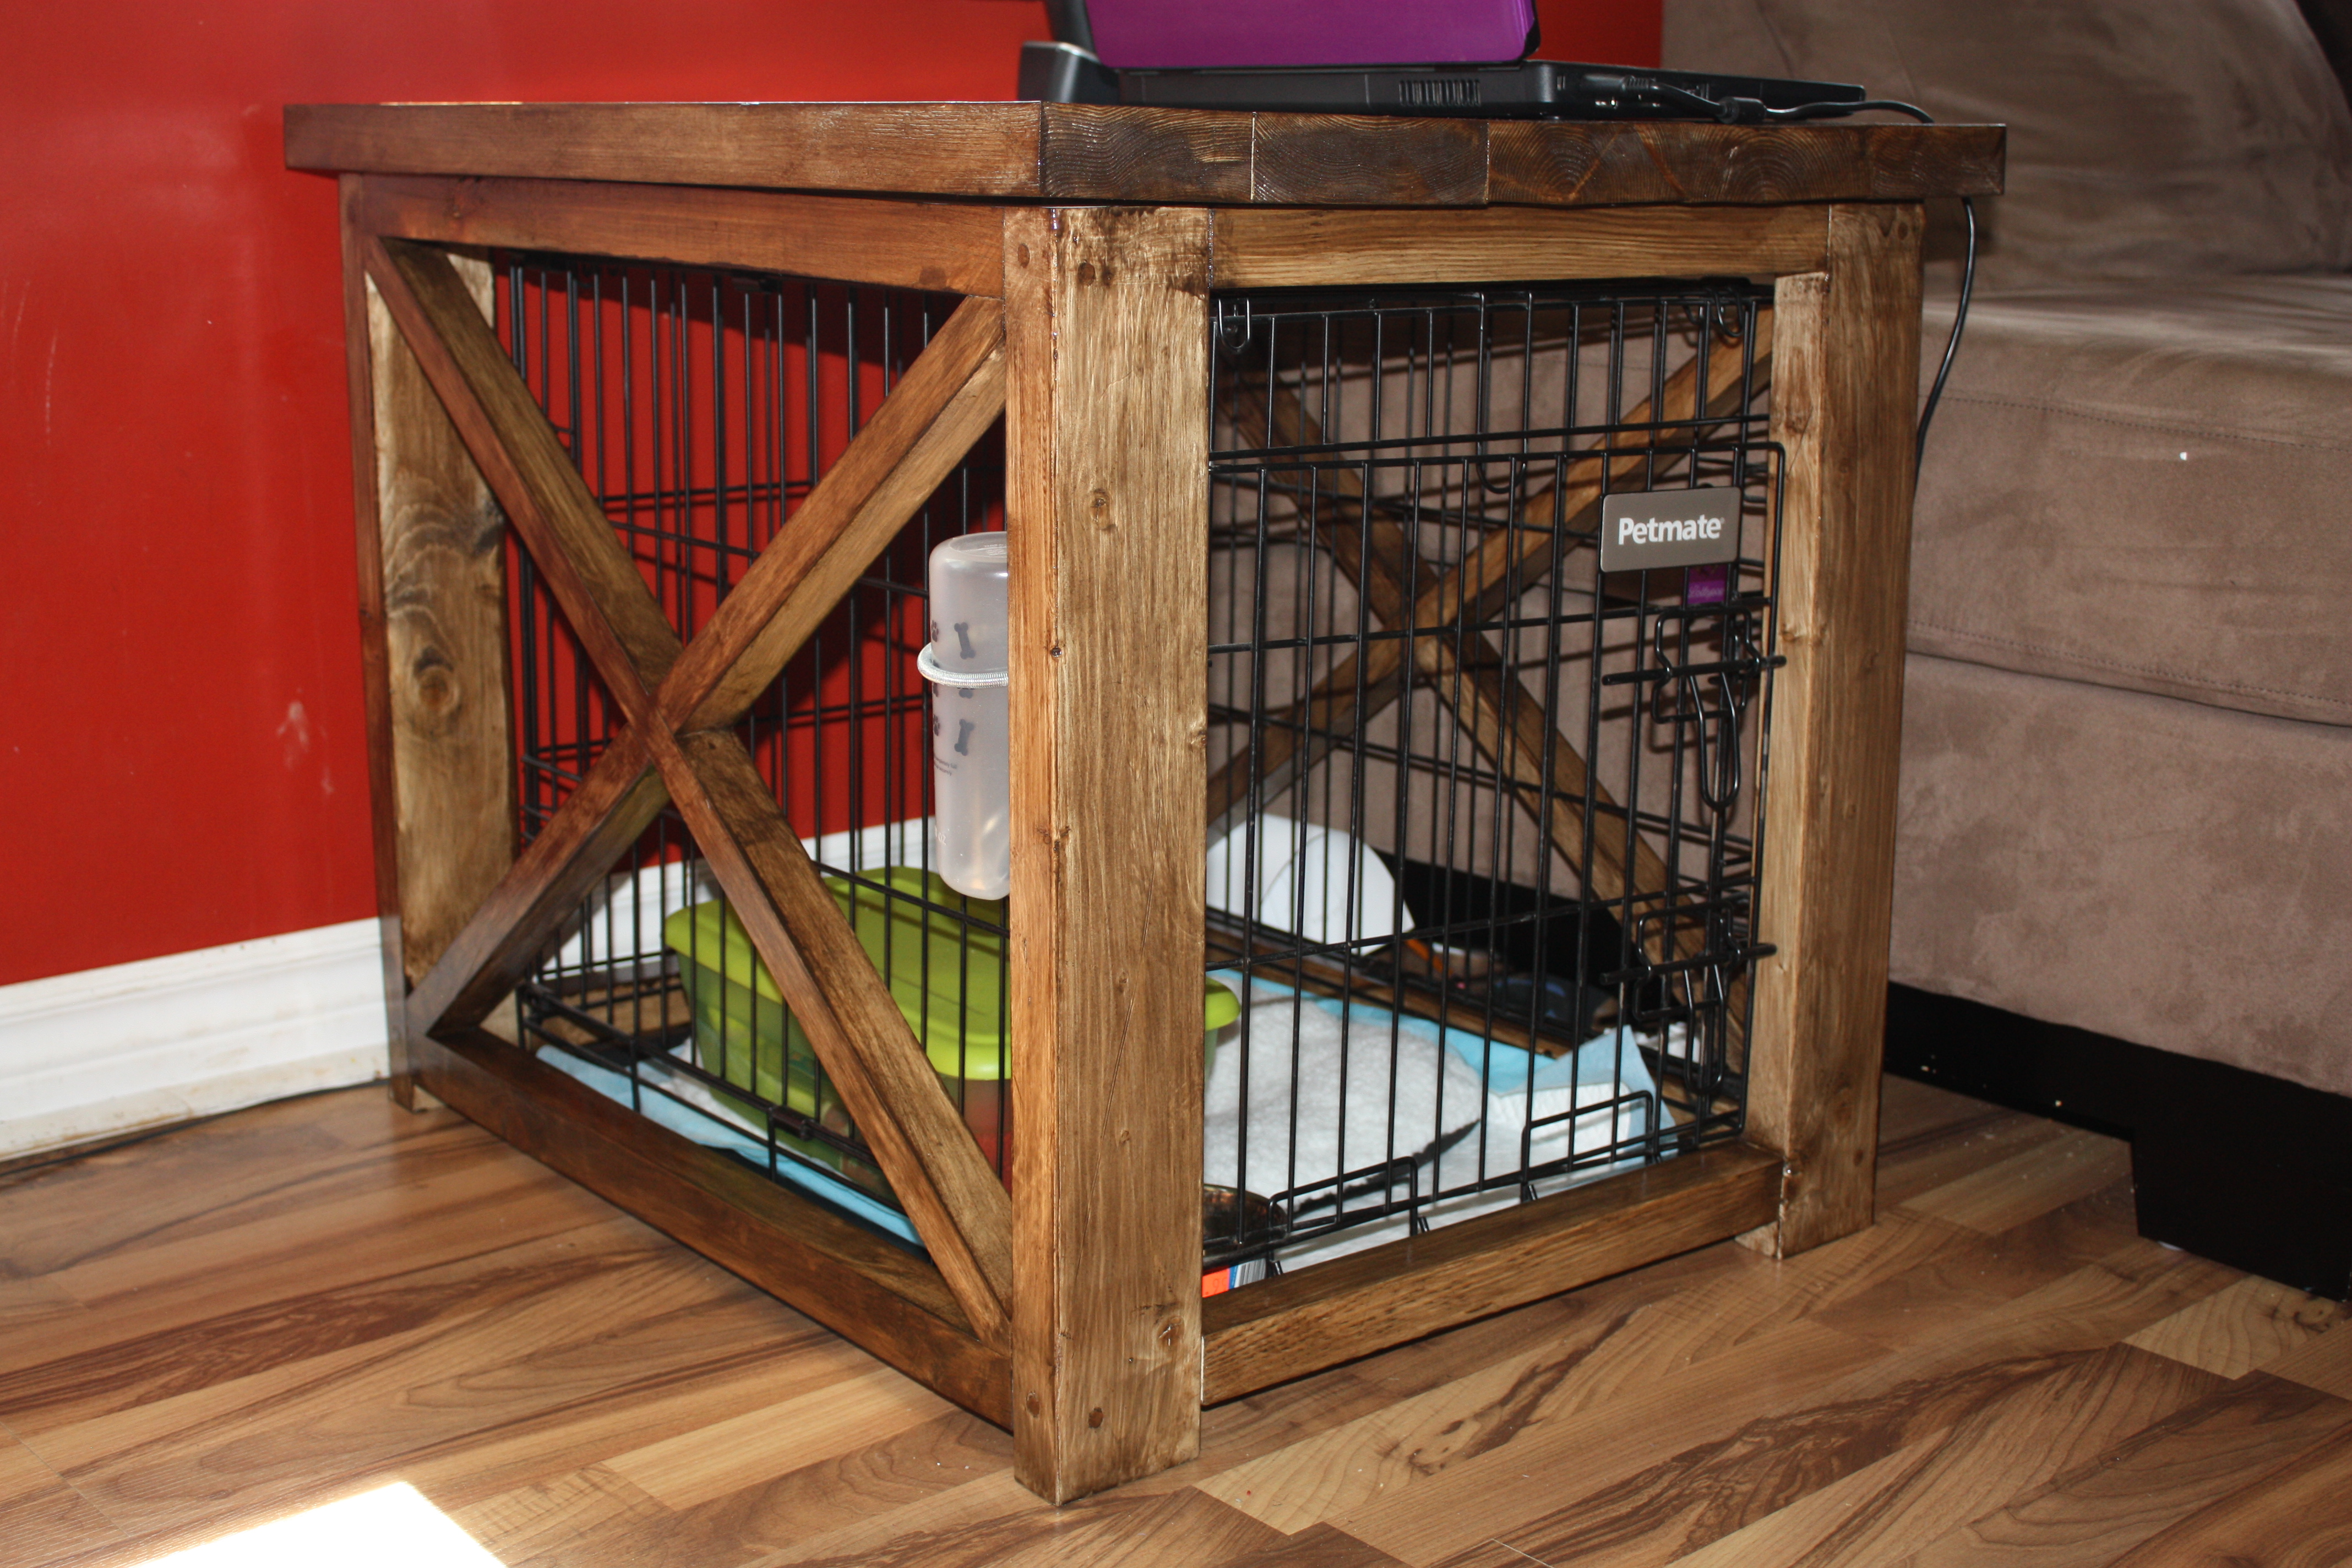
We are getting a puppy in a couple weeks and we want to crate train her. We have a small house so the only place we have to put the crate is in the living room. Needless to say, we needed a way to make the crate look good in our living room. That's when I found the plans for the rustic x-end table. The dimensions were almost the same as the dog crate. I only had to change the dimensions by a couple inches and wallah! Now the crate doesn't look out of place and I have a place to put my laptop and phone! I ended up ripping the 2x6's just a saw blade width down to get rid of the rounded edges and that made the top come together smoother. I also planed down the top a bit as well. In some spots, you can hardly tell they were 2x6's laminated together! I used two different stains on it. The first coat was a tudor stain but I wanted to warm it up a bit so I put a coat of antique walnut on it as well. I am very very happy with how this turned out. Now my husband would like me to build a coffee table to match!
Estimated Time Investment
Day Project (6-9 Hours)
Recommended Skill Level
Beginner
Comments

Thu, 02/25/2016 - 08:59
Click Bait
This entire site is click bait. yet to see one actual plan. its like all stolen data from pinterist. which is equally as bad
Christmas Gift
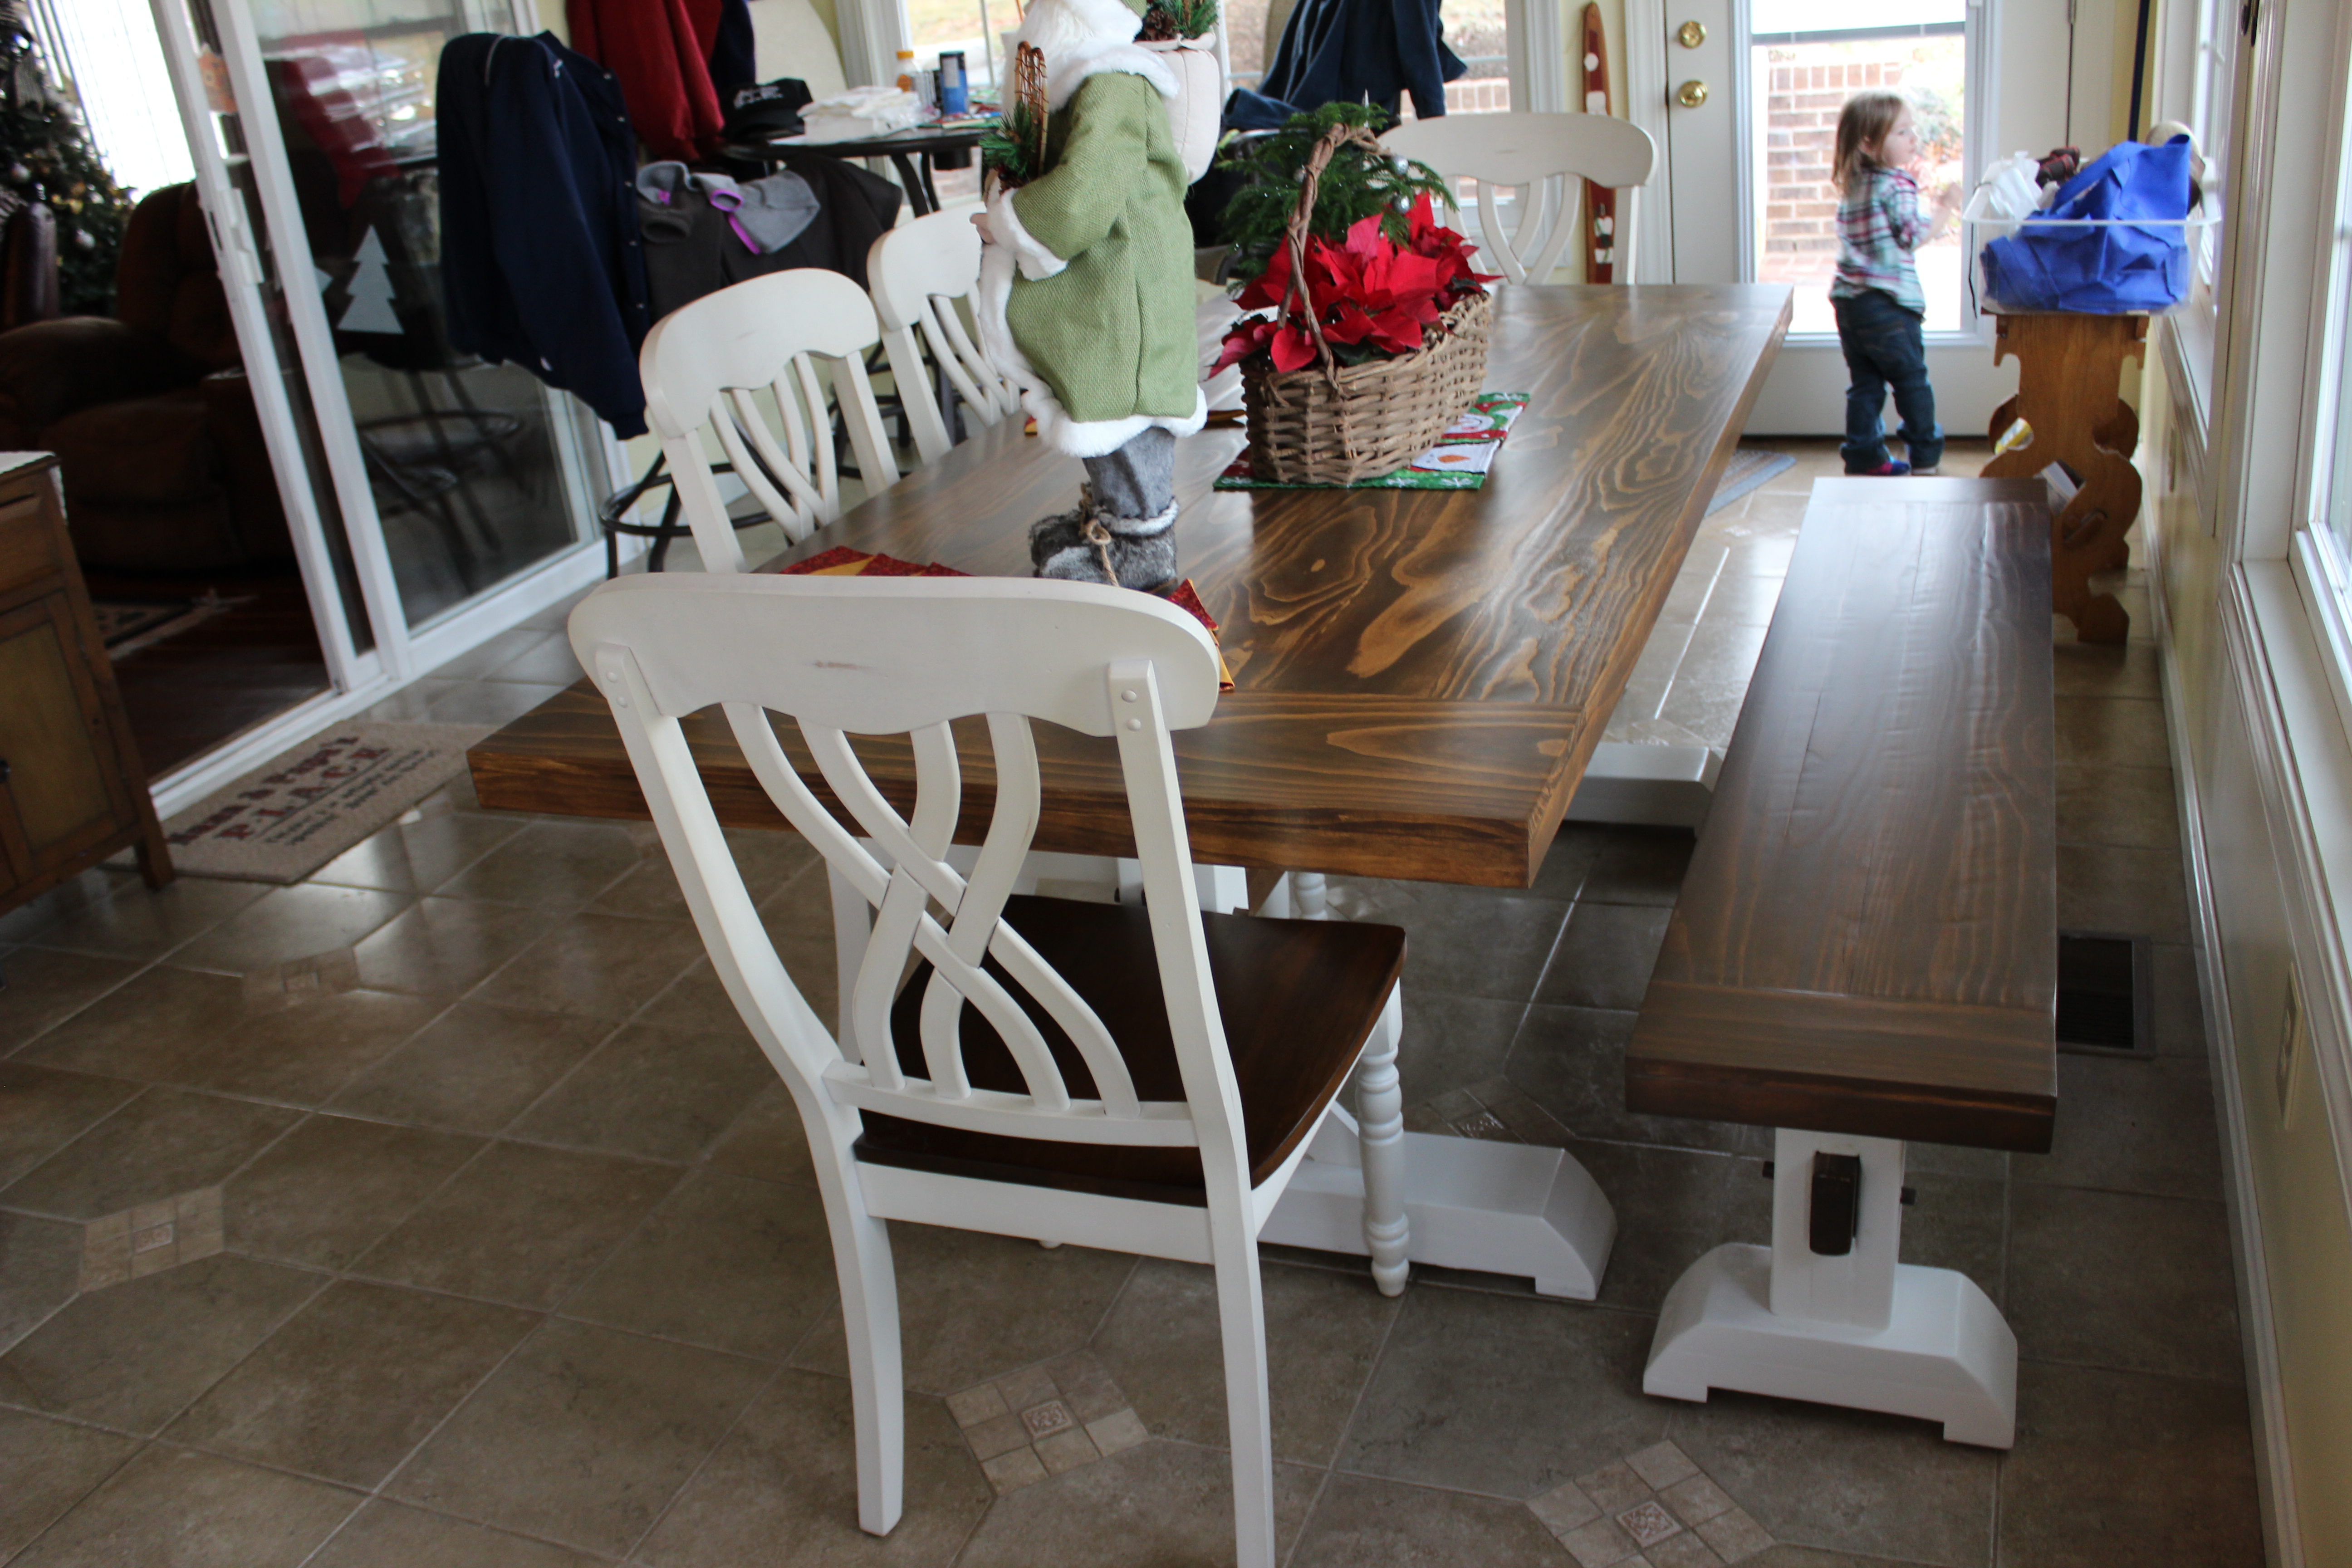
I built this as a Christmas gift. The overall length was shortened to 6' long, I only used two legs, however I built the bench with three legs overall length 6'. Finished to match chairs purchased from overstock.com
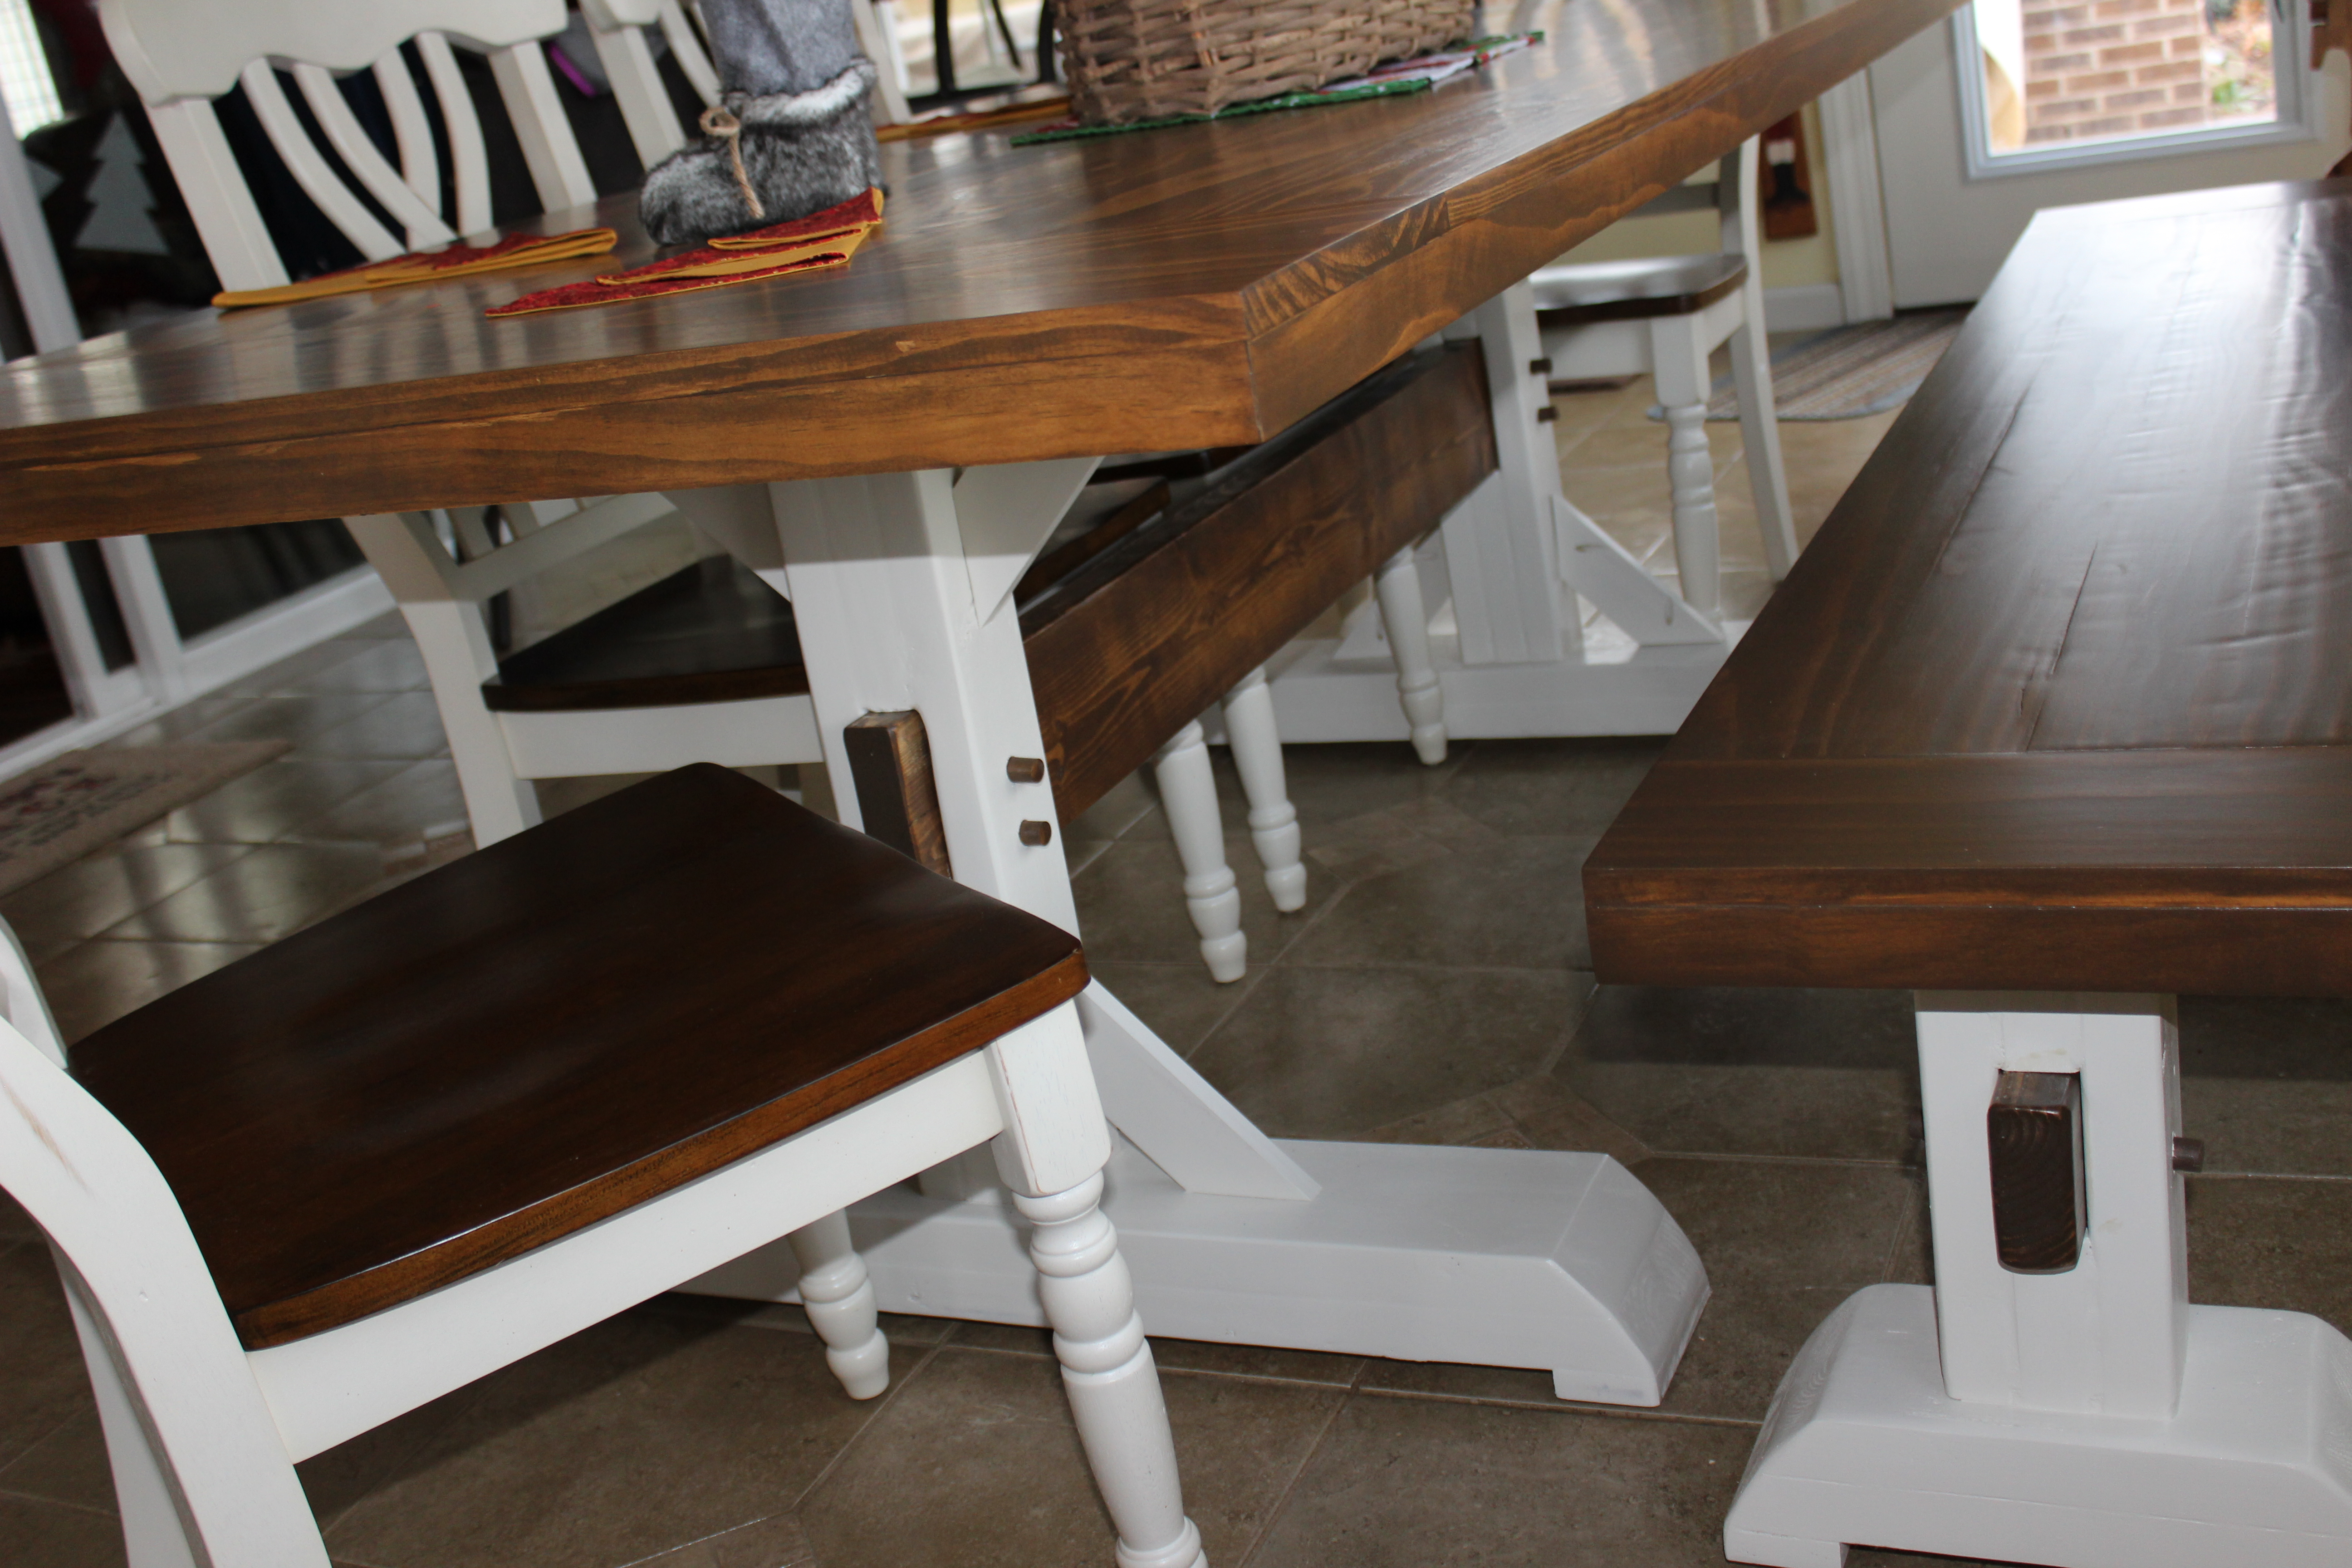

Built from Plan(s)
Estimated Cost
$275.00
Estimated Time Investment
Weekend Project (10-20 Hours)
Finish Used
Custom with four coats of Simi gloss polyurethane.
Recommended Skill Level
Beginner