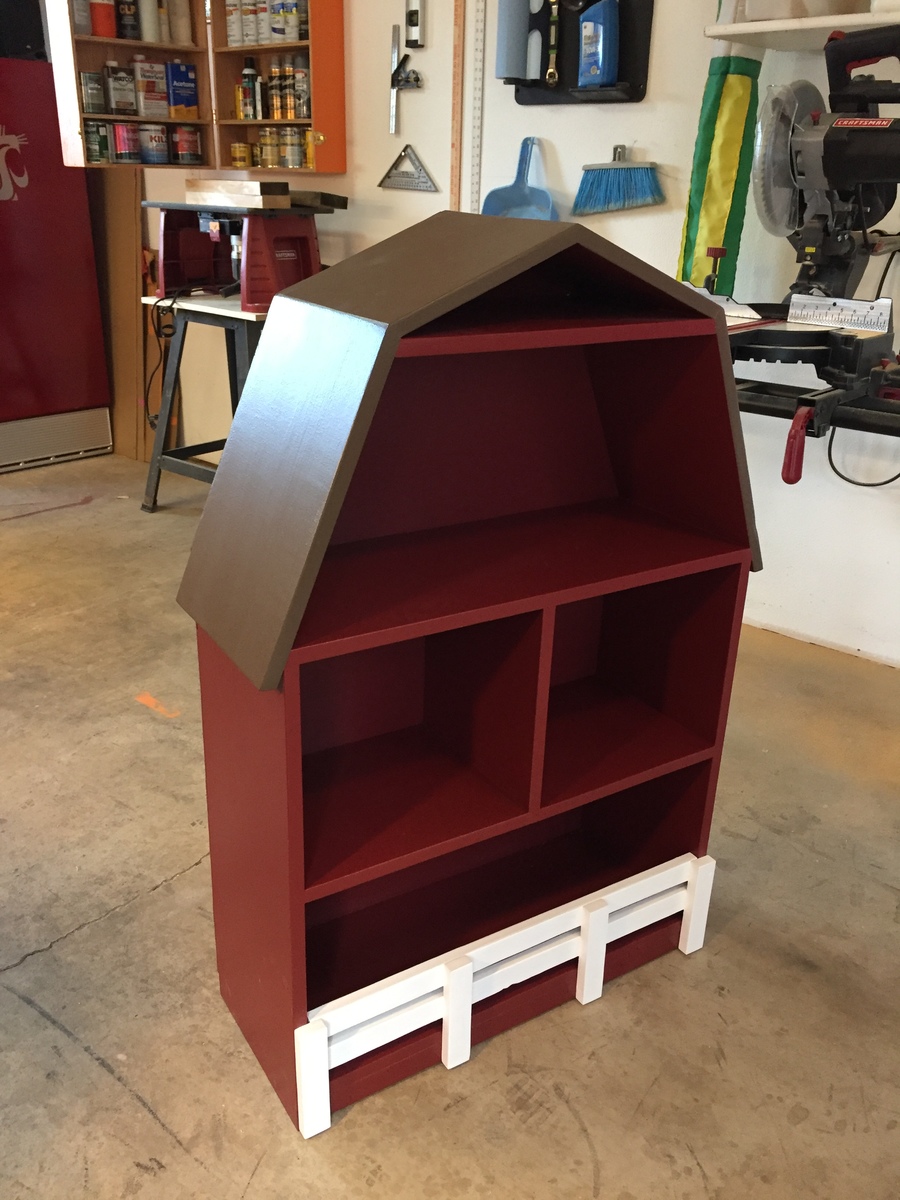
Barn Dollhouse
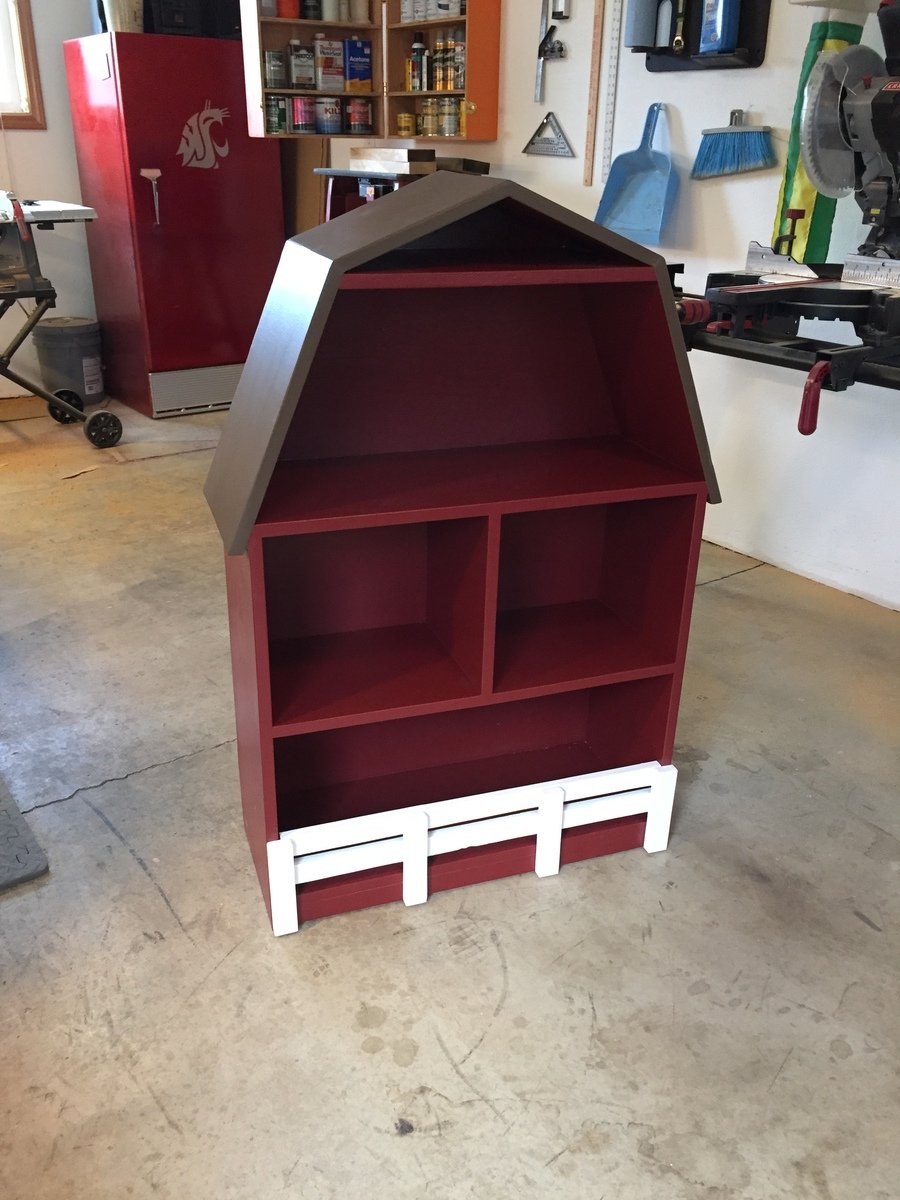
Our daughter loves to use it as a place to store animals as well as books.
Built from Plan(s)
Recommended Skill Level
Beginner
Our daughter loves to use it as a place to store animals as well as books.
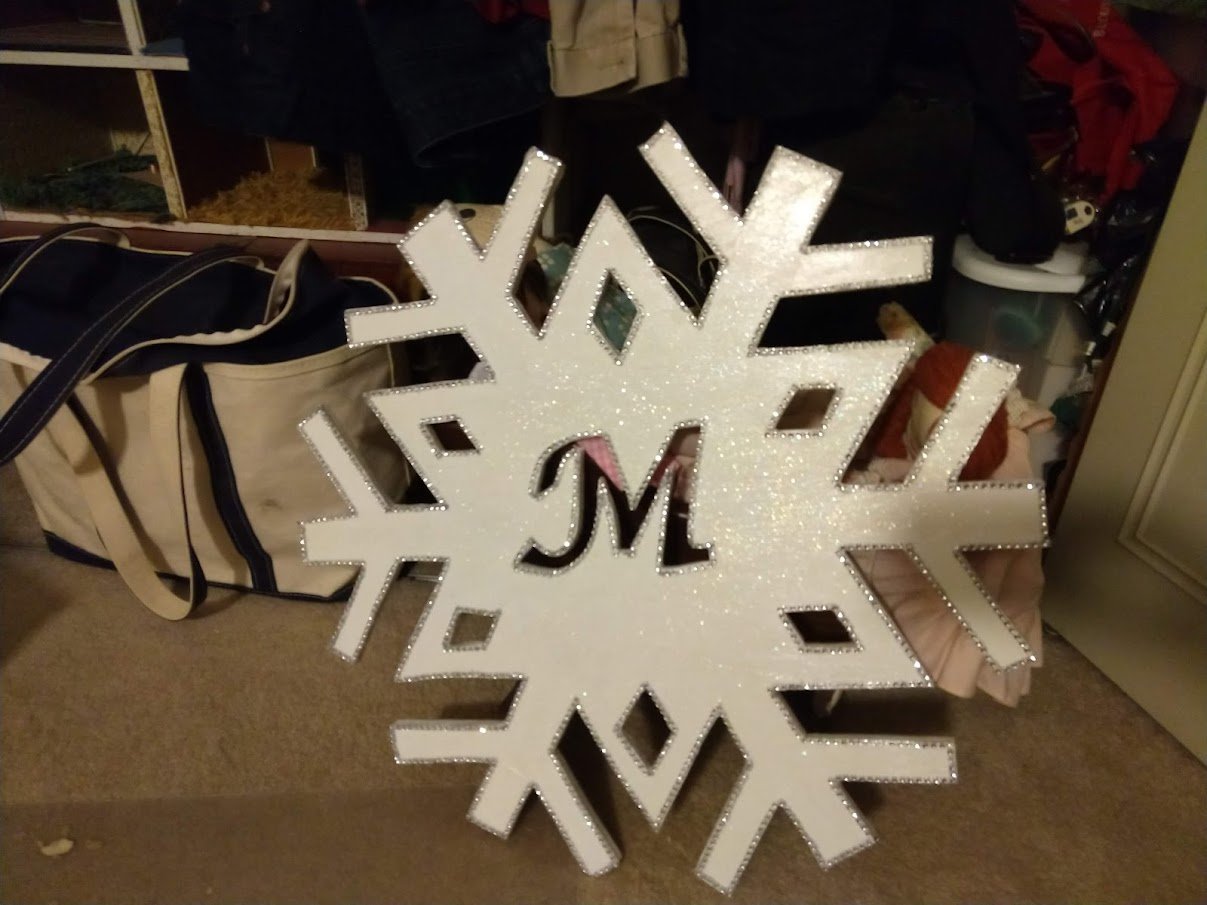
I decided to make several of these for family this past Christmas. I made mine from oak which was harder to work with, but more resistant to scratches and nicks. I primed and painted them white with some leftover wall paint. Then I added some craft paint that had glitter in it. While it was still wet, I dusted it with more glitter: white and iridescent. Then I sealed it to keep the glitter from going everywhere!!! Then I hot glued all the sides with a rhinestone like ribbon I found at the Dollar store. I was very please with the result. I also found pearl like stickers that I hot glued on the other snowflakes when my rhinestone ribbon ran out. I added felt stickers (those that are used on the bottoms of chair legs) on the back to prevent the wood from banging on the door every time it opens and closes.
Love this project! I thought it was pretty easy and it was a good practice with the jigsaw, drill and sander which are relatively new skills for me.
Tue, 01/18/2022 - 16:33
That looks awesome, way to go and such a great way to sharpen those skills!
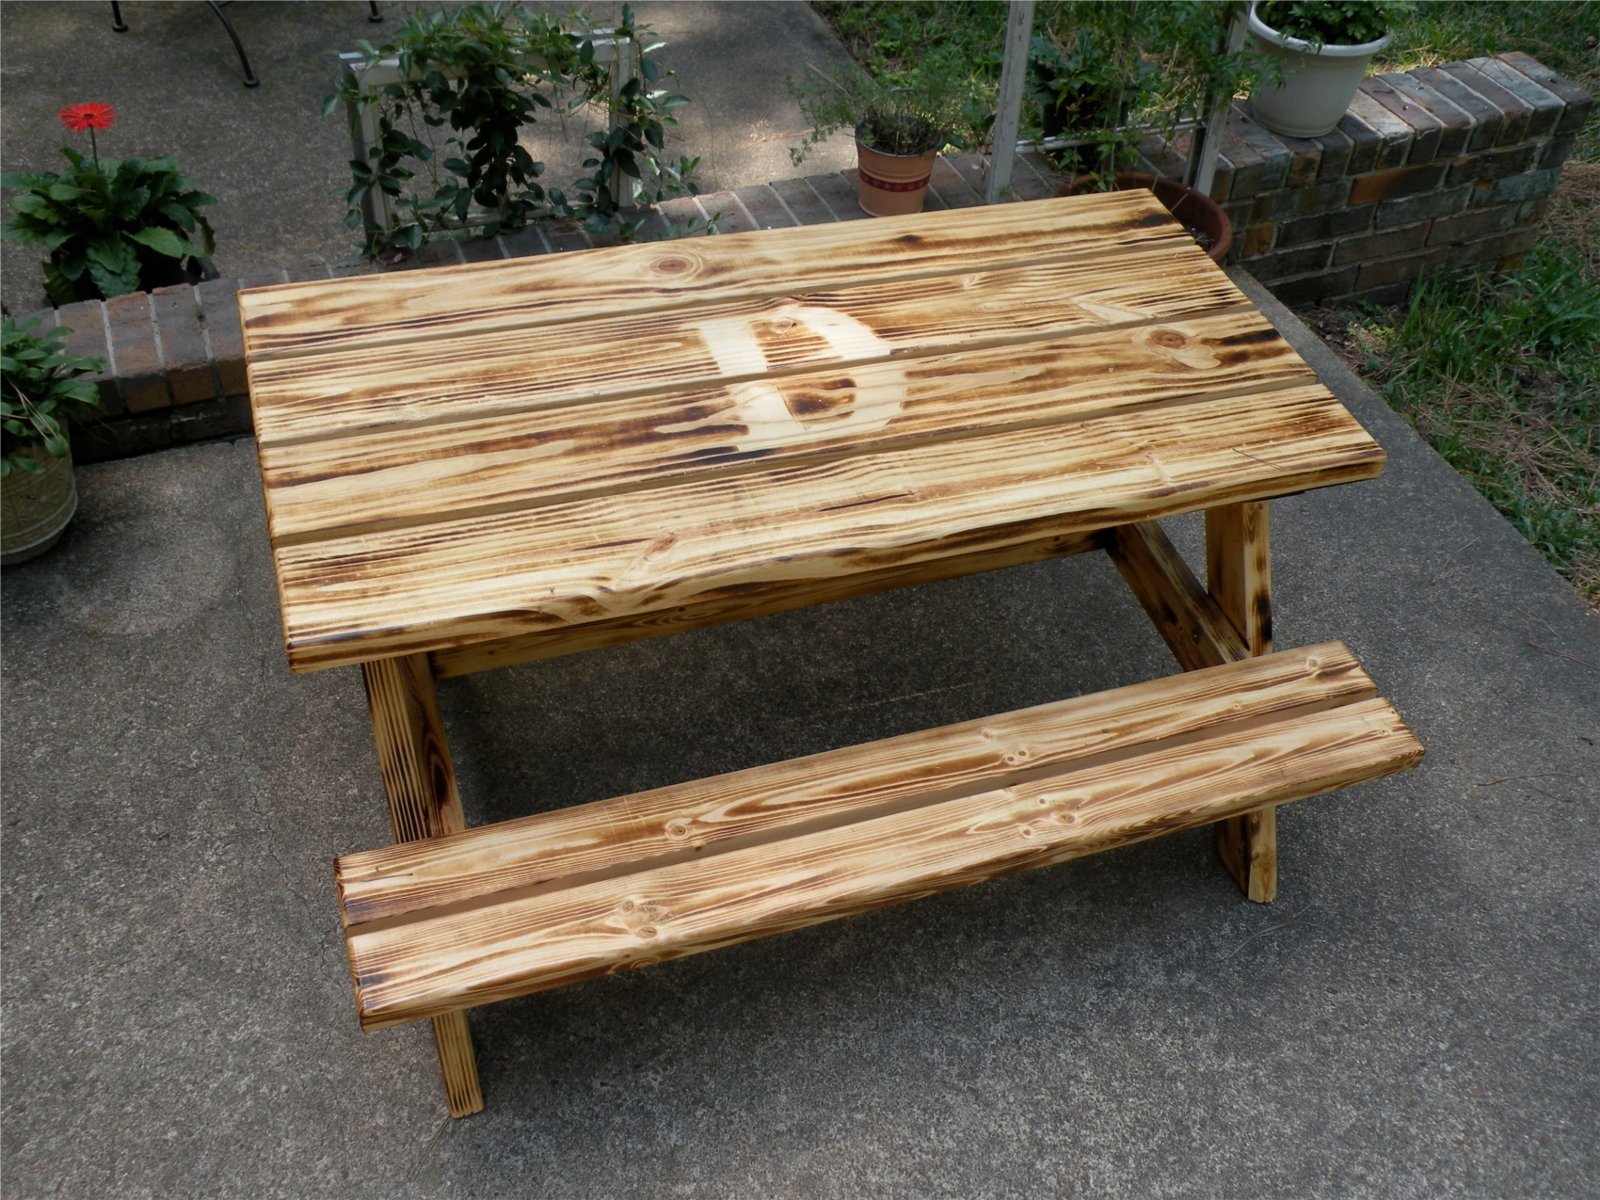
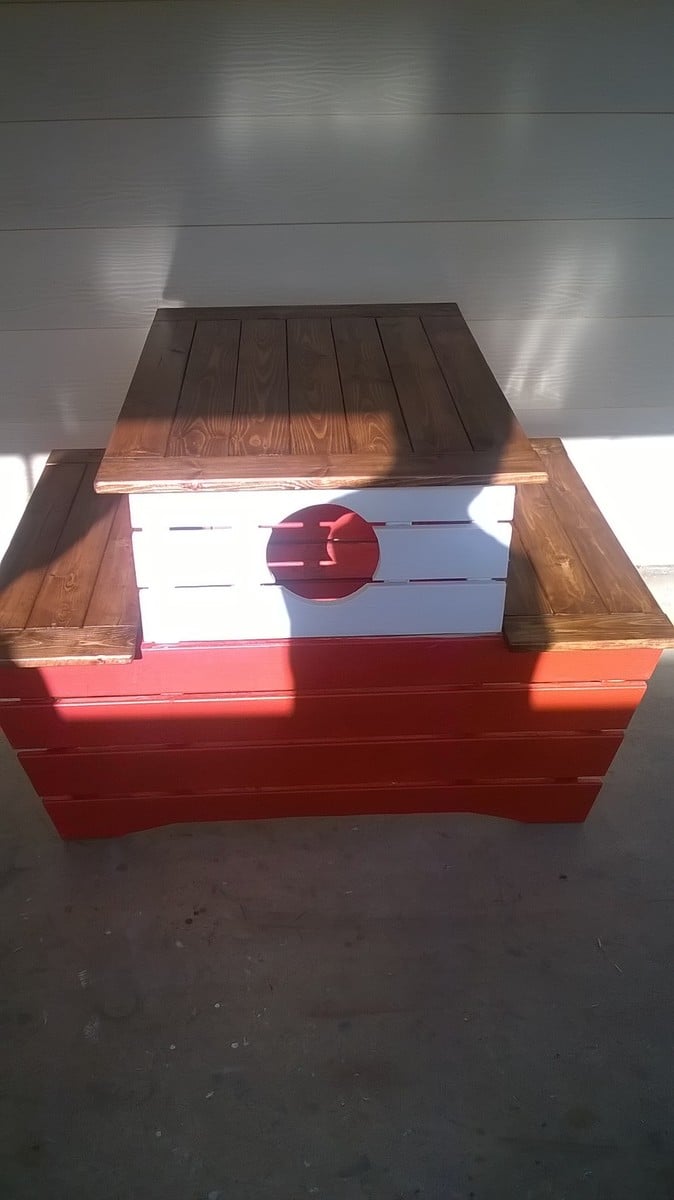
I modified this plan quite a bit. I chunked up all of the wood for a sturdier table. I also did braces on the underside of the table and benches so there would be no nail/screw holes on the top. For the D, I taped a chip-wood letter from Hobby Lobby to the wood while I burned over the entire top.
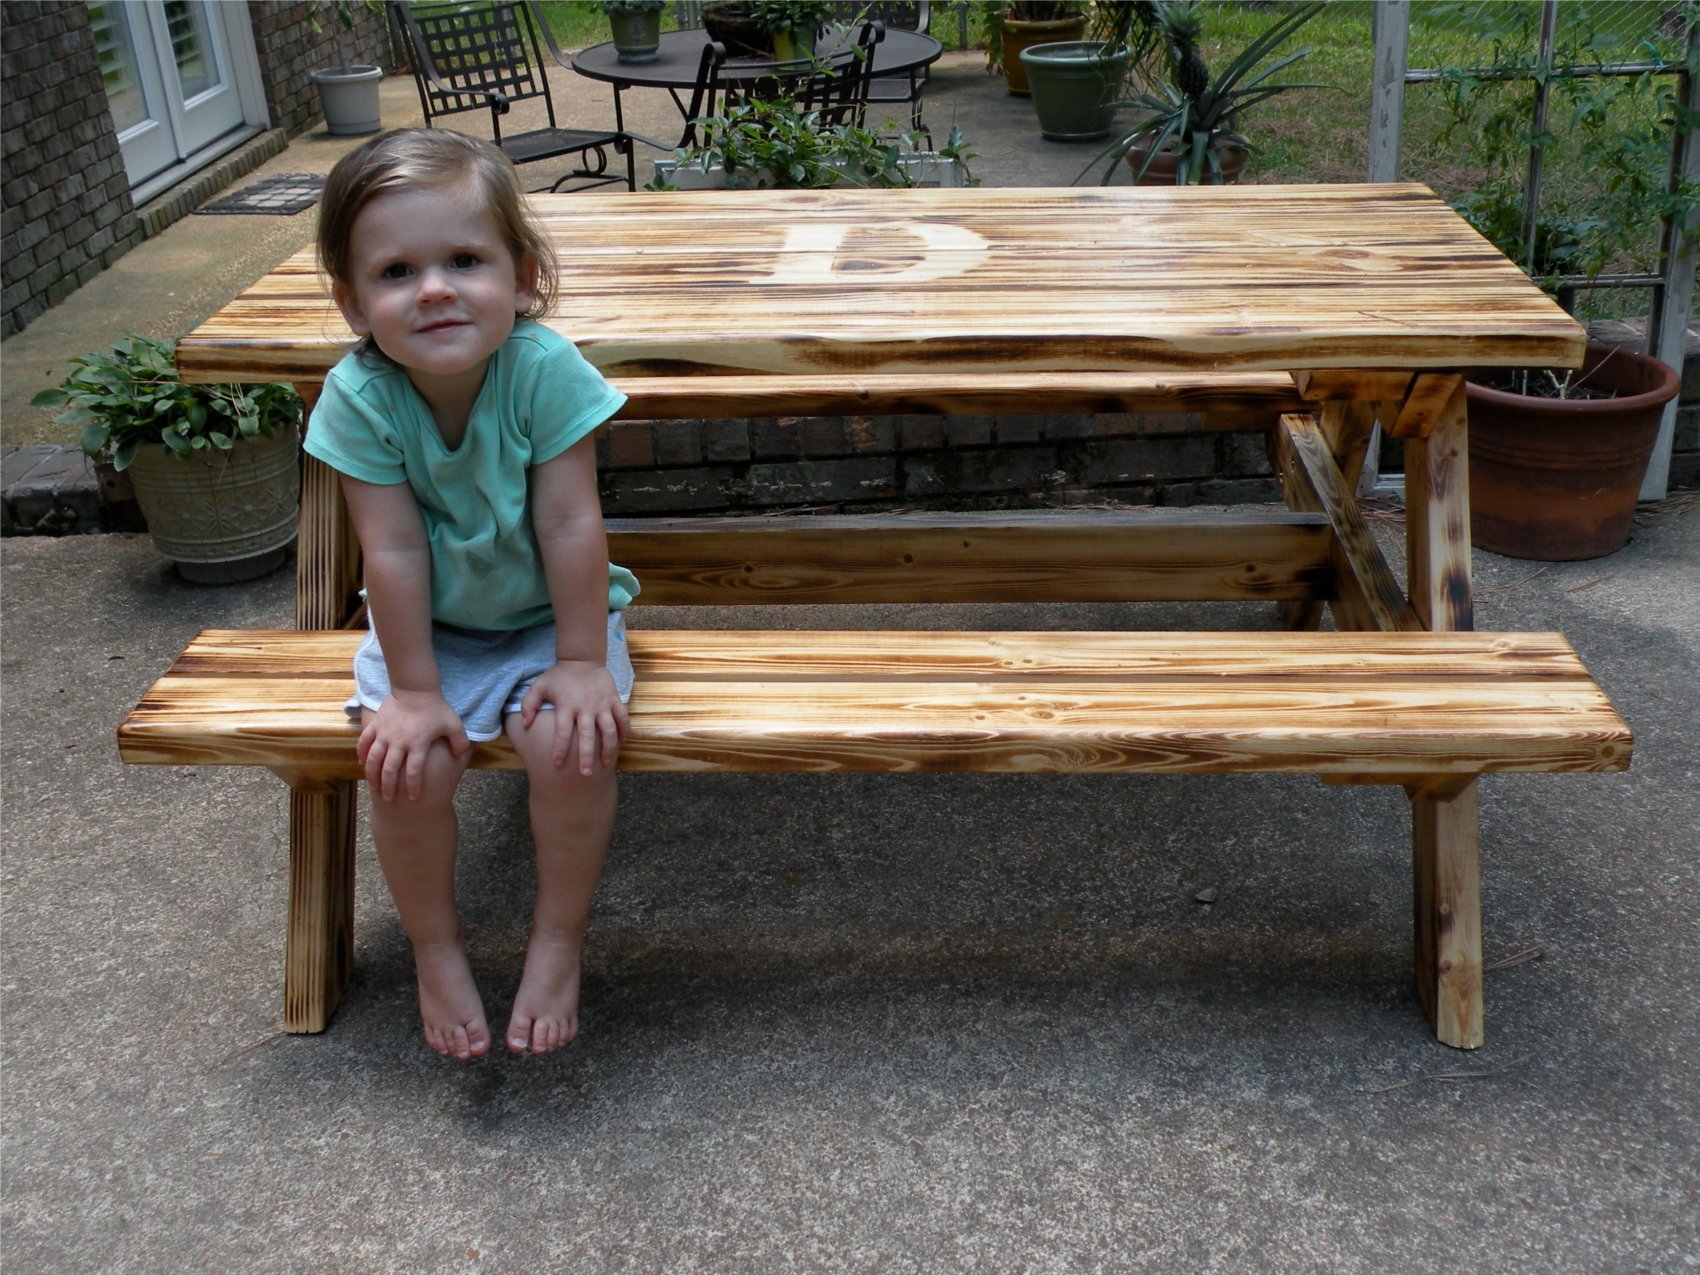

Please click the link to my blog post "One Man's Trash is Another Man's Treasure" to get the full story and more pictures.


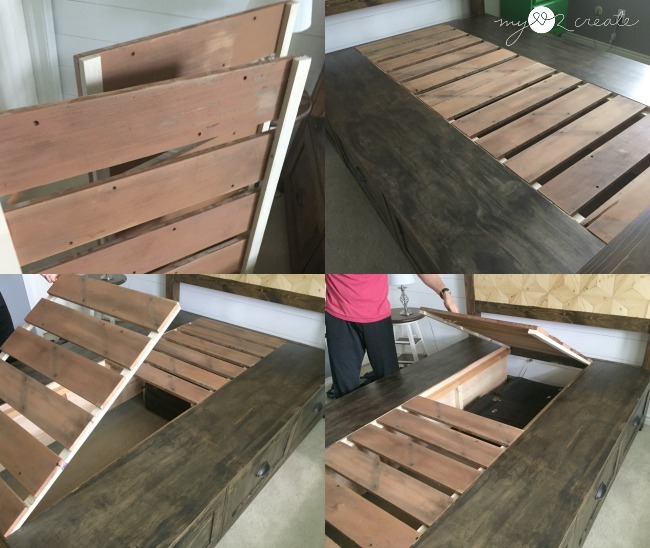
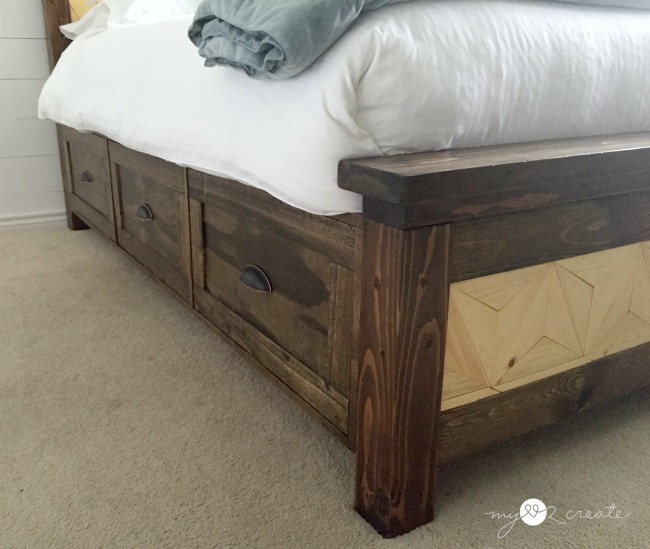
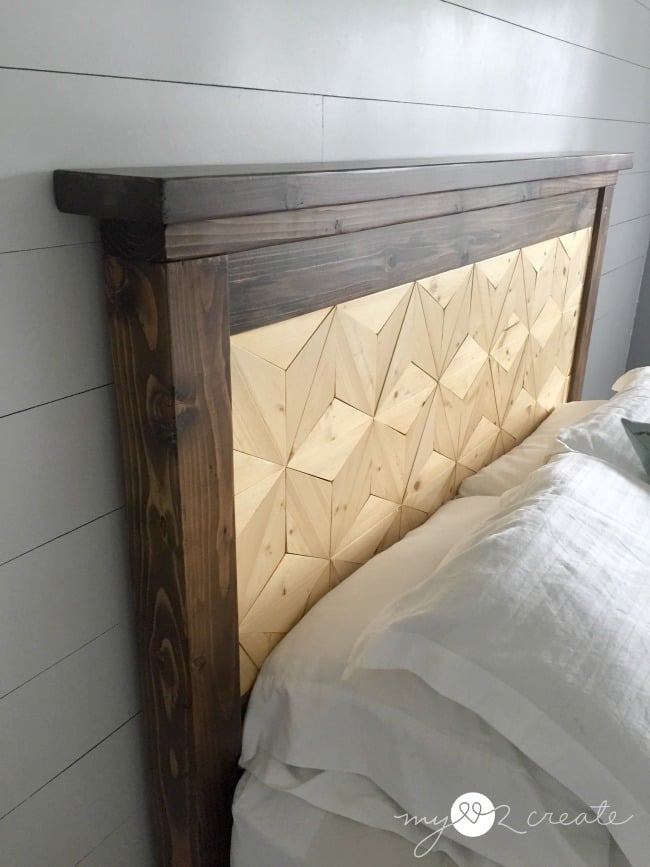
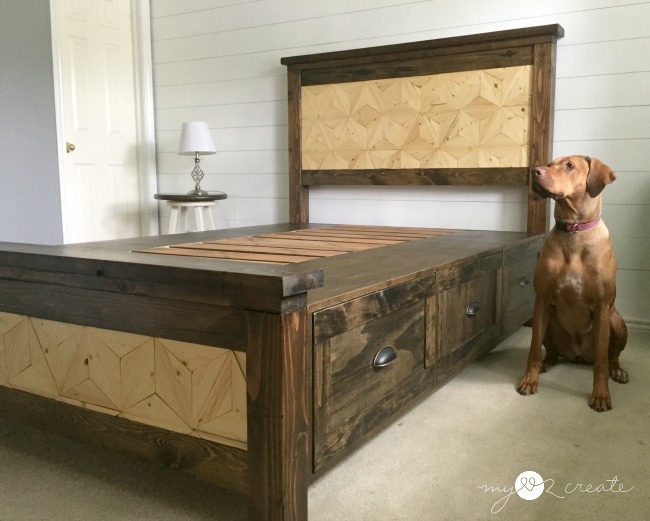
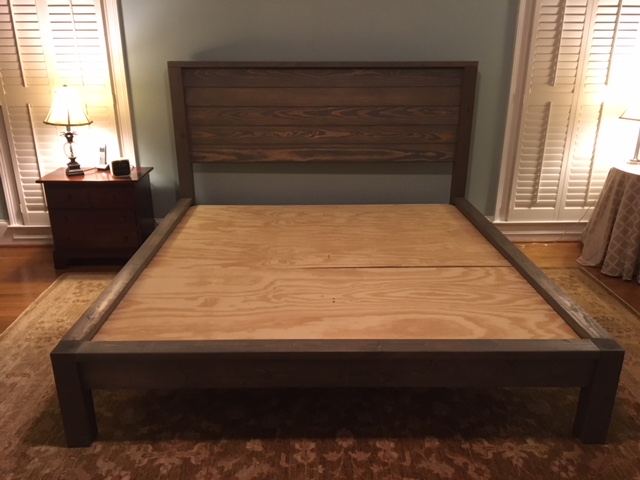
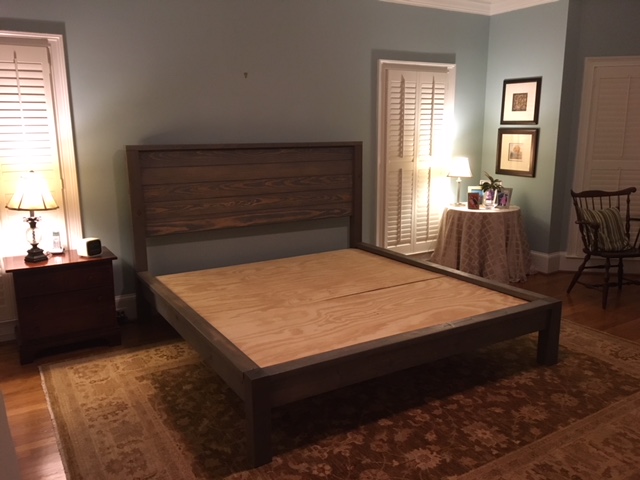
I have always loved Ana's Farmhouse bed, so when she came out with the Farmhouse bed with storage drawers I knew it was the perfect solution for our small master bedroom. Ana's plans were awesome and made this an easy build. I wanted my bed to be a little unique so I tried a geometric pattern for the head board and foot board and I LOVE it! I also decided to make my slats removable for easy access to under the bed storage and this is one of my favorite features of the bed! I think my husband and I just found a new spot for hiding christmas presents! :) Check out my blog post for all the details and loads of photos!
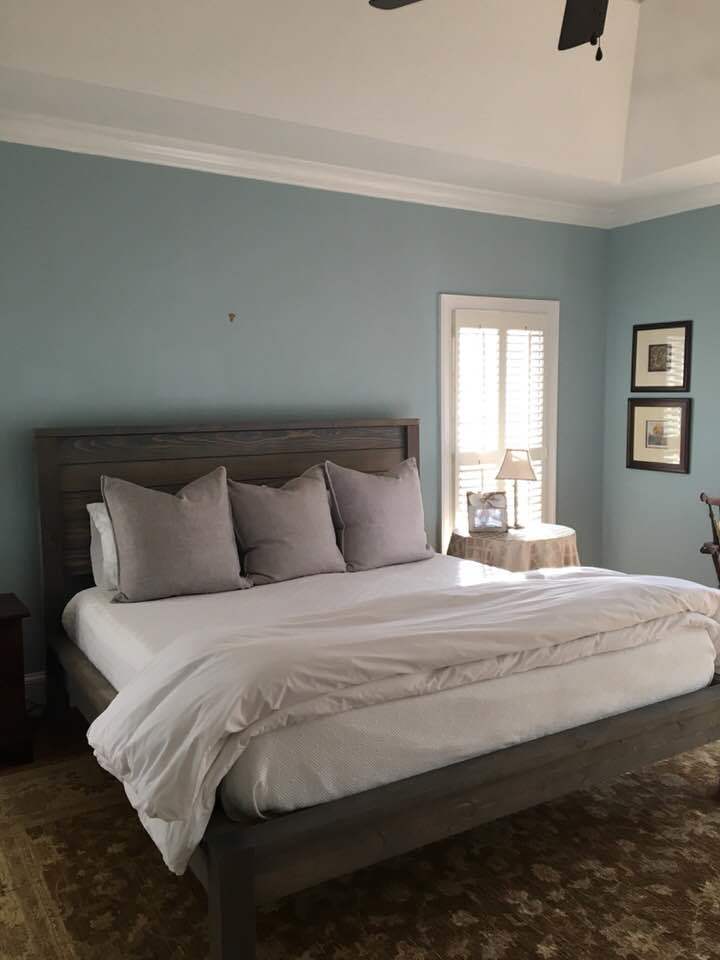
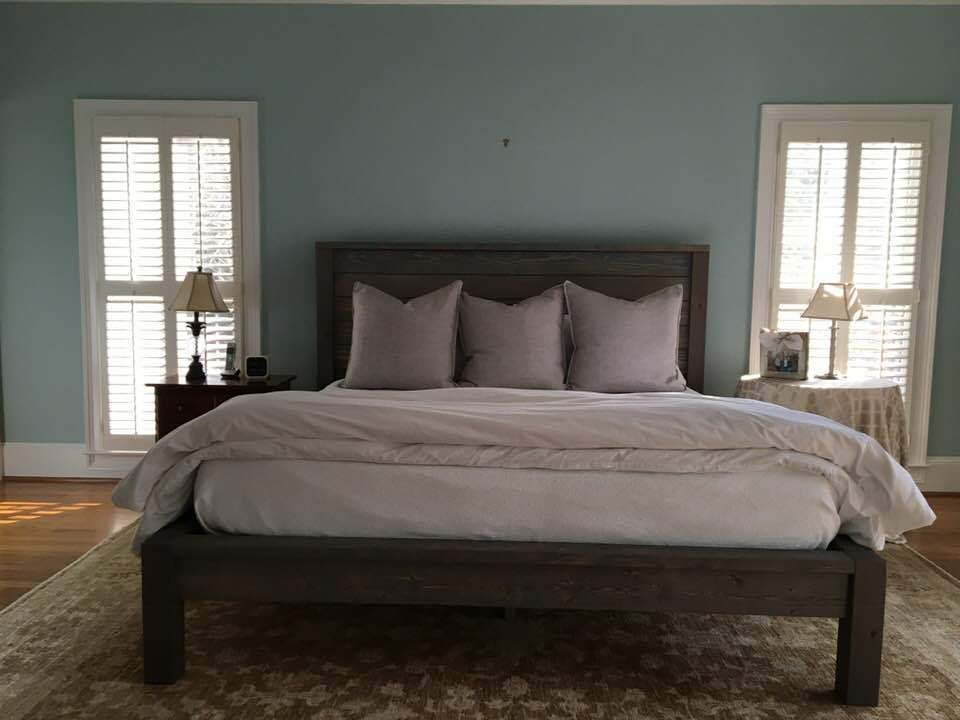
This is fairly close to standard other than I raised up the sides and footboard 2" from the plans. I also used a plywood platform in place of slats and a standard box spring (there are 3 2x4 supports under the plywood). This saved some money since we just bought a king size Casper mattress and we prefer the look.
The other modification is that I purchased "bed rail fasteners" from Amazon. These "clips" enable us to easily disconnect the side rails from the headboard and footboard (like you might find on a purchased bed frame) for when we decide to move or redo our floors or whatever. I thought that was better than having a semi-permanent connection with screws.
Tue, 01/30/2018 - 04:12
I went back and added another modification I forgot. I bought bed rail fasteners from Amazon in order to be able to quickly disconnect the rails from the headboard and footboard. I prefer this versus having to disassemble the whole thing when we move/redo the floors/whatever. I'm happy with that decision even though it made the alignment a little trickier.
Tue, 01/30/2018 - 09:42
I love how you raised it. What height does your mattress sit at? I'm thinking of raising the rails by 2 or 3 inches as you did, but using 1x10 or 1x8 for the rails instead of 1x6s. In your opinion, would this look good? Or make the clean lines look too heavy?
Fri, 02/02/2018 - 08:25
Sorry @canuck I tried to reply to your other post but it never posted apparently? I was going to do the same thing with 1x10's but then I lifted one at Lowe's and thought it would just be too heavy and cumbersome. As it is, the bed feels like it could take a direct mortar hit! Then I looked for 1x8's and they weren't in stock so I ended up just using the stock 1x6's.
I think you could raise the rails/footboard another inch or two easily (I did 2" higher so 16.5" for the footboard posts because my wife wouldn't let me go higher) and still be fine aesthetically. The plywood platform sits a tad below the top of the sides of course and then the mattress is 10" tall so I think the final result is just above 25" from top of mattress to floor which was close to other beds in our house (our last bed was slightly higher [with a full box spring], at 26.5").
Thanks for the compliment and good luck!
Fri, 10/15/2021 - 06:10
We too have used the same modifications as you. However the bed fasteners I have bought seem to be too wide for the male connector ends on the 4x4.
Can you provide a link to the fasteners you bought?! I thought I was going to get this together today but doesn’t look like it.
Thanks,
Liz
Mon, 01/13/2020 - 19:05
Beautiful work! I also love the blue paint color on your walls. Any chance you know the name/number of it? Thanks!
Thu, 06/18/2020 - 09:31
I also purchased bed rail fittings for the bed. How did you line everything up? Did you attach it to the cleats or the 2x6's on the side rails? I really wish that they came with instructions for installation, but they didn't, do you have any advice for me? Thanks!
We made a few changes to fit our needs but love the design. Way better than any kit you can buy!
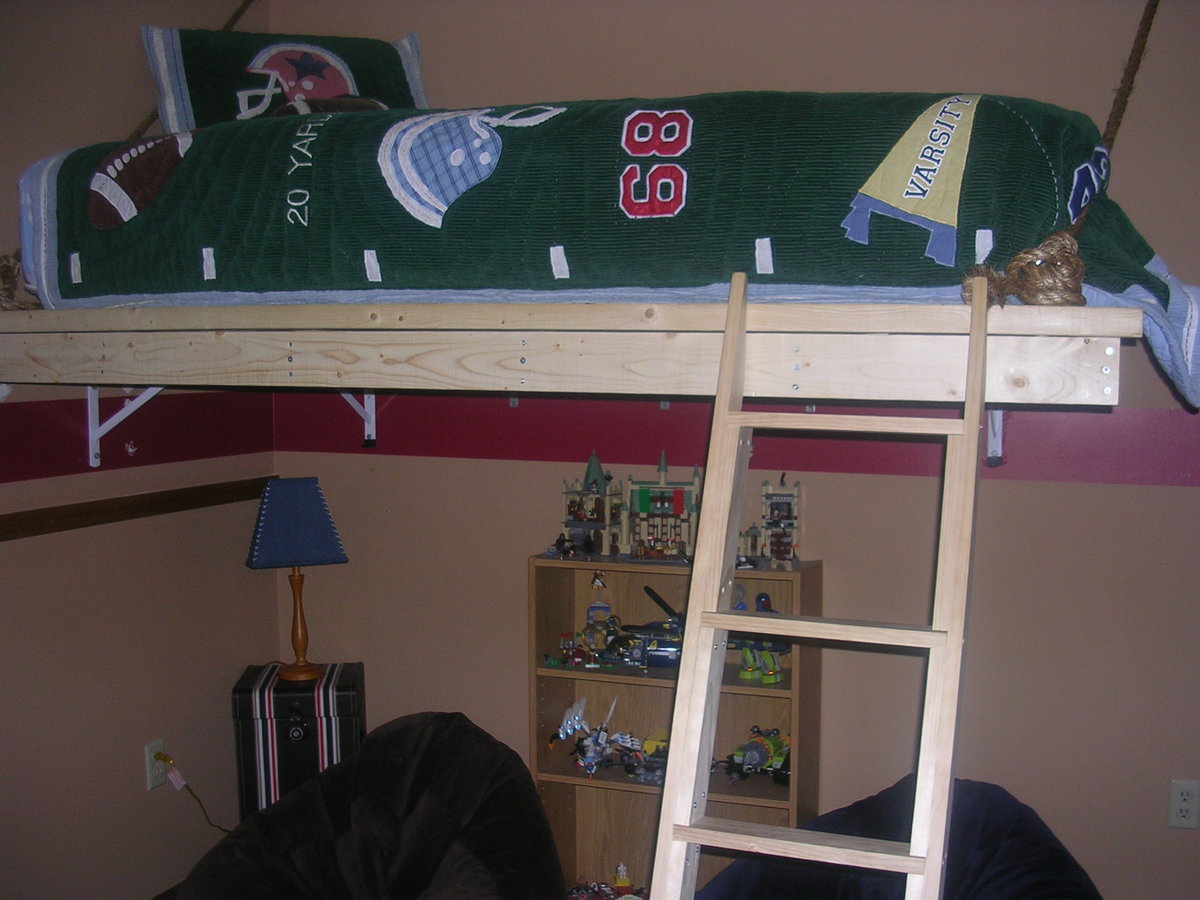
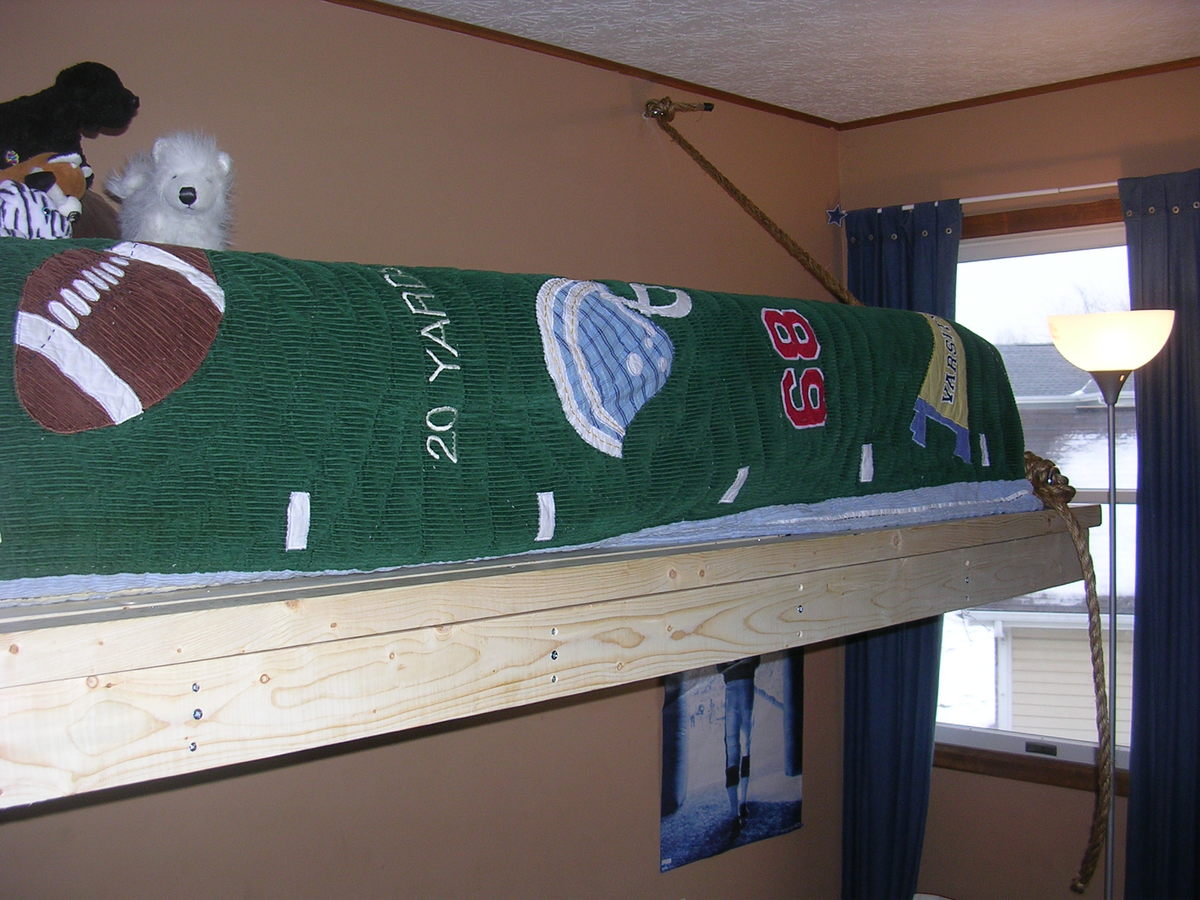
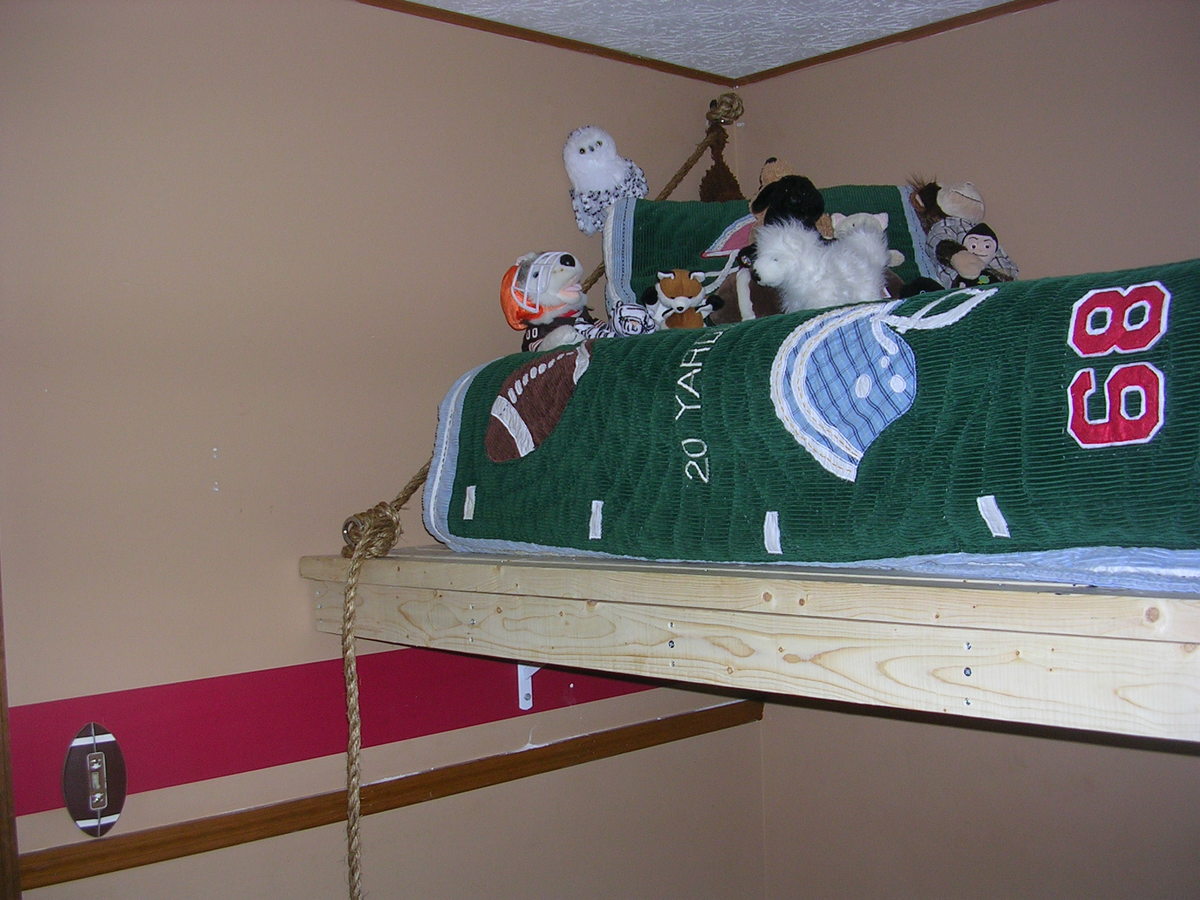
My son wanted a loft bed for his birthday ... until he saw this hanging bed! When he and his sister went to their cousin's house for the night, we decided to give it a try.
It's actually not that hard. Being rookies, we didn't realize how heavy the 2x4s are. If we were to do it again, we would use 1x4s instead. But, our bed is quite sturdy. We exhausted our cordless drill mid-way through the project.
But, this plan doesn't need many cuts. Most of the cutting was done at Home Depot.
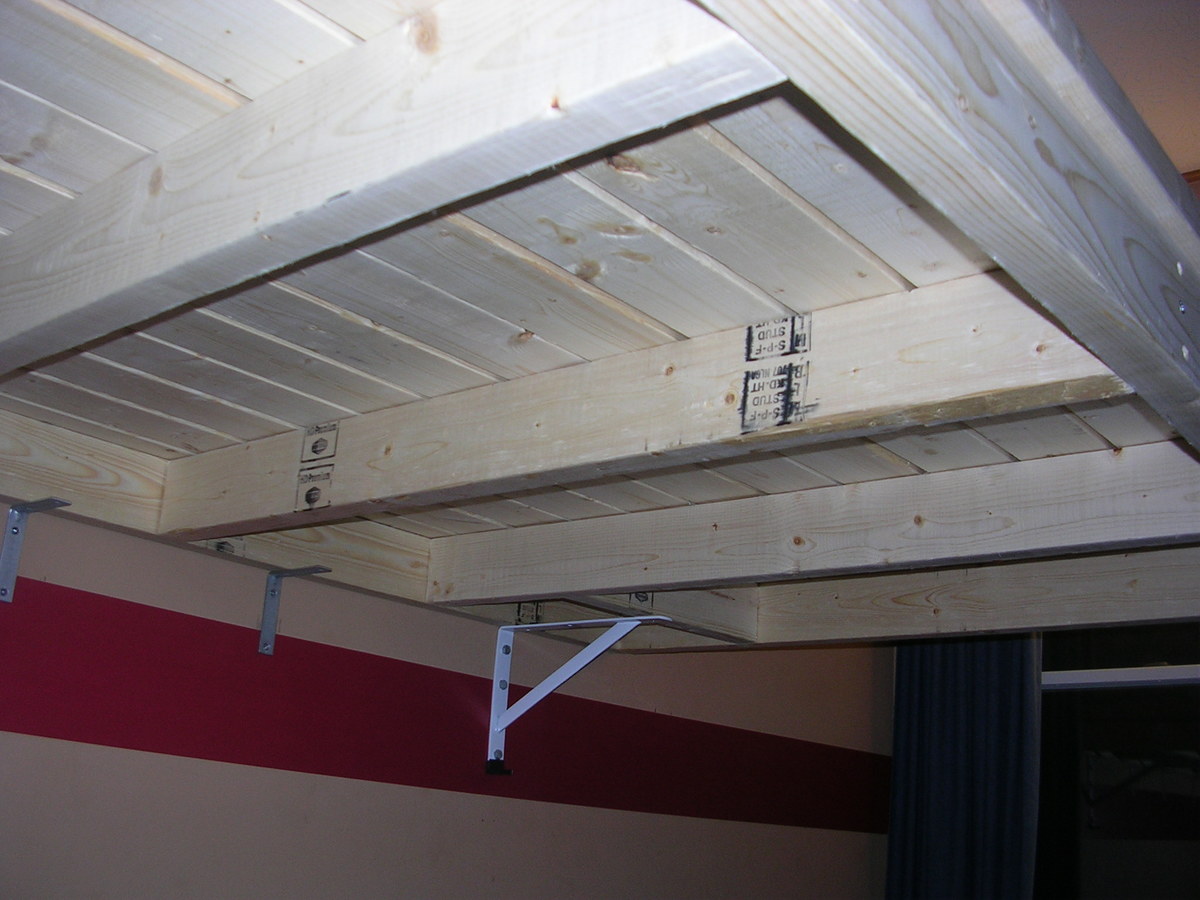
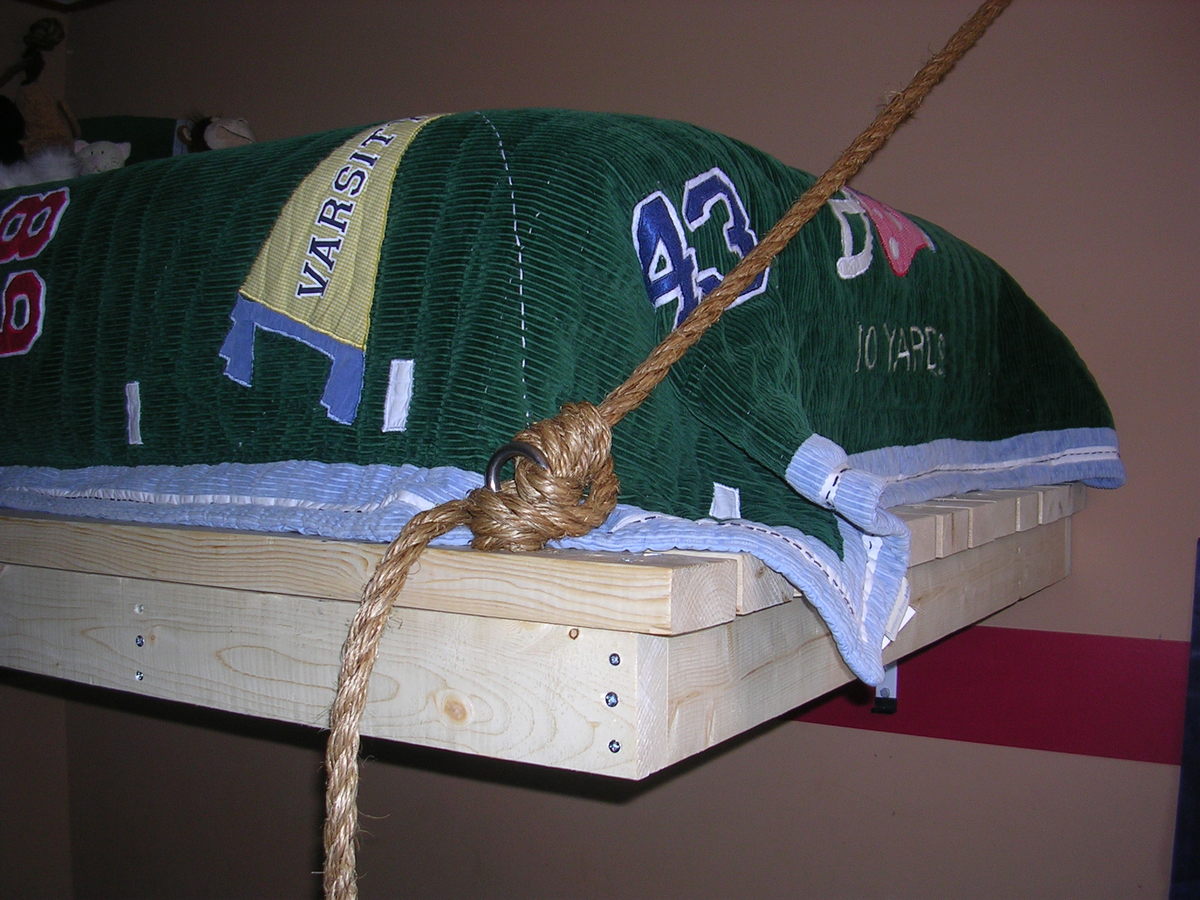
The tricky part was actually getting it on the wall. We borrowed 2 squat racks and put the bed on those until it could be anchored. We also bought L brackets and used those rather than the lag bolts. The rope gives it a nice look, but actually won't become load bearing unless the bed starts to fall.
Our son loves the bed and it gives him plenty of extra space to work with in his room.
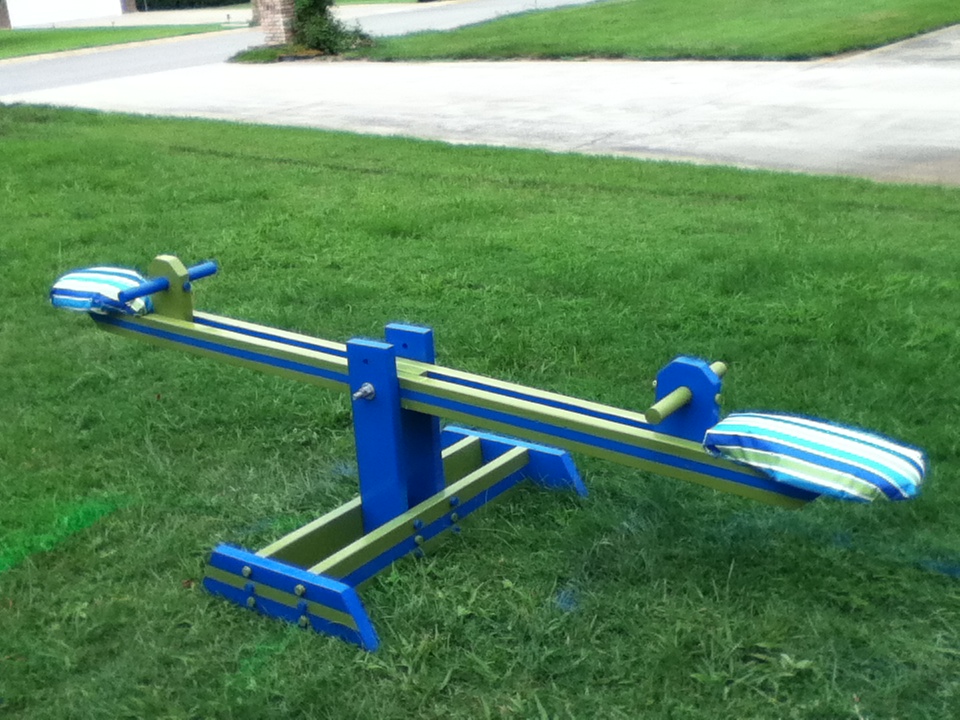
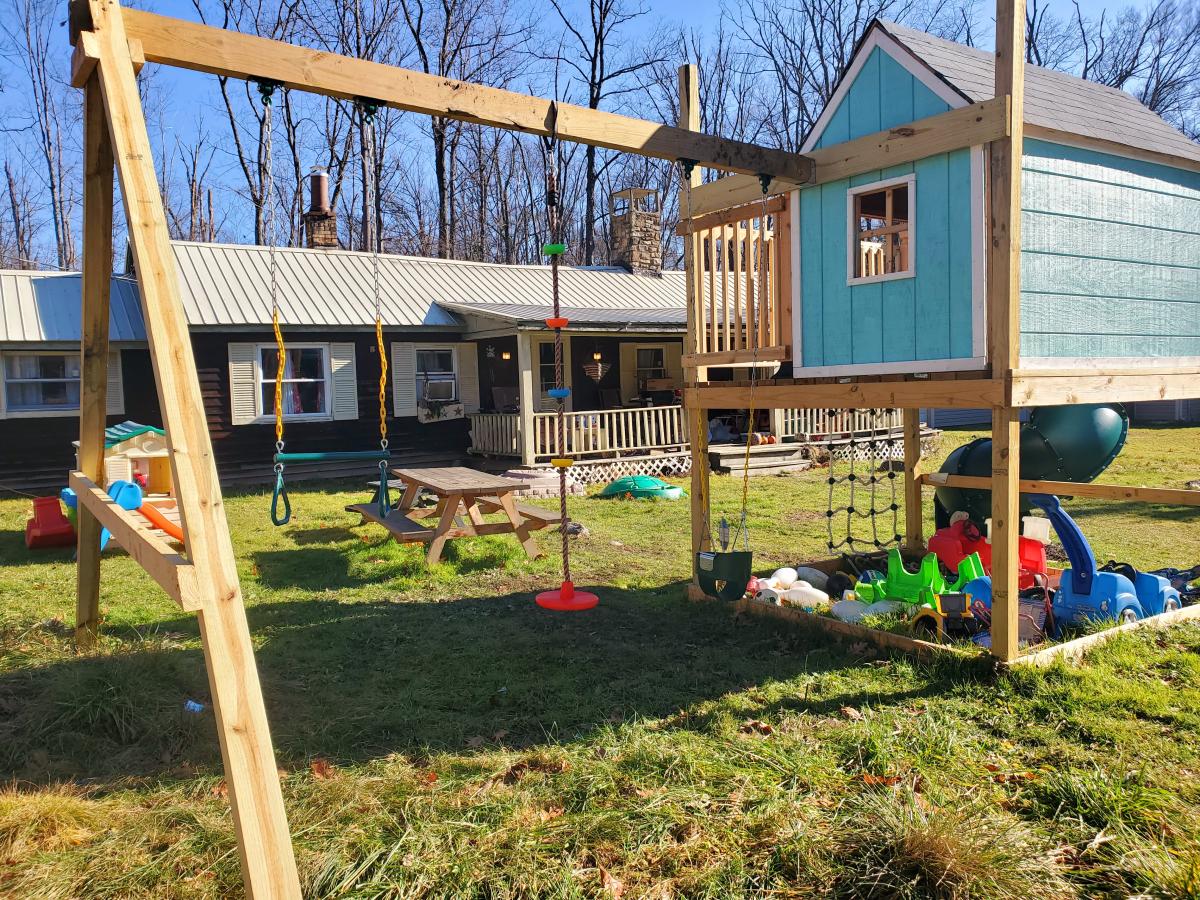
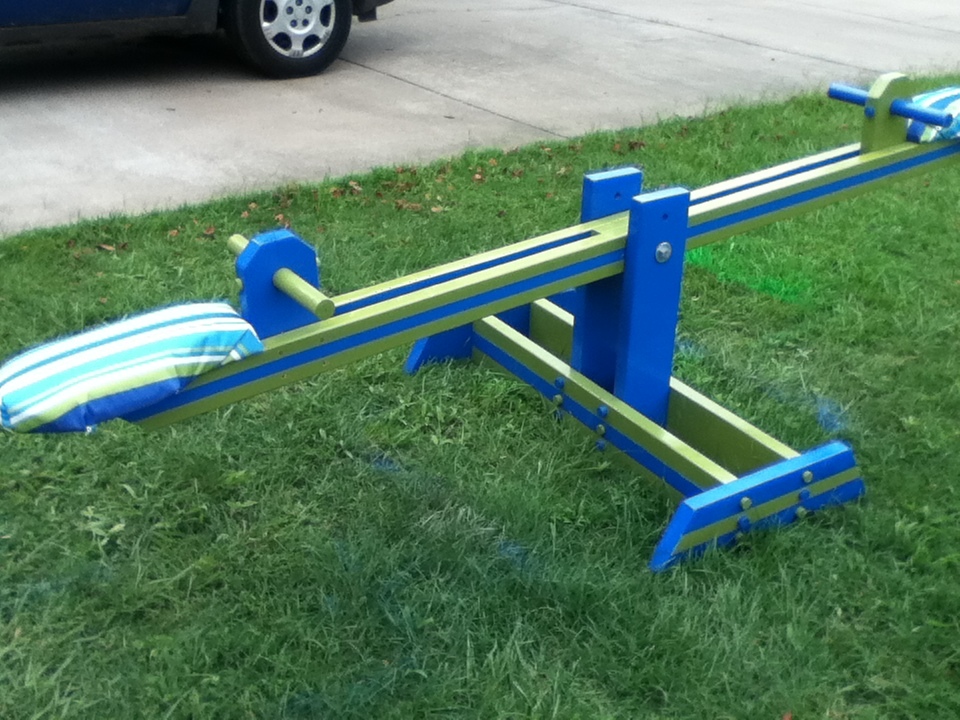
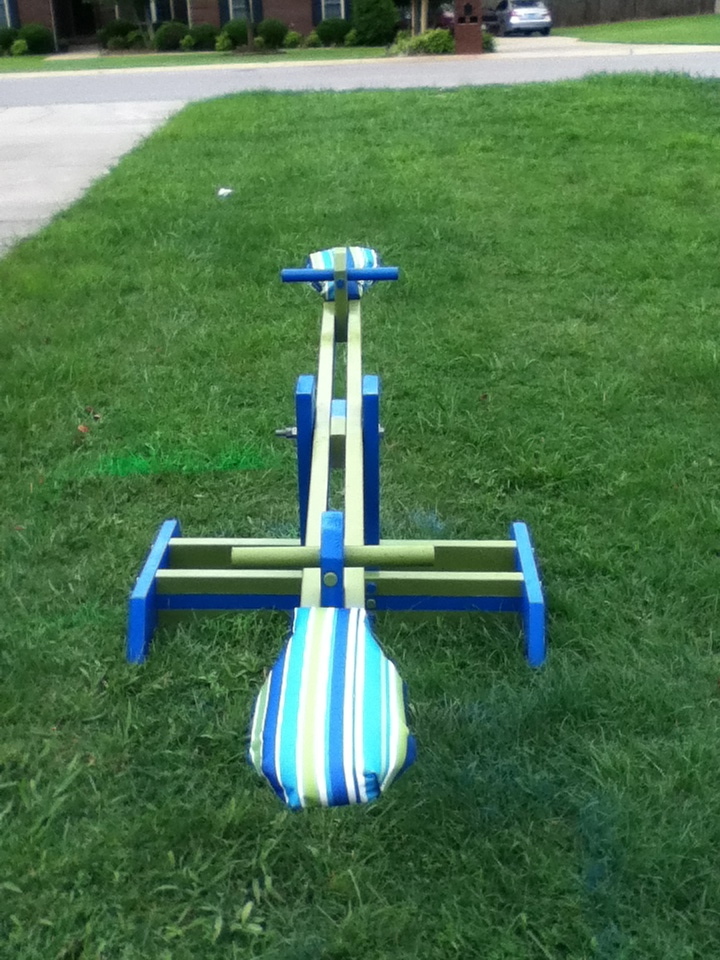
I was actually looking for loft-bed plans when I stumbled upon this little gem. My kids were out of town for a week at the grandparent's house. I had some free time on my hands and before jumping into a big project like a loft bed, wanted to get my feet wet with a smaller project. I way overshot the 2 hr assembly time on this one. My extended cut/assembly time was because I triple coated each surface with paint and then put a clear coat sealant over the whole project. The paint choice was because my daughter's favorite color is blue and my son's is green. Plus, the racing stripes across the base and the cantilever took some extra time with added paint. With the screw holes, I took a 1/2 inch thick dowel and chopped off a bunch of 1/4 inch thick "coins," match painted them & glued them over the screw holes. As a result, it appears that there are dowels holding it together. With the seats, I used my trusty jigsaw and cut a ~34 inch long hourglass shaped piece of wood (wide at the top/bottom, narrow in the middle), then cut that in half to use as the form-fitted seats. I shaped the outdoor fabric (awning material that matched my paint job) around the seats, filling with 3 inch thick batting. The kids are coming home tomorrow and I hope they like their new toy.
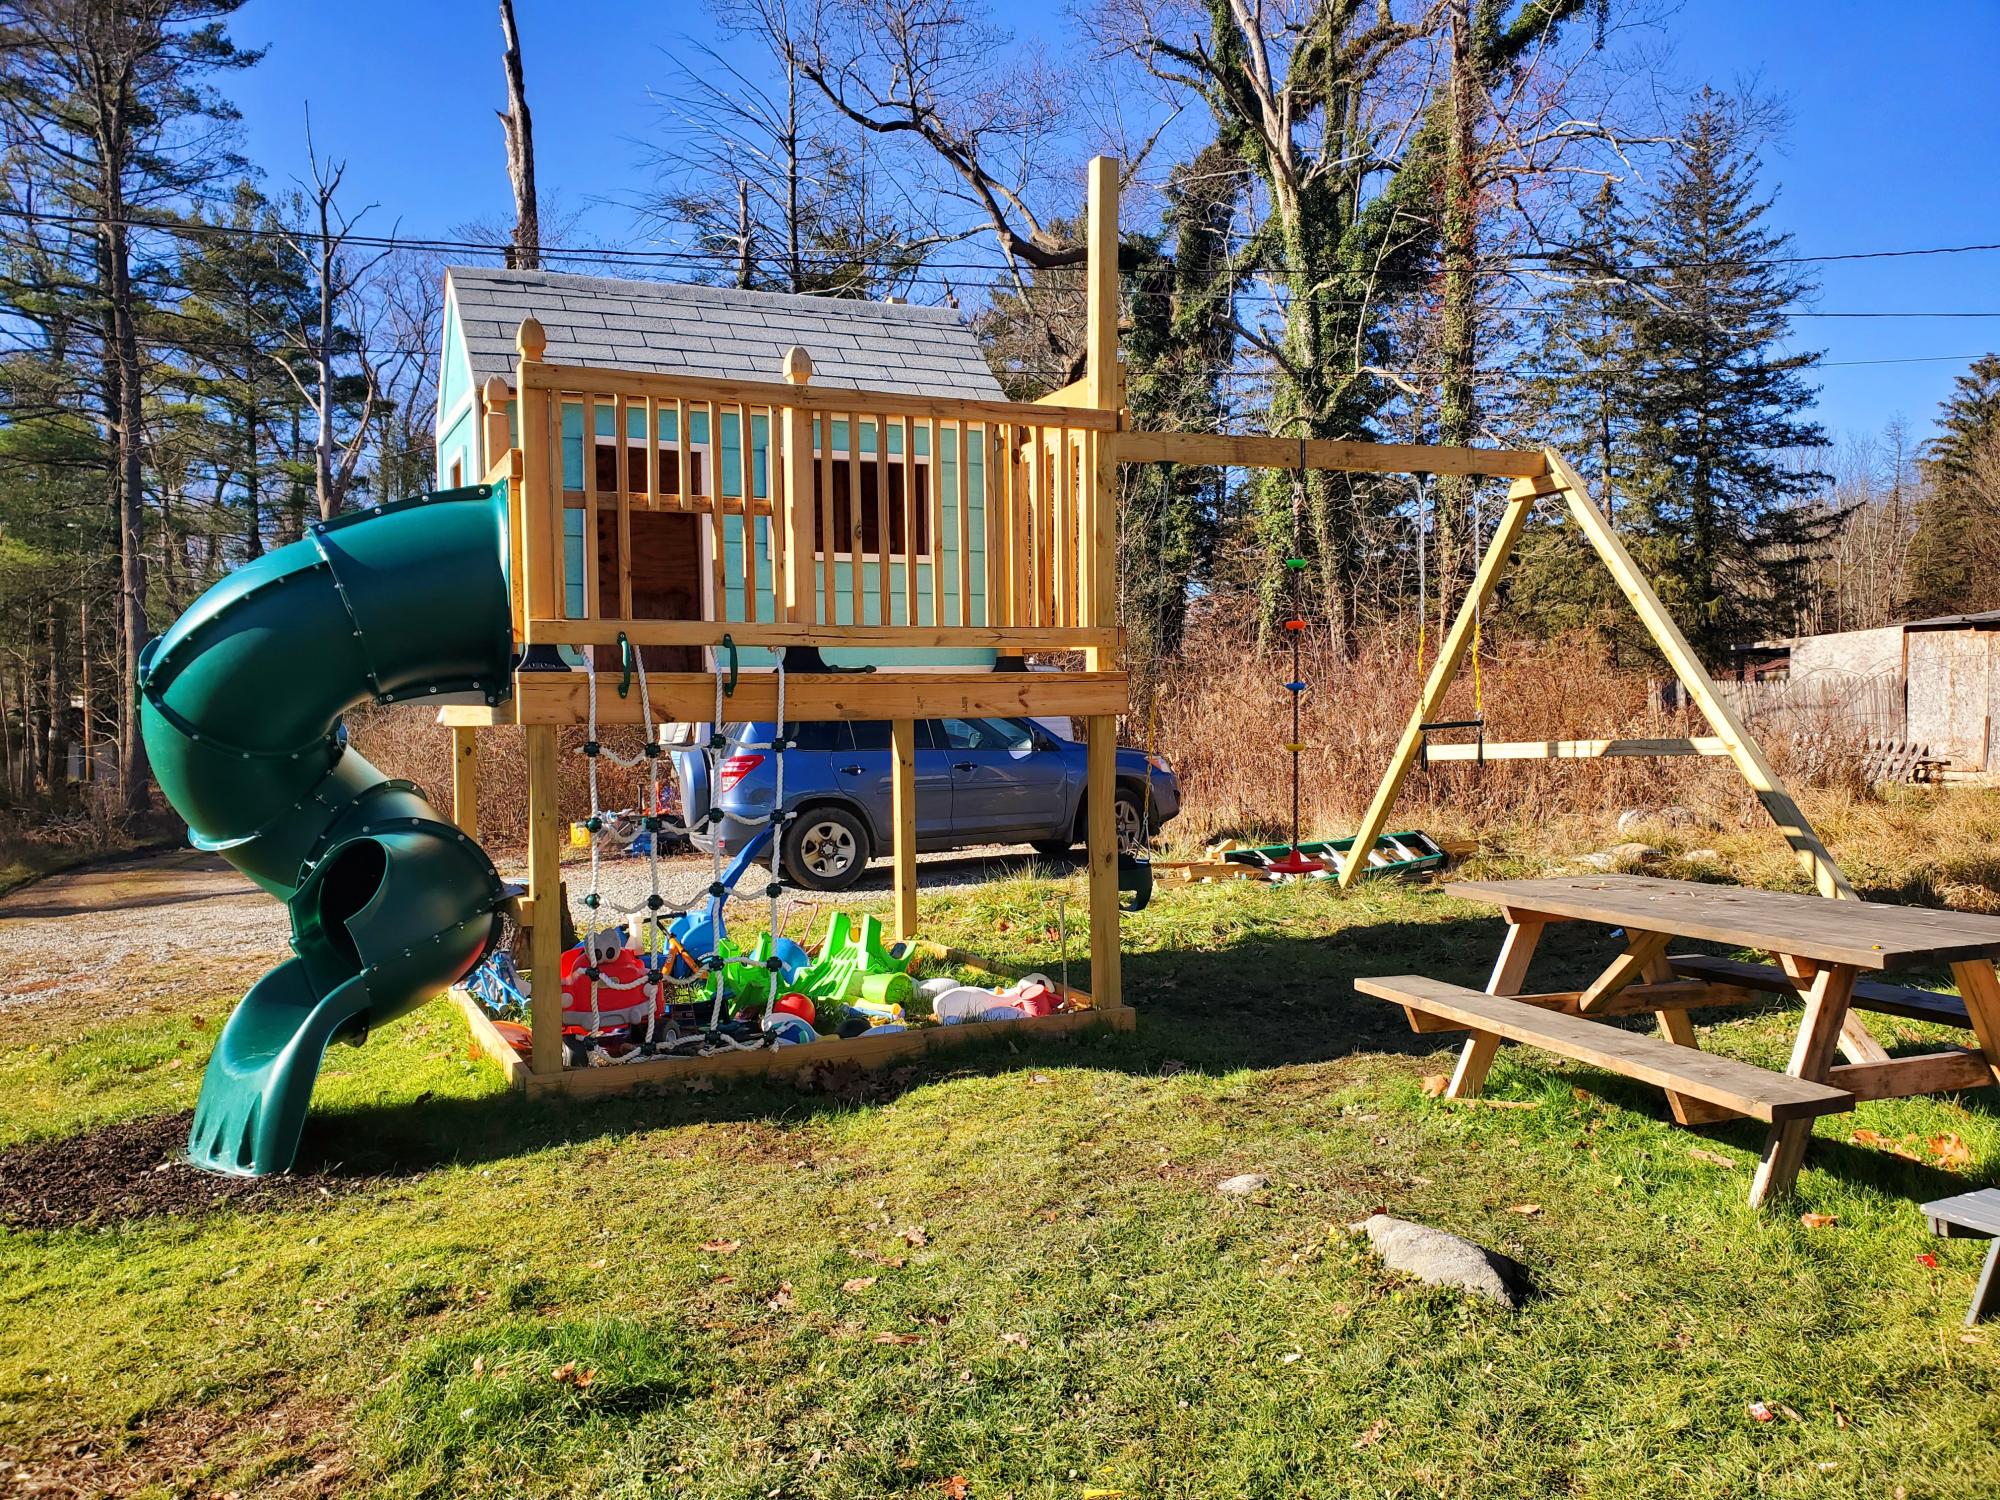
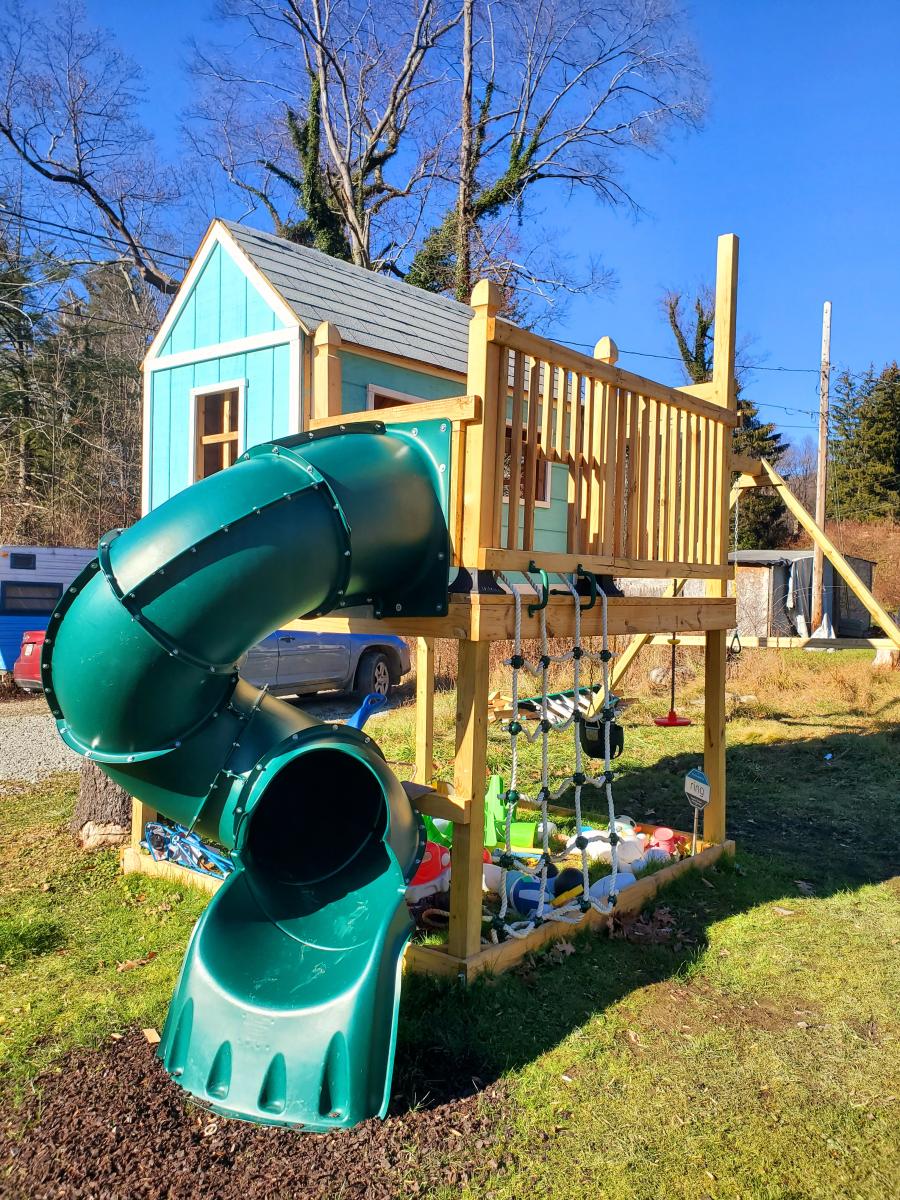
Build this for my two sons with plans from the website.. Turned out good I think. Modified to make it a touch bigger than the original design.

I made this for my son; he loves it! I don't have the tools to bevel edges so I did my angles with a cheap jigsaw and I think they turned out just fine. Thinking of adding a narrow shelf on the bottom.
Super easy and inexpensive build!


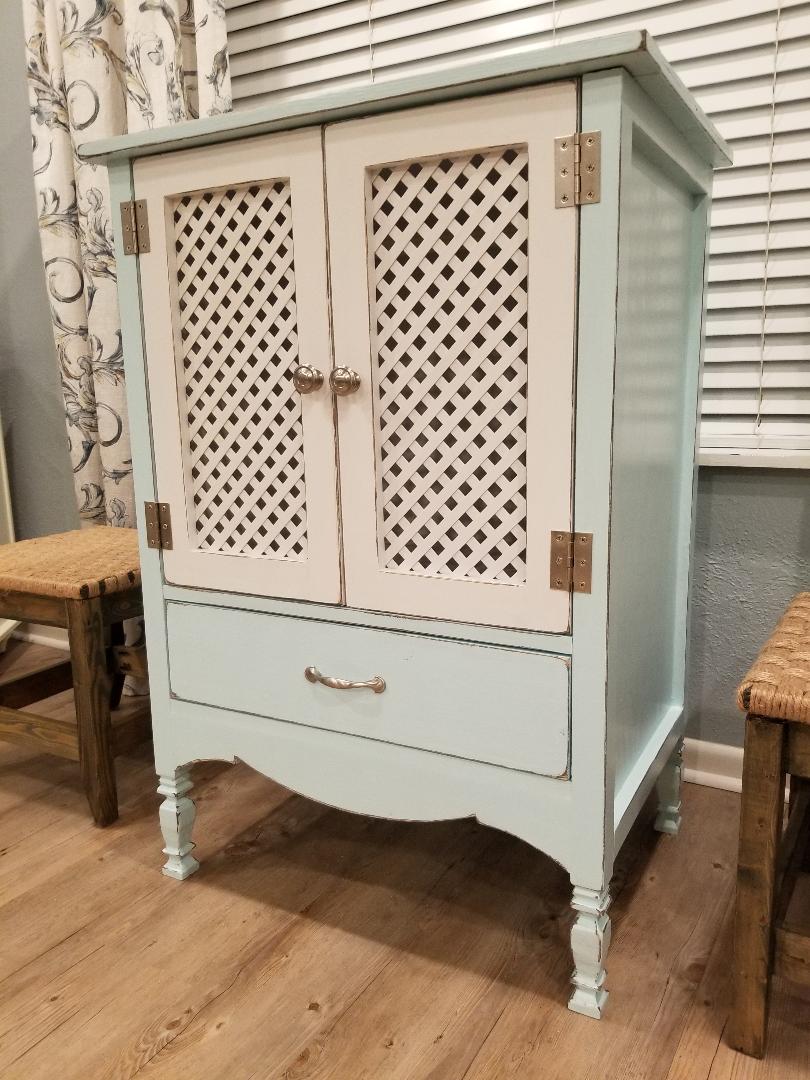
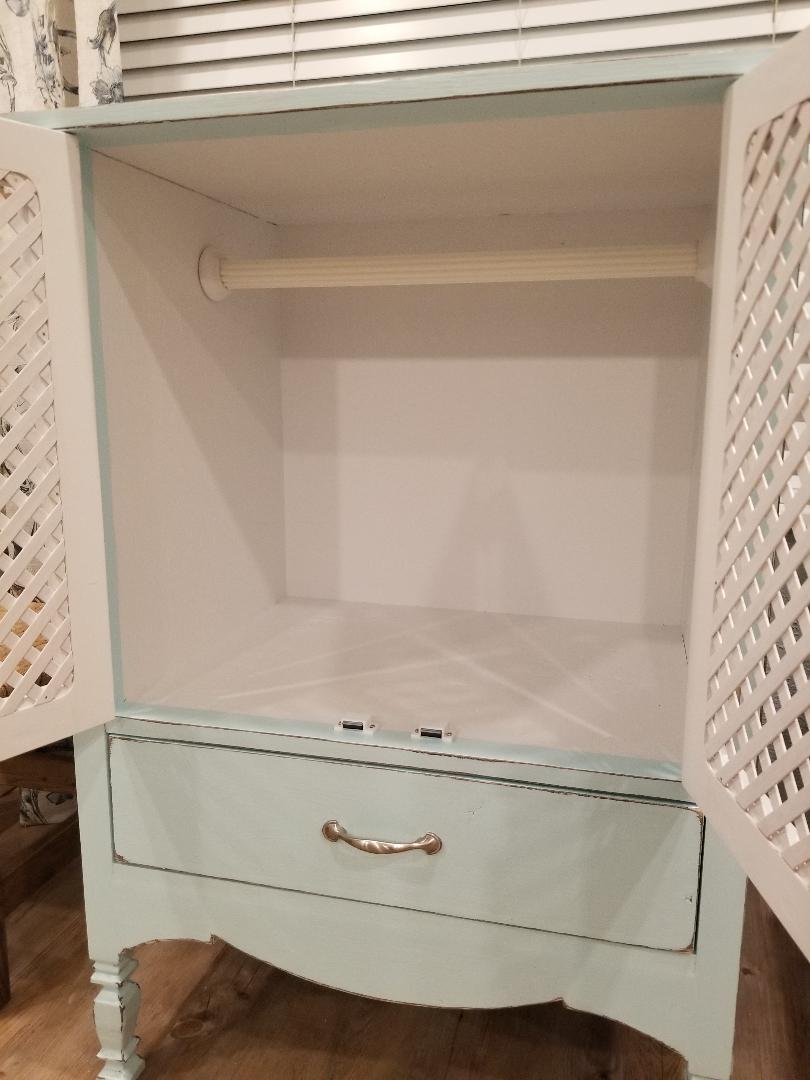
OMGSH ... I'm in love with this project!! My brother had given me some left over lattice that he had, and I was wondering what project I could use it on. This turned out so precious. However, I must say that drawers aren't for the faint of heart. Feeling defeated, I took the cabinet over to my brother's workshop and he helped me (or maybe he just did it for me). Anyway, as with all of my projects, it's going in the annual church auction and I can't wait to see how high it goes!!
Again, thanks Ana for your blog ... you're such an encouragement!!!
Thu, 02/17/2022 - 08:35
WOW, all the details and color choice are spot on! It will definitely be a big hit at the auction!
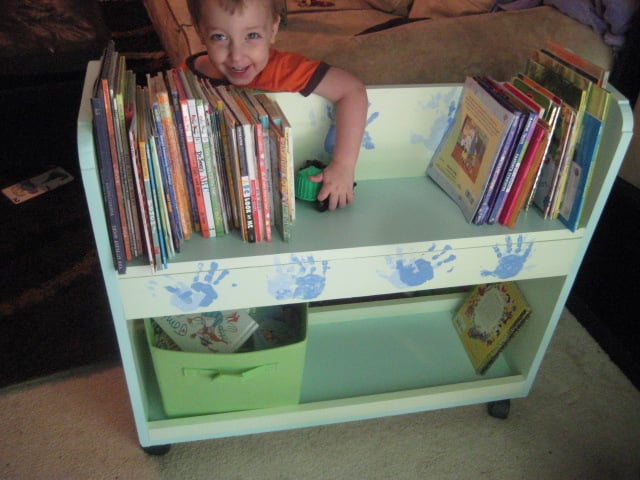
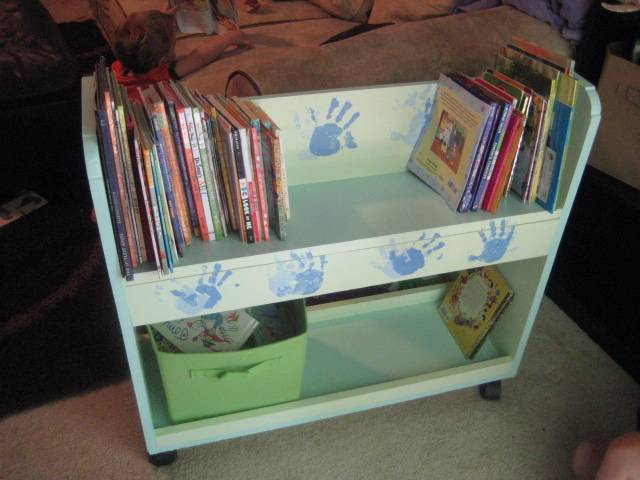
My children's books at my children's level! They take pride in building for themselves, and I couldn't be happier~
Ana's library cart was a breeze to build! I used my new pocket-hole jig with great success. This cart is strong, and holds a load of books.
The guys at Blue cut the wood. Thanks to the staple sticking off the end of some of my lumber, the cuts were off. I had to use coarse sand paper to take 1/8inch off some ends. Lesson learned~
The finish was the most fun. I used paint leftover from other projects, all water-based products. The top of the shelf has my 4yr-old son's hand-prints, the smaller face has my 2yr-old son's hand-prints. Alex loves it most, going to it and patting it and pressing his hand on it first thing every morning. They are both very proud of our work :D
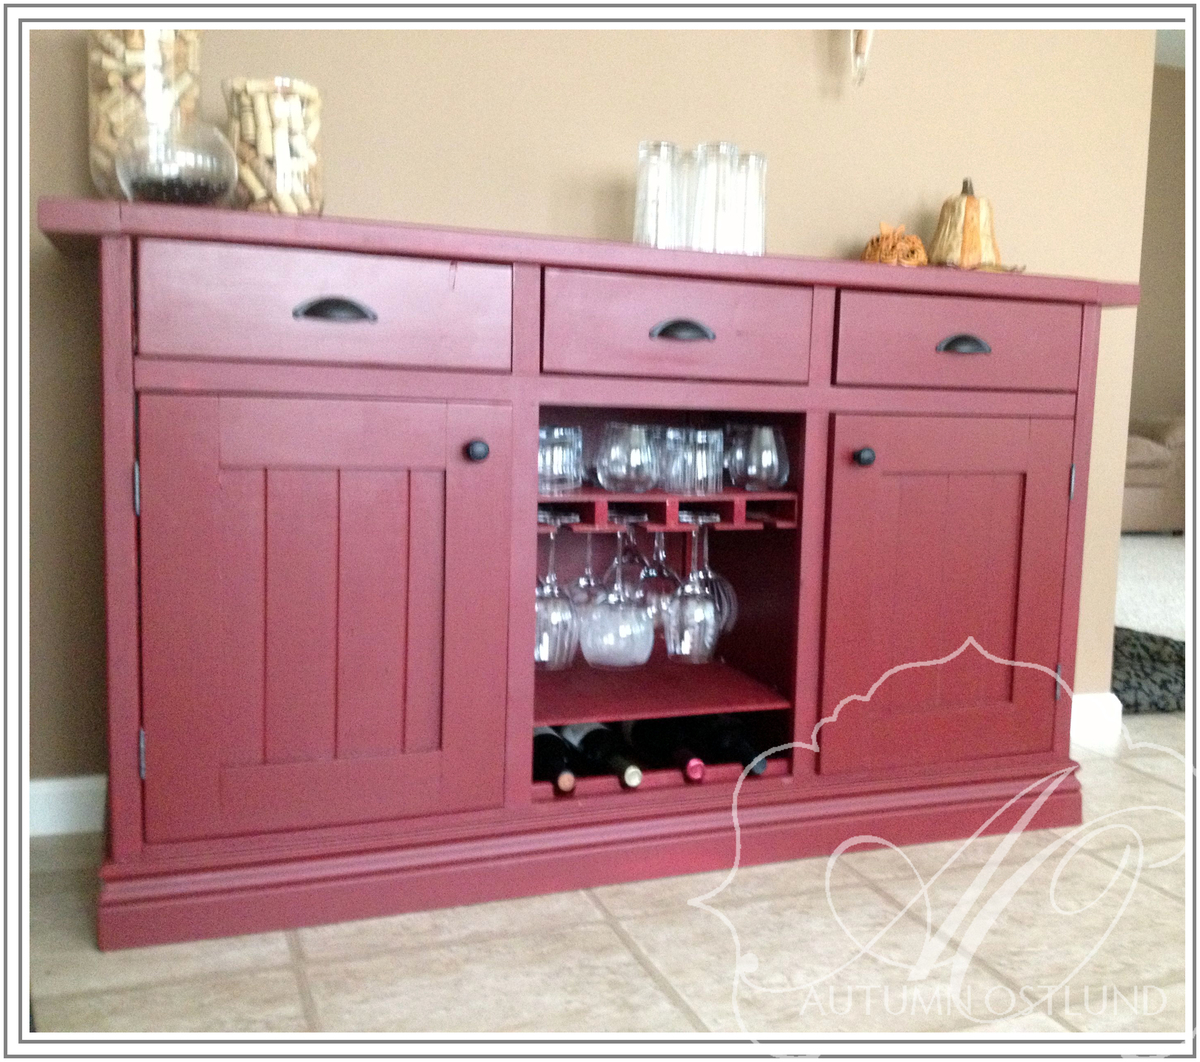
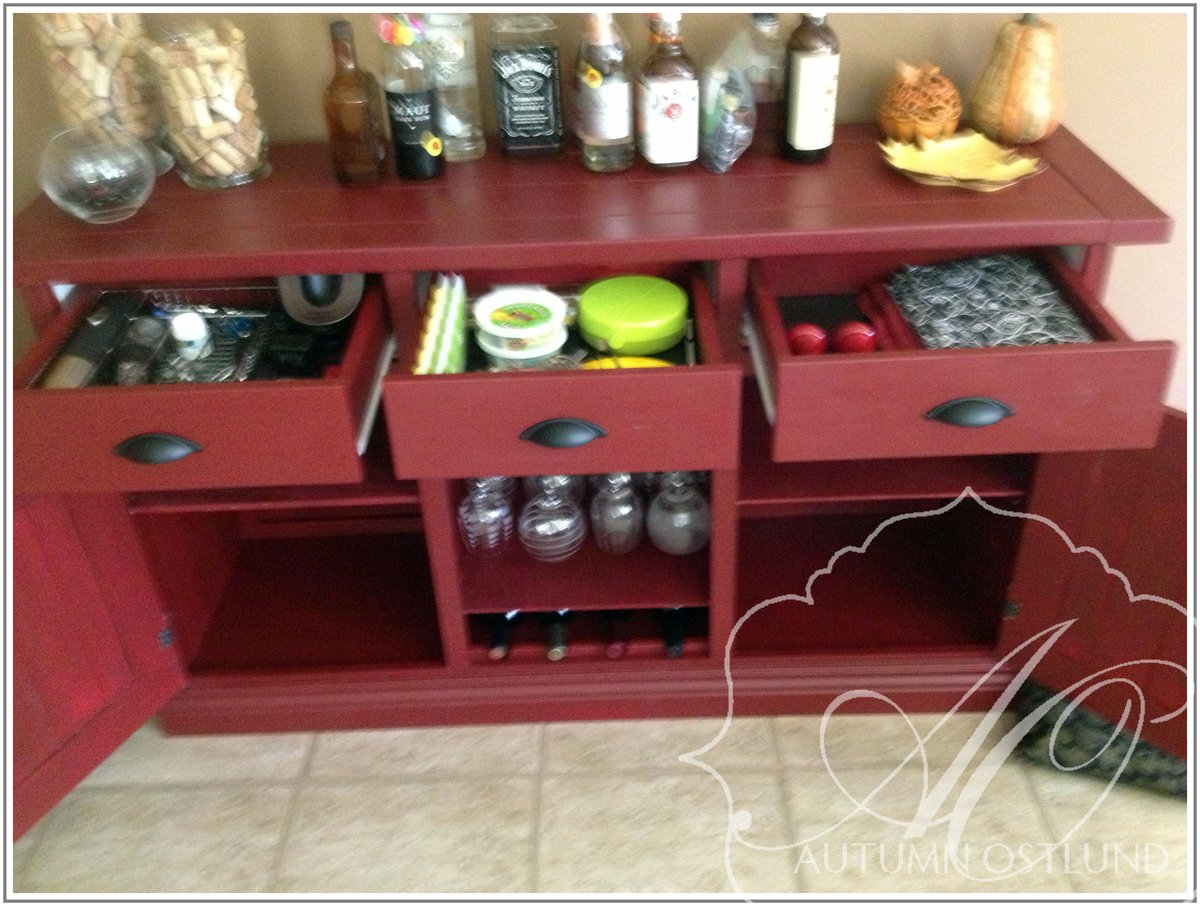
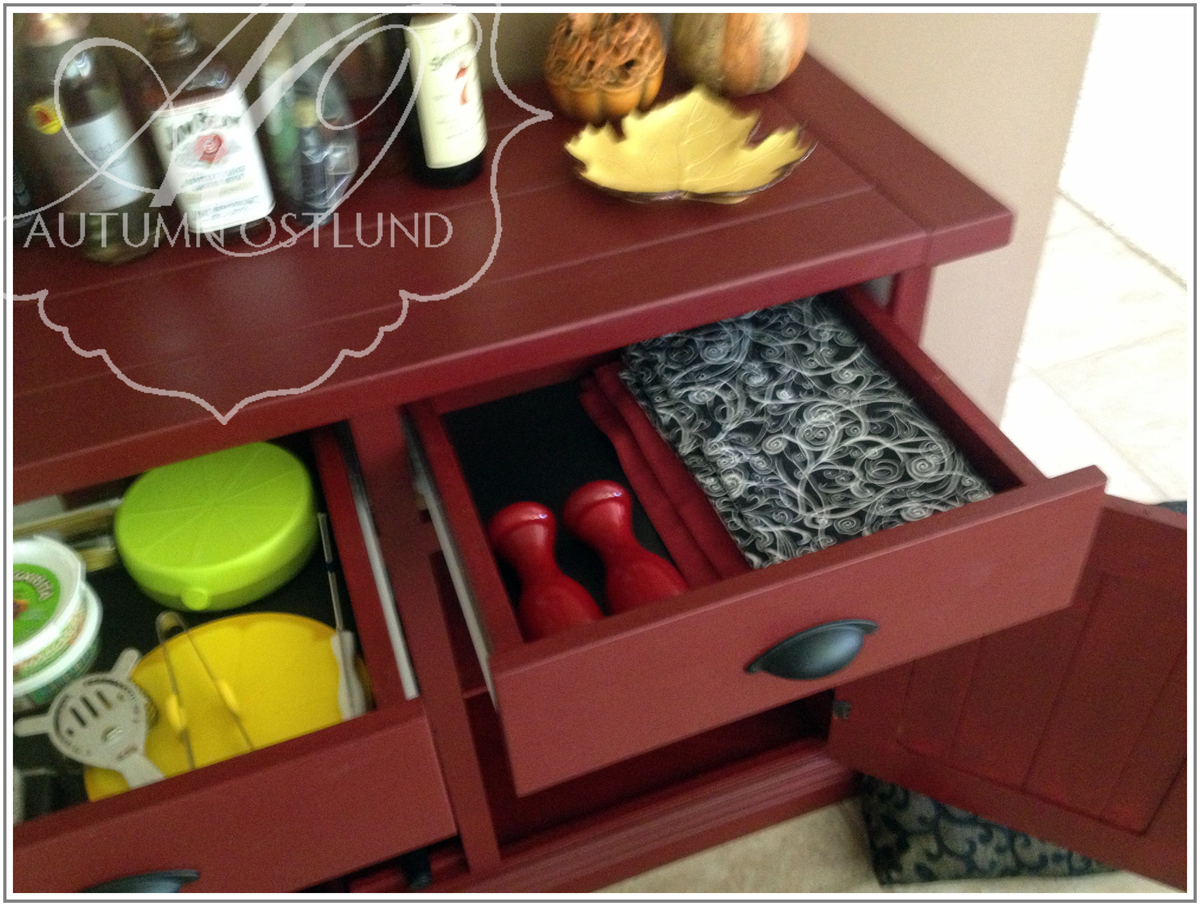
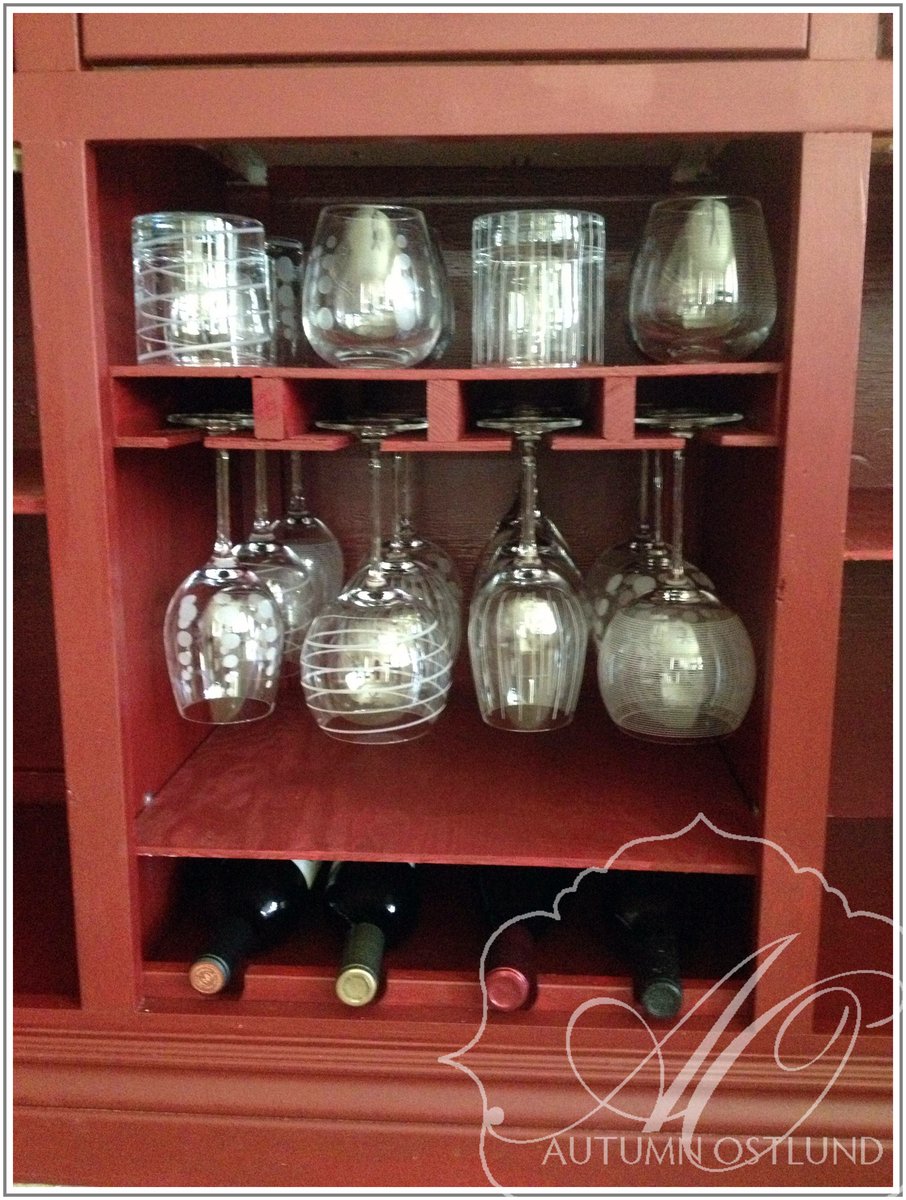
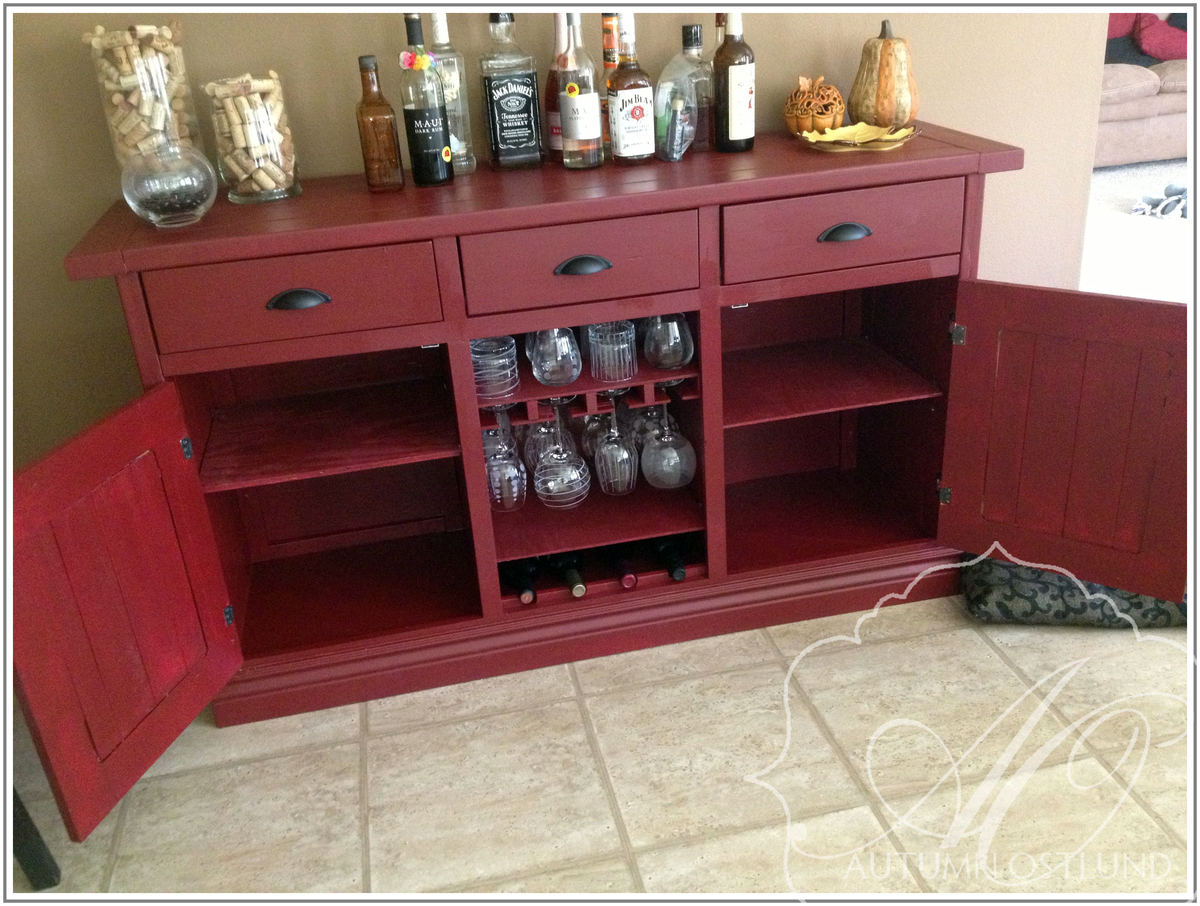
I modified the plan for the planked wood sideboard so it wasn't so large. I also took out the middle door and made an open area with shelves and a stemware rack.

Wed, 07/17/2013 - 09:49
What a bold and functional sideboard you've created. :) Lovely.
Mon, 12/22/2014 - 12:58
Do you have plans you would share for the open area with shelves and stemware rack?
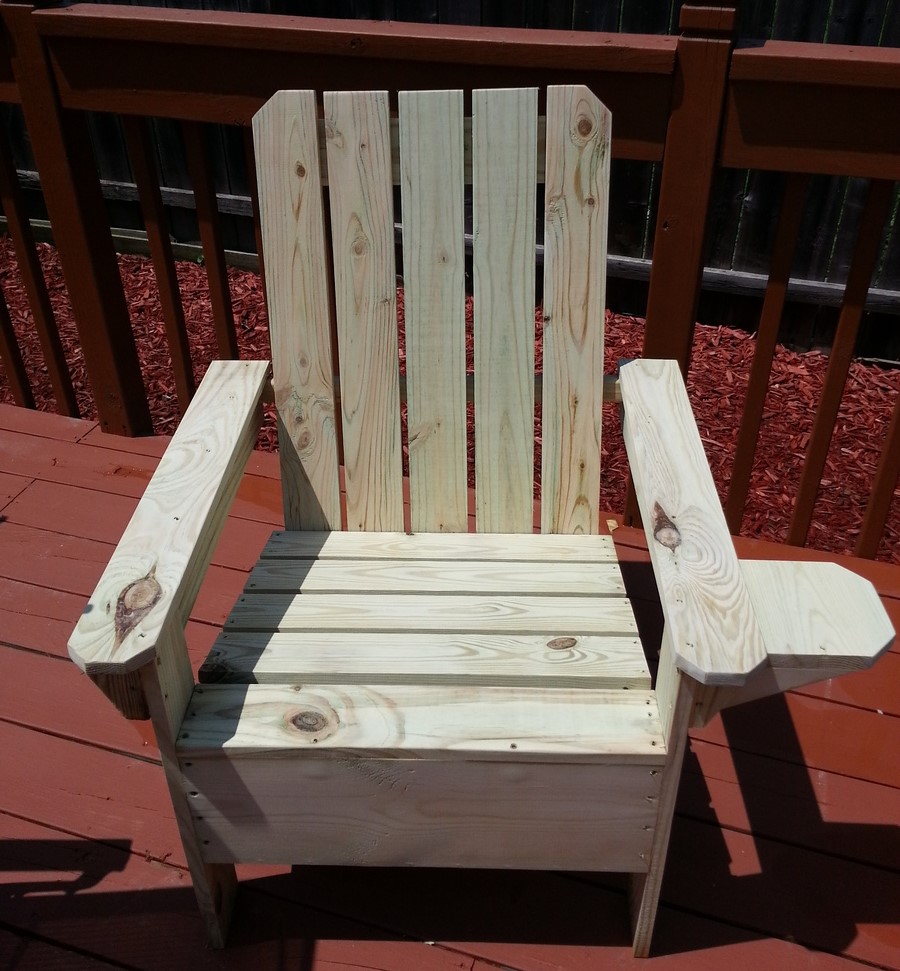
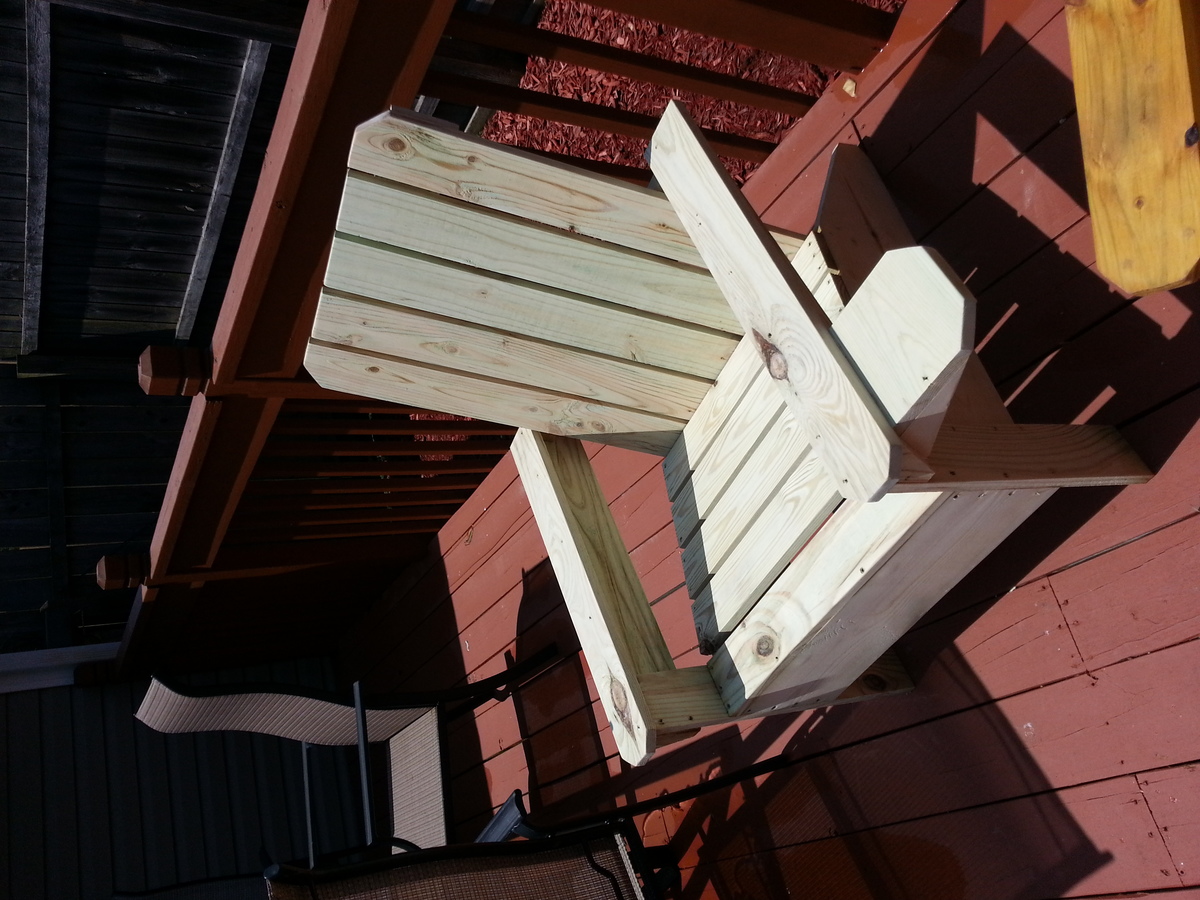
Great plan and project. I added a cup holder with left over lumber. Added some 45 angles to give it some dimension. Screwed and glued almost everything from the back to avoid any screws
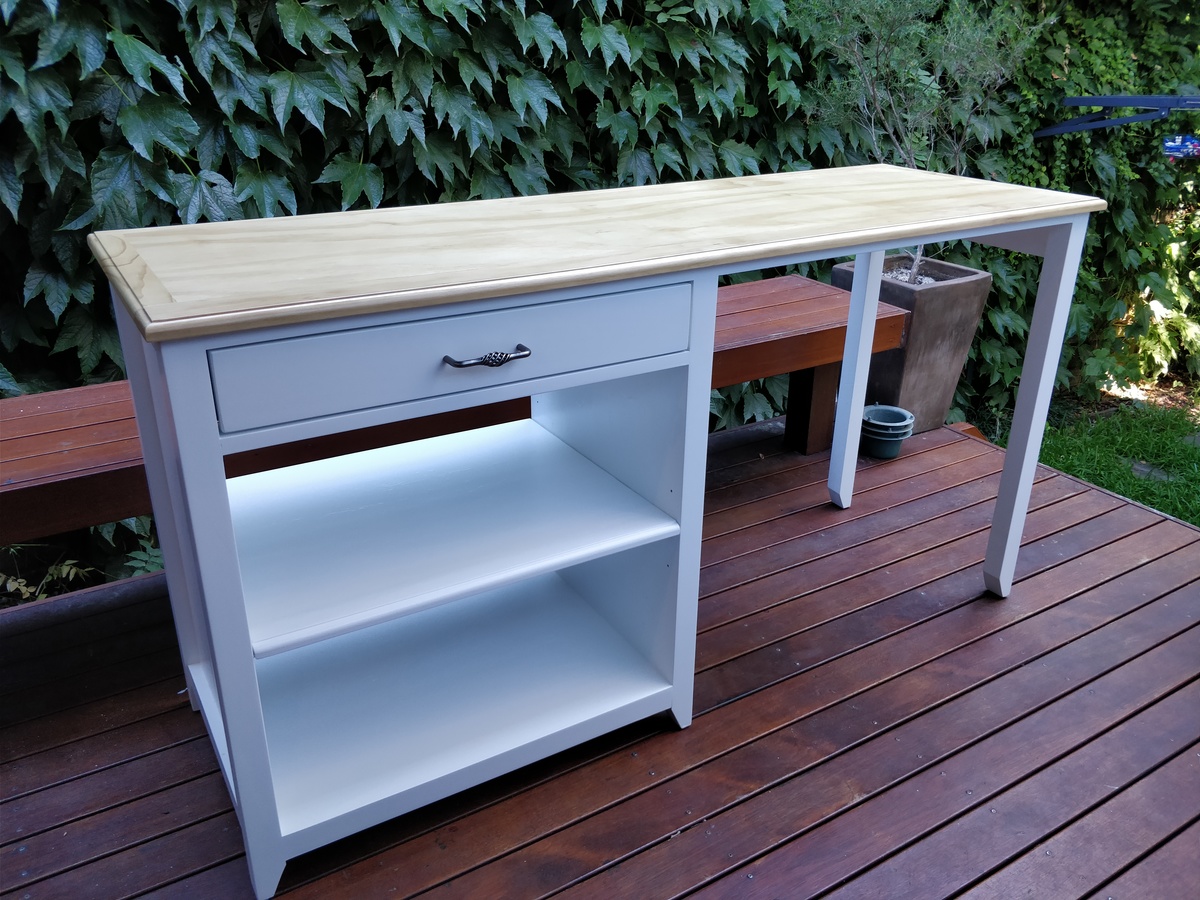
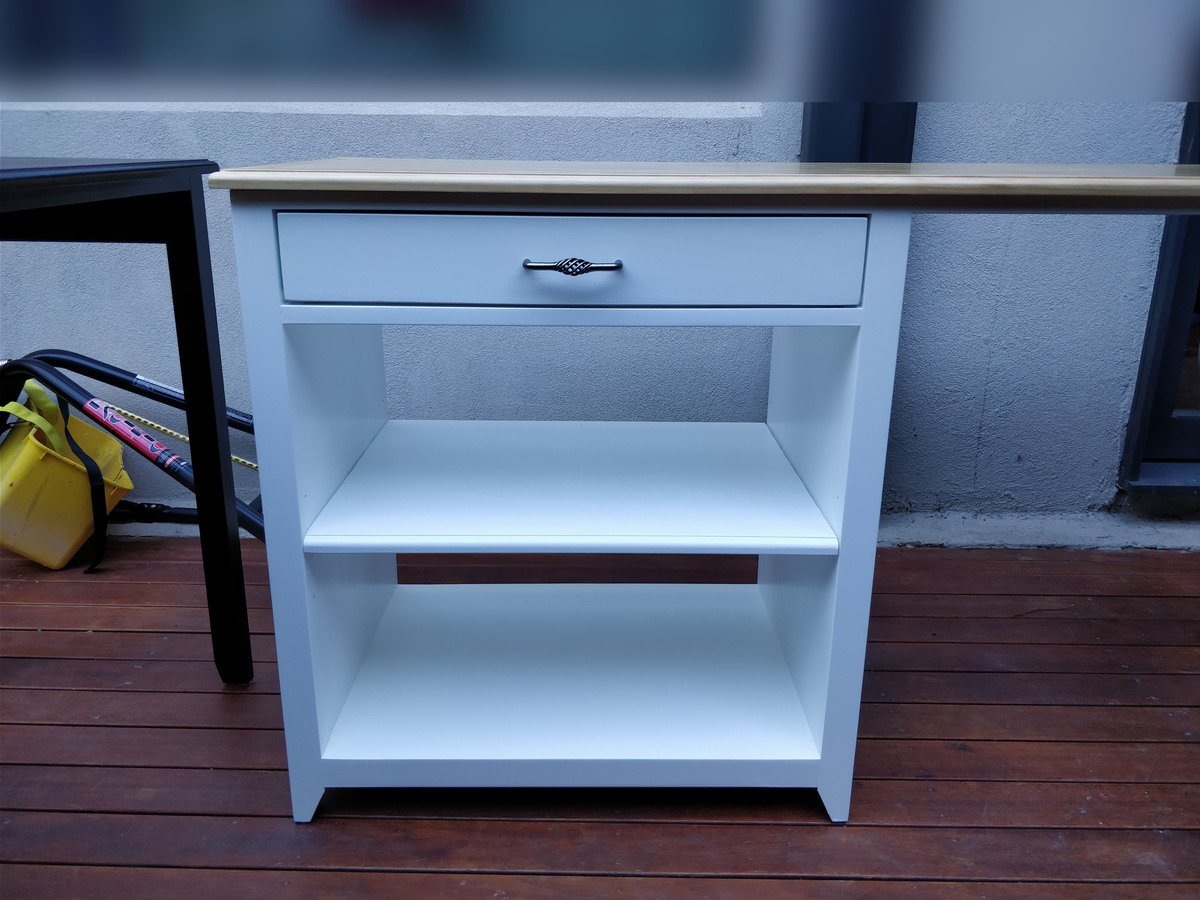
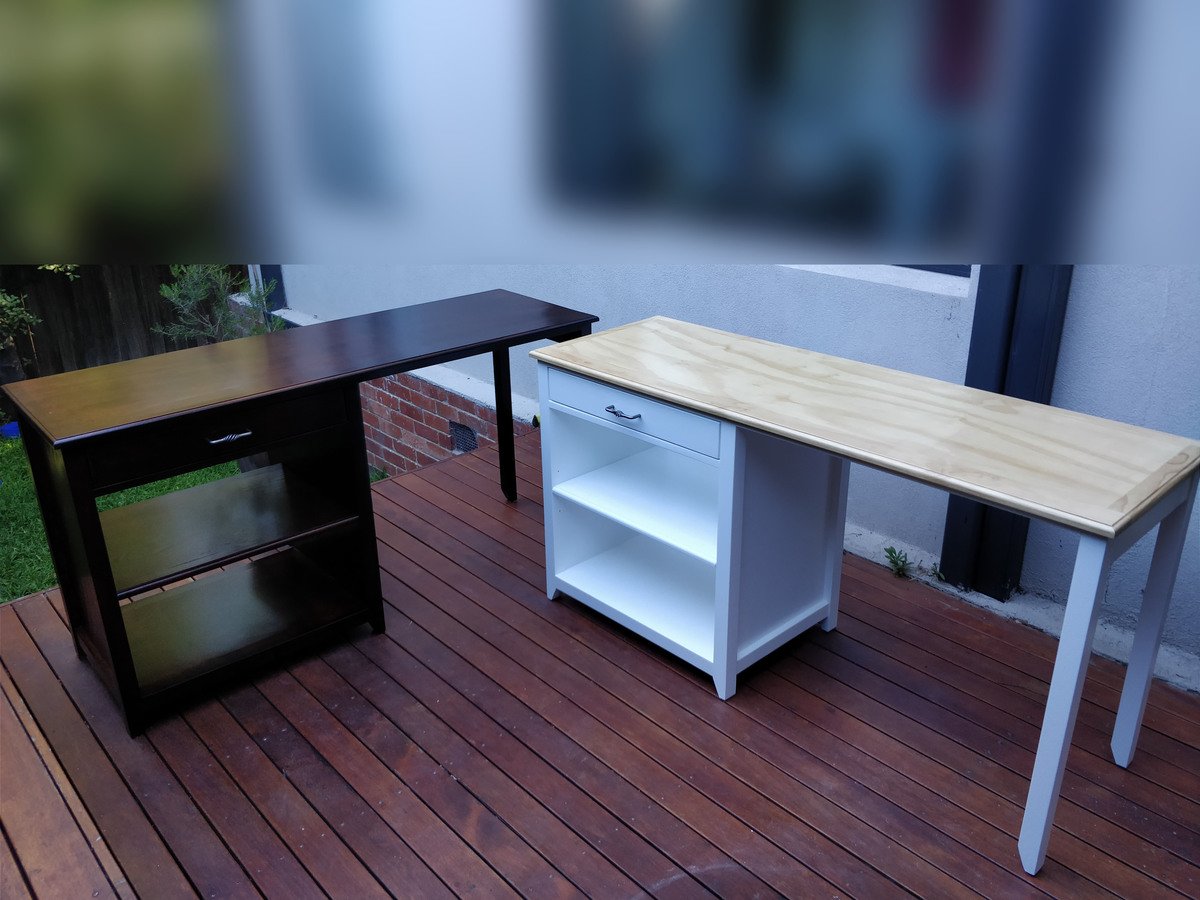
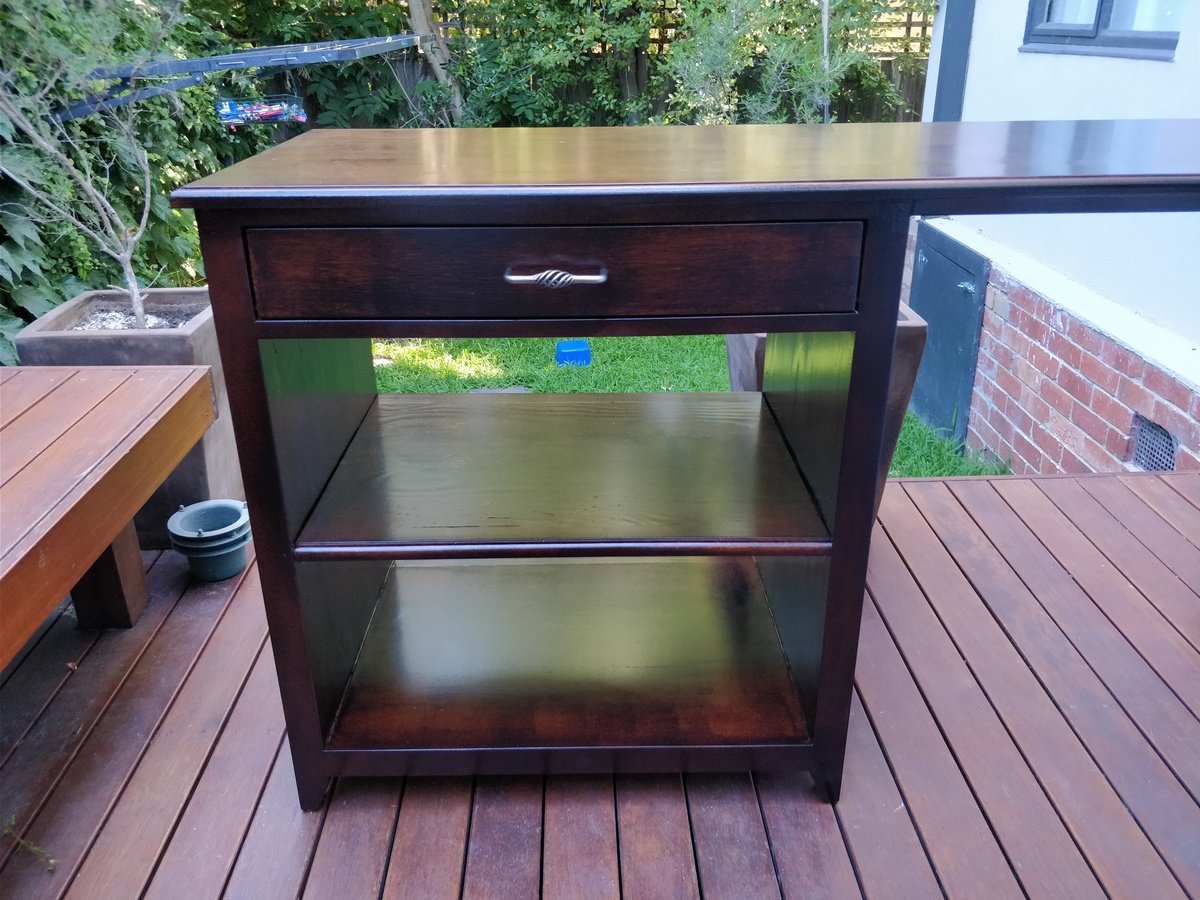
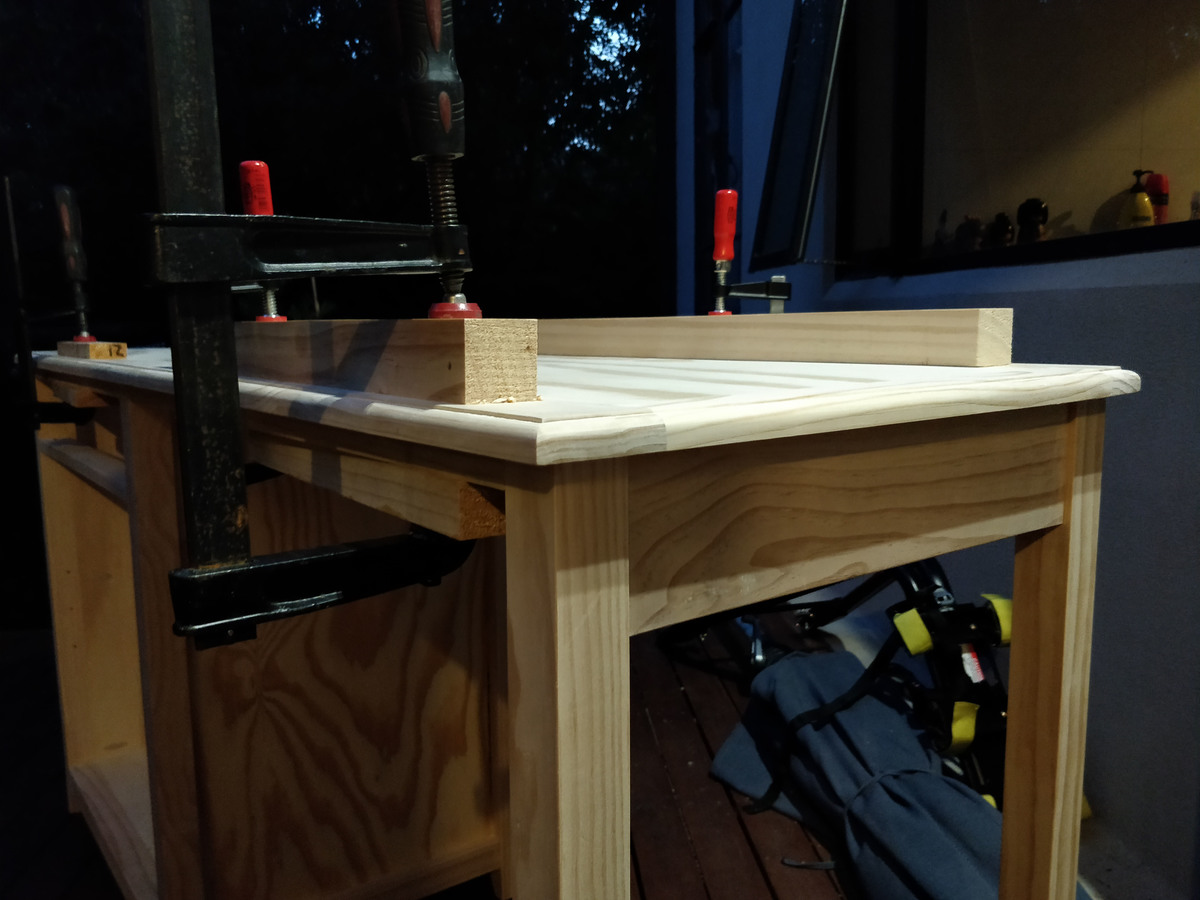
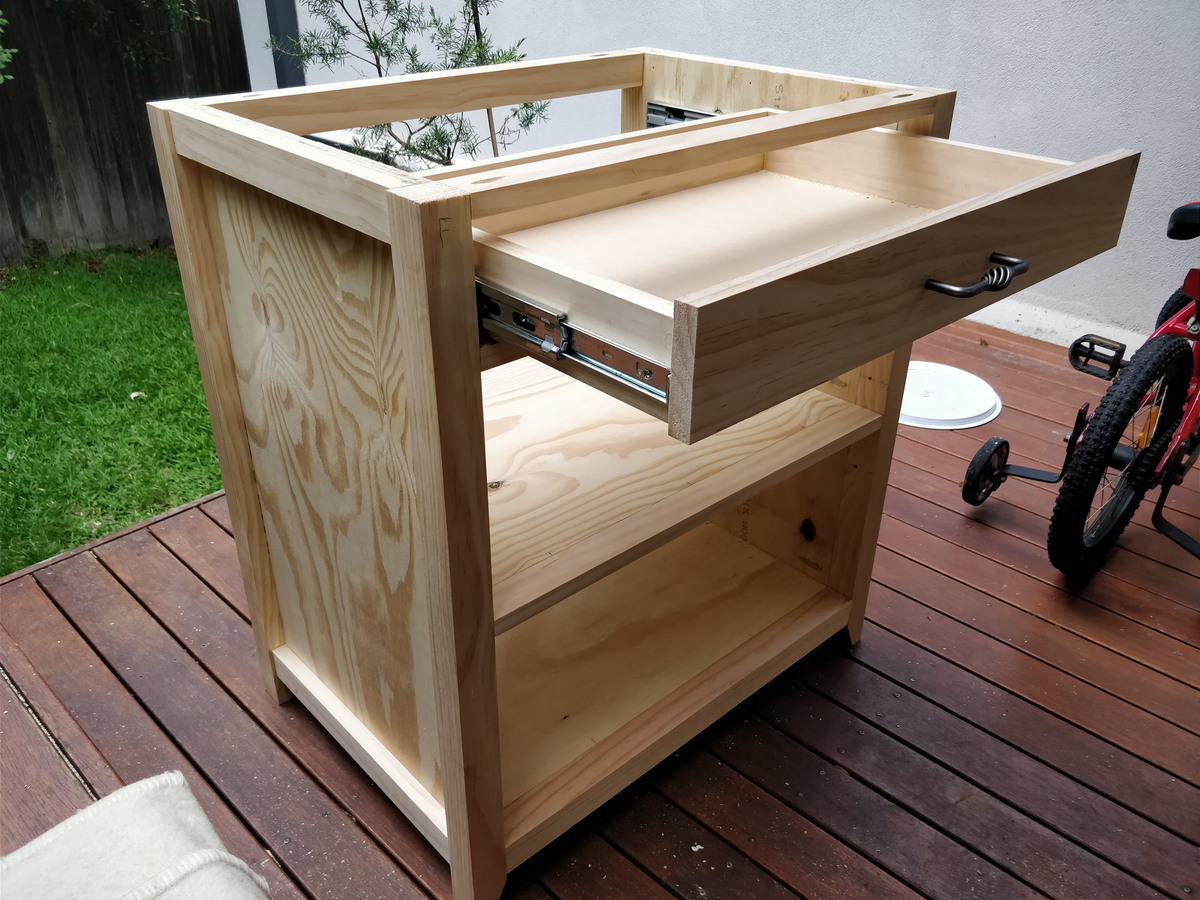
I made a pair of Channing desks, one for each son to match the Channing Bookcases I'd made previously using another one of Ana's plans! I followed the directions pretty much exactly, except for a couple of minor changes. On the tops, I wanted to router the edges to add detail, and to make it neat I covered the ply end-grain with some pine 2x1's. At the end (step 15) of the build I added the extra support. 2x1 at the front to match the rail above the drawer, and 2x2 at back to make the RHS legs properly sturdy.
Overall, the project was not particularly difficult, the building took about 3 days to complete both desks. As usual the finishing always takes longer than the building, and in this case it took 4 days. This was mostly due to the 6 hrs between coats for the varnish.
I sprayed the white desk (masking the top) with satin door trim paint I had available, and I used clear satin varnish on the top as a contrast.
The other desk has 1 coat of sealer and 3 coats of chocolate walnut satin stain/varnish.
I'm very happy with the results - but I'm not really sure which one is my favourite!

This was our first project and i gotta say, I love doing this! There are so many ideas on this website!
This was super easy, my husband and I had trouble with some of it because it wasnt fitting right, but we just tweaked it and it turned out perfect!
I had been looking online for an outdoor sectional for months, and the price was too high for us to spend. Our final total was only 238 dollars all together. Store (and bad quality at that) furniture would have cost us over 500. So, I am VERY pleased.
I got the cushions on craigslist. Listed at 8 dollars a cushion. They were still in the wrapping! We have one extra cushion that we plan on making an ottoman soon.


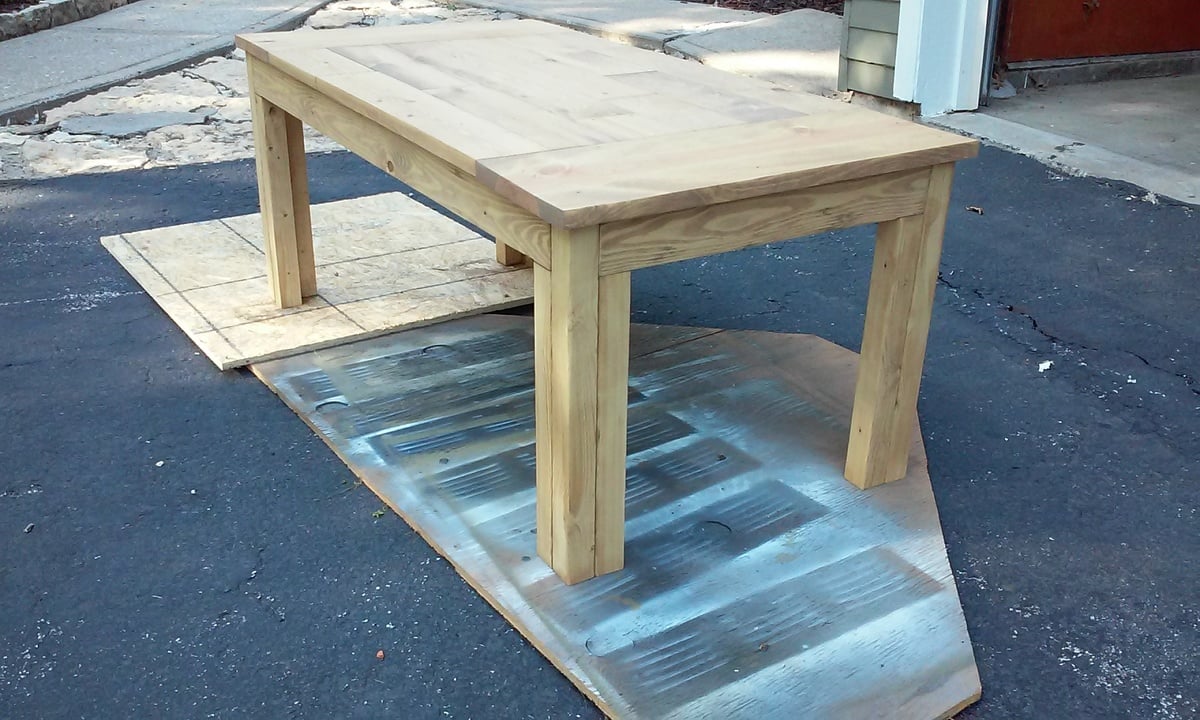
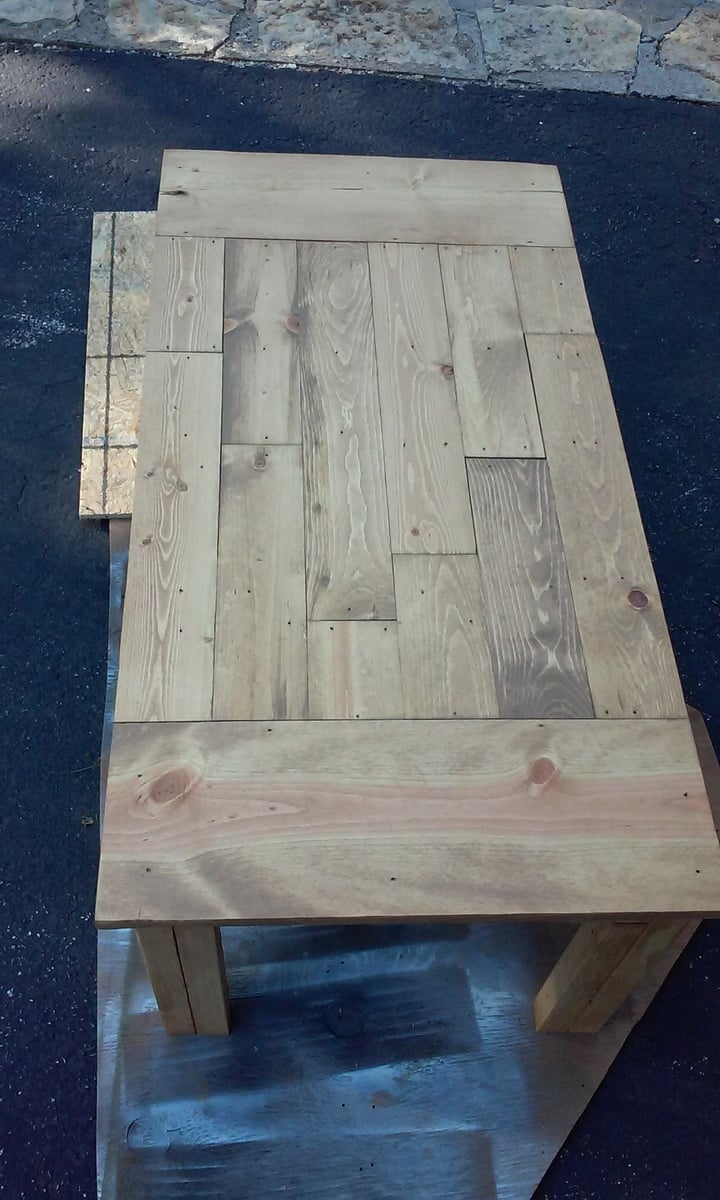
Decided it was time to use up some scrap wood and build a coffee table.
Now I need to get wood to actually make the matching end tables.
1x8s and 1x4s for the top and 2x2s for the legs and underside braces
Hope this help to inspire others on how to use up their scrap wood
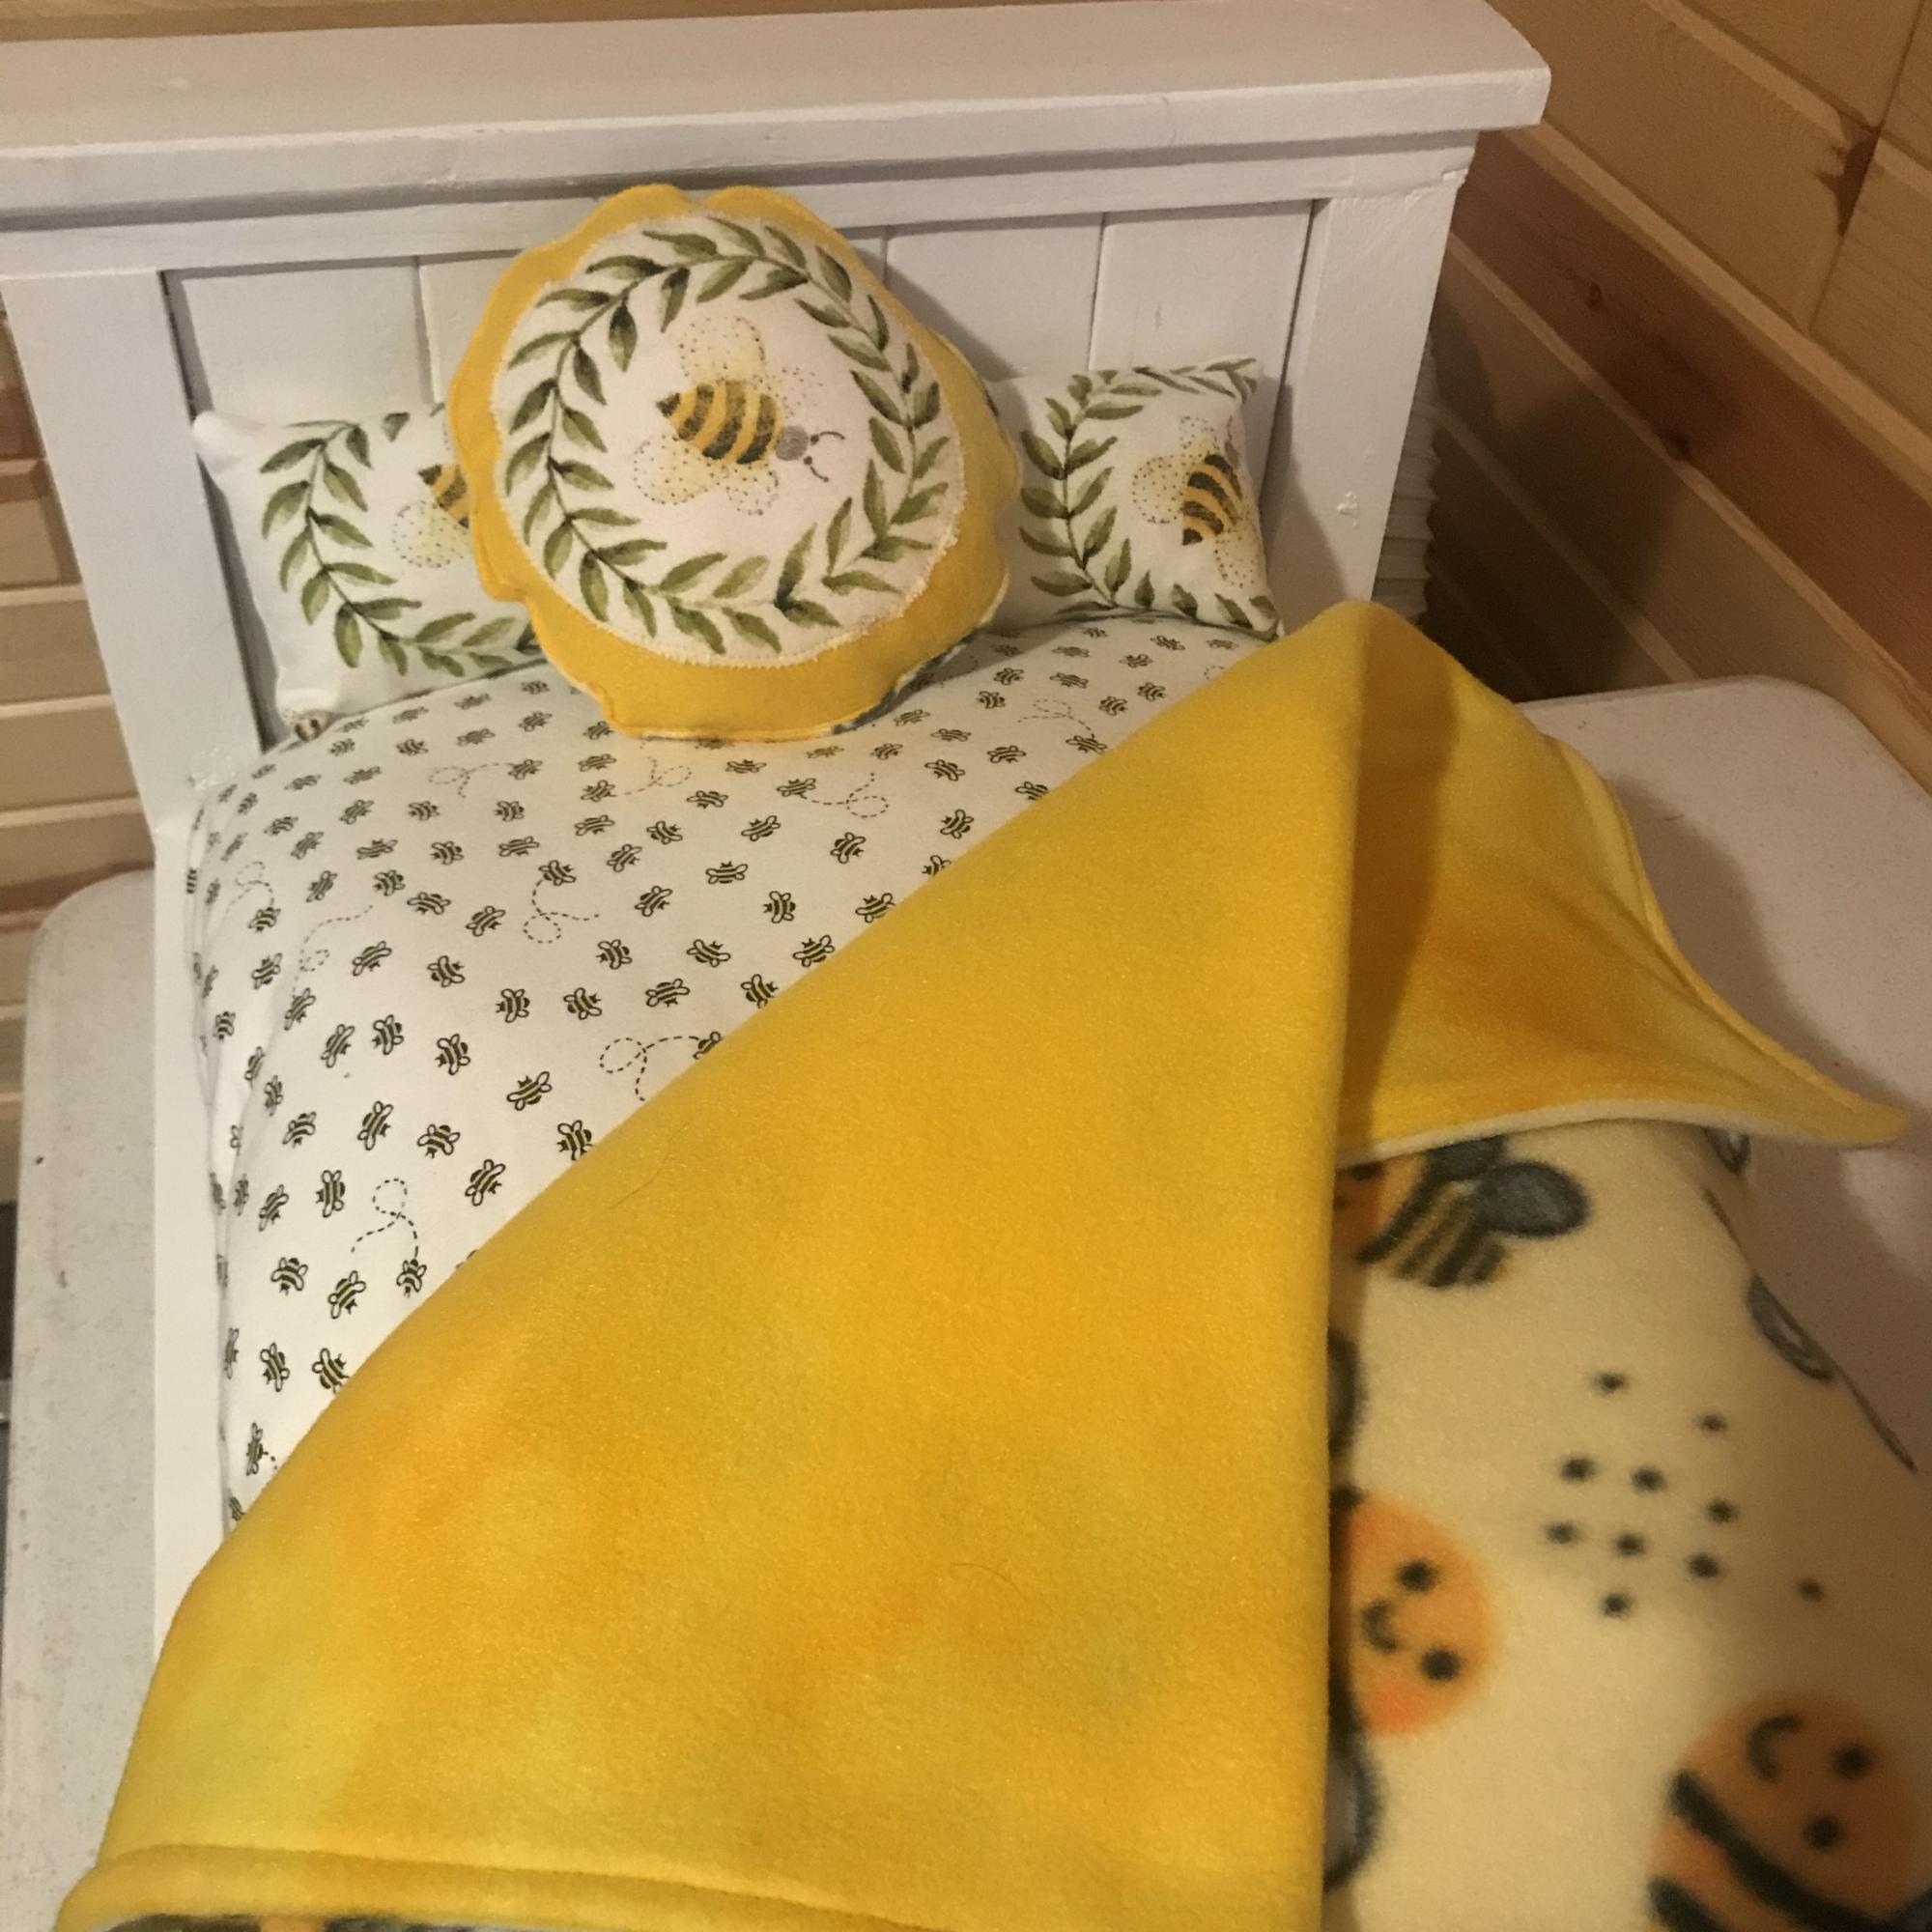
I made this for my granddaughter’s birthday. It was super easy, but it’s really big. I’d reduce size if I made it again. She said she can fit 2 dolls in it.
Thu, 03/31/2022 - 08:17
That is a gift to be cherished for years, thank you for sharing!
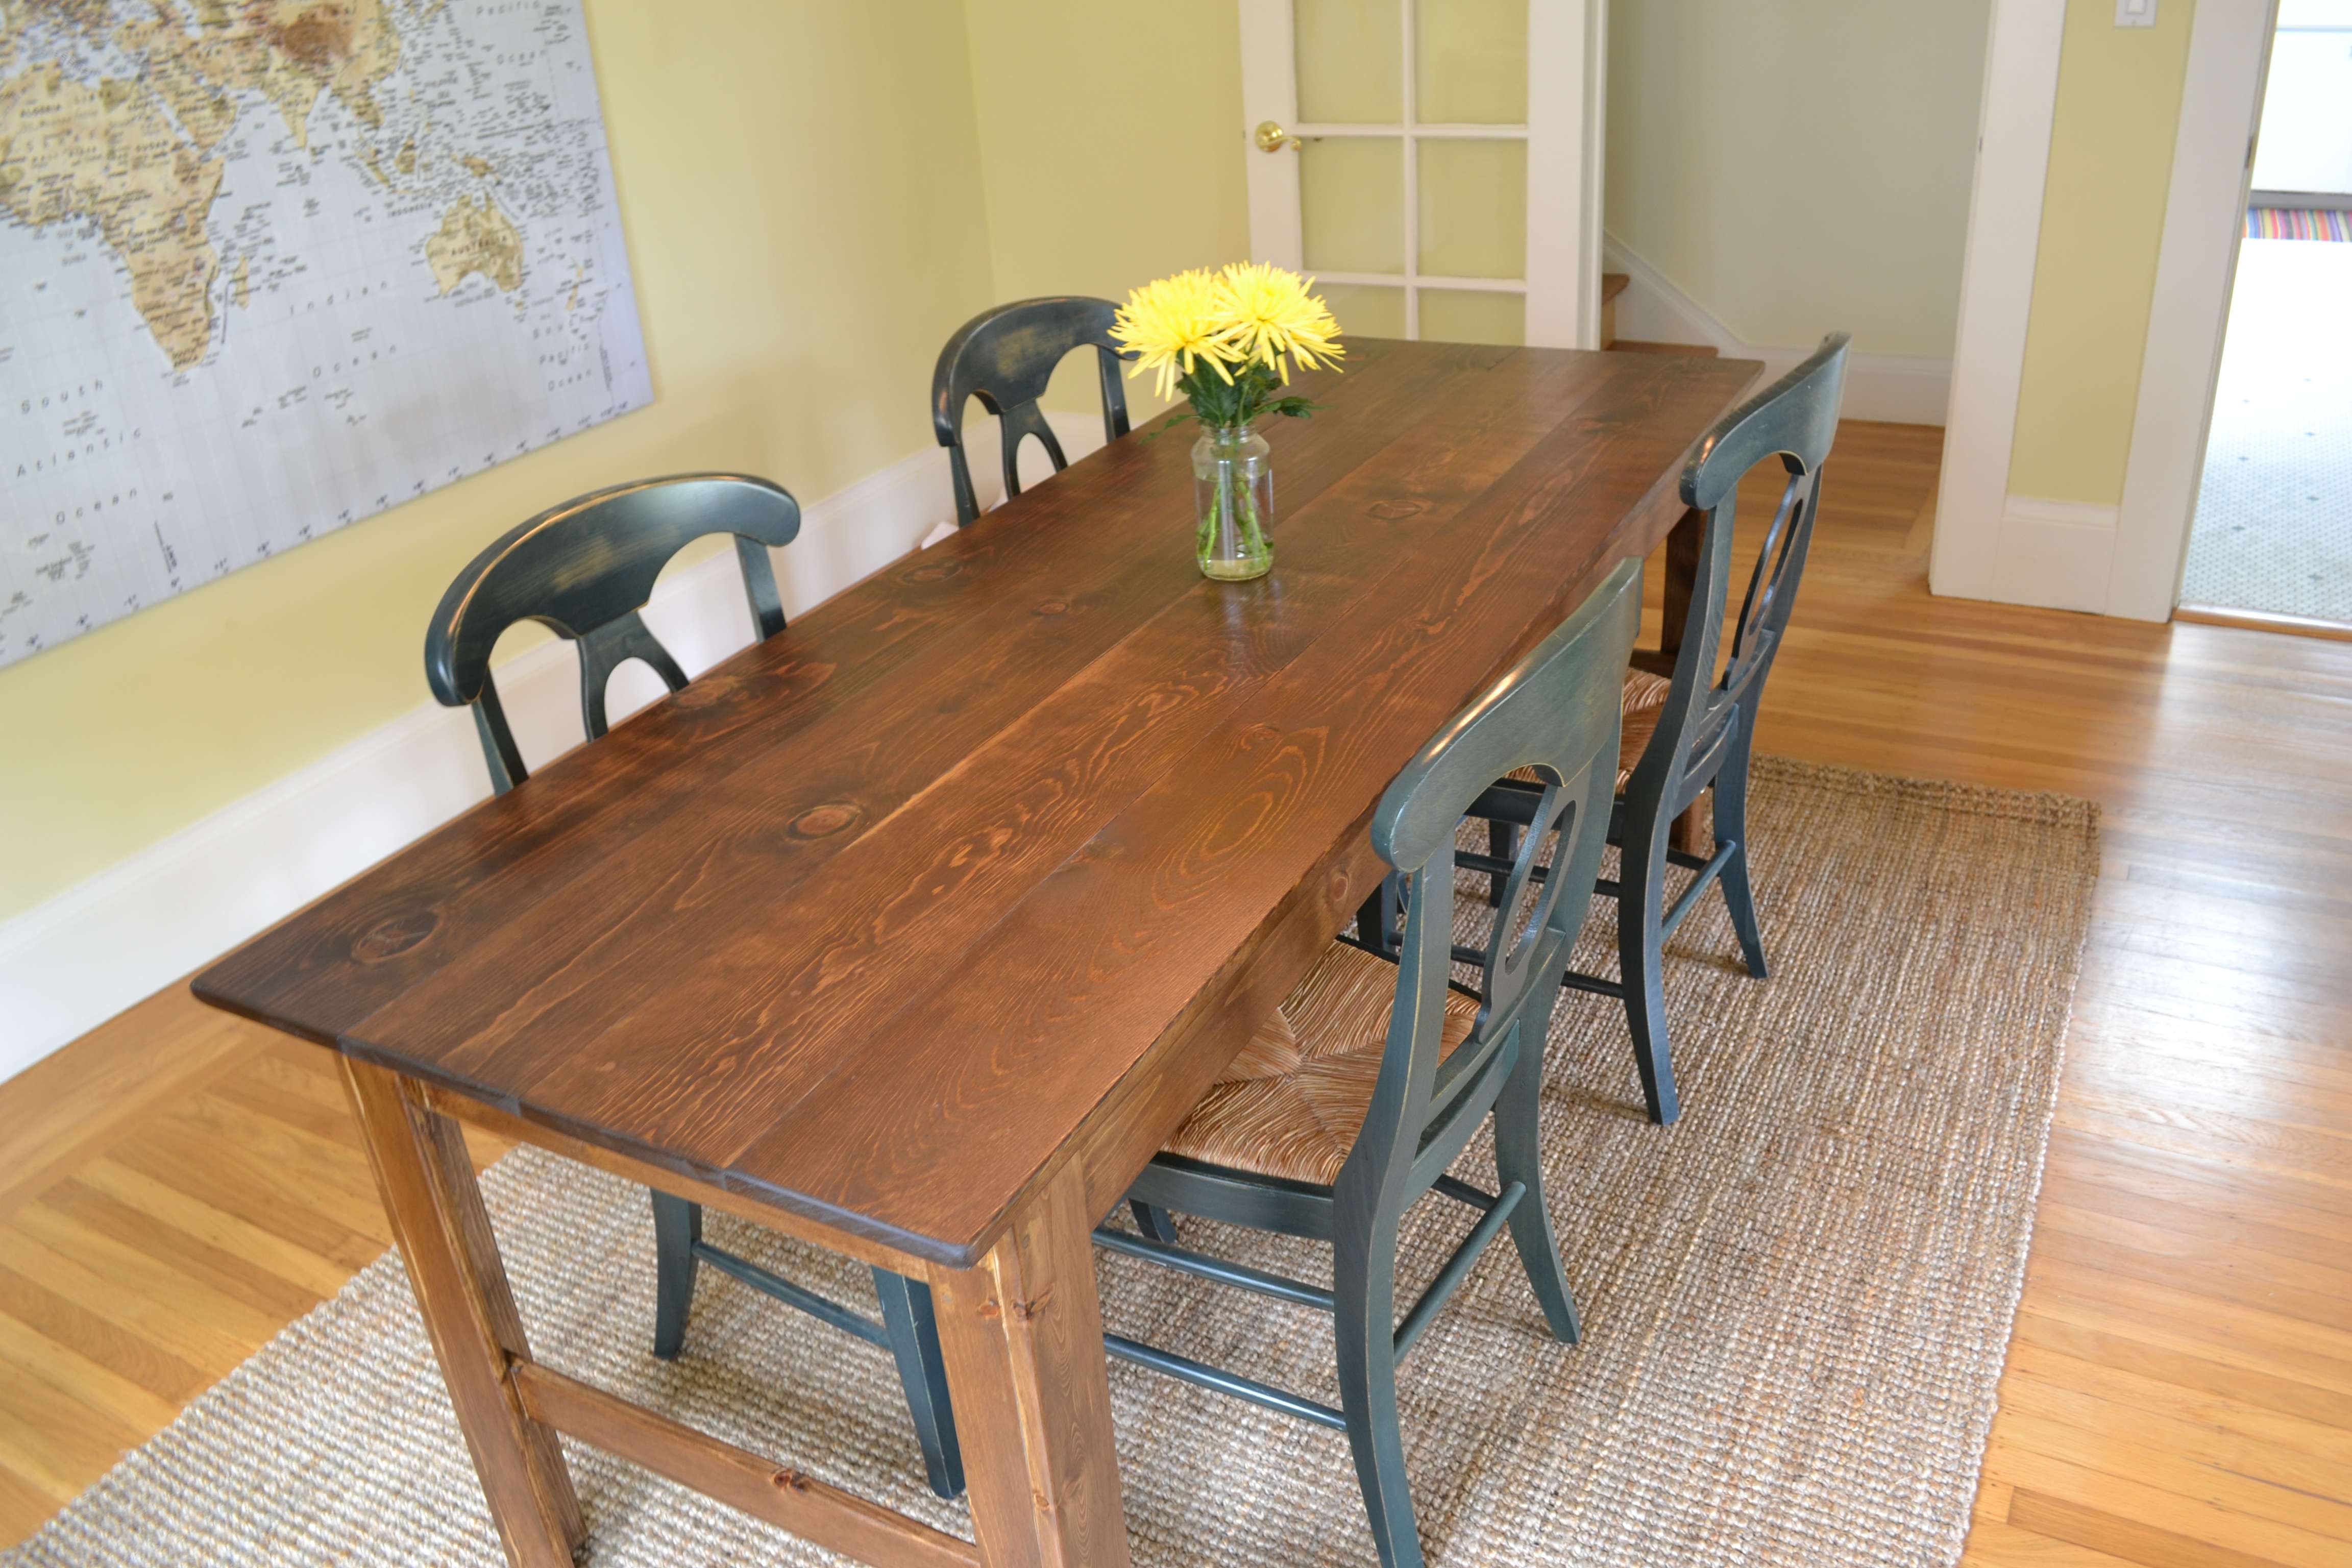
This is my take on Ana's Narrow Farmhouse Table project. I plan on adding a bench to one side and random color matched chairs to the other.