Slide out pot rack
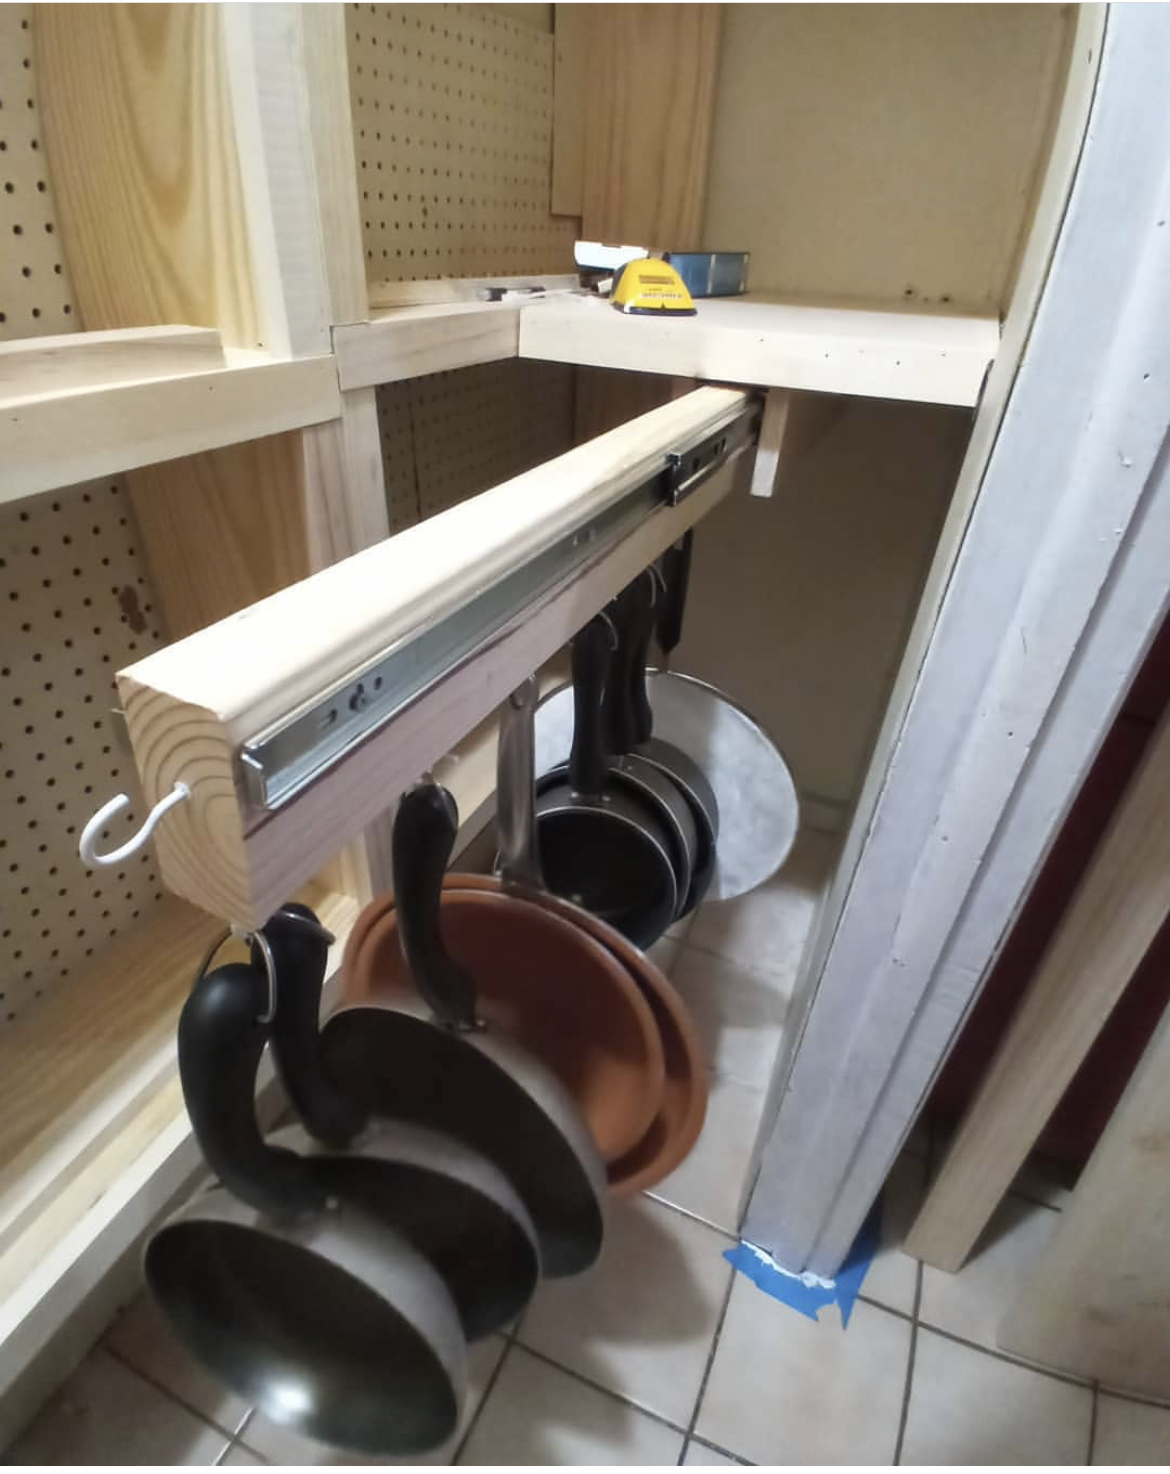
Built my in-laws a new pantry closet. I wanted to give them as much pantry storage as possible so I followed Ana White’s slide out pot rack plans. My mother in-law loves the new space saver for her pots!
Built from Plan(s)
Built my in-laws a new pantry closet. I wanted to give them as much pantry storage as possible so I followed Ana White’s slide out pot rack plans. My mother in-law loves the new space saver for her pots!
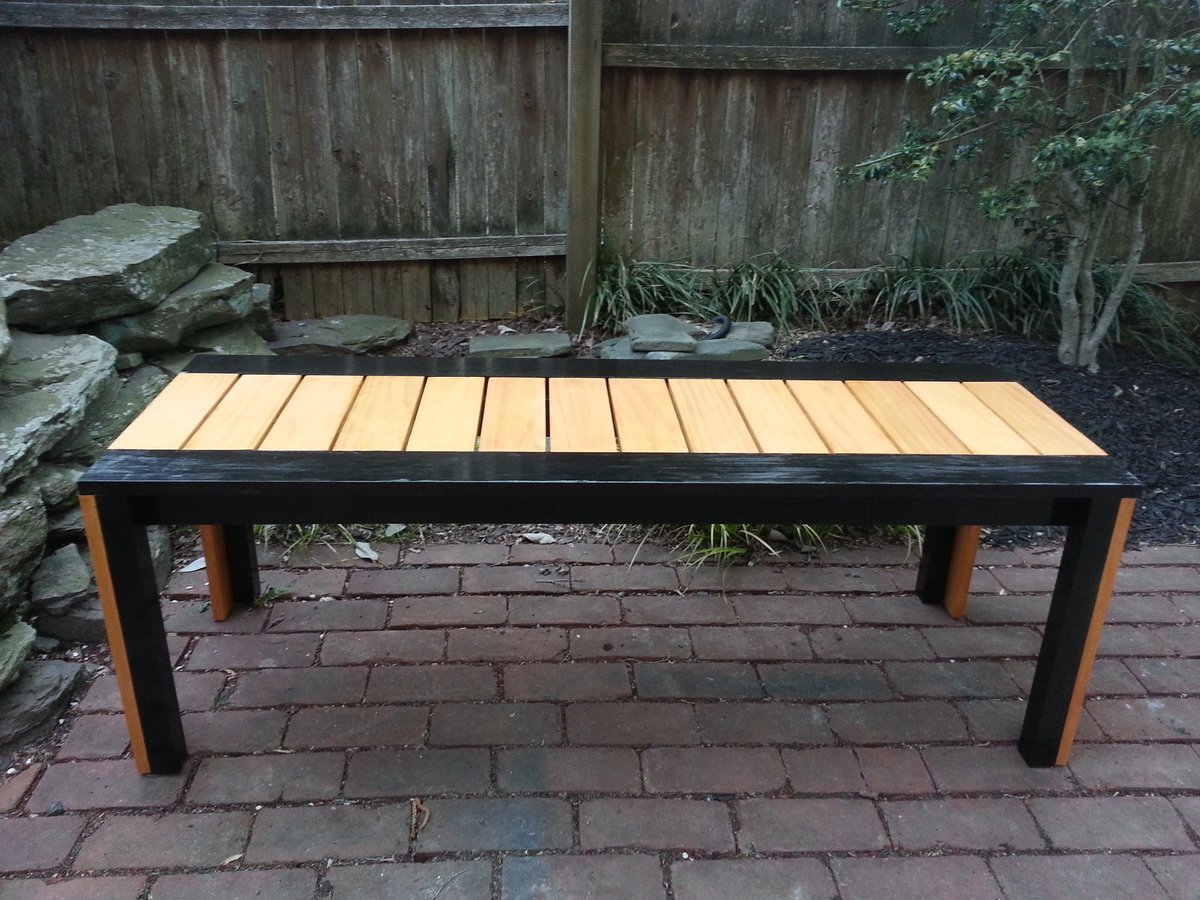
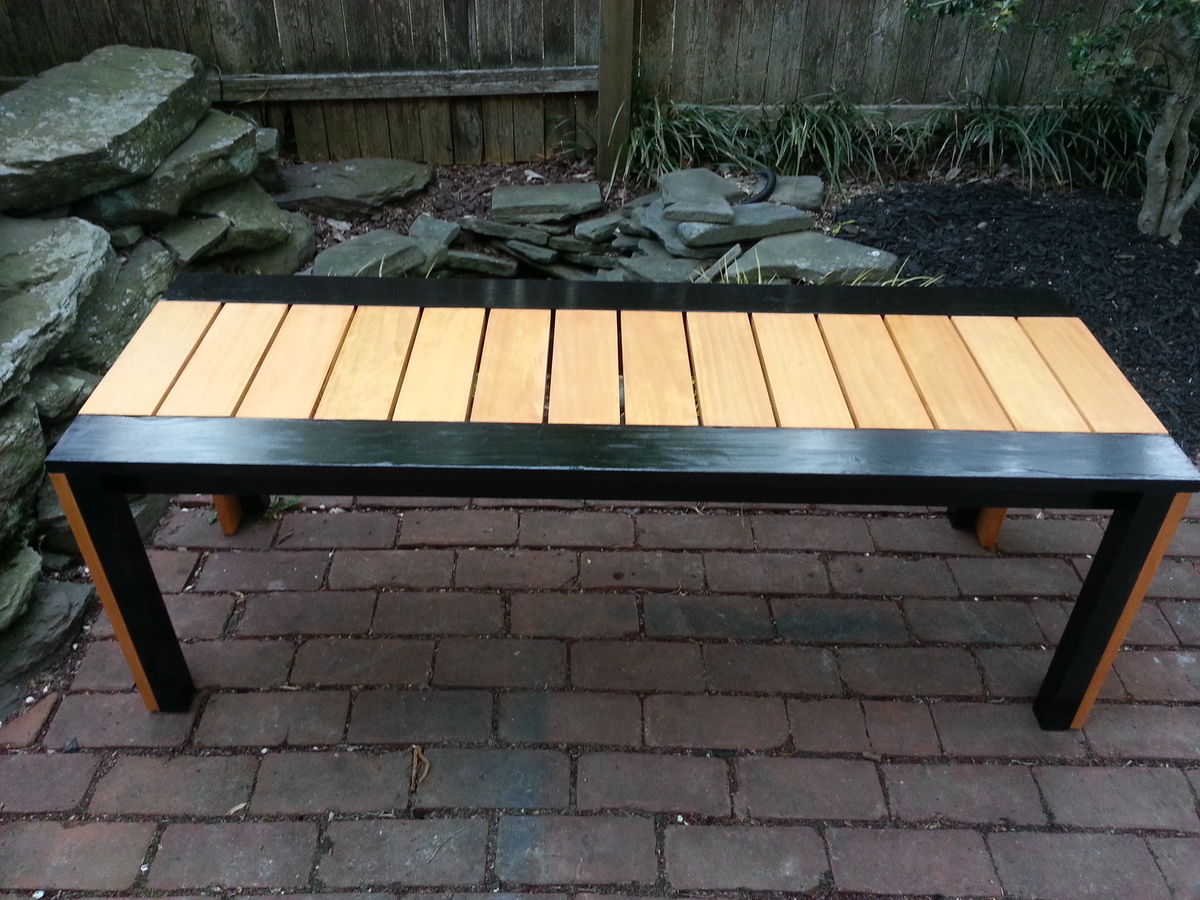
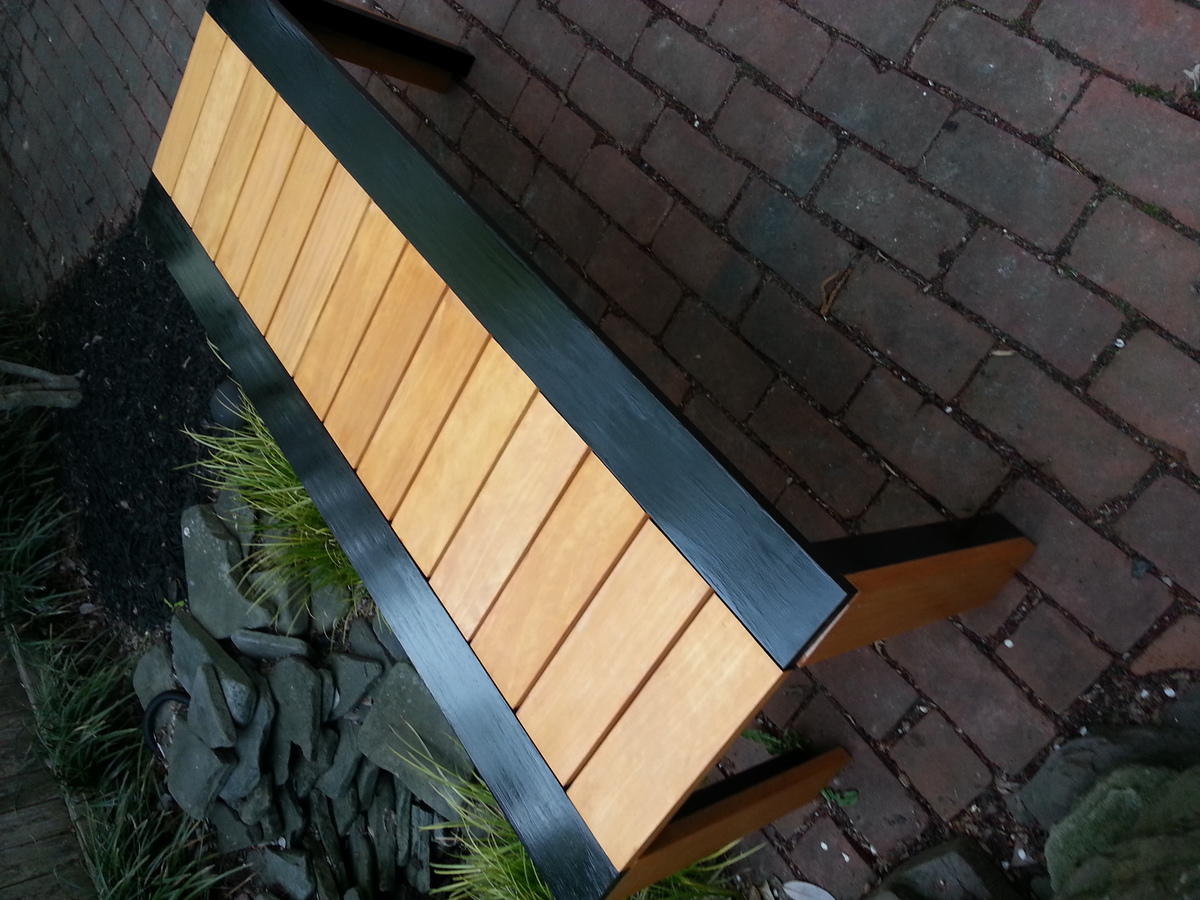
This bench is the first project I have built from Ana White's plans, and I love how it turned out! The cutting list and instructions were very easy to follow. The most difficult thing about this project was the staining and painting, which I admit I have never been great at. I built this bench because my fiance and I needed additional outside seating on our patio for a party we threw, and I literally built it the day before! A week after the party I gave it to my fiance's daughter who wanted it as an indoor hall bench for her house. At first I was sad to give it up, but I figure I can easily make another! Thank you so much, Ana, for the fabulous plans you provide!!
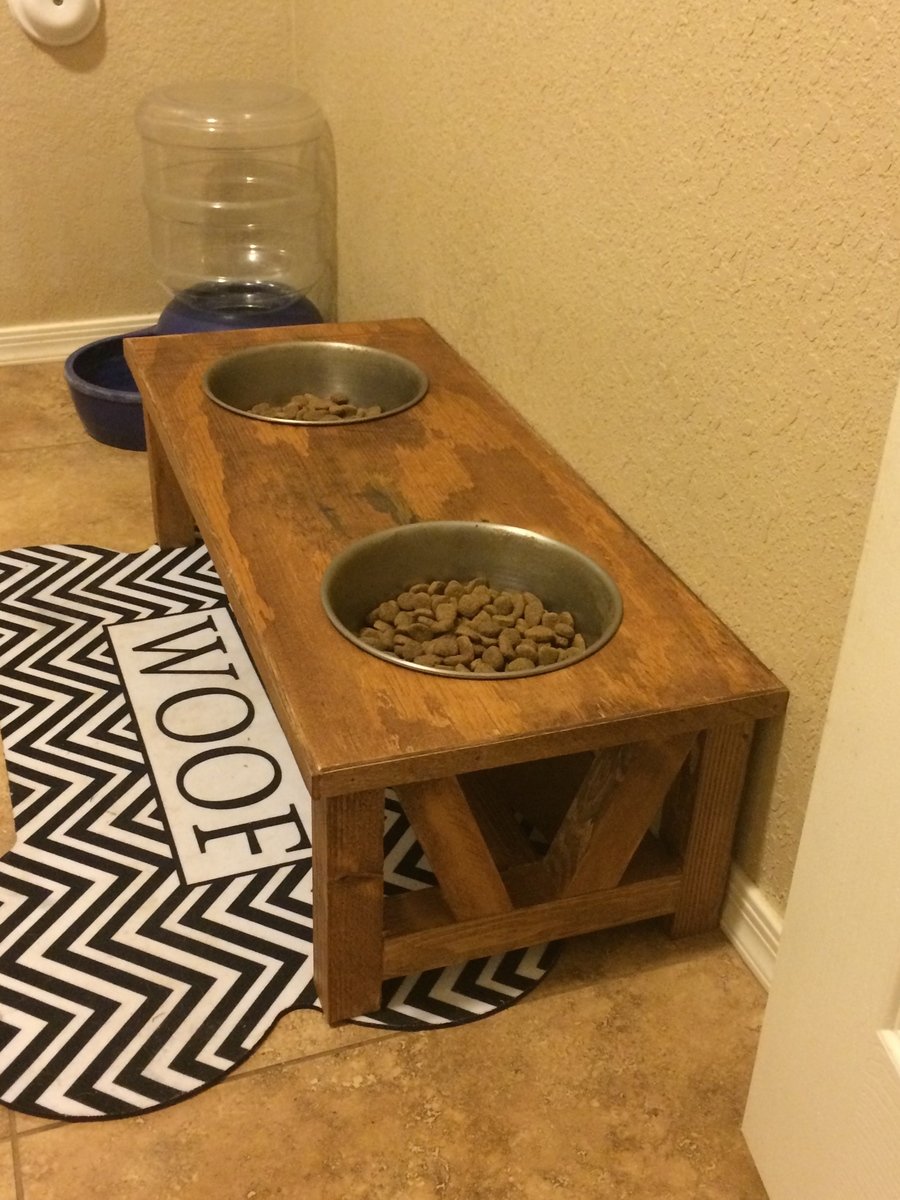
Dog bowls made from scrap wood! Super Easy!

Pretty happy with how it turned out. Will take our 4 year year old a bit to get comfortable with the ladder. Wish our room was long enough to add the stairs. Good plans though and thank you Ana White for making them available online.
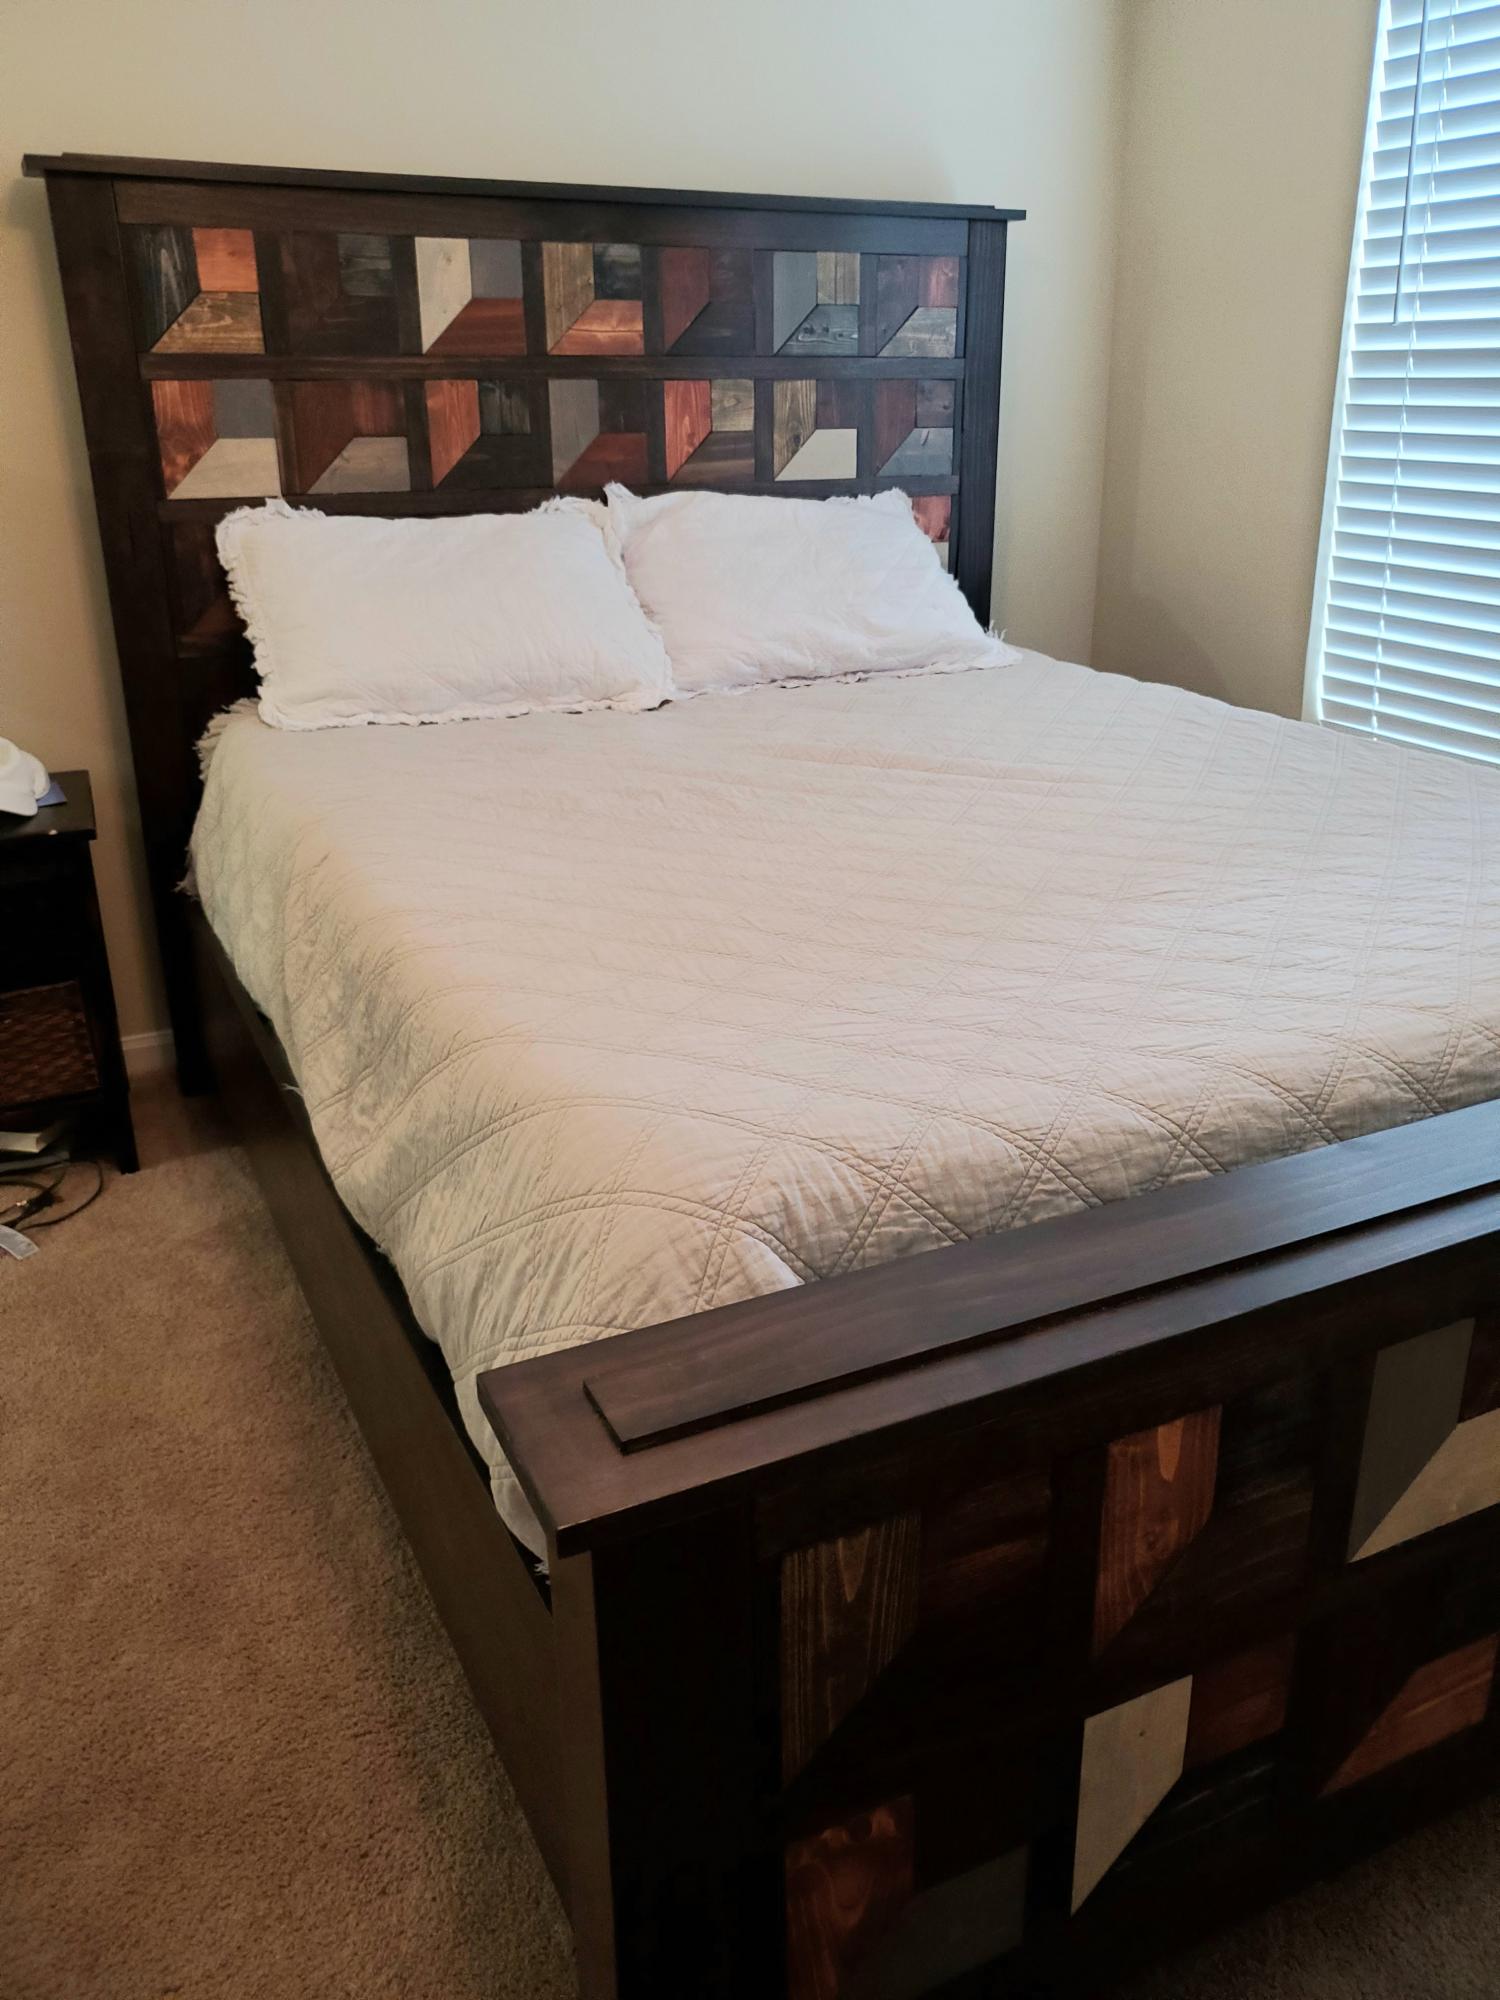
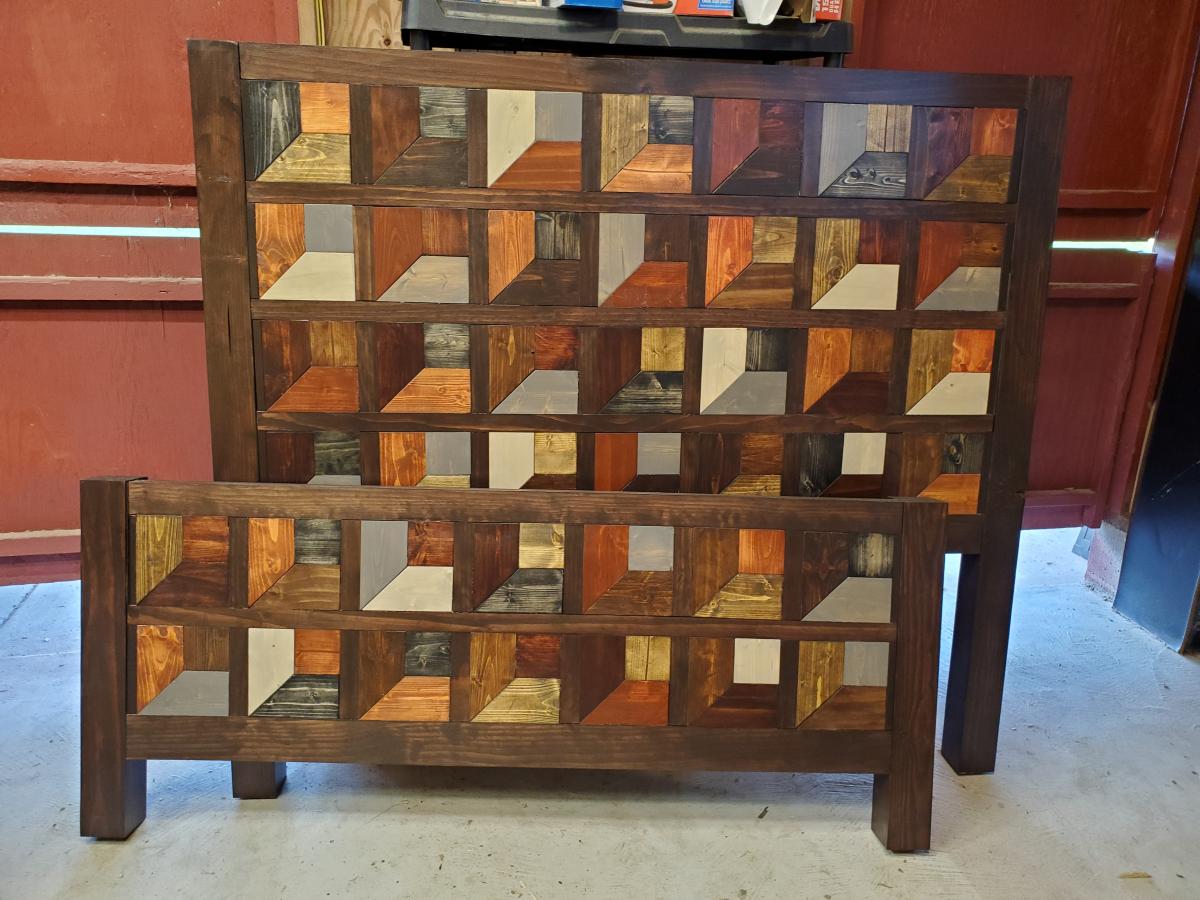
My son needed a bed for his new apartment and this is the design we chose. The cuts are 1x4 pine stained different colors. He loves the bed!
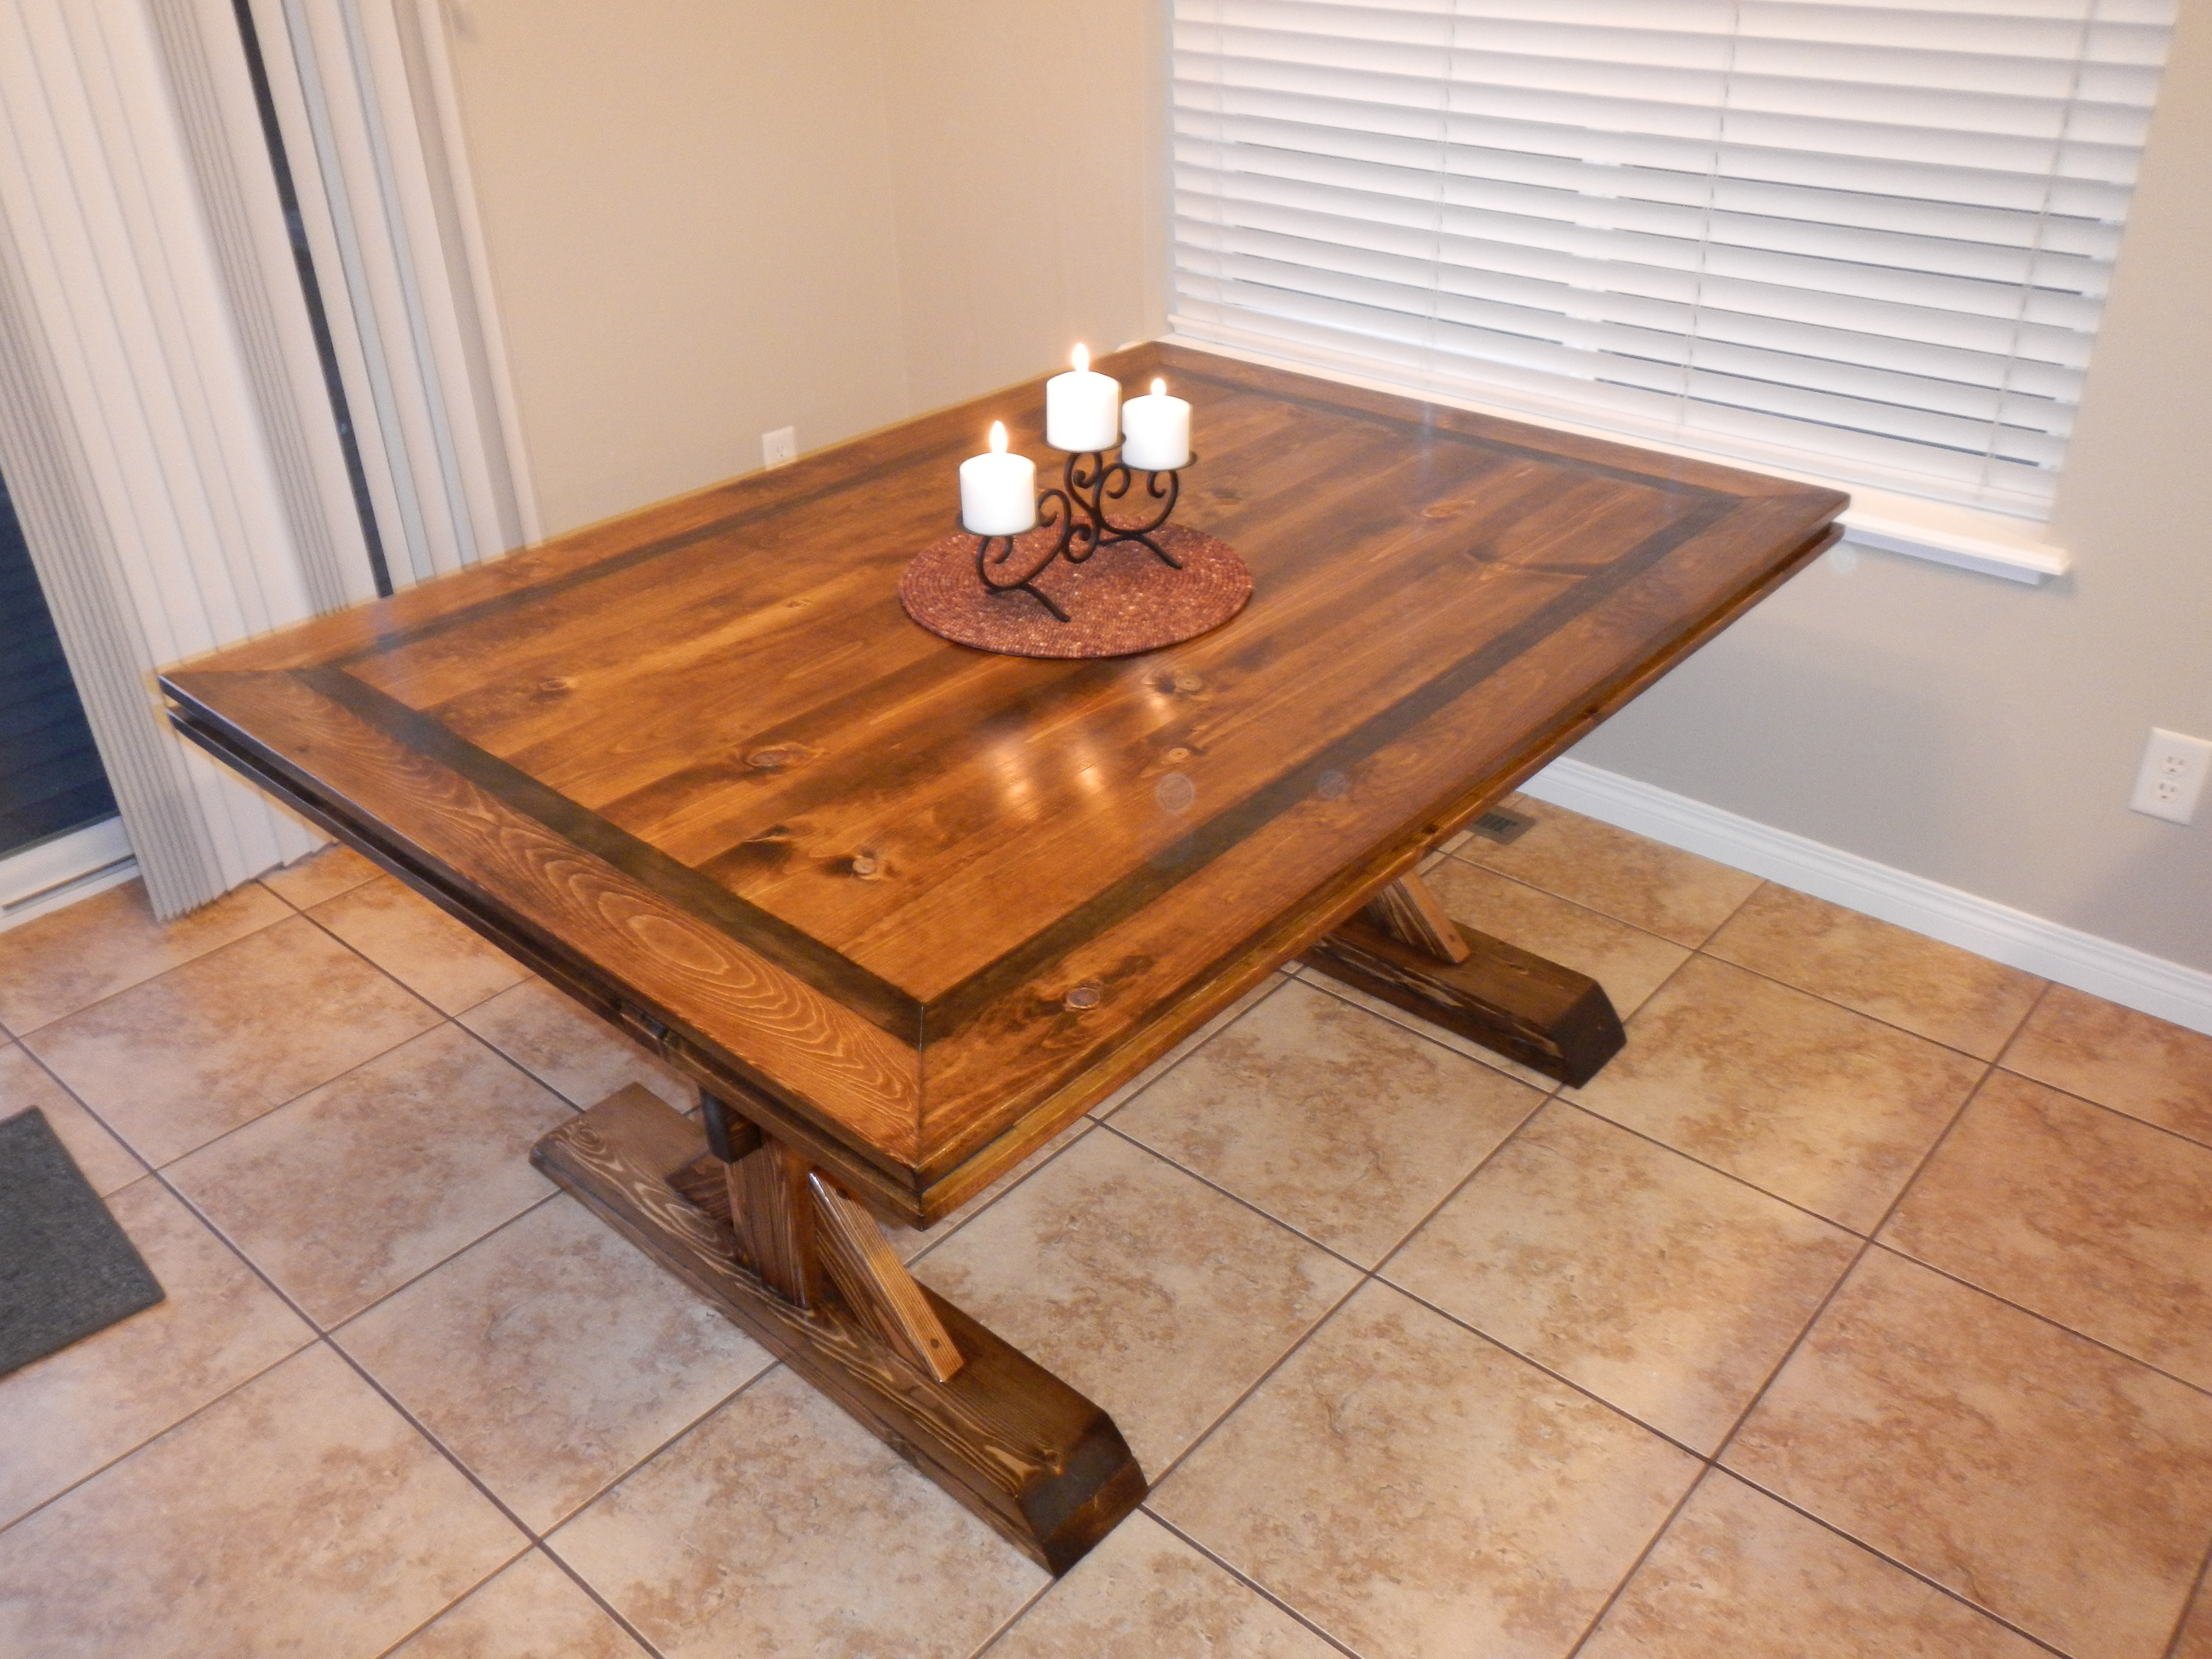
This is a combination and a scaled down version of a couple different farmhouse table plans. It is 60"x43" to fit our dining room. I integrated an inlay looking piece into the top with a 1x2 and mitered the corners of the outer two layers. The thickness at the edge of the table was accomplished with 1x4's with the middle layer inset by 1/2"... chairs to match are in the process of being built.


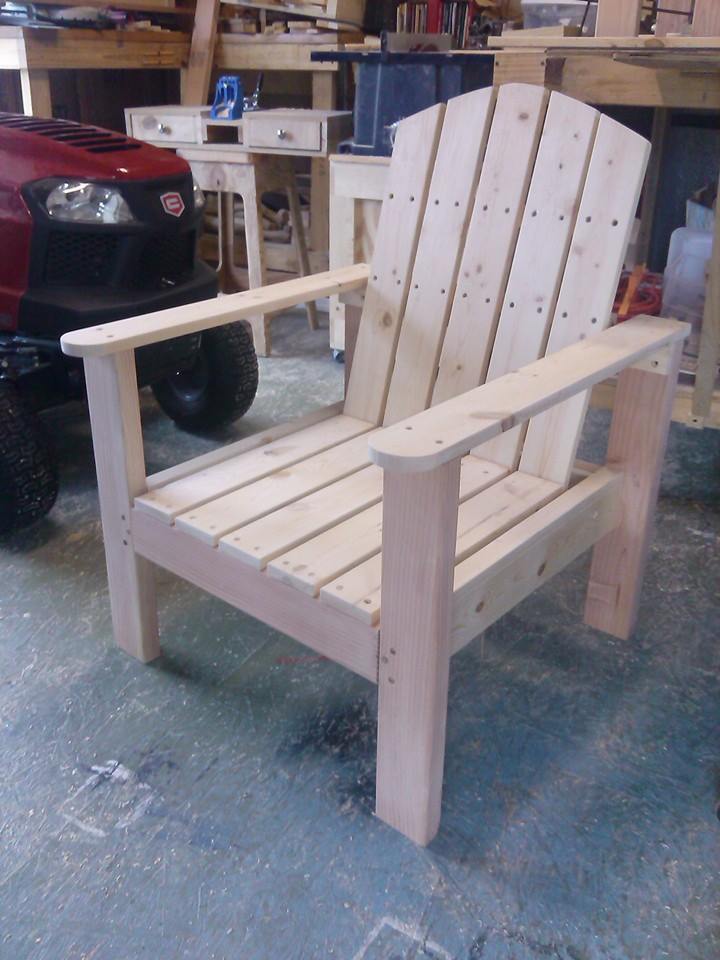
Modified the arm rest and the back to my liking.
Tue, 06/23/2020 - 08:59
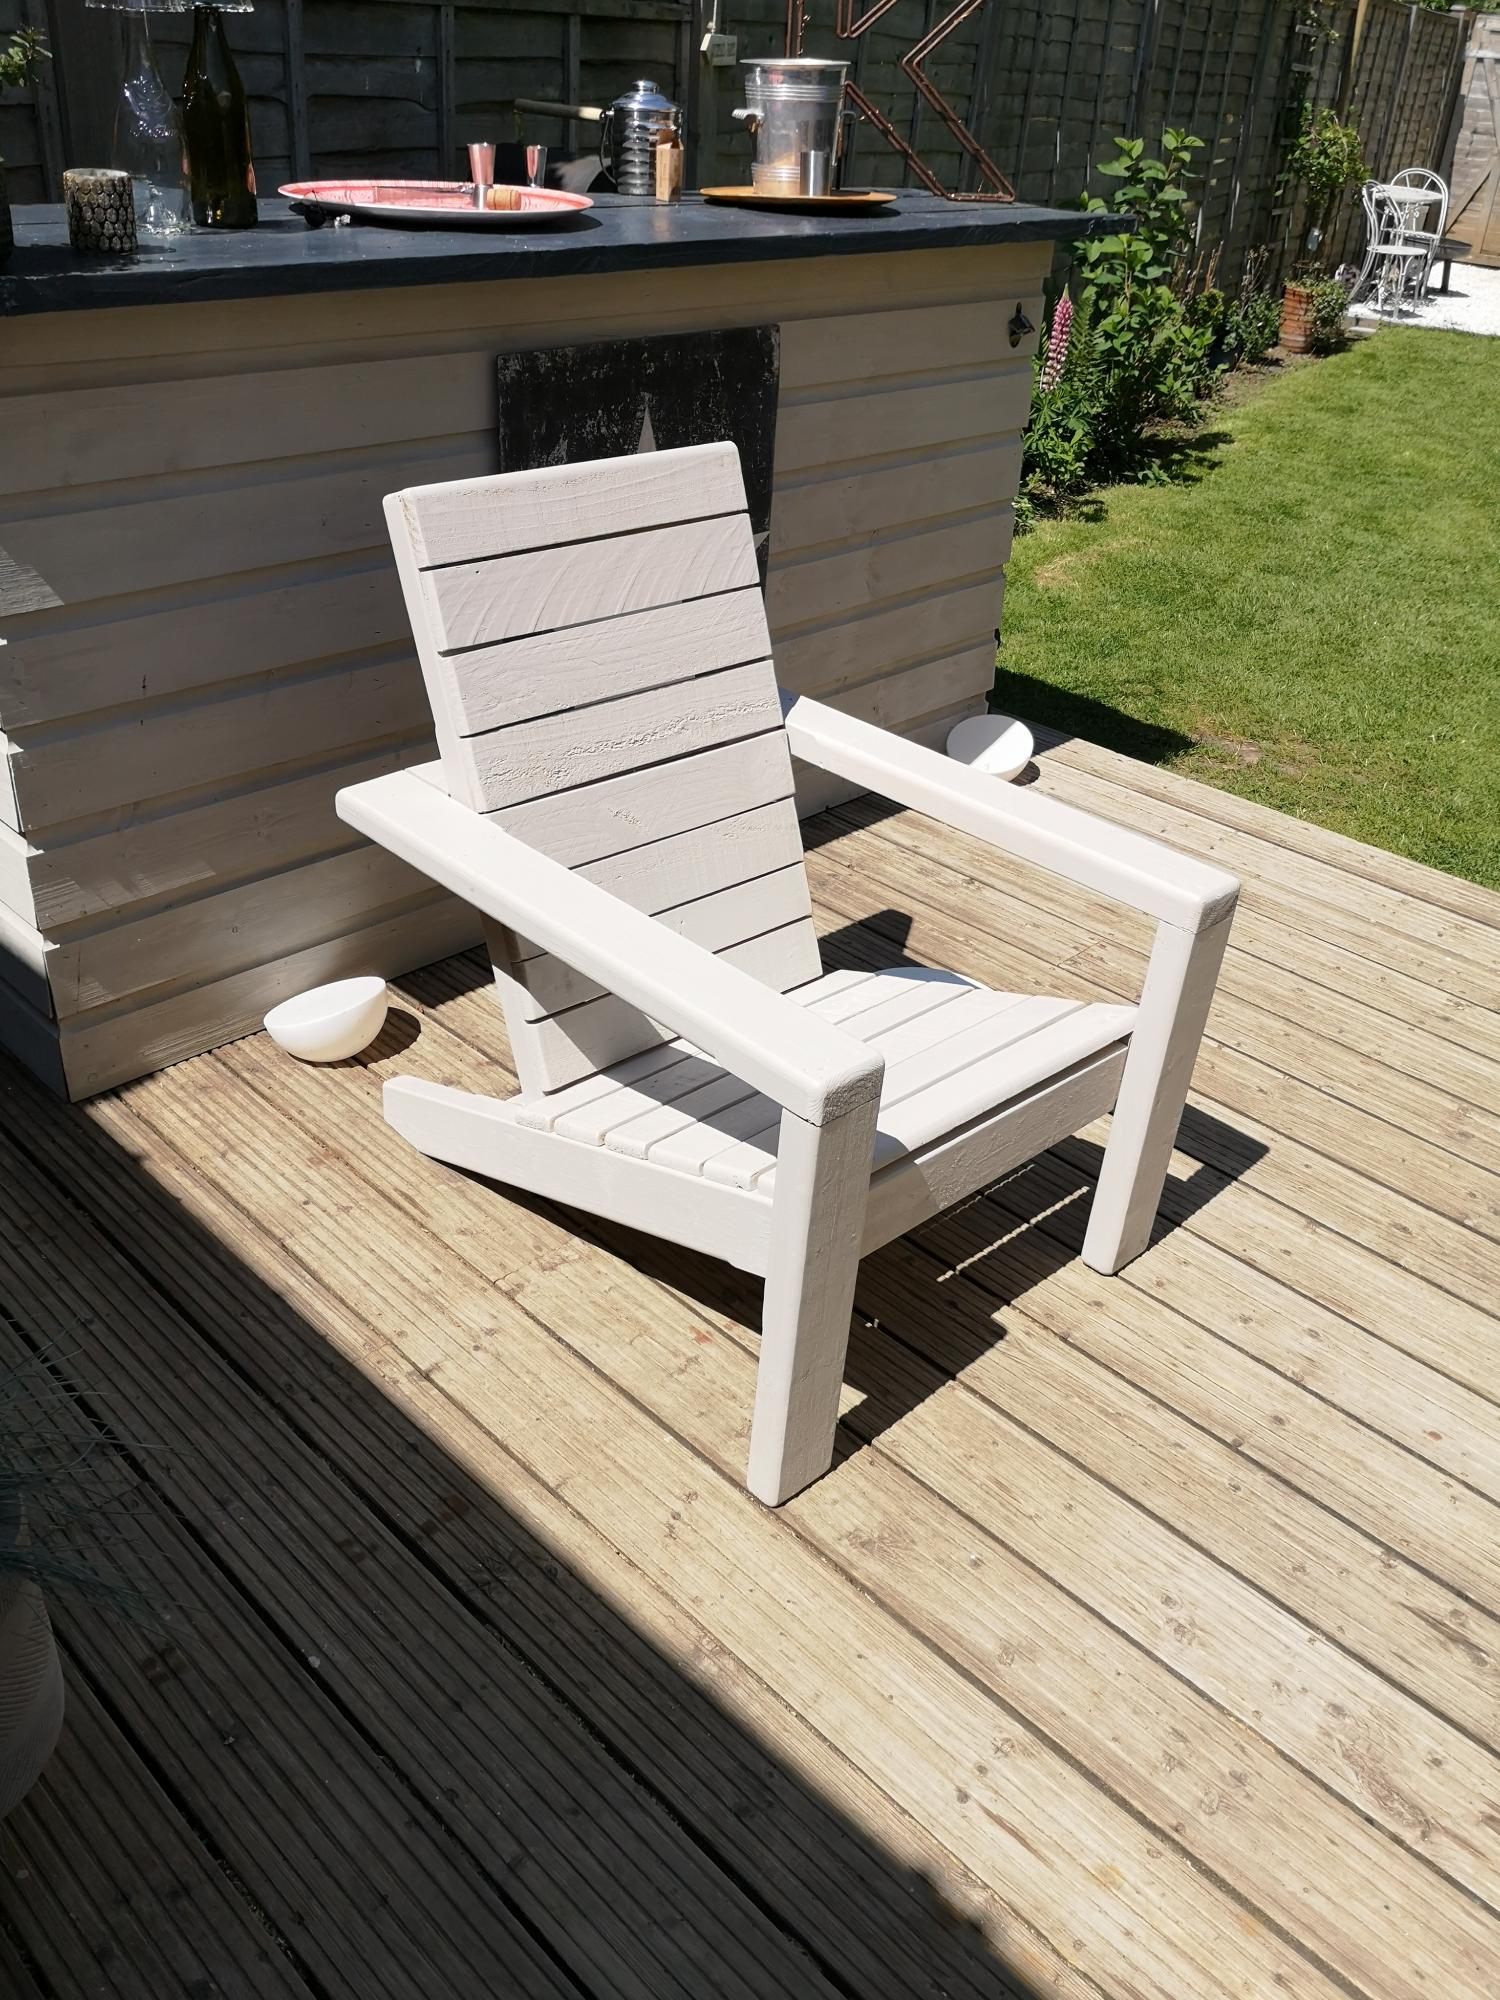
Hi, are plans available for this modified chair design? I like that the seat pan appears to be flat and the Adirondack style to the back slate.
I love the way these chairs came out, thanks for the plans. I used pallet wood for the slats and rounded everything over with my router. Also added a 2x4 across the top of the back to give it a more solid look.
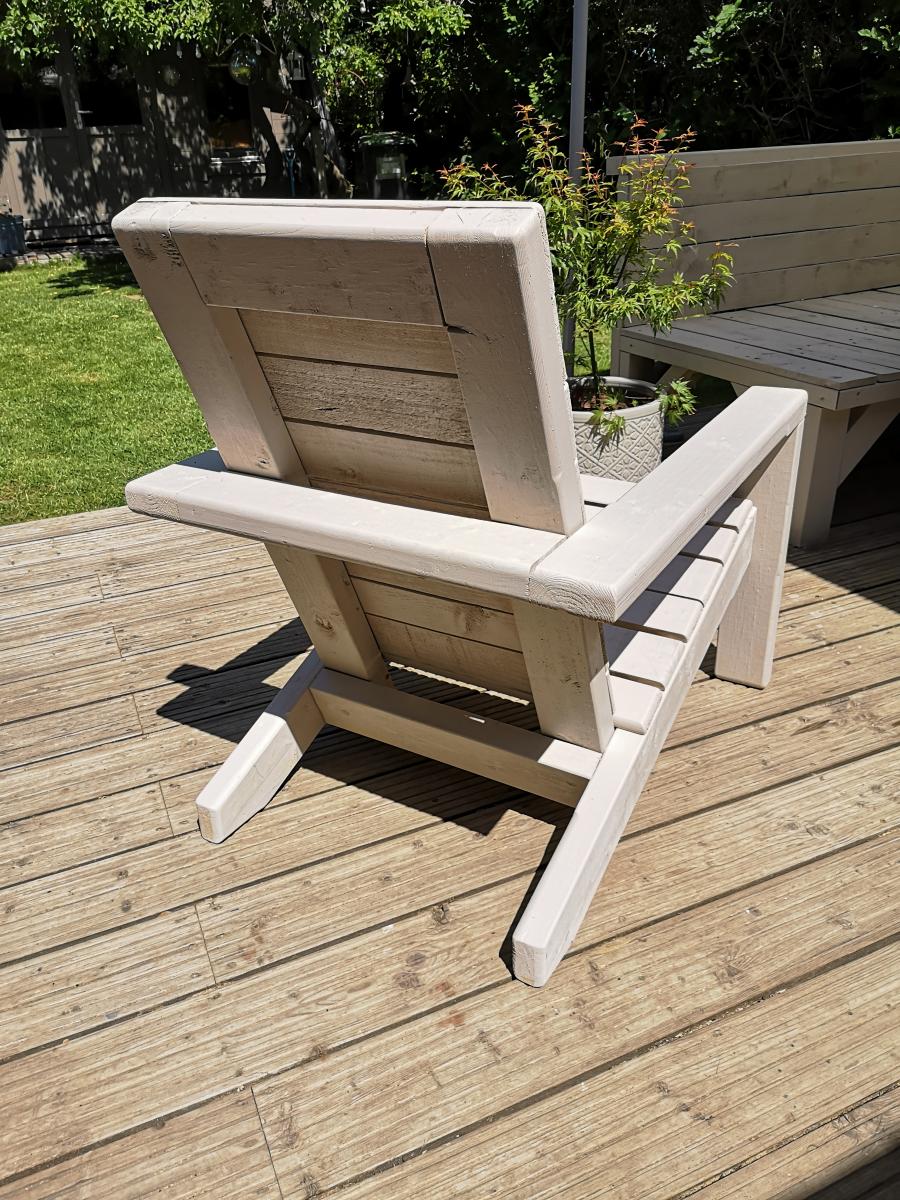
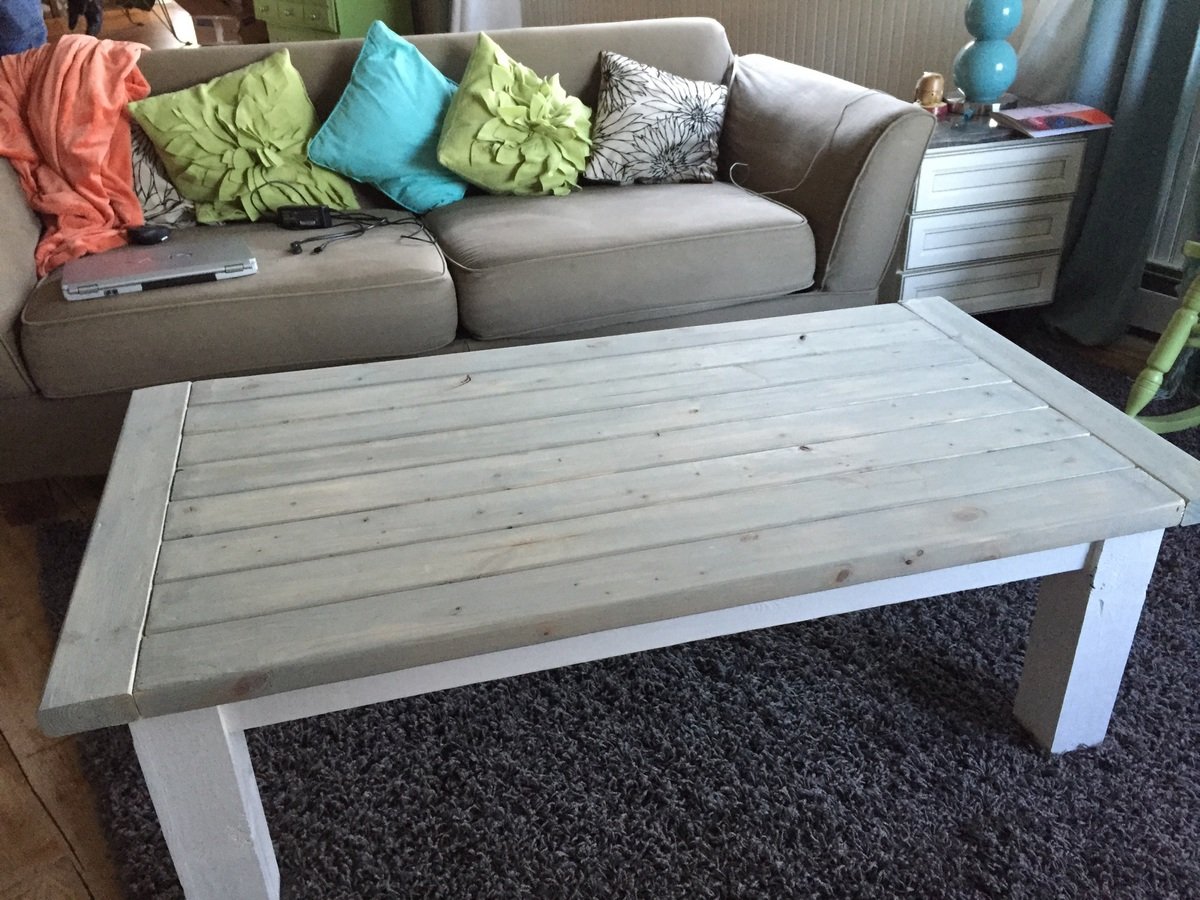
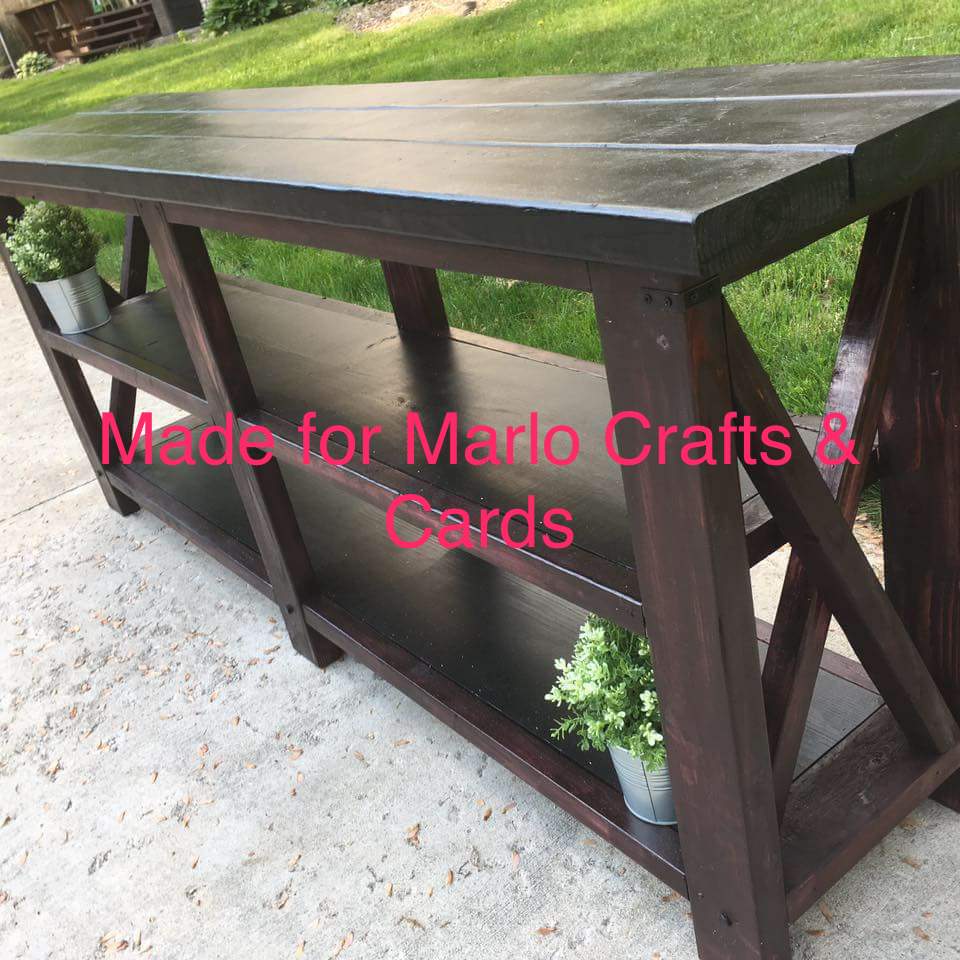
My boyfriend built this for me as a birthday gift. It is absolutely beautiful, he did a great job - especially with limited carpentry experience! The top is stained with pickled white stain tinted with gray, and the bottom is painted white.
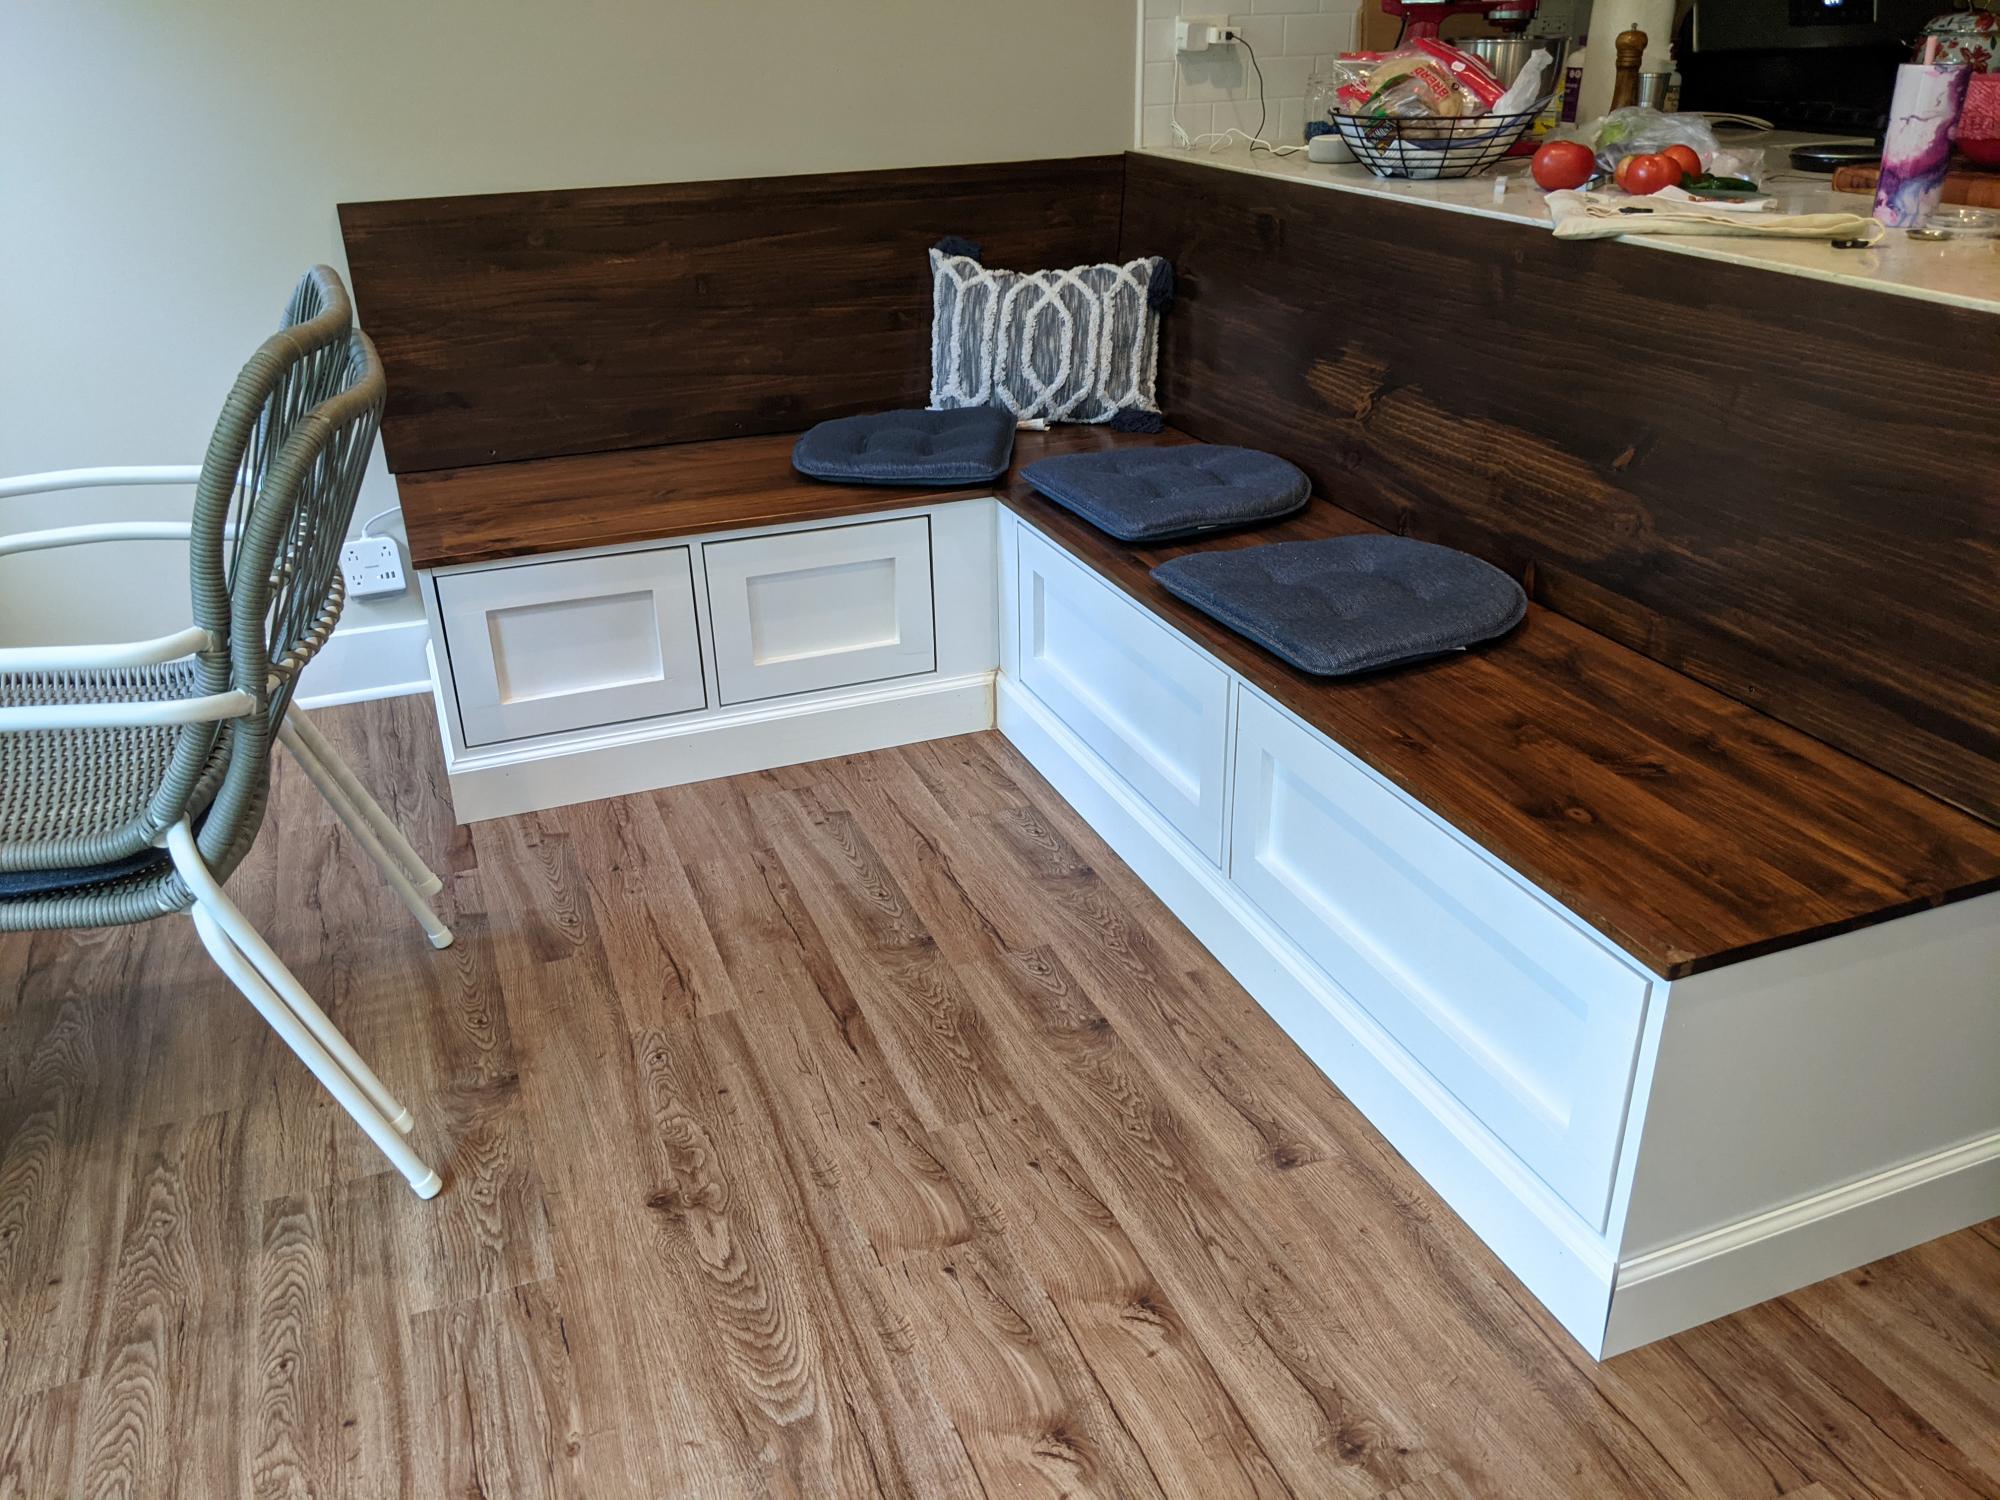
I built the above corner bench based off of the frameless drawer bench plans (they are on the shelf help site) which are very similar to the essential entryway bench plans, but the drawers are included. The long bench is 60", the shorter side 42".
For the carcass i did use the shelf help pre cut plywood.
When I started the project beginning of 2021, there was no tutorial for the corner part yet, so I was very glad to see I did the right way when the corner 'add on' came out, also found on the shelf help site).
The shaker fronts were shown in the barn door console plans, so I adopted that.
I get loads of compliments and obviously even more when people hear I built it myself.
The hardest part about this project were the drawer slides and getting them to line up and work as expected. The I broke the soft close on one of the big drawers during final assembly and still didn't bring myself to exchange the slide to a working one... 😊
But overall I'm really proud of it!
Tue, 10/05/2021 - 12:03
Thank you so much for trying out Shelf Help, what a grand project!

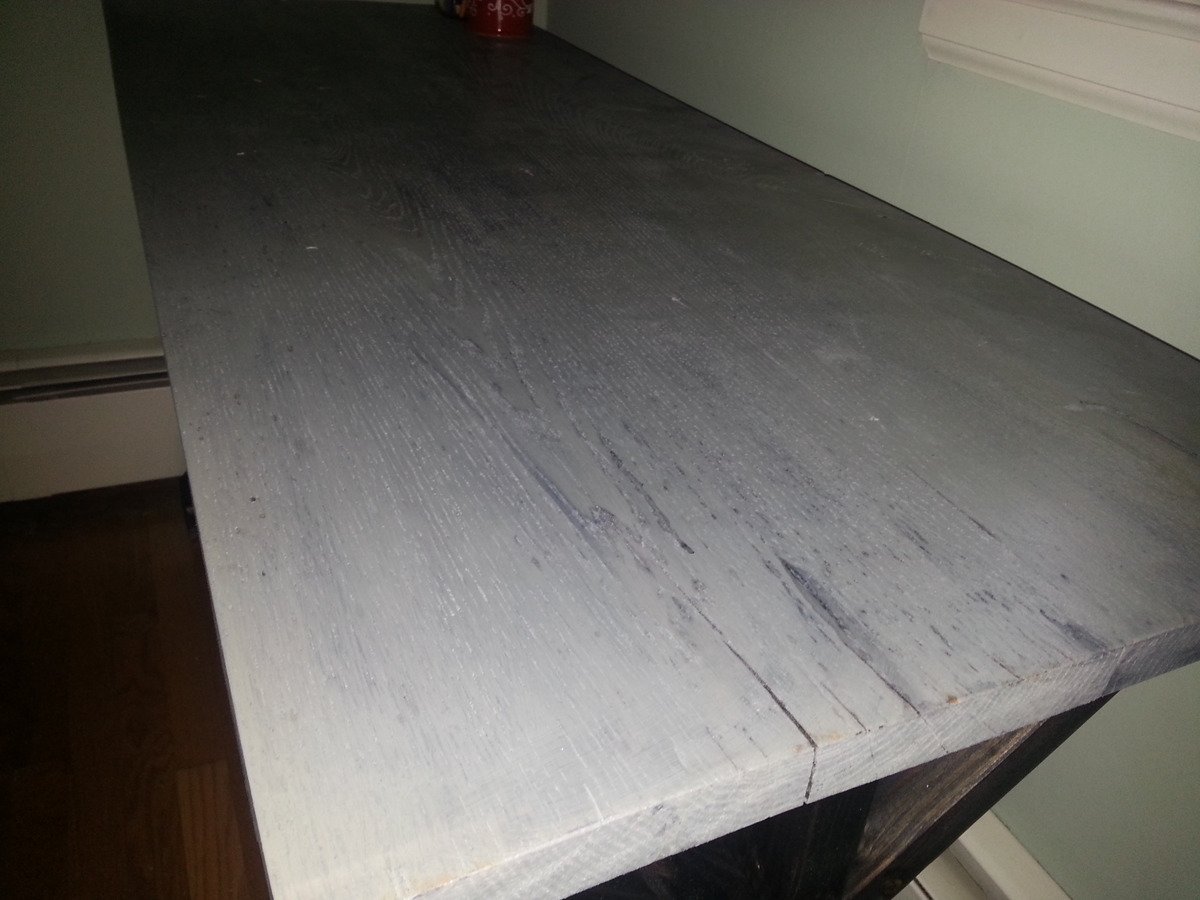
I made this based on the $55 fancy x desk plan for my daughters room. It is 18" shorter (54") so I eliminated the diagonal braces at the back of the plan. It still is very sturdy. I made the top from rough sawn oak board that I had in the yard by handplanning the top and edges. You could just buy 1x12 oak if you wanted to, although it would be pricey. If you are in Connecticut let me know I have a few thousand feet of it! My daughter loves the desk!
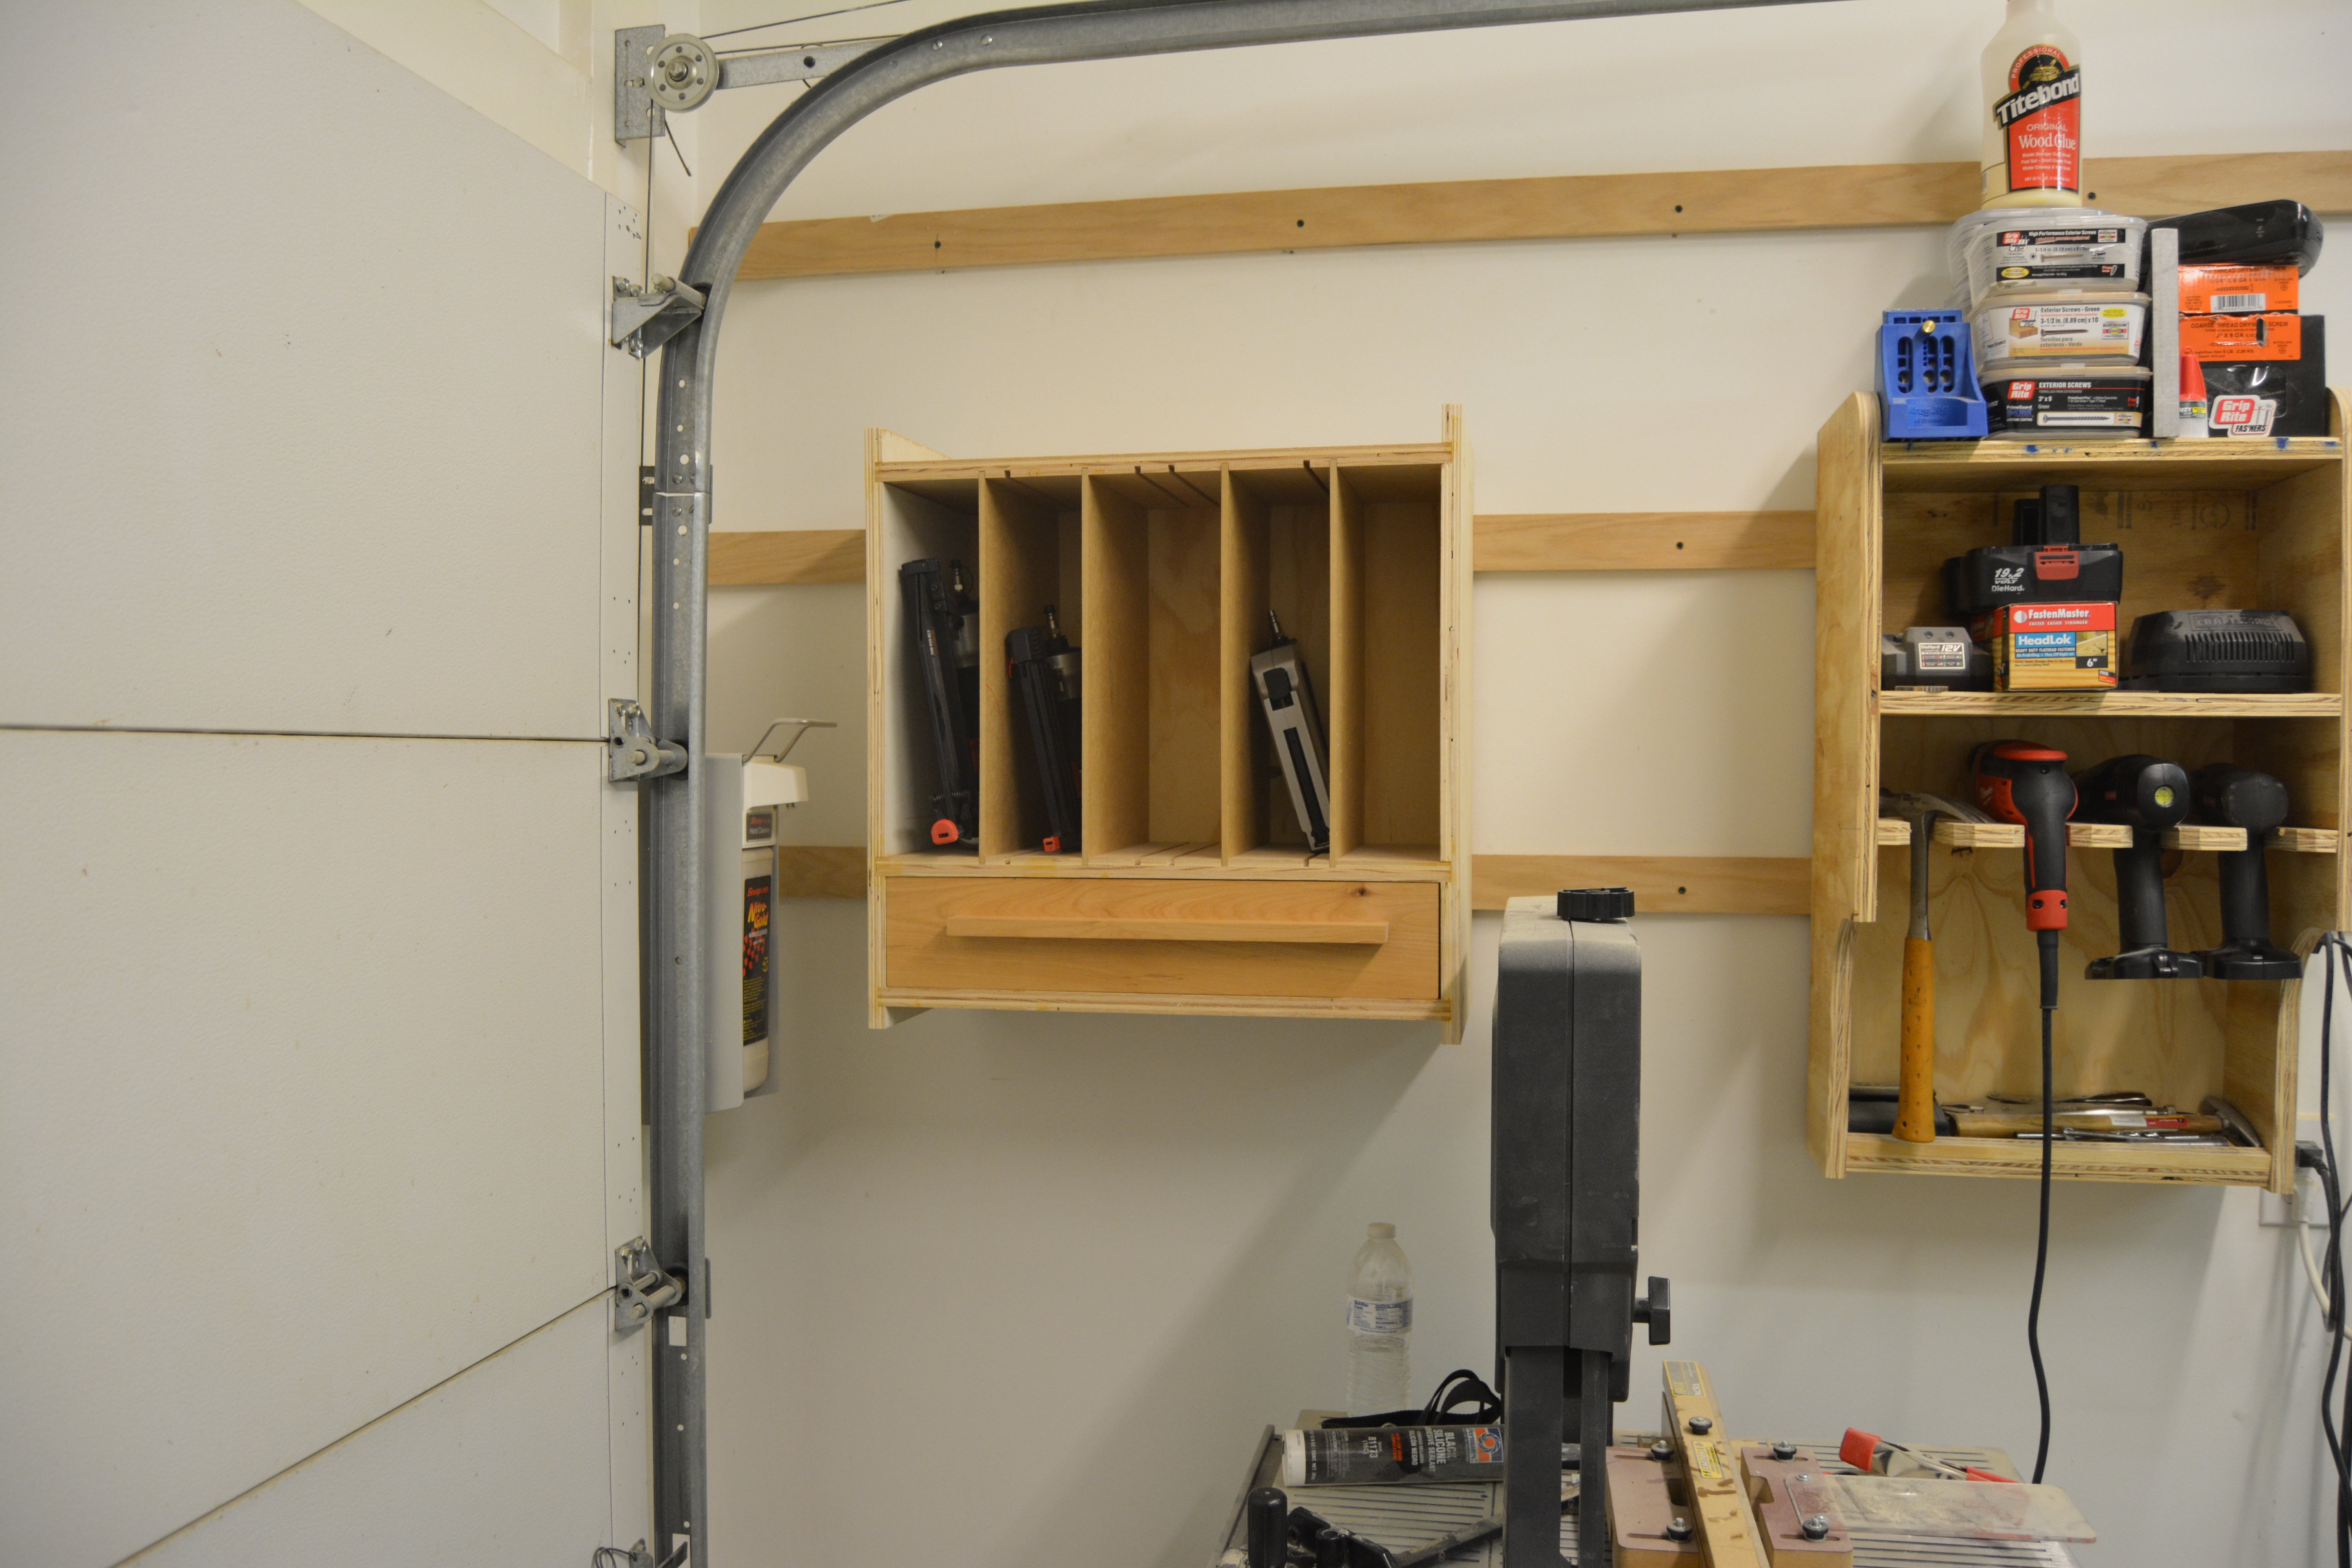
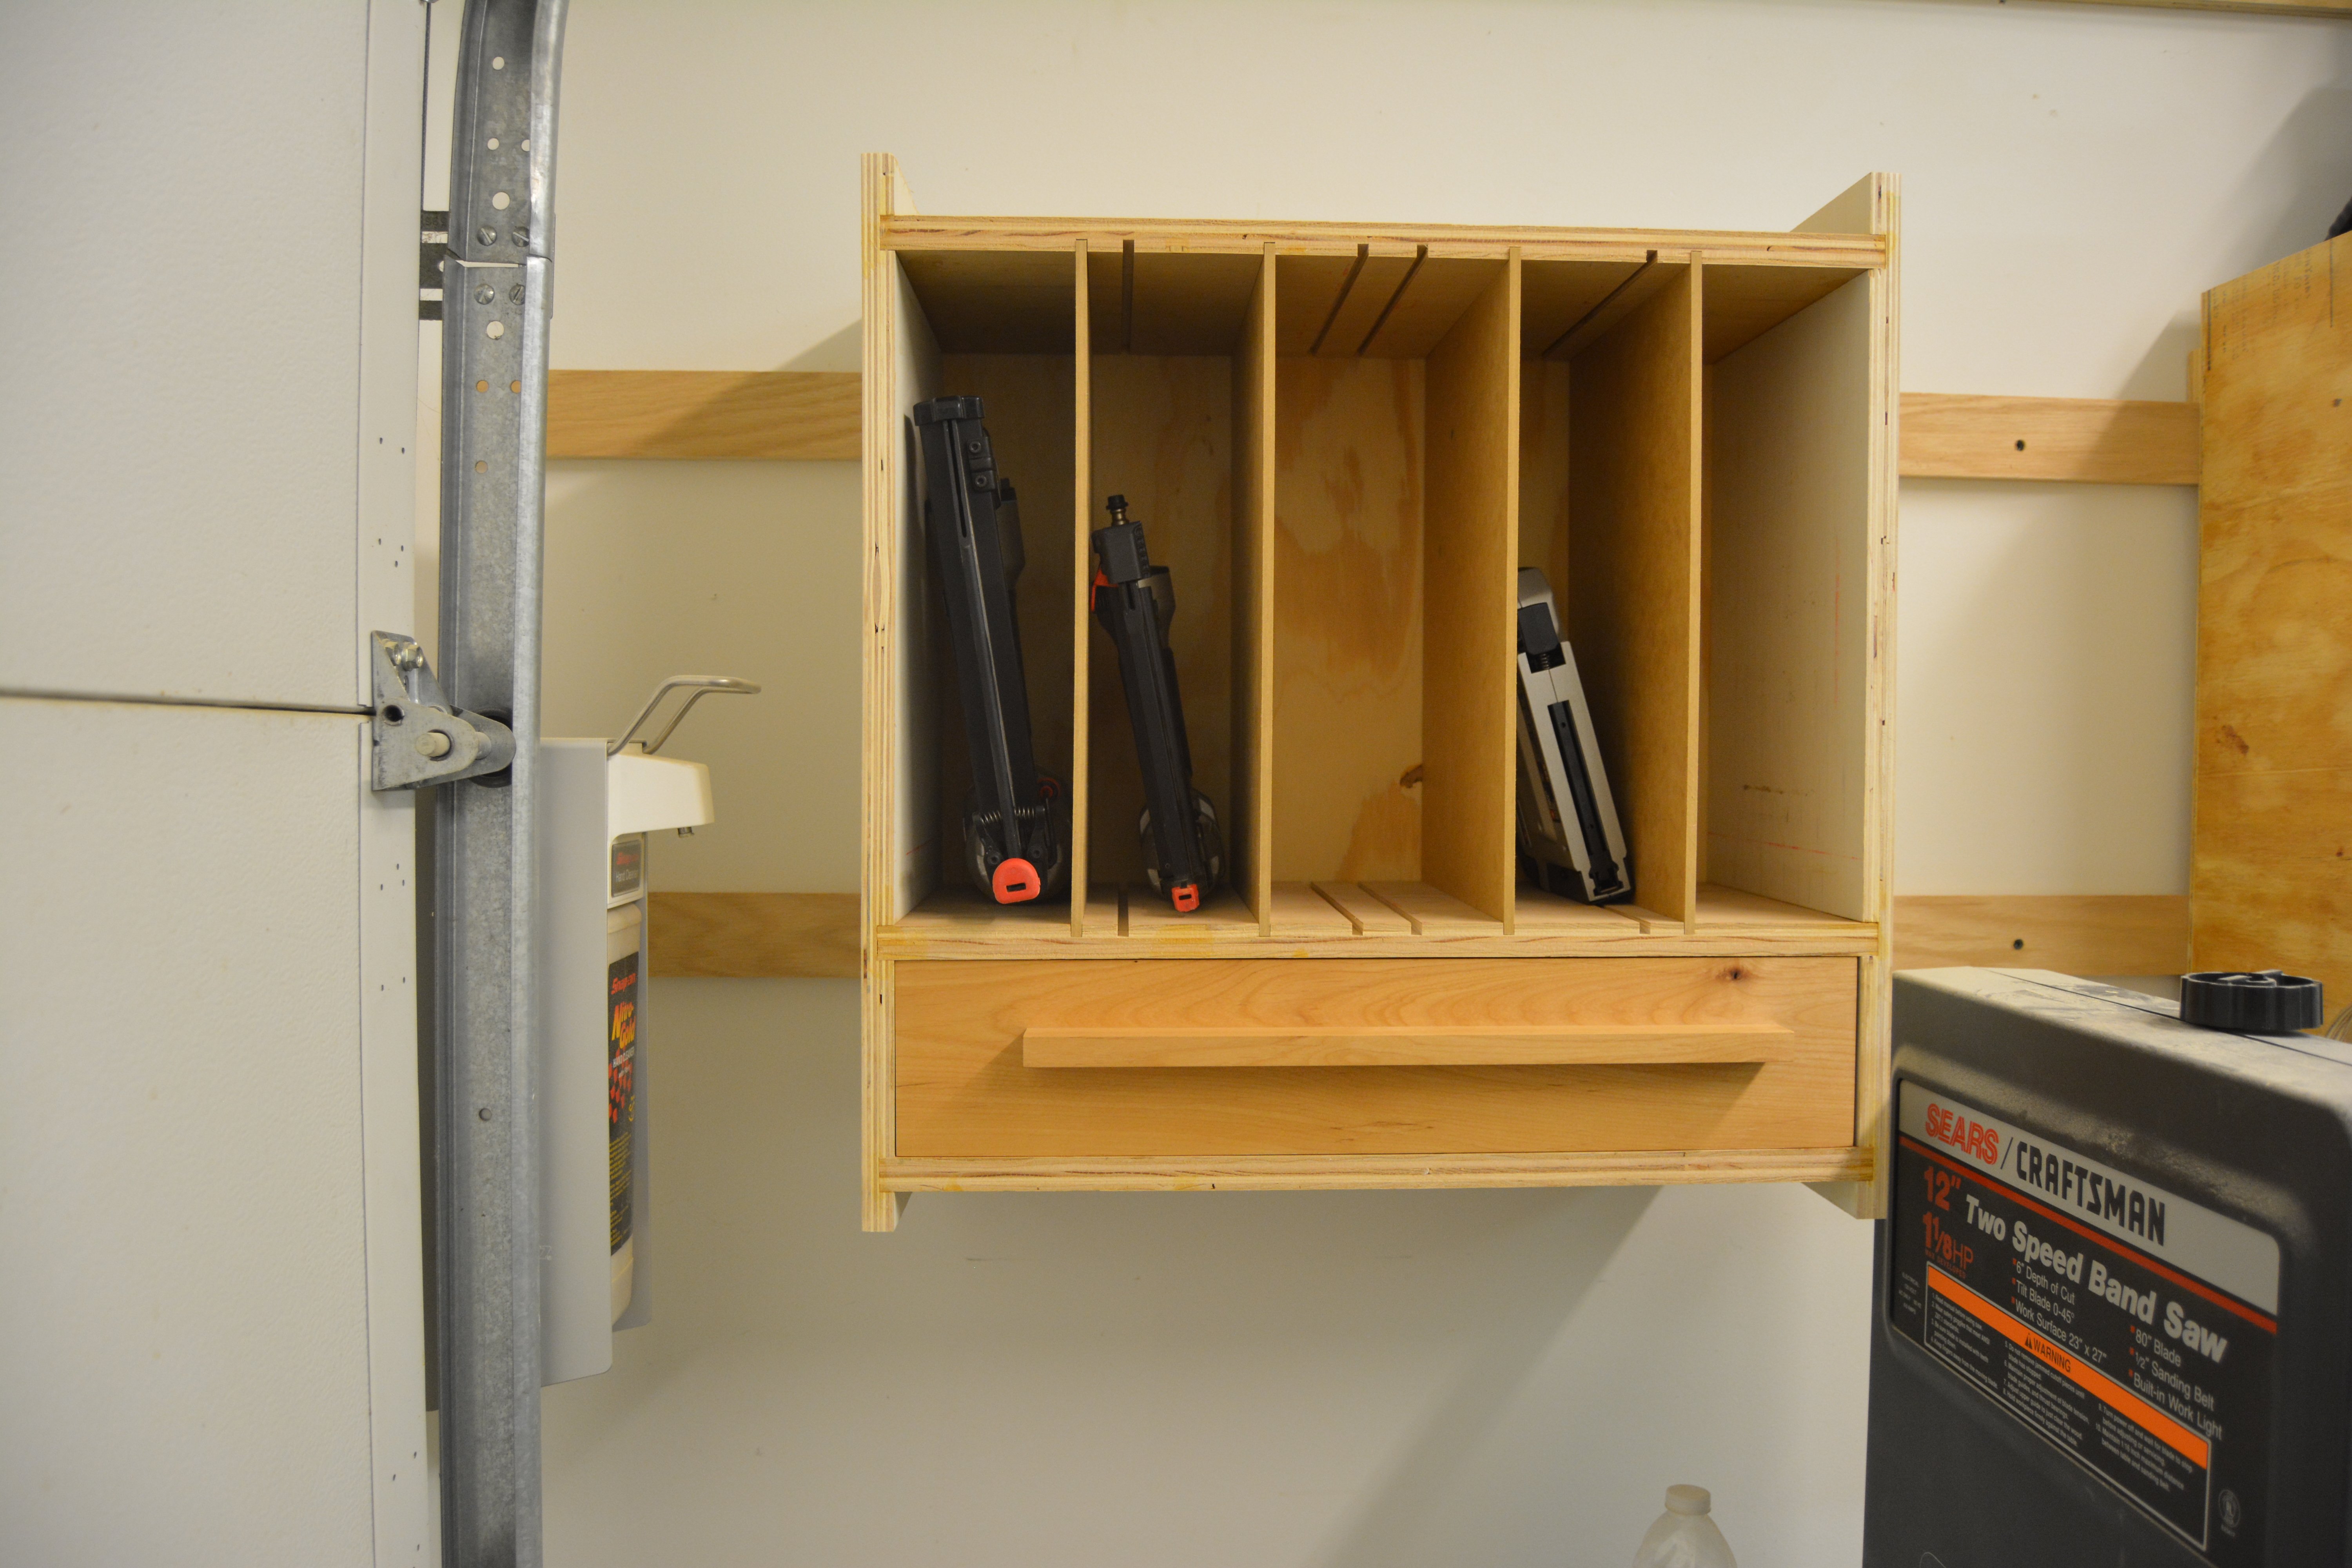
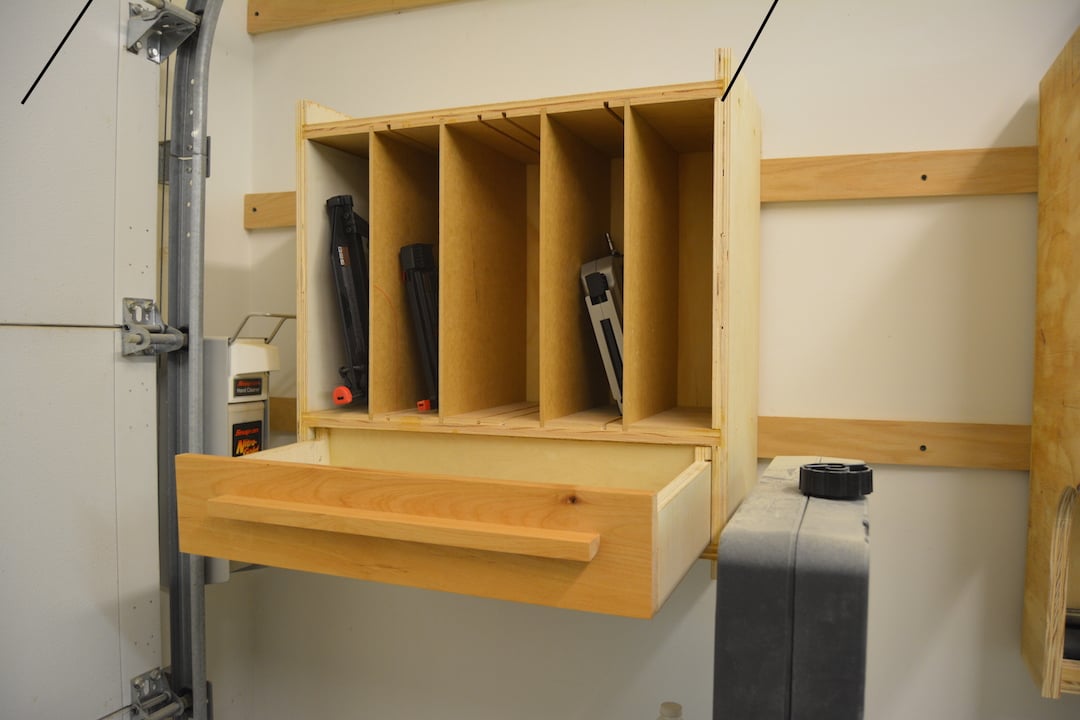
This week was a collaboration between me and Brad at FixthisBuildthat.com. I made a slight variation of his hanging tool cabinet to store my nail guns. More details at my website: http://www.lanebroswoodshop.com/2015/03/nail-gun-cabinet.html
YouTube video: https://www.youtube.com/watch?v=BUHnkjojlWc
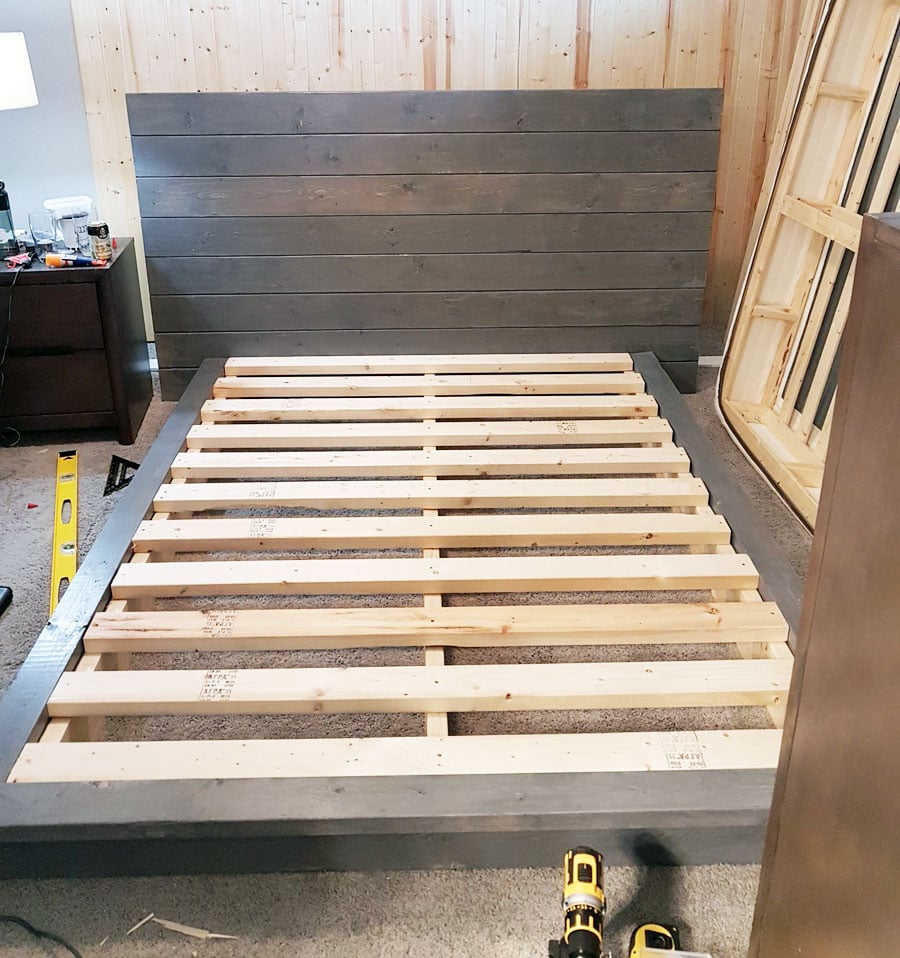
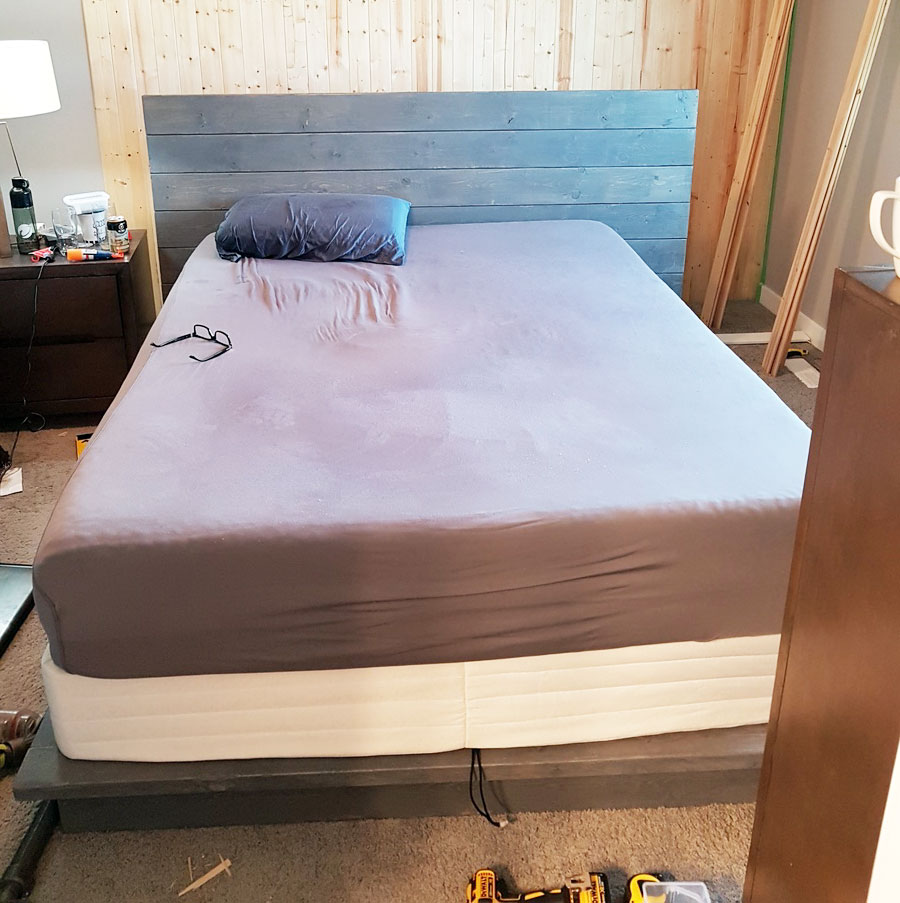
The bed in grey, also made the backboard taller (and doubled support on back) because the bed will have a box spring (photo 2). Awesome plans, love the look already. Excuse the background mess. The back wall is part of the same project! Thanks again for the plans!!
Note to future builders, learn from my one fatal mistake, be really picky on your quality of wood. I had some slight frame issues because on a bad board that resulted in about a 1/4 inch bow on one side. My slats are all use rival but you can see some done touch both sides...that is the bow. Still no one will likely notice but me.
Second, there was no info on spacing along the frame for attaching the 2x4 to the 2x6. I used 12", maybe overkill.
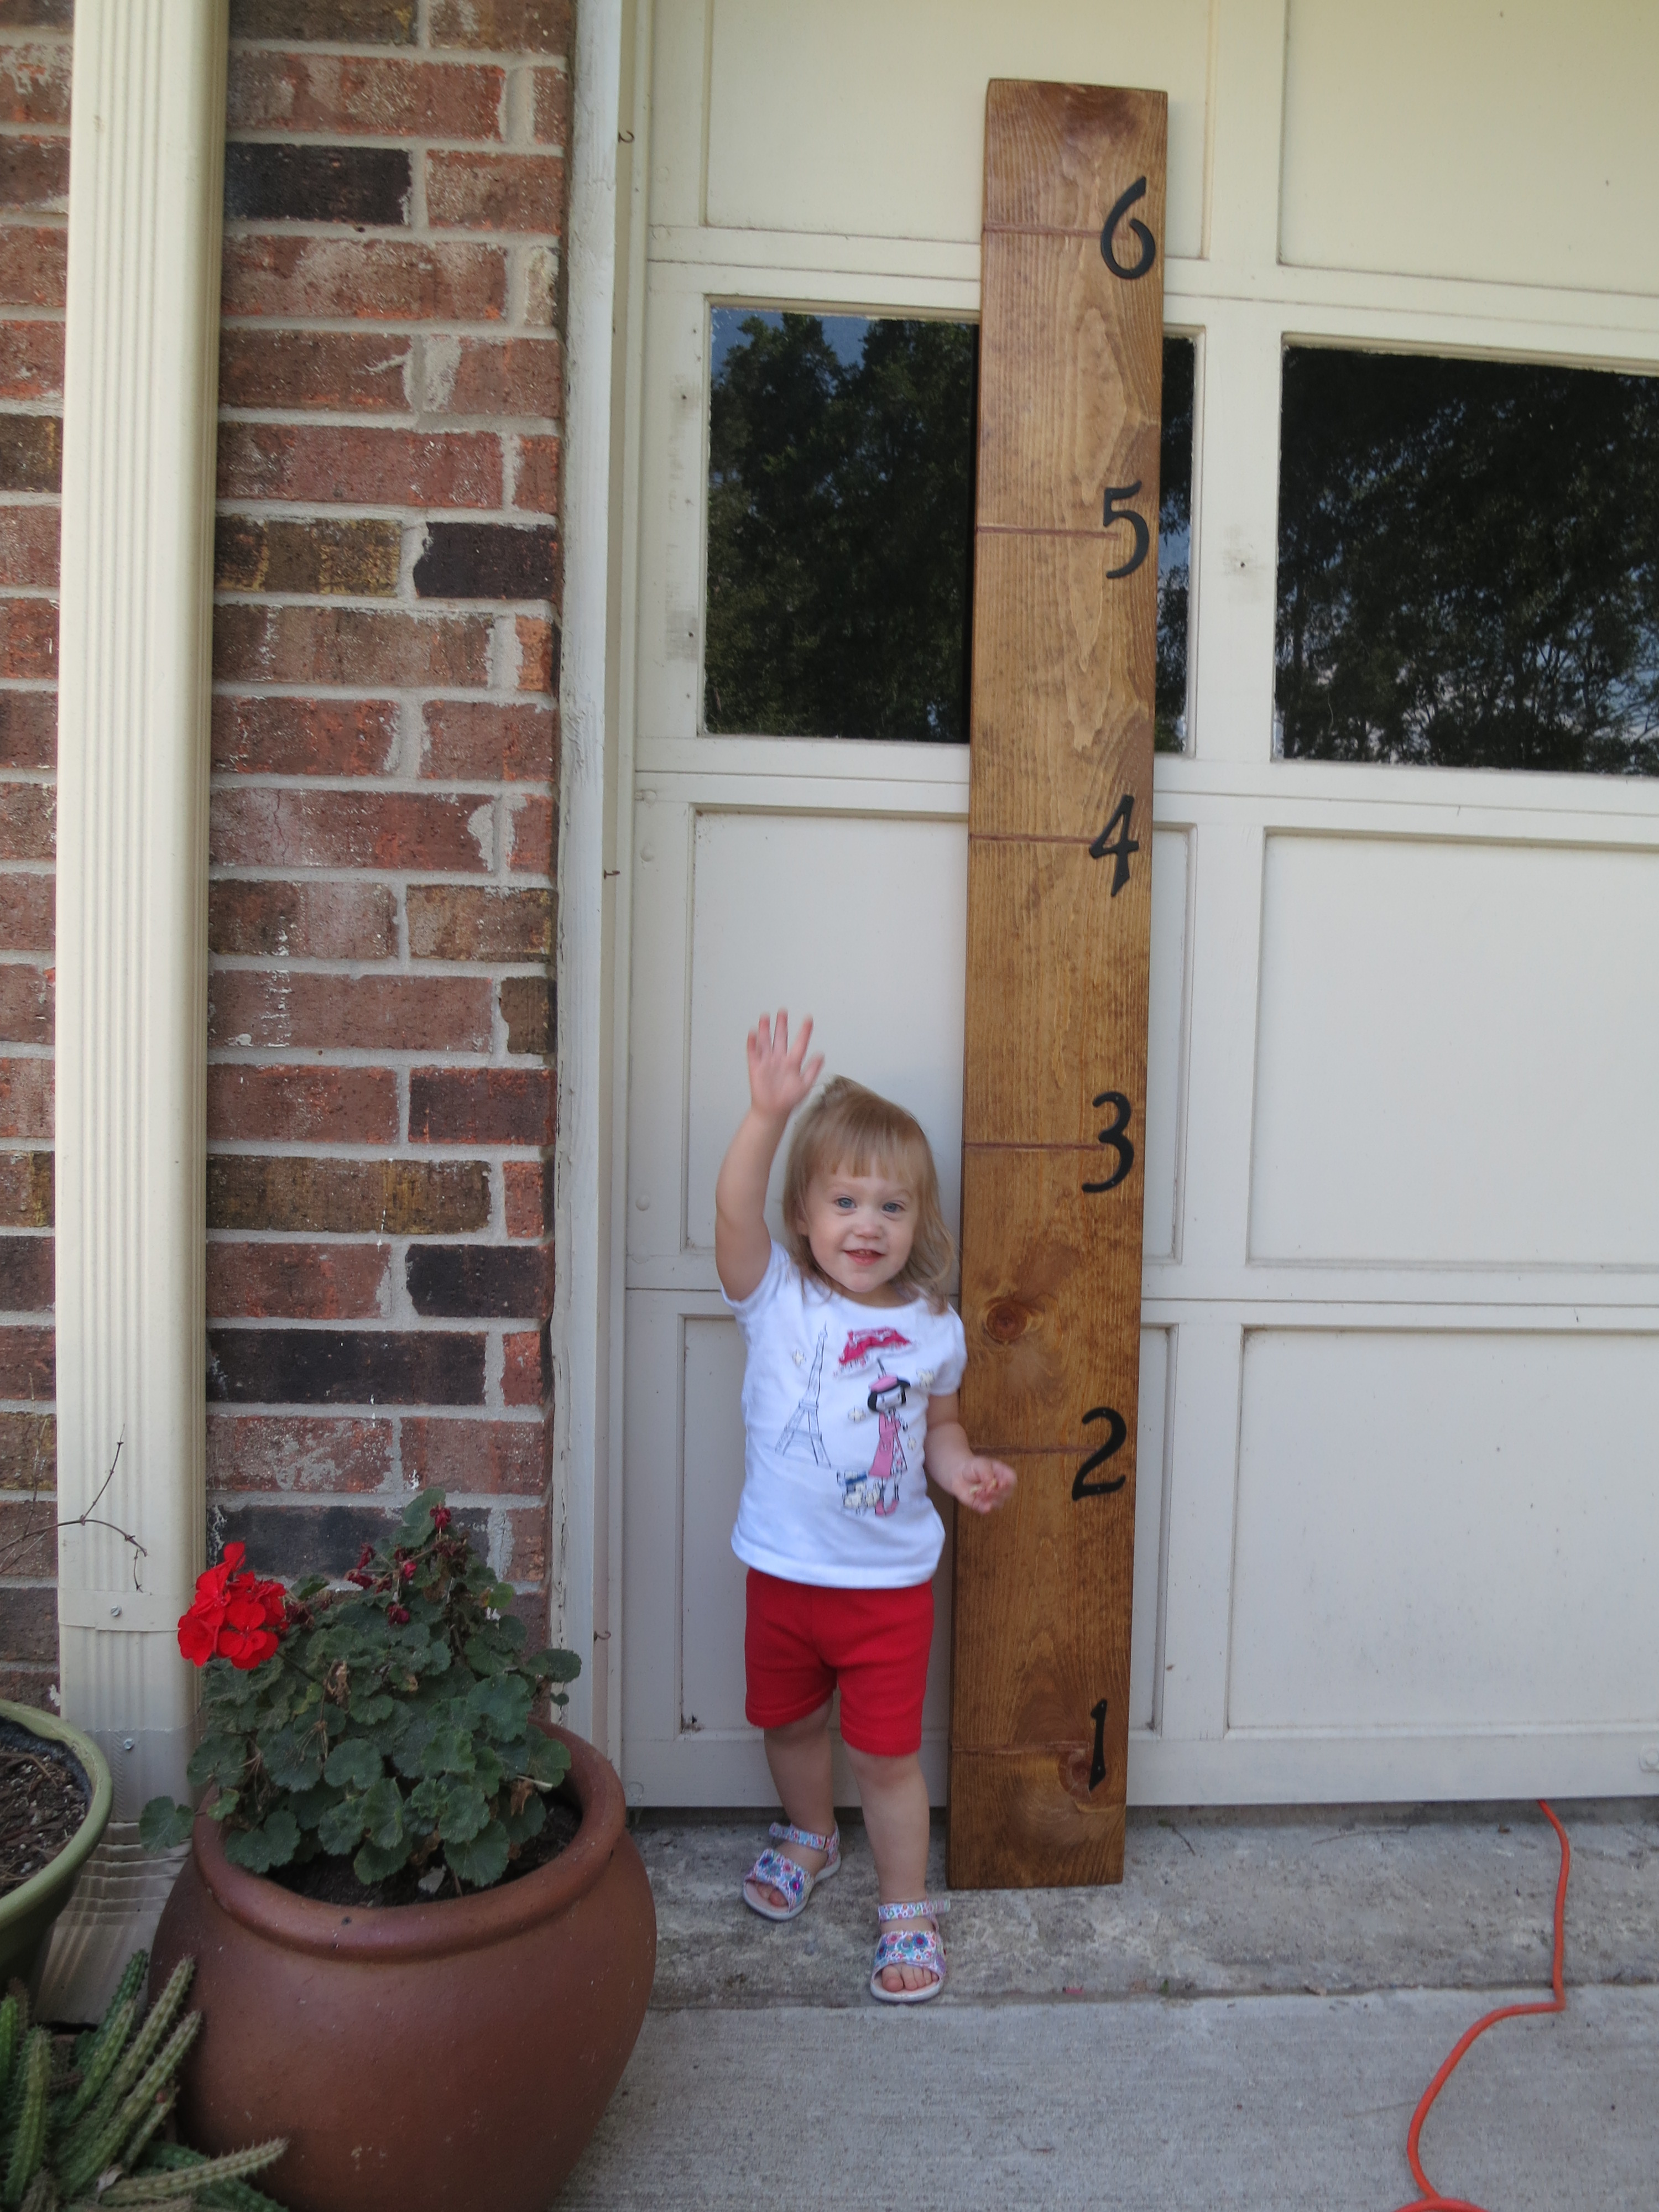
We bought the house my husband actually grew up in. In the garage, on the wall, is theire family's height chart. When they moved taking it with them wasn't really do able. So, for Mother's day we wanted to give his mom a NEW (relocatable) height chart for her grandbabies.
One long board, another small board to insert at each foot mark, some house address numbers, and two different colors of stain, and we had what we wanted.
My husband made this in no time.

We were using a 1970's dresser set which was constructed of mdf wood with a laminate teak exterior . I decided to do a makeover that would match our bed. Instead of simply painting, I decided to use solid wood (pine) and get rid of the poor laminate drawer fronts.
More photos and tips on my blog about this project:
http://www.woodworkingfourdummies.com/blog/dresser-set-makeover
Cheers,
Ian

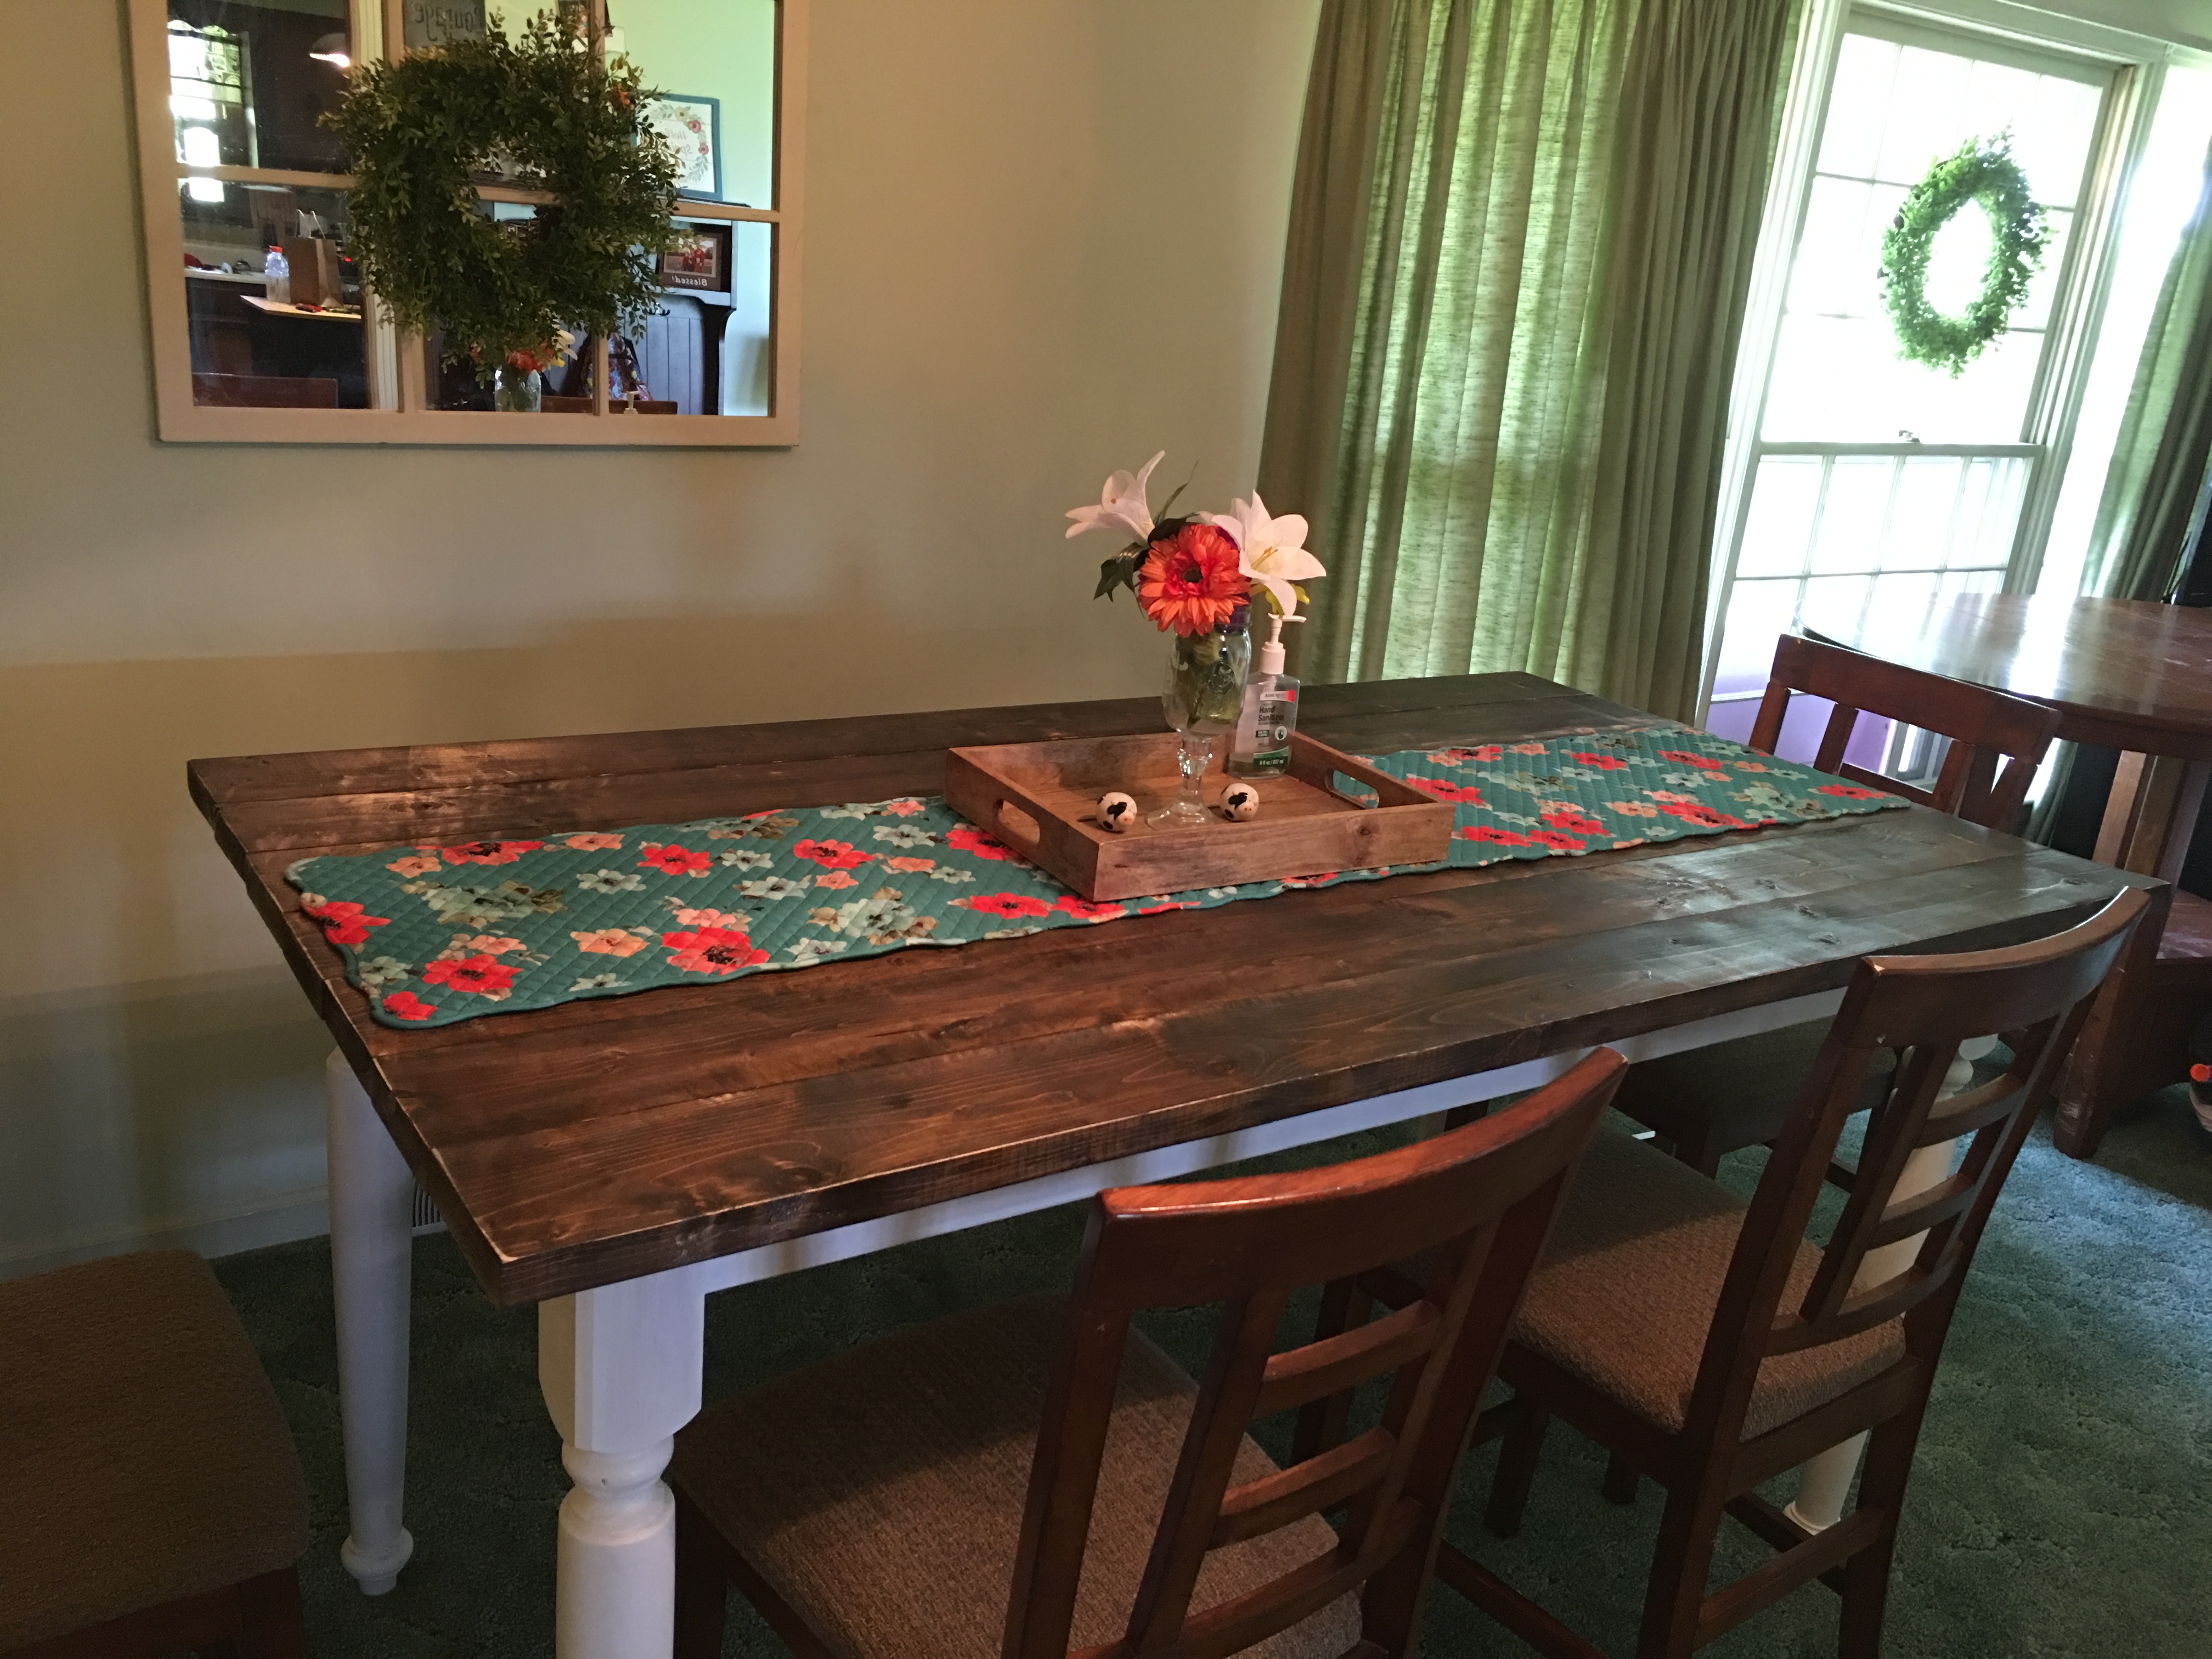
Recently built this table my first build actually. I told my wife we needed a new table because we didn't have enough room for our youngest to move up to the table she said let's build one. Well I did the "building" and she did the staining painting and sanding. She is currently putting new fabric on our old chairs. And now she has me building a bed. Her words when I finished "I didn't know you could build stuff". My reply "that was part of the plan lol". Thanks for all the designs.
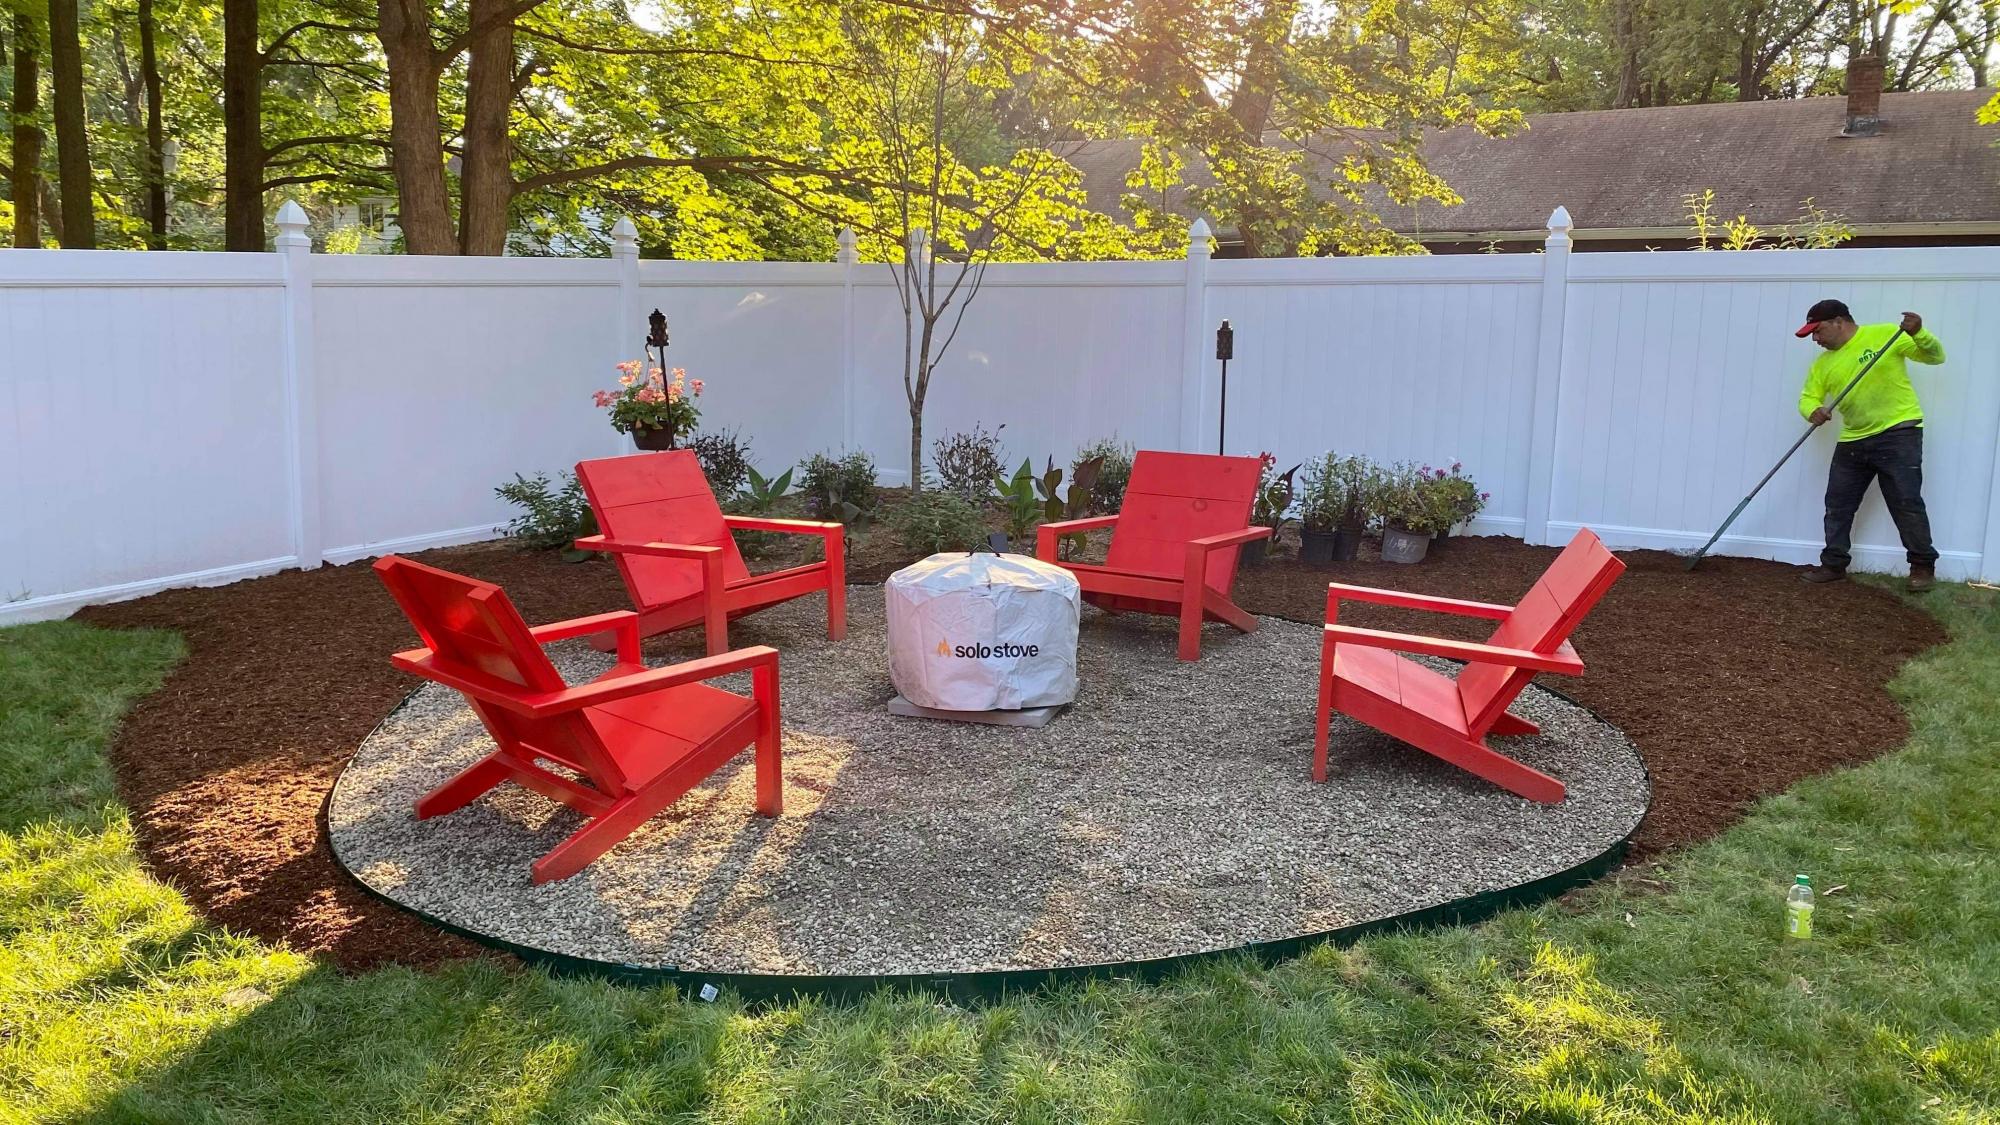
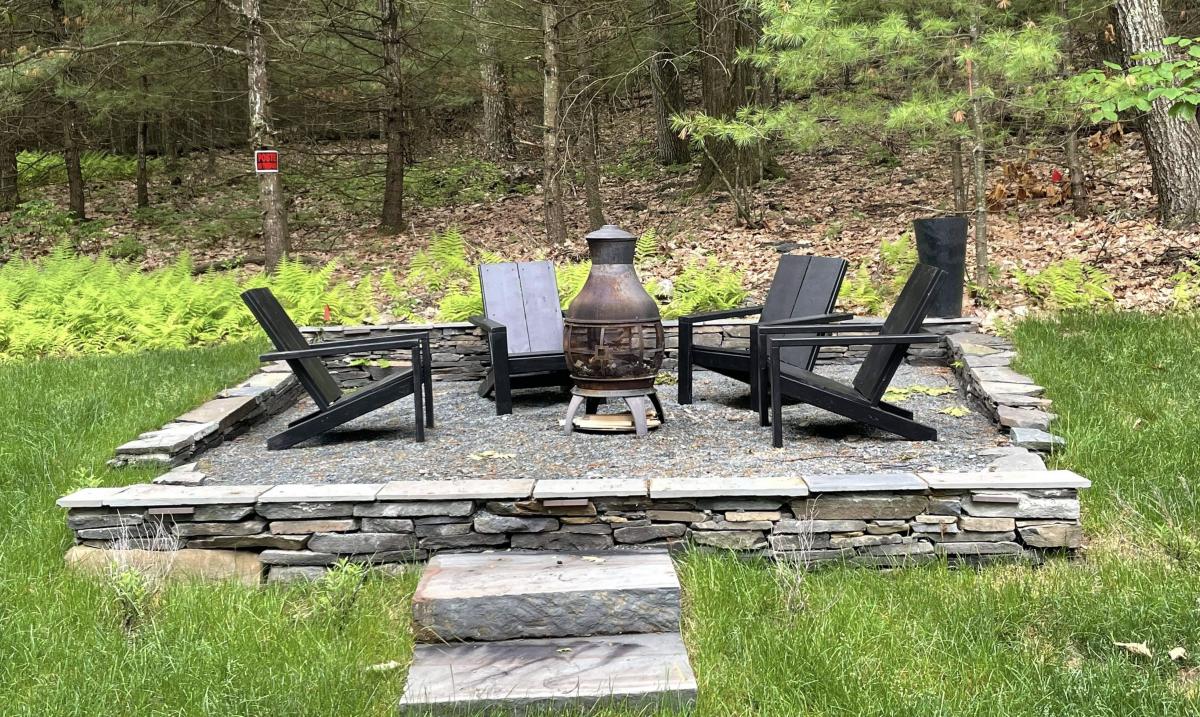
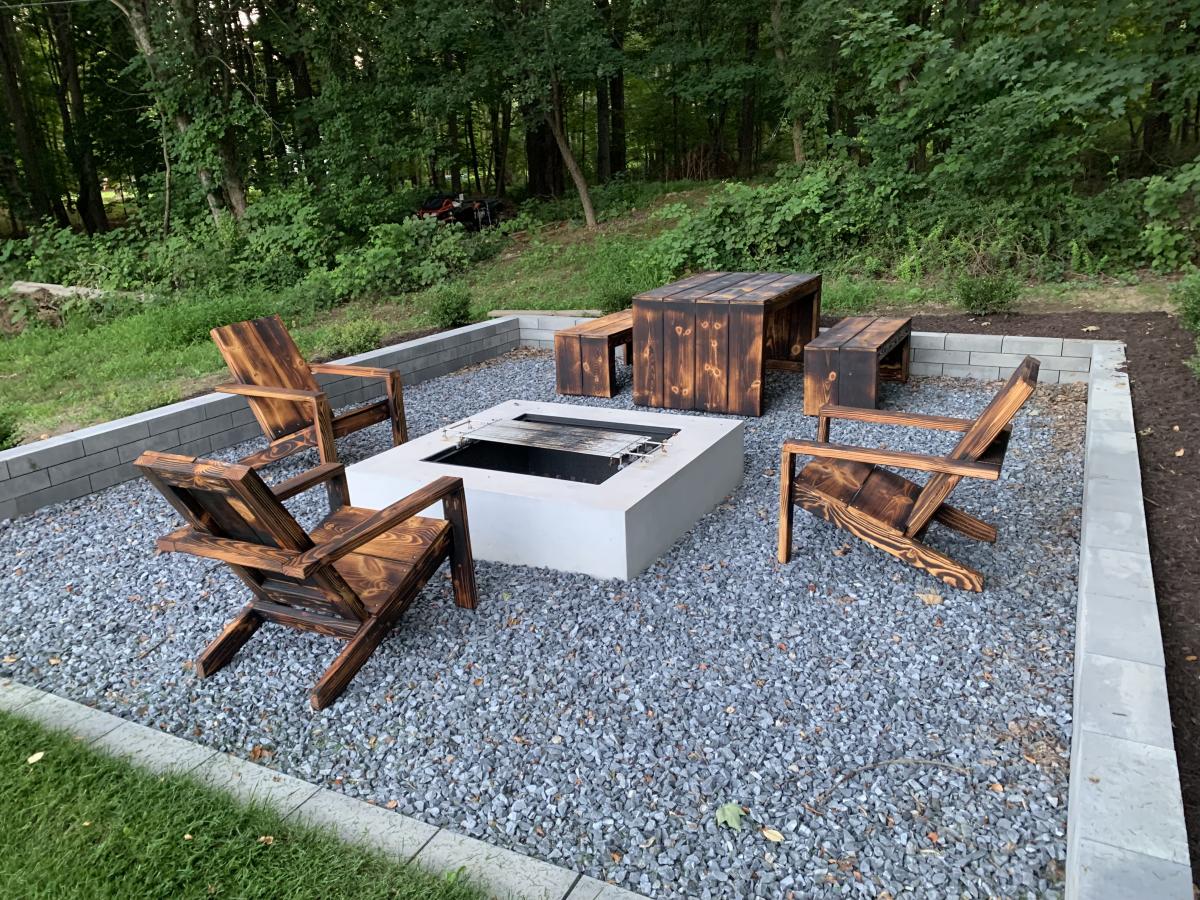
I started out several years ago building the Modern Adirondack Chairs using Ana White's plans. Customers loved the modern design and I was able to fulfill orders in any color or stain. Customers even asked if I could make a children's and adult size chair. These pans are available upon request.
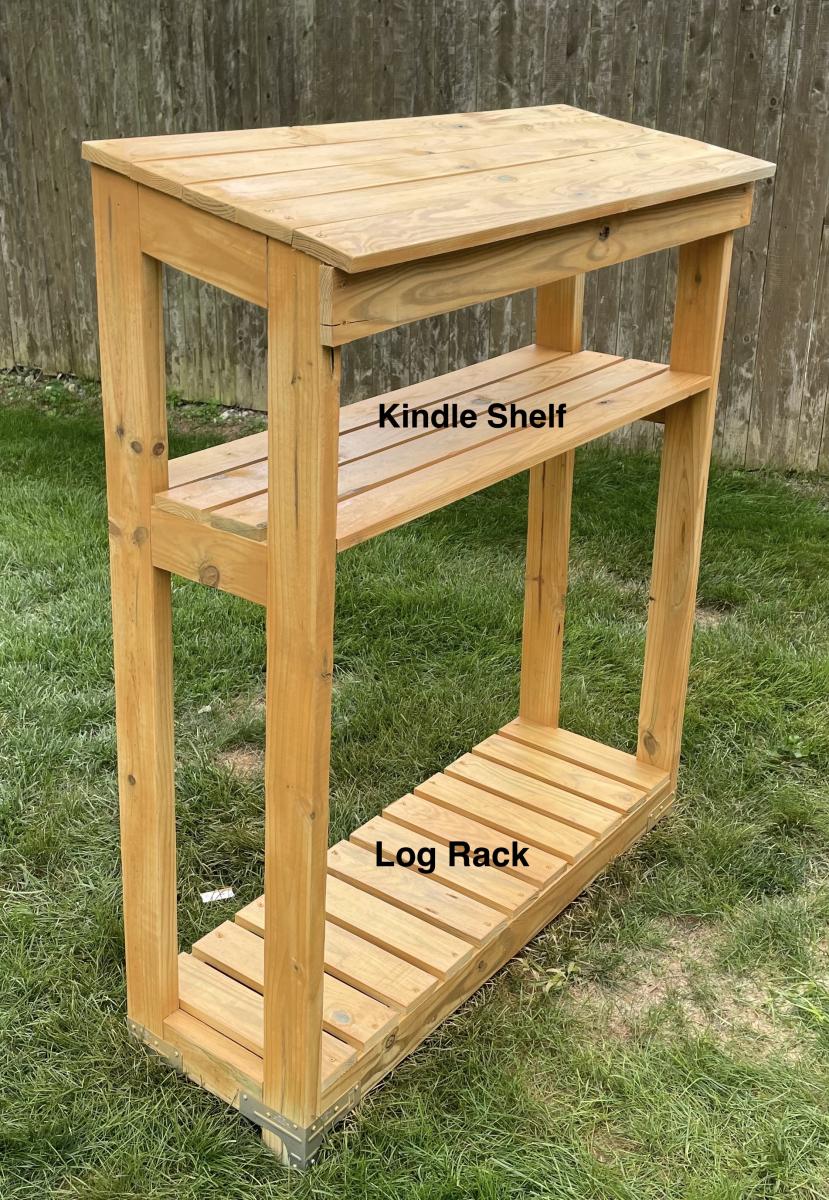
As the trend towards outdoor living increased due to the pandemic, I expanded my product line to tables, benches and patio planters. I even created my own design for a fire pit rack and bench based upon Ana's designs.
Today, I have a thriving business for commercial and residential fire pit furniture and accessories.
I continue to follow Ana White for inspiration and ideas, George
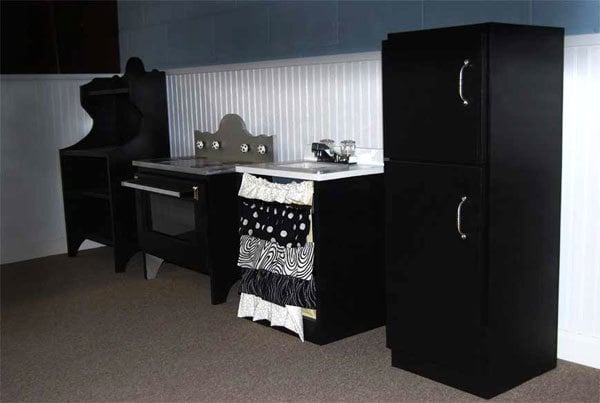
don’t know when I first stumbled across Ana’s site. But – when I started printing the plans that I wanted, and I printed a whole 2 inch binder – I knew I was addicted.
It was November and I wanted to build the whole kitchen, the hutch, fridge, sink and stove. (I get obsessive about things) That was a lot of building! Being the numbers dork I am, I ran to my excel sheet – planned out all the cuts to use as little MDF as possible. I used three sheets of MDF – which totaled about $90, the accessories and flat black paint ran a little under $30, so in total the four pieces were $120, for all 4 pieces! My full story of my husbands blizzard drive to the depot, and 120 cut’s later are in my blog: http://mycreativeescapes.blogspot.com/
I work full time and I have three kids 4 and under, so I had NO idea when I was going to do it, but – I knew I was going to do it – and as a christmas present!
My dad helped me with the first two pieces, and I finished it up. It secured my love for building!
Overall the building was super easy – after a few popped nails, I got the hang of the nail gun. After the first piece, I figured out the tricks to be able to build it myself. Clamps are my new best friend!
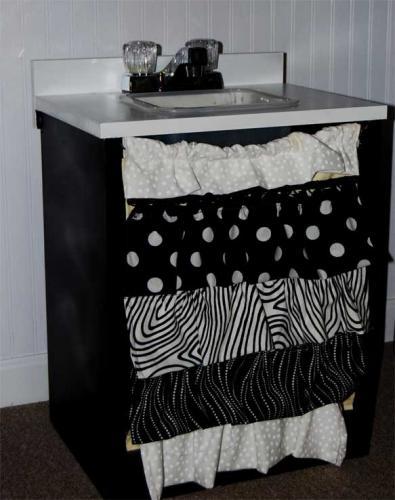
The finishing – ahh good times, nothing like the wife wanting to use the power tools, and the husband wanting to do the paining. He insisted! We had flat black paint, so we did most of it in flat black. We wanted to do “Stainless” but the chrome didn’t look very good because we painted on the primer with a brush – we didn’t spray it, so when we sprayed on the Chrome spray paint – you could see the brush strokes. So we ended up painting most of it black as you can see in the picture.
This is what the project looked like pretty much done, just drying. My plans are resting on each piece, the clamps are holding the oven door together. And the plastic bin is my sink!
Ana – you truly are an inspiration! Your plans are awesome, and your generosity is amazing! I seriously have a binder full of your plans, and I am going to guess about every other blog post will be featuring your work. My first project was a simple bookcase, then the entire kitchen set, then the bench with the butterfly hinges that revealed storage for my mom (for christmas, it made her cry!). I can’t wait till the weather is warmer so I can build more! Thank you from the bottom of my heart! Next – I will post some pictures of my three little nut bags playing with there new kitchen from Santa, and my two girls and my niece sitting on the bench I built my mom.


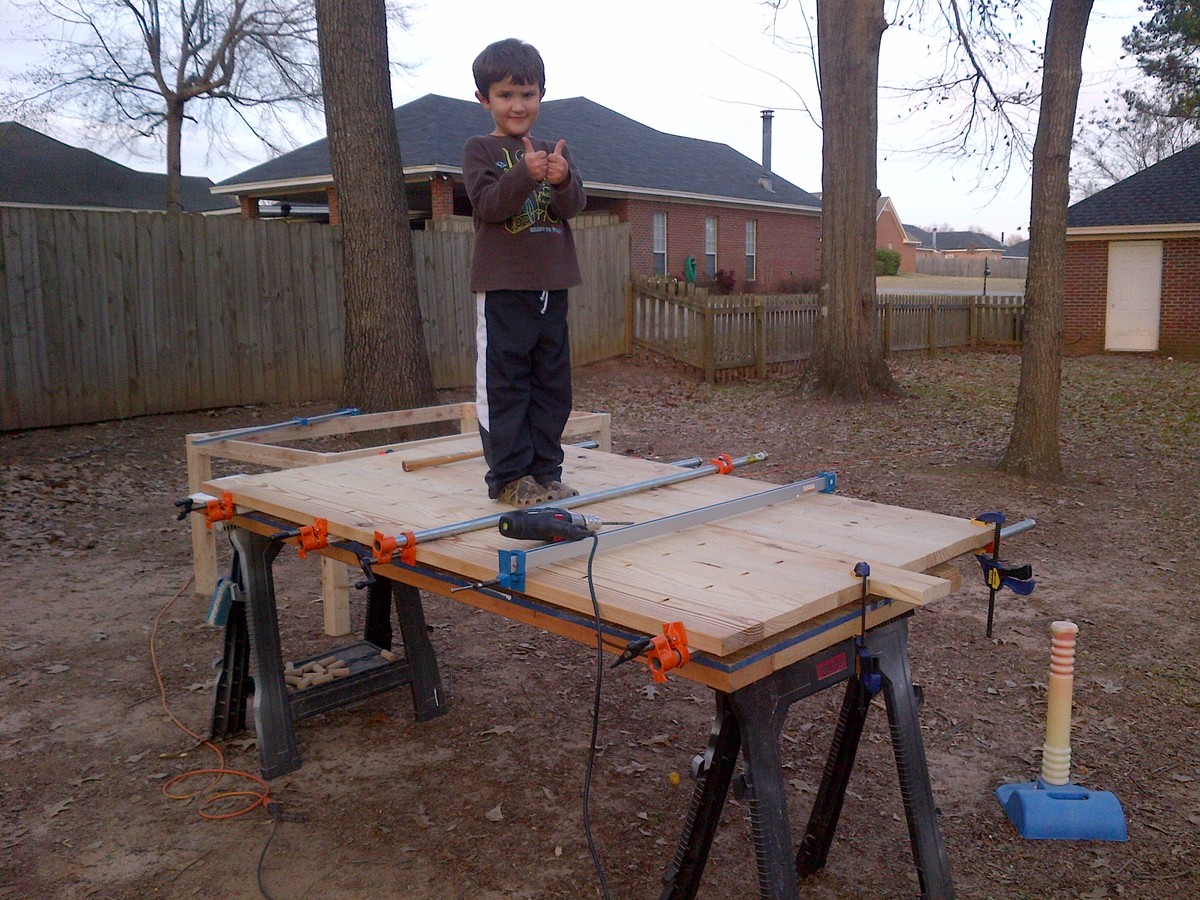
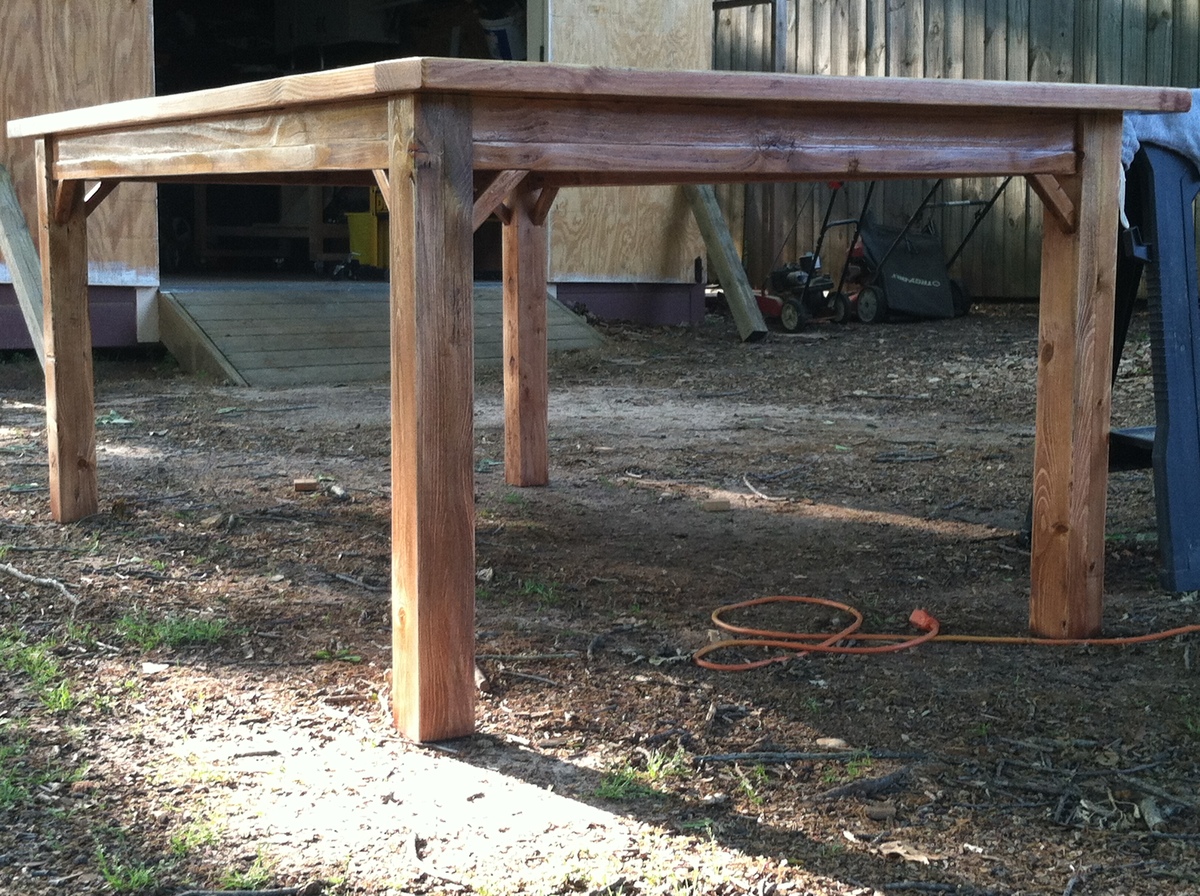
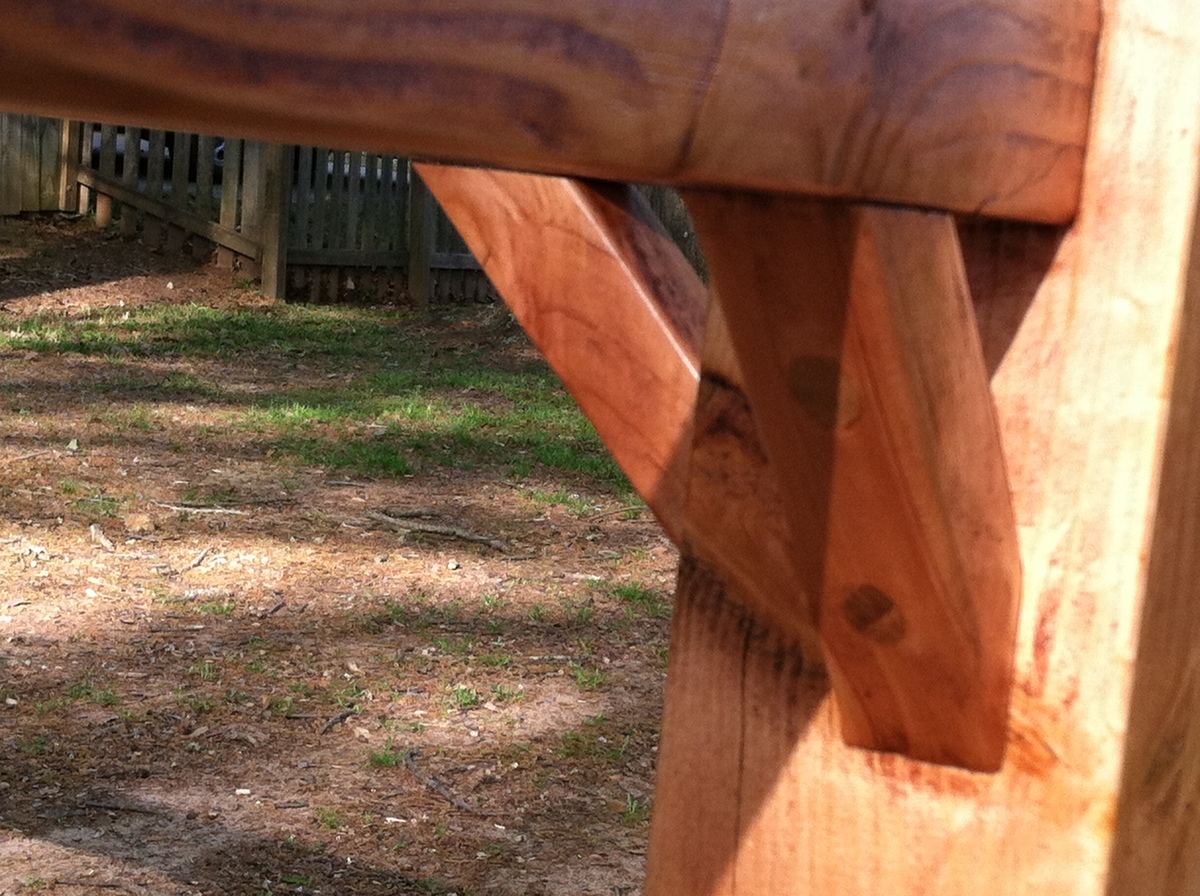
My wife and I love this table: http://www.woodlandcreekfurniture.com/graphics/DT00100NEW.pdf so I took the Farmhouse Table plan and modified it just a little bit. I used pocket screws to join the table top and eventually wound up installing 2x4 runners on the underside to sturdy the top even more. I also used my son to help keep the boards flush while I screwed them together. He though it was wonderful to help his dad out this way.
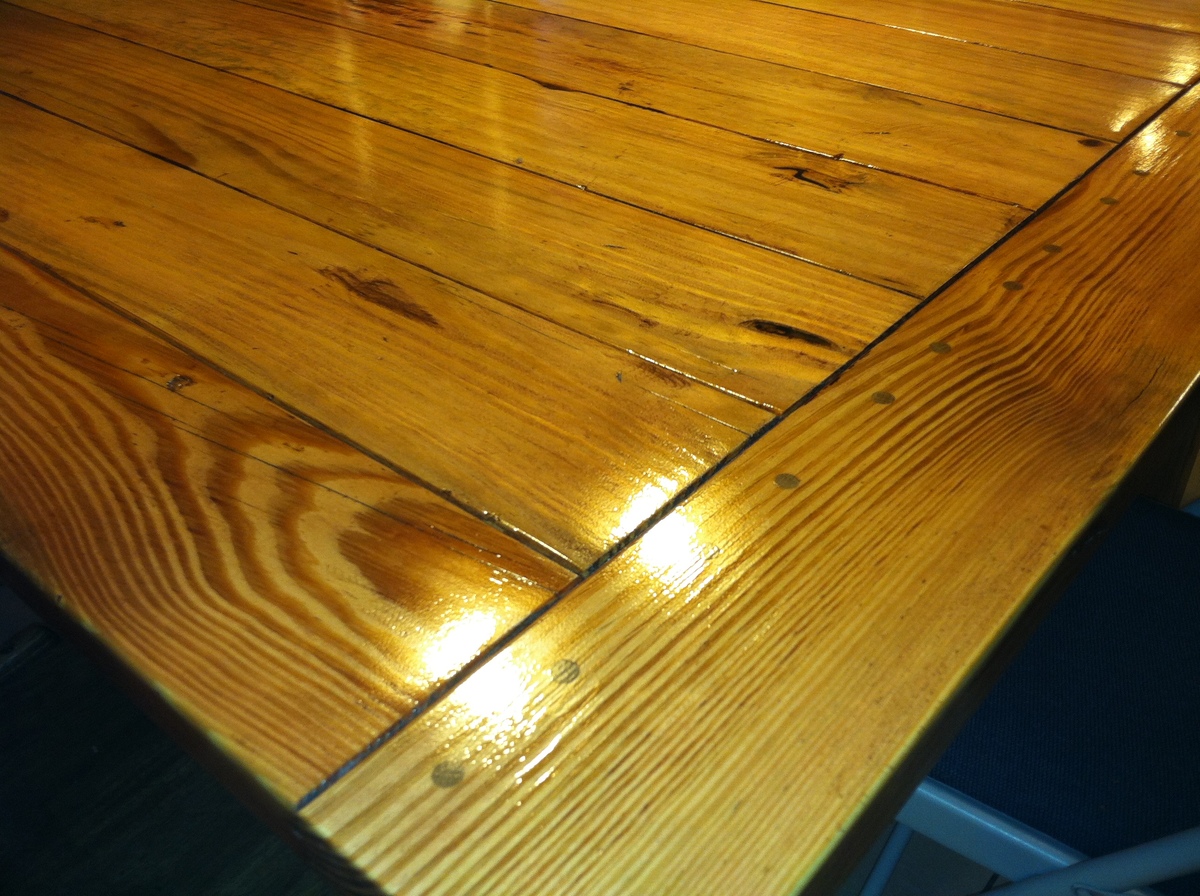
For the table frame I used a 1" straight bit in my router to put a little "flair" on the rail. The leg bracing is 1x1 scrap that I had left over from ripping the rail to size. I used my drill press on the bracing to make the recessed hole for the screws at the correct angle. I then covered the screw hole with a 5/8" red oak dowel.
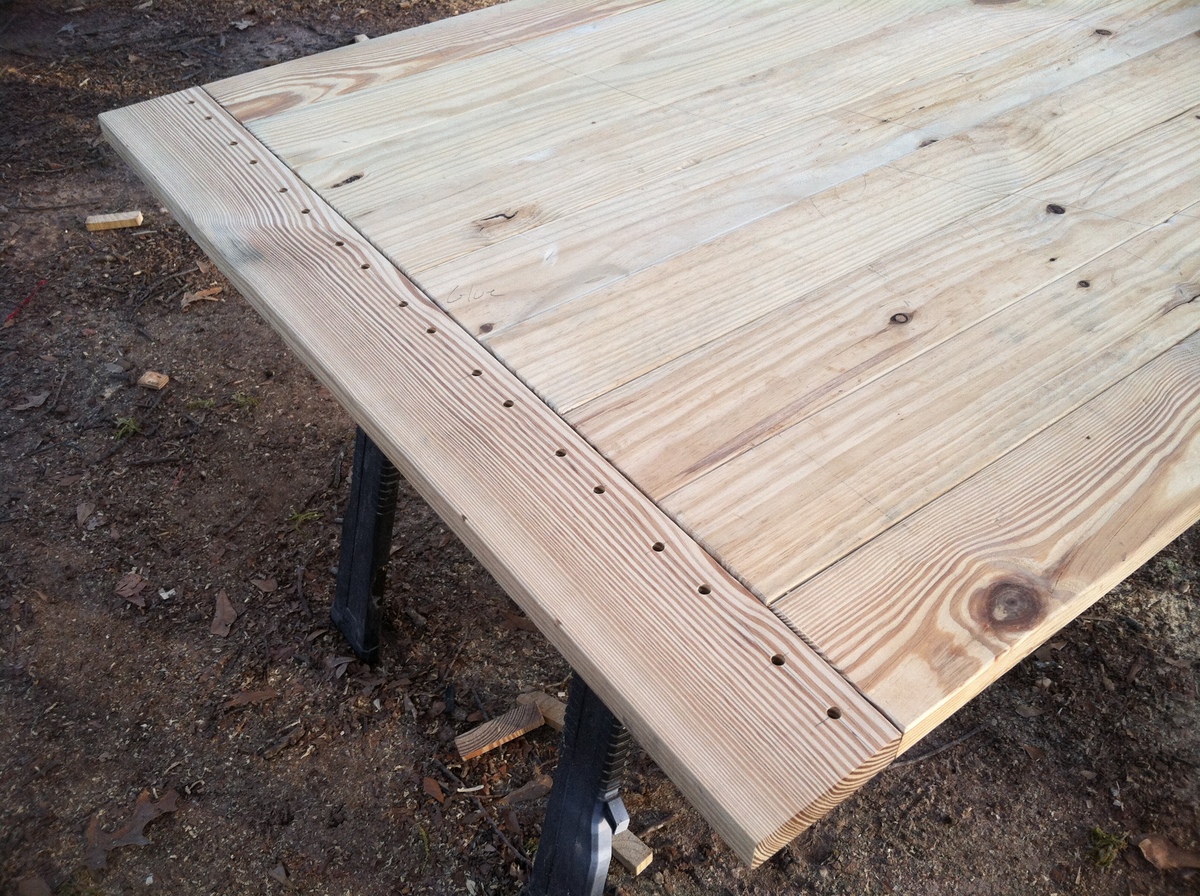
I decided to go a little more traditional on the breadboard end just to see if I could do it. Its really not that hard just more time consuming. I used a 5/8" red oak dowel that I bought at the hardware store for joining the breadboard to the rest of the table top.
My table is made of a mixture of pine and spruce. I used shellac to seal the wood before staining. Shellac keeps these softwoods from splotching when they are stained. I then used Minwax Red Oak stain. I let the stain sit for about 15 minutes before wiping it off. The color turned out great. I used my Christmas money to buy an LVLP spray gun to hook up to my pancake compressor. I used the Spray-It 3000 to apply polyurethane. I put 5 coats on the frame and 10 coats on the top itself. In between each coat I used 0000 steel wool to buff the surface. The very last coat I left alone so it would shine. It left it with a little bit of an "orange peel" finish but I thought it made the table look more rustic so I left it alone.
All in all it took me about 60 hours over a 6 month period to get the table done. When you have a real job, kids, and a house to take care of it takes a while to do stuff like this.
I've got a plan for some chairs so I think I'm going to try chairs next. They say if you can build chairs you can build anything. I've built just about everything but chairs so maybe this saying will work in reverse. If the chairs go as fast as the table did, it might take another 6 months to get one done.
The wood for this table I got for free. My brother-in-law works in the lumber business and this wood was the throw away that none of the contractors wanted. All of it had been sitting in the sun and was warped, gray, and cracked. A friend from church who does woodworking for a living planed and jointed the boards straight and square for me. The lumber is construction grade pine and spruce. Most of the money I spent on this was for the spray gun, the finish, and the hardware that I used for joining the tabletop to the frame.
A help hint I found out after the fact. If you're sanding pine and spruce with a random orbit sander or any electric sander you are going to leave little "swirlies" throughout the wood. Either sand the wood by hand to prevent the "swirlies" or learn how to use a card scraper so you don't have to mess with sandpaper. The "swirlies" showed up when I applied the stain. Before then I couldn't see them. My wife thought the "swirlies" added to the rustic-ness of the table, so I left them alone.
Sat, 05/11/2013 - 07:31
I forgot to include this in my post. I used Devcon 5 minute epoxy to seal all of my knot holes.