Community Brag Posts

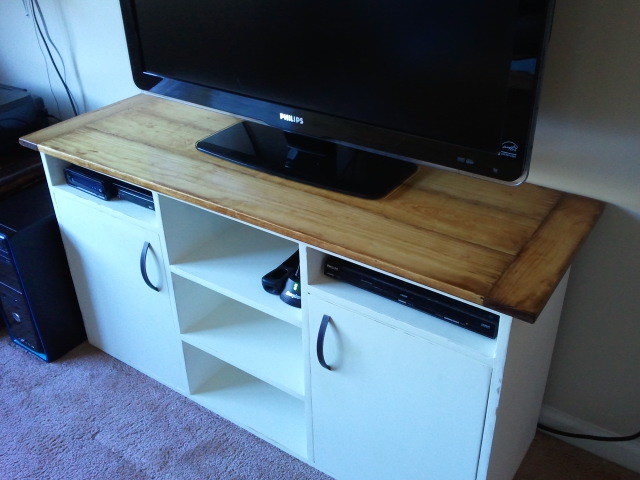
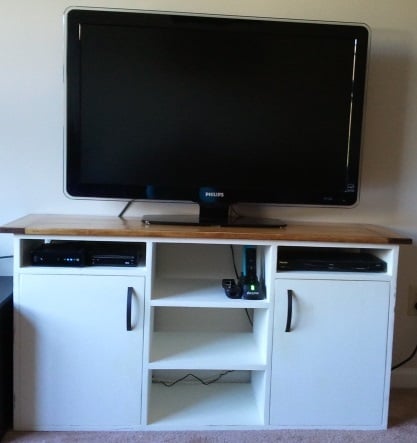
TV console

Submitted by Bunnie1978 on Sun, 10/27/2013 - 06:50

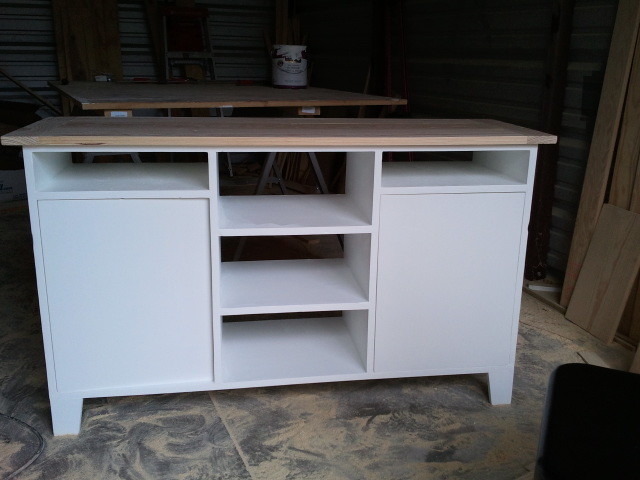
I ran into all sorts of problems building this! I started building it based off the materials I had on hand, not really knowing what it was going to be in the end. I started with the plywood box I hadn't intended for it to be a TV console, at first I was thinking a stand for a 55 gallon fish tank (which I have since sold.)
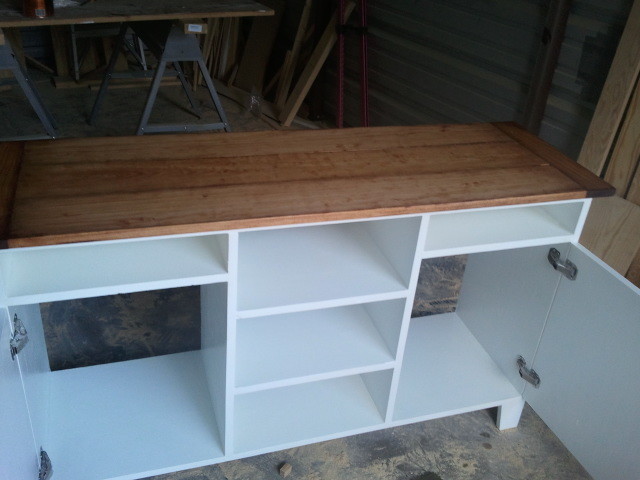
Once I decided what I was actually doing, it went together fine. I was going to make all three of the central column area into drawers, but I can't afford the hardware for that right now. I made the farmhouse style top and stained it to match the coffee table I made previous. However, I had many issues with finishing, problems with the legs, and after attaching the top accidentally broke off one of the breadboard ends of the top.

Finishing it was most exasperating. I started out with a mini-roller and white gloss paint. After I got it completely painted, I put on poly, but the poly dried very yellow and completely ruined the finish. I had to sand it almost completely back down to the wood to get it out. By the way, I learned something important about sanding which I will share with you... the cheaper sanding discs (made from clay) are crap. Get the ones made from ceramic. They last considerably longer and get the sanding done SO much faster. I love the guys at Lowes. :)

After I got it sanded back down I got some flat paint and used my sprayer. I love flat paint, it was so easy to get it on evenly. I did water it down quite a bit though. Then I sanded it down to a beautiful very smooth finish with some slight distressing. HOWEVER - flat paint needs a top coat, and I again screwed it up. Not as bad this time though. I used a spray on poly just in some places which gave it a little bit of an aged look, not too bad. Not exactly what I wanted, but doable.

I have not reattached the top with the expectation that I will still need to do more finishing, and it will be easier that way, and I will still be adding large caster wheels instead of legs on the bottom to raise it up a few more inches.

Also, the smaller cubby areas over the doors... they aren't big enough to use a sander to get the insides.

I used invisible hinges for the first time on this project which worked out quite well, and I love those.

I would love suggestions on finishing... if I use flat paint because it's easy to work with, what is a good top coat for that? Or should I stick with gloss paint and no top coat, and try that for my next one? Paint with primer? Still learning...

They say it takes 10 years to become proficient at a skill.. I've got about 8 years of building left before I'll be good at it. :)
Estimated Cost
90
Estimated Time Investment
Week Long Project (20 Hours or More)
Recommended Skill Level
Beginner

Comments

Val Manchuk

Sun, 10/27/2013 - 23:32

Hi There,

I do two coats of primer, and I sand very lightly, just enough so the surface feels smooth. I follow that with one coat of white semi gloss for most of my builds. White hides so many flaws! If I think the project needs a topcoat I will use Varathane Diamond Coat. That's what works for me. Hope this helps!

Val
artsybuildinglady.blogspot.ca

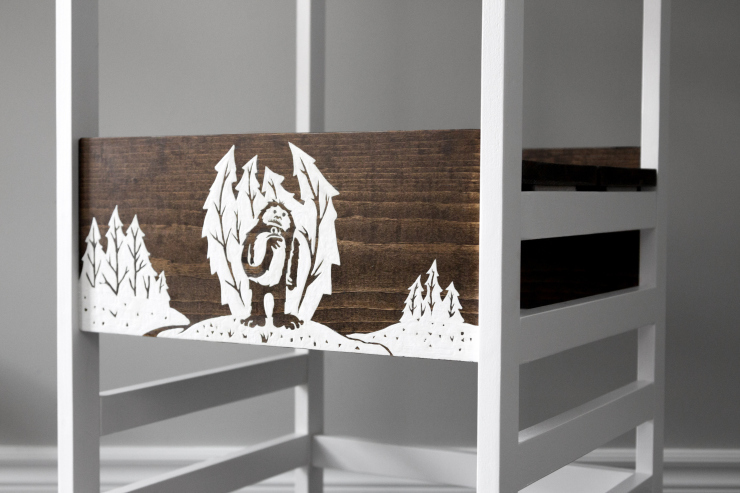
Caleb's Yeti Tower

Submitted by Anonymous (not verified) on Mon, 01/11/2016 - 17:38

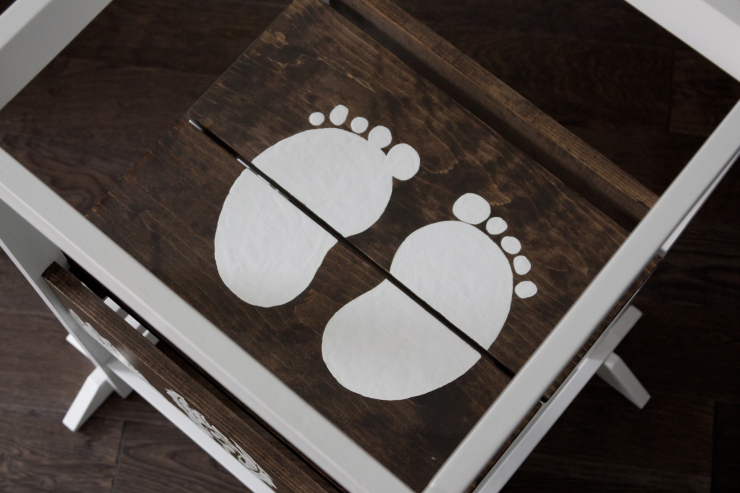
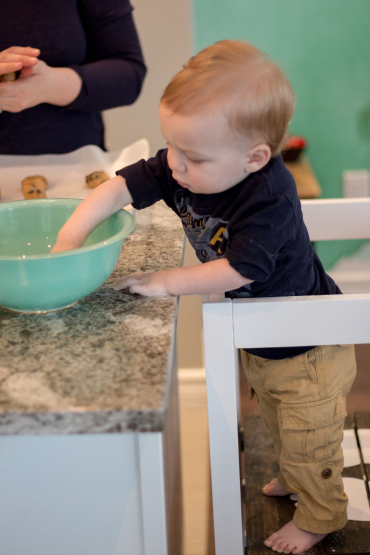
This was easily the most elegant and functional tower design I found on the internet and it does not disappoint! I made a few modifications that included a lower, squarer (?) profile to fit under our counters, a hand painted mural, some stain, and of course some Yeti-your-feet-go-here-footprints on the platform. As soon as the paint was dry, I set my son up at the counter in it. His little face lit up with delight at all the new details and things to see. He instantly started looking at everything with swift little back glances at me that said “Really Mommy?! I can stand here?!” Totally worth it!

Built from Plan(s)
Estimated Cost
$50
Estimated Time Investment
Weekend Project (10-20 Hours)
Finish Used
Behr Enamel Paint
Minwax Polycrylic
Recommended Skill Level
Beginner

Comments

Farmhouse Bench Brag

Submitted by mvanmeg on Mon, 05/20/2019 - 08:56

Farmhouse Bench completed.  Pine base painted black.  Bench top is mahogany stain on maple. 

This is going to the cottage to live at the end of the bed.  Will be used as extra seating at the dinner table as required.  

Estimated Cost
$65
Estimated Time Investment
Weekend Project (10-20 Hours)
Finish Used
Black semi gloss on the base
Mahogany stain on maple top. Clear coat of poly over stain. 4 coats for extra durability
Recommended Skill Level
Intermediate

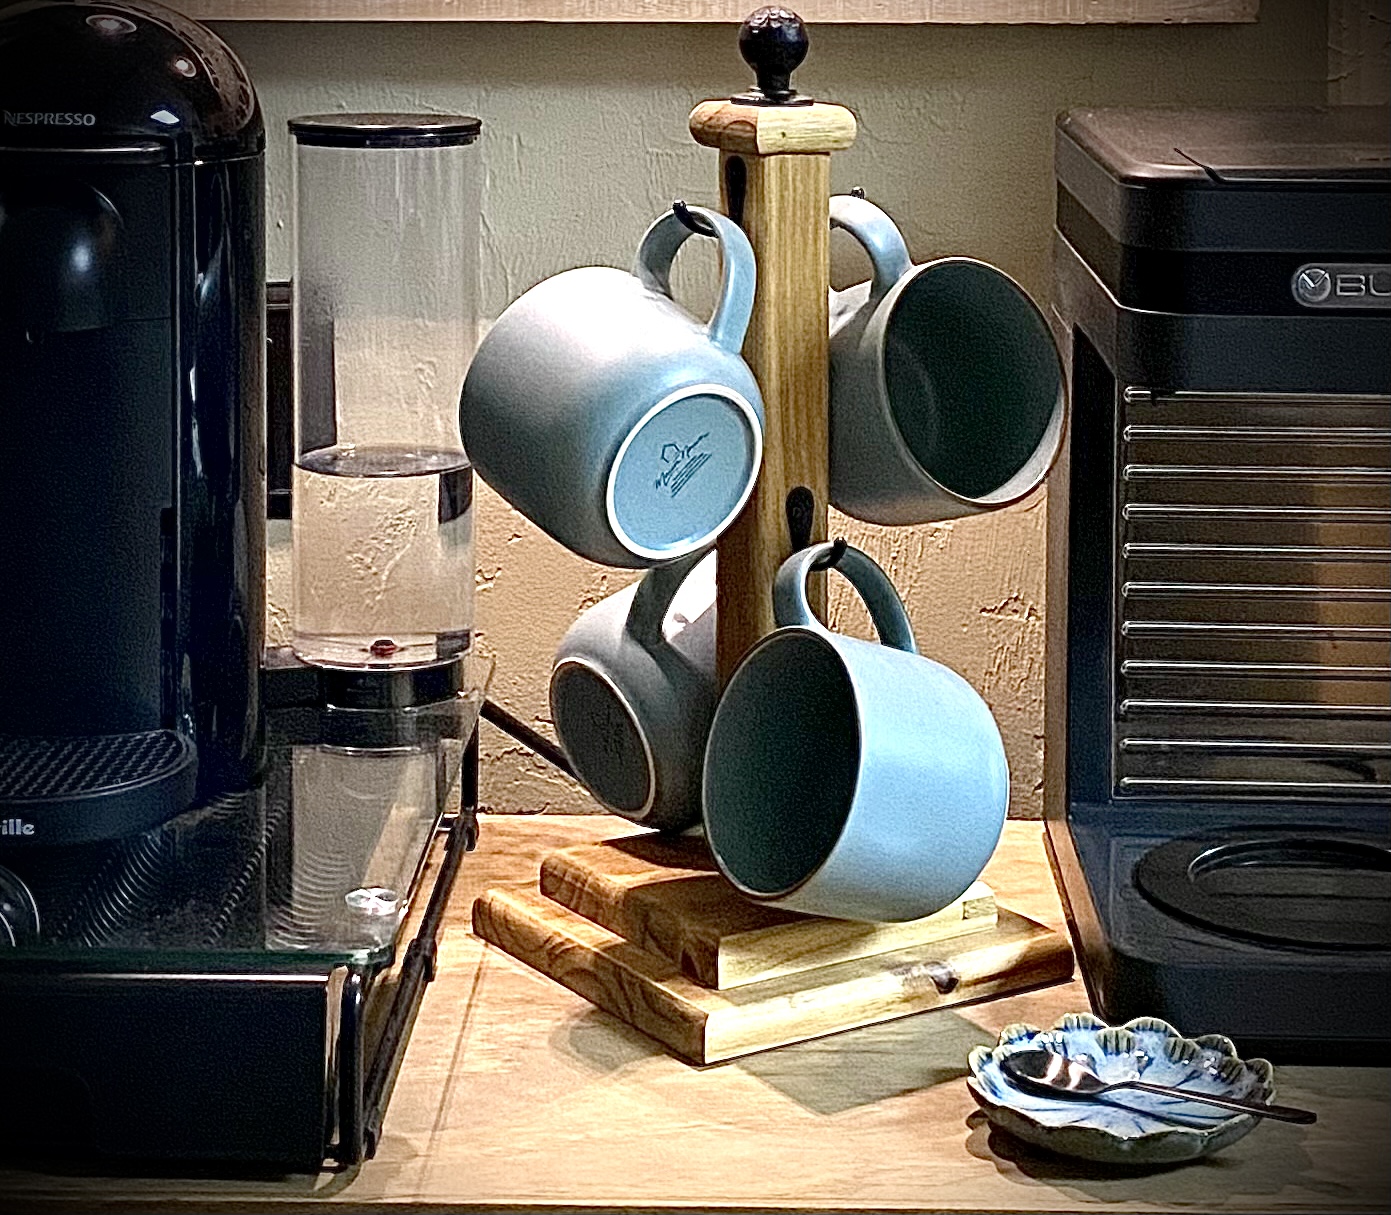
Cup tree inspired by Anna’s plans

Submitted by Anonymous (not verified) on Sun, 03/12/2023 - 14:17

Used Anna’s cup tree plans for this project. Thank you Anna!

I’ve also successfully built a few of your beds. Your plans are always straightforward and easy to follow.

What you do is so appreciated!!!

Angel

Built from Plan(s)

Comments

Our Farmhouse Table....my first build!

Submitted by jchorton on Sun, 11/27/2011 - 19:55

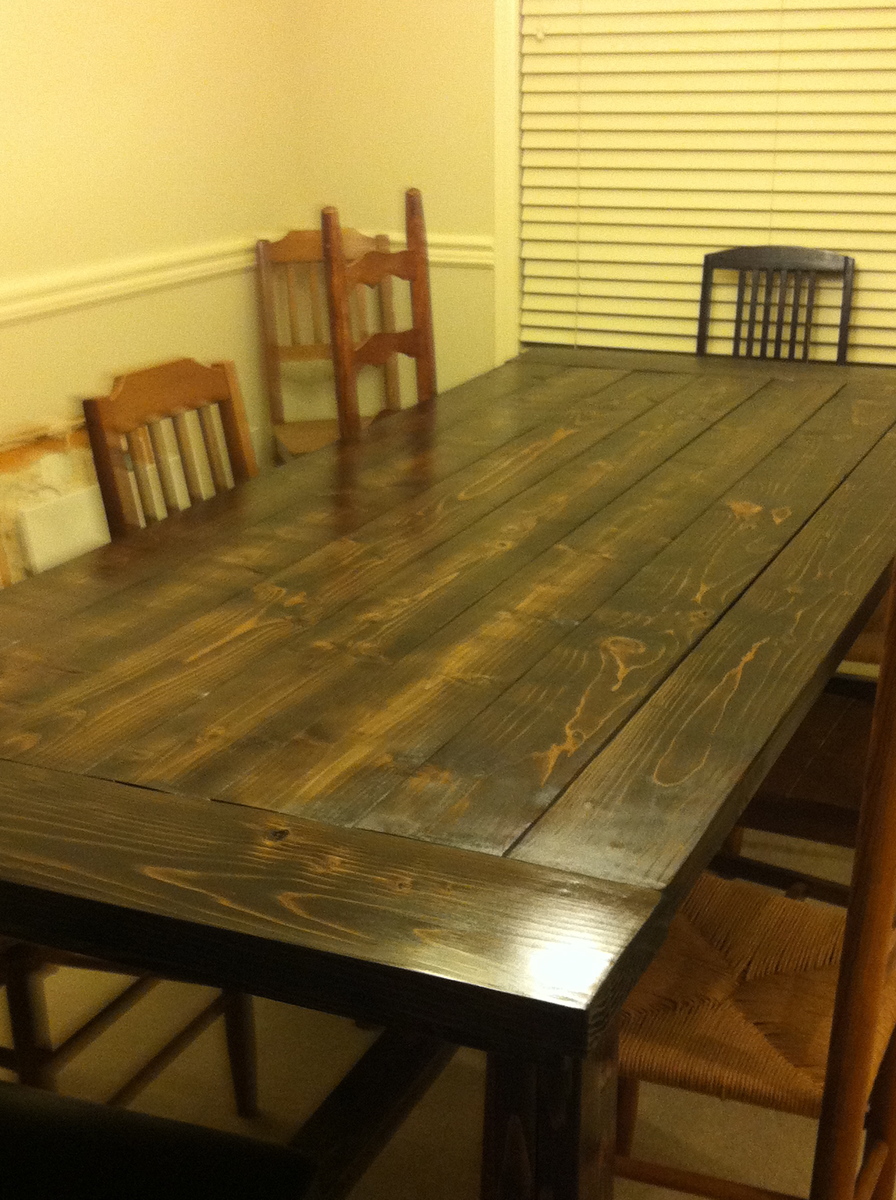
Due to limited space and inclement weather, this table took us a bit longer than a weekend....in a perfect world, we would have been done a lot sooner...however, it was completed just in time for Thanksgiving dinner...hence the mis-matched chairs. I LOVE my new table. It turned out even better than I had hoped. Thanks Ana!

Estimated Cost
$125.00
Estimated Time Investment
Week Long Project (20 Hours or More)
Finish Used
I used two coats of Minwax Dark Walnut and then three coats of poly.
Recommended Skill Level
Beginner

Comments

sgilly

Wed, 10/02/2013 - 13:11

I don't know how I missed seeing your beautiful table! What a nice finish. I'm planning to build one for my son and his wife and would love to know how's it holding up. Would you do anything differently?

Smaller Size Kids Chair

Submitted by rosiejane on Tue, 10/29/2013 - 01:46

This is the third smaller sized chair that I've made. This was for my nephew's first birthday. Adjusted the measurements to suit smaller kids. My chair gift list keeps getting longer. I've got another 4 to finish before January.

Estimated Cost
$5 AUD
Estimated Time Investment
Weekend Project (10-20 Hours)
Finish Used
dulux aquanamel vivid white - 2 coats; dulux mondrian blue - 2 coats; lightly distressed then finished with cabot's cabothane water based poly - 2 coats.
Recommended Skill Level
Beginner

Side Board based on your planked sideboard plan

Submitted by Ken Brown on Tue, 05/28/2019 - 06:52

I modified this sideboard from the Anna White plan that used 2x4s and 3/4 inch plywood, by substituting select pine 1x4s for the face frame and 1/2 inch maple veneer plywood for the vertical partitions and shelves. Vertical partitions were inserted into dadoes in pine 2x4 cross pieces joining the two base 2x4s. The end pieces and doors were made with tongue and groove joints using 1/4 plywood and 1x4 or 1x2 frames. Next was addition of the face frame(1x2s)and base. The 1x4 base covered up the 2x4s, and was mitered at each corner. I used ball bearing slides to attach the drawers, made of 1/2 inch plywood. I painted the carcass with a latex paint and purchased 13/16 inch Cherry boards to join together to make the top. The drawer fronts where made from 1/2 inch plywood, with rabbitted pine edging added to match the doors. The Figure shows the finished side board with hardware installed.

Built from Plan(s)
Estimated Cost
$400 for materials
Estimated Time Investment
Week Long Project (20 Hours or More)
Finish Used
Latex paint on carcass, cherry stain and polyurethane on shelves and polyurethane only on top.
Recommended Skill Level
Intermediate

Conversation Set

Submitted by Anonymous (not verified) on Sun, 03/19/2023 - 18:31

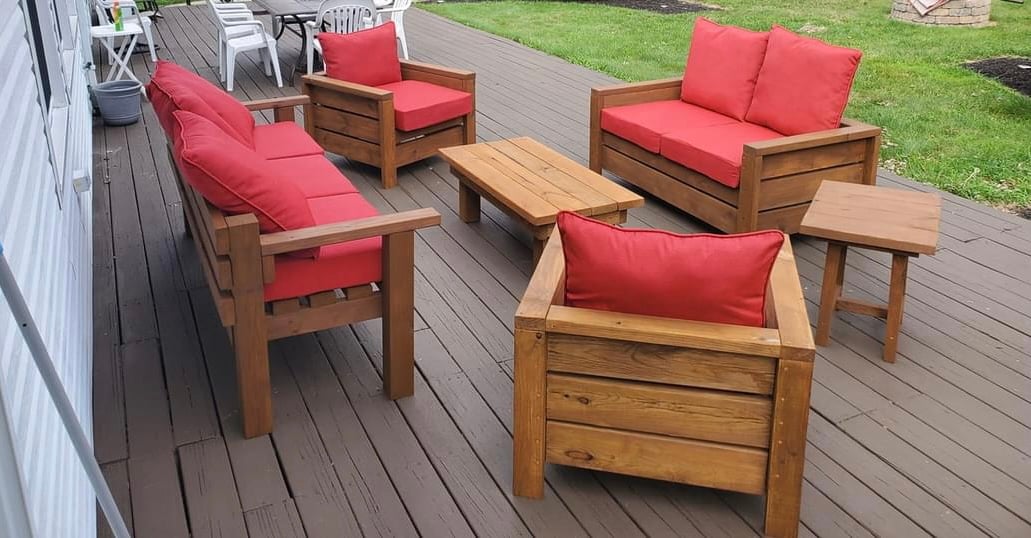
My husband built this conversation set during covid. Since then he has built so much stuff for our yard. More pics to follow.

Comments

Bread Box

I started baking my own bread a few months ago, and storage was an issue. My husband decided to build me an old fashioned bread box and set out designing one on his own to fit in our small galley kitchen. I love it. It is a double decker, so I can fit two loaves in it just fine. The inside is coated with a food-grade sealer.

Estimated Cost
$20: $16 for the food-grade sealer and $4 for the handle, scrap wood used from other projects.
Estimated Time Investment
Afternoon Project (3-6 Hours)
Finish Used
White spray paint, food-grade sealer inside.
Recommended Skill Level
Beginner

Comments

JoanneS

Wed, 12/07/2011 - 03:49

This is an awesome idea, can't wait to make one for my kitchen. Beautiful job! Thanks for sharing this!

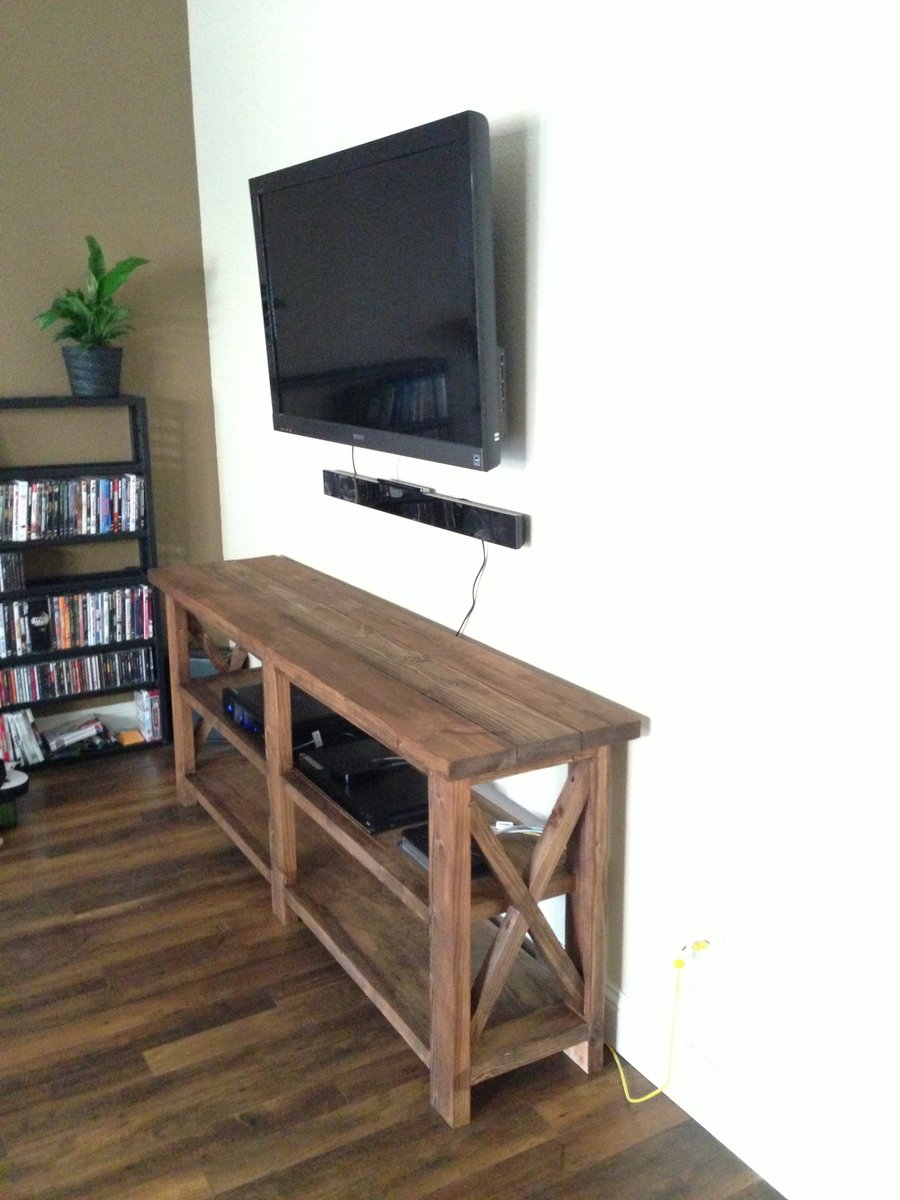
Rustic X Console Table

Submitted by hmctagg on Sat, 11/02/2013 - 13:06

We followed the plans closely, and it turned out well for the first project. It was the perfect size for what we needed! My husband had never built anything like this before and after a little research on how to use the kreg jig, he was able to finish it in a weekend.

Estimated Cost
$120 including finishing supplies
Estimated Time Investment
Weekend Project (10-20 Hours)
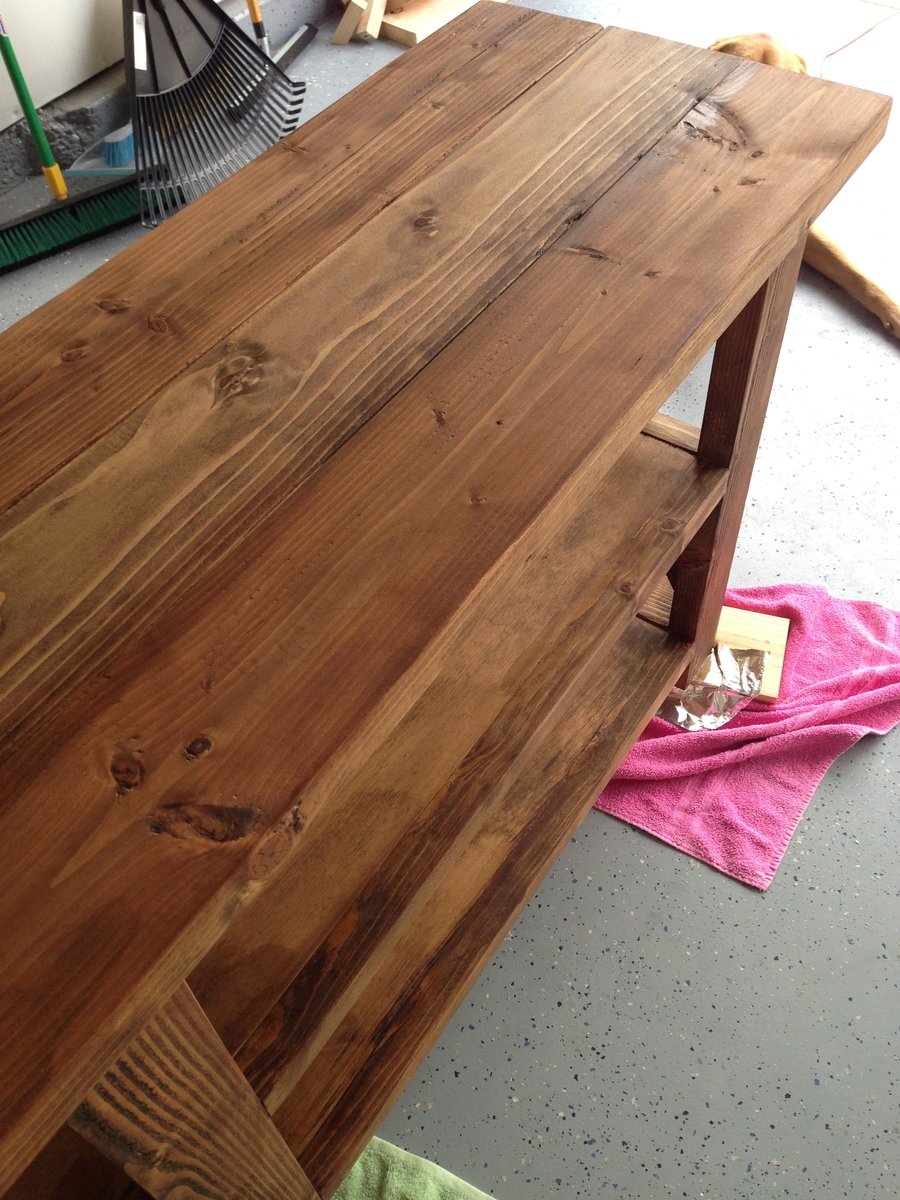
Finish Used
I used one coat of Minwax Provincial. I originally bought a sample can to practice on some scraps and then planned to go buy the bigger can, but I was able to stain the entire table with the sample size using an old T-shirt instead of a brush (I didn't want to risk brush marks). I liked the look after one coat, so I stopped there. I also decided against adding the hardware since I liked the look without it.
Recommended Skill Level
Beginner

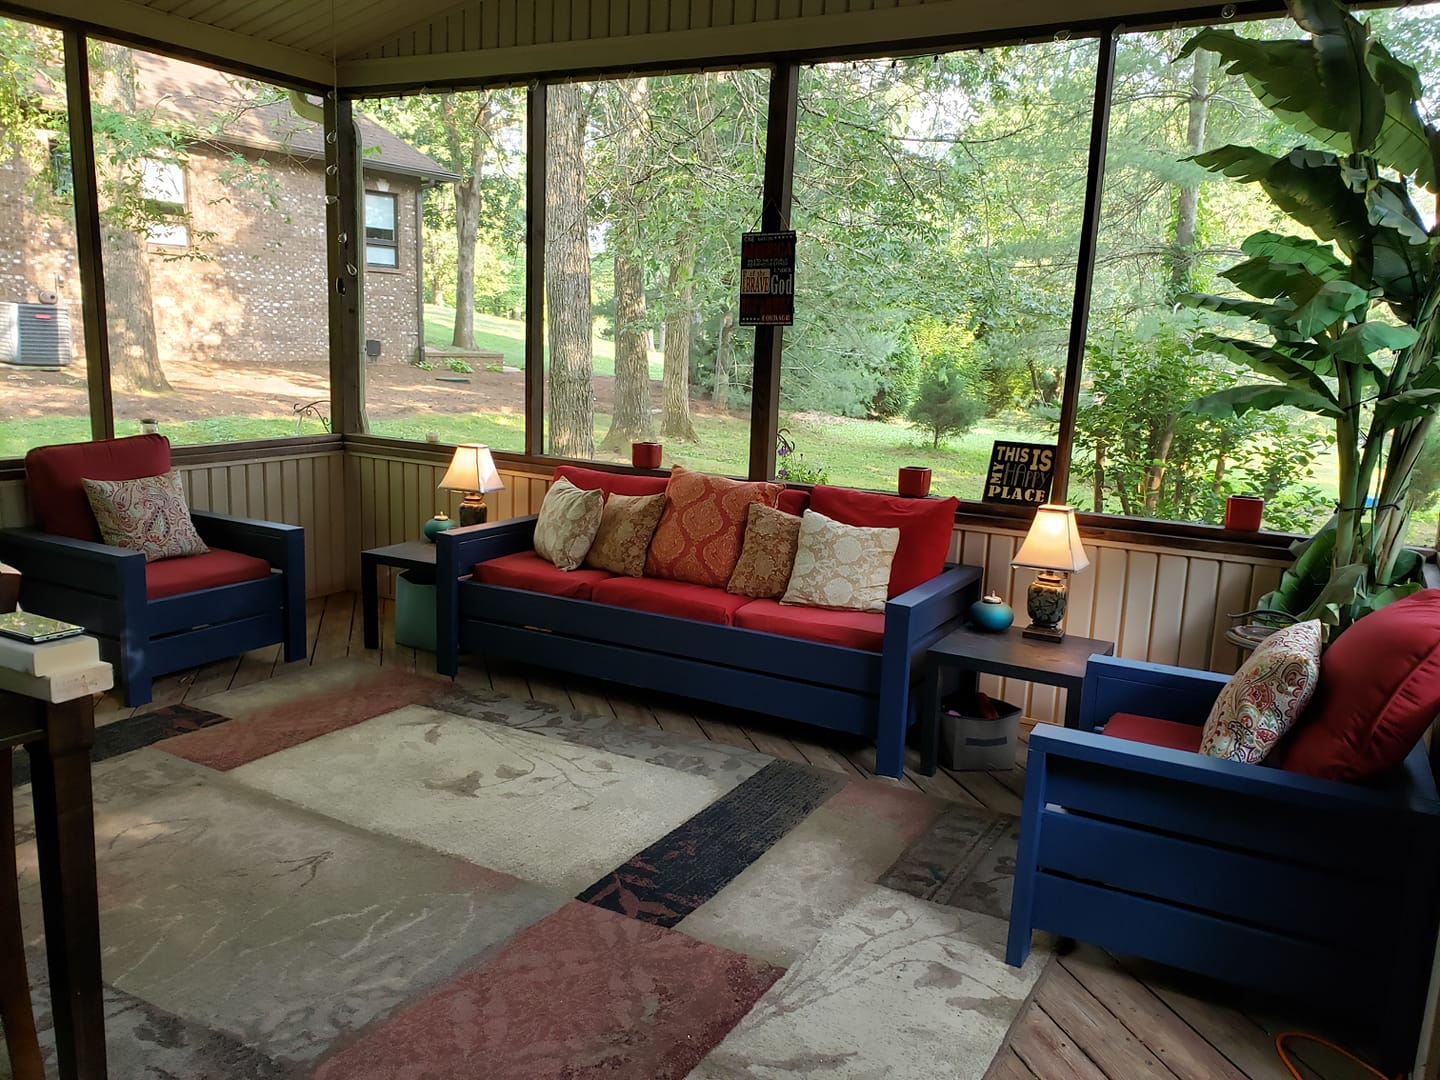
Modern Outdoor Chair and Sofa

We built the chairs first using the Modern Outdoor Chair Plans found here on Ana White. We then modified the plans to make a 75" couch that fits 3-25" cushions. Both were super easy to build. We are very happy with them. We built the couch on the porch because it is very heavy when finished. Everyone loves them!

Estimated Cost
Wood and screws for chair around $30 each. Wood and screws for sofa around $60. We already had the paint and cushions.
Estimated Time Investment
Afternoon Project (3-6 Hours)
Finish Used
Satin Exterior Paint
Recommended Skill Level
Beginner

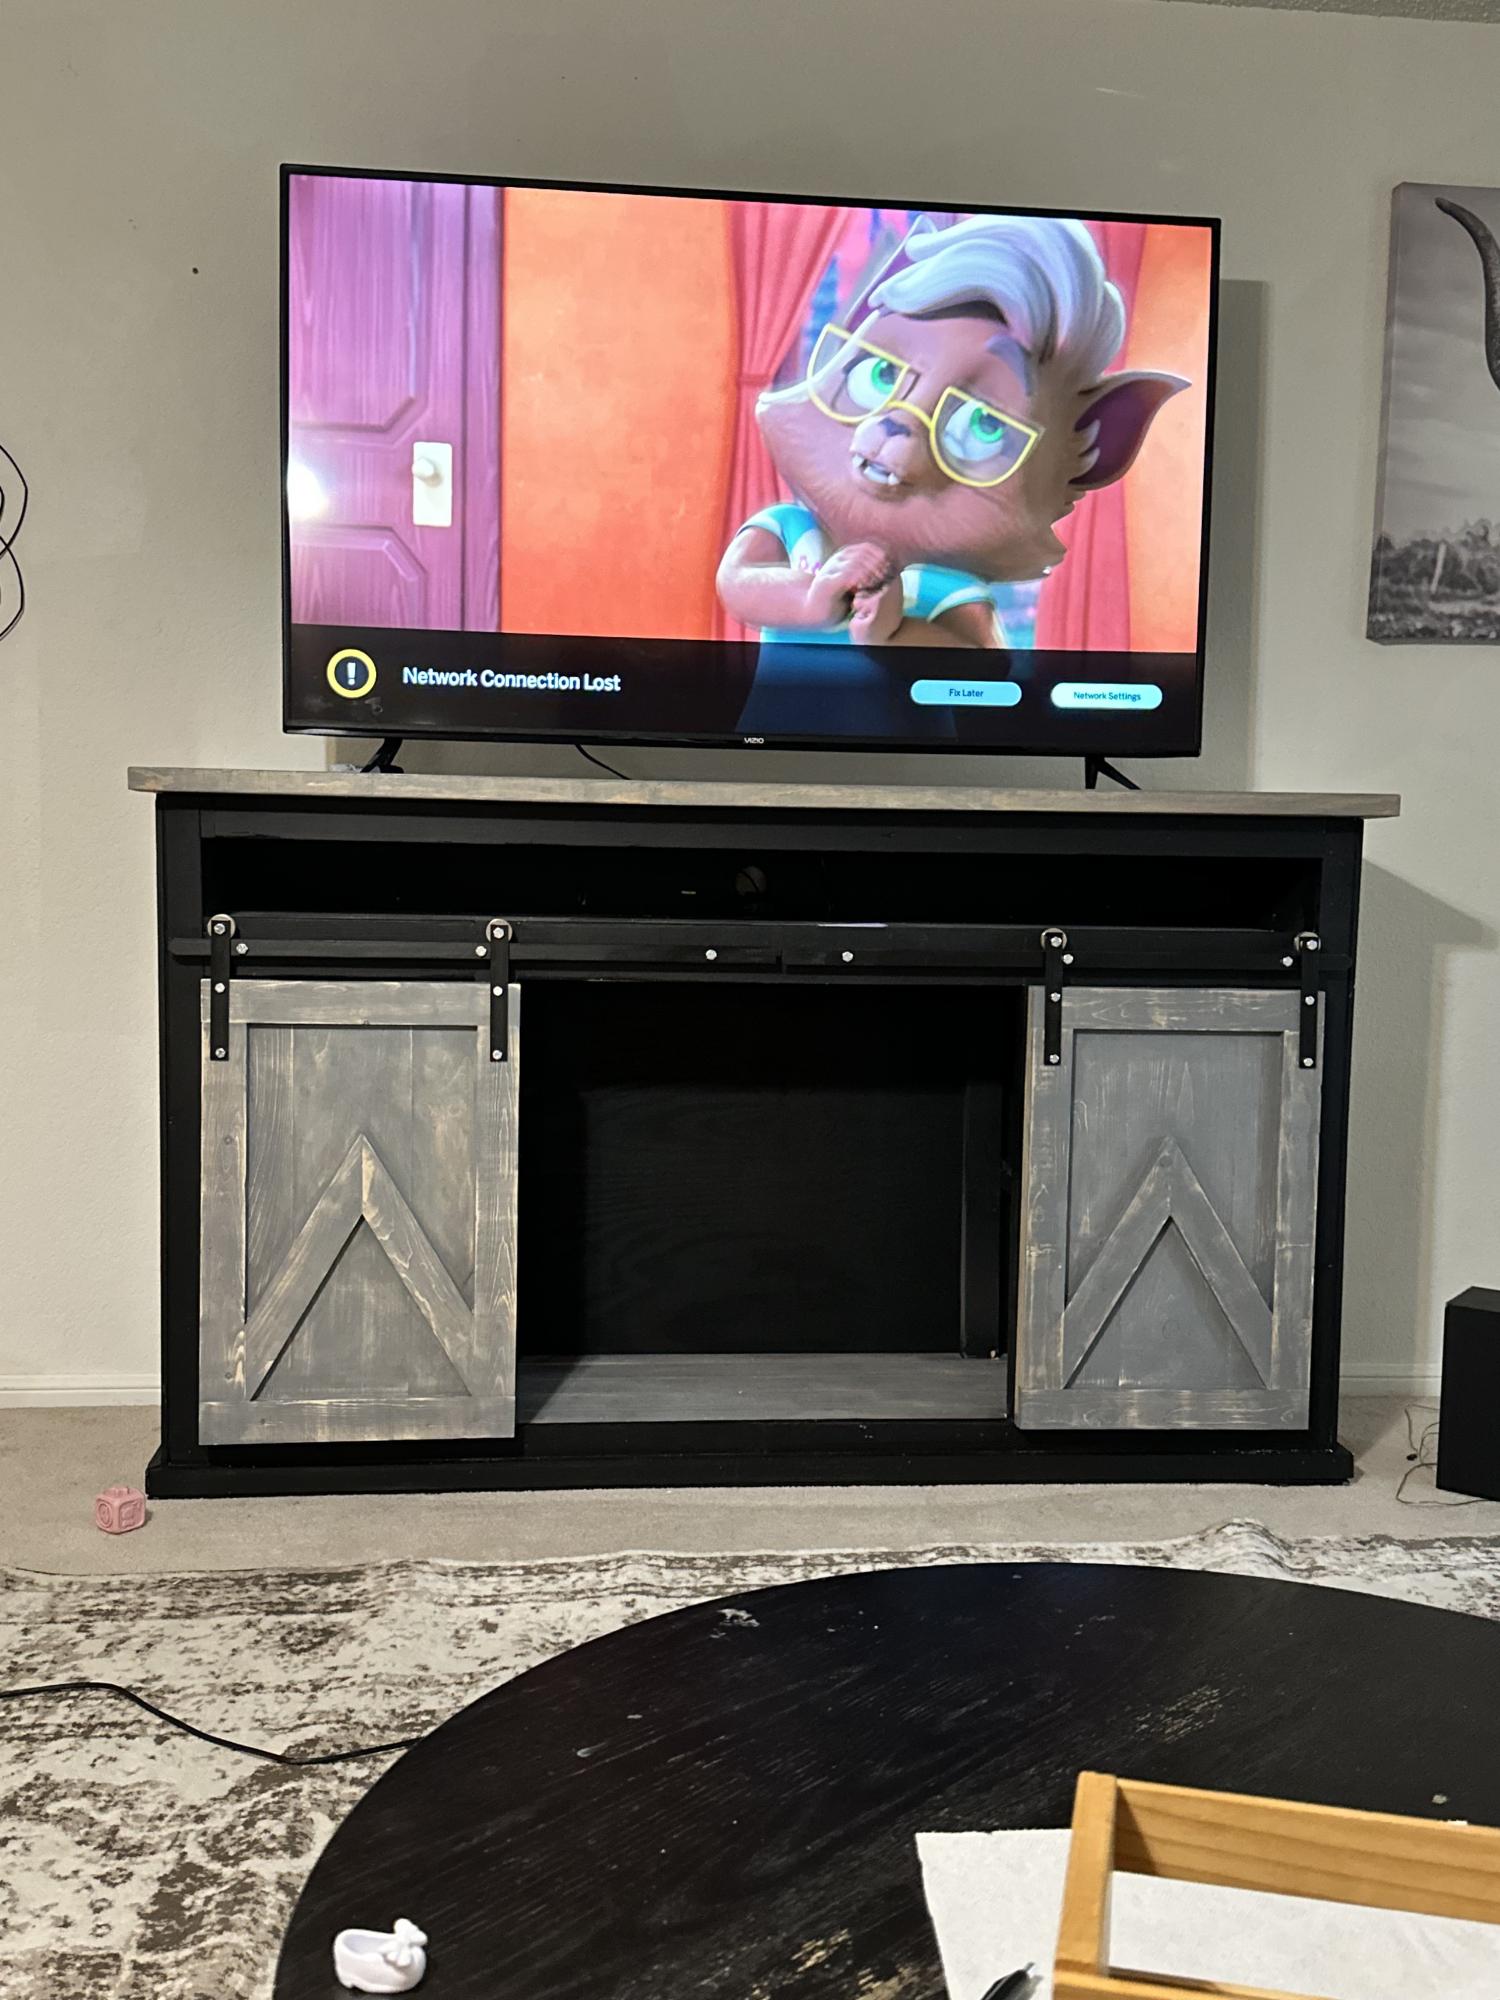
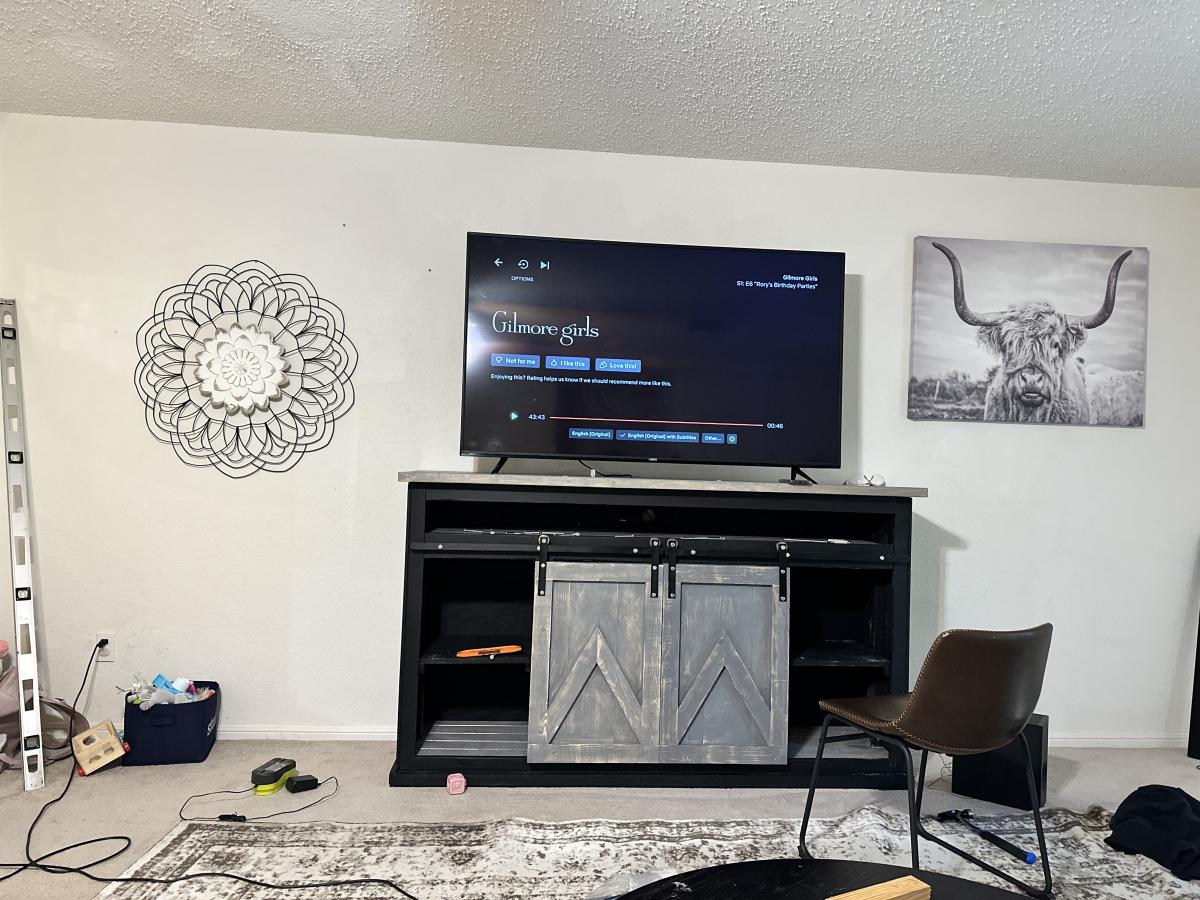
TV Stand

Submitted by Anonymous (not verified) on Fri, 03/24/2023 - 17:18

My daughter wanted a TV stand with a space for her sound bar, along with storage for toys and blankets. Hardware for barn doors were used from a video you had posted

Built from Plan(s)

Comments

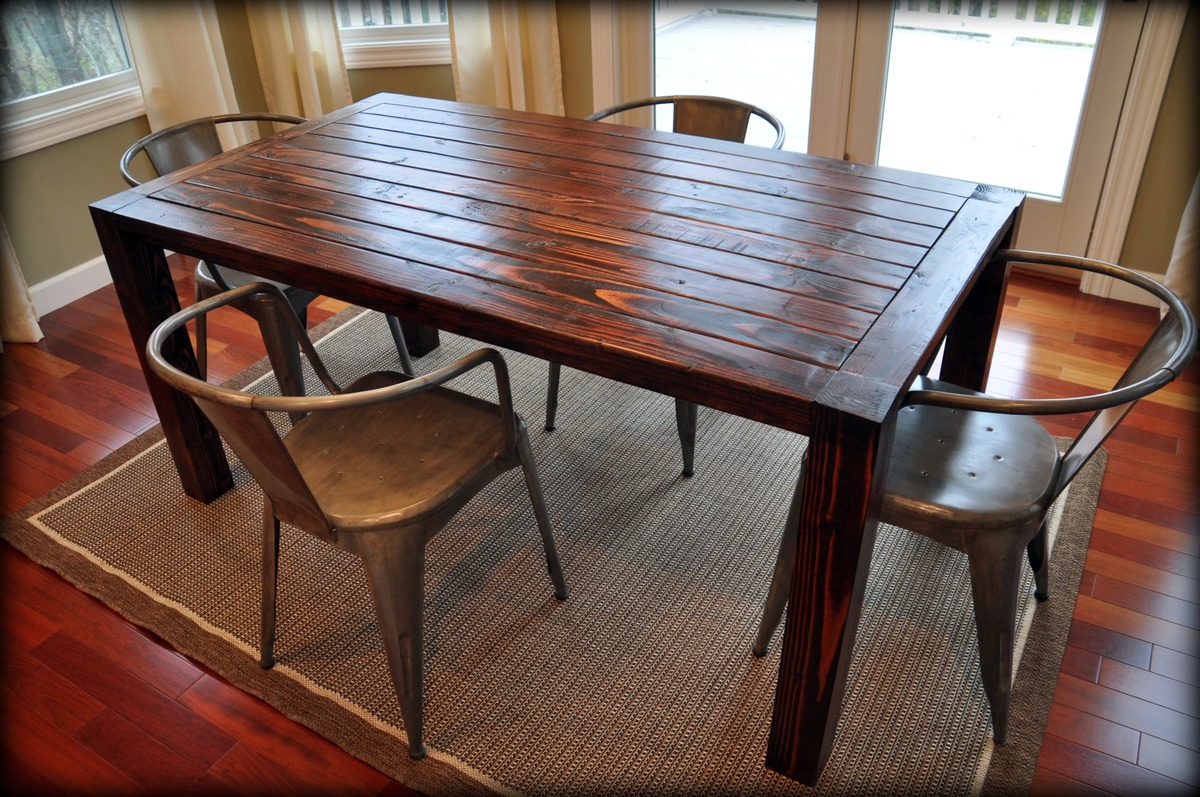
Farmhouse Table

We love the look of farmhouse tables but not their hefty price tags. So we decided to build our own. $60 in supplies and a week-end's worth of time left us with a beautiful table that has a story. Ana's plans were easy to follow. Building furniture is so rewarding...and easier on the wallet!

Built from Plan(s)
Estimated Cost
$60
Estimated Time Investment
Weekend Project (10-20 Hours)
Finish Used
We used two coats of Minwax Red Mahogany and three coats of Minwax Fast Drying Polyurethane Clear Satin
Recommended Skill Level
Intermediate

Comments

Laurel (not verified)

Wed, 12/14/2011 - 09:17

I was looking to make the farmhouse table this weekend but I think we'll make this instead. My husband wants "big legs" and I saw this and immediately knew that it was perfect.

Guest (not verified)

Tue, 12/20/2011 - 11:27

WOW! First your table is amazing- great work! Second, I am wondering if you wouldn't mind sharing where you got your chairs? I love the look of them with the wood table!
Thanks!

MS (not verified)

Thu, 01/12/2012 - 12:32

Hi, I love this, great job! I am wanting to build a bigger one that will seat 10-12. I love the farmhouse table on this website, but I do not like the way the supports underneath prevent you from sliding chairs up to the ends. Do you think it would be sturdy enough without them? Like you did for your table here.
Thanks!!

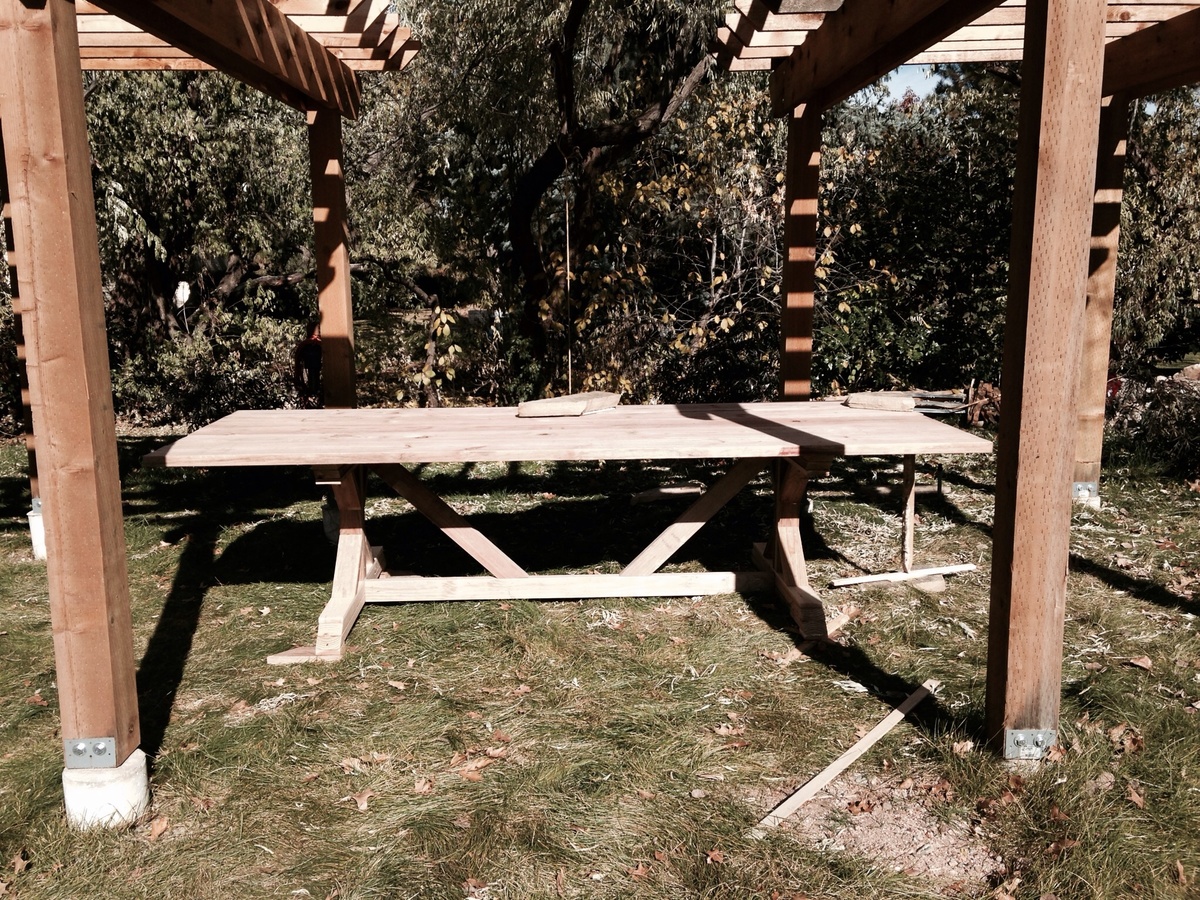
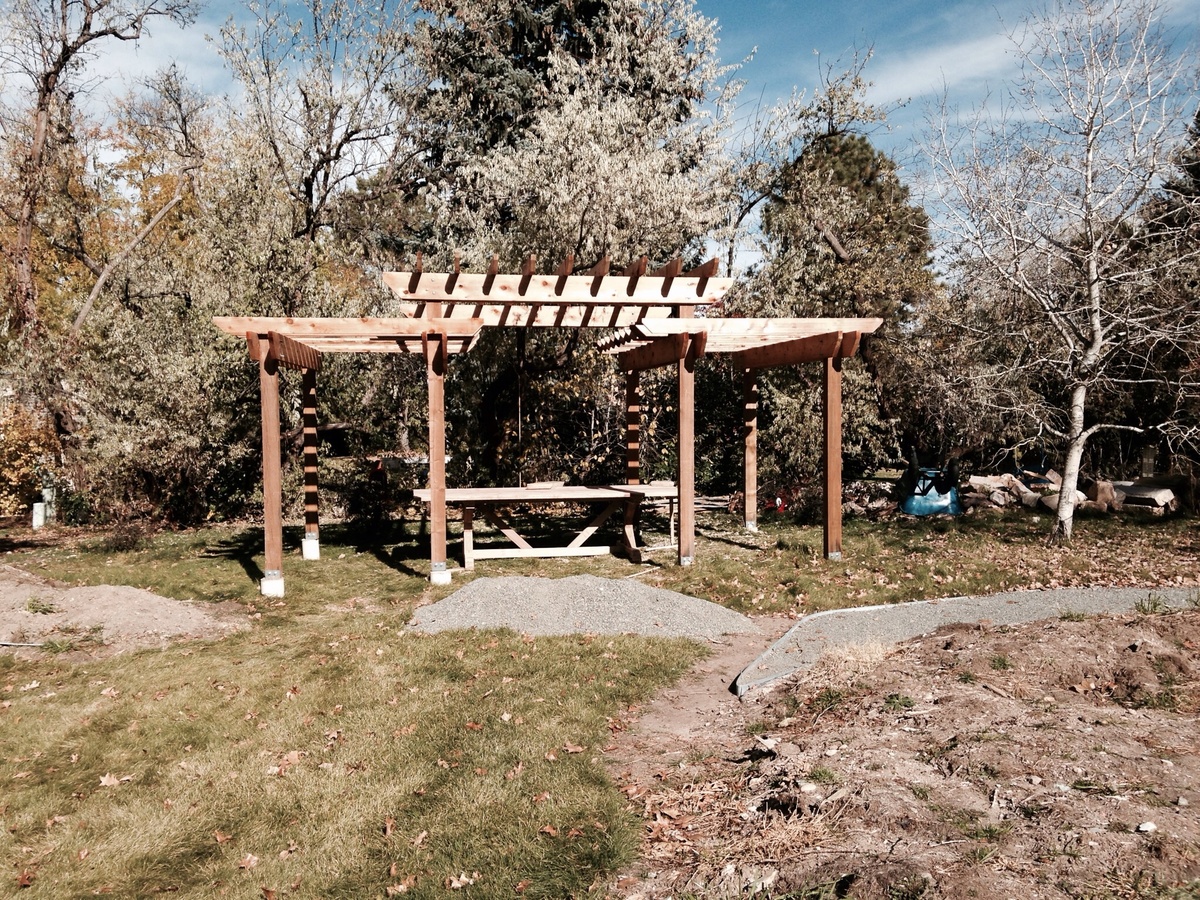
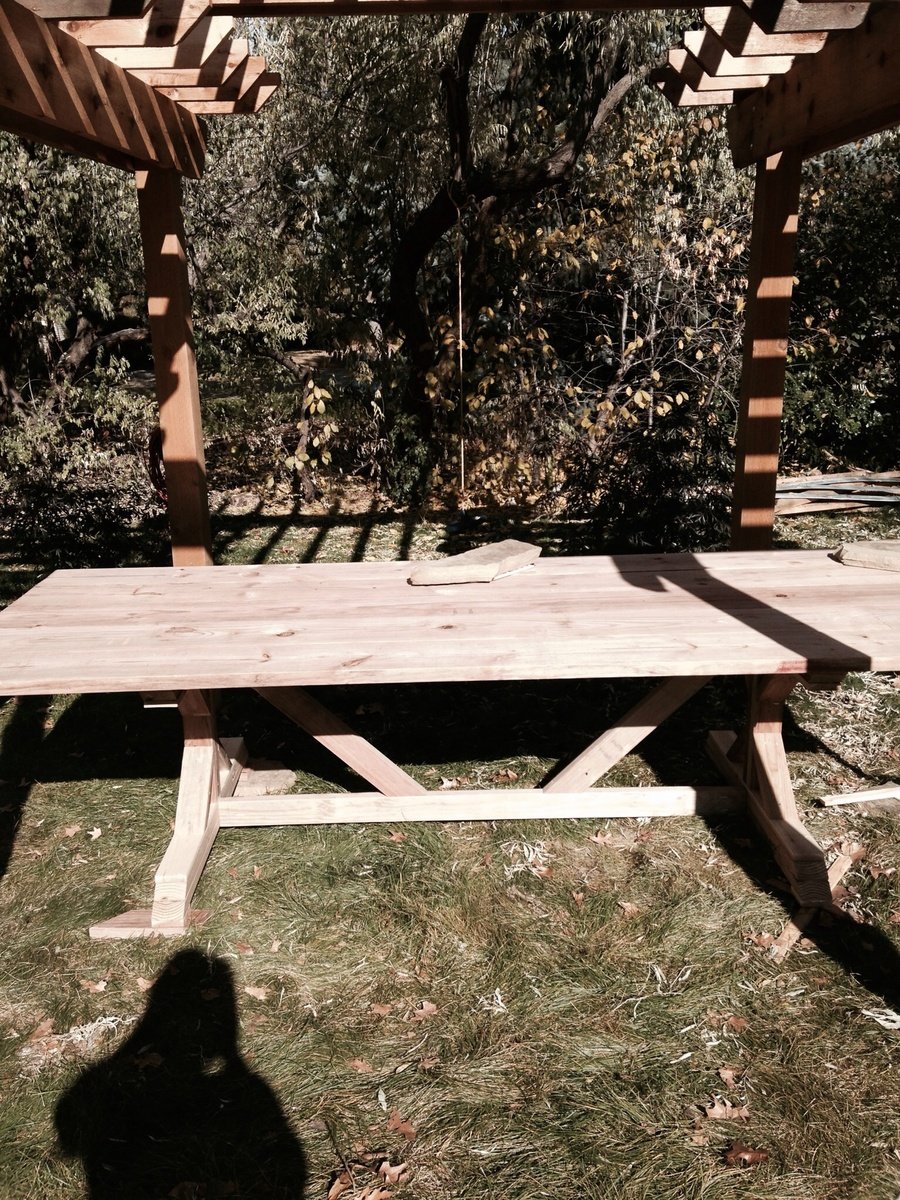
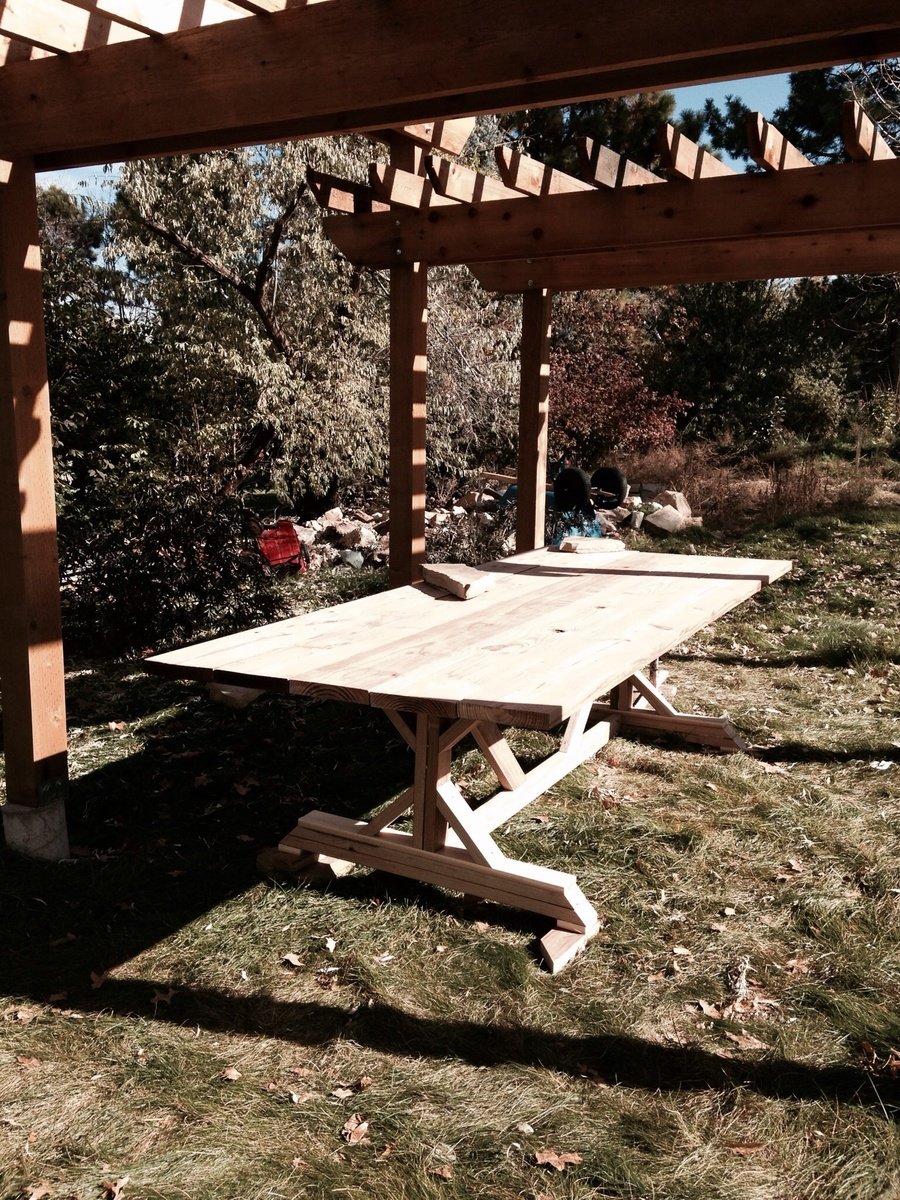
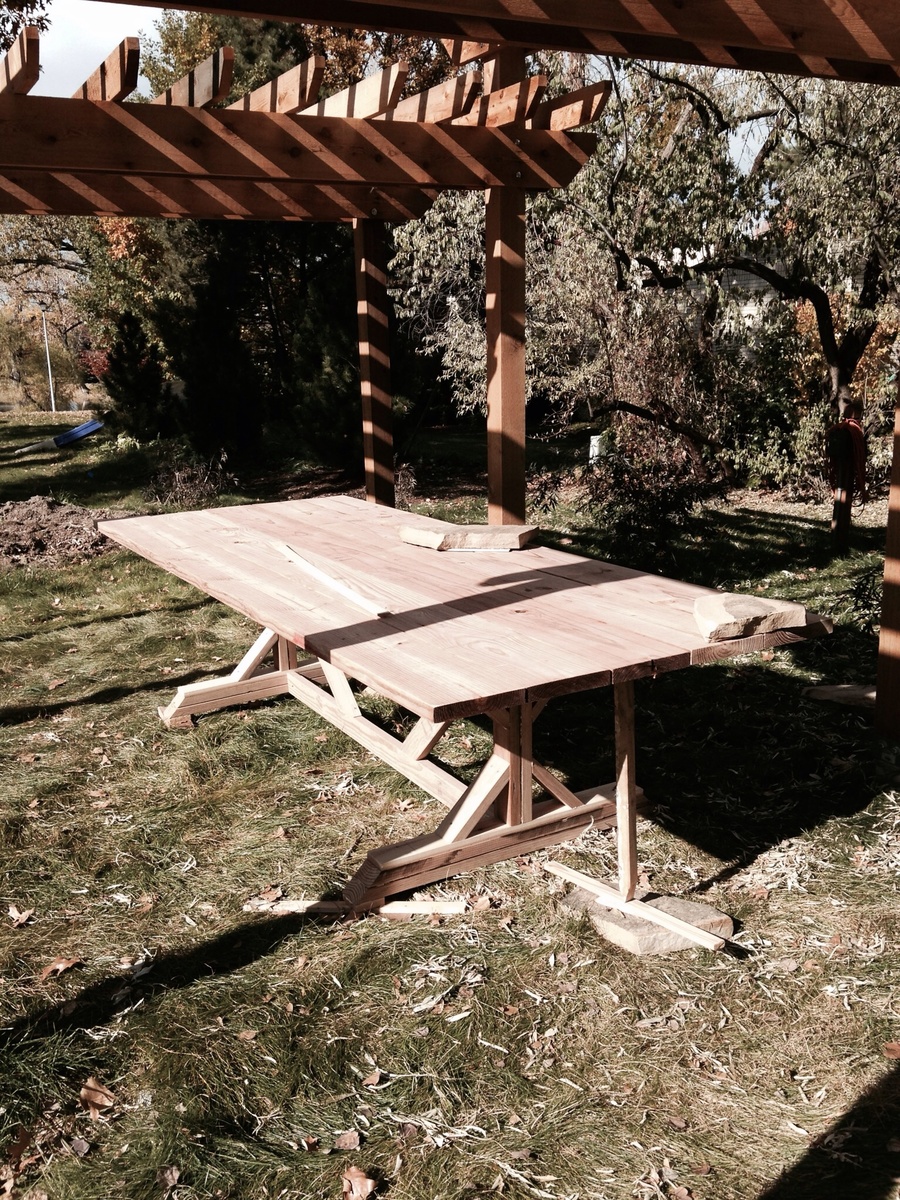
Our new farm table for our new pergola!

Our dear friends built us a pergola over the summer and I wanted a big outdoor farm table to go underneath but had no interest in spending thousands on one already made. So, thanks to Ana White, I found the directions to making this 'anthropologie knock-off' for under $200! We made ours 10' long by @46" wide. And I included support boards on the underside of the table top for additional support and to try to address the fact that one of the boards us a little warped. It's not nearly as beautiful as our pergola and still needs to be stained/treated, but I can't wait for next spring and summer when we can hang and laze around out here! I'm so proud of us. Thanks Ana!!!

Built from Plan(s)
Estimated Cost
$200
Estimated Time Investment
Day Project (6-9 Hours)
Finish Used
Outdoor table for backyard
Recommended Skill Level
Starter Project

LOVED this easy build!

Submitted by Anonymous (not verified) on Wed, 01/20/2016 - 14:48

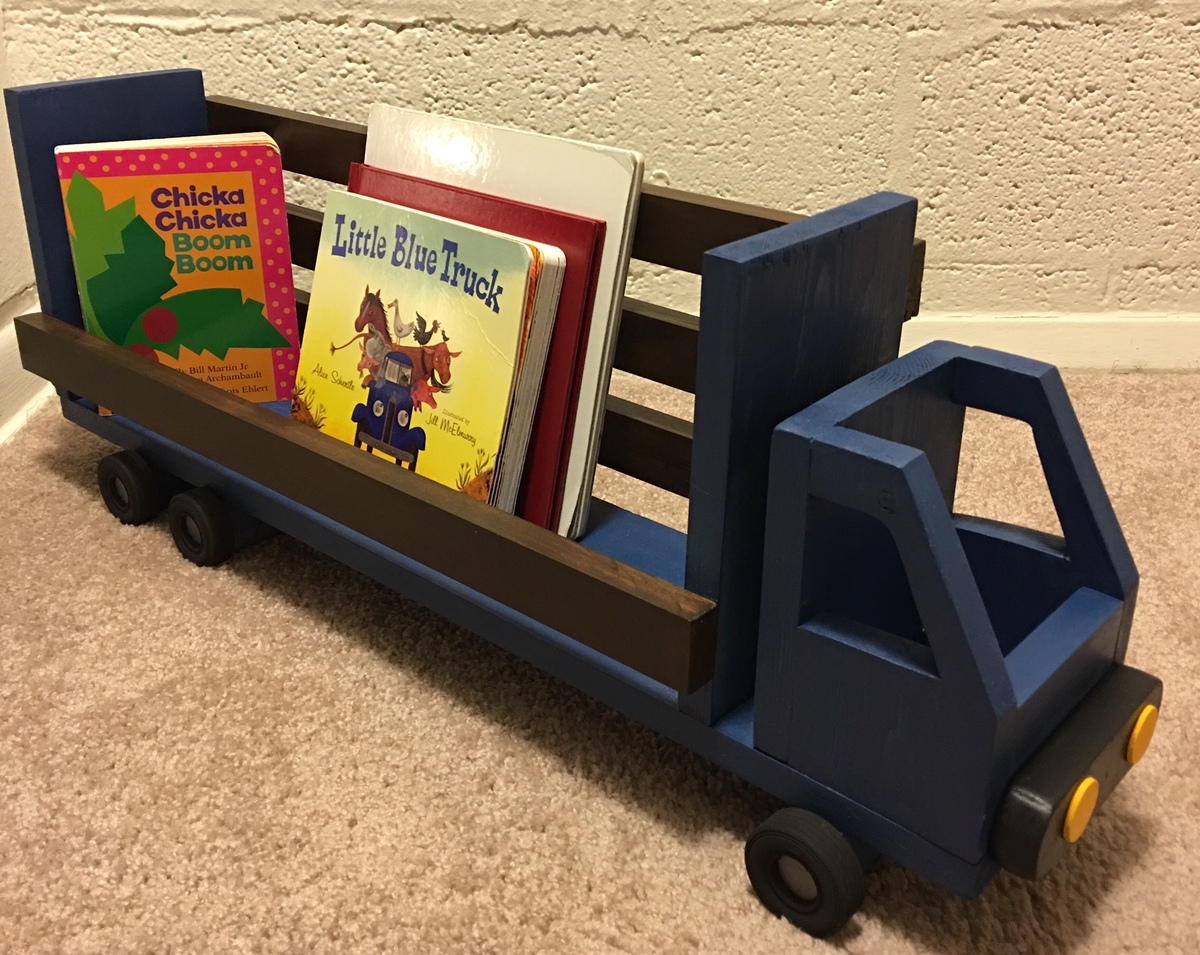
Built this over 5 days, around my son's naps (including 2 days for sealant to cure). Actual time was probably around 8 hours total. Not too bad for my third project! I only built one shelf and am using it for storage in our master bathroom. I love the way it turned out. Thanks again, Ana, for a great project plan. :)
Built from Plan(s)
Estimated Time Investment
Day Project (6-9 Hours)
Recommended Skill Level
Beginner

My First DIY project!

Submitted by Admir on Wed, 06/19/2019 - 13:11

For my first ever DIY project this was easy and fun.  Didn't take long at all, less than 2 hours.  Will be making the sectional also. 

Built from Plan(s)
Estimated Cost
Less than $50.00
Estimated Time Investment
An Hour or Two (0-2 Hours)
Finish Used
None yet, haven't decided what to use.
Recommended Skill Level
Starter Project

Comments

Kids Art Table

Submitted by beingbrook on Thu, 12/15/2011 - 08:43

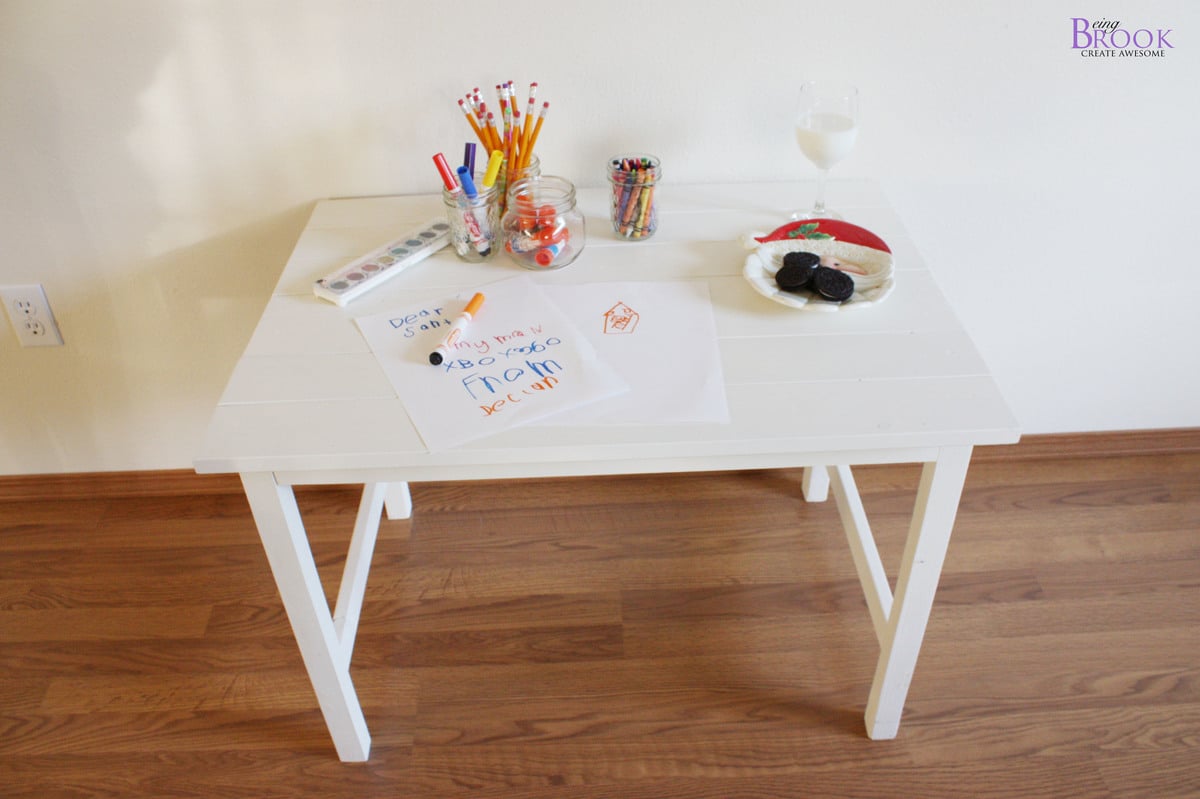
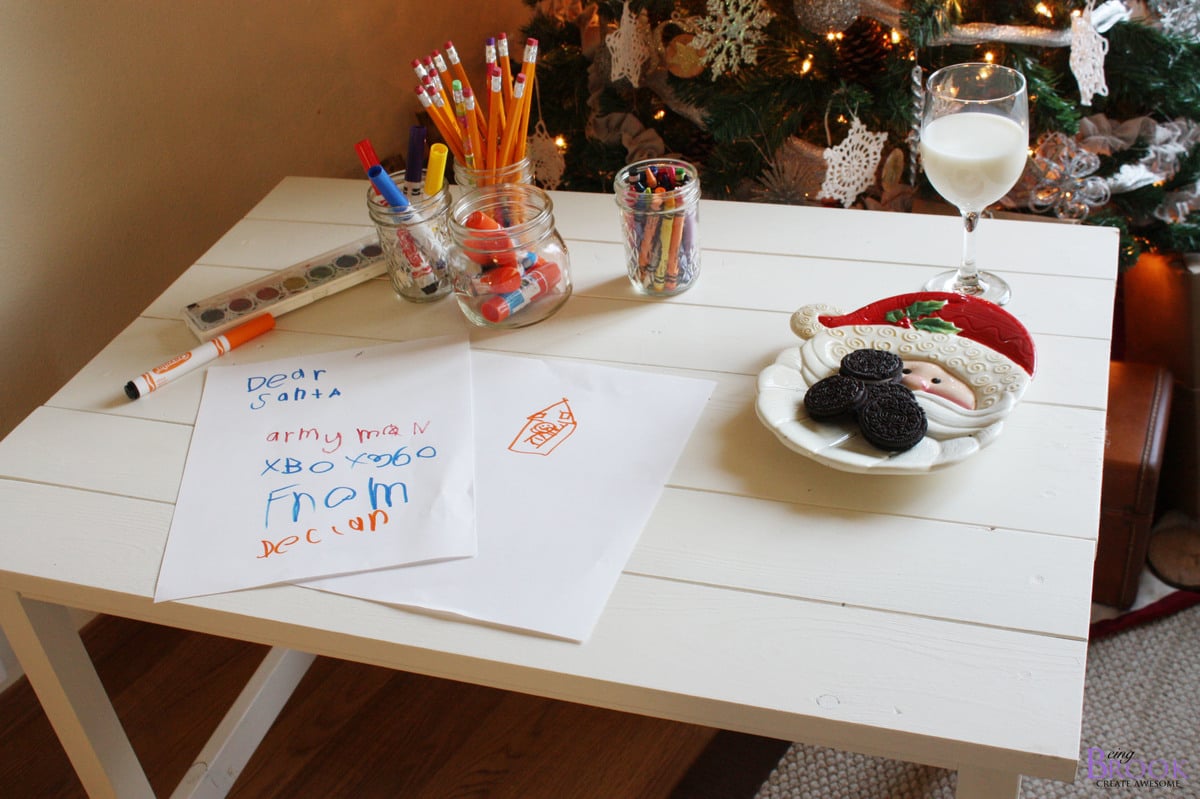
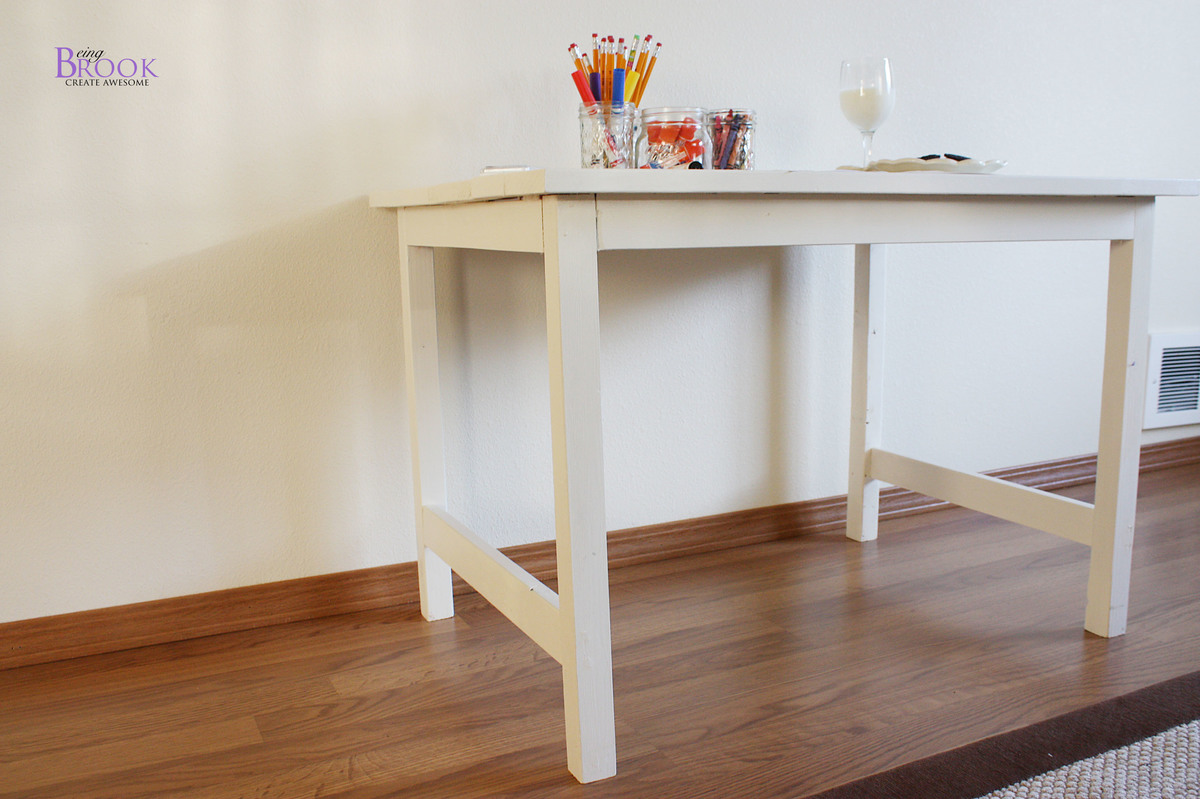
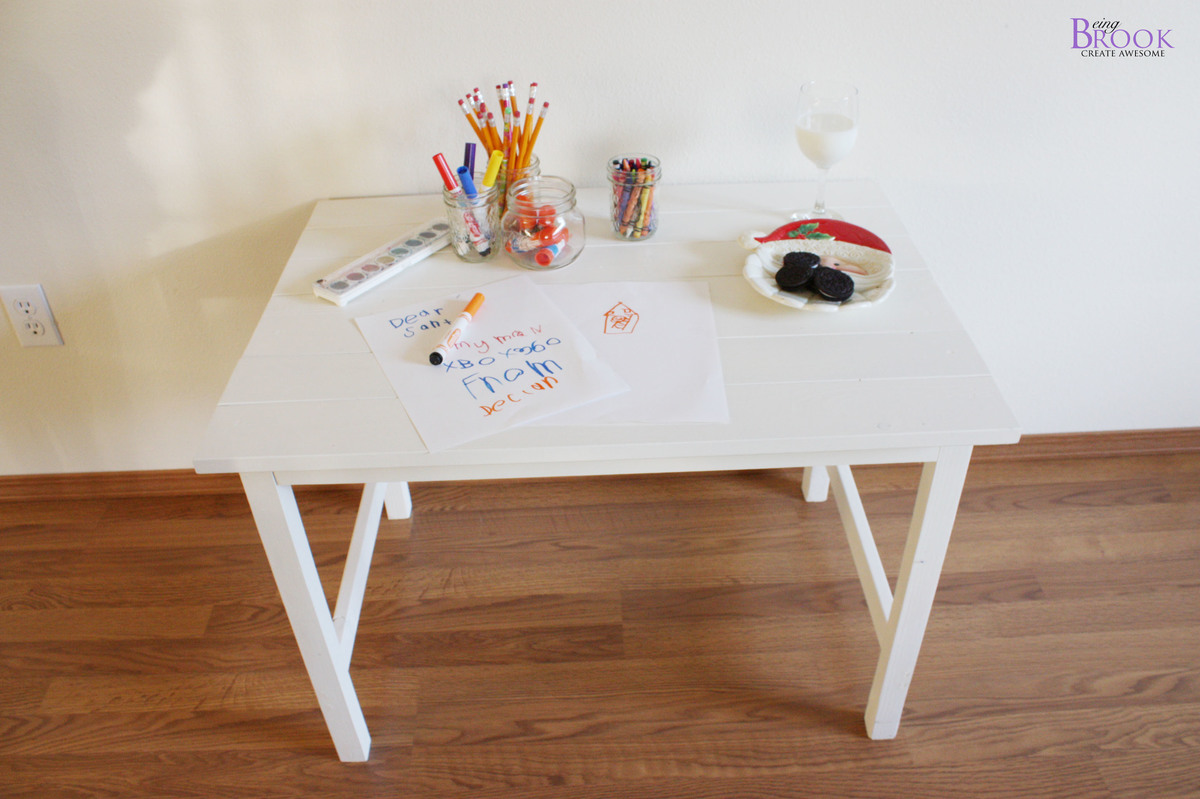
My husband and I built the art table to give our 3 year old for Christmas. We have had great success building from other Ana-White plans and the Clara table was no different. We did modify it by adding a 1x3 to the legs to give it more stability. I think the table is great without it but we have older kids too and wanted to make sure the table could withstand them sitting on it or leaning against it.

The table was built with scraps from our garage so the top is modified slightly because of that. I think the only thing we bought for this project was a 2x2 for the legs. Can't beat a $3 table!

Built from Plan(s)
Estimated Cost
$3-Probably less than $15 if you needed to buy all the wood
Estimated Time Investment
An Hour or Two (0-2 Hours)
Finish Used
Sanded and then painted with 2 coats of Sherwin Williams dover white in Satin.
Recommended Skill Level
Beginner

Comments

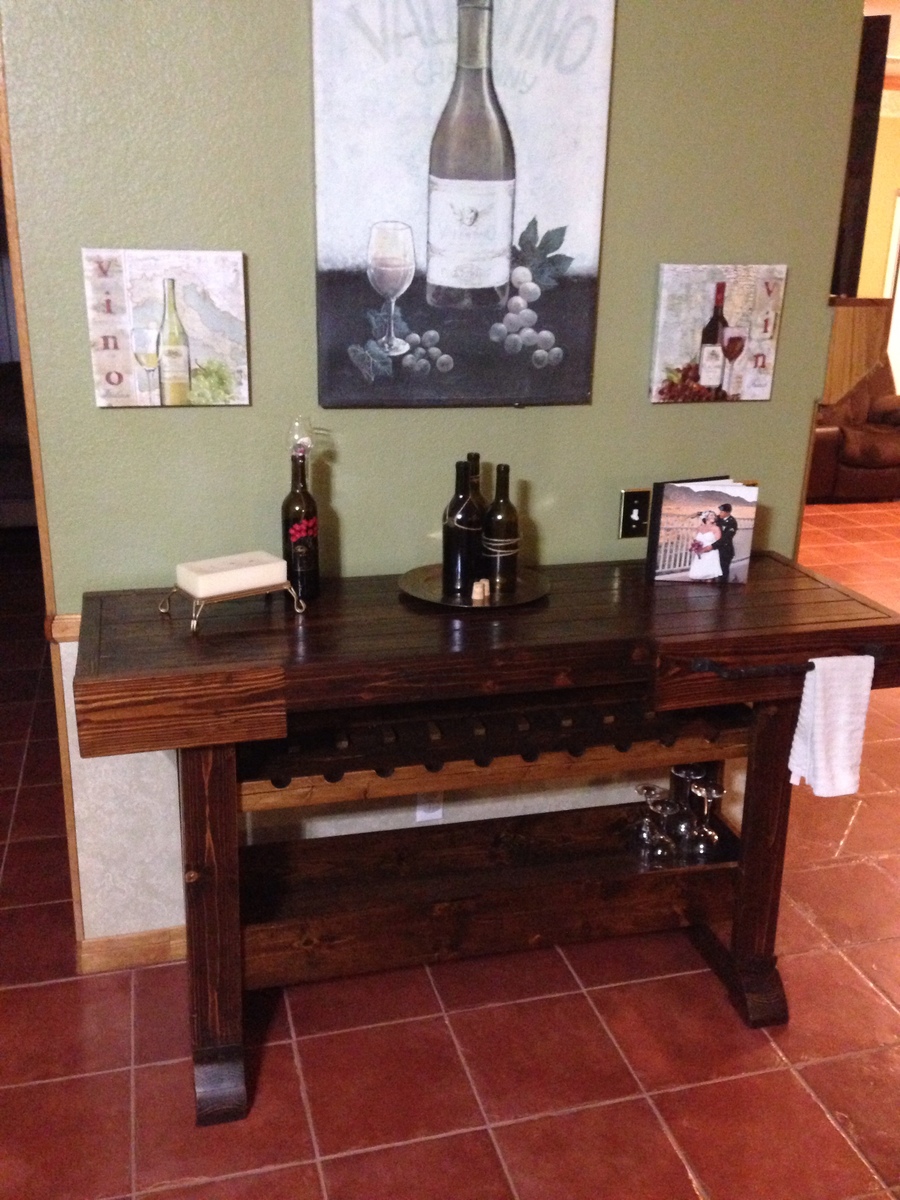
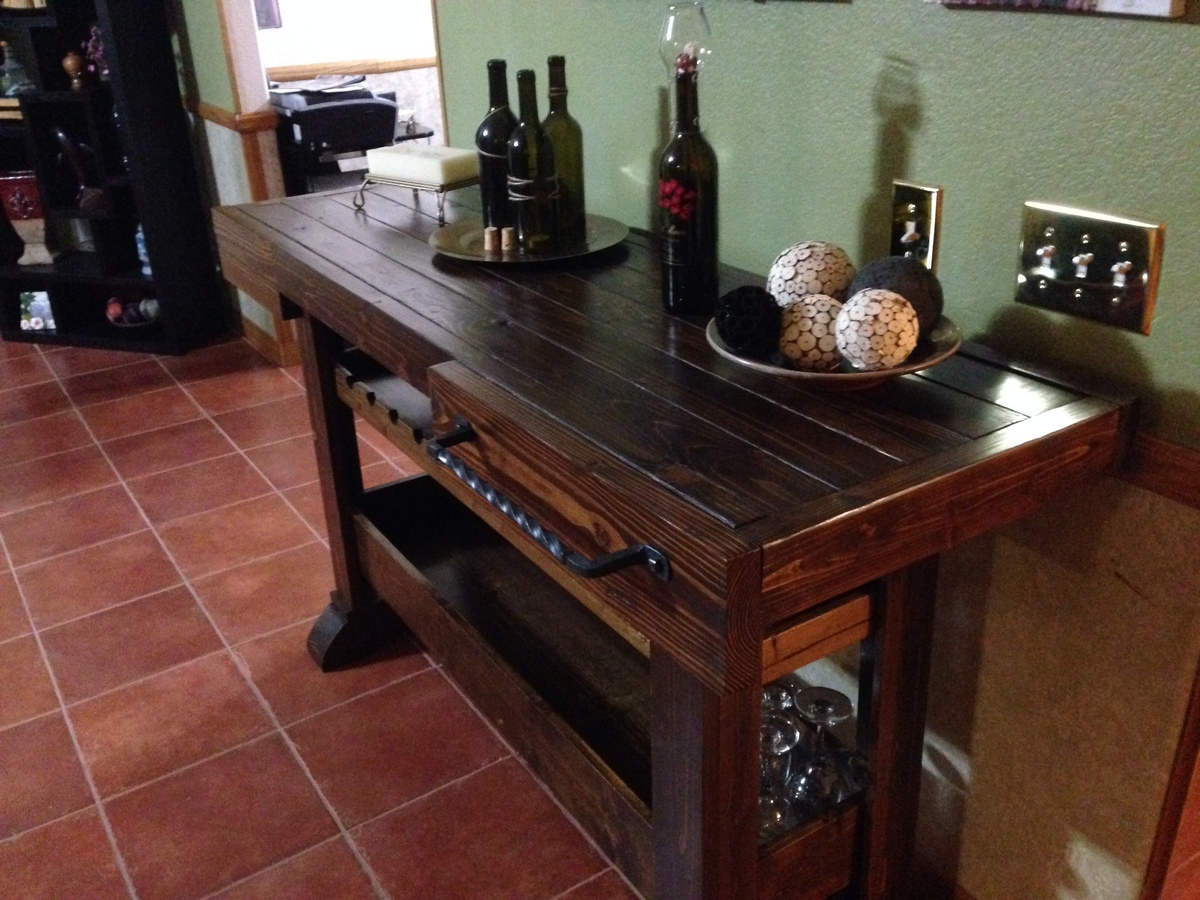
Wine Console Table

So this is my first attempt at woodworking. In fact it's the first time I've really created anything with my hands. I came across this website and saw all of the wonderful creations people have made and decided I wanted to give it a try. I saw the Workbench Console and loved the design of it. I knew my sister-in-law was looking for a console table for her new house and being a wine lover I figured I'd give those plans a go. I added a second shelf for wine bottle storage and flipped around the tabletop. I really wanted to have a towel rack attached to it as well but after scouring the hardware stores I couldn't find anything that "fit" the look I wanted so I called a buddy of mine who is a blacksmith and with his expert guidance he taught me how to make the towel rack I wanted. I'm proud to say I made everything on that table including the hardware (minus all of the wood screws of course ;)

To be honest, when I went into this project I wasn't too sure about what the results would be, but I was very pleasantly surprised with how well it turned out when it was finished. So much so that after surprising my sister with her new table I've already started on another console for my own living room wall. This site has been very inspirational and has shown me that anyone can build fantastic pieces as long as the desire is there! Thanks Ana!

P.S. This project took a long time for me to complete mainly because I had no experience at all going into it. Now that I've put one together I've noticed the next one coming together much faster.

Built from Plan(s)
Estimated Cost
$120
Estimated Time Investment
Week Long Project (20 Hours or More)
Finish Used
Started with a coat of Minwax Dark Walnut and finished with two coats Minwax Anitque Walnut Polyblend.
Recommended Skill Level
Beginner

Comments

spiceylg

Thu, 11/07/2013 - 05:29

Fantastic first project and also impressed with your newly found blacksmith skills!

Honestabe37

Fri, 11/08/2013 - 21:27

Thank you for the kind words. It's been fun to see the response from friends and family. It's kind of hilarious to me that I've only built one table and now I have requests coming from family, friends and co-workers for everything from end tables to entertainment centers! But first things first, I'm piecing together my new console table for the living room. I just wish I had more time during the day to spend on it!

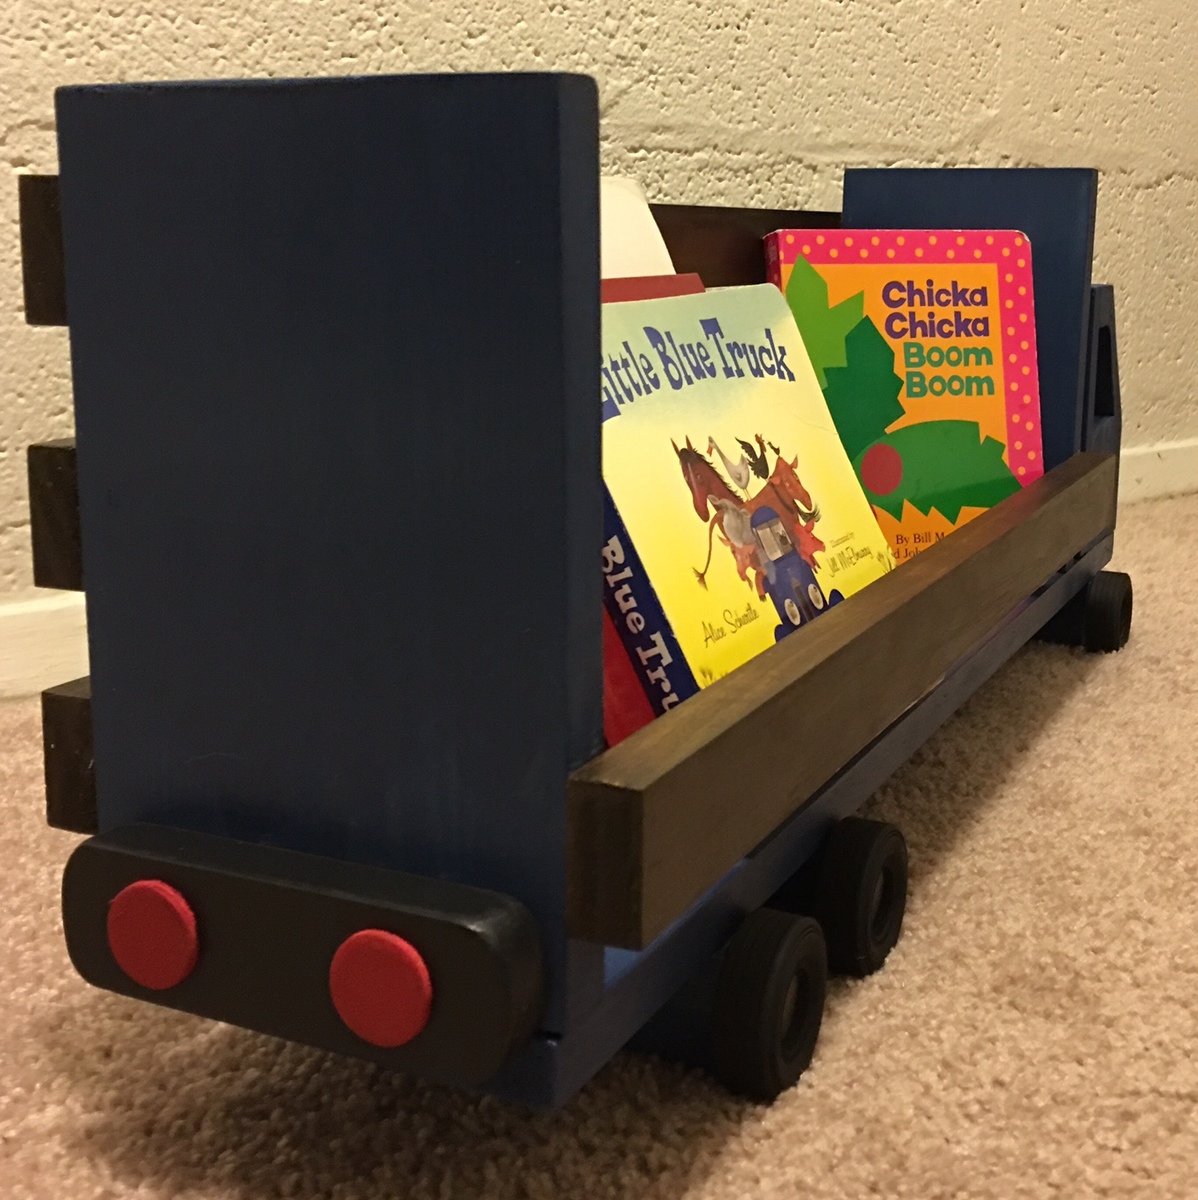
Truck Shelf

Submitted by DMax2010 on Thu, 01/21/2016 - 15:26

Loved making this shelf!

Built from Plan(s)
Estimated Cost
Under 10.00
Estimated Time Investment
Afternoon Project (3-6 Hours)
Finish Used
Minwax express color in Indigo, Minwax express color in Walnut
Recommended Skill Level
Beginner