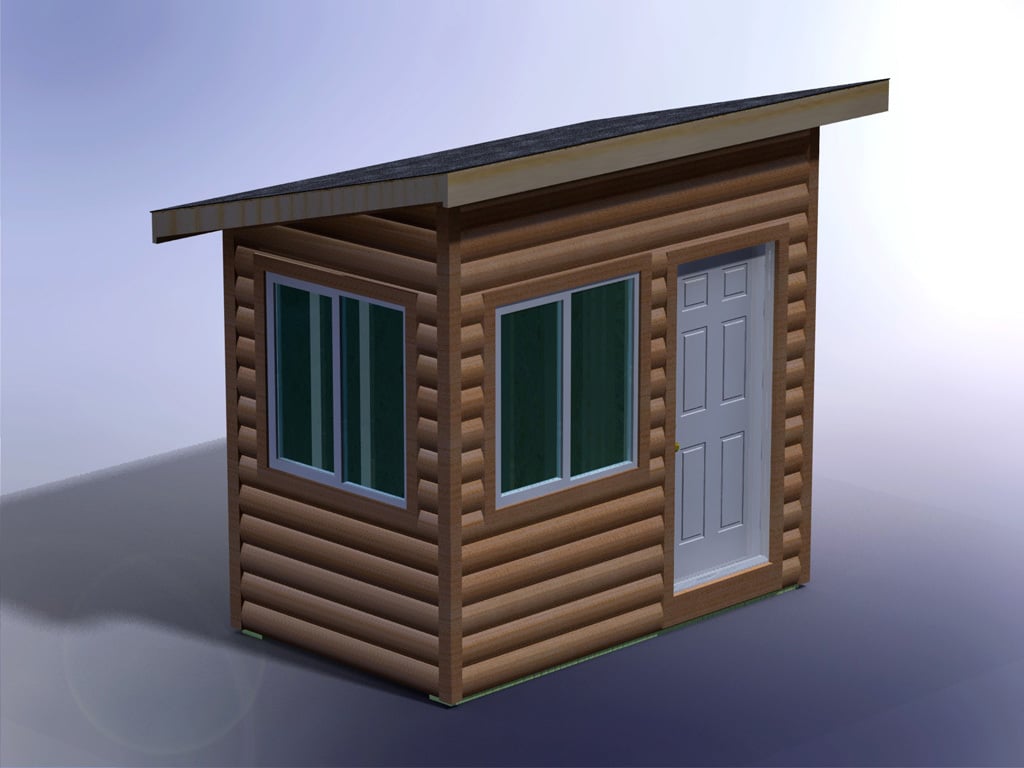
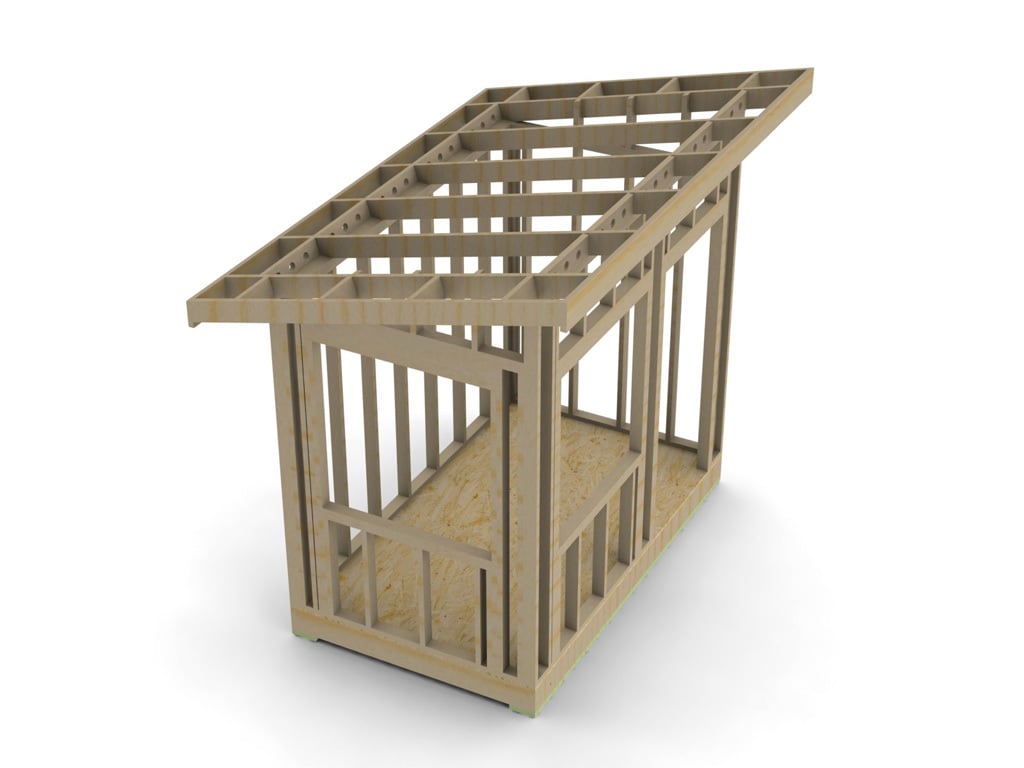
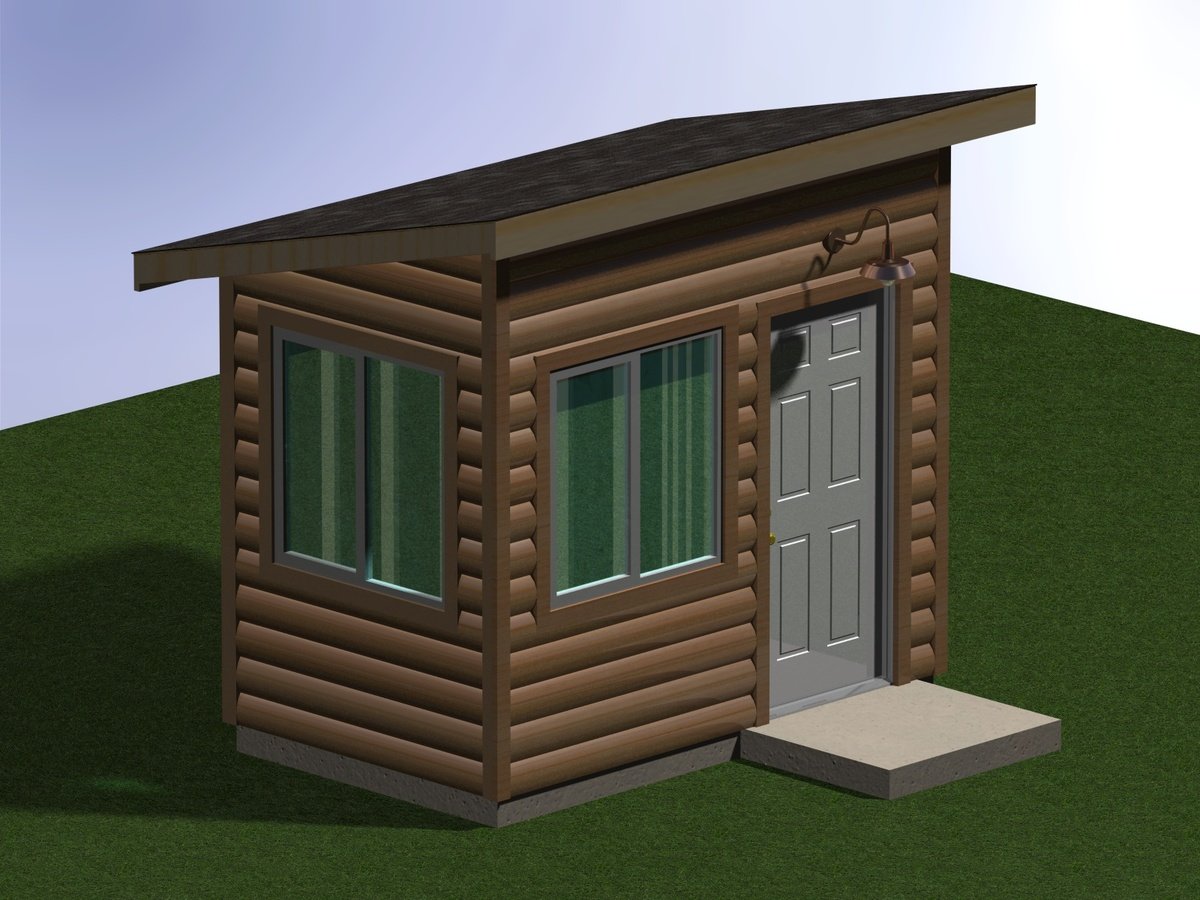
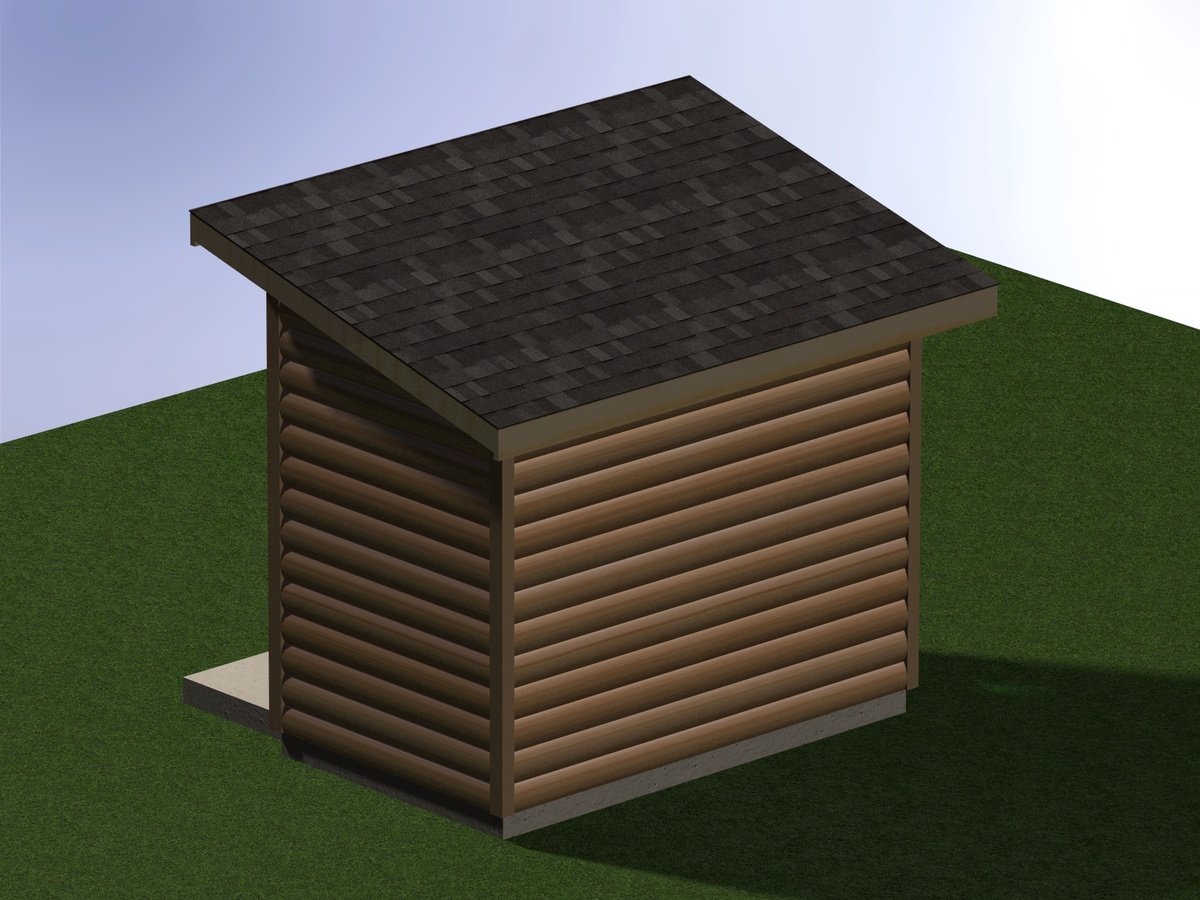
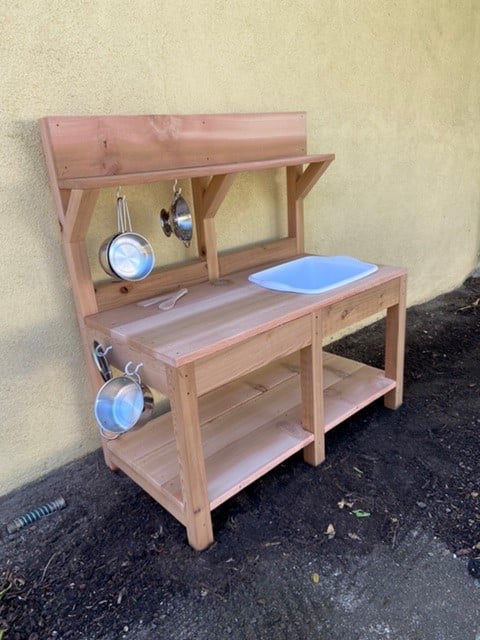
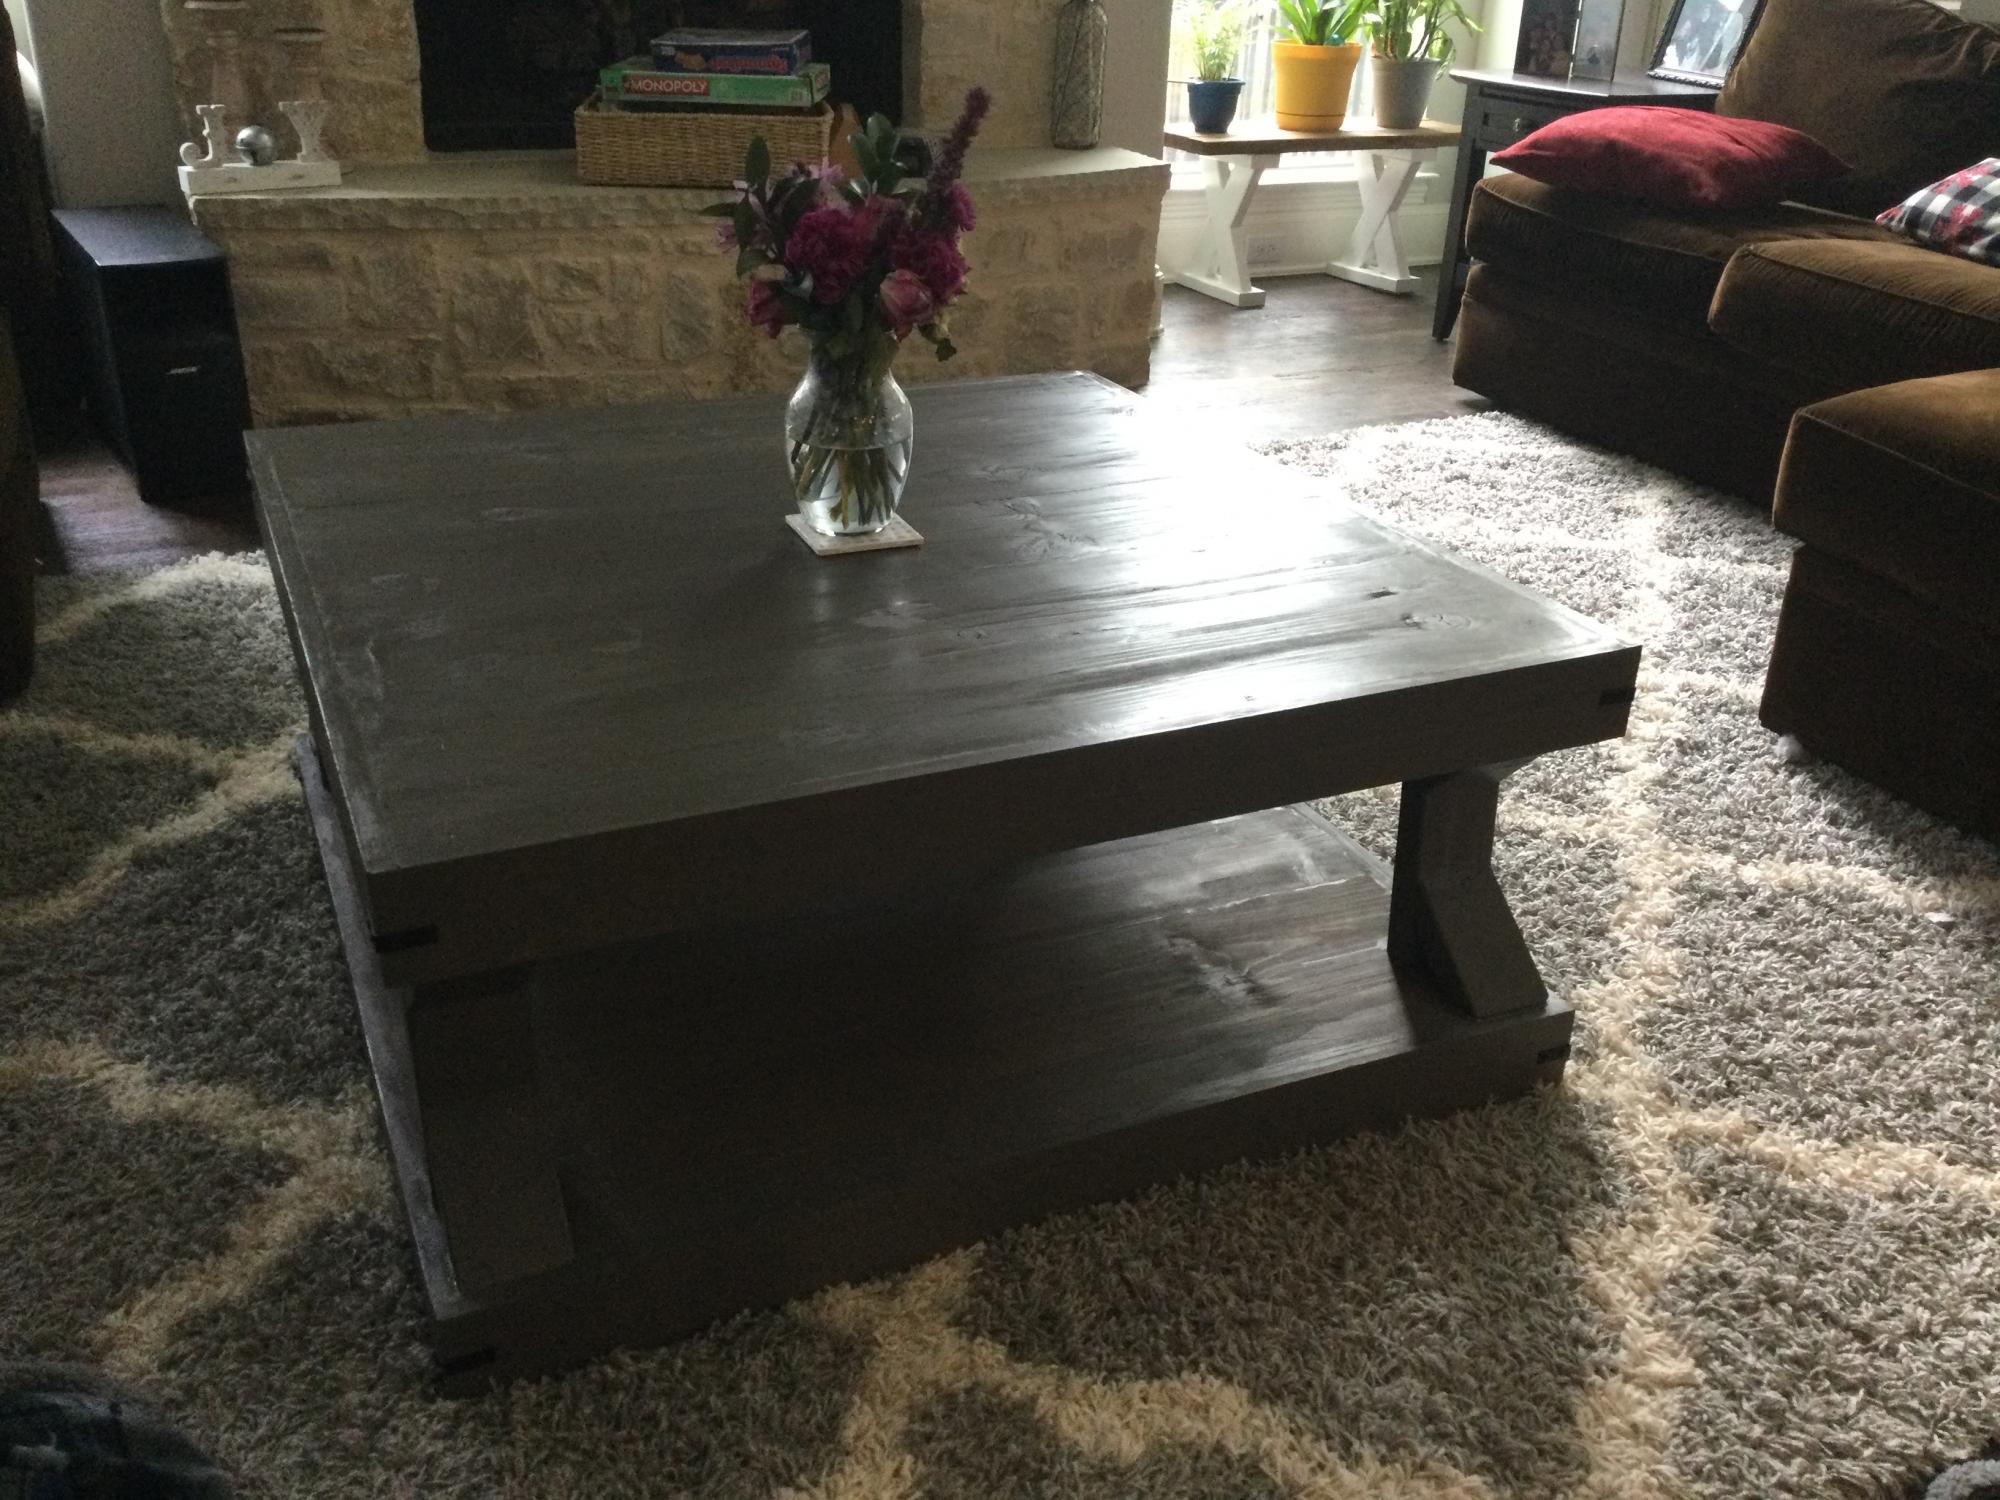
Work Bench
![](/sites/default/files/105572801_3049396425114641_5616622060770044768_n.jpg)
I just started wood working this past few months, and this is I think my 6th project already. Super easy to make and so sturdy!! This will definitely help make building easier!!
We found your great plans and site online. My son, Michael made 6 Garden Benches for his Eagle Scout Service Project and donated them to the local Master Gardener’s Association.
They turned out beautiful!
Thank you for sharing your plans. We’re looking forward to building more of your projects!
The Taylors
I based this project on the Outdoor Shoe Bench. We used some leftover wood from a large building project, so we had to make some changes depending on wood dimensions available, but it worked. We also did a few things a little differently, such as the overall dimensions and how we did the lot. I very much appreciated the help and inspiration I got from this website!
We needed some extra kitchen storage with a baby on the way and this project did the trick! We needed something skinny since space is a premium in our kitchen. I am happy with how this turned out. I made the shelves adjustable using the Kreg shelf pin jig, which worked amazingly.
Thank you for sharing the plans for this. I really liked how out breaks down into 8 pieces to move. I felt the plans were lacking a bit of detail, I ended up downloading the sketch up app for $10. That app helped a ton! Due to lack of detail and not thinking ahead I ended up putting a couple bolt holes in bad spots and had to wood fill and move them. I also didn't understand what mirror image of left and right side were. Lol. I laid down the left side and carefully assembled, then I made the right side to look exactly like it. Lifted the left side, looks beautiful, lifted the right side and looks like a million screws. Lol. I also had to add additional wood to make it work since I essentially built the side inside out. I think I put the slats in a little closer then the plans suggested, I ended up cutting a few more if you notice the gap in bottom bunk slats. I also purchased "backpack strap" from ace hardware and laid it across the slats. I screwed the end slats and stapled the middle ones to the strap. All in all, a great project and it will last for years. Thanks for sharing. Built from http://www.ana-white.com/2013/06/plans/triple-bunk-staggered-beds
Full storage bed made from farmhouse storage plans.
Great easy project to get the bigger chicks out of the garage to integrate with the older hens. Made some modifications because we have a lot of critters trying to kill the chickens/chicks.
This was my first wood working project in a very long time. I was a little nervous about doing it because it would be on display in the main entry way of our house and I didnt want to make any mistakes. It took a little longer than I had hoped, but I think going slower helped make it perfect.
Sat, 09/01/2012 - 14:31
Great job! Been wanting to make one myself. Love the color and stain.
I wanted a set of pool deck furniture and your plans were exactly what I was looking for! I made two chaise lounges and two chairs. I bought the cushions from Big Lots at a great price. The longest part of the building process was sanding each board. I modified the plans by adding wheels, using a 1 × 2 instead of a dowel for the reclining bar, and changing the legs slightly. It was so helpful to have a buying and cutting list!
So why did I decide to build my own bed?
1. Cal King Frames are hard to come by in Canada and if purchased from a store, they cost an arm and a leg. Also I wanted a new mattress made of solid latex - very spendy - so our budget was already maxed out from that.
2. You come across a Kijiji (canada's craiglist) listing for 200sq ft of 3/4" solid oak flooring
3. You know Ana's plans will help tremondously and it gives you the boost to finally decide - yes I can build my own furniture.
So the upcycling made this all doable! Some random Kijijier thought to pass along the left overs from a flooring install (the other option was burning it he said) I said thank you very much and took all that wood home. Now he had bought raw rustic grade oak. Only $1.89 a sq/ft to buy FYI)
So it was not perfect, with many pits, wormholes, cracking and complete holes. But the raw oak was great for a number of things - the distressing was real - no extra effort required, also the raw oak was easily stained with my homemade iron acetate stain (steel wool and vinegar) and I was able to bevel the edges without ruining an existing finish.
Thankfully I only needed a few long boards for the framing and was able to use the better short boards for building out the foot and headboards. I improvised the posts on the end with a clever mitered 4 board combination. Cutting just the tongue and the inside edge of the floorboard created a inset detail on the post that is very forgiving to my crappy cuts and ended up doing the trick. I also saved my sawdust from cutting to mix with glue and fill the major holes and pits in the wood. This took the stain very nicely and didn't add any extra cost to the project. Anyways if anyone wants more suggestions on making use of cut off material just message or comment below.
By the way the plan is awesome and I much appreciated it during the process. I did complicate things by making the drawers 24" deep vs 16" and having to upcycle a product rather than just buying material.
To make use of the depth with a cal-king I decided to go with 24" deep drawers - fyi this means more material, more dollars,and more weight! Huge amounts of weight, once since I decided to go with 3/4" Birch ply for the build. I lift for fun and fitness so I managed, but beforewarned - the plywood frames are awkward and heavy.
I ended up needing 4 sheets of 3/4" Birch ply b/c of the upgraded sizing. Even at 50% off (lucky me) this still was $160 in plywood + $50 for Luann for drawer bottoms and closing the back of the frame behind the drawers. I also used full extension drawer slides so that I can actually access all that storage so set me back another $180. I got the lights from Lowes for $60 for the pair.
Total cost $500 + free oak floor cast off + time = a priceless project
Followed Ana’s plans down to the measurements. Didn’t have a brad nailer, so I attached the 1x4 sides with 3/4in pocket holes and 1 1/4in PH screws. Additionally used trim screws and 1 1/4 finish nails throughout it for places I couldn’t put a PH. Plan on getting four more brackets for the bottom half, like the top. Very proud of myself.
Stained the legs, top, and base before completely assembling them.
Porch sectional all done. Just need the fire pit.
This is something I didn't know I needed until I built it - just wanted a quick, simple project - now it is finished, I use it frequently (It does hold an adult's weight!). I used radiata pine as per plans, but 3 pieces of cypress pine (fence pickets) for the threads. Very clever design & just a sweet piece of furniture. I like my timber au naturel, so finished it clear.
This is my first attempt at wood working. Now I am going to try the rustic look finishing.
Tue, 07/08/2014 - 09:15
It took a few attempts and my miter saw would only go to 48deg but not hard just took some preplanning and practice on scrap wood
Sat, 07/12/2014 - 21:16
So I tried the rustic look stain with tee and oxidizer, and I it came out brown, so disappointed
These plans were great. Easy to put together and they look quite amazing. And they are solid! Bought cushions from IKEA and the wood from Home Depot. Stained and sealed.
Golf Locker. We love it!
We really needed some sort of coffee table for our game room loft, but we didn't want something that big taking up space in the small room. Armed with the plans for Ana's Turned Leg Coffee Table and an old cabinet door we found on the side of the road, we made a snack table instead.
We modified Ana's plans a bit to accommodate the cabinet door. It was very simple, and only took us a few hours to build. You can find all the details on my blog.
I've tried this before as a gift for a friend's new baby. I then wanted to do one for myself but change the measurements somewhat. This is 45" long and the same width as the original. I reduced the height to account for the 3" foam cushion. Besides that it's pretty much the same as the toy chest plan.
Building and sanding took about 3 days working after work only. Painting took the longest time.
This project was so much fun. I had to make adjustments for the size of my systems, but it was well worth it. I will be adding the doors later after our baby is old enough to crawl. Thank you so much for sharing this project!
Loved these plans! Was my first project I tackled trying my hand with a new hobby of wood working to stave off quarantine craziness :-) finished project looked awesome and got me started working on other plans on the site.
**note**
Side table was just sanded and refinished, wasn't built just tried to match.
Comments
ewebrat
Mon, 06/29/2020 - 12:44
I also made one of these…
I also made one of these last week and it has already proved it's worth many times! Yours looks great - I hope you get lots of use out of it :)