My friends are all having kids these days, and I had a lot of scrap 1x6 kicking around.
After applying a stain on the boards, I printed the letters and numbers as large as I wanted them. I used ''French Script MT'', size of font 185 and I cut them out to make a template.
I happened to have some chalk board paint, which gives it a nice mat color.
I recommend to leave enough space for baseboards, in my case Ive started numbering the charts at 8'' high. A picture hook is set in the back to hang it on the wall, you could also simply screw it on the wall.
Its quick to make and doesnt require a lot of cutting!
Estimated Cost
the price of a 1x6 board, about 6 feet long.
Estimated Time Investment
An Hour or Two (0-2 Hours)
Finish Used
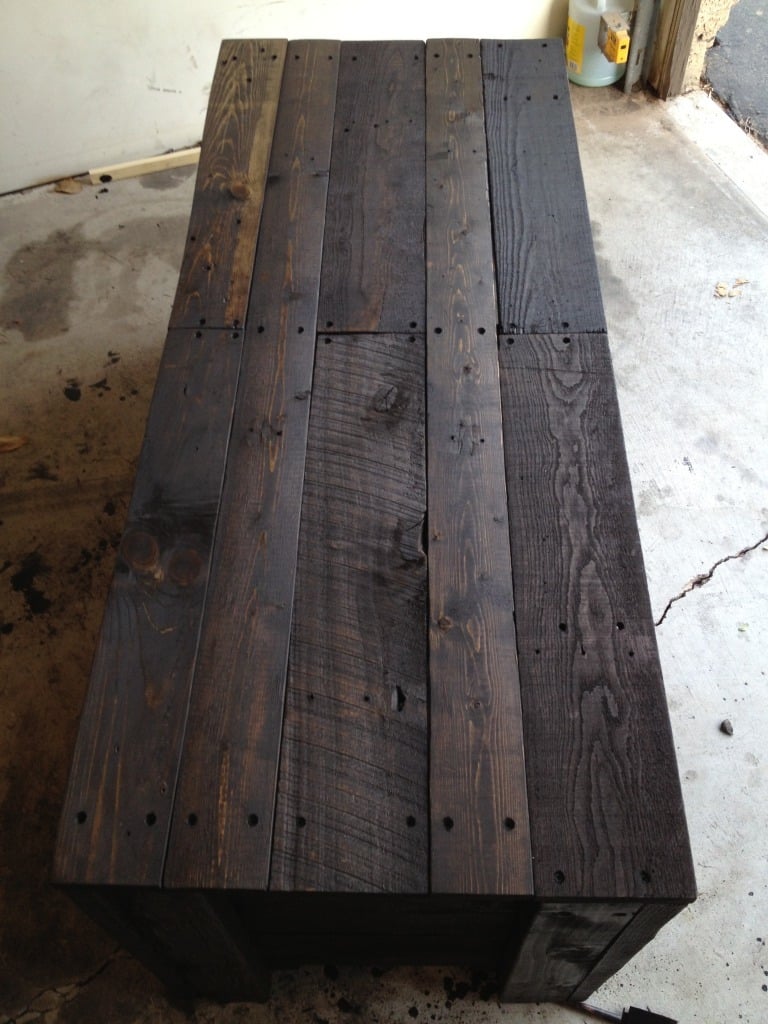
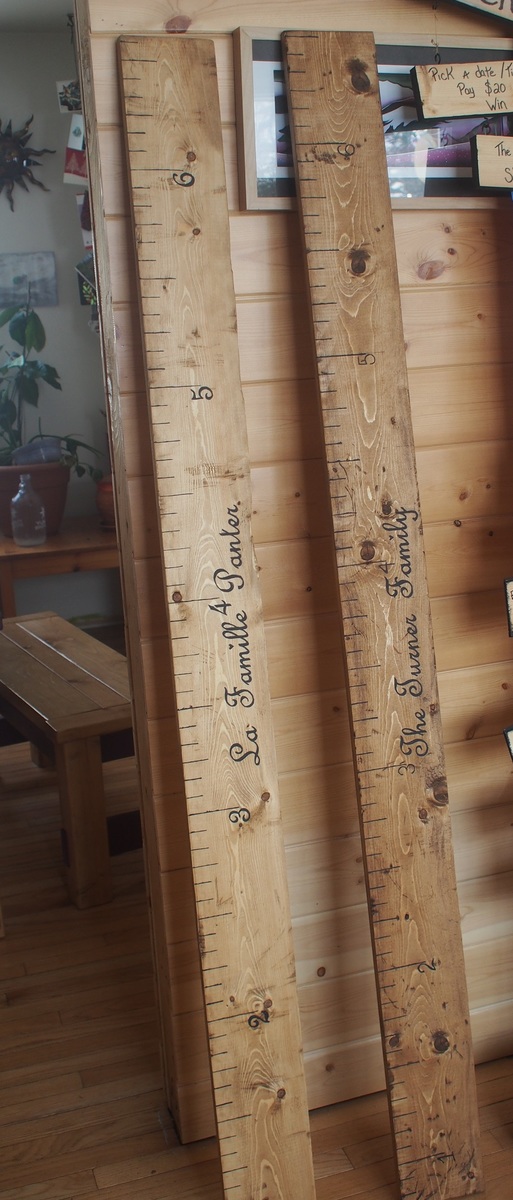
The darker color is Minwax ''Colonial American''.
the lighter color is Minwax ''Natural''. I like it a bit better for these boards as I think it will be easier to see the lines that the family will draw to mark their kid's height as they grow.
I used a black chalkboard paint to paint the numbers and letters, I free-handed these after drawing them with a pencil, using a template for reference.
Recommended Skill Level
Starter Project


Comments
spiceylg
Fri, 05/03/2013 - 05:09
Cool
Pretty cool idea!
LexiB87
Sat, 02/22/2020 - 20:04
Where do I find the plans…
Where do I find the plans for this?