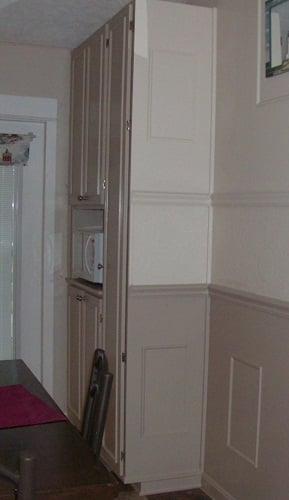
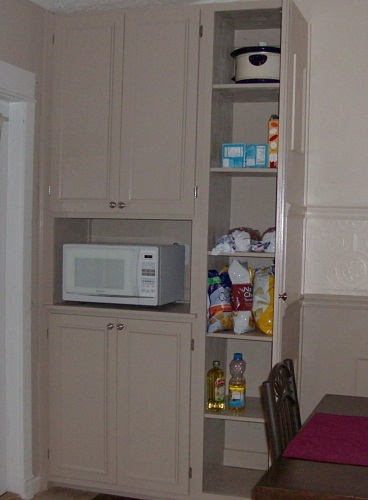
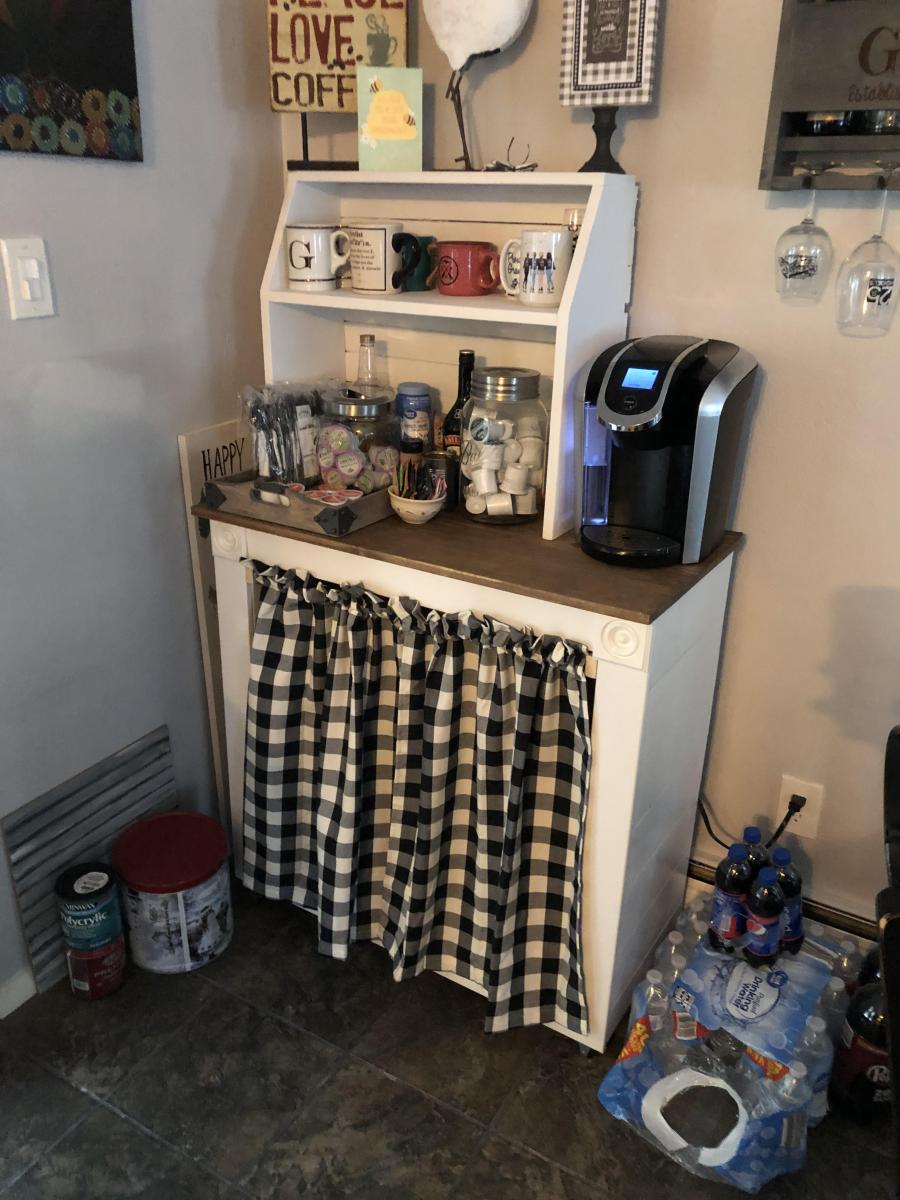
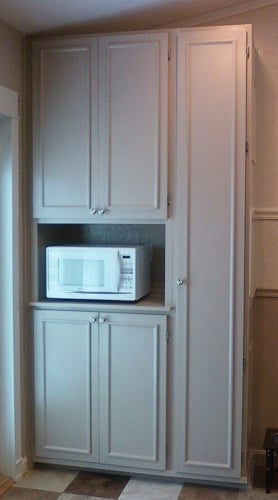
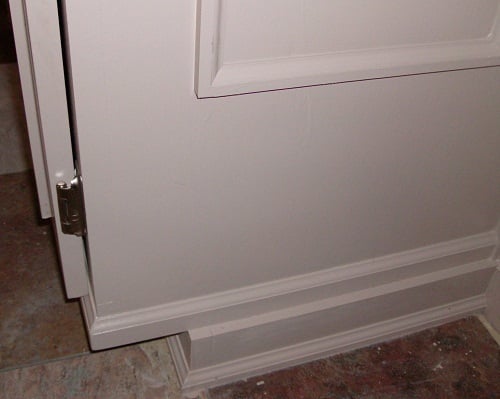
2x4 Sectional , table, and chairs
![](/sites/default/files/20230402_123224_0.jpg)
Your easy to follow 2x4 proje ts turned out amazing. My outdoor set is complete. The chairs, also, came from your plans. I built all of it by myself in one weekend. Thank you
![](/sites/default/files/20230402_123243_0.jpg)
Your easy to follow 2x4 proje ts turned out amazing. My outdoor set is complete. The chairs, also, came from your plans. I built all of it by myself in one weekend. Thank you
I needed some furniture for a summer tv room ( cooler downstairs) I was making. These sidetables and tv stand are loosely based off Ana's work.
We paired this bed frame with Nathan James upholstered headboard to replicate our favorite Airbnb we stayed at in Telluride. That bed was a $1300 from West Elm. Minus the tools, this bed came in around $500 for everything (including bedding).
Wood: Douglas Fir
Stain: American Walnut
I used your workbench plan to build my Brew Bench. I changed the measurements to fit my space and used a butcher block for the countertop. Very sturdy and pretty easy project. Took one day to build.
Scott R
Followed Ana’s plans to the inch and I had no issues at all everything fit like a glove. I used knotty pine for all facing boards except for the 2x4 sandwiched second from the top on both head and footboard (used spruce). I used spruce for anything that would be hidden. Glue and #10 fasteners. Instead of screwing the side rail cleats to the foot/headboard post I used 3.5 inch bolts and washers.
A Canadian King is when your dog owns your bed and allows you to sleep in it.
These came together nicely but I definitely advocate the right tool for cutting the curves on the sides. Also, the next time we make them, and we most likely will, I will make the roomy version. The wider size will give us a little more room for a few extra books. All in all the girls are very please with them. I like that they are just above their bed to make night time reading easy and fun. Couldn't have done it without you Ana. Thanks.
I followed the Rustic X Tall Bookshelf plan to make a set of bookshelves for my husband for Christmas! It was my second ever woodworking project. The plan was really easy to follow and so fun to make! I ended up using an additional shelf piece on the very top for a more modern spin on it. I also bought a pocket hole jig to use on this project. I'm happy with how it turned out!
We do not have a garage yet, so this size works great to push out of the way when not being used and pull out for a workbench and also to extend the table top for the saw. The plans were easy to follow and easy to modify. I added a base made of 2x4’s to make it sturdier since it will be moved across a deck vs a level floor. I also added some boards behind the shelf to keep things from falling out the back and adjusted the height to match the table saw top. Next up will be a router table stand to replace the camping footlocker.
I built this book rack using scrap wood and modified plans from the Full Length Plate Rack. It was a really straightforward build, and functions very well as vertical storage that takes up little space. I predrilled, screwed and glued all of the joints, vs. stapling.
We needed a sturdy table but didn't want to spend a fortune buying one so decided to take a stab at building one. Our space isn't too large but also wanted the ability to expand the table with leaves if we have a large crowd. I built leaves by cutting notches in the horizontal leg 4x4 and then sliding in/out with 2x2's attached (see pic).
I will say it makes life a whole lot easier learning how to use Sketchup or some other design software. That way you can visualize what it will look like, cuts you need to make especially if you will be deviating from the original post design and don't want to do math in your head (like me).
Working on getting furniture done for my kids. Gives me something to do when they are away on visitation. New furniture from a store is too expensive right now & gives me something to work on to keep my mind off of things.
Modified to fit a Twin XL mattress.
Fri, 04/27/2012 - 13:37
Beautiful job! I love the color. I have memories of being gone for weekends on visits and coming home to a newly decorated "Rainbow Brite" bedroom and my mom assembling a waterbed for me on the kitchen floor (it was the eighties); it felt great to know that my mom was thinking about me while I was gone, your kids will not forget those things.
Wed, 05/16/2012 - 09:48
Hi!, i am new to all of this and would love to make this bed for my daughter, could you share the measurements for the twin version? thanks!
Sat, 06/02/2012 - 03:12
Hi, I like this bed for my son, also looking for the measurements for the twin version.Thanks
Sat, 09/01/2012 - 20:31
I built a similar bed for my niece. I designed the boxes slightly different however. I followed the Twin Farmhouse plan but removed one board from the headboard/footboard panels. This narrows the width to accomodate the storage boxes. http://ana-white.com/2012/03/twinning
Sun, 01/17/2016 - 09:17
Hi! I know this question has been posted before and replied to but, for some reason, I can't see the replies so... would anyone mind maybe sharing their converted measurements for a twin sized bed? Thank so much! This will be our first project and I'm sooo nervous!
Sun, 01/17/2016 - 09:17
Hi! I know this question has been posted before and replied to but, for some reason, I can't see the replies so... would anyone mind maybe sharing their converted measurements for a twin sized bed? Thank so much! This will be our first project and I'm sooo nervous!
Fri, 02/05/2016 - 20:20
I made this bed in a twin. The twin mattress is 39x75. That's 21 inches narrower and 5 inches shorter than a queen. So just make the head board, foot board, and slat measurements 21 inches shorter keeping the height the same. The length is five inches shorter but to get three drawer slots the same size I made mine 75 3/4 long. ( 24 1/4 for each drawer slot).
King bed hand made made with 1by4 pine boards
My husband is deployed and I just decided to start building, to keep my mind busy. I built this table & benches, sanded, stained it & had it in my nook in just 6 days!!! I worked on it every night when the kids went to bed. Thank you Ana White!! :) I will be using this site quite a bit to keep me busy!
Tue, 02/25/2014 - 00:56
Thank you for the idea, i am definitetly going to use your design on a future project of mine.
Tue, 02/25/2014 - 00:56
Thank you for the idea, i am definitetly going to use your design on a future project of mine.
My husband and I had been looking at many different stores to try and find a bar table for behind our new couch in our basement. We wanted something that people could eat and drink at when we entertained and/or be able to sit at and play video games. I should have known we were better off to build our own rather than look in a store. It was only $30 in lumber and took 3 hours to build. And another project in the books!
Built this as a platform bed for guest bedroom. Nice, sturdy bed.
Sat, 09/29/2012 - 04:11
I Love this Bed. Would love king size dimensions. This is exactly what I have been looking for.
I needed more storage for our TINY kitchen. I found the nursery armoire plans and asked my dad to help me build it for a pantry! We modified it some by making it taller and adding more shelves inside (sorry no pics of that). For the doors I wanted to do something fun so we cut lots (over 700!) of small pieces of wood and inlaid then in a herringbone pattern - IN LOVE! For the handles we used copper pipe and I am IN LOVE with those too! Enjoy!
~ Maggie
Thu, 04/10/2014 - 18:32
You did a marvelous job on this, that herringbone inlay is amazing!
I combined my favorite elements from three of Ana's dollhouse plans to make this dollhouse for my kids. My favorite part is the stairs, which I cut from a 2x4 with a miter saw. I made this project from start to finish in one day while the grandparents took the kids, and it was ready for Christmas morning! I made simple furniture for it, too, which you can see in the second picture.
Wed, 02/11/2015 - 06:35
Is there any way you could email me the plans you used for the furniture? or just individual pictures of the furniture? [email protected] (you may wanna copy and paste that people always get it wrong, haha).
I LOVE THIS
This is a gun cabinet I made for my dad out of old barn wood.
Thank-you so much Ana White! We took on our back deck as a family COVID19 “homeschool” two weekend project! Why just build a sectional sofa when you can build a sectional sofa, coffee table, farmhouse table with two benches, two Adirondack chairs and a side table that the 11 year old designed and built himself! Mission accomplished, he’s a builder for life.
Our deck was brutally neglected and the boys had had some exposure to power tools and small builds. We decided that the best way to remedy the situation was to set up a family build all at once so that the tools are out and then put back away after the build is complete!
The plans were easy to follow and incredible! Thanks again so very much!
I used rough cedar to build the patio set. I pre-sanded all pieces to smooth them out and sanded again at the end to limit any remaining splinters. I could not find cedar 2x2, so I ripped all 2x2 from 2x6 using the table saw. The furniture is covered by our porch and we decided to leave it unfinished to let it weather naturally. The plans were modified slightly to accommodate IKEA outdoor cushions. I had some remaining wood, so I built a basic coffee table using some black iron hairpin legs from Amazon.
Here's our planters, and they're our first carpentry projects! We found that there were cost efficiencies when building 2 units. We also opted for nut and bolt attachments for the legs instead of making pocket holes…mainly because I don't have the guides for making pocket holes. Seems to work fine, although I do still need to get a saw that I can cut off the excess bolt length on the inside (see pics). Perhaps next time I should trust my measurements and buy the correct bolt length. Ended up costing about $250. Slightly more than the cost of ready-to-build planters at home depot, but those weren't elevated and not nearly as heavy duty or as large. Well worth the investment of both time and money, and a great starter project for beginners. Good luck to you all! -Don and Staci
Comments
Ana White Admin
Fri, 04/14/2023 - 13:35
Built in one weekend!
This looks fabulous!!! Thank you for sharing.:)