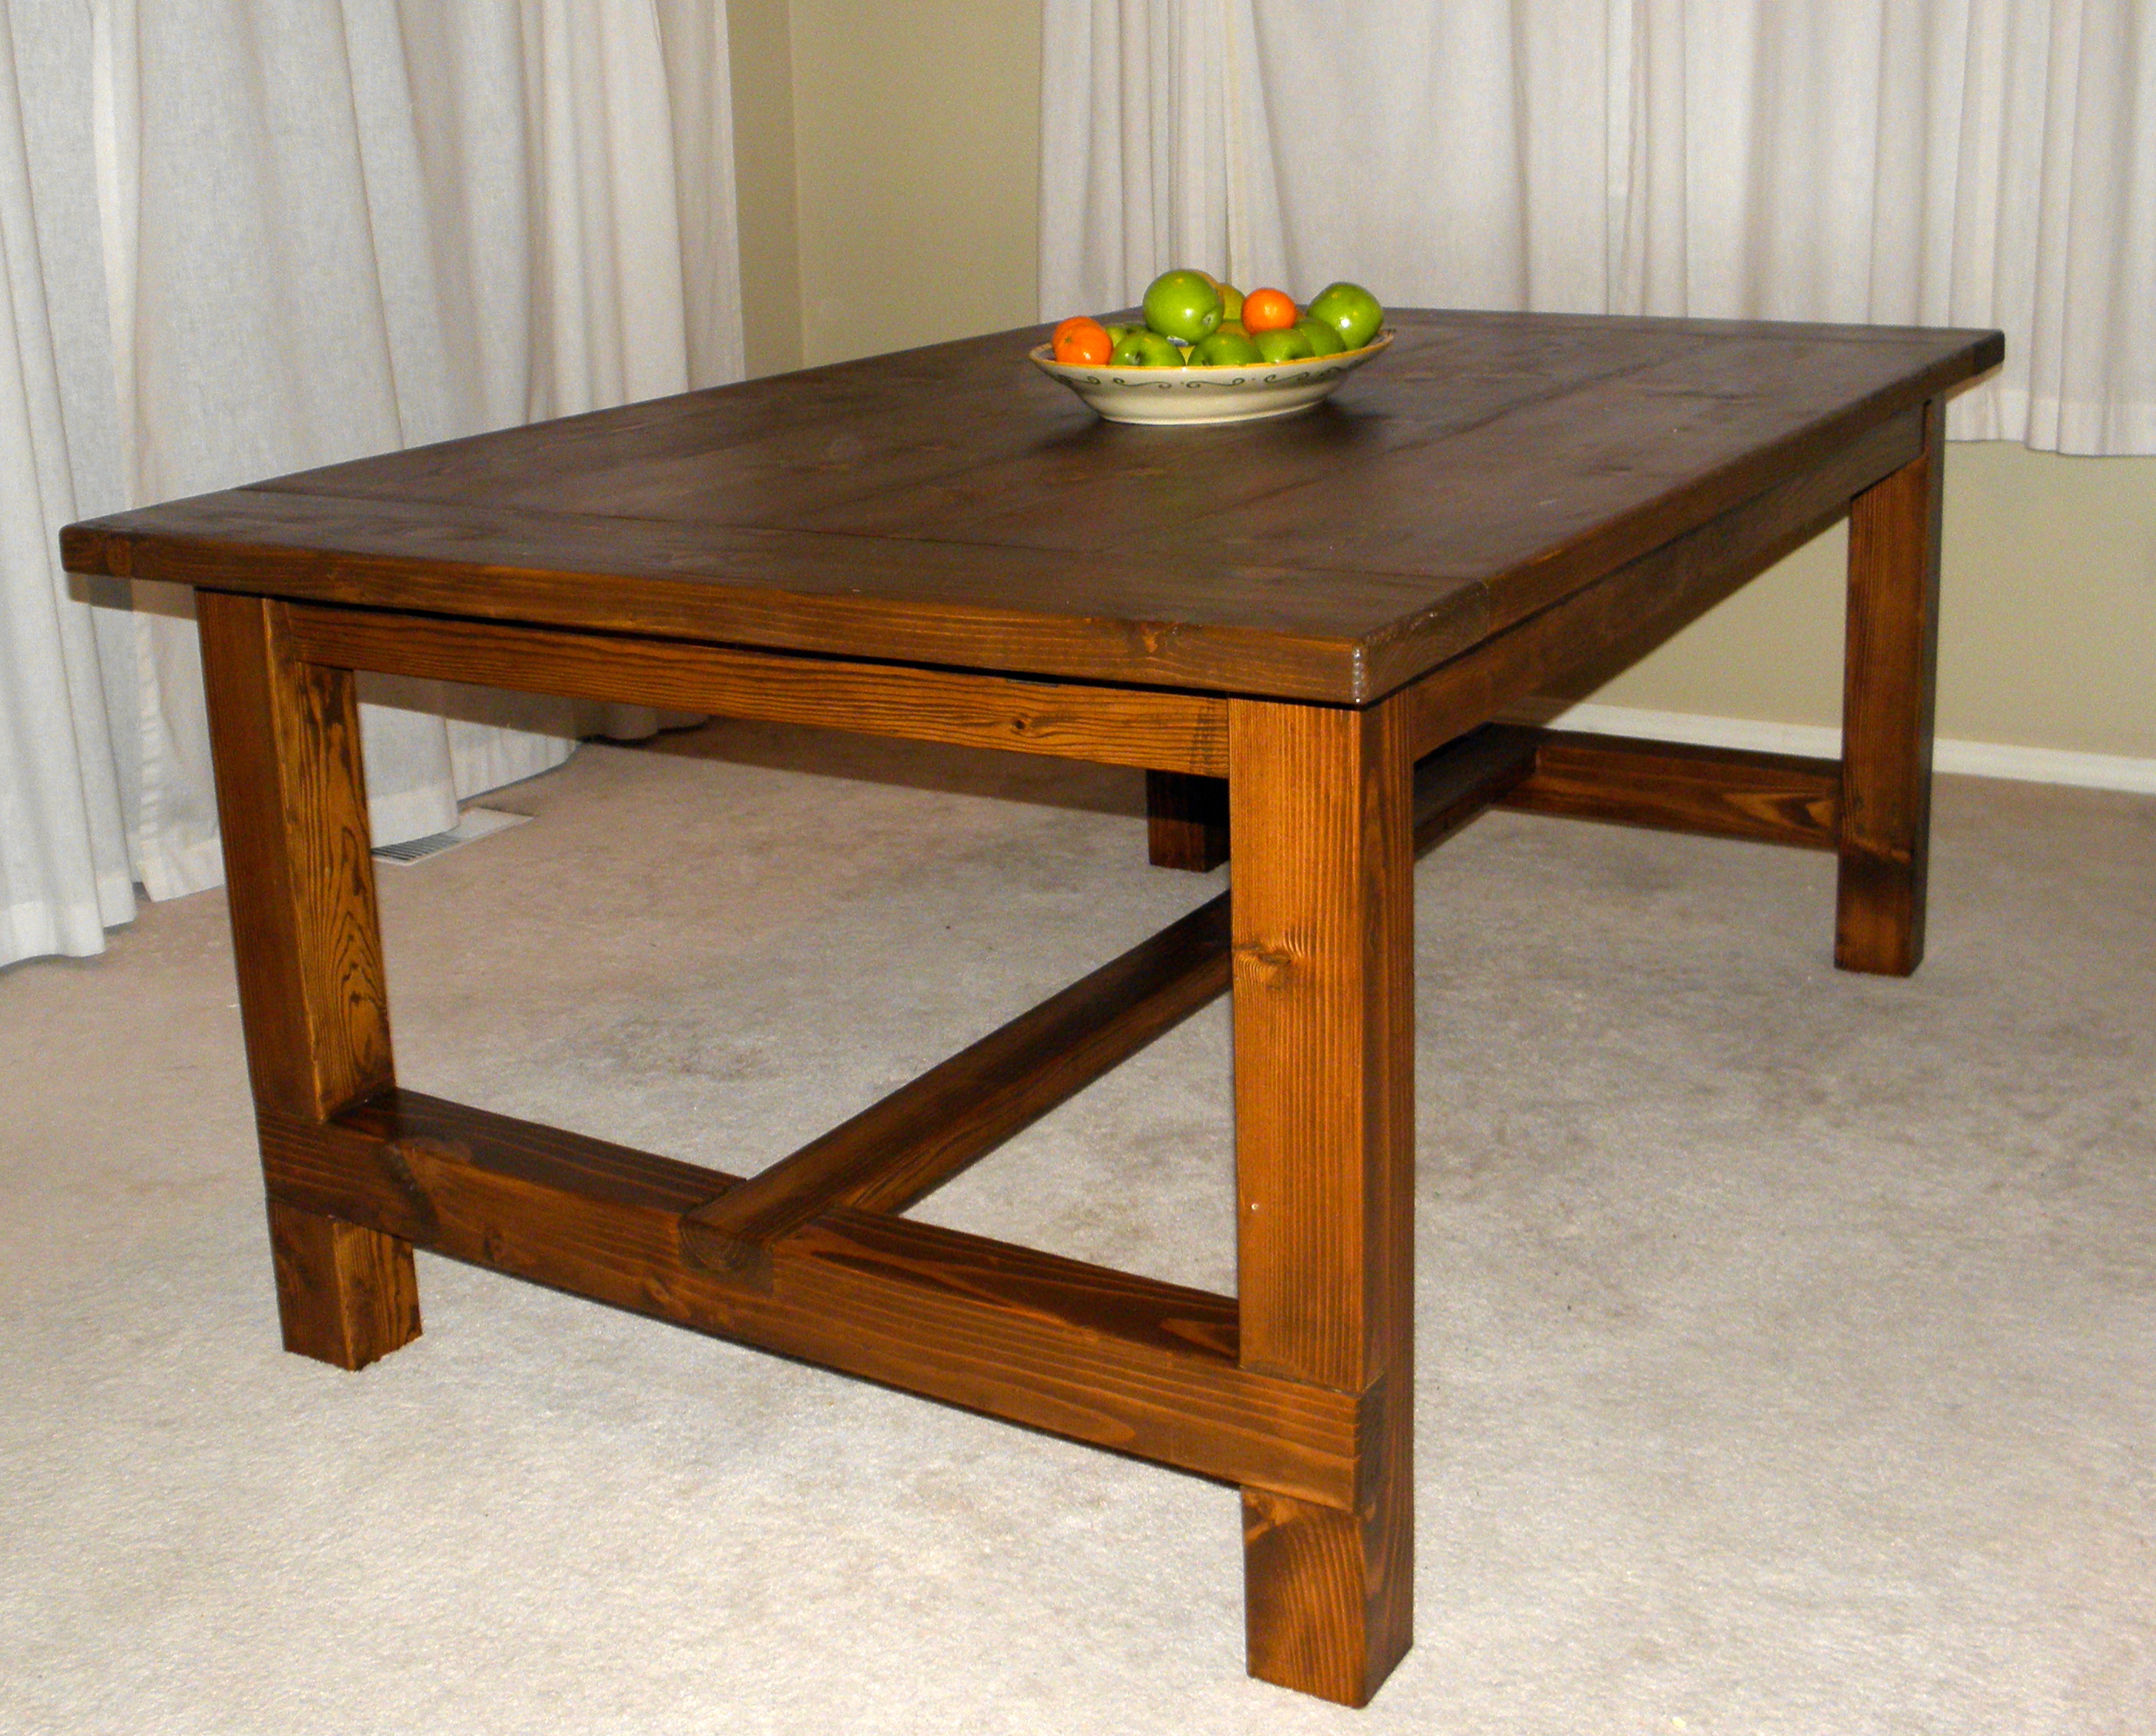
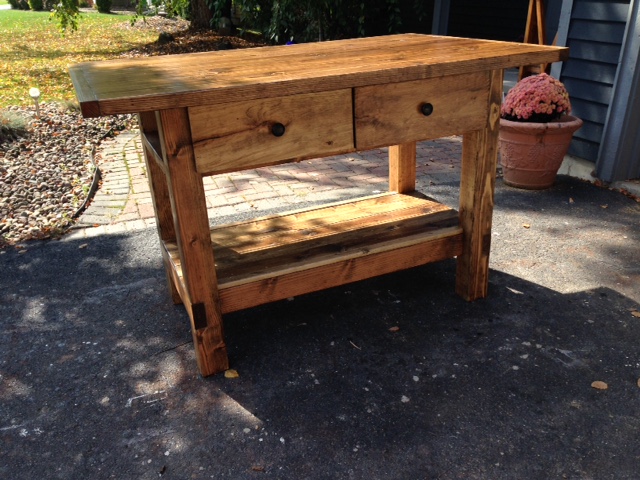
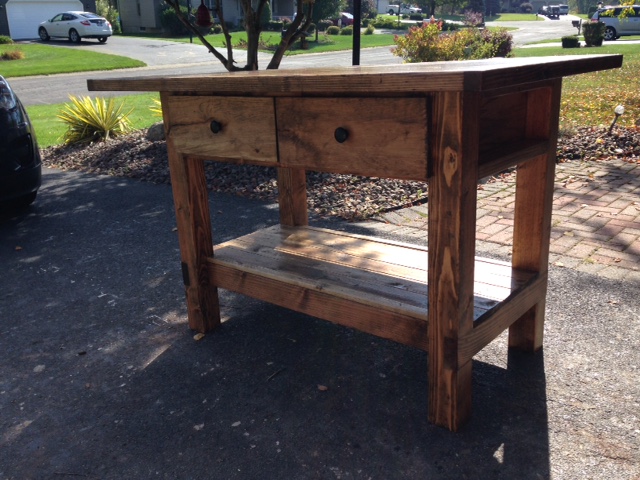
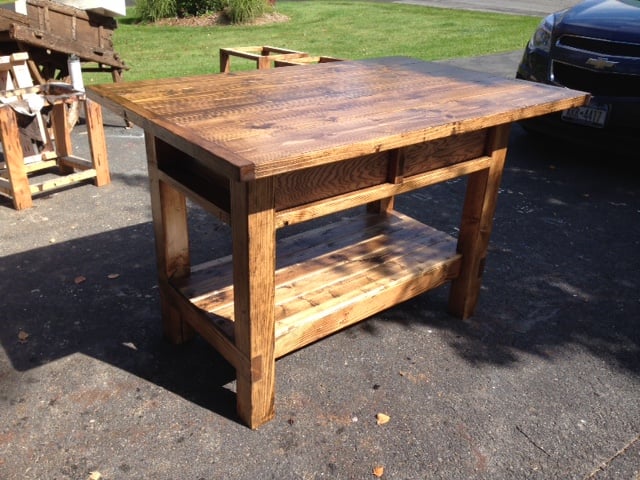
Community Brag Posts
1st project
![](/sites/default/files/3154843119_1395083544.jpg)
Built a set, used this as an entertainment stand below the TV, mactching coffee table done and end table to go with it. Altered the plans (dimensions) a little to accommodate my room. Love this site! Thanks Ana!
![](/sites/default/files/3154843120_1395083544.jpg)
![](/sites/default/files/3154843121_1395083544.jpg)
![](/sites/default/files/3154843122_1395083544.jpg)
Pocket hole top, 6" lag bolt frame
![](/sites/default/files/image_600.jpeg)
Slightly lengthened from the plan, used 6" exposed lag bolts for a sturdier frame, covered the bolts on the sides with a dowel cap over the bolt to mimic a dowel construction.
Comments
Farmhouse X desk
![](/sites/default/files/IMG_1399.jpeg)
I changed the design a bit and added shelves to fit bins and a pencil box.
Pork and Bean Can Storage
![](/sites/default/files/porkpin.jpeg)
Pork and Bean Wall Storage
John
Maple Mission-Style Farmhouse Table
![](/sites/default/files/3154843329_1395679459.jpg)
Using the Farmhouse Table plans I just modified them to the dimensions I thought would be best for my space. Tried mortise/tenon joinery on the legs and that took a lot of time since it was my first time. The table top is put together with pocket hole joinery. I love my Kreg Jig.
Kentwood bookshelf
My gal loved the way this bookshelf turned out. It was my first time building it and if/when I'm commissioned to build another one, I'll likely use wainscotting for the back instead of knotty pine which is 3/4" thick. just made the back a little bulky for my taste. I also would've taken the time to put the pocket holes where the shelves were going to be so I didn't have the different tint of stain on the plugs. Would've been an easy thing to do, but I wasn't thinking ahead at that moment, I guess.
Great plan, Ana. Thanks for the resource!
DIY Wine Caddy
![](/sites/default/files/winepin.jpeg)
For a first try what I learned was my spaces was not exact. Hoping to make another one and correct next time around.
![](/sites/default/files/wine1pin.jpeg)
![](/sites/default/files/wine2pin.jpeg)
Extra Large Shoe Shelf
Like just about every woman, I have LOTS of shoes! Well I couldn’t find an attractive enough shoe rack to fit in with our “Closet” furniture. We use an entire bedroom that our bedroom is connected to because the closet in that bedroom is minuscule. Anyway the closest I came was a simple design from the particleboard stacking closet unit line, you all know what I’m talking about. Well the problem was that they were $10 each & I would have needed like 6 of them & they didn’t come in black, which I tend to like because it doesn’t show dirt & that way all the furniture in the house is interchangeable if I feel like moving things around. I had plywood left over from my bed project so I just copied the design but made it a bigger single unit.
Chalkboard Coffee Table
![](/sites/default/files/3154843574_1396447667_0.jpg)
So I used the tryde coffee table plans and modified to size I wanted. For the top I cut off round edges on my table saw and them laminated with glue and pocket screws. I used 2 coats of the chalkboard paint allowing to dry 24 hours for each coat
![](/sites/default/files/3154843573_1396447667_0.jpg)
Colonial Maple Minwax stain
American Flag Rustic X Coffee Table
![](/sites/default/files/13131037_10209357728279748_4363968821156165566_o.jpg)
Loved the design of the coffee table and needed something in my living room to make it feel a little less empty. As I was building the table I realized that the bottom shelf was roughly the size of a flag that I've built in the past and decided to add one to it to bring a little patriotism to my living room. I used a torch to burn the flag onto the wood. Love the way it turned out!
Comments
Farmhouse bed - full
![](/sites/default/files/80FBDB9B-EC33-42C0-A3DC-1A05004F84AE_0.jpeg)
We built the full sized Farmhouse bed and stained it with gray stain. Are building a trundle to put under later this week. We added 3 inches to the height to be able to add the trundle.
DIY Wine Caddy
![](/sites/default/files/wine%20giftpin.jpeg)
One of my first projects…thank you Ana White for building my confidence in wood working! ❤️
Midge Newth
![](/sites/default/files/wine%20gift1pin.jpeg)
![](/sites/default/files/wine%20gift2pin.jpeg)
Comments
Barstools
A 30" tall bar stools inspired by the plan simplest stool.
Comments
Fri, 07/20/2012 - 05:32
I like your design. Finally
I like your design. Finally made an account and will be making matching ones. Thanks for the inspiration. If the better half doesn't like the first one I will have a new stool for my workbench
Tue, 09/04/2012 - 15:20
by adjusting circular saw
by adjusting circular saw depth and using chisel and hammer and lots of sanding :)
Taylor Console
![](/sites/default/files/3154843680_1396648645.jpg)
I love this plan and had already built one a few months ago. It is an easy project to tackle ;) I did change things up a bit. Will be building another one soon :) Thank you so much for sharing the plans.
![](/sites/default/files/3154843681_1396648645.jpg)
![](/sites/default/files/3154843682_1396648645.jpg)
![](/sites/default/files/3154843683_1396648645.jpg)
Breadboard Trestle Table and benches
![](/sites/default/files/image_620.jpeg)
This table was custom made for a good friend and his family. He wanted a trestle style with bench seats for his kids and able to have room to sit at the ends as well. In addition, he wanted breadboard table top. Engineering wise, thats a tall order. So I made the table top solid by using biscuits to secure the timber and since the breadboards could not be supported by the trestle legs I used 5/8" dowel rods, 6" long, 2 per board. I used a 2x4 and scrap plywood to make a dowel jig. I also reinforced them with 3" pocket screws on the bottom.
The next challenge was bringing the legs in enough to make room for end seating while still allowing room for the benches. I used 2x6s on the top and bottom of the trestles and secured them flush to the edge to allow for leg room at the ends.
I used 1" dowels to secure the 4x4 runner using a split/wedge technique. The benches are pretty strait forward and I also used biscuits to make solid tops.
To save money and to have a rustic look, I used douglas fur framing lumber which required many hours of scraping and sanding to make the top level and splitter free. Additionally, I used 5 layers of polyurethane to withstand the wear and tear of a young families daily use. Thankfully they fell in love with the table as much as I did!
![](/sites/default/files/image_621.jpeg)
![](/sites/default/files/image_622.jpeg)
![](/sites/default/files/image_623.jpeg)
![](/sites/default/files/image_624.jpeg)
![](/sites/default/files/image_627.jpeg)
Minwax satin finish polyurethane
Sawhorse Table
I made this table for my two boys to do their homework on so I modified it a little to make it shorter.
I used reclaimed 2x4's for the base and MDF for the table top.
Kitchen Island with Storage
![](/sites/default/files/island3pin.jpg)
I started with your basic plan but i slightly modified it with out the overhang too much and added a set of doors and covered where the seating would be. But it still has room for two seats .. I made mine rustic :-)
backyarddiybuilder.ca
![](/sites/default/files/island1pin.jpg)
![](/sites/default/files/island1pin_0.jpg)
4x4 Farmhouse Table with Video
![](/sites/default/files/3154843823_1396821336.jpg)
When I saw Ana's plans for this table I had to build it. I did modify the size to make the table top a little wider and longer. The extra width is great for putting more food or a center piece in the middle of the table.
I thought the build was pretty simple and everyone who visits our house loves the table. It is definitely a conversational piece.
The table and benches are heavy duty and will be able to passed on for many generations. I love the rustic look and so the steel wool/vinegar stain was my finish of choice.
I decided to document the entire build and created the most in-depth farmhouse table video tutorial online. The goal with the video is to show how easy it is to build the table using Ana's plans!
![](/sites/default/files/3154843817_1396821336.jpg)
![](/sites/default/files/3154843818_1396821336.jpg)
![](/sites/default/files/3154843819_1396821336.jpg)
![](/sites/default/files/3154843820_1396821336.jpg)
![](/sites/default/files/3154843821_1396821336.jpg)
Outdoor Chair
![](/sites/default/files/A9087862-6C5E-4219-ACE8-1D788229FE09.jpeg)
Adjusted the height of the back to better support back cushion.
Angled back and seat boards for relaxed fit.
Used pine boards for side of chair.
![](/sites/default/files/DF24198D-534C-46BB-A24A-F5EAEAABB9ED.jpeg)
To be added: Spar Urethane (Satin)