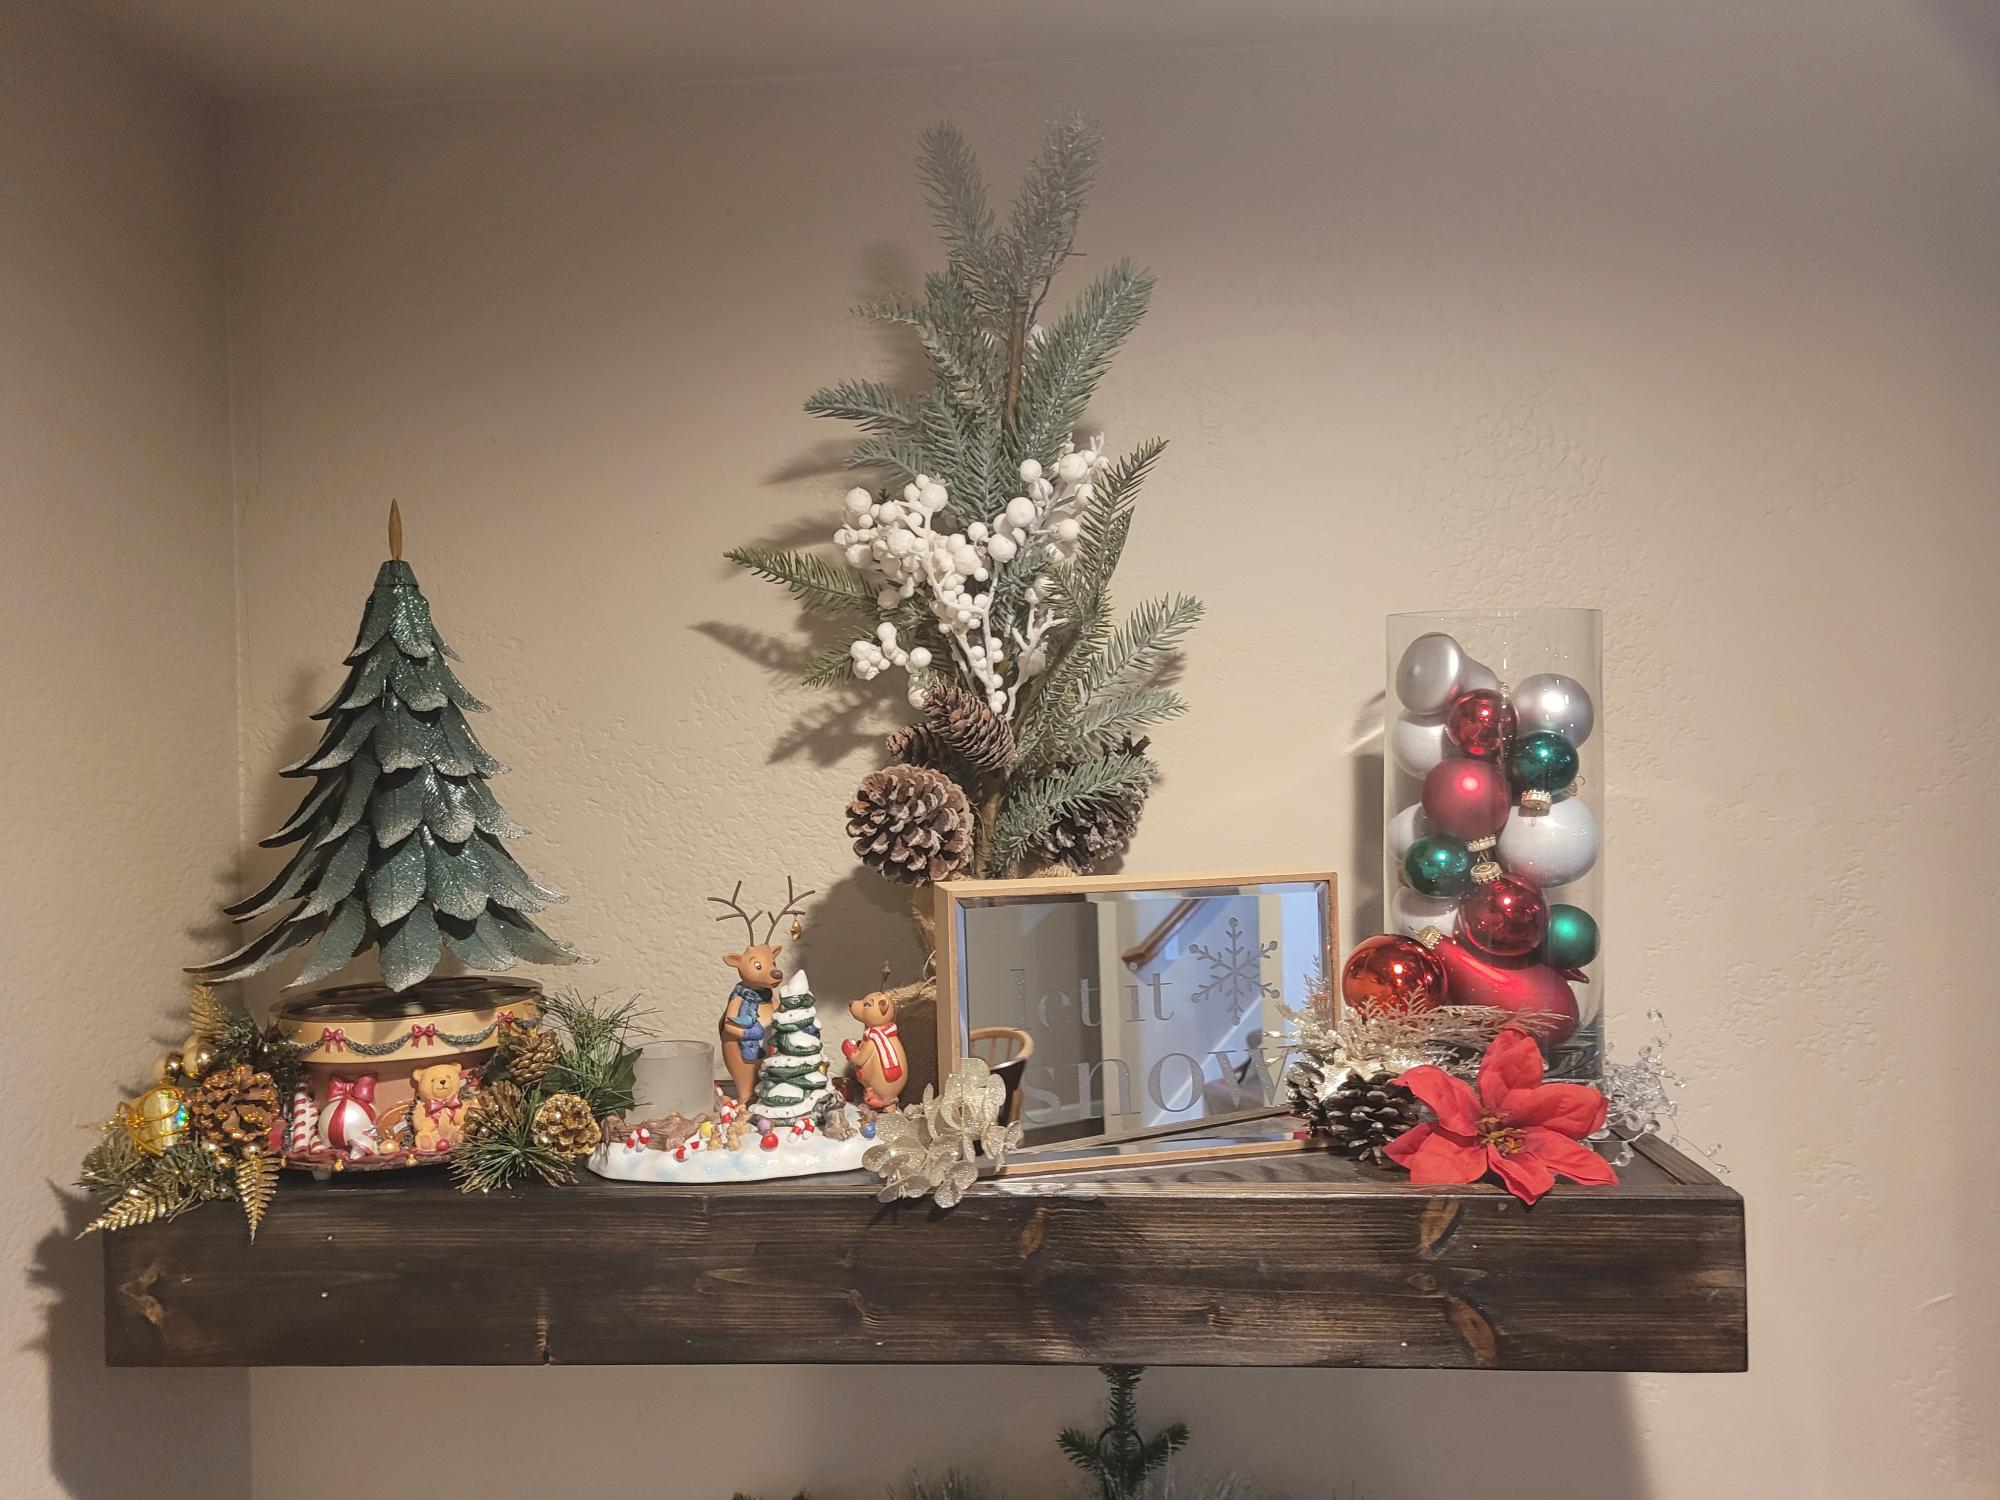
Floating Shelves... Simply Fantastic and Easy...
Utilized your idea... First ever woodworking project. My wife is super excited these shelves came out superb. She is excited to see what I have planned next. Thank you.

Built from Plan(s)
Utilized your idea... First ever woodworking project. My wife is super excited these shelves came out superb. She is excited to see what I have planned next. Thank you.

We bought a vacation home that has such a small kitchen. I knew we needed more storage. So I checked out Ana's plans and made this bad boy based on the Simplest Armoire plans.
The home is in the mountain/lakes area of northern New Hampshire, so I wanted to bring the outside colors in. I used Valspar Cabin Red paint and the Valspar Antiquing glaze over the top after distressing it a bit.


My husband and my boys built it, painted it, and stained it in a weekend. Great father and sons project. I used the same black paint and stain that Shanty-2-chic used. I LOVE it.. now on to the benches.

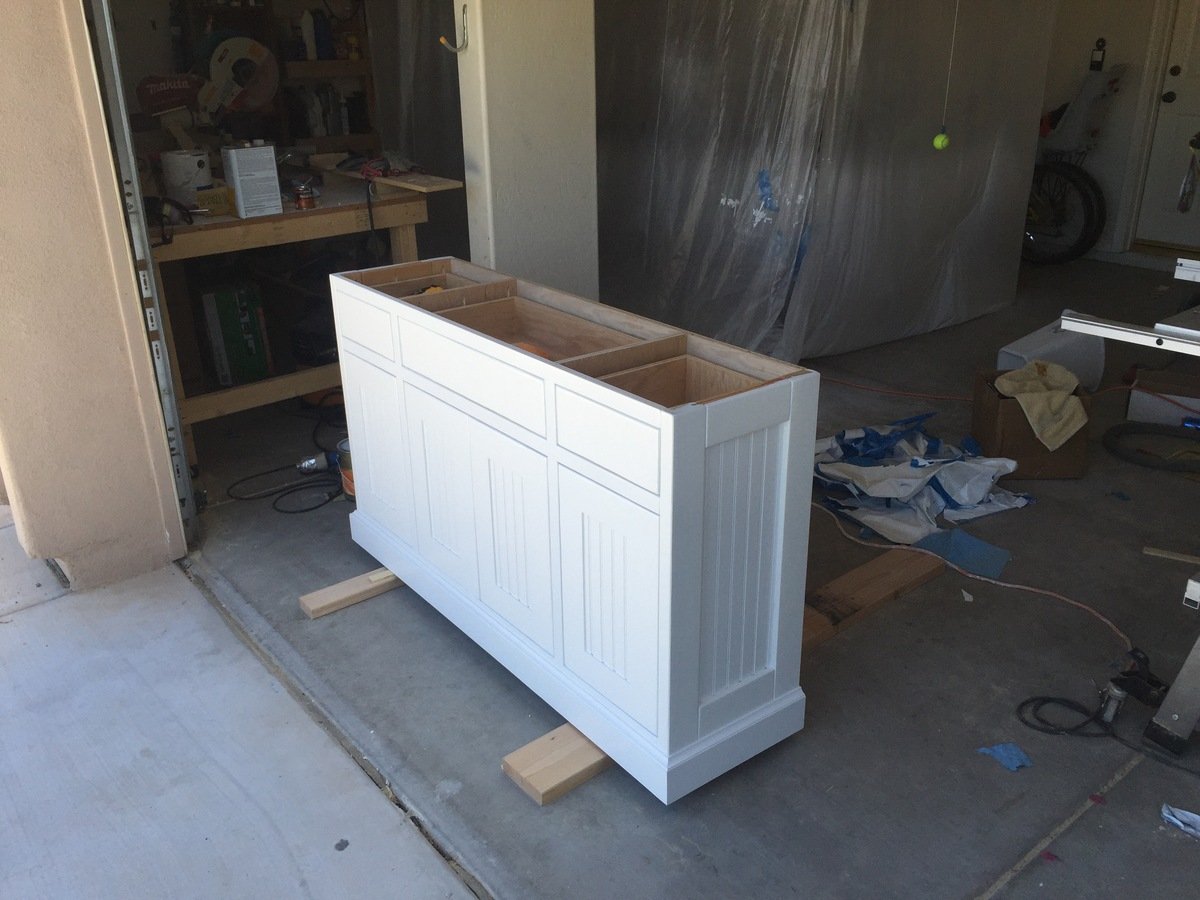
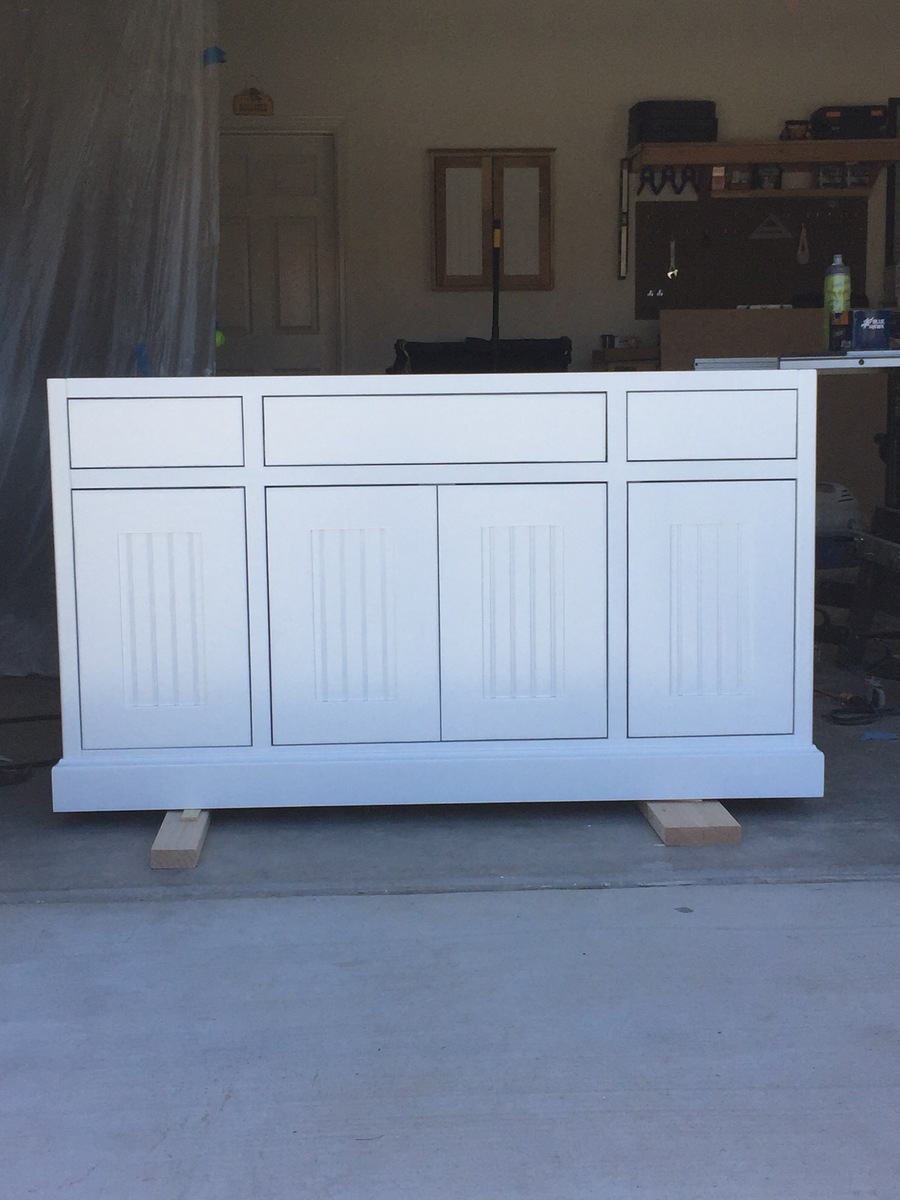
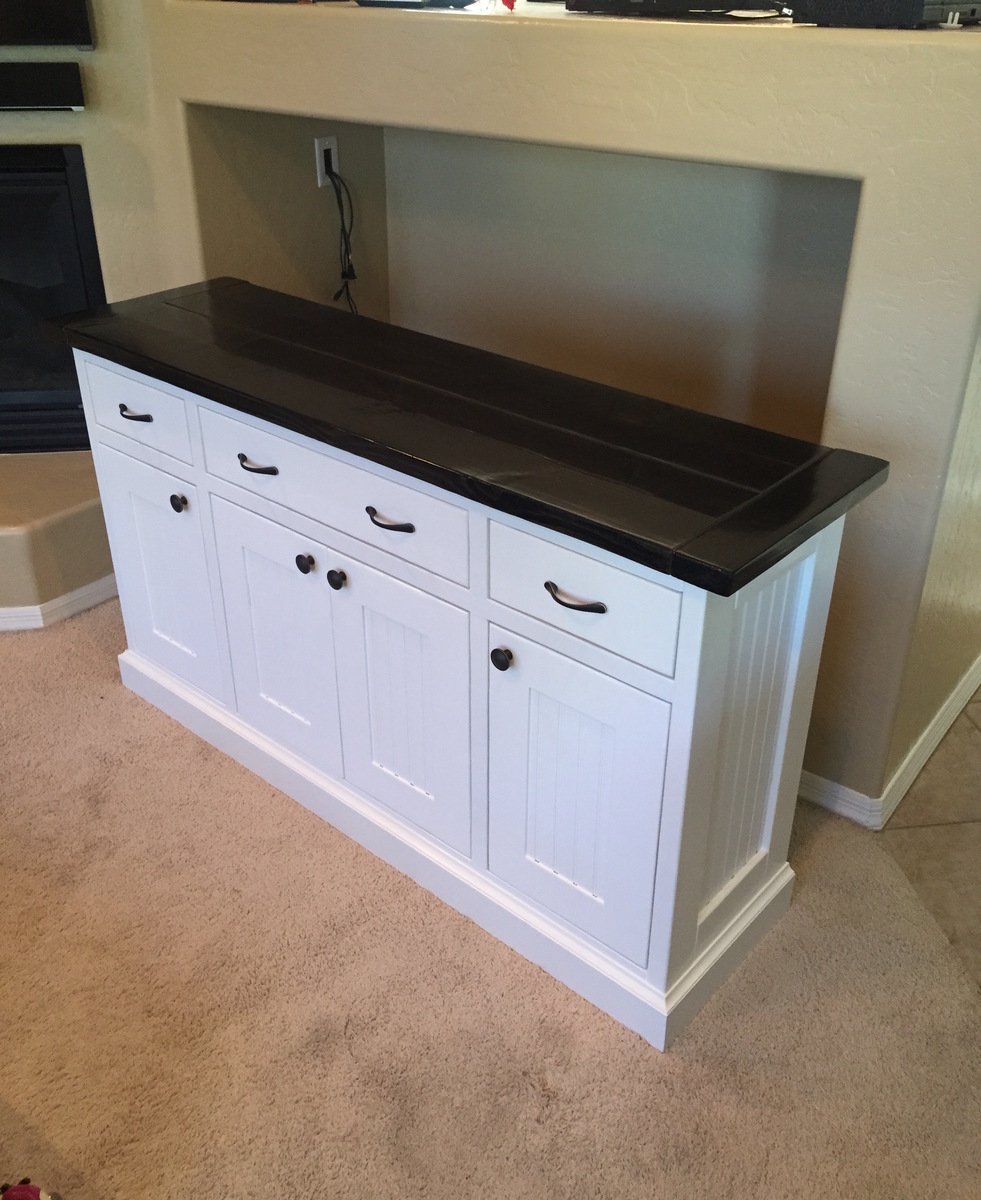
So many great plans on this website! I am constantly looking to Ana's website for inspiration for my next project around the house. The inspiration for this piece was that we needed something to fit an odd space in our home. Looking through the site we found the perfect fit. We based our design off Ana's planked wood sideboard table with a few minor changes. First since we wanted to do a two-tone finish, so I added an additional piece to the top of the face frame to keep the look symmetrical. I also used two 2x10's for the table top instead of what the plan called for and beadboard for the inset panel in the doors and sides. I decided to use tongue and groove construction for the sides of the table and for the doors. A technique for building inset doors that has worked for me is to build the doors to the exact size of your door opening and use the table saw to trim the tops and sides to fit as needed. This way I am to achieve a very uniform fit that can be difficult to obtain otherwise (unless you are a pro, which I am not!) I finished the inside of the sideboard table with satin polyurethane, the exterior base and doors with sprayed high gloss paint. The top was finished with min-wax ebony and 3 coats semi gloss polyurethane. Everyone in the family was very happy with how this turned out.

Fri, 06/26/2015 - 19:21
this looks really great. I love the two tone colors. a nice stain + white paint is my favorite combo :)
Wed, 08/19/2020 - 18:32
hi do you happen to have the dimensions and break down of how you made this particular one?

I used some of the measurements that I found on your site and downsized them to fit my needs. The table was a wedding gift for my granddaughter. She and her new husband were very pleased. Thanks for your help.
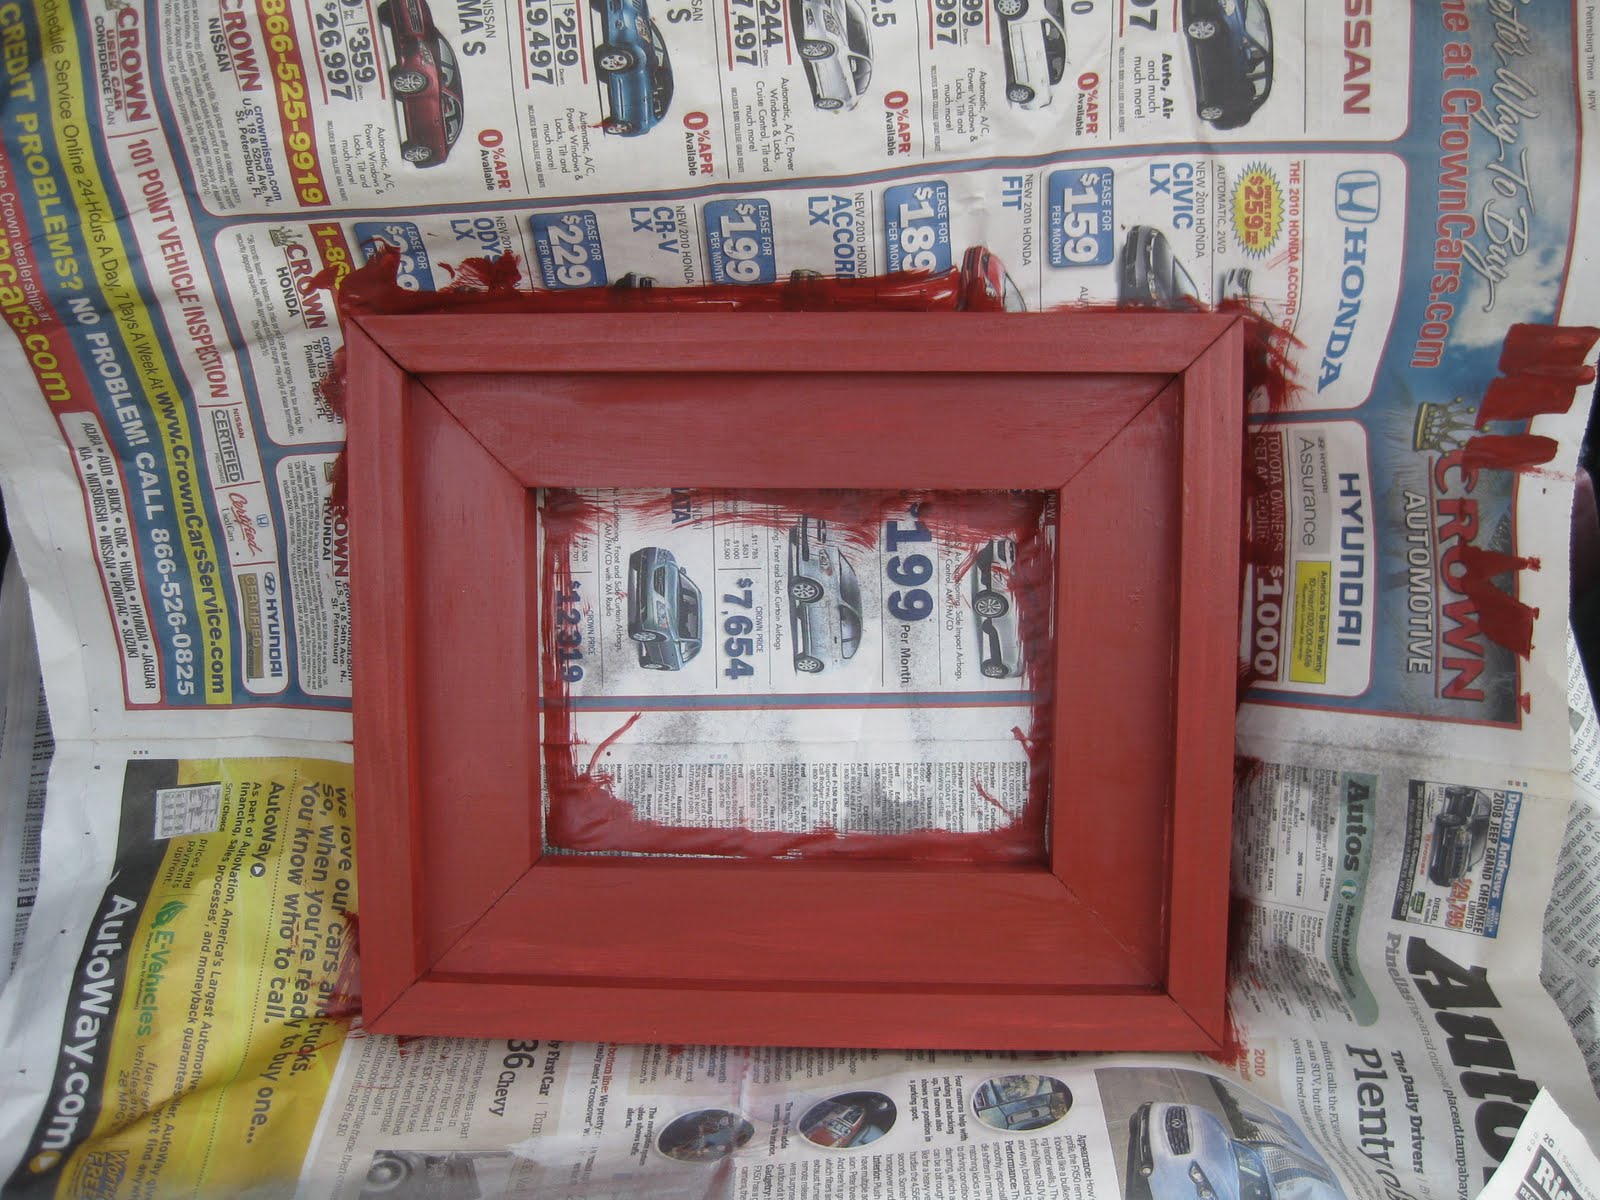
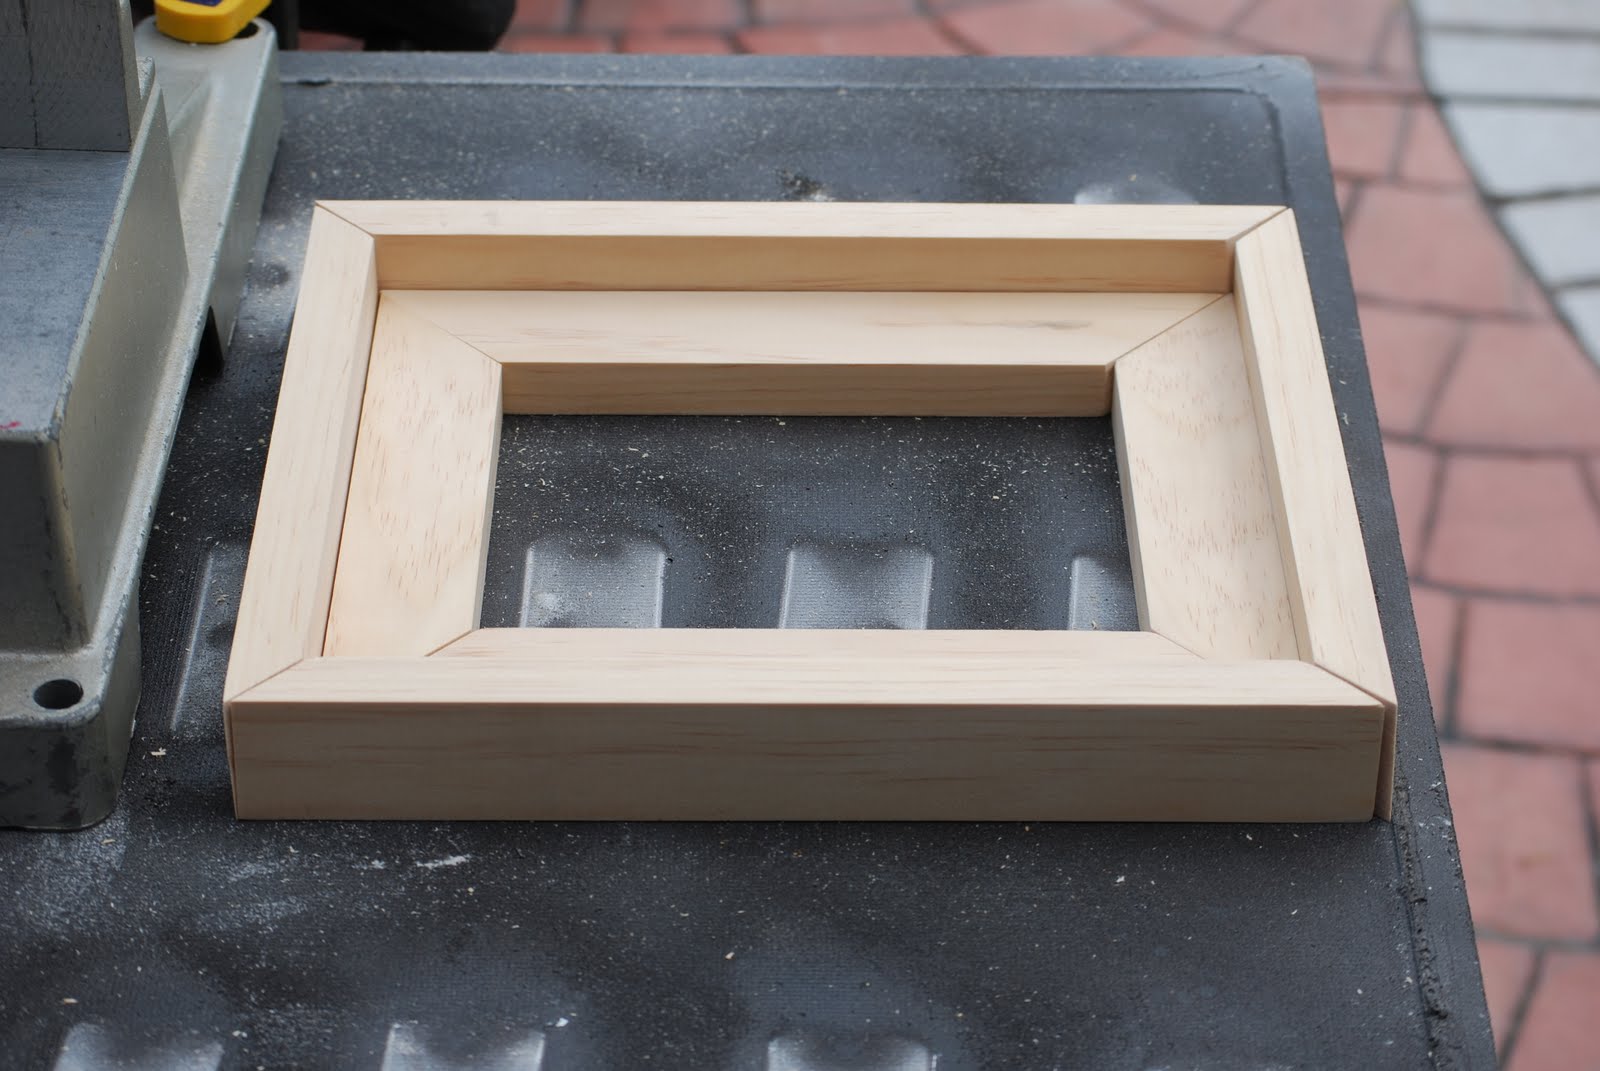
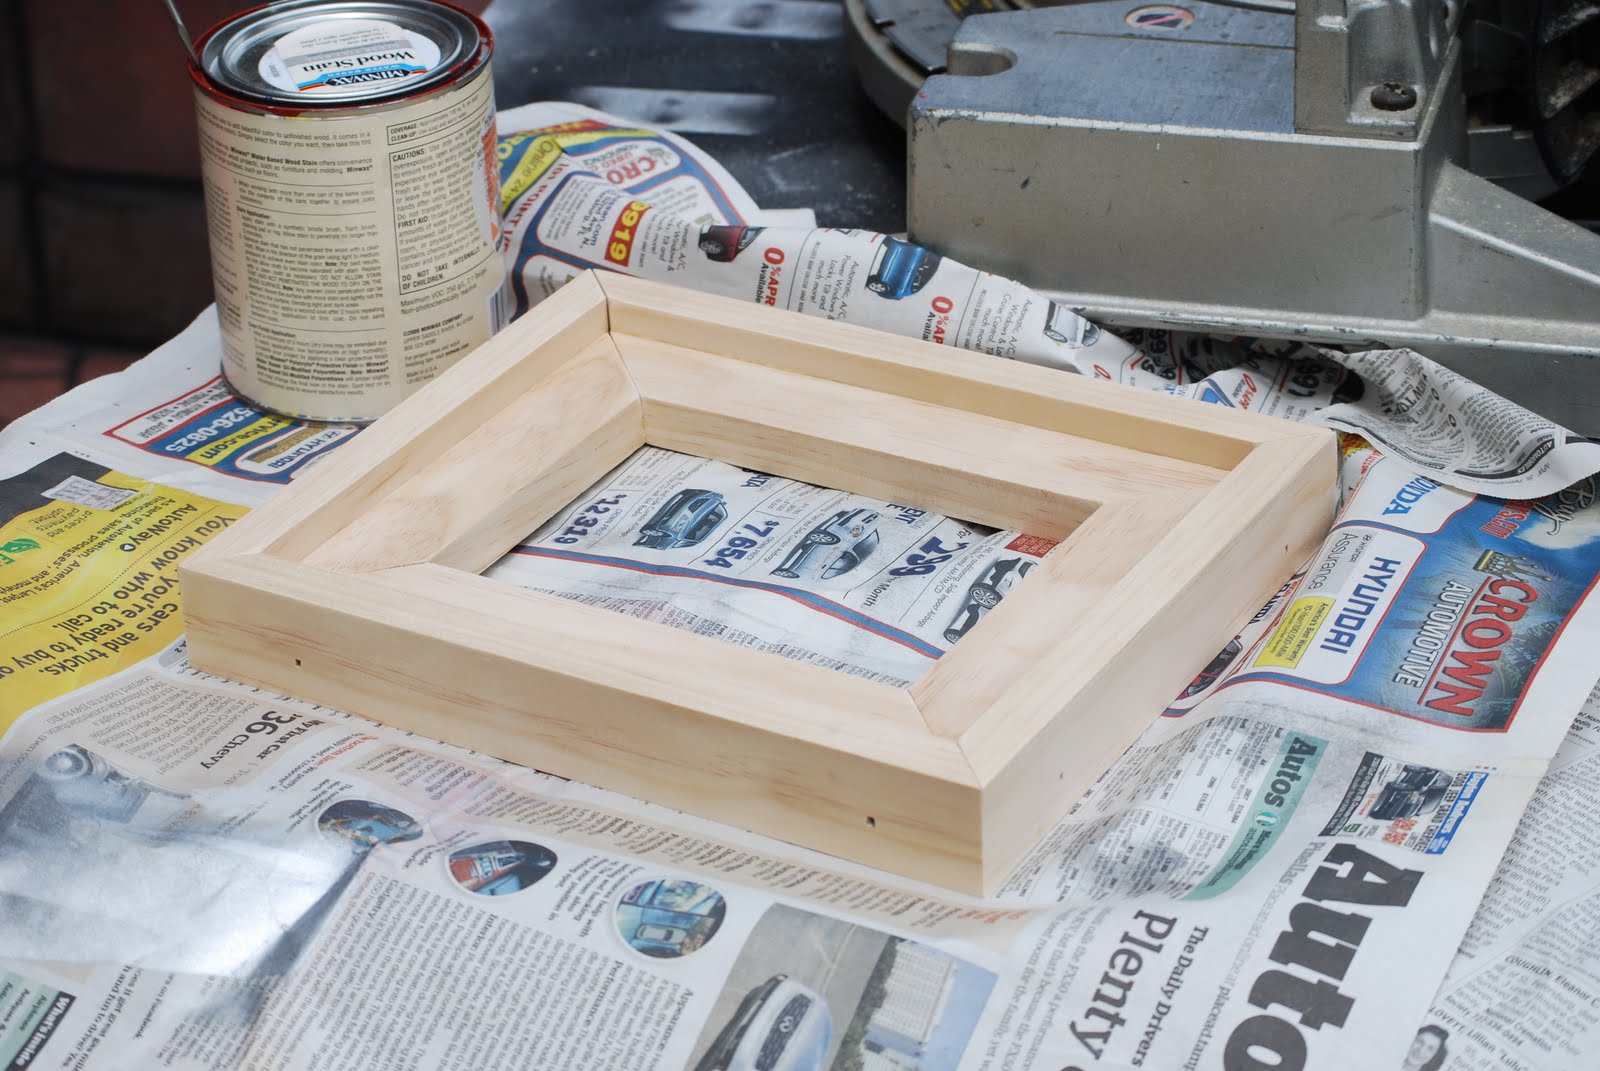
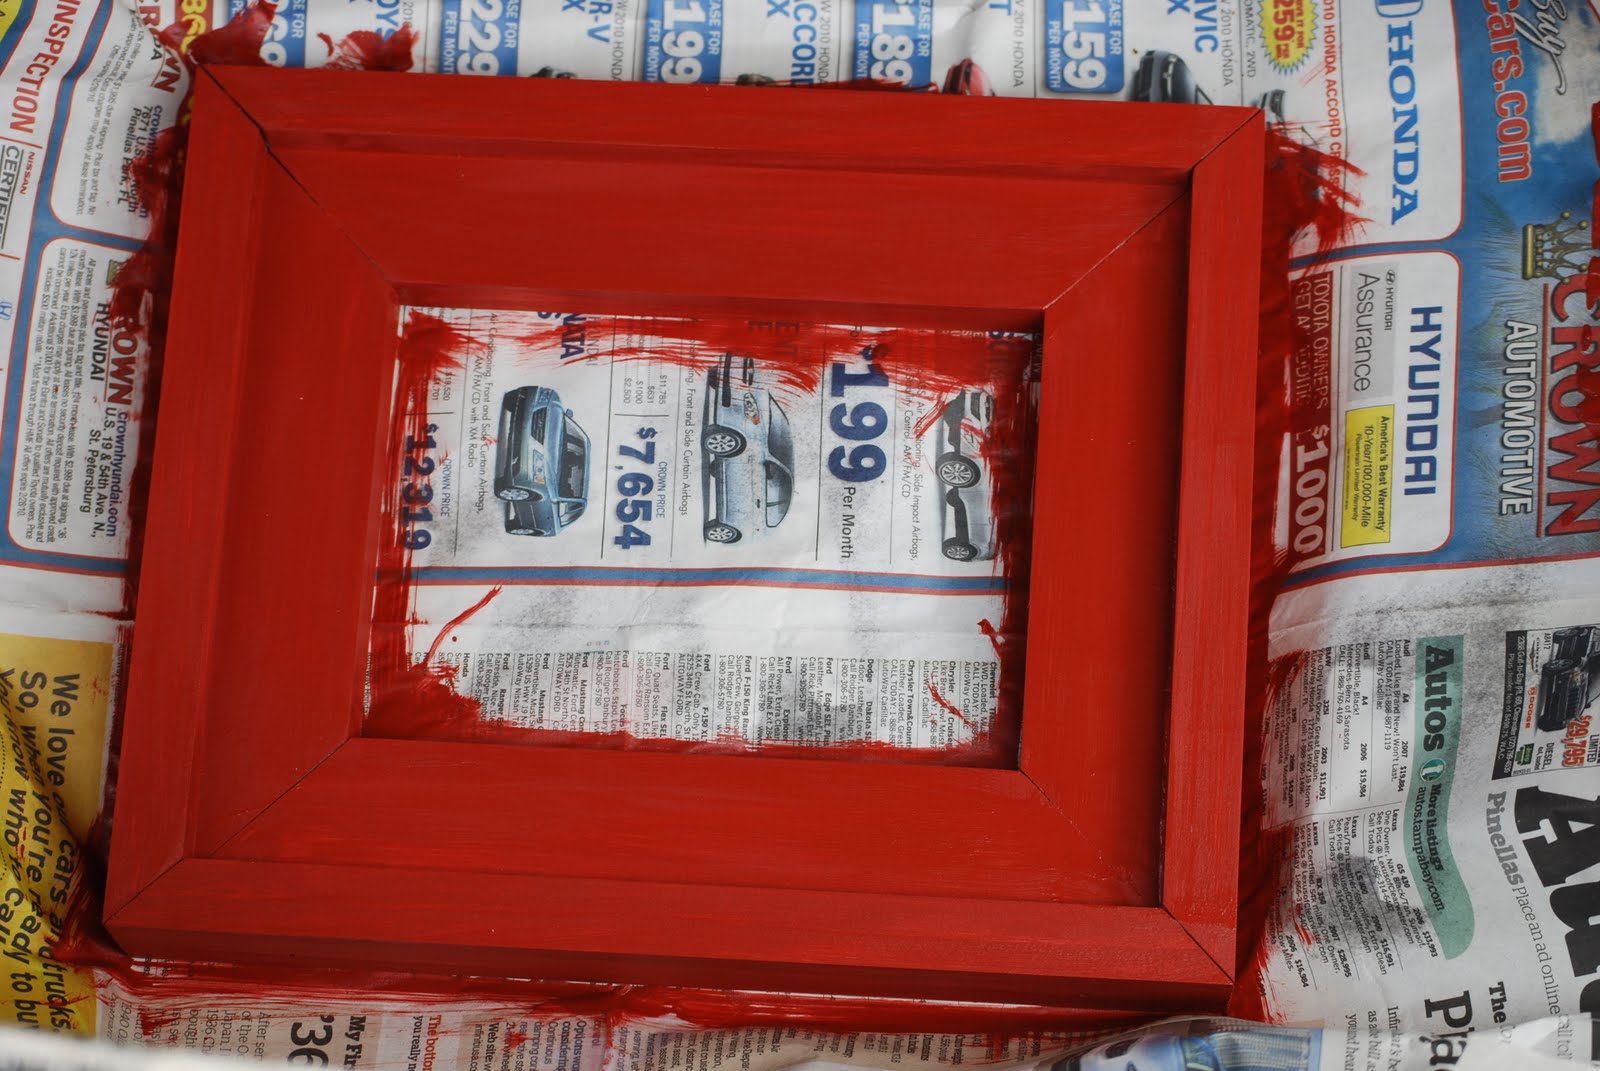
This was my first try at making a picture frame. I've used this same principle to make single framed picture frames numerous times since then. Thanks Ana! Such an easy build!

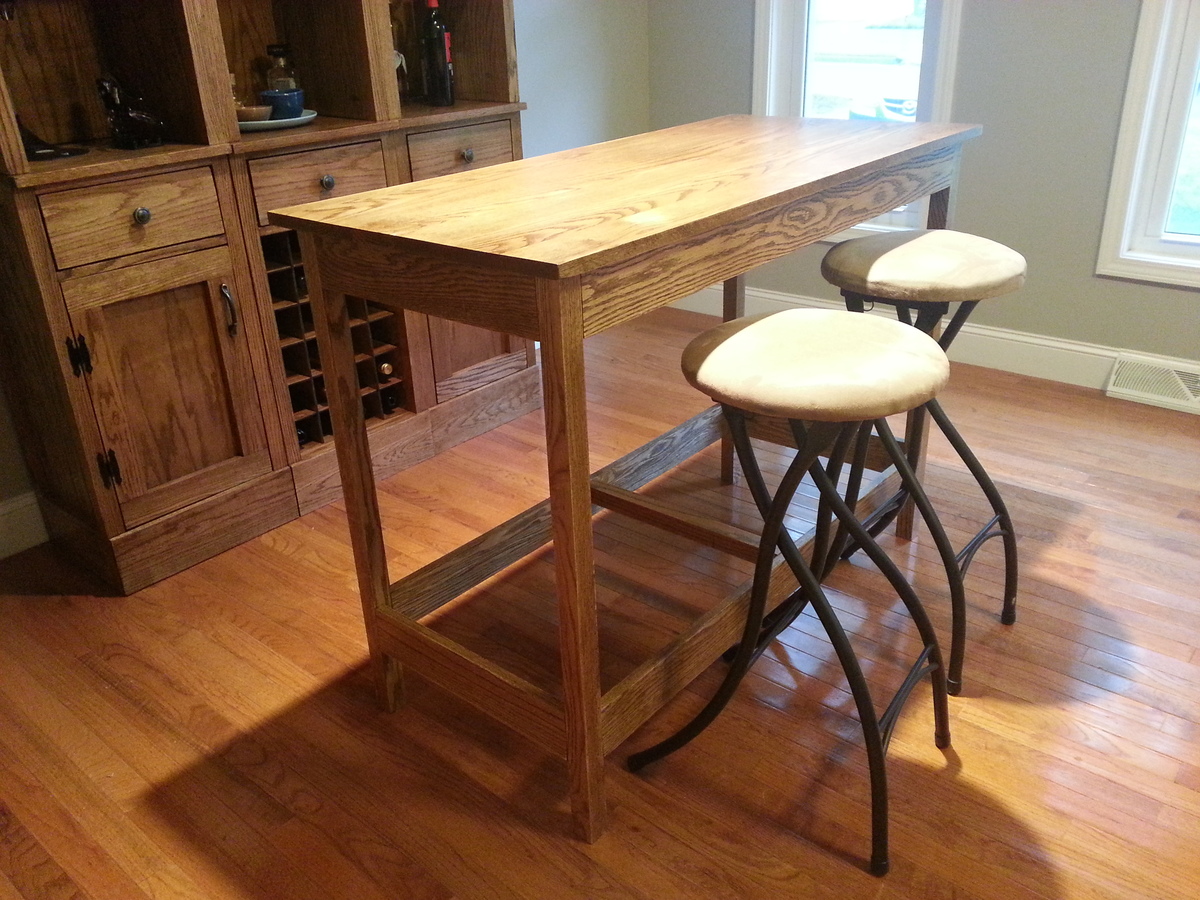
Second Project! Although the storage capacity of the Modular Bar is awesome, we needed a good workspace for pouring the drinks :)
I modified the "Simple Kitchen Island" plan a little:
1) Instead of using a 2'x4' project panel for the tabletop, I used the jig to put together two 1x12s, this made it a little bit narrower, but since I was staining I prefered the look of the edges of solid oak.
2) I didn't need the storage of the bottom shelf (and the dogs would get in anything I put there), however I knew people may put their feet on the bottom rails so I beefed them up to 1x4s instead of 1x2s and added a middle beam to stabilize them some.
3) I increased the total height some so we can pull the island up to our current 36" high dining room table to accomodated two extra people.

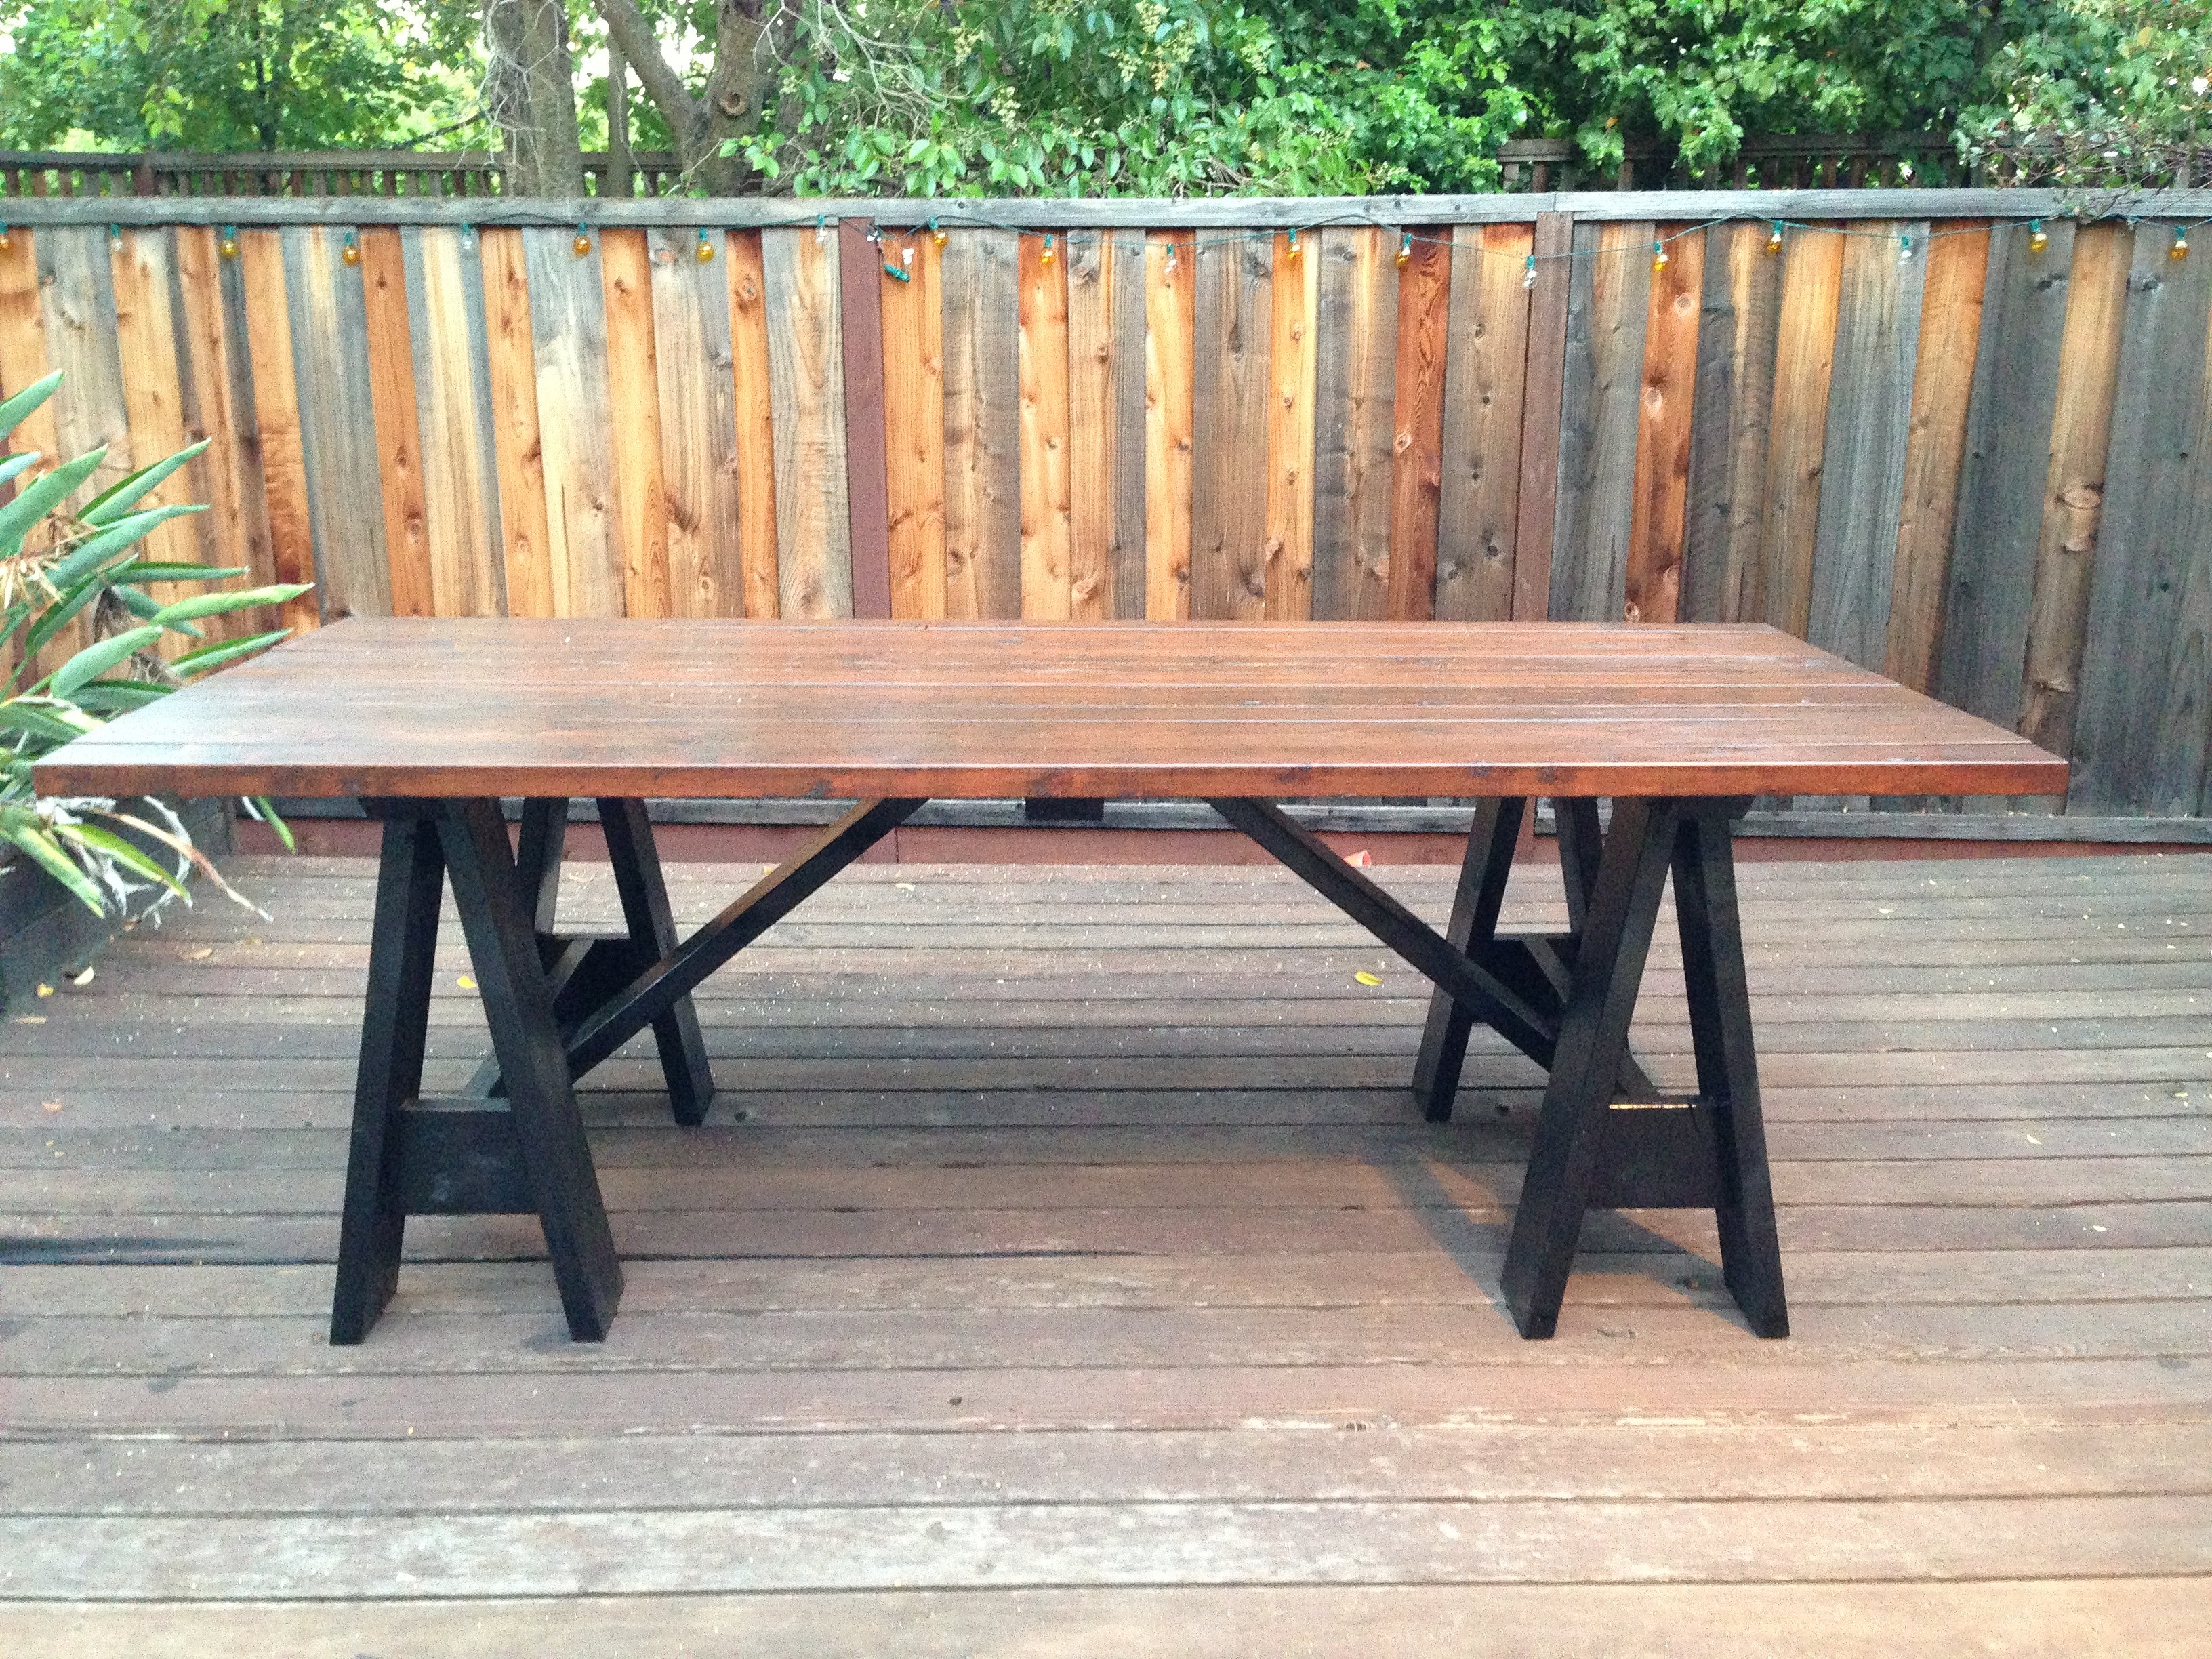
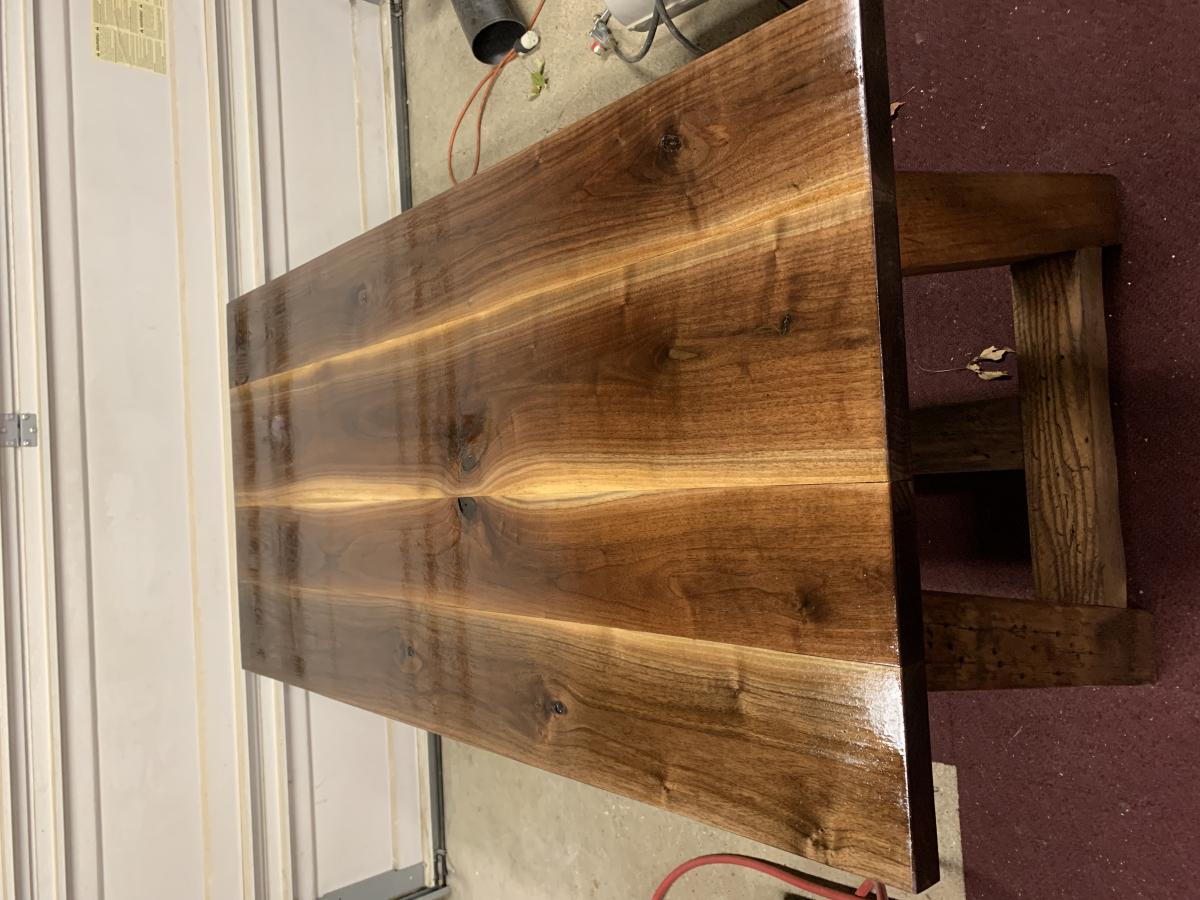
Country Table - dark walnut stain and satin polyurethane coat.

I saw your design for the queen and made the king for my wife. As you can see the mattress we have is not long enough because they are two small twins next to each other. We need a new mattress but it’s not in the budget yet.
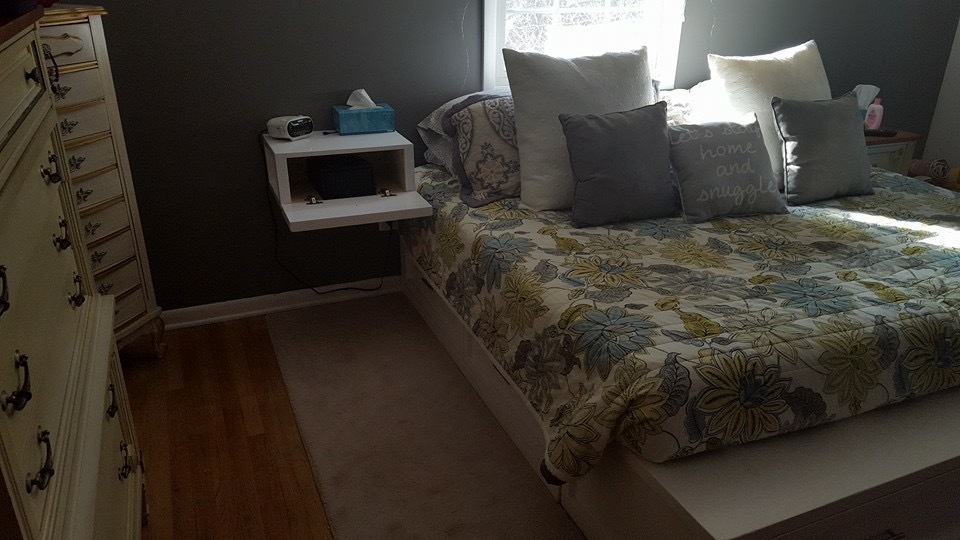
I also made some floating night stands of my own design to match so the drawers would still be able to open on the sides.

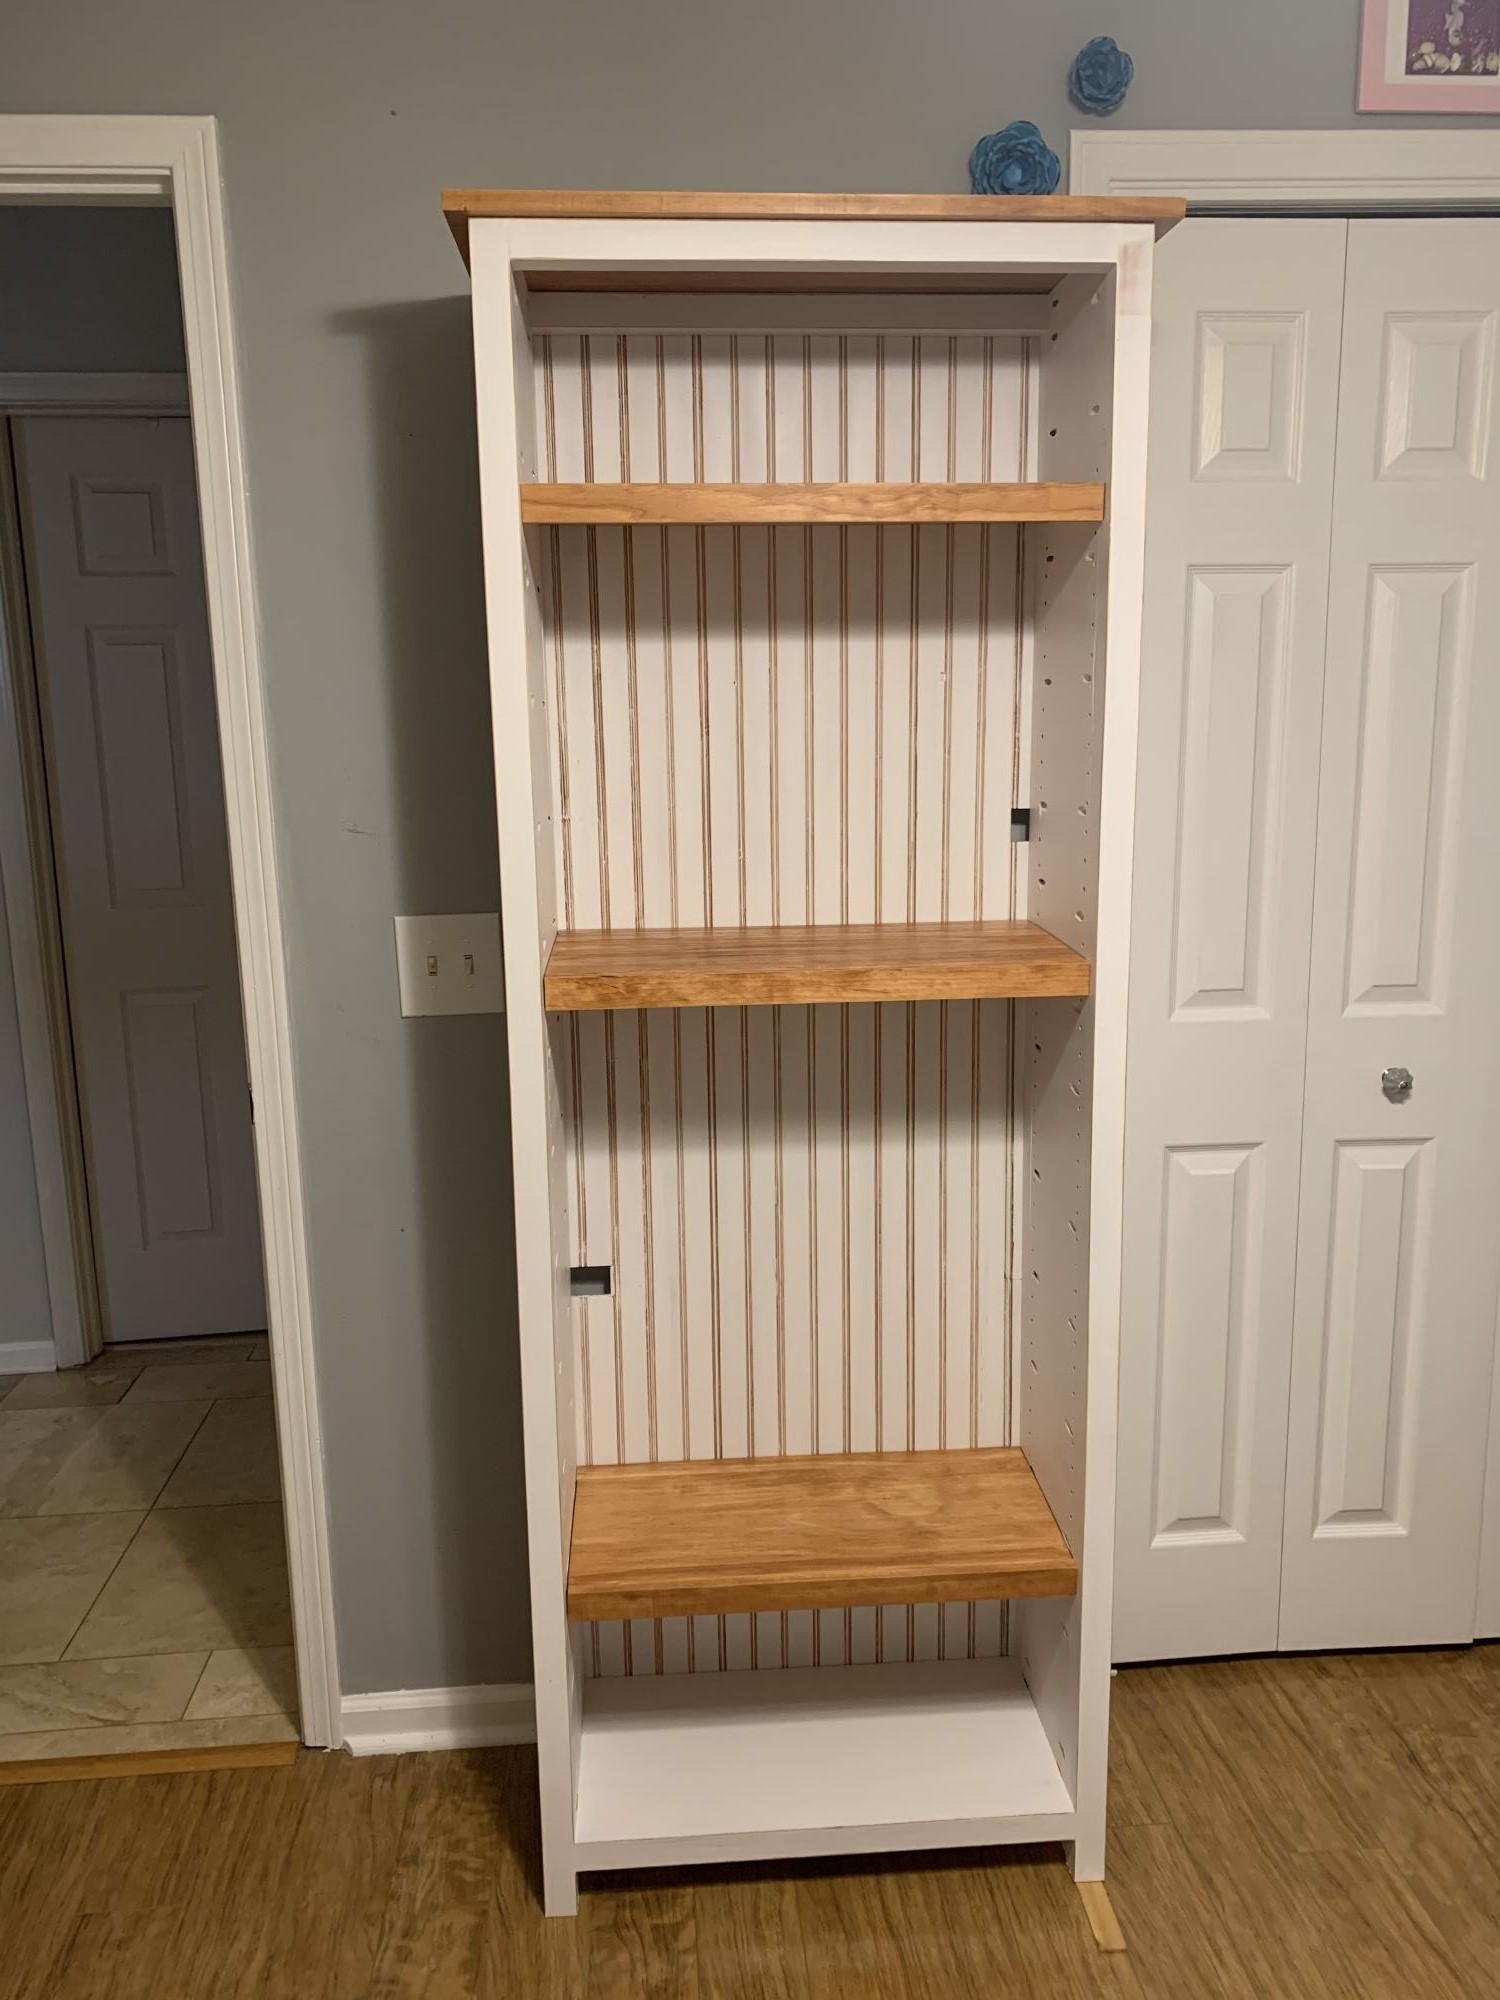
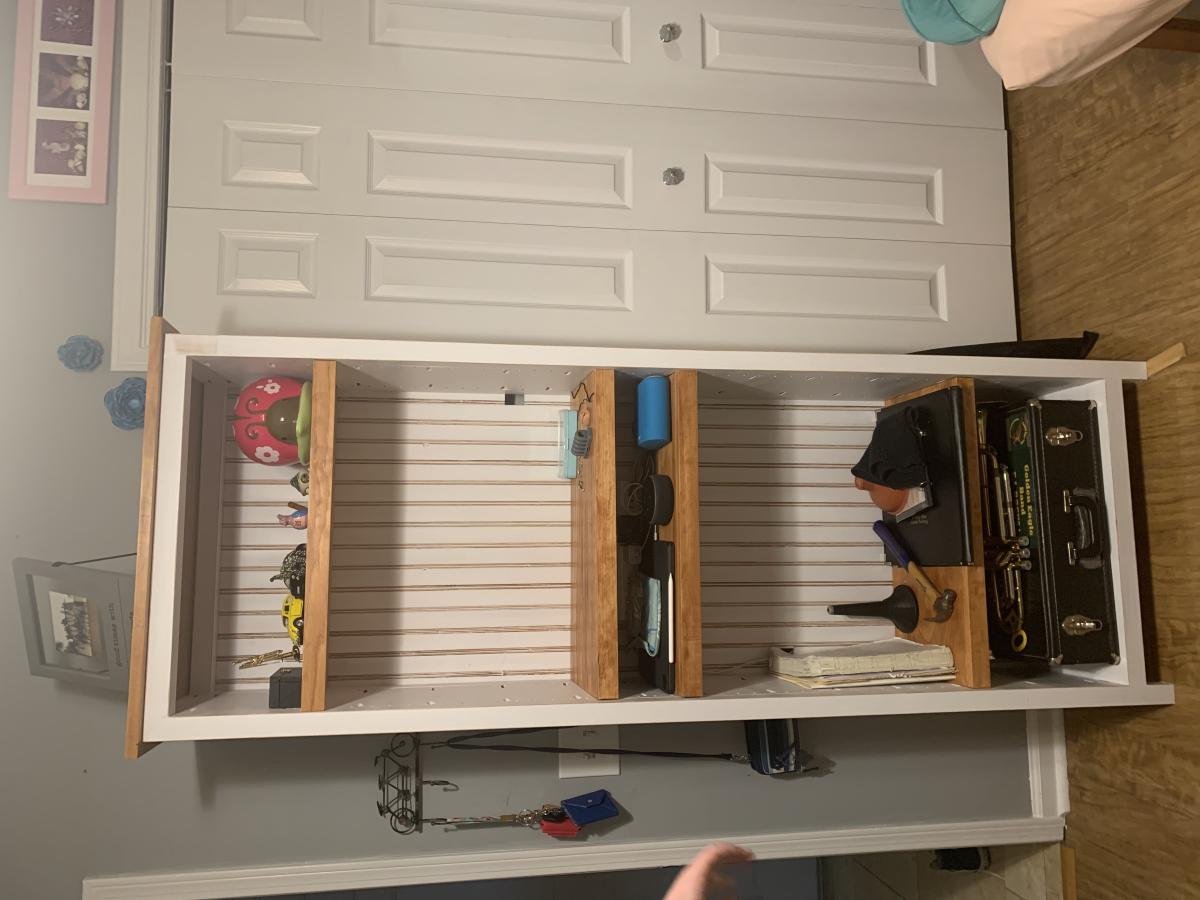
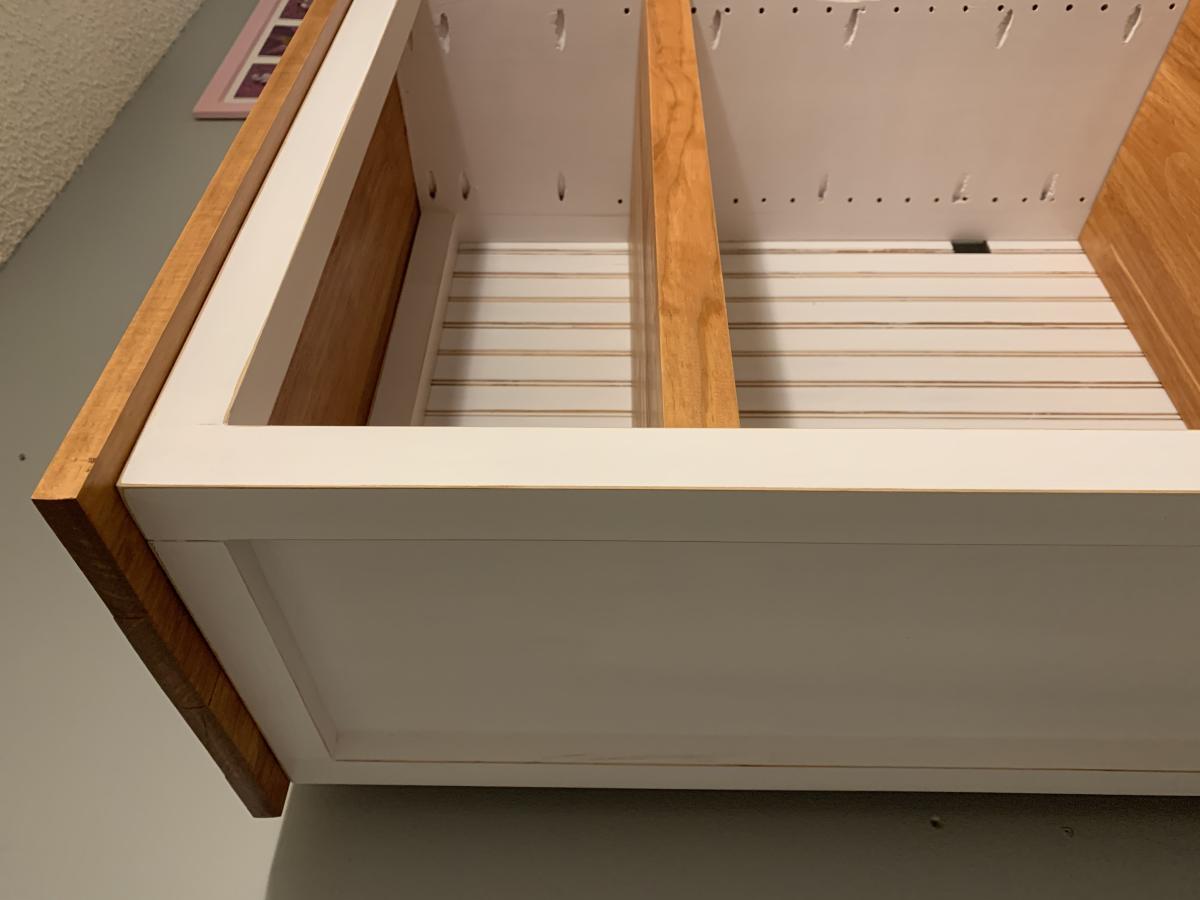
I used the Kentwood bookshelf plans and tweaked it to fit the space. My daughter loves it and is working on organizing her room. She is looking for the perfect mirror to put in the biggest shelf, and an earring jewelry box
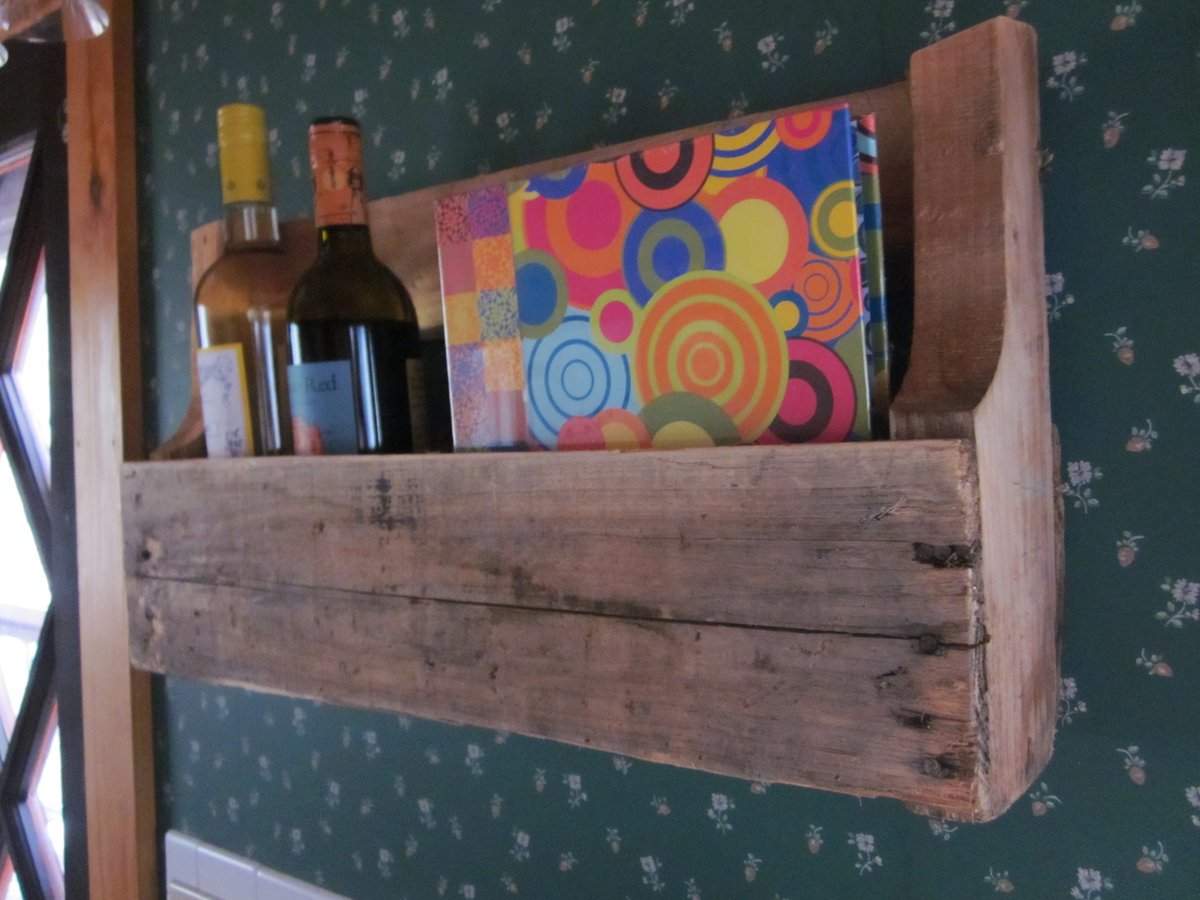
This was the easiest project EVER! And I love the look! The wall space I have for it wasn't long enough to accommodate the width of the whole pallet, so I cut it right after the center brace. Used another piece of the pallet for the bottom. Did a little sanding around the edges so it wasn't rough. That's it! Just wanted a shelf for a few bottles of wine and a cookbook. Voila!

This is my first hand made project using reclaimed wood. I always liked the look of the wood and black gas pipe together.
Hope you enjoy it


Tue, 07/09/2013 - 10:47
I love how you mixed reclaimed wood and black pipes, something I haven't even considered when building furniture yet. :)
This was my first attempt at making anything. Thank you to Ana for providing such easy plans and the encouragement to try something. I think I'm hooked!
Sun, 05/31/2020 - 13:21
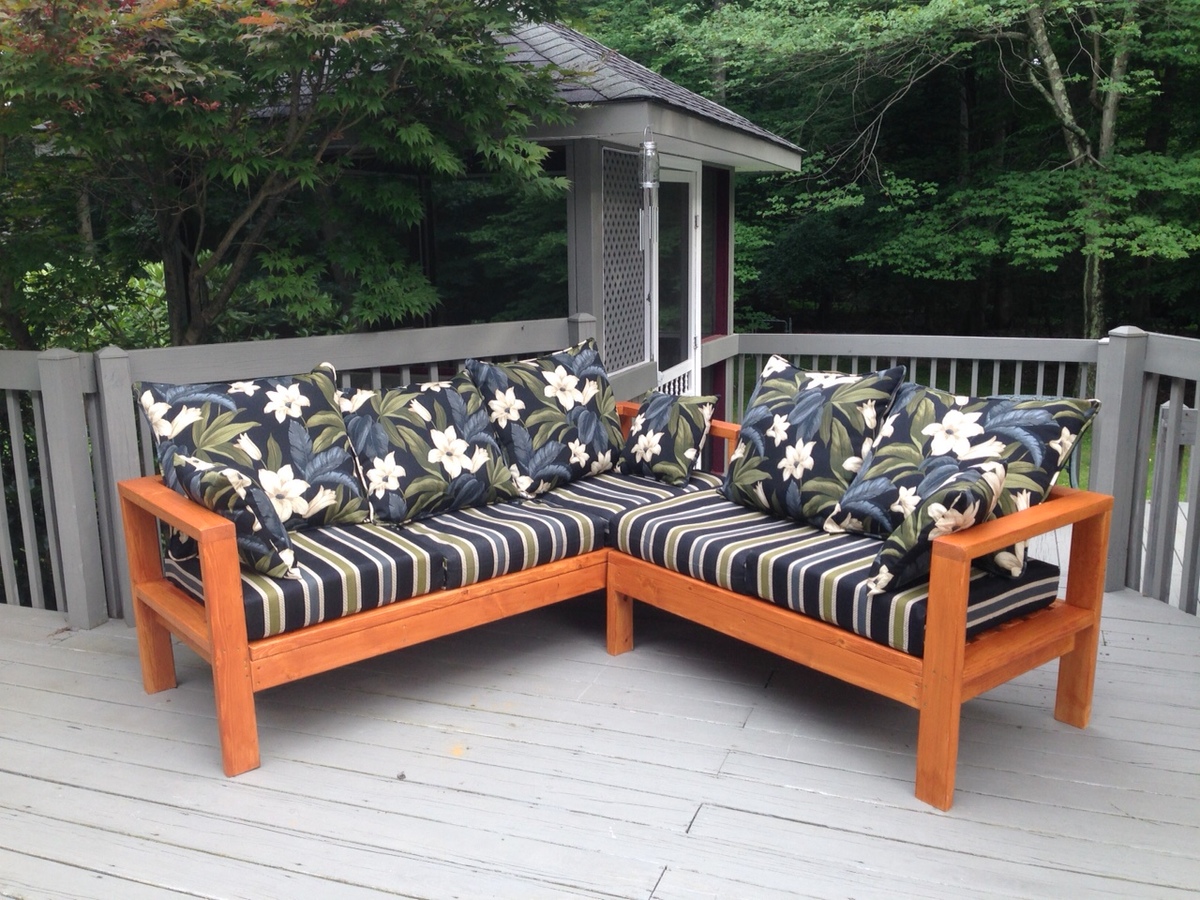
Beautiful! where did you get the cushions from?

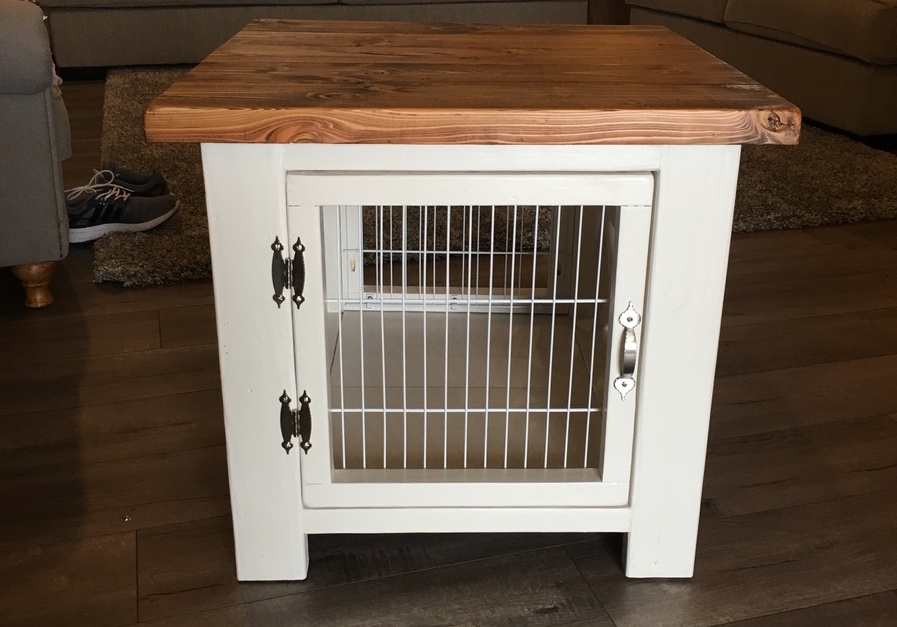
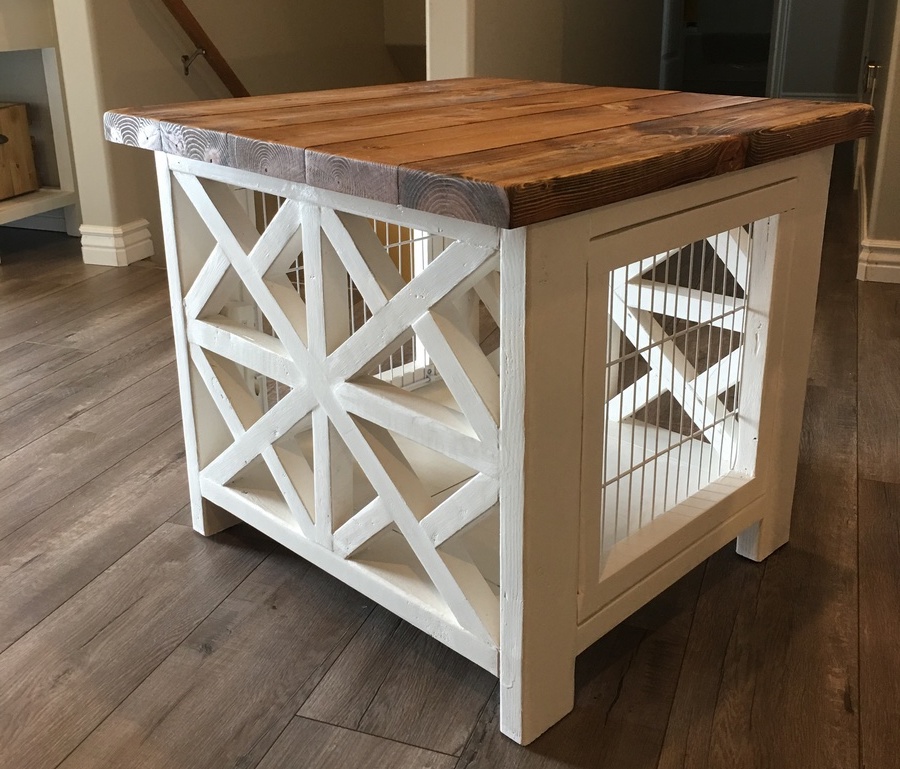
I was able to take the end table plan and modify it slightly to accommodate the kennal. I added the detail to the sides using a couple 2x2. The for door and rear I made a frame and then cut down some wire shelving. I think it turned out quite nice. Now the dog has a good place to sleep and I don’t have to have an ugly kennal in my great room.
Tue, 02/07/2023 - 13:55
Better than anything you could ever buy! Thank you for sharing, it looks awesome.

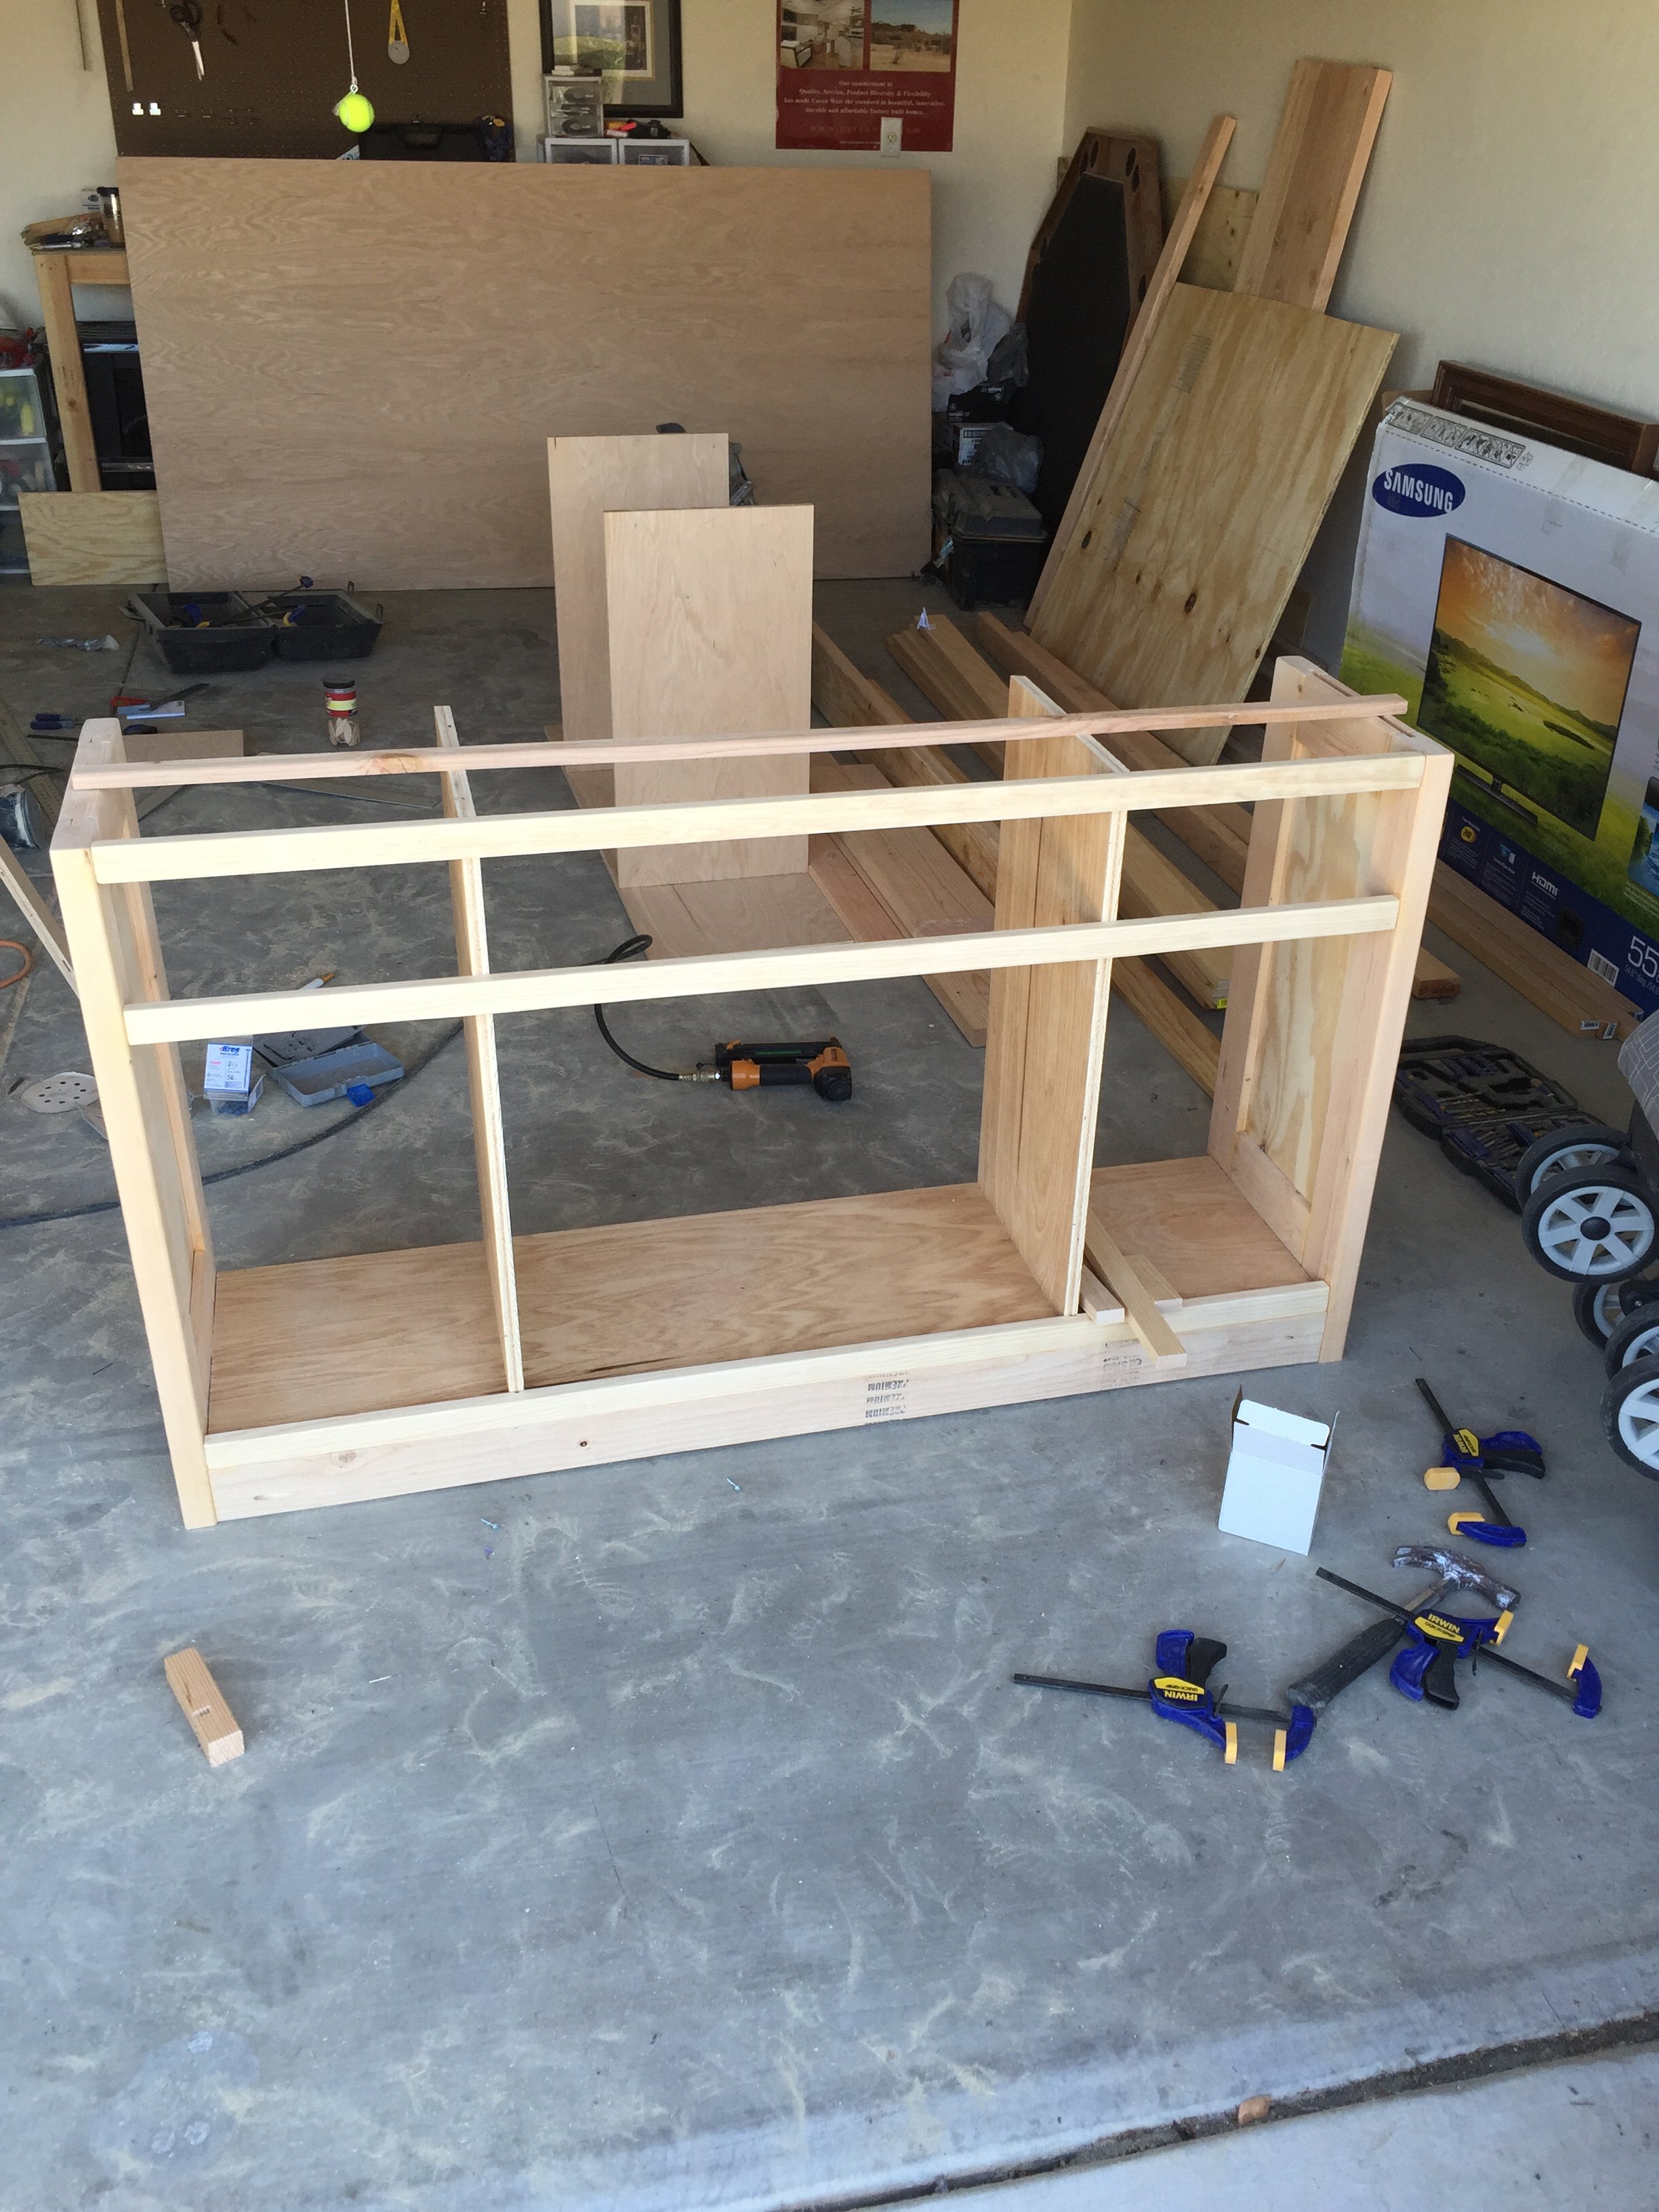
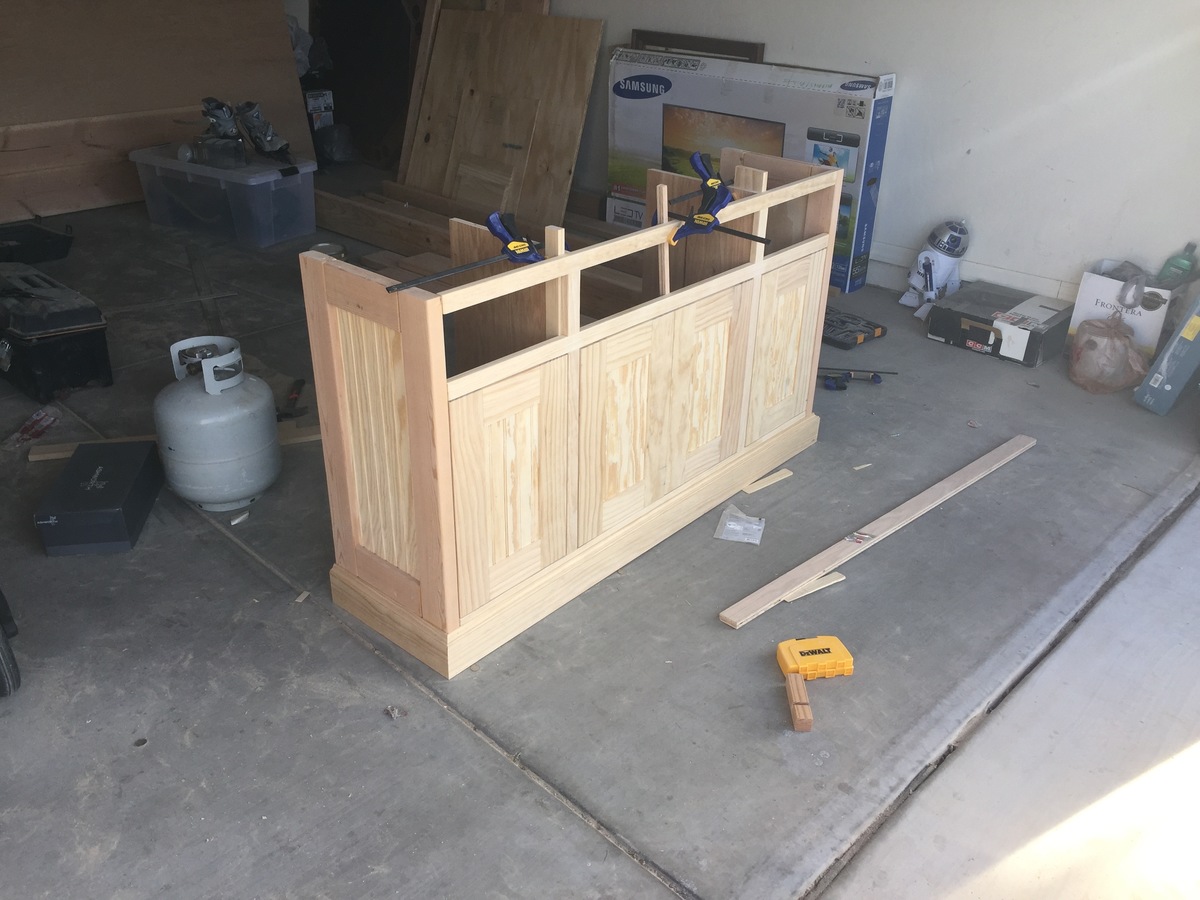
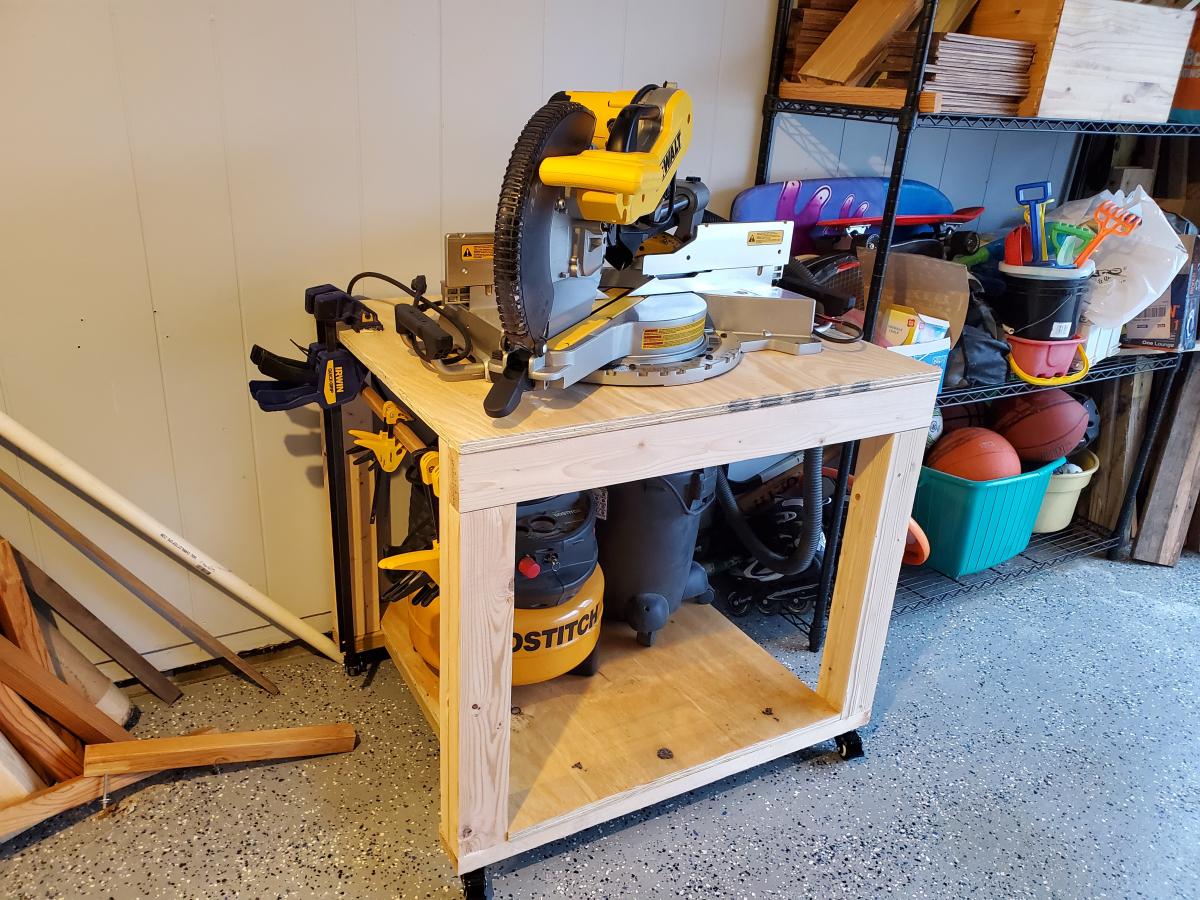
My fabulous husband bought me an awesome new miter saw for Christmas, and it is way too heavy to lug around! So my first project with the new saw was a workbench to mount it on! I added wheels so it can roll anywhere. I'm also very short and wanted to store a very tall shop vac on the lower shelf so I made modifications to accommodate that. I also made it 30" x 36" to make it just the right size for my saw. I will be using this piece as the center of other work tables I will build in the future!
I made a few modifications to the plans, but the overall simplistic design was what I was after. Thanks Ana!
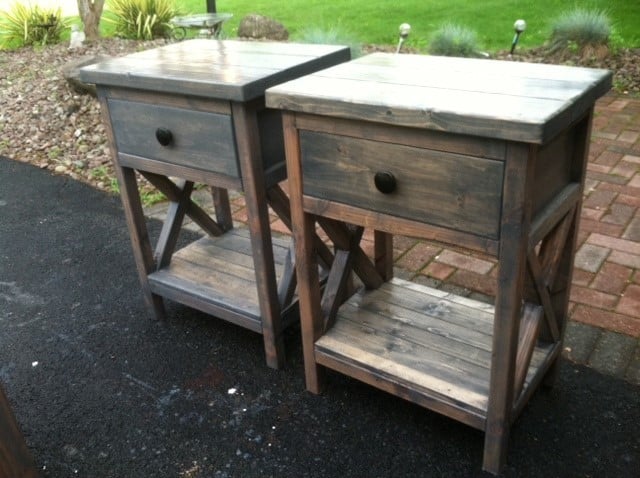
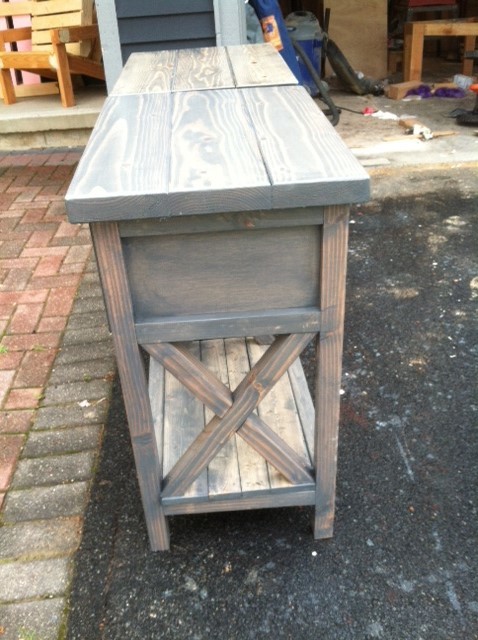
Used the simple nightstand from this site, and modified to add in the "X" on the sides. Finished in a Classic gray minwax to give reclaimed wood look.


Thu, 07/11/2013 - 19:32
Can you please post how you did this. I'm going to make my first project this weekend and I would like it to be this. I know it's based off the simple nightstand but can you give the details on the alters especially how to make the x? Thank you
Sat, 02/04/2017 - 13:39
Did she ever post her plans? If so, I can't find them! I prefer this design to Ana White's original, but I don't trust myself enough to try and wing it and make it look like hers. Did you end up making something similar?
Sun, 07/24/2016 - 12:38
I am very interested in building these nightstandss, could you post the plans, or where would I be able to locate the plans? Thank you!
Tue, 08/23/2016 - 05:30
Your nightstands are beautiful and I am working on creating my own! Did you keep with the original plans and use the 1x2 and 1x3's for the legs? Yours look thinner. Did you use 1x2's for the X sides?

In reply to Question about design by Oohlaladesigns
Tue, 08/23/2016 - 14:11
I didn't build this, but I feel pretty confident in telling you that the legs/x's are 2x2s.
I made this for my grandnephew and it was really easy to build. I put it together first using a power brad nailer and then went back and screwed it all together for extra strength. The cut/build took just a few hours. The painting took several hours since I didn't prepaint and had to tape off where the colors were different (lesson learned for next time).
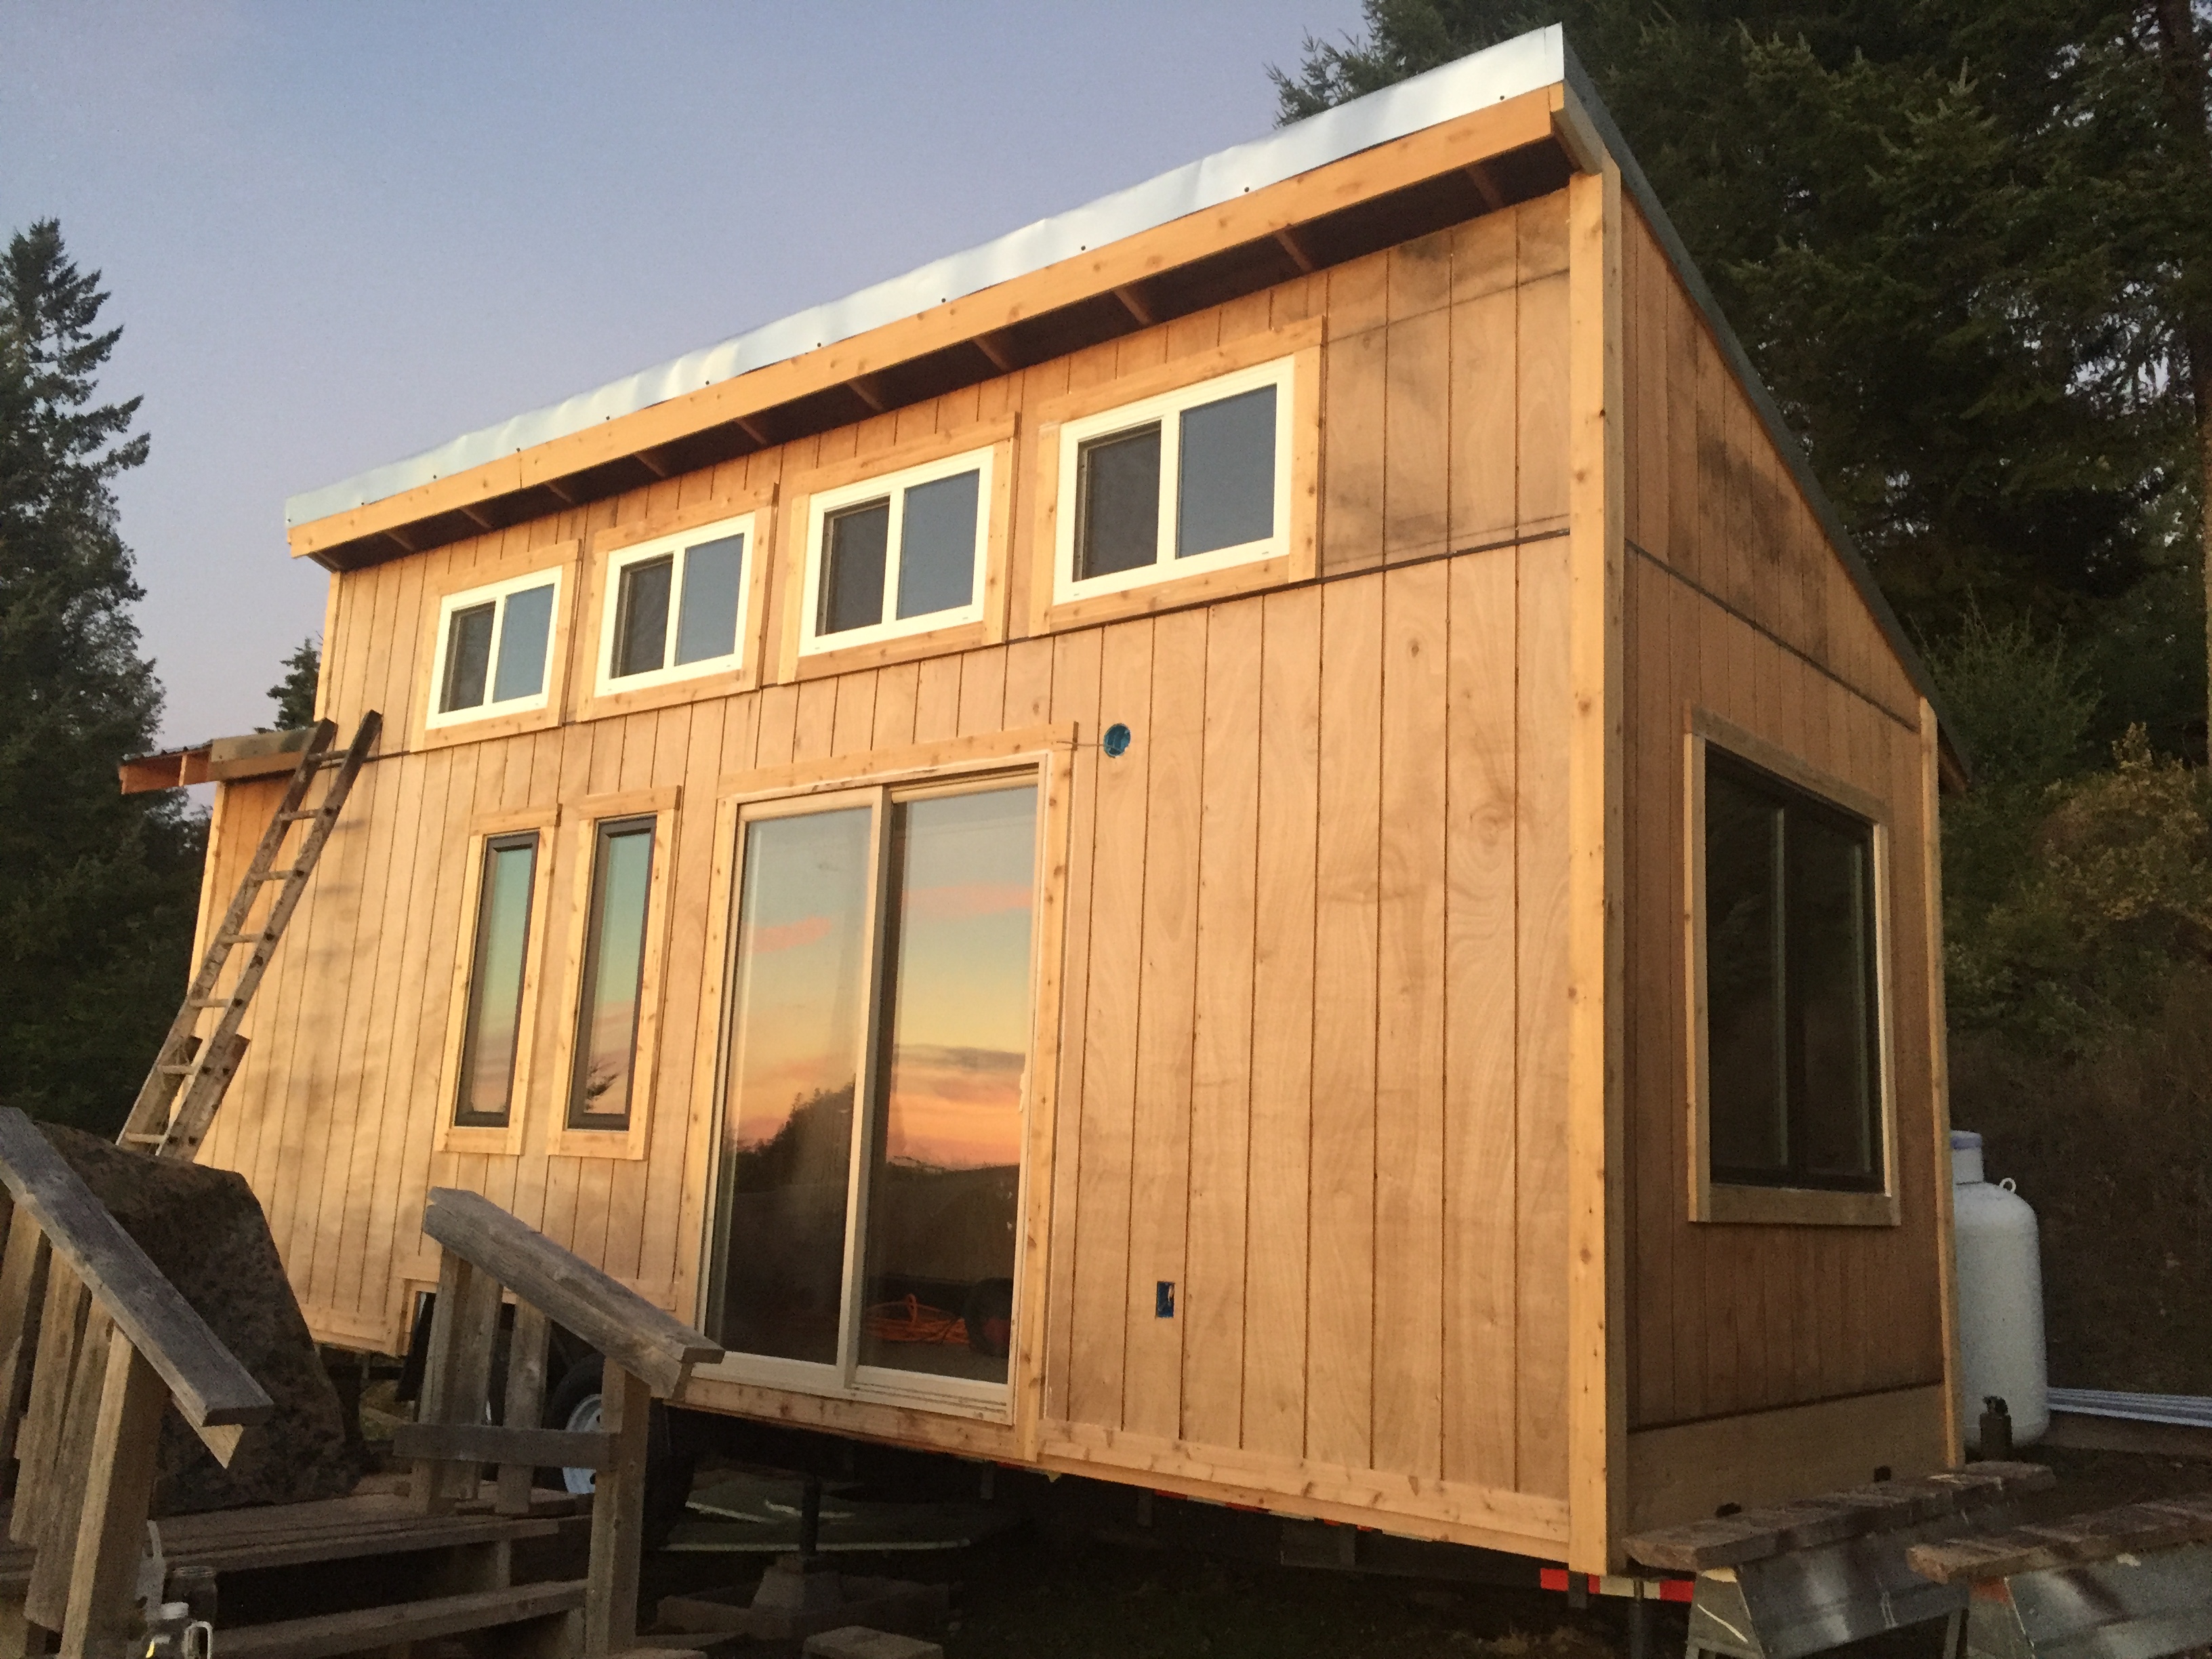
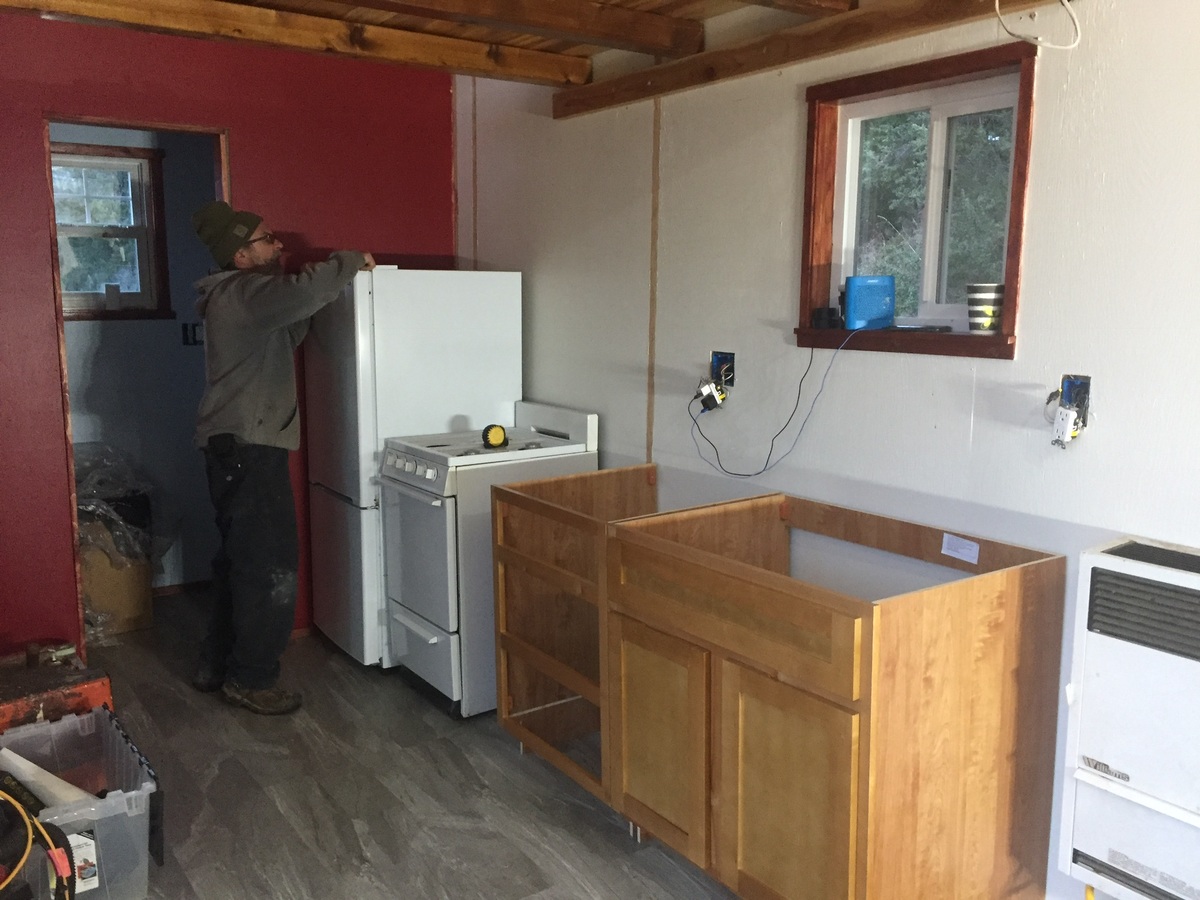
Ever since I saw the "wild rose" I knew it was the one I would build for my mom. I wanted a tiny house she would not have to climb a loft for her bedroom and still fit everything she would need. This is a brilliant layout! Many family, friends, and strangers donated money, time, appliances, and windows to get this house built. My husband and I have been finishing it up ourselves with some professional help in between since September and just put the appliances in today. Tomorrow the sink and counter-it's really happening, pinch me I'm dreaming! Thank you Ana & family, I can't imagine what kind of house my mom would have ended up with without your help. This was a really easy and fun build. Thank you so much!
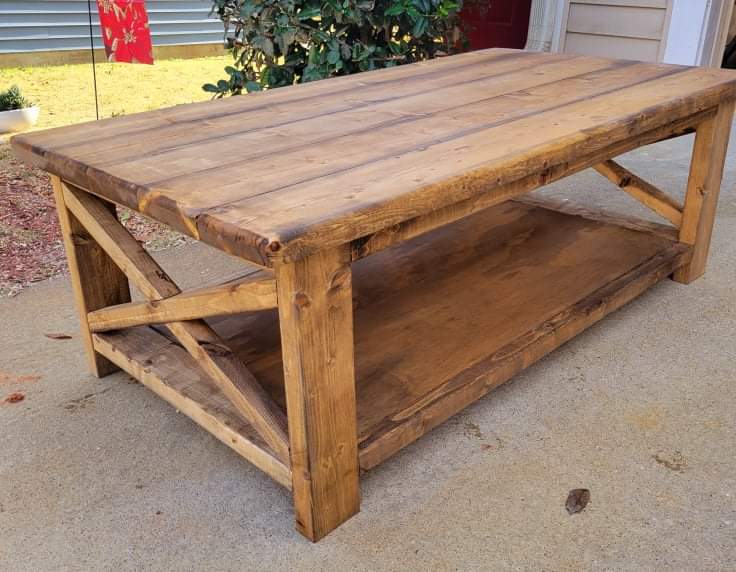
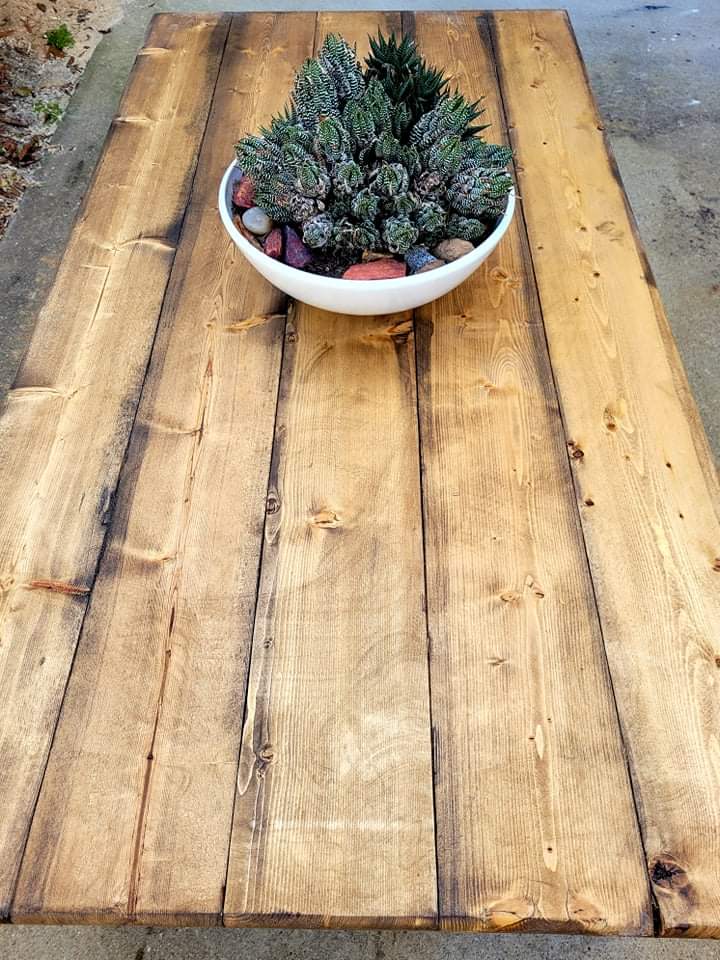
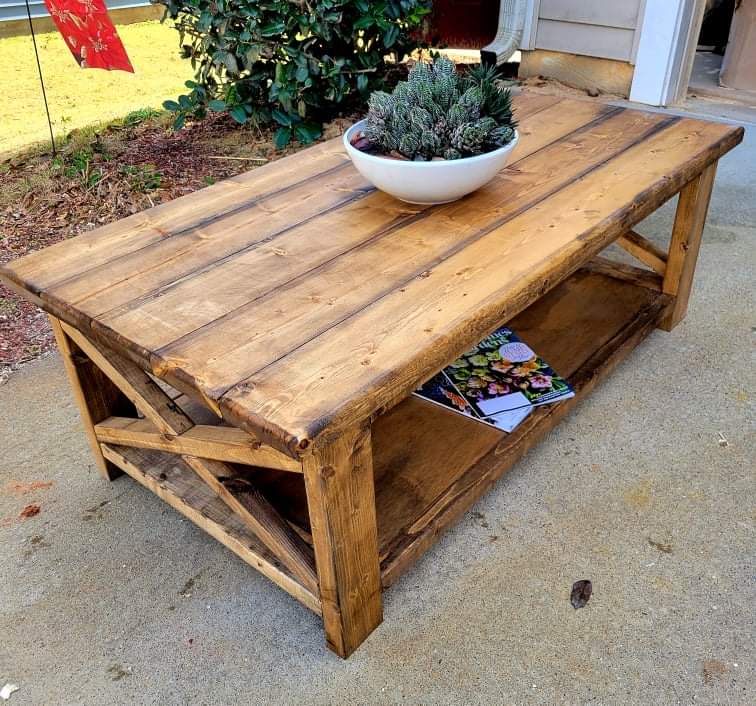
Had fun with this build. Love how large this table is. Gives me a place to put my feet up and there is still room for the kids to play with Legos. Lots of storage space underneath.
Finished with Varathane Golden Oak with Minwax Ebony lowlights.
Wed, 01/19/2022 - 12:29
Great job on the build and finish choice! Thanks for sharing:)

Comments
Ana White Admin
Mon, 12/27/2021 - 22:22
Great first build!
Way to go, that looks amazing! Can't wait to see your next project:)