Community Brag Posts
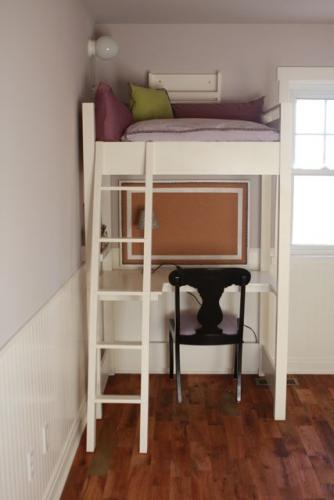
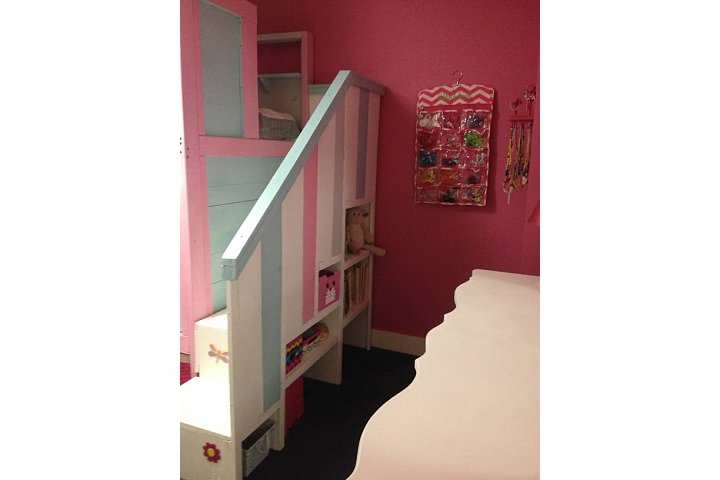
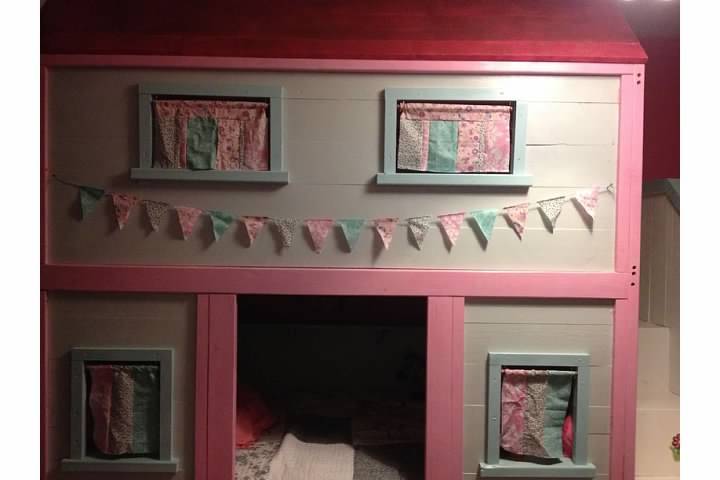
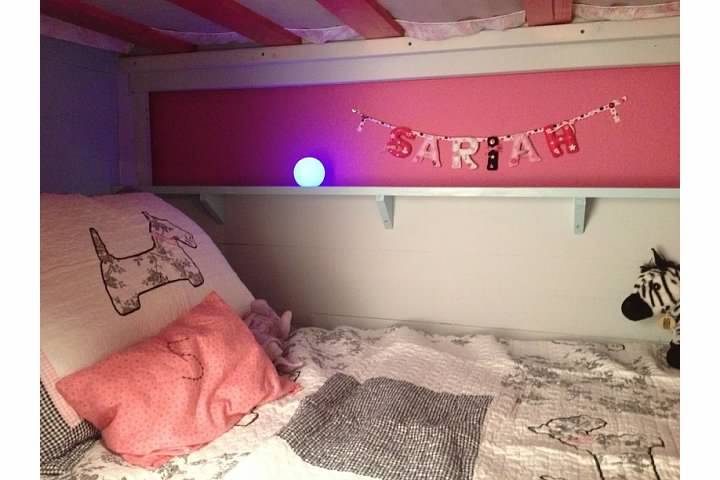
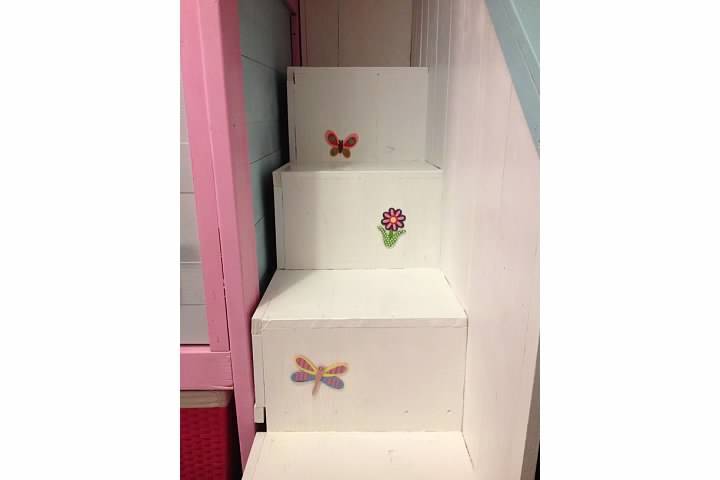
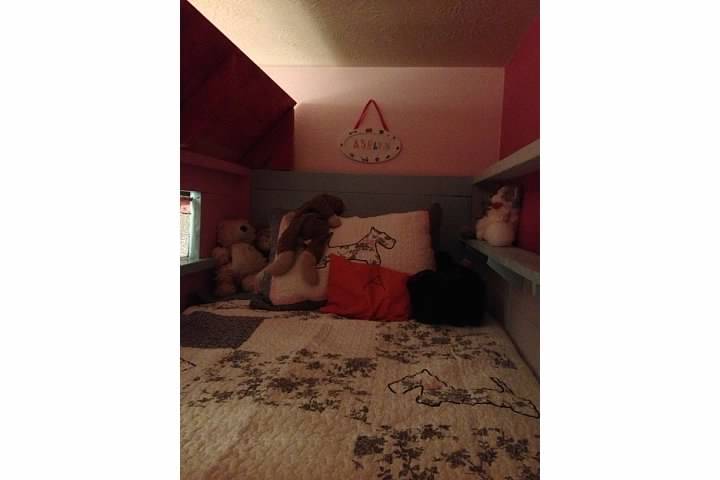
Kid-sized reading loft and desk
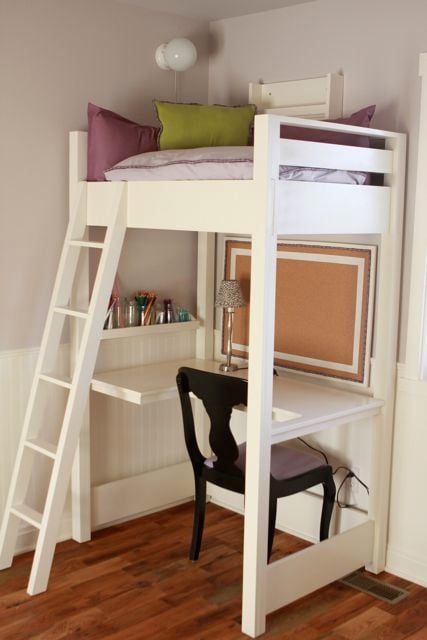
This project is a modified version of Ana's loft bed. We shortened it and made it a bit more narrow to fit our space and because we only needed a place for our eight year old daughter to read and work, not a place to sleep. We also added a desk to the bottom, making it a full-service work station for our elementary school girl!
Built from Plan(s)
Estimated Cost
$125
Estimated Time Investment
Week Long Project (20 Hours or More)
Finish Used
Sherwin-Williams ProClassic white followed by Minwax Polycrylic.
Recommended Skill Level
Intermediate
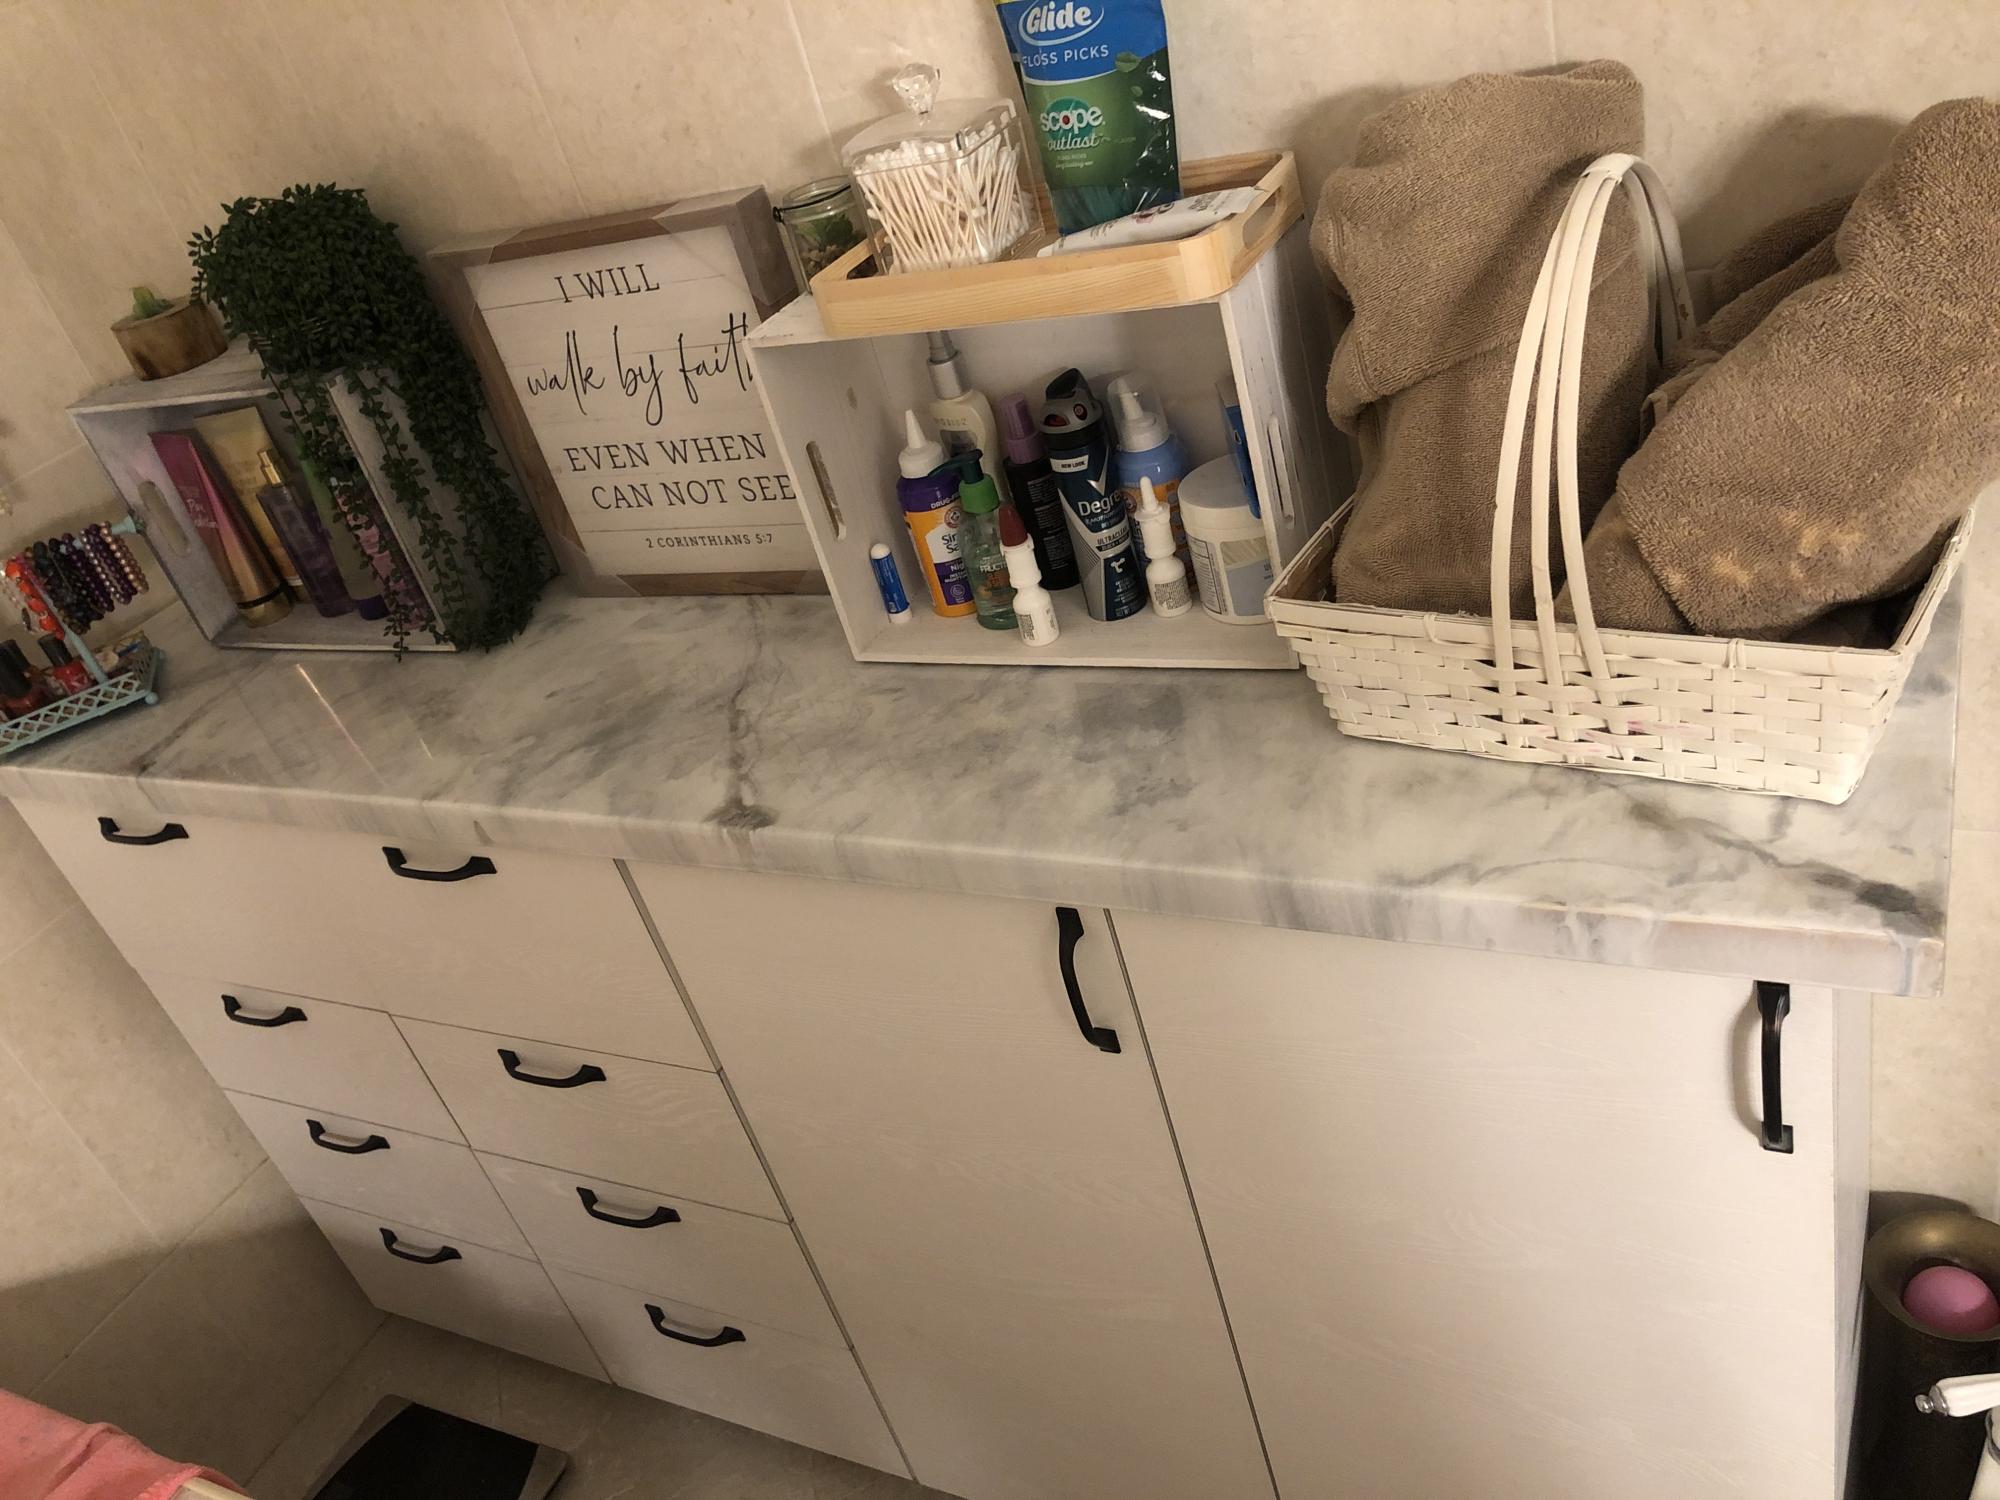
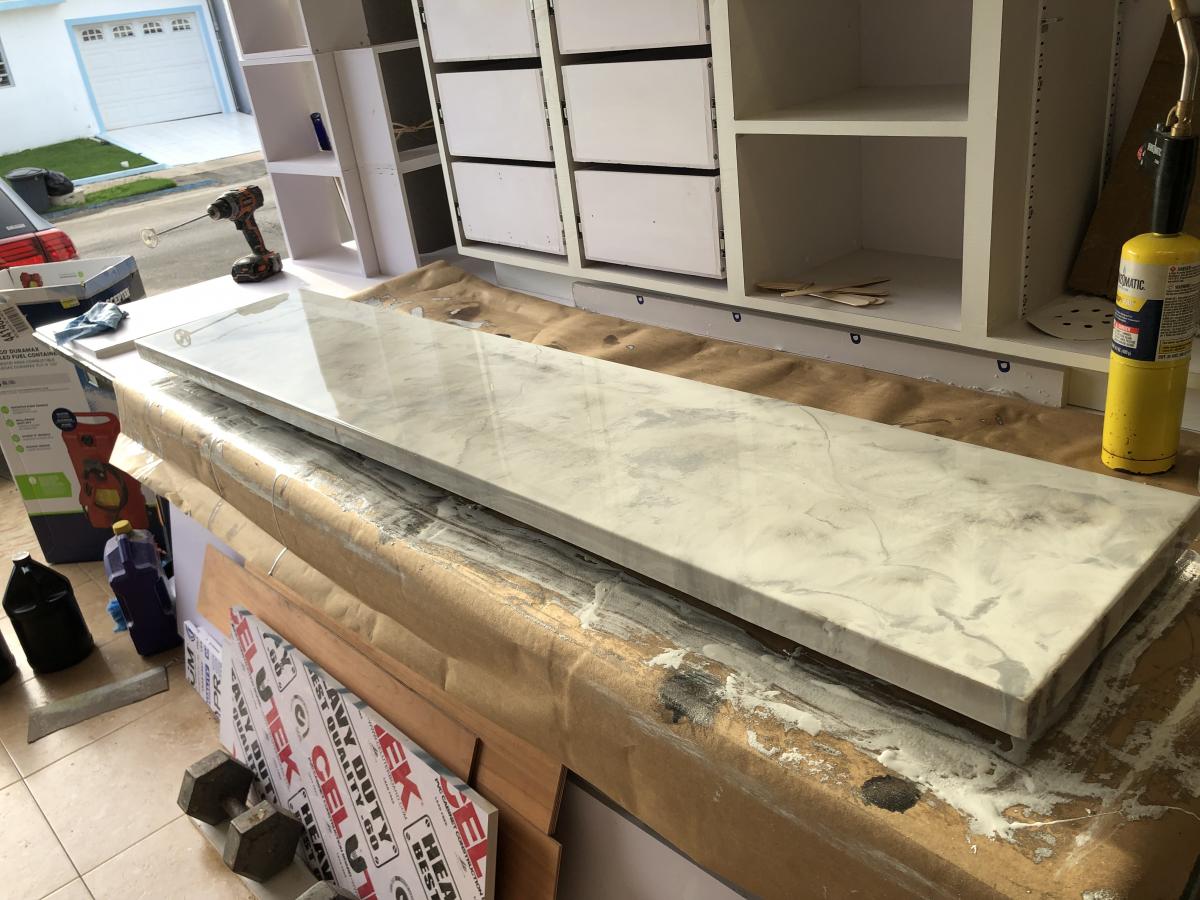
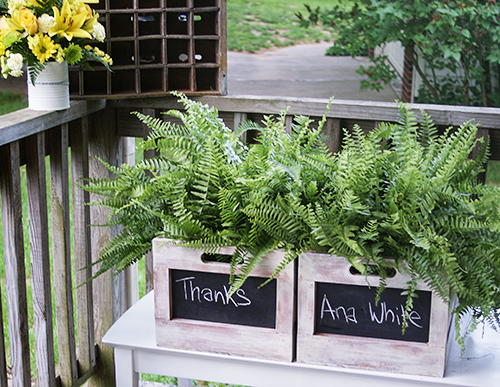
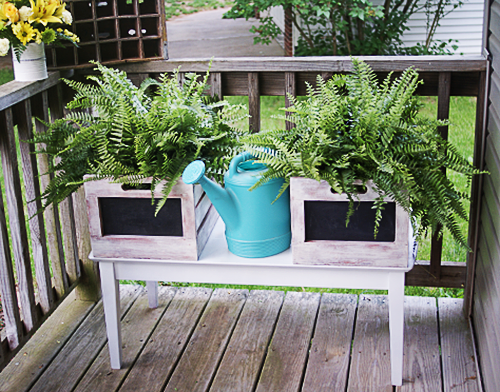
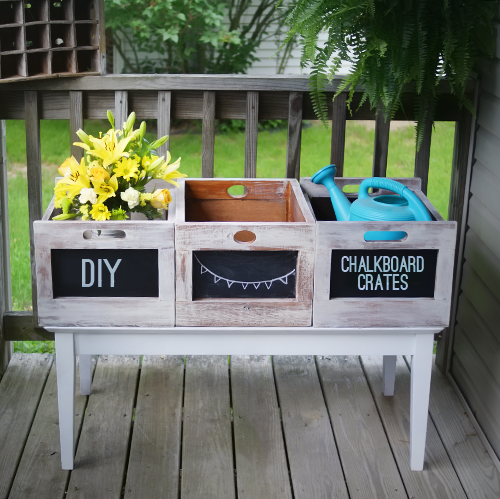
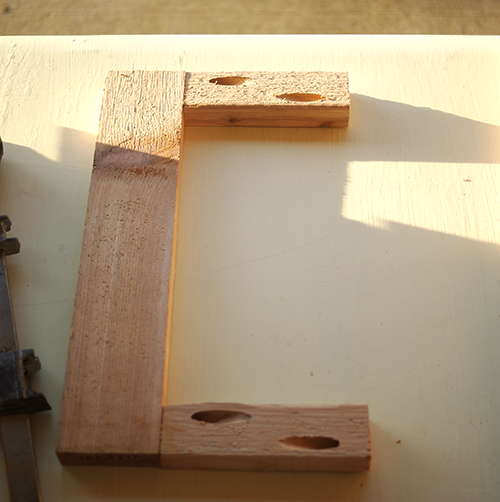
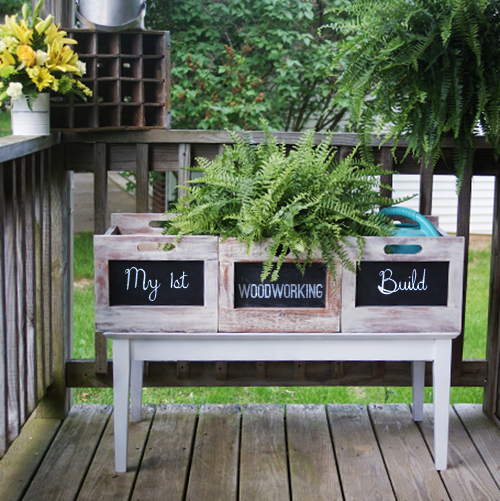
Chalkboard Crate Planters
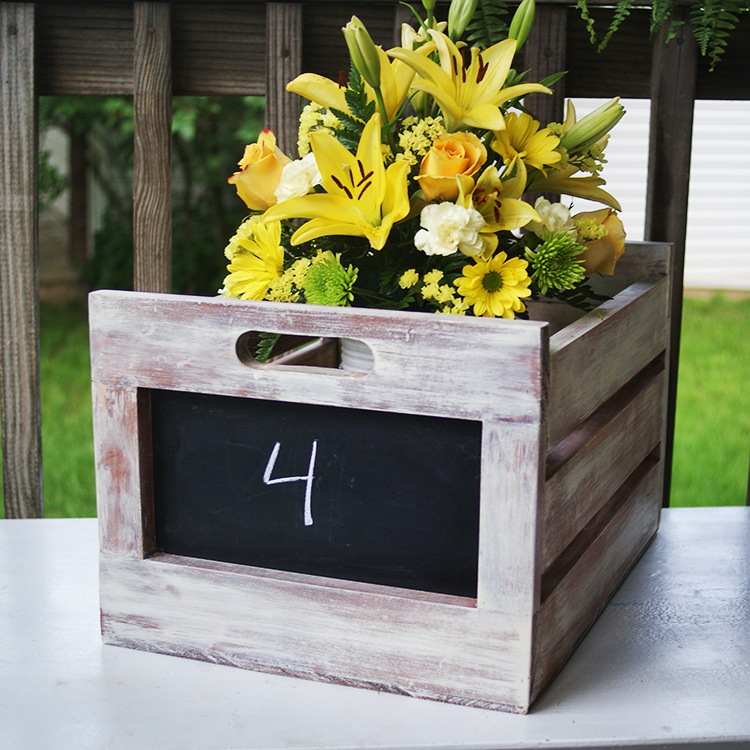
I made 3 crates using Ana Whites Chalkboard Produce Crate plan. It was my first woodworking project, was totally doable, and has created a monster. The middle crate in the photos was the first one, and I added extra 1x3s on the sides because I thought I didn't want the gaps between the side boards. Changed my mind for the second 2. I wanted a chippy finish so I stained with glaze and burnt umber by Golden, followed by a topcoat of dry brushed Titan Buff. I sealed with CeCe Caldwell Aging Wax.
Built from Plan(s)
Estimated Time Investment
Afternoon Project (3-6 Hours)
Finish Used
Stained with acrylic glaze and burnt umber by Golden, followed by a topcoat of dry brushed Titan Buff
Recommended Skill Level
Starter Project
Comments

Thu, 08/29/2013 - 18:29
These are beautiful. :) You
These are beautiful. :) You did a fantastic job!
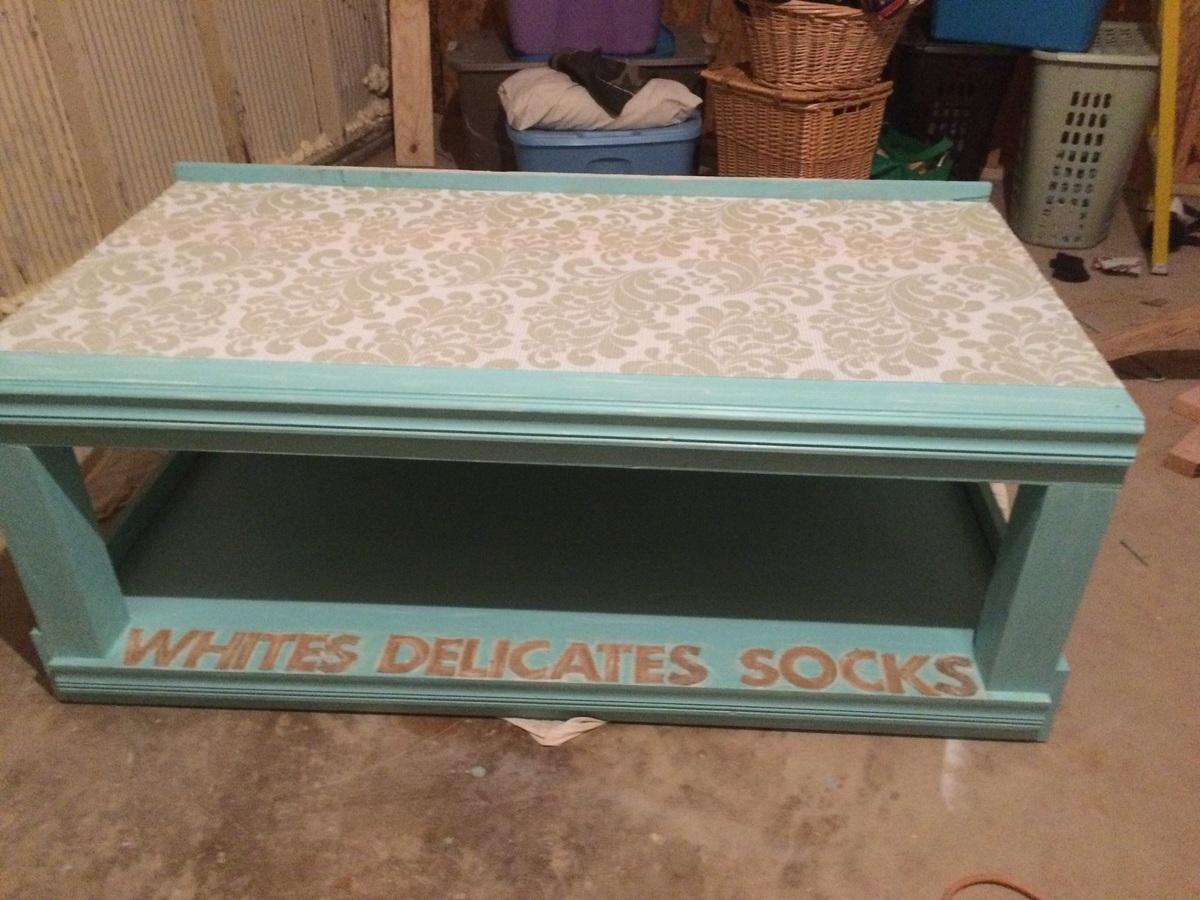
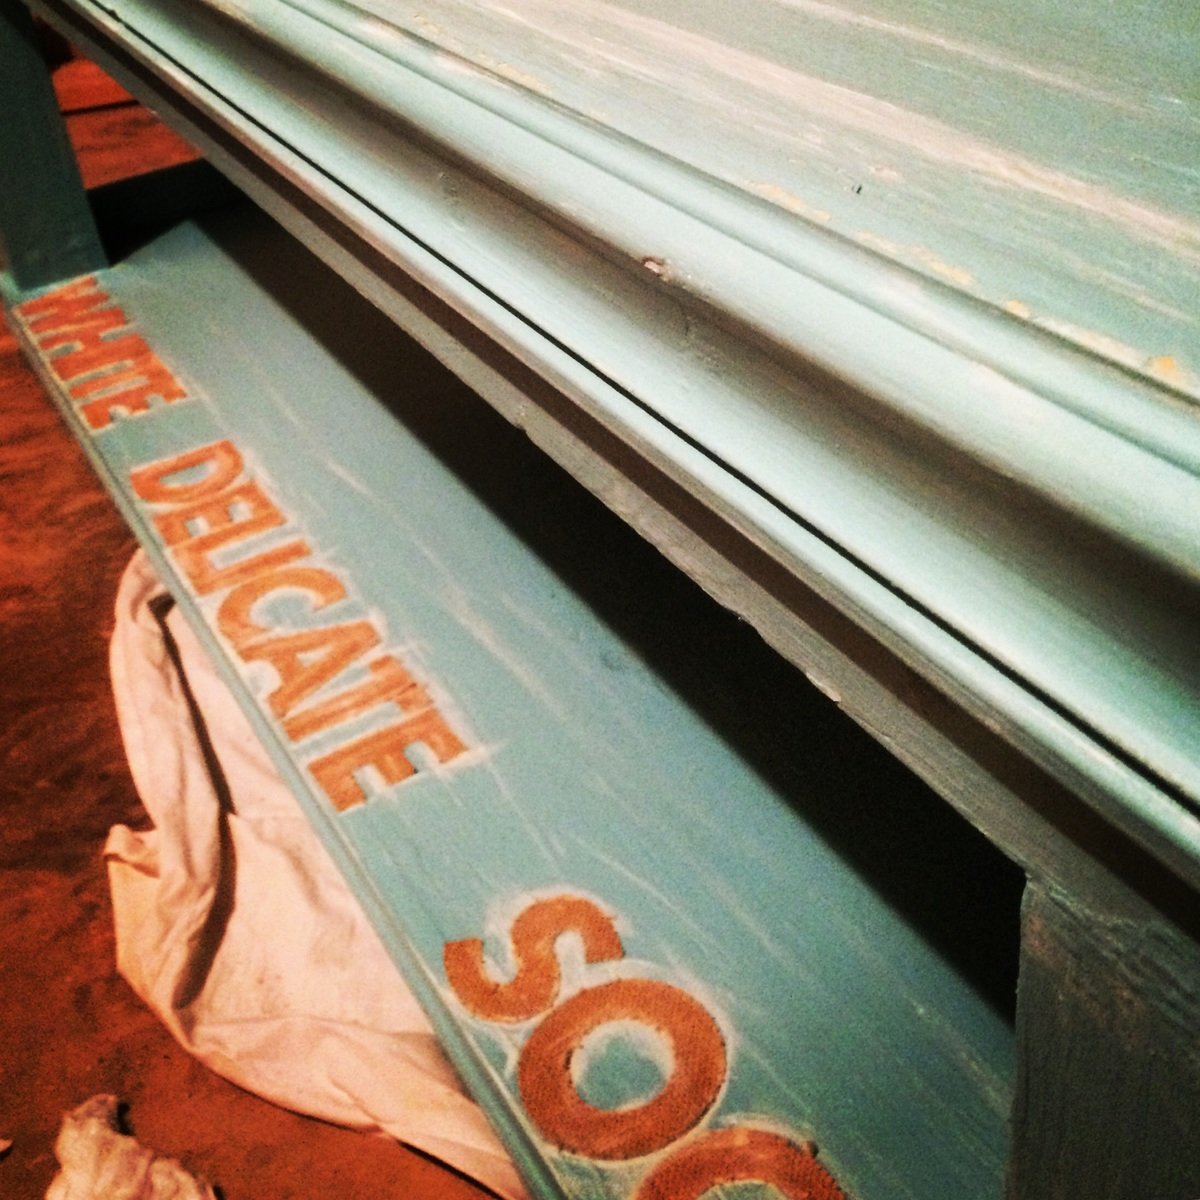
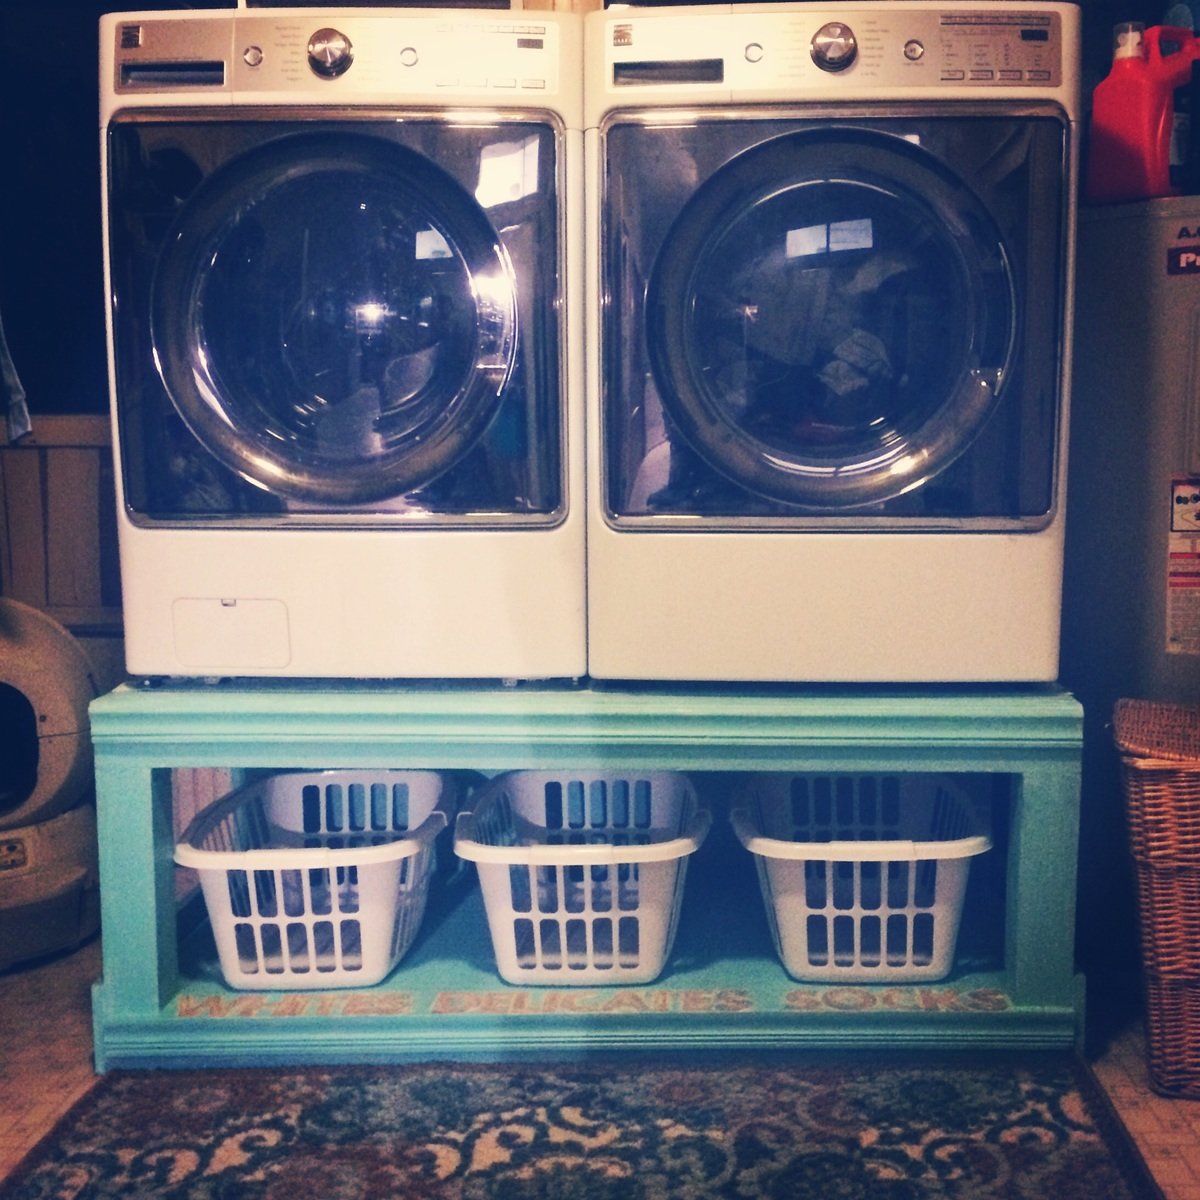
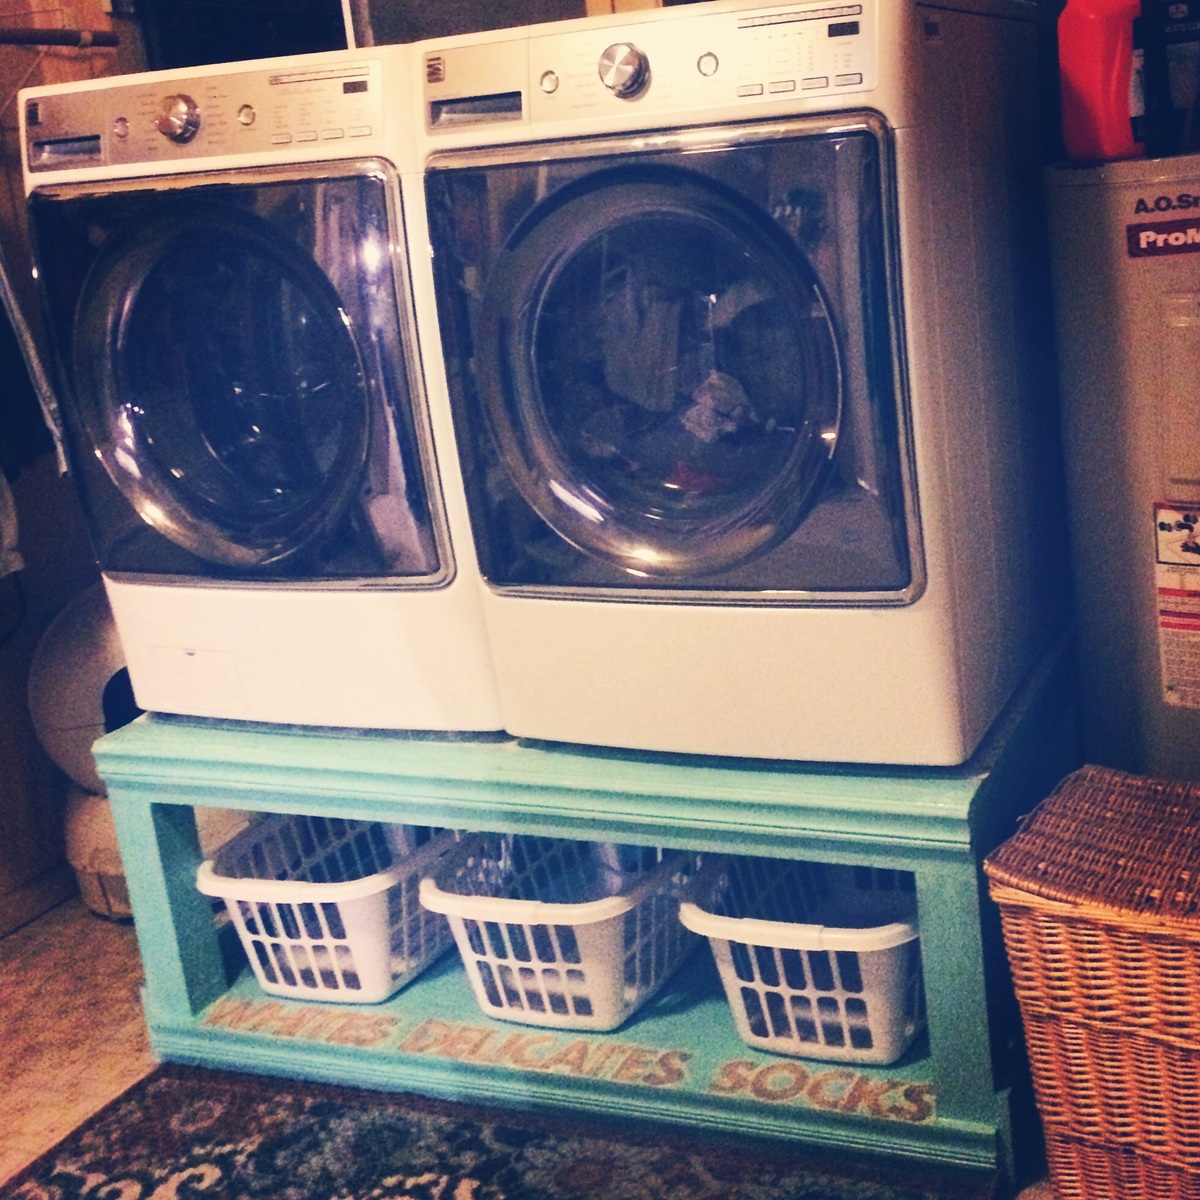
My beautiful pedestal!
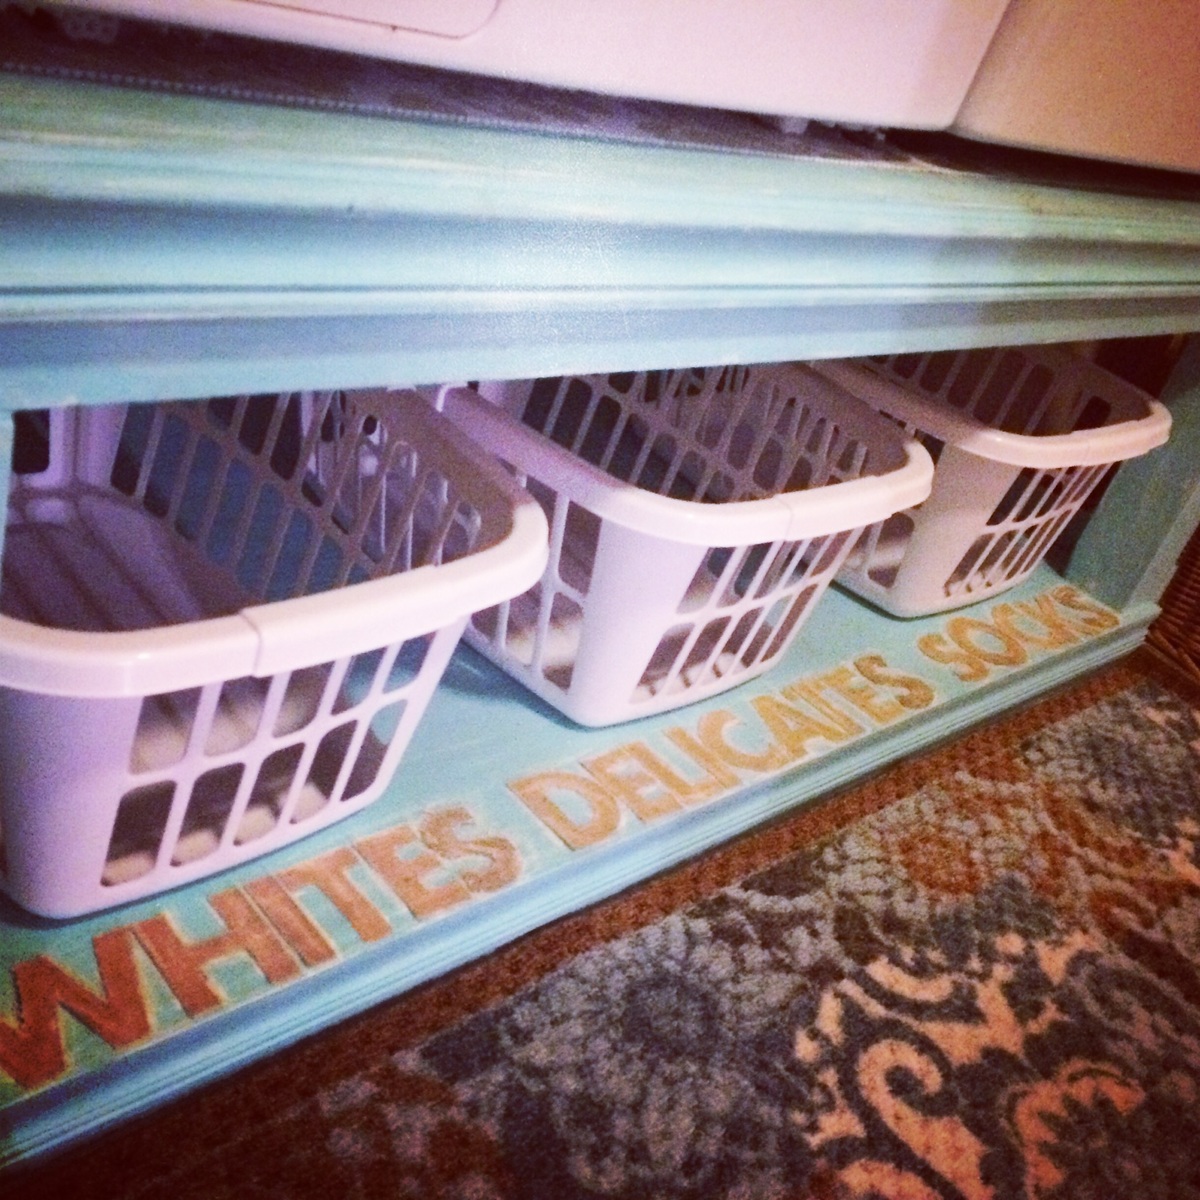
My best friend and I built these Easter weekend with very little husband intervention. I then painted and finished them and installed them with my husbands help. The main modification we made was to figure out the angle to cut the posts in order to adjust for the slope of my laundry room, which is a converted porch on a 1912 craftsman. It was not easy, but we jumped for joy when we tested it out and it was level! We decided to use plywood scraps on the side and back for more support and to keep laundry from falling behind the washer. I had the chair raiI trim from another project, so I used that along with a healthy dose of wood filler. I absolutely LOVE how it turned out...now I just need to find cuter baskets.
Built from Plan(s)
Estimated Cost
I had most of the supplies on hand, so I would say less than $60.
Estimated Time Investment
Weekend Project (10-20 Hours)
Finish Used
Primed with white primer, followed by blue paint, then I sanded to antique it along with adding a few vanilla highlights. I applied the burlap letters with craft glue and highlighted them with paint, followed by two coats of satin poly spray. I applied the pad on top with craft spray glue.
Recommended Skill Level
Intermediate
Comments

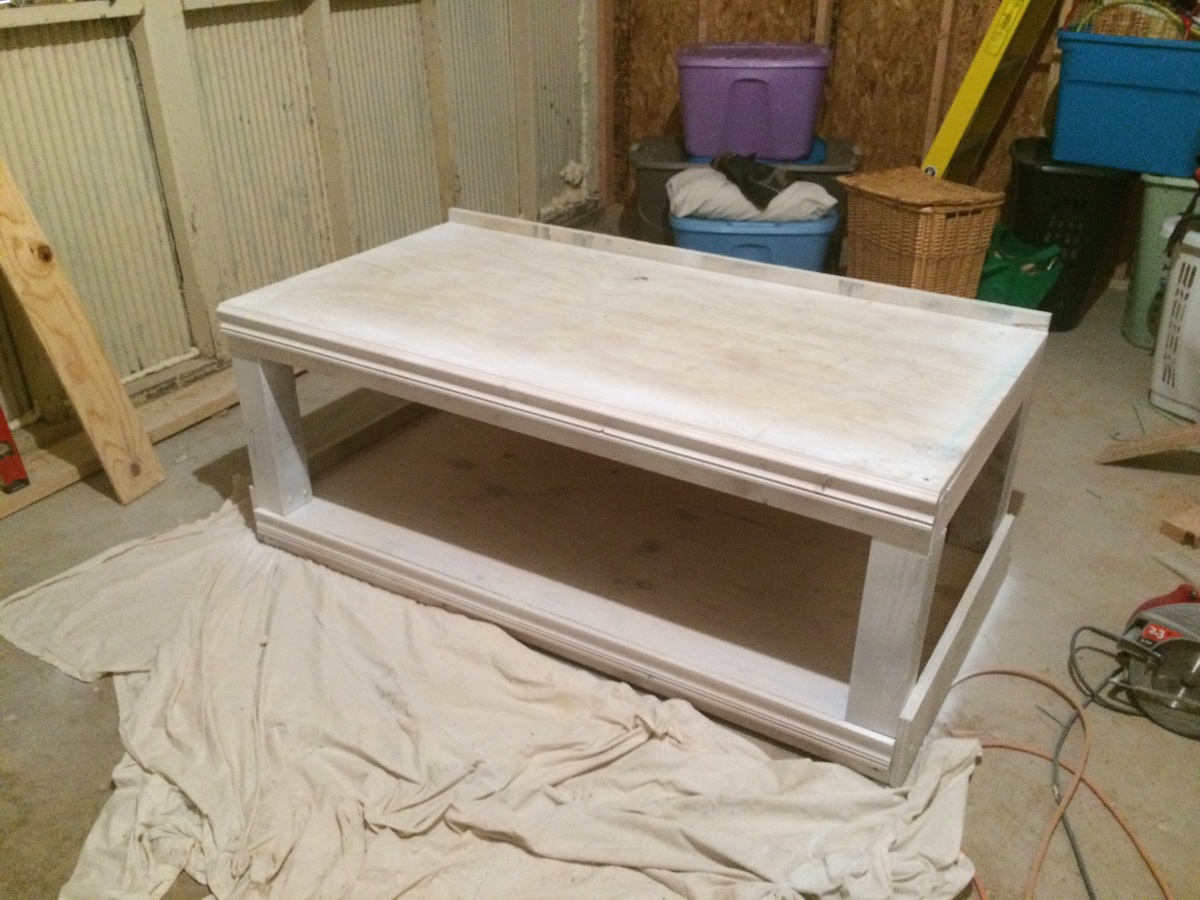
Tryde Coffee Table

I love this site! This is my second build. I started this project one weekend and came back to it to finish. Unfortunately, two of the boards bowed by the time I got back to it the next weekend; so, I added imperfections of mine own and give it a rustic look!


Built from Plan(s)
Estimated Cost
$60 for lumber
Estimated Time Investment
Weekend Project (10-20 Hours)
Finish Used
I used Varathane weathered grey stain and poly semi-gloss for the top. For the bottom, I used Varathane ebony stain and poly semi-gloss. I went with these because our couches are black on the bottom and grey on top.
Recommended Skill Level
Beginner
Simple Garage Shelving

Easy, fast and affordable garage shelving!
Built from Plan(s)
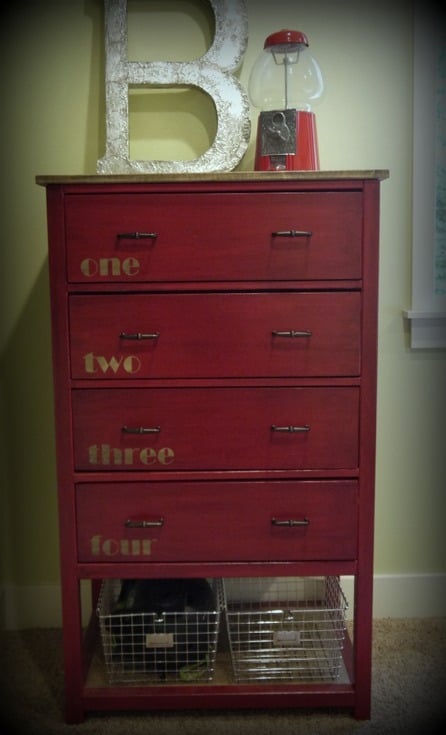
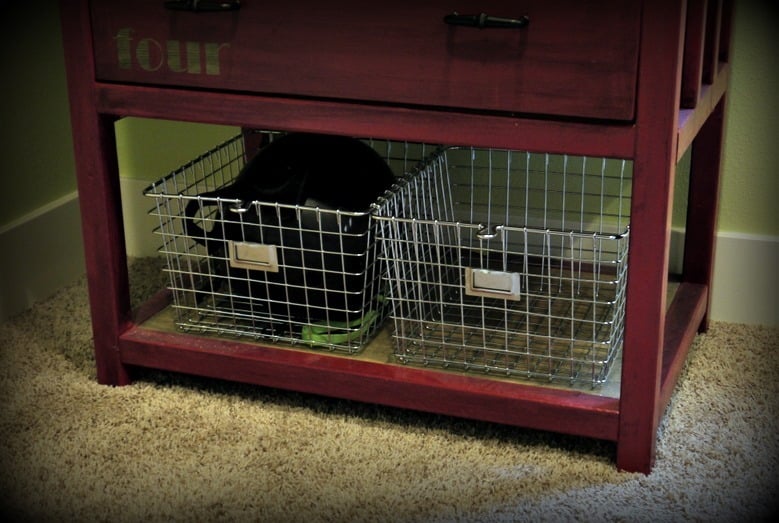
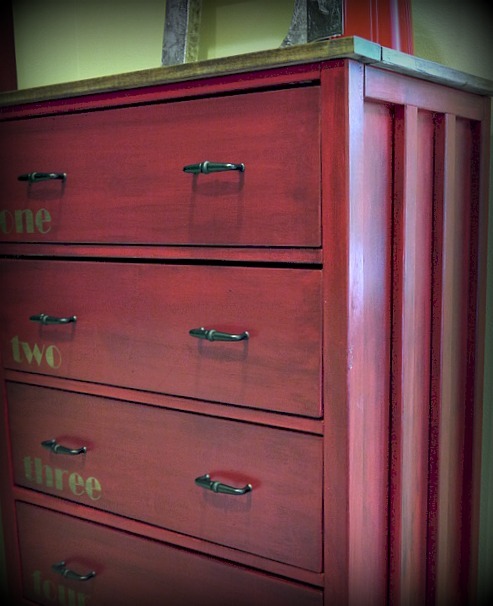
Red Hen Home's Narrow Cabin Dresser
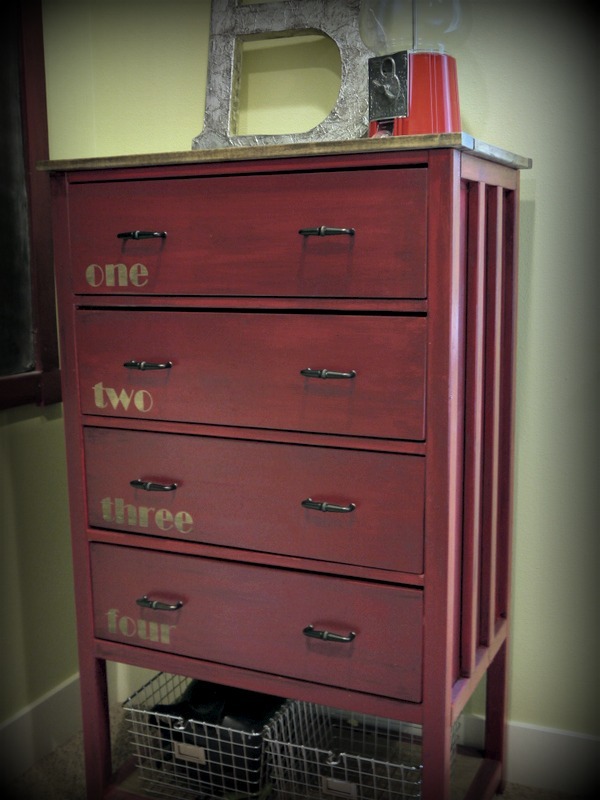
This was my first project with drawers, and I learned through sad experience how important it is to have ULTRA straight boards to begin with! I am grateful for things like itty-bitty washers to help correct things that aren't quite straight enough. More info on my blog!
Built from Plan(s)
Estimated Cost
100
Estimated Time Investment
Weekend Project (10-20 Hours)
Finish Used
Top and shelf are a custom mix gray-brown stain. Red Valspar paint for the body, glazed with ebony stain.
Recommended Skill Level
Intermediate
Comments
Mon, 10/21/2013 - 10:47
My dresser has been a nightmare
I had to use Full Extension slides instead of regular euros because of the seam for the drawer bottom being right in the middle of the mounting holes. Now my drawers are not quite mounting the correct way. I have learned a lot of painful lessons on this one. Man.
Reclaimed wood dining table

Built this for my wife from warehouse floors from the Mare Island Naval Station. 150 plus year old planks. Doug Fir. Hope it will become a family heirloom!
Estimated Cost
$700
Estimated Time Investment
Week Long Project (20 Hours or More)
Finish Used
Classic Gray and Dark Walnut on the top. White wash on legs.
Recommended Skill Level
Intermediate
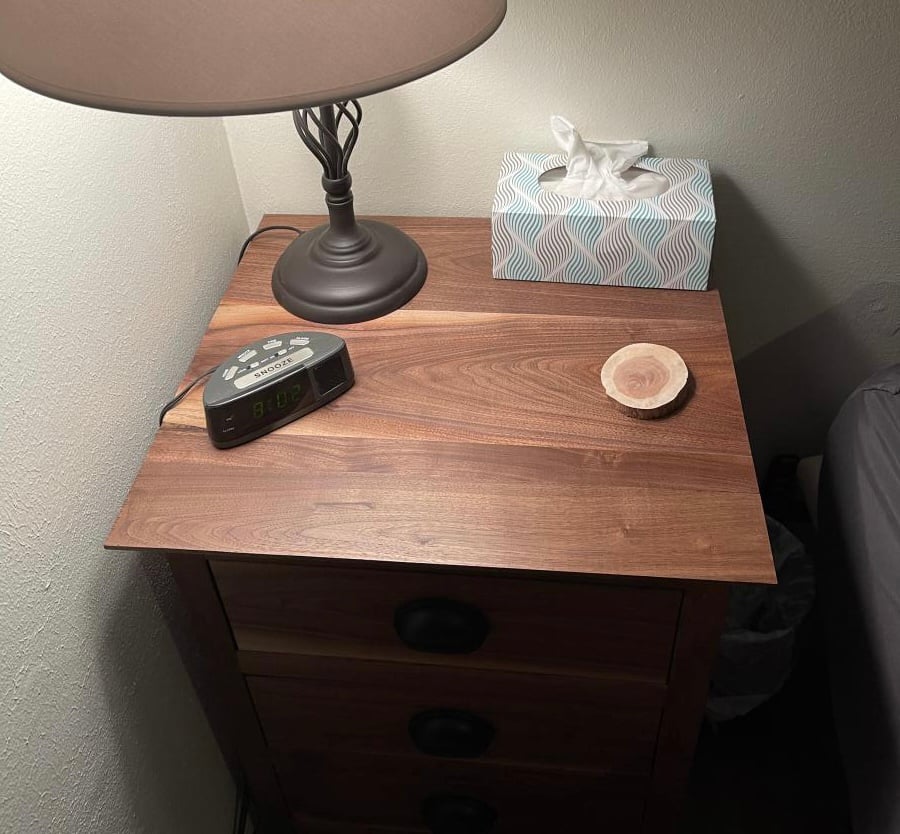
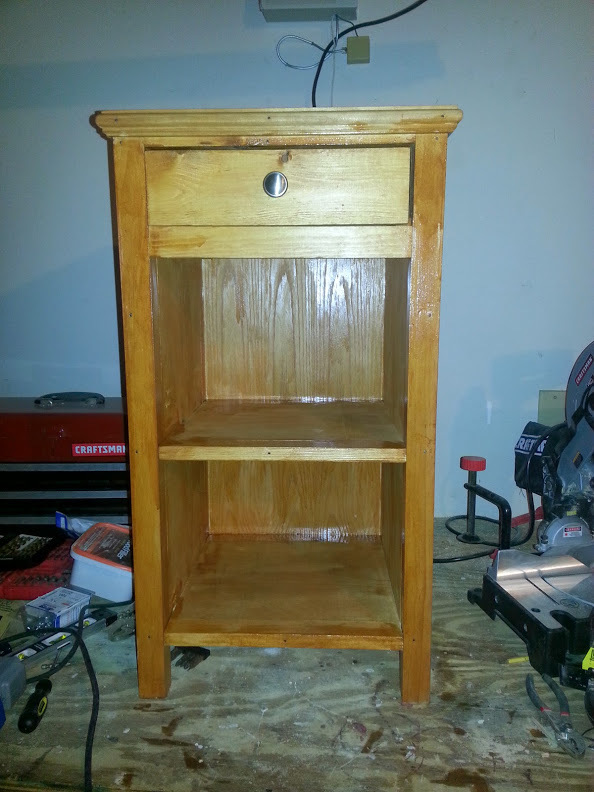
Nightstand
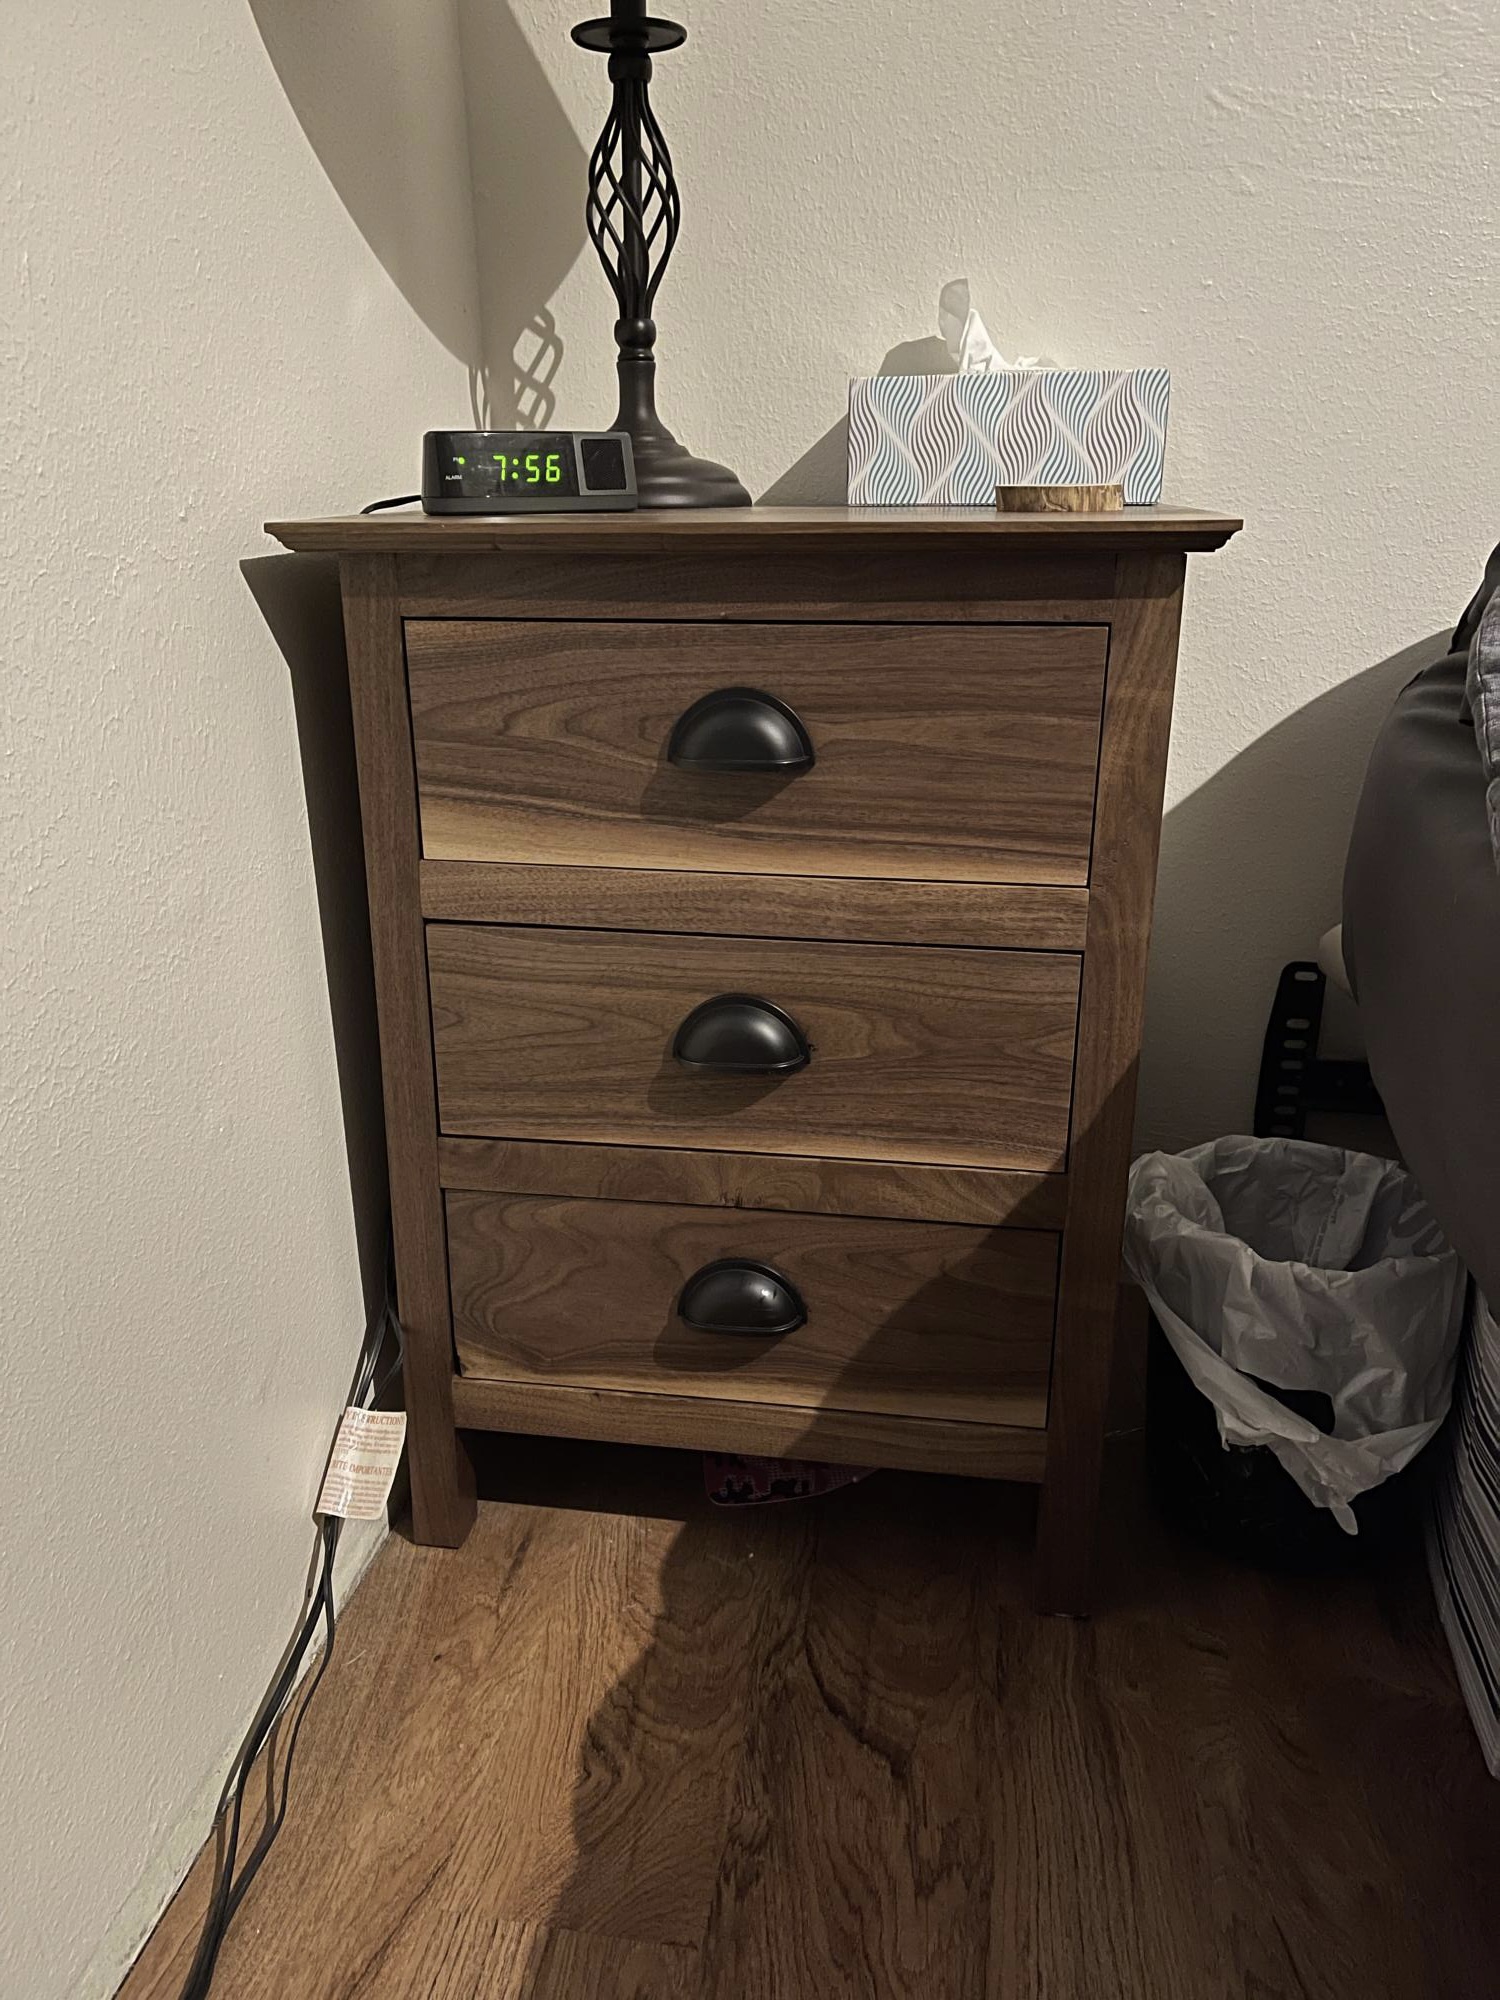
We made this out of walnut we milled a couple years ago. We didn’t stain just used Dixie Bell Gatorhide to seal it with. Not sure why the pictures turned sideways when they uploaded.

Built from Plan(s)
Comments
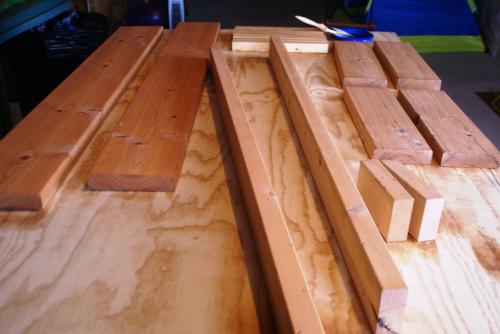
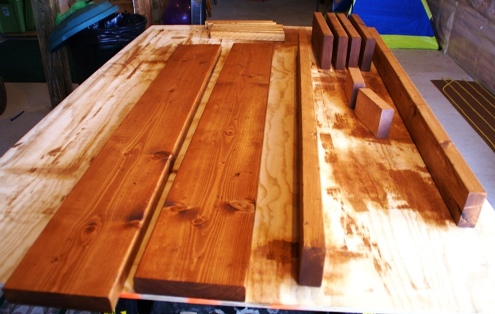
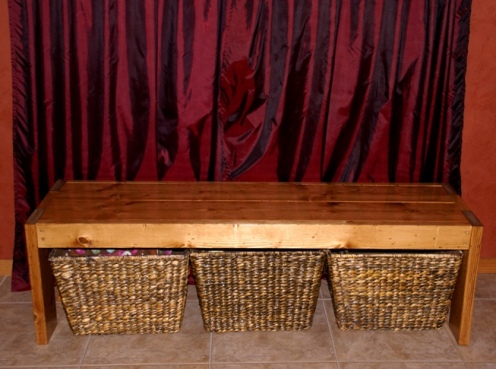
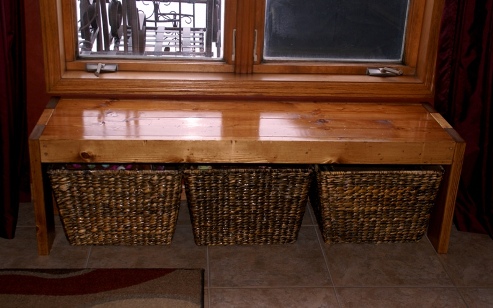
Modern Farm Bench Adaptation
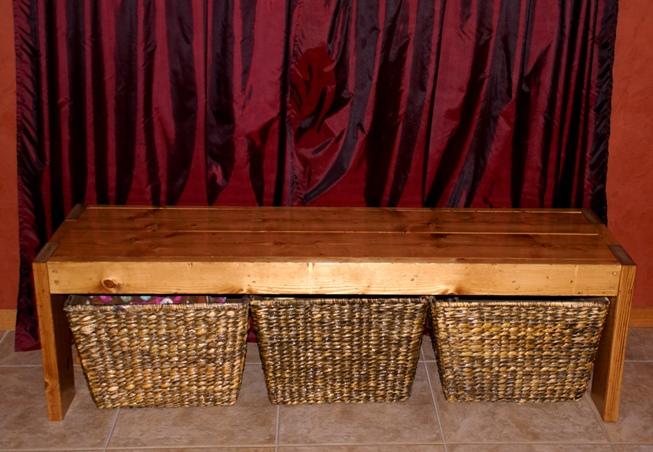
I have been wanting a bench for this space for years. I adapted the plans to fit the baskets I was already using. I used 2x8s to make the seat deeper. Final dimensions are 60" wide by 17.5 deep by 18" high.
My actual cut list:
2 - 2x4 by 57" front and back apron
4 - 2x6 by 18" legs
2 - 2x8 by 57" seat
6 - 2x2 by 14.5" seat supports
2 - 2x4 by 6.5" side spacer between legs
I used a Kreg jig for the first time to attach the support pieces to the side aprons. I used the same hollow made by the Kreg to add a few screws through the support pieces into the top.

Estimated Cost
$25
Estimated Time Investment
Weekend Project (10-20 Hours)
Finish Used
Minwax wood conditioner. Minwax Pecan and Early American blend. Minwax gloss poly.
Recommended Skill Level
Beginner
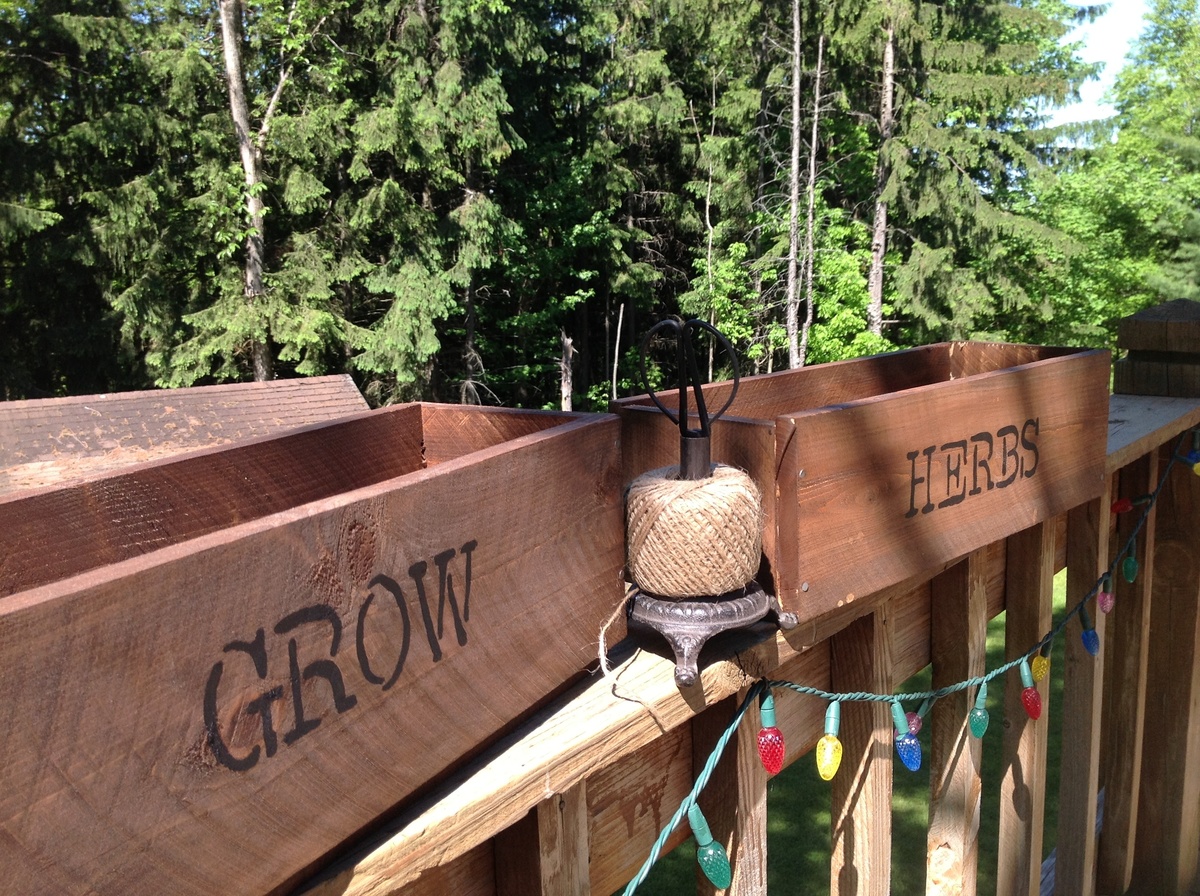
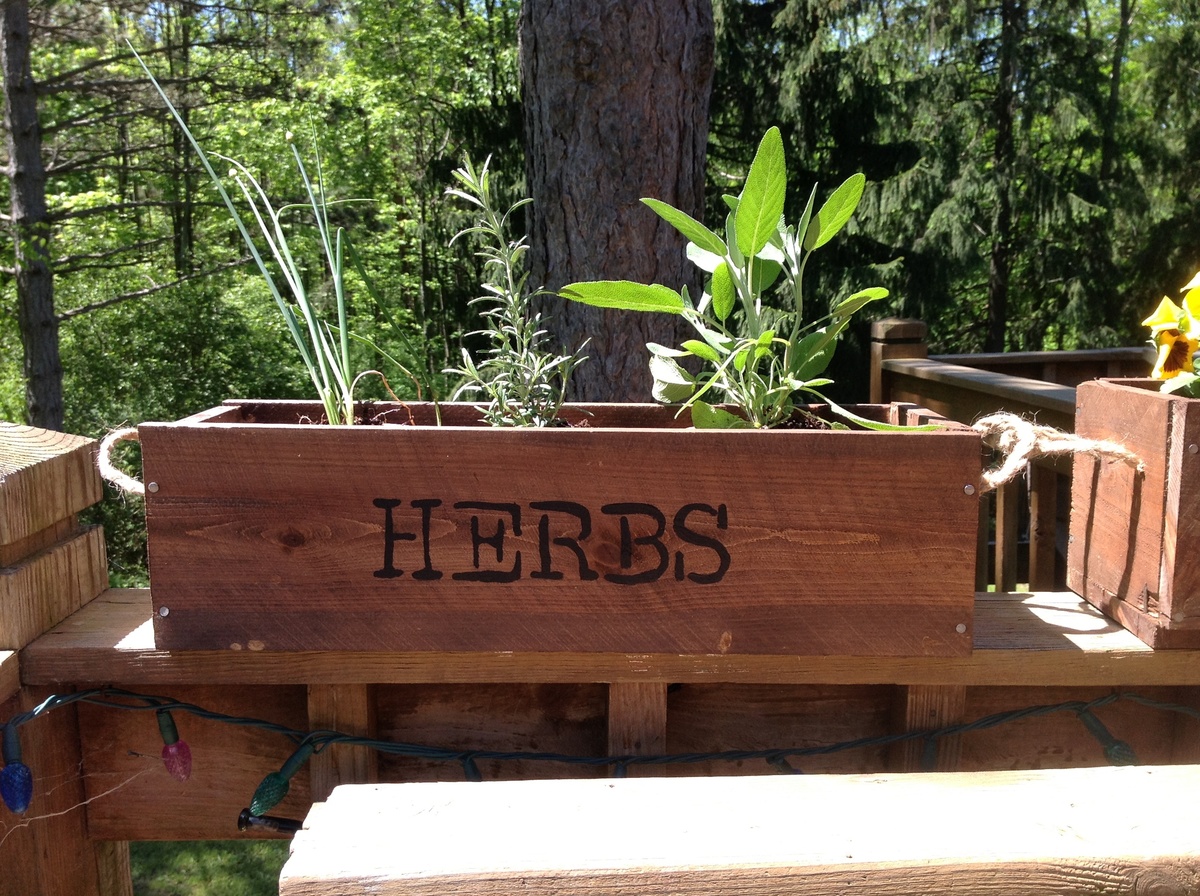
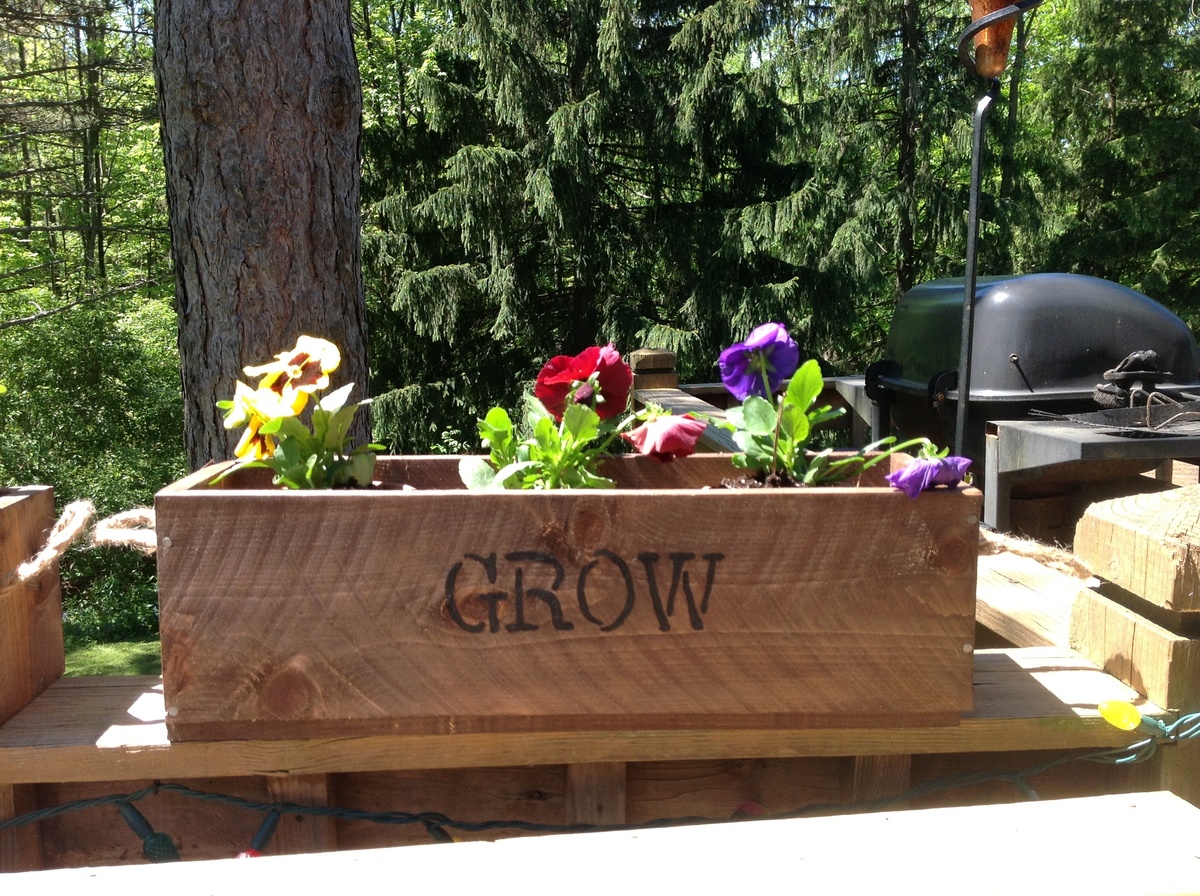
Very first project - planter boxes
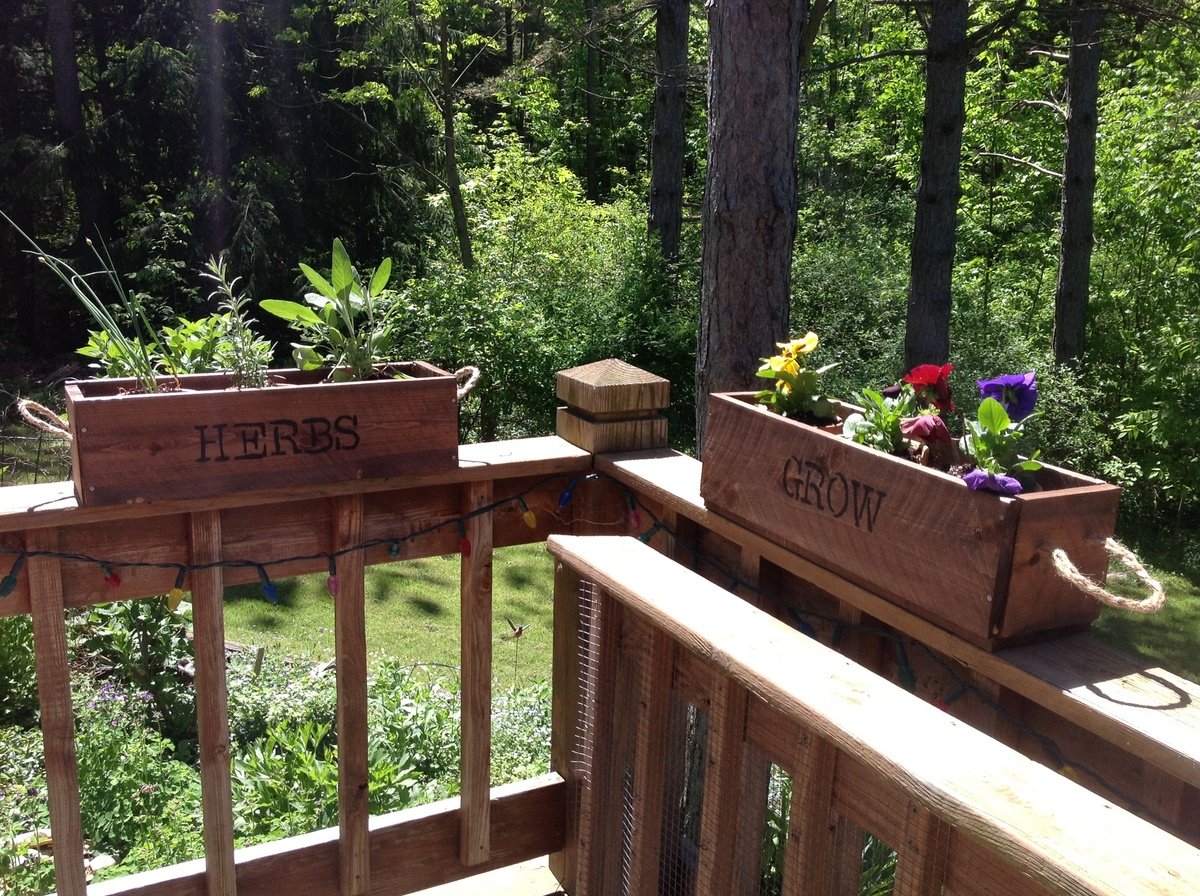
My very first woodworking project. I learned a lot. Most importantly, to watch my cuts more carefully. Also, a good stain and stencil dress up anything. I used braided jute for handles and love them!
Built from Plan(s)
Estimated Time Investment
An Hour or Two (0-2 Hours)
Recommended Skill Level
Starter Project
Comments

Sun, 05/26/2013 - 22:47
Herb Garden Planters
I love your herb and flower planters! Now I'm inspired to do some up for my deck as well! Nice job!
ALPHABET BLOCKS INSPIRED KIDS STORAGE SEATING

This project allows your creativity to flow. It's a woodworking and art DIY project. These storage benches for children are inspired by my youth when I played with wooden alphabet blocks. It's the perfect accompaniment for this Alphabet Blocks Inspired Chalkboard Play Table.
Estimated Cost
$15/a seat
Estimated Time Investment
Weekend Project (10-20 Hours)
Finish Used
latex paint and pecan stain
Recommended Skill Level
Beginner
Comments


kids bench
I built this bench for my niece on her birthday. It as easy and fun to build. My niece and everybody at the party loved it.
Built from Plan(s)
Estimated Cost
$12
Estimated Time Investment
Afternoon Project (3-6 Hours)
Finish Used
Valspar Simi-gloss white
Recommended Skill Level
Starter Project
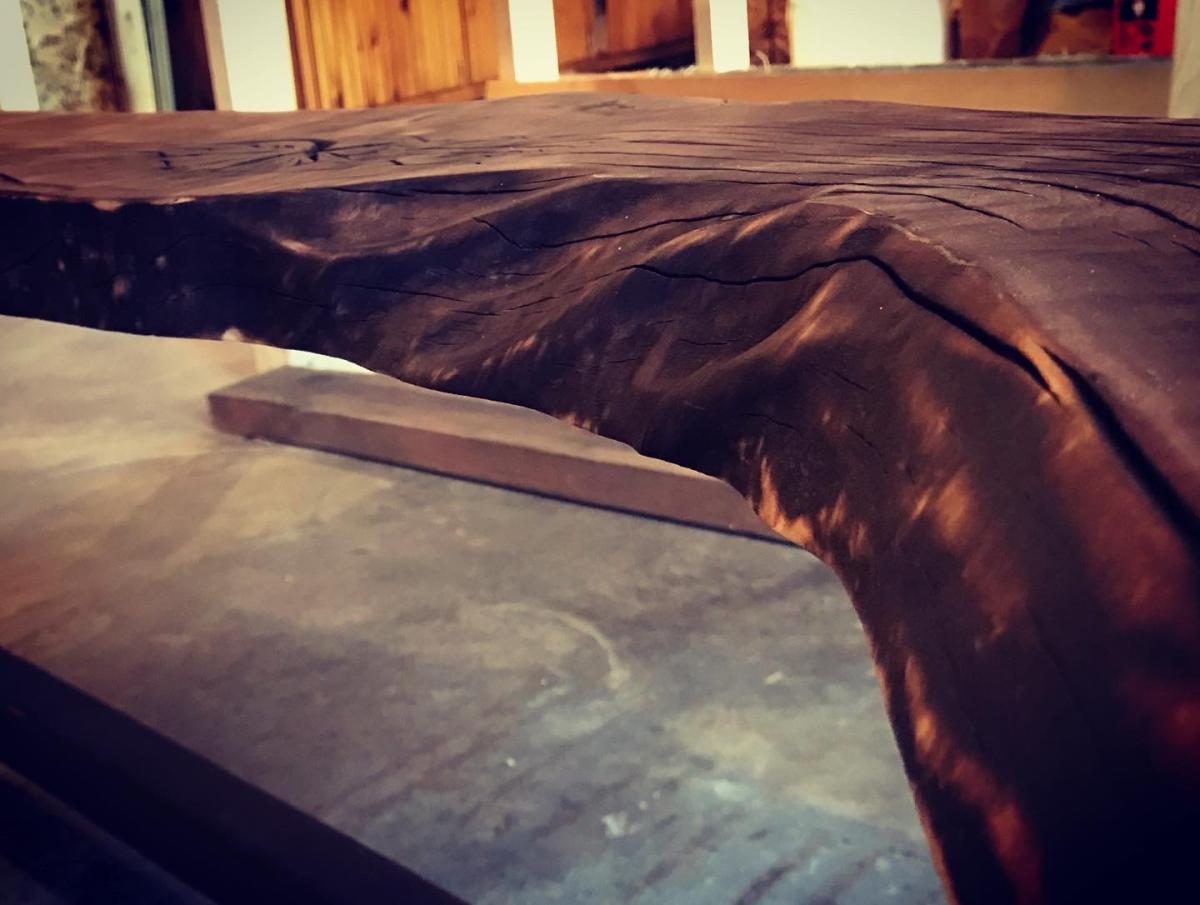
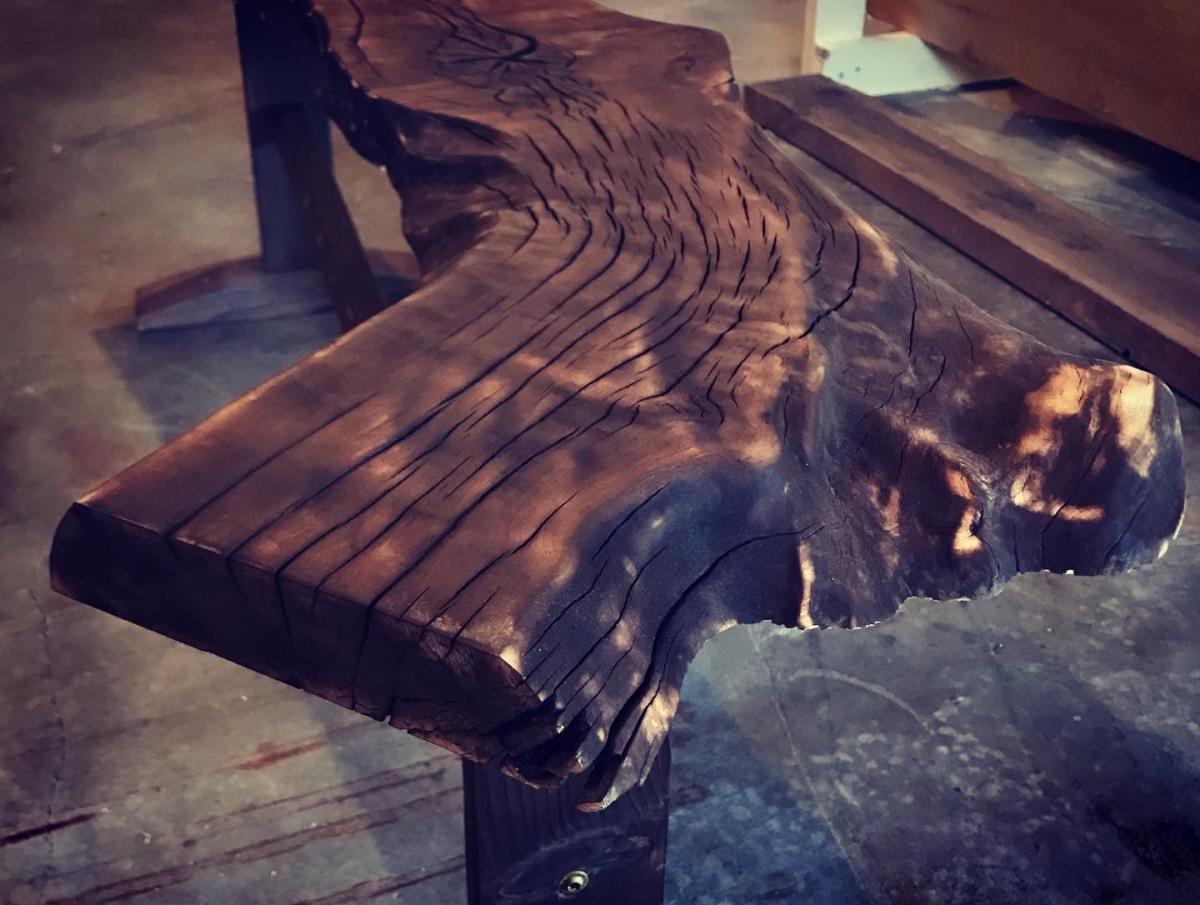
Live Edge Oak Bench
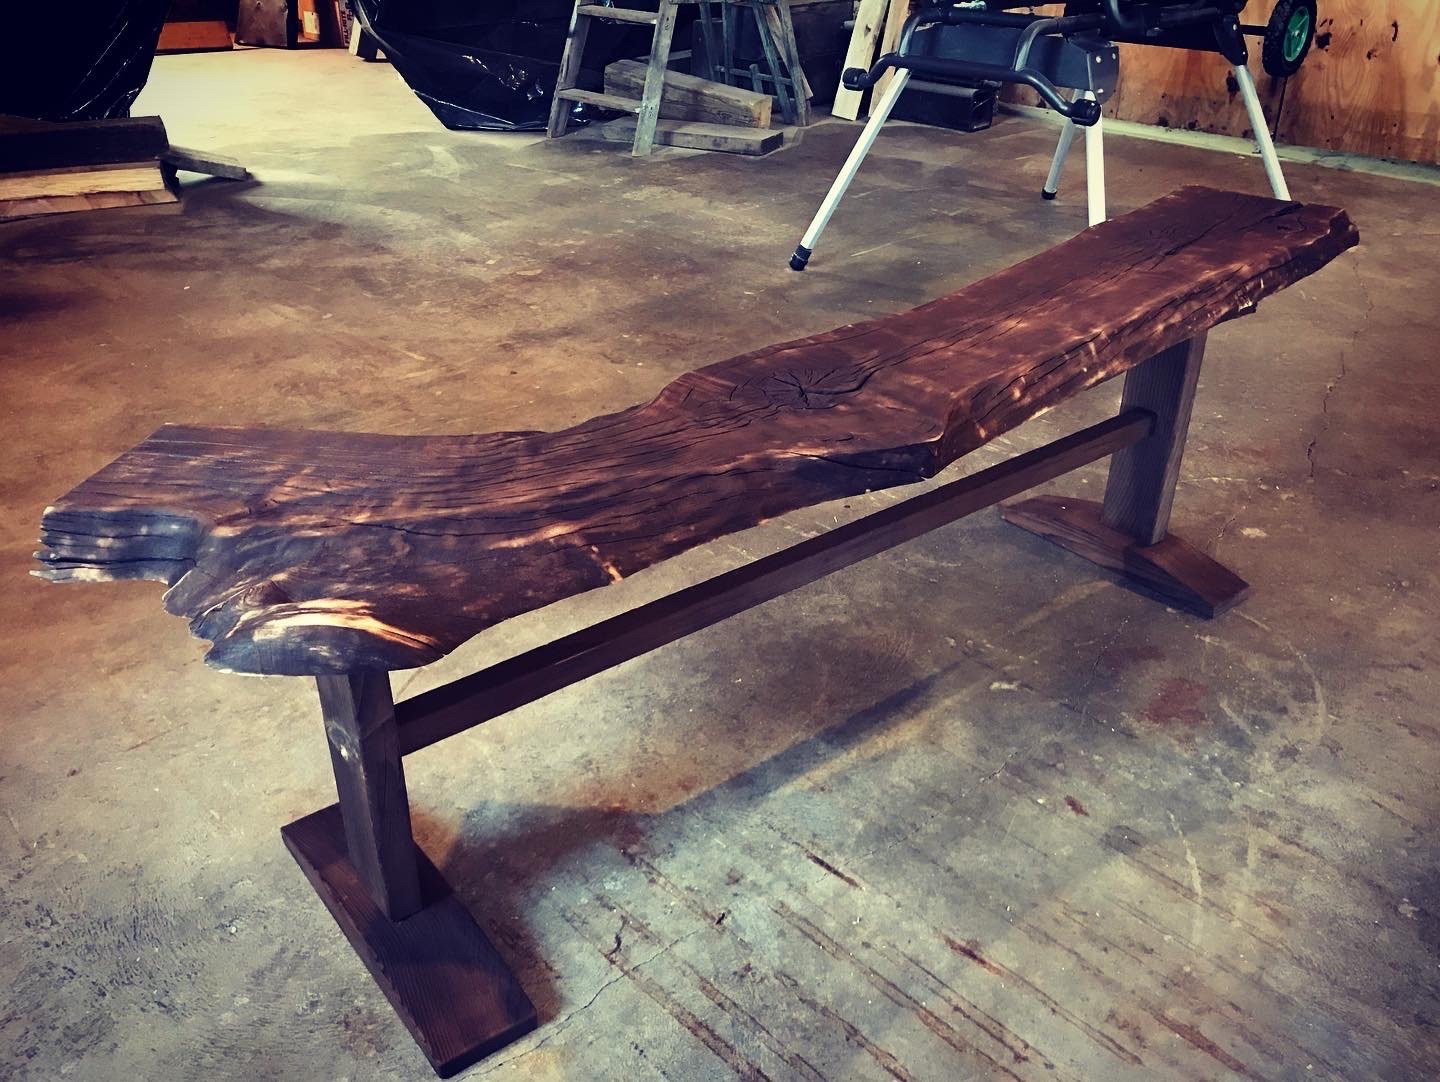
I found this oak character slab at a local lumber yard and fell in love with it. I loved it so much I bought a second one. After torching the slab using the Shou Sugi Ban method, I scraped away the charred surface and used tung oil to complete the finish. I added two more coats of tung oil allowing at least 24 hours in between each coat. The legs are made from rough cut pine from the same lumber yard (these guys take good care of me!). I also used the same charring method on the legs and feet along with tung oil. Check out all the detail and character of the edges! This bench could easily be used as a coffee table. It is approximately 6 feet long and 30 inches tall.
Comments
First Build: Bookshelves
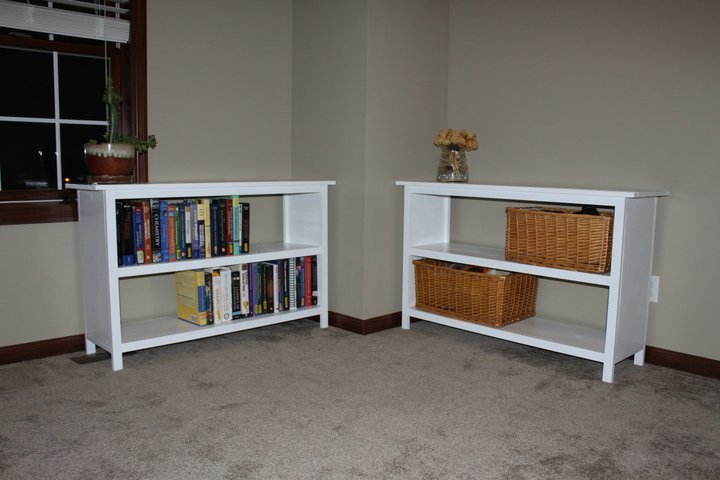
This was my first build, and it went really well. My dad helped me to cut the wood, and I was able to completely assemble, prime, and paint them by myself in the basement.
I decided not to use MDF, instead I used plywood, I think they turned out to be quite sturdy.
Built from Plan(s)
Estimated Cost
$100
Estimated Time Investment
Weekend Project (10-20 Hours)
Finish Used
Behr White High gloss paint and white primer.
Recommended Skill Level
Starter Project
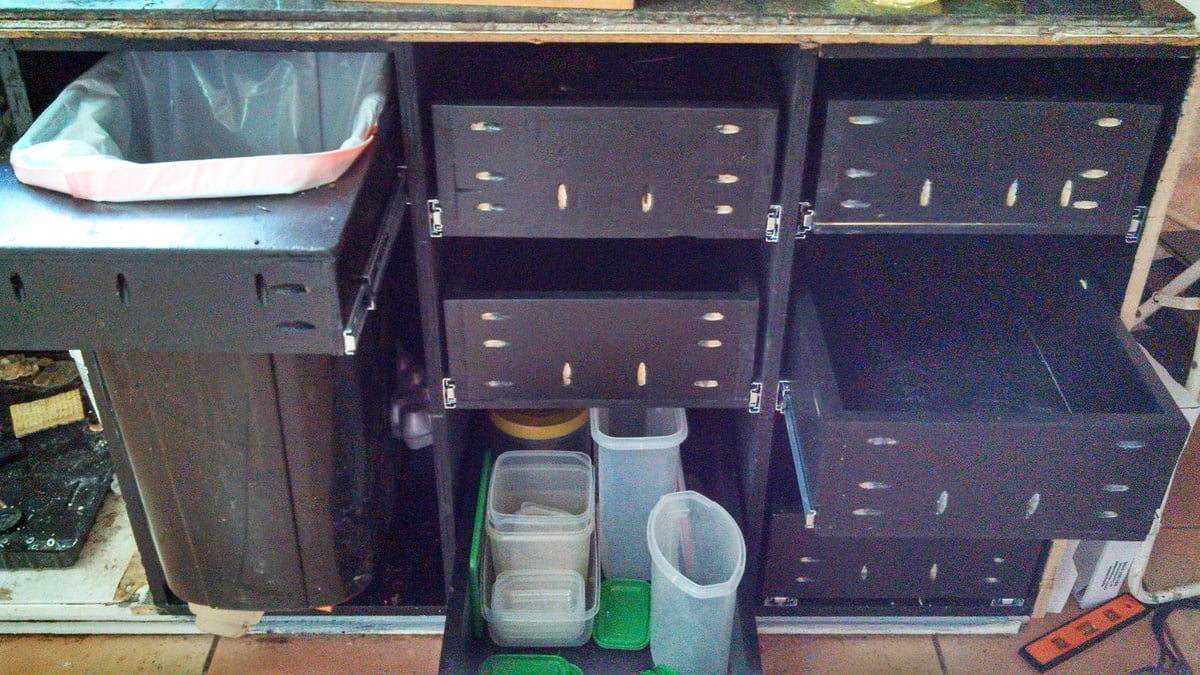
Kitchen Remodel
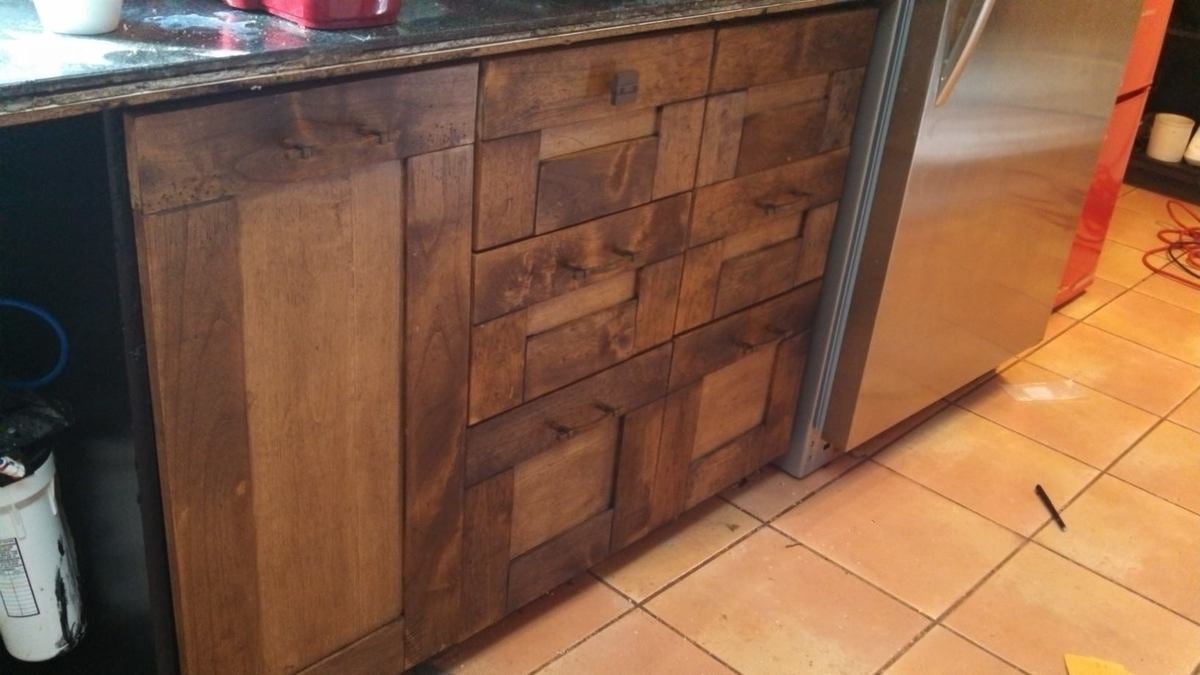
These are the original cabinets that were built with the house in 1971. They had small drawers at the top and 2 shelves. They weren't very efficient storage. I pulled everything out of the cabinet, pulled off the facing (euro-style) and restructured them to have full size pull out trash and 6 nice large heavy duty drawers. The drawer fronts I made from alder wood based on a design I saw online.
Built from Plan(s)
Estimated Cost
$100 - $200
Estimated Time Investment
Week Long Project (20 Hours or More)
Finish Used
walnut stain; artistic distressing; glaze made of the same walnut stain and black paint used on cabinets. I used a chisel, a hammer, an exacto knife, some nails and a rasp to distress the fronts.
Recommended Skill Level
Beginner
Vintage Bunk Bed

We built this bunk bed for our daughters (age 3 and 4) and they LOVE it! We are so happy with it.
Built from Plan(s)
Estimated Cost
$600
Estimated Time Investment
Week Long Project (20 Hours or More)
Recommended Skill Level
Advanced
Comments
Rustic X for a dining room console table
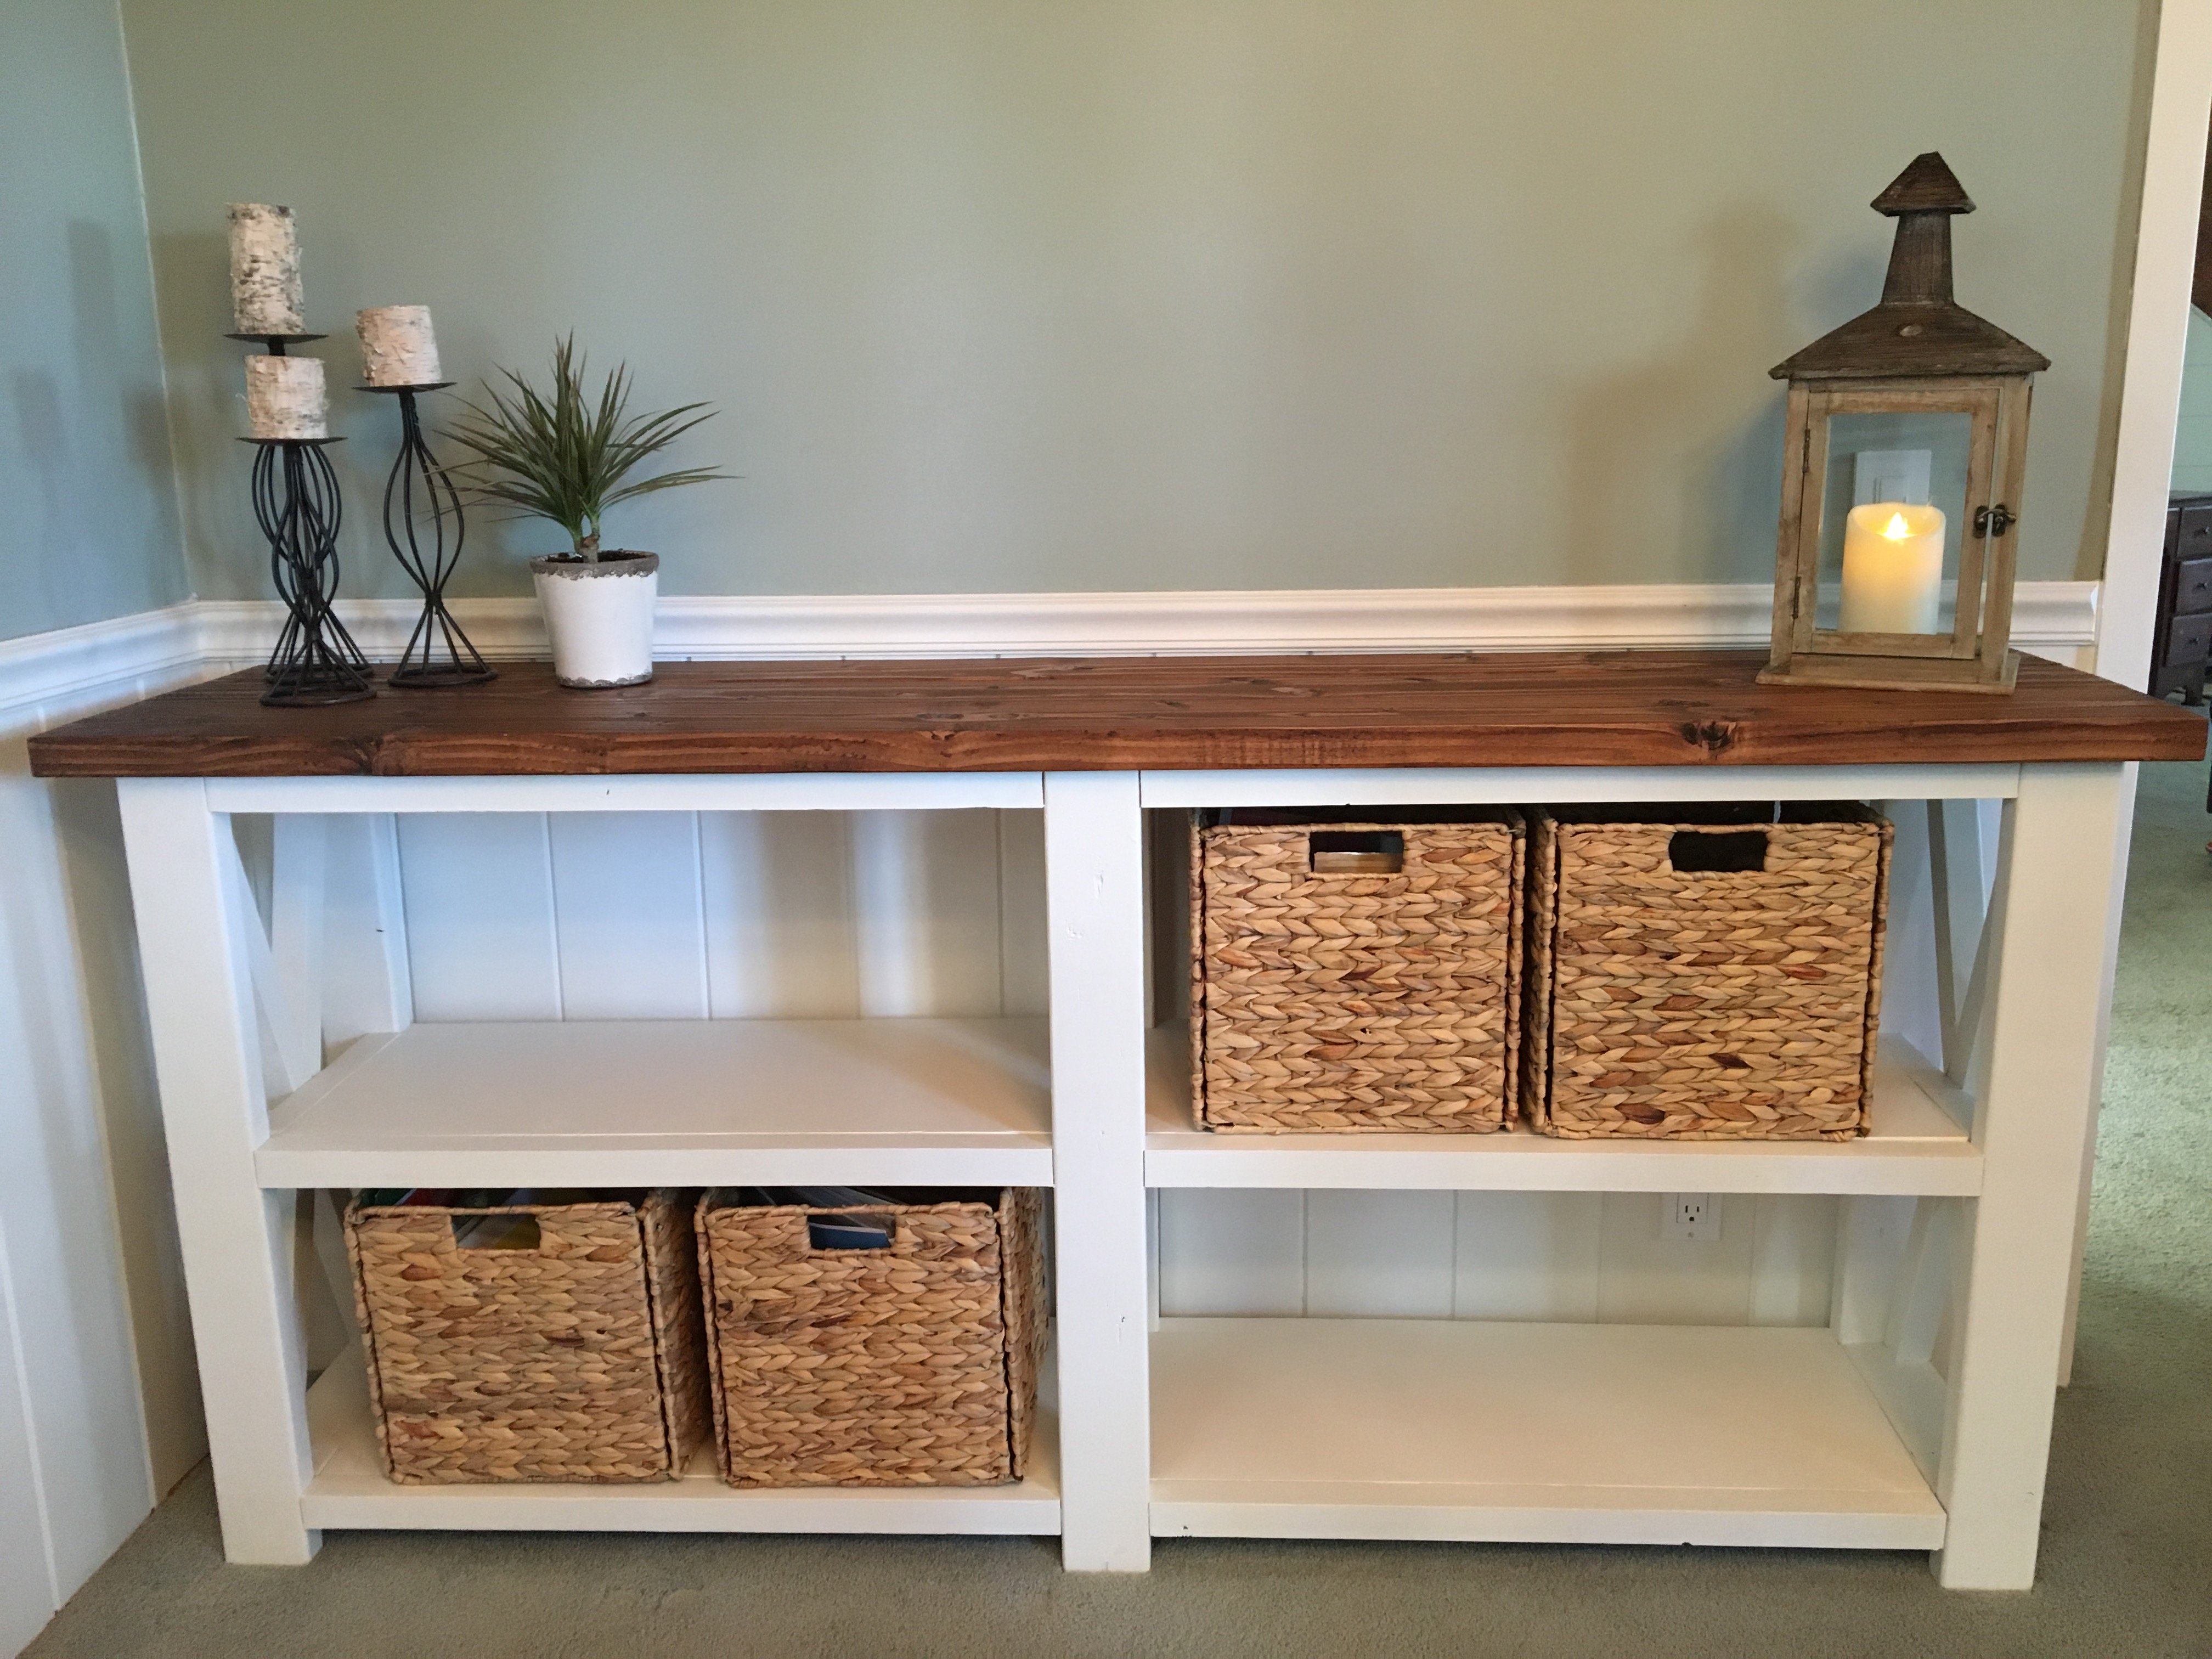
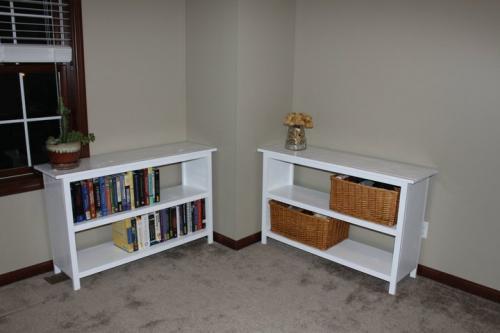
I made this all by myself, using a borrowed R3 kreg jig. It took me about four days, working several hours a day, in between babysitting sessions when the grandparents had my kids. I'm proud of how it turned out. I planned to put a back and solid sides on it because I need it to function as a bookshelf for the kids' books, but I couldn't figure out how to attach my panels and in the end I liked the airyness of the X sides.
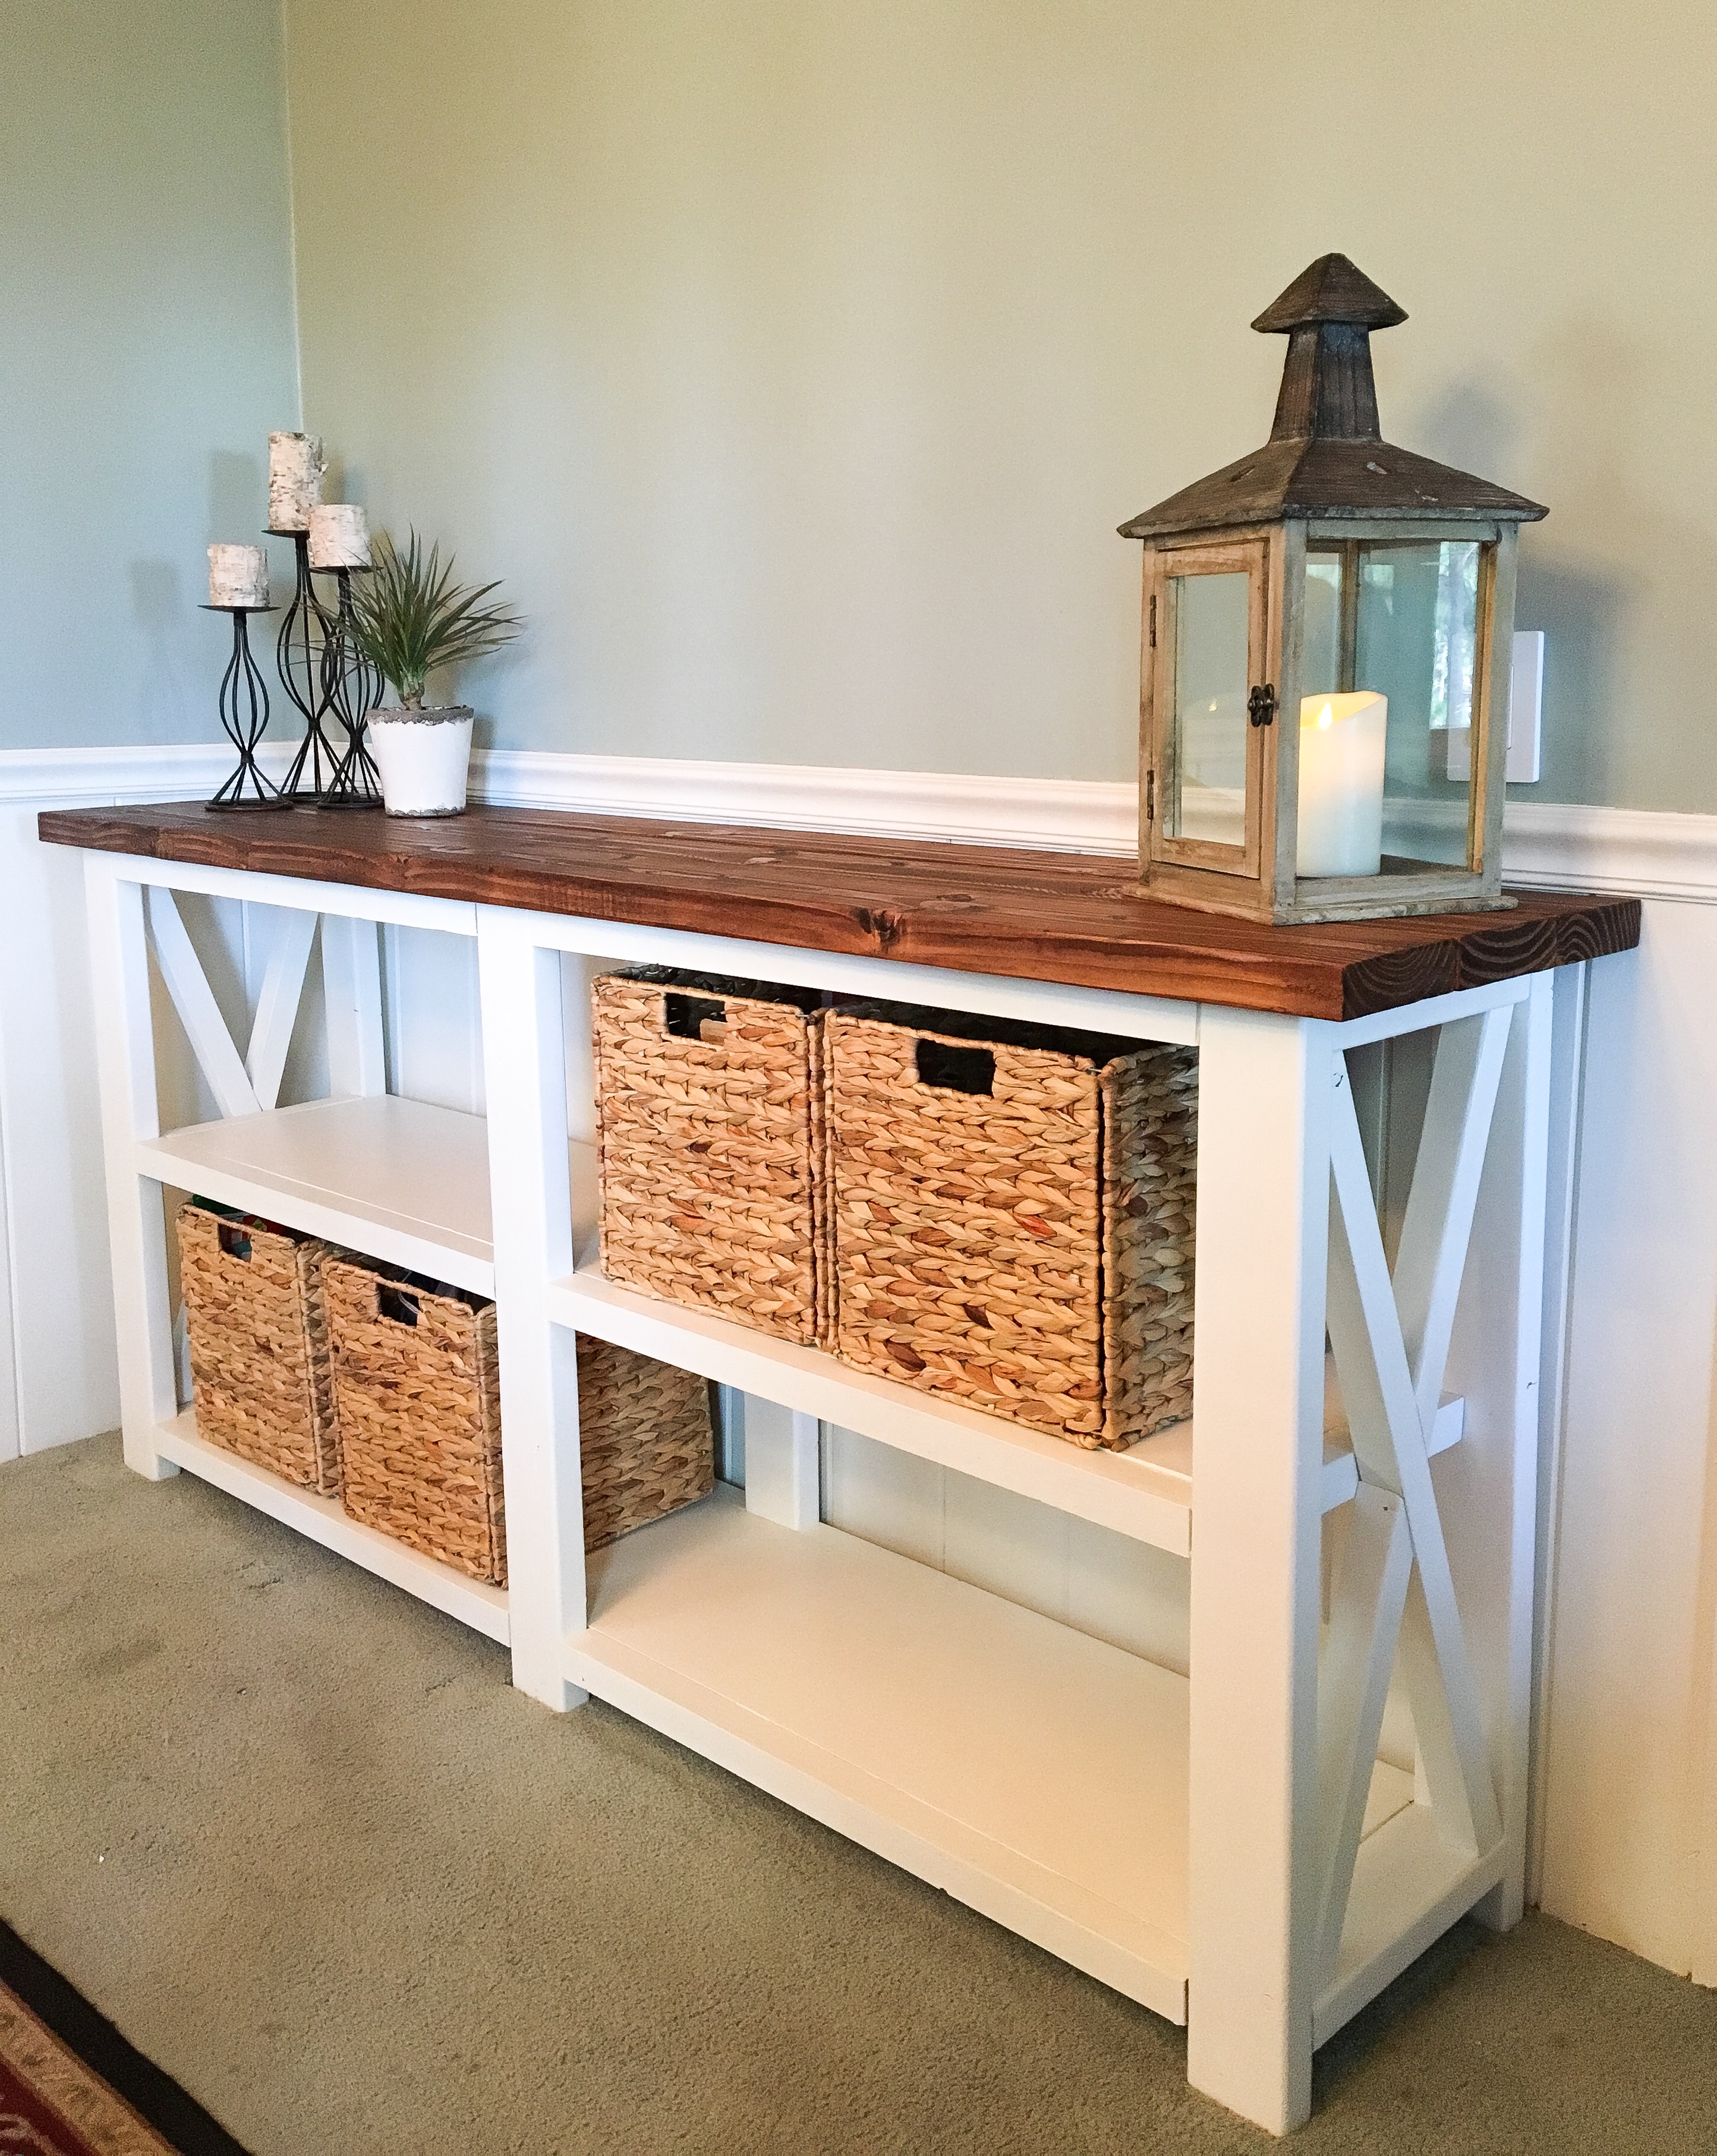
Built from Plan(s)
Estimated Cost
$80
Estimated Time Investment
Weekend Project (10-20 Hours)
Finish Used
Leftover Paint & Minwax Provencial Stain and Polyurethane
Recommended Skill Level
Beginner
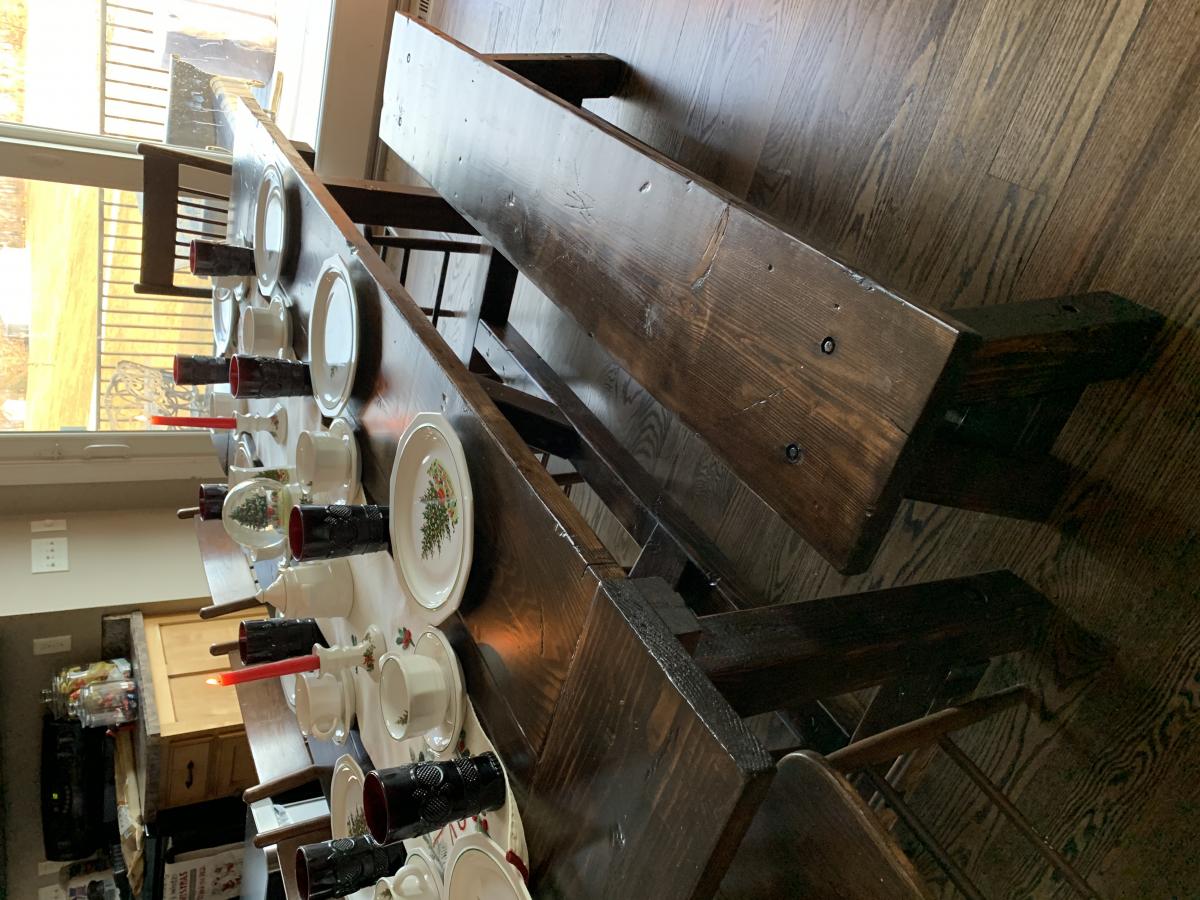
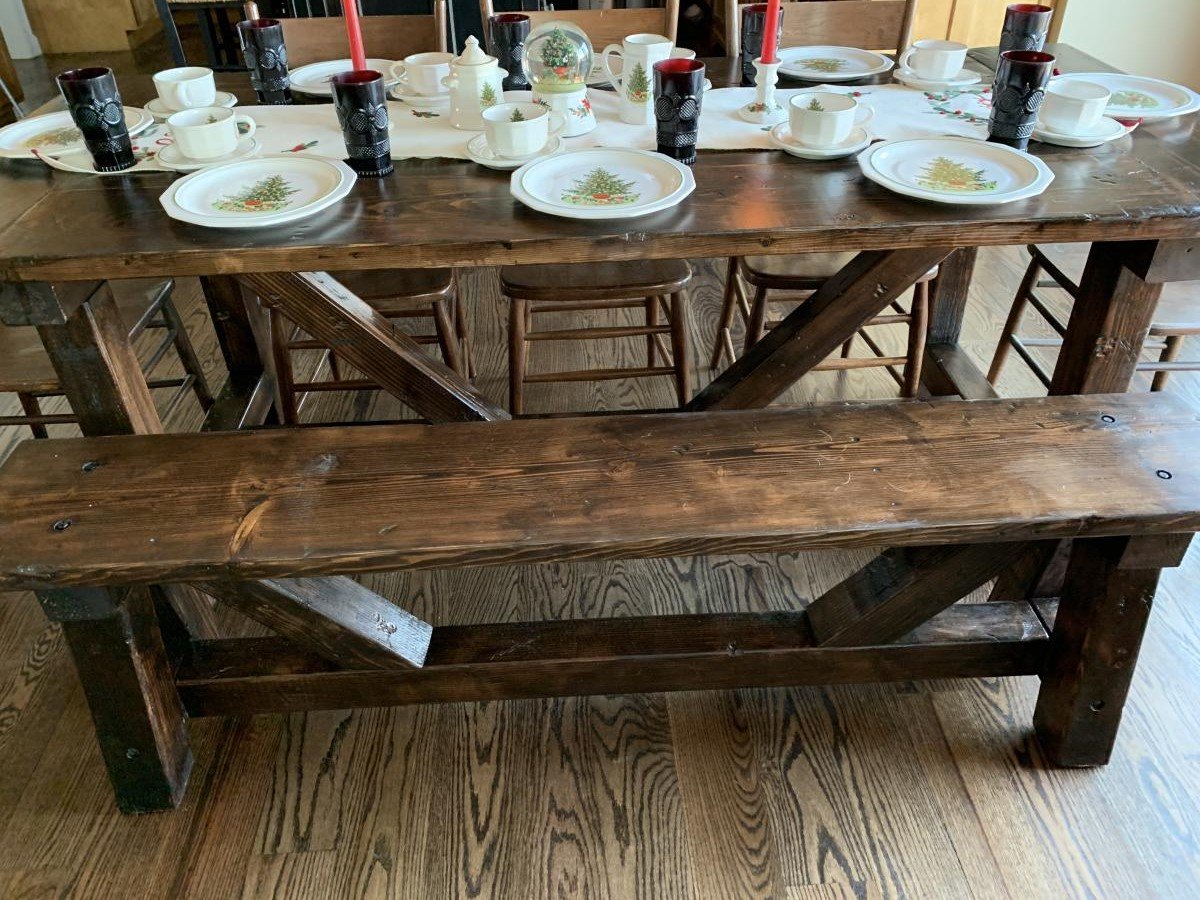
Modified 4x4 Beam Table
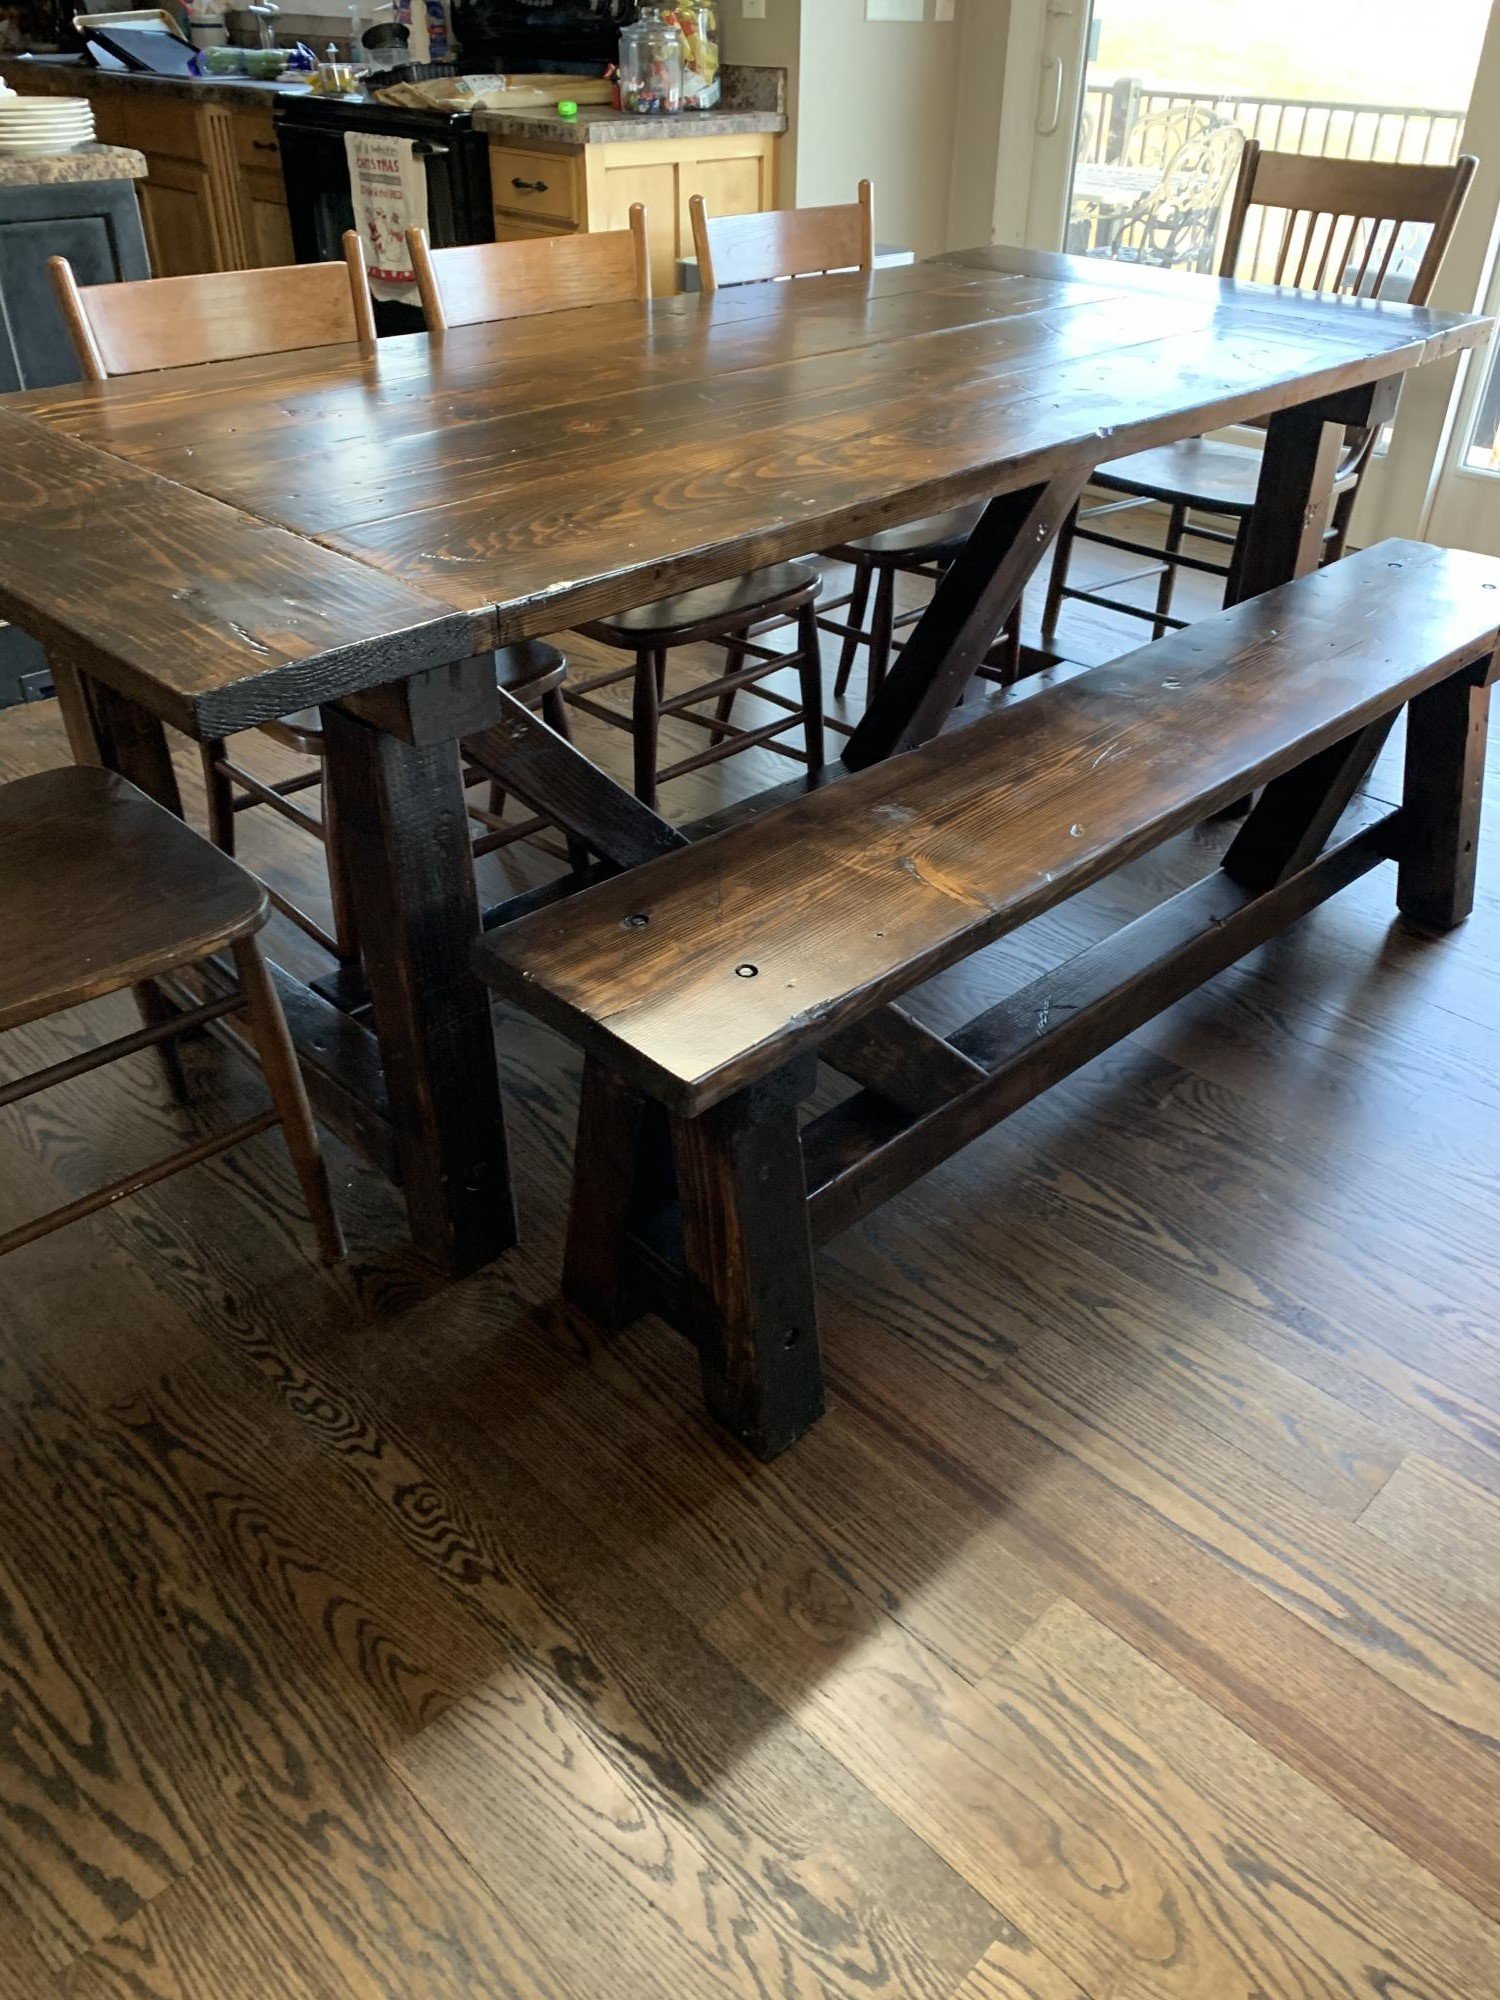
I modified the plan I got from this site to better fit the size we wanted (a bit longer) and to fit the style we wanted (without angled picnic table style legs). Sorry pics are sideways or upside down. They weren't on my end...
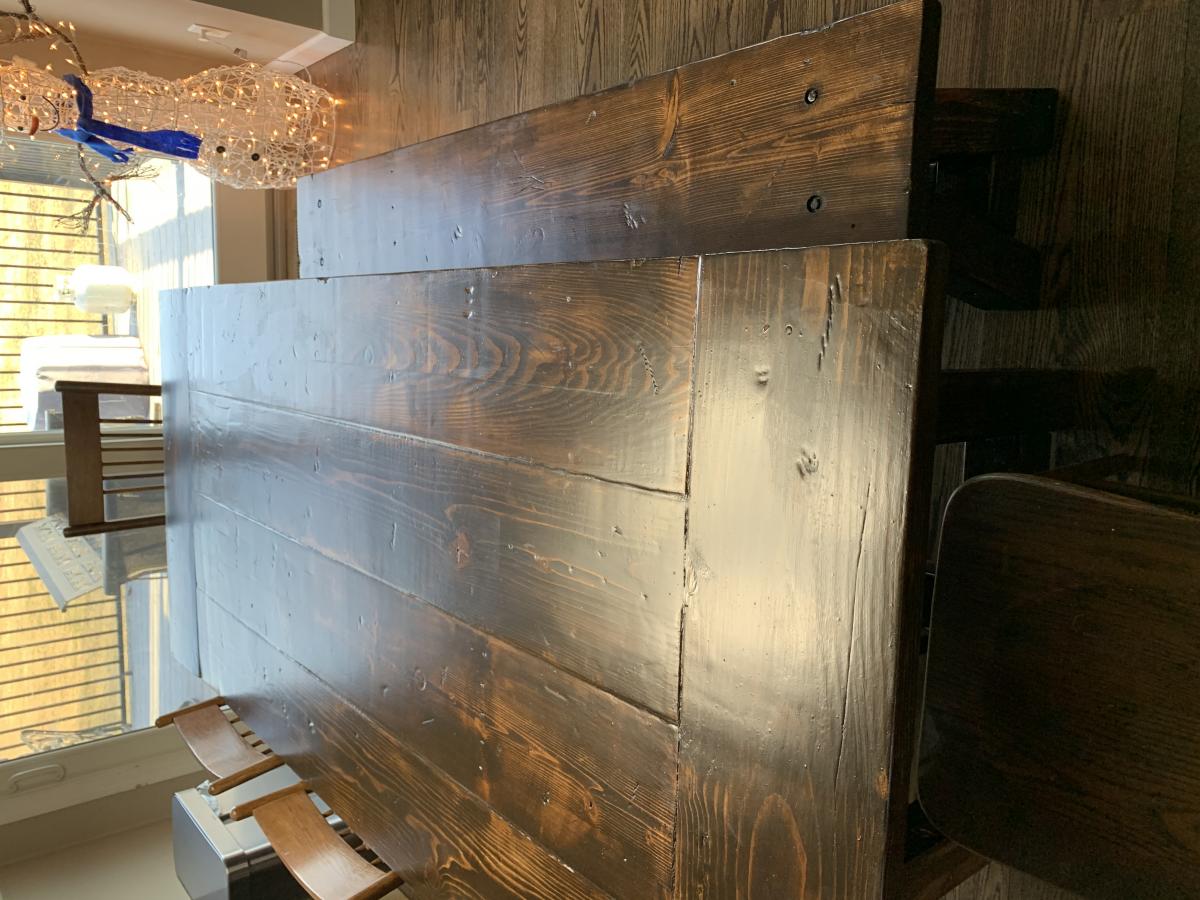
Built from Plan(s)
Comments
Fancy X Picnic Table

My husband built this loosely based off the plans and scrap wood we had in the garage. I stained it with Minwax in Winter Sky. Thanks Ana!
Estimated Time Investment
Afternoon Project (3-6 Hours)
Finish Used
Minwax Winter Sky Stain
Recommended Skill Level
Starter Project
Comments
Thu, 05/30/2013 - 11:27
Great Job!
I love that you had scrap wood laying around and came up with this magnificent piece. Love that color!!!
Julia Nightstand with Shelf
This was my first project for my new house. I think it turned out well. I added a middle shelf. I built two for our bedroom, one for both my wife and I.
Built from Plan(s)
Estimated Time Investment
Afternoon Project (3-6 Hours)
Finish Used
Minwax Golden Oak Wood Finish
Recommended Skill Level
Beginner
Comments
Ana White Admin
Mon, 10/04/2021 - 16:45
Way to go!
That is fantastic, lovely build! Thank you for sharing~