Wood Adirondack Chairs
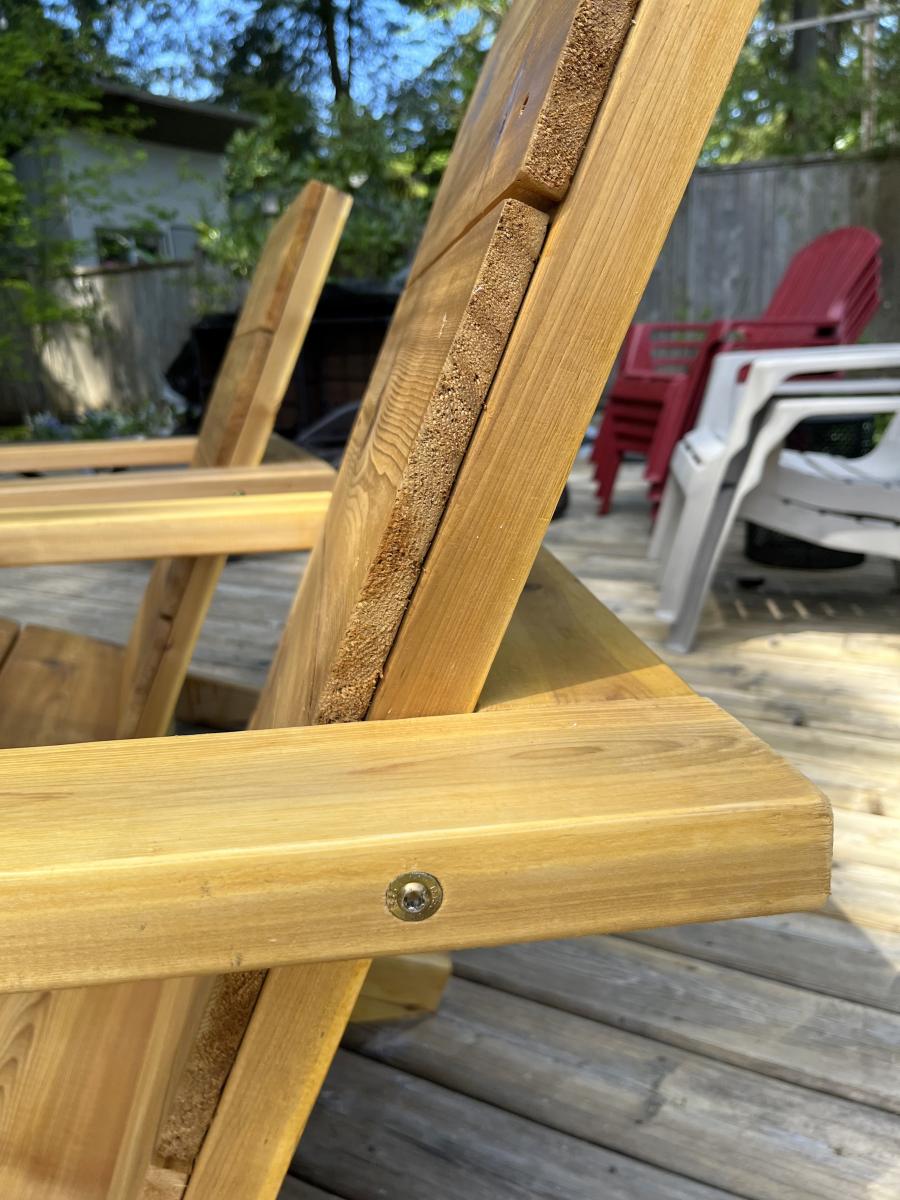
I added a 6 inch lag screw to support the arm in case someone sat on the arm. I also added small metal brackets hidden to help secure the leg strength.
Matt
Built from Plan(s)
I added a 6 inch lag screw to support the arm in case someone sat on the arm. I also added small metal brackets hidden to help secure the leg strength.
Matt
Custom Farmhouse Table built using plan by Ana White!
Wed, 12/19/2012 - 15:10
Trying to get the plans for the farmhouse dining table
Tue, 02/24/2015 - 14:12
definetly going to use this building plan but scale it down by 50% and make a cute, sturdy, lasting coffee table. Thank you for the plans
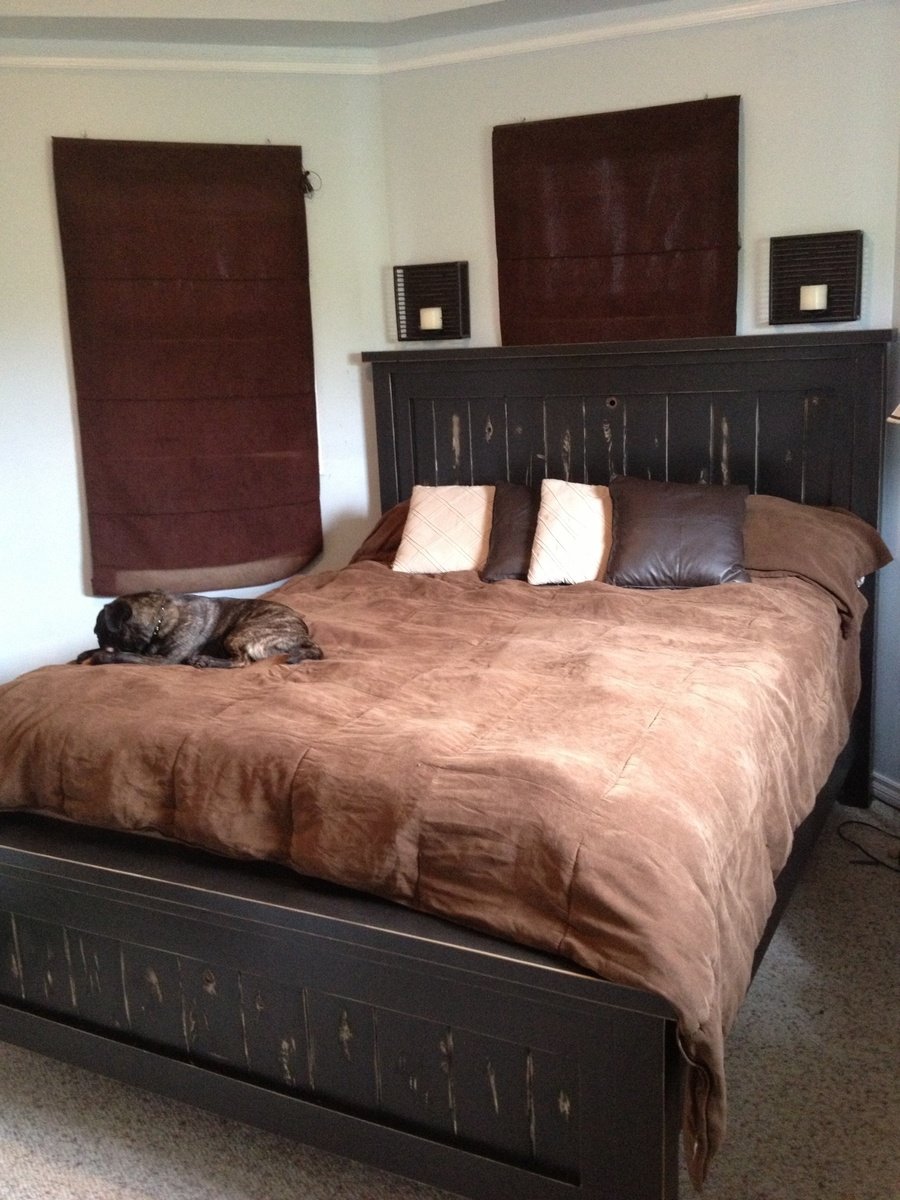
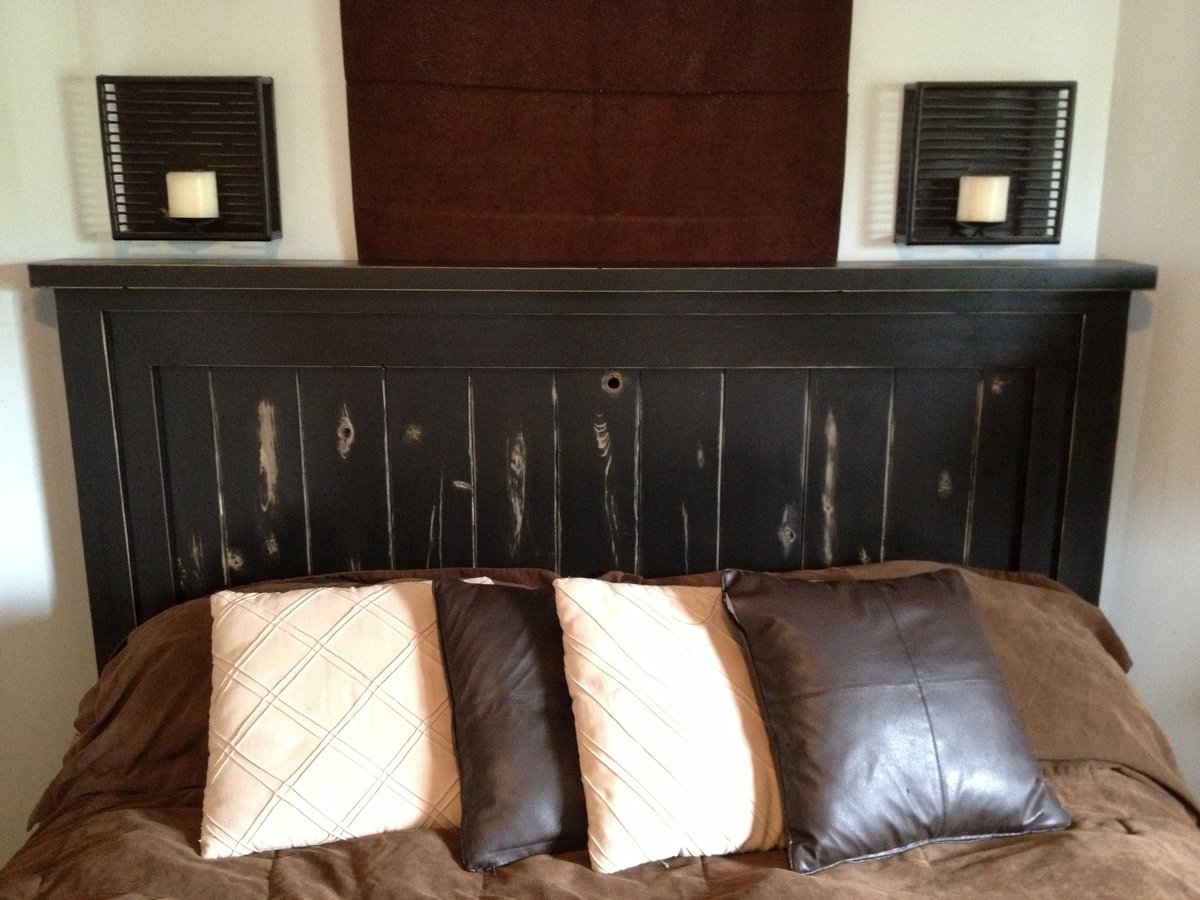
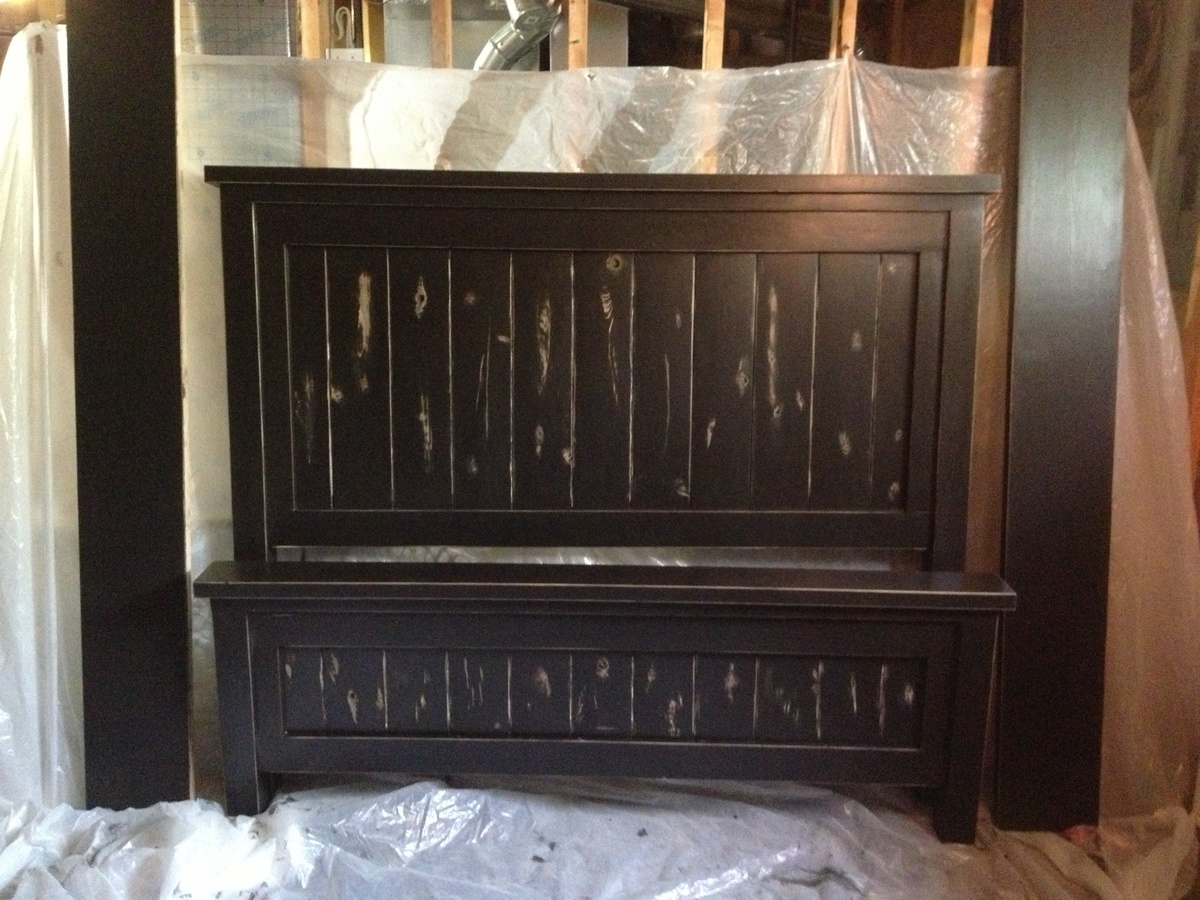
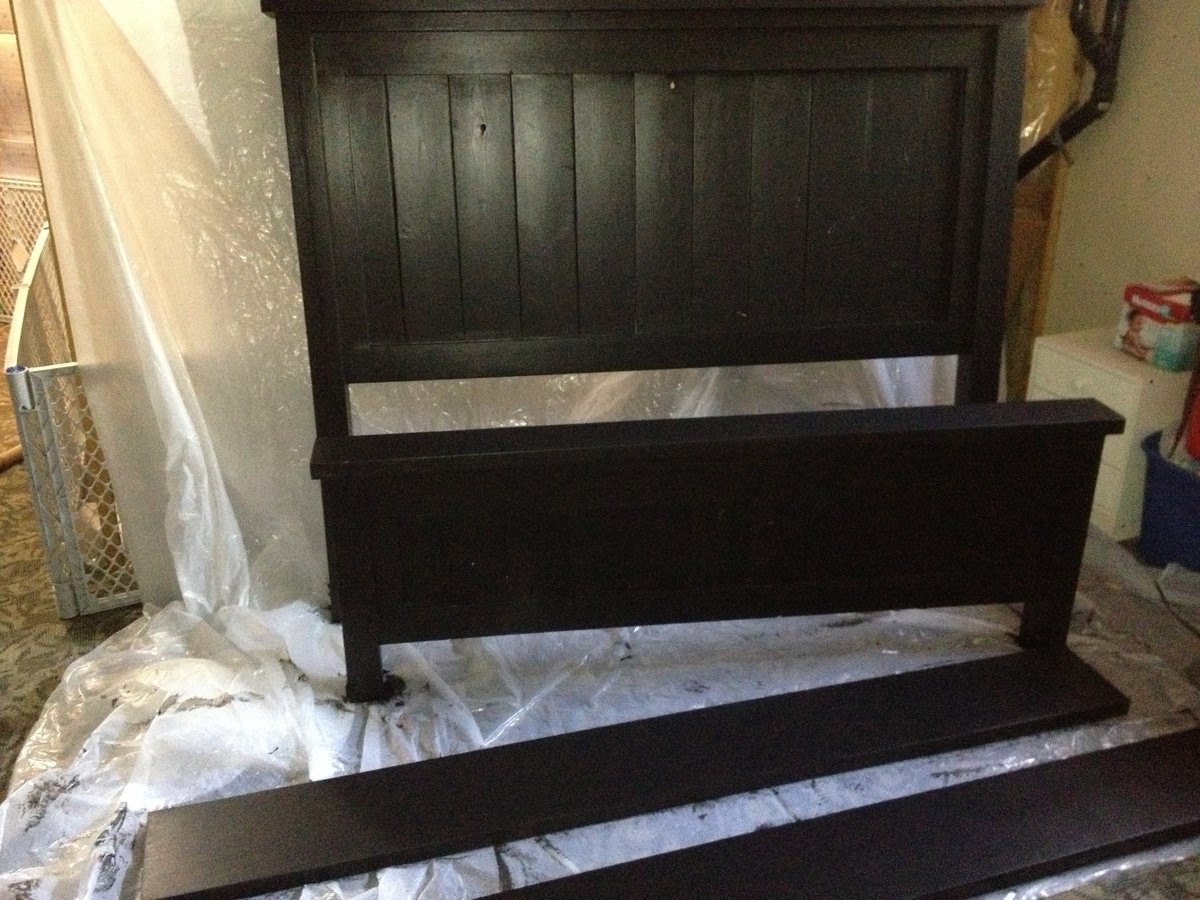
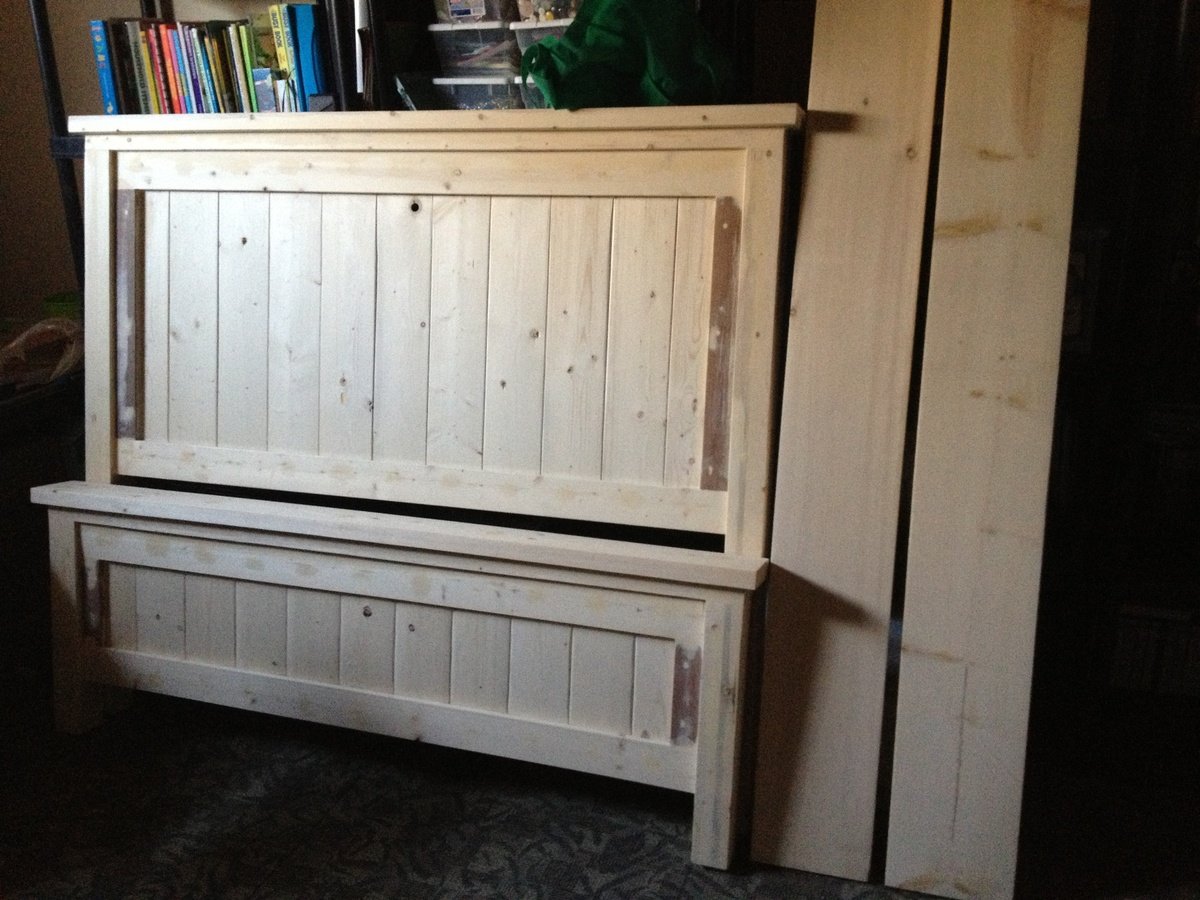
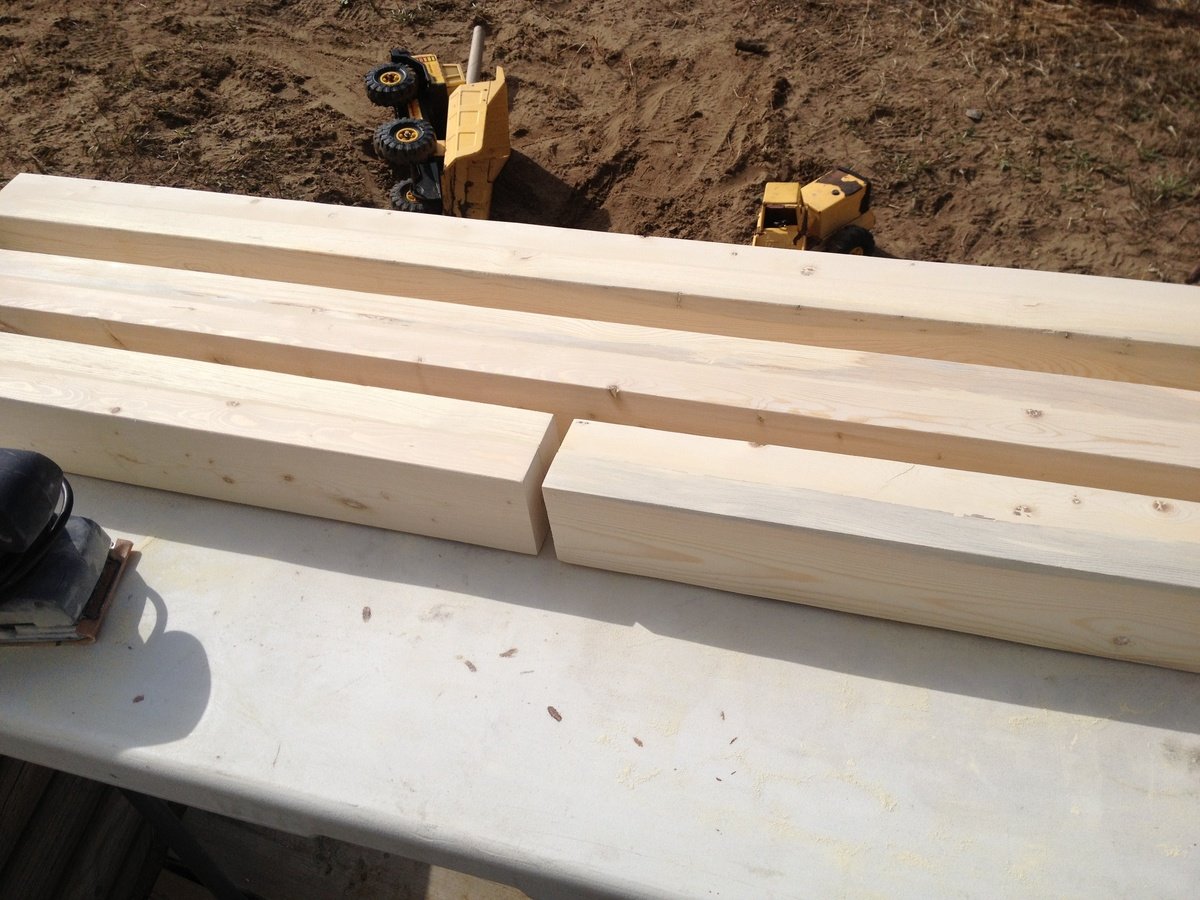
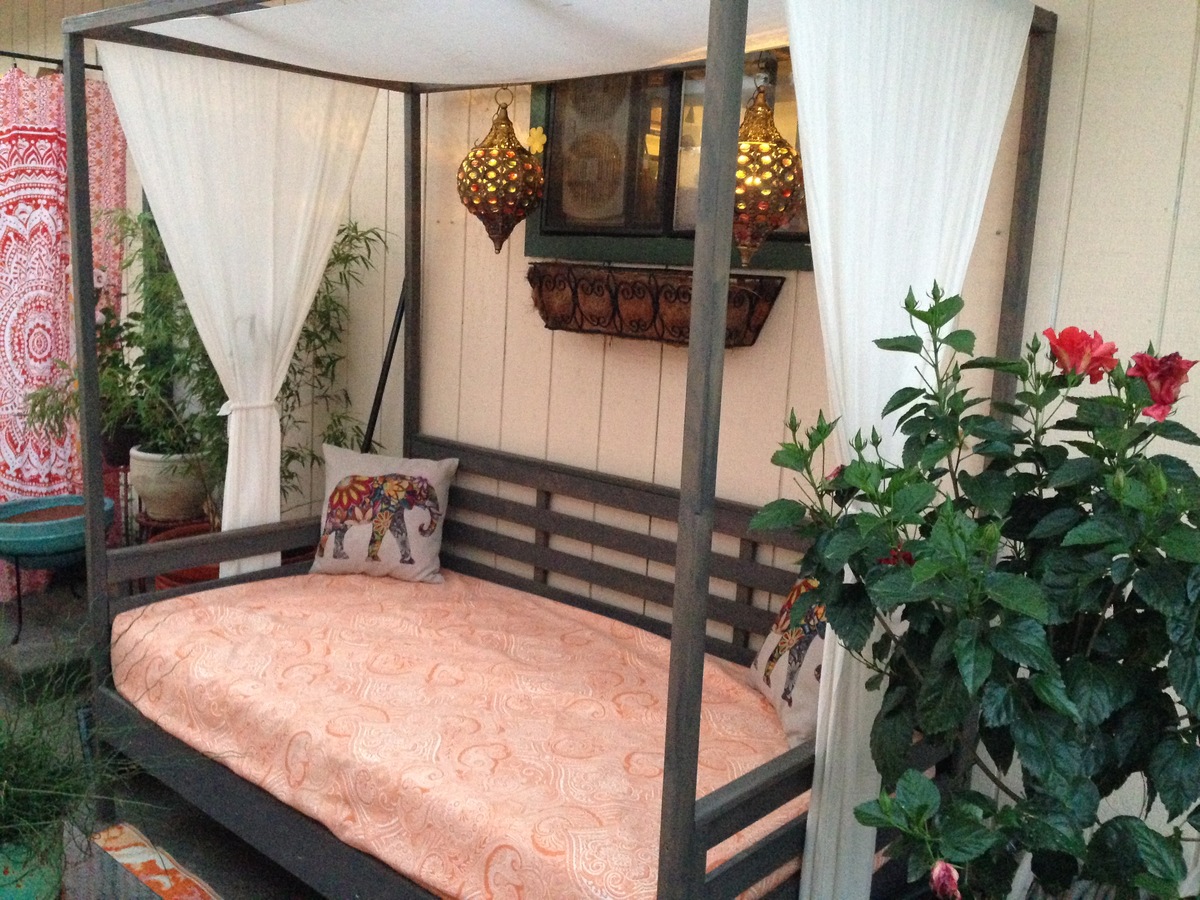
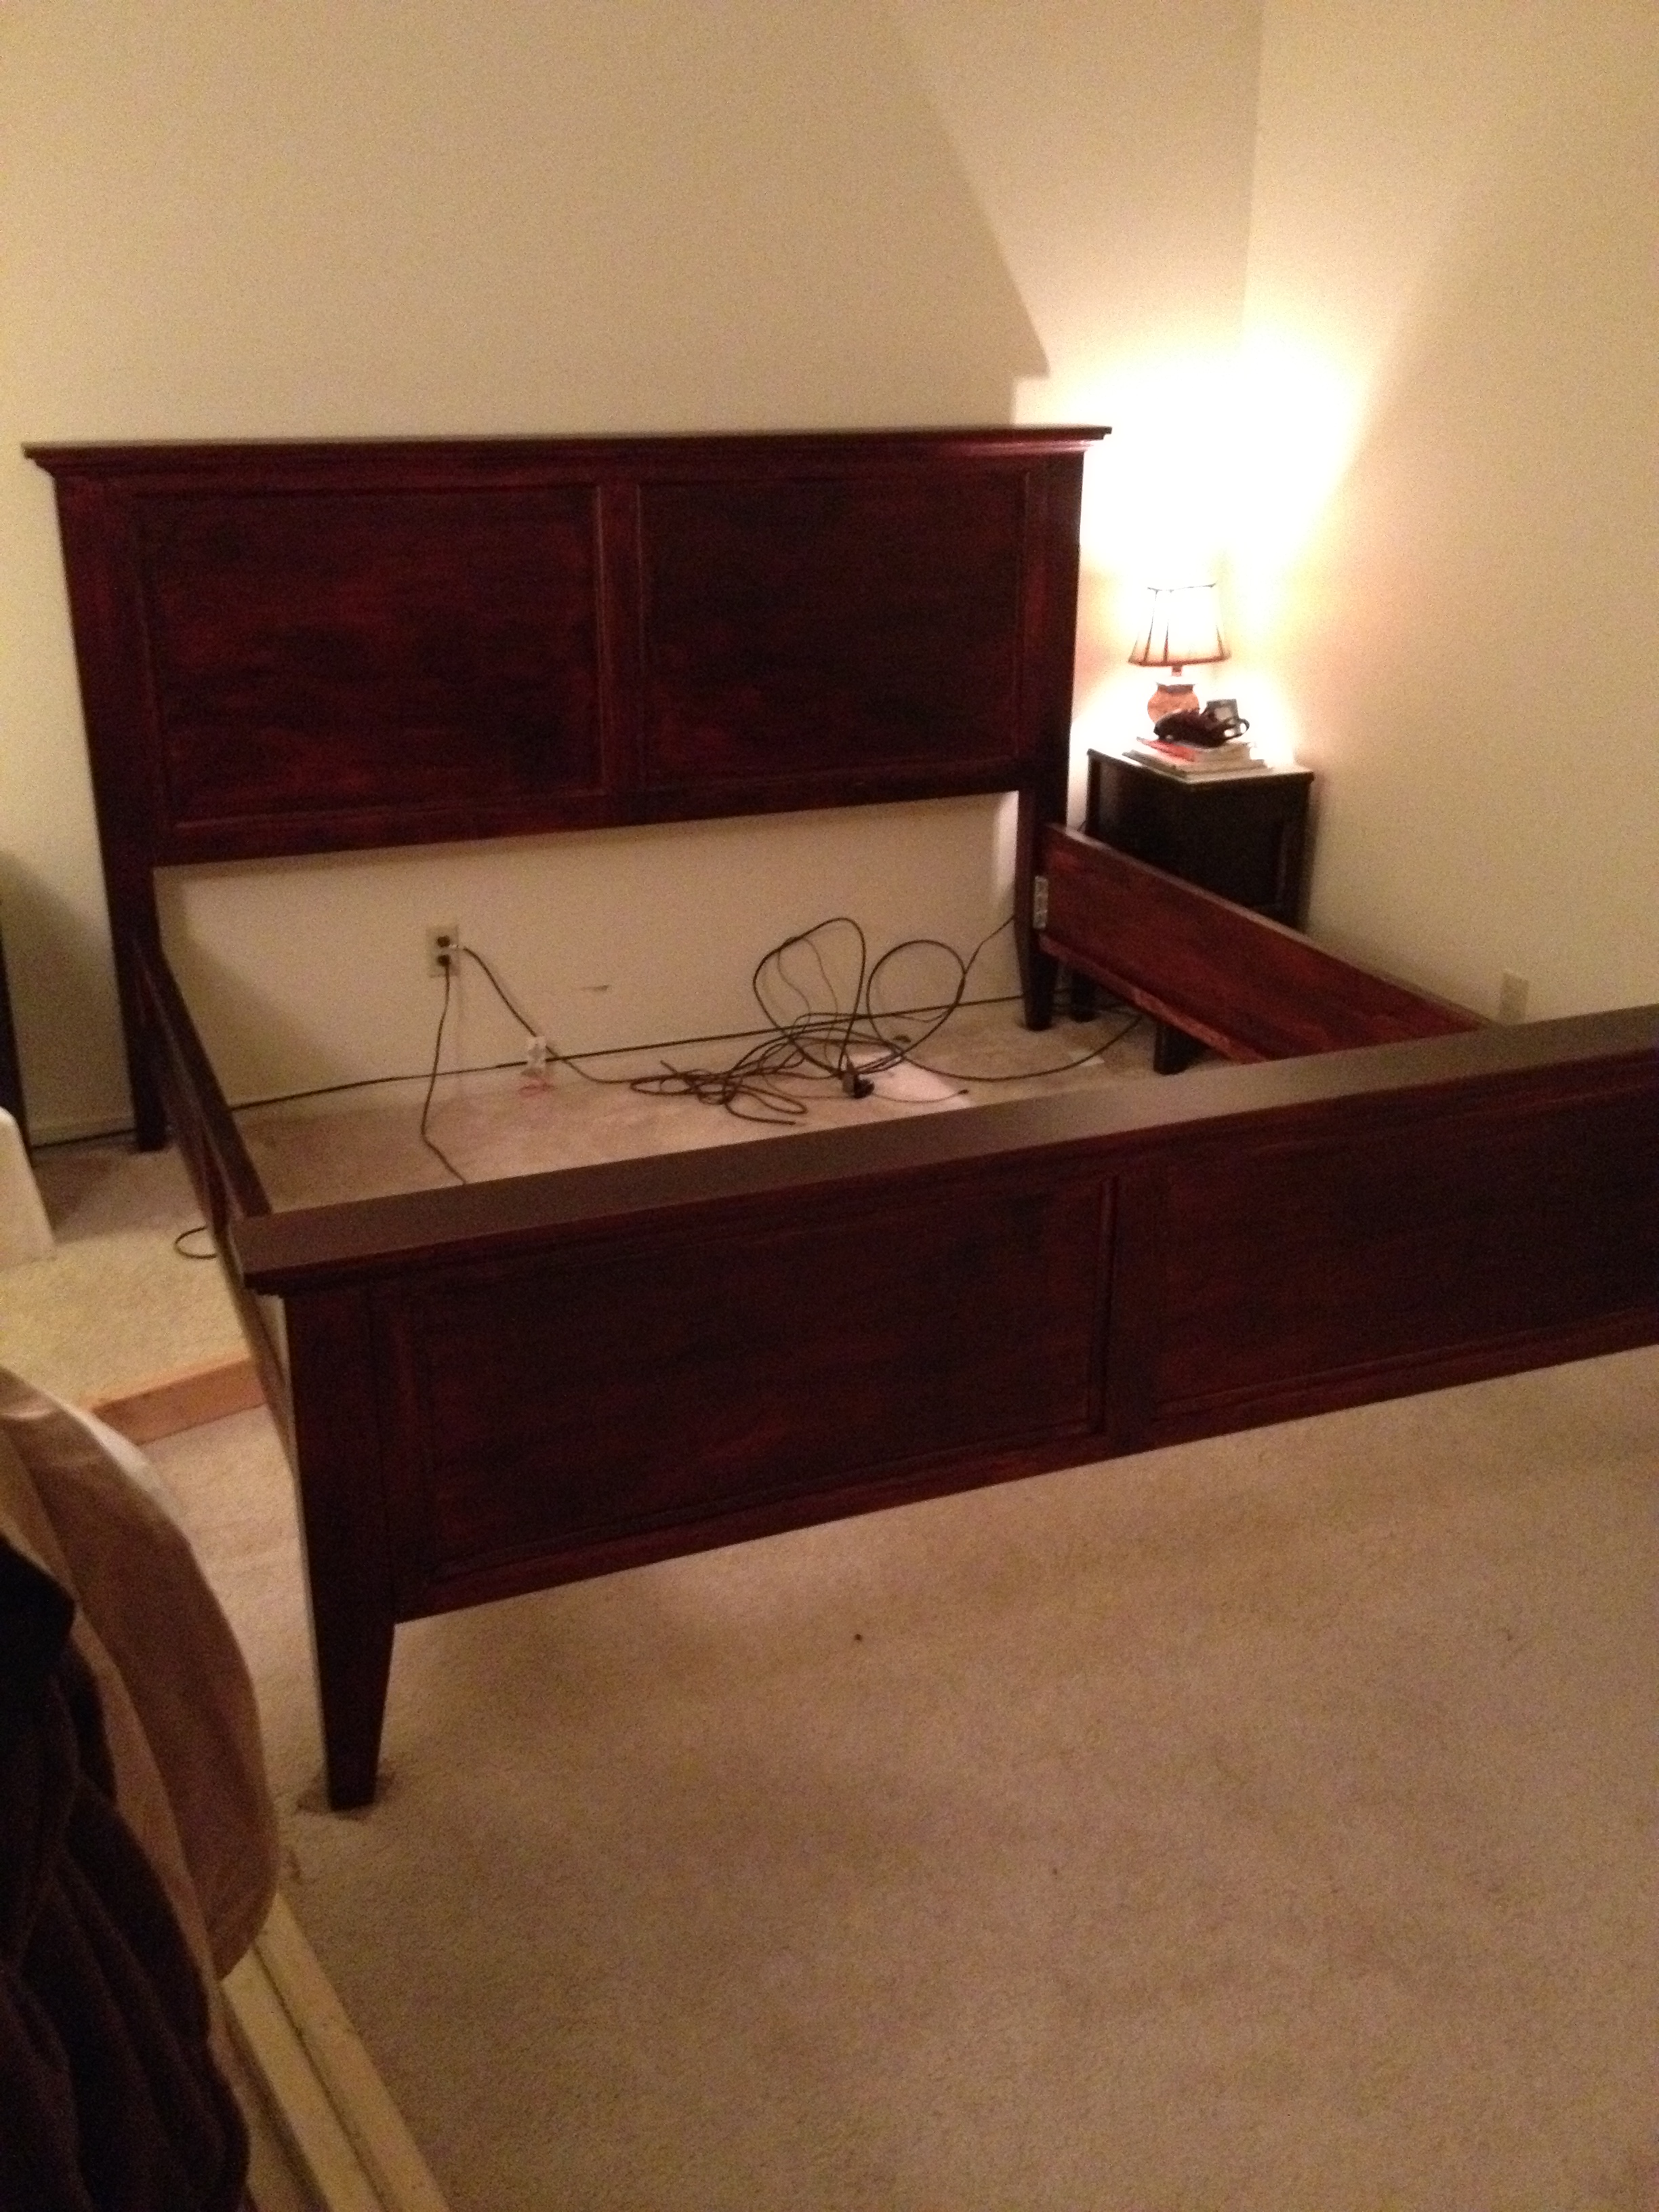
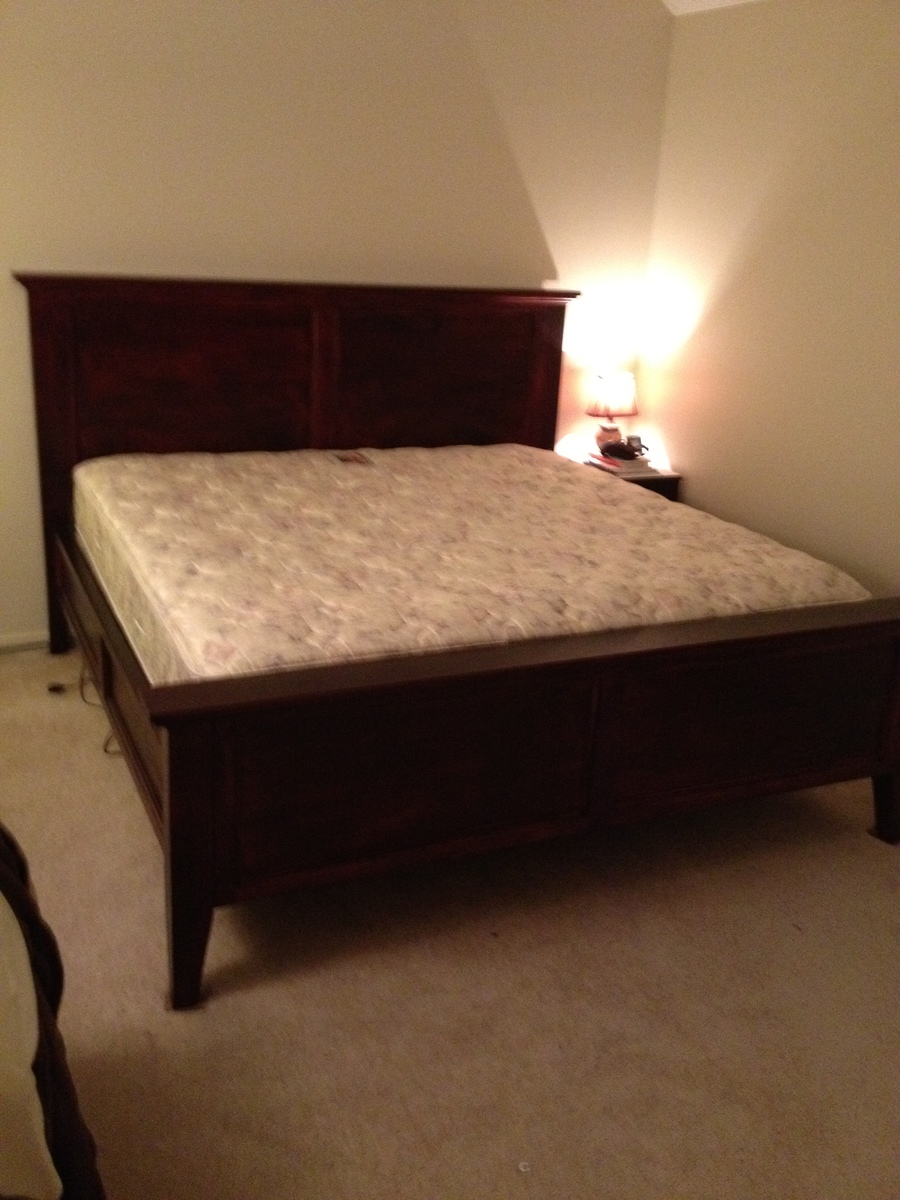
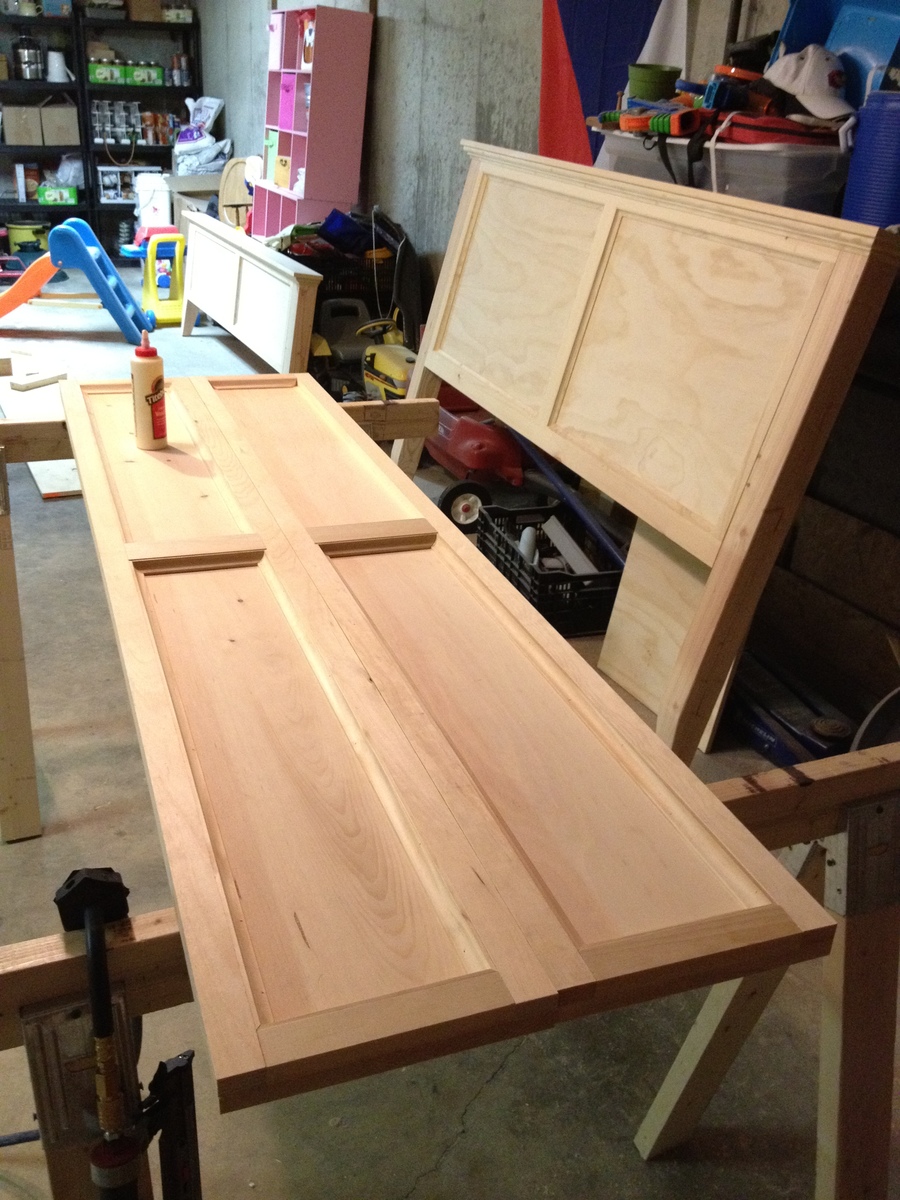
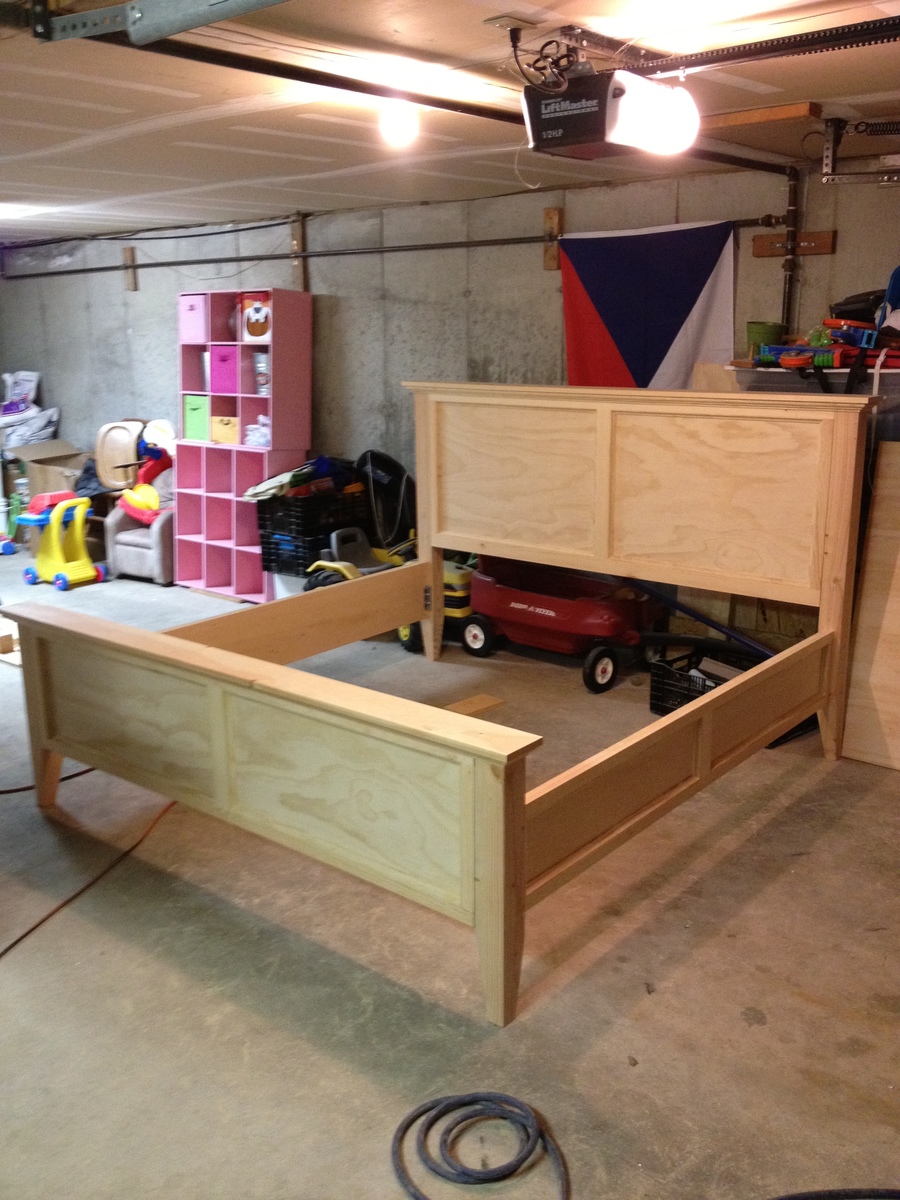
This was my second build and though it took longer than I'd hoped (as everything does with little helpers), I'm pleased with how it turned out. I deleted the arch in the plan and added trim on the edge of the 1x6s on the head and foot board to cover slightly larger gaps due to my poor spacing. Also, I was unable to find untreated 4x4s for the four posts so ended up using two 2x4s for each post (shown in the last photo). Otherwise, I followed the plan which made it fairly simple. If I can do this with a three and one year old and one on the way, anyone can! Thank you Ana for your inspiring and easy to follow plans as well as all of the great information provided on your website for beginners like myself!
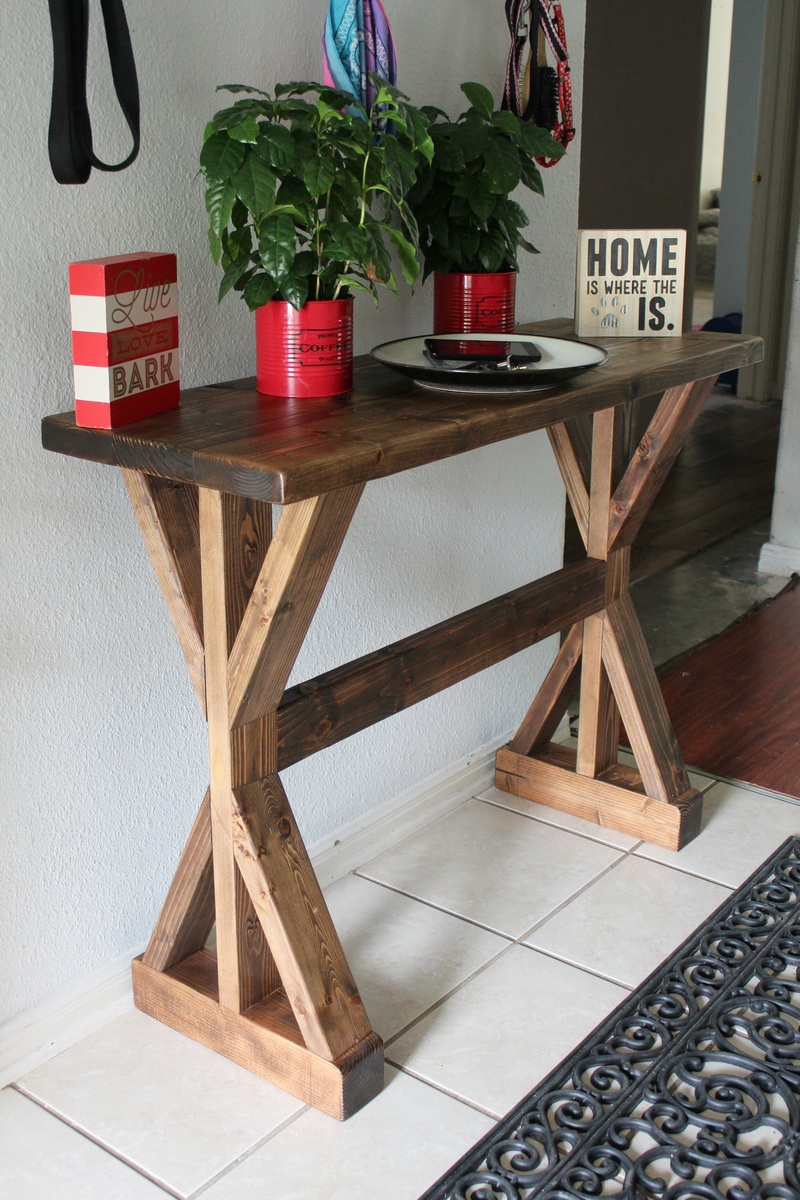
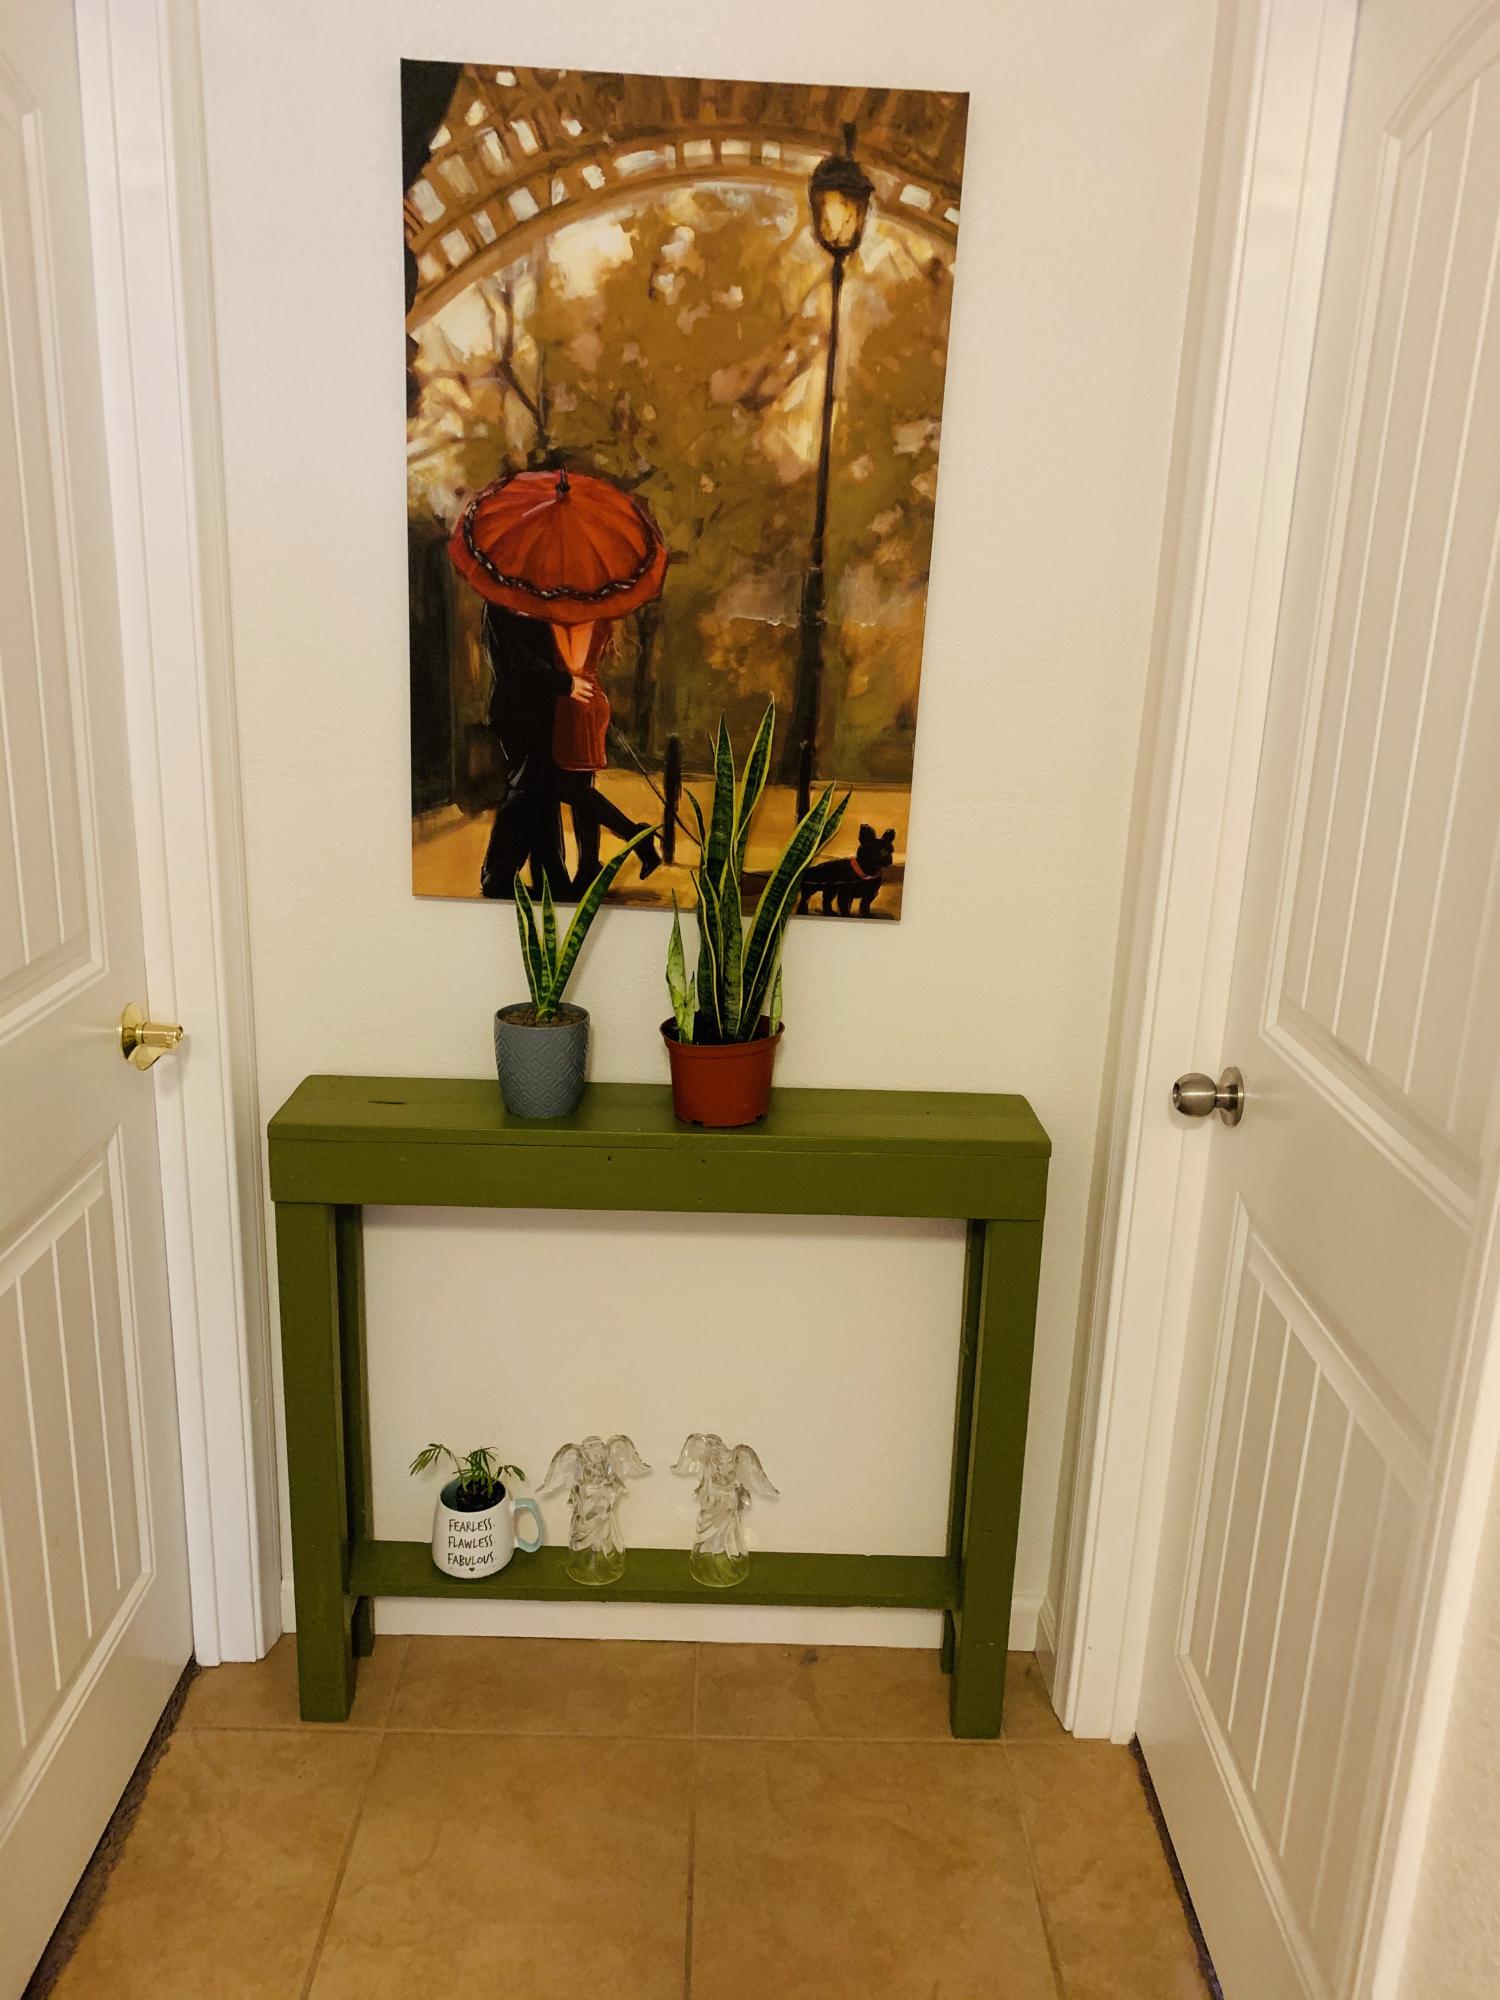
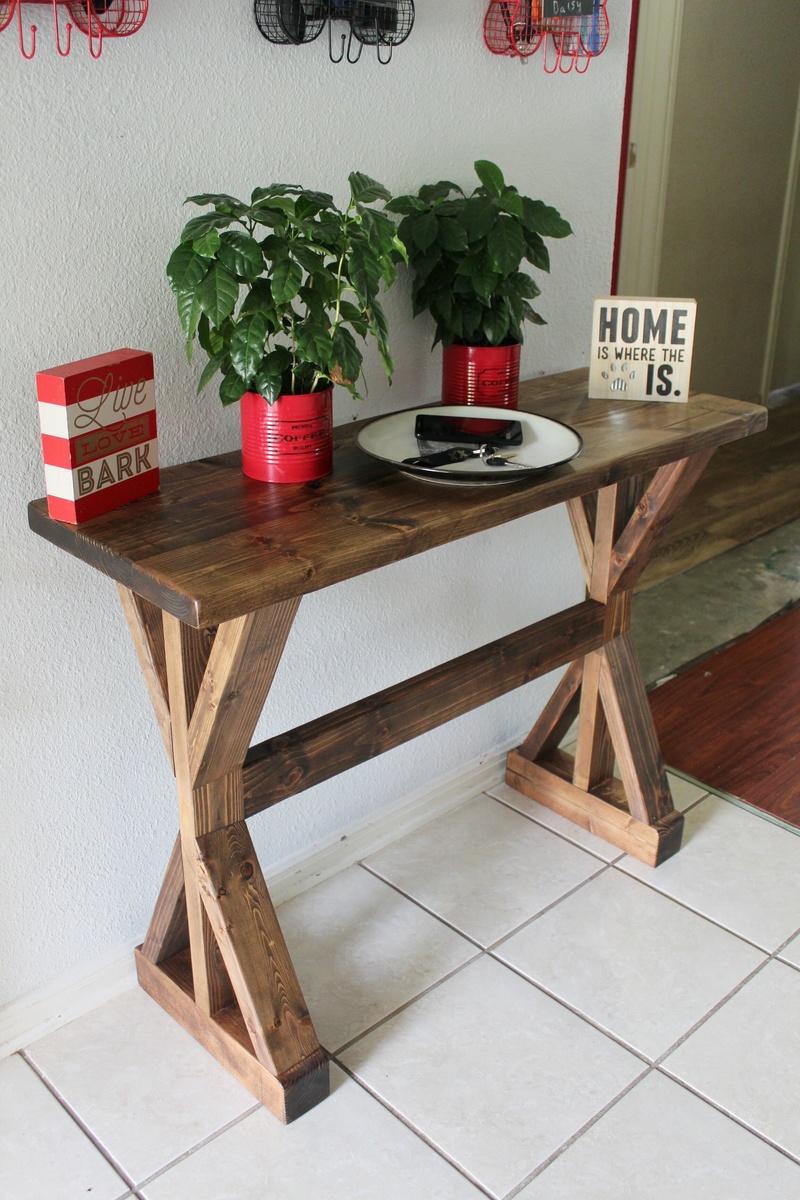
My new handmade Rustic Console, made from 4x4 Douglas fir, 2x4 pine and 2x6 pine wood. This stained using leftover stain from Minwax Expresso and Special Walnut and mixed them together and created a deep golden dark brown color with made the grain texture stand out more. Then I applied Varathane Polyurethane to protect the finish. The entire project was fairly easy besides the angle pieces on the legs since my miter saw only can achieve a 65 degree cut. I ended up creating a jig to cut the angle pieces.
44in long X 15in wide X 33.5 in high
More pictures available on my Facebook:
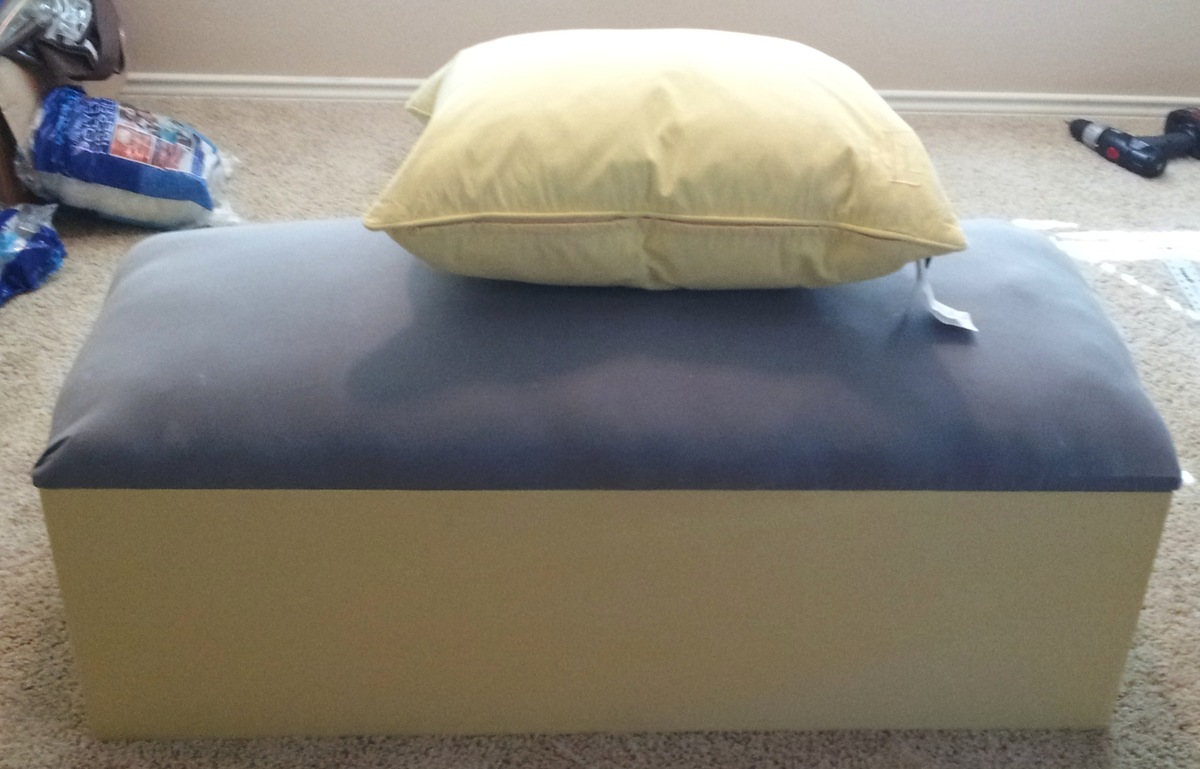
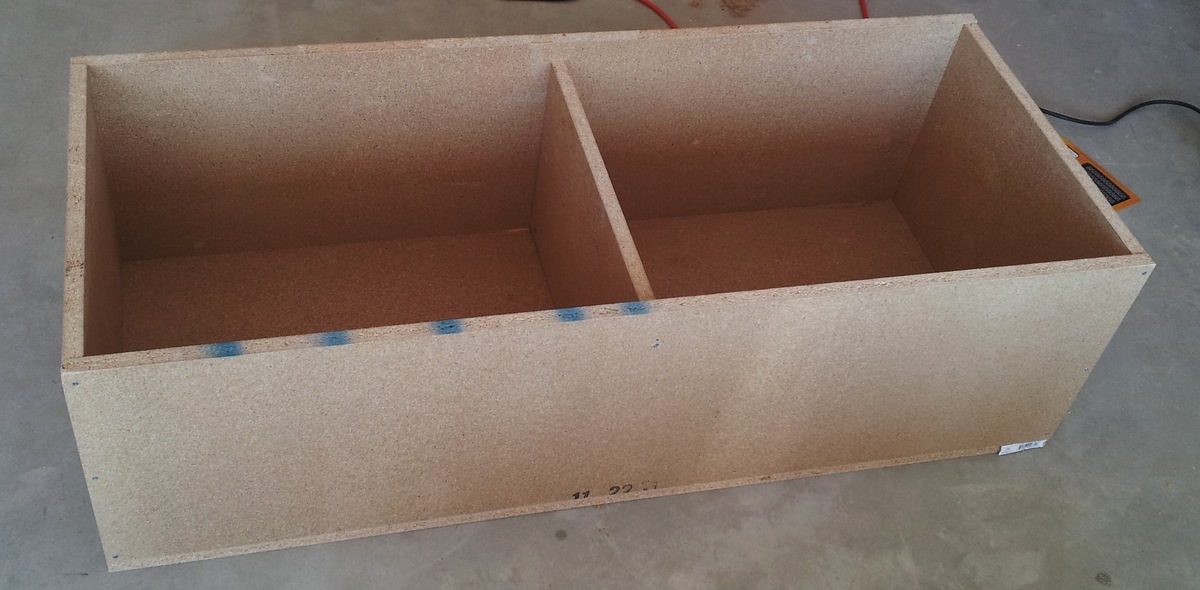
I had some leftover plywood after I made my storage bench and asher/dryer pedestal so I made plans for a storage ottoman with it. After I put it together I cam to Ana's site to upload my plan only to find out she had already made something similar. The only difference in mine is that I added a divider so my wife and I have our own sides and used polyester filling for the top instead of foam (about half the price).
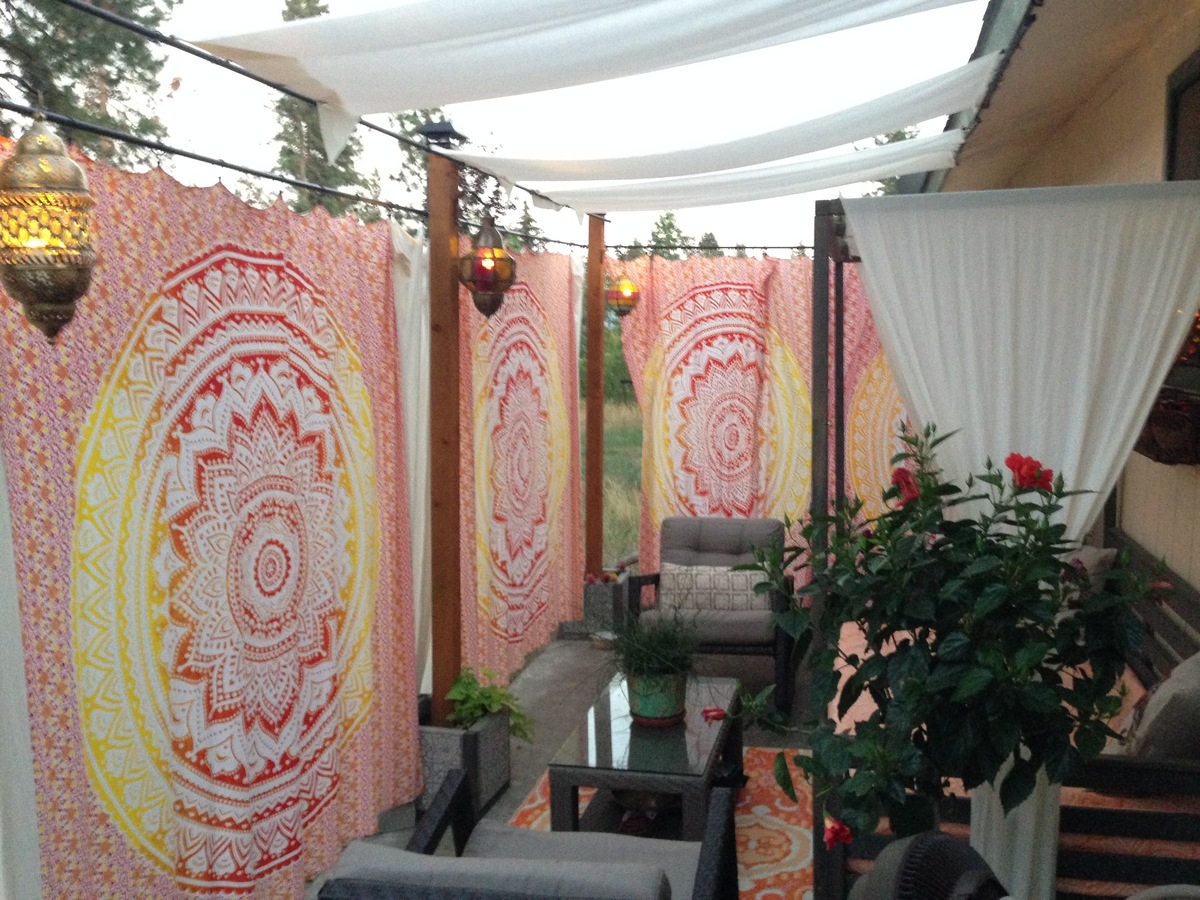
This was an awesome, quick, and easy project. The sanding, staining, and drying, took forever for me but the actual cutting and assembly was super quick. I have this on an uncovered patio and my local store didn't carry cedar in the sizes I needed so I went with the cheapest wood I could find and used a high quality oil based outdoor stain. I am hopeful it will hold up to our pacific NW winter because it won't be coming in. Considering I had never made anything before and had never used a miter saw, sander or quick square, I am happy with the time it took to finish this.

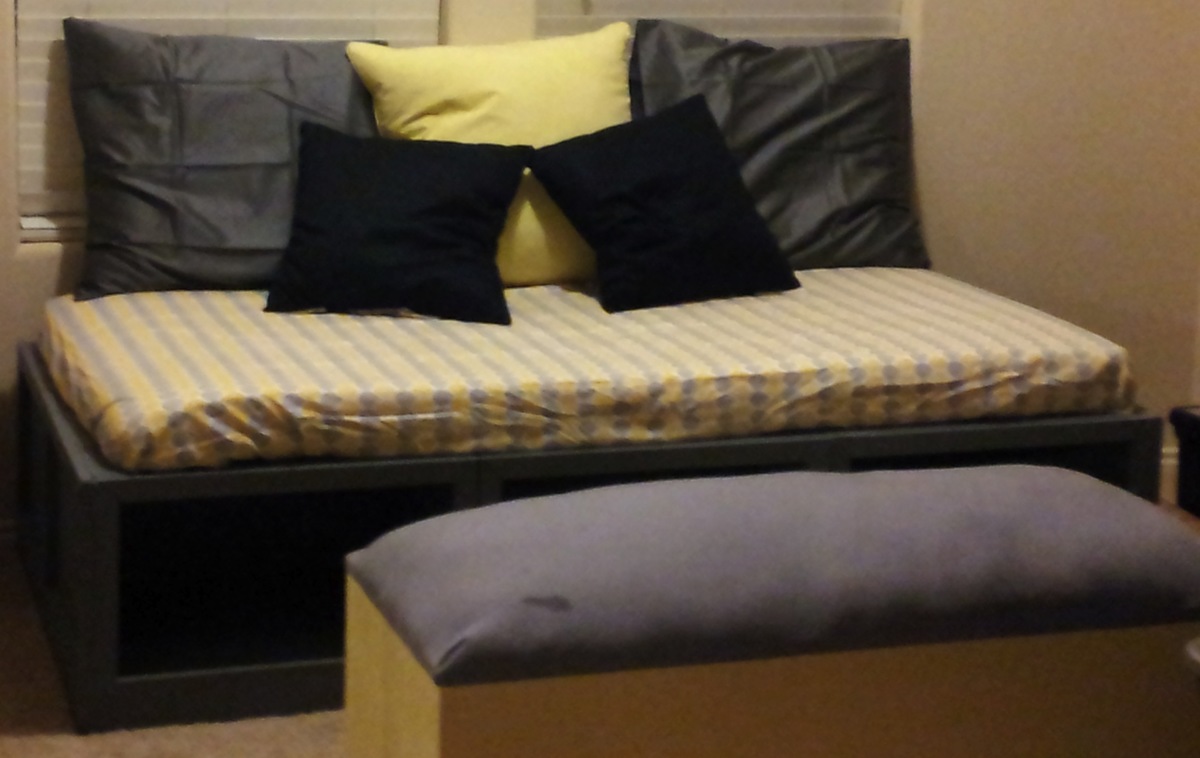
Took this same plan, but for the inlay, used a bunch of different scrap woods and make the brick pattern. Then stained the frame and legs with a weathering grey stain to go with the striation gray board that I found in a lumber mill. This was a great project to learn some skills from my uncle and work on together with him, and best of all, I get this beauty for my home, and I have not had a true bed frame (only the metal ones that come with a mattress) in almost 15 years. Thank you for the wonderful plan. Will be able to enjoy this for years to come.
I pulled most of my ideas for this from the Farmhouse Bed and some of the modified brag posts. It's all pine - I didn't want to spend the extra for something harder, but it's triple finished, so that should help with durability.


Tue, 08/07/2012 - 06:46
What a beautiful build! Please modify your post so that there is a main picture for all to see on the home page.
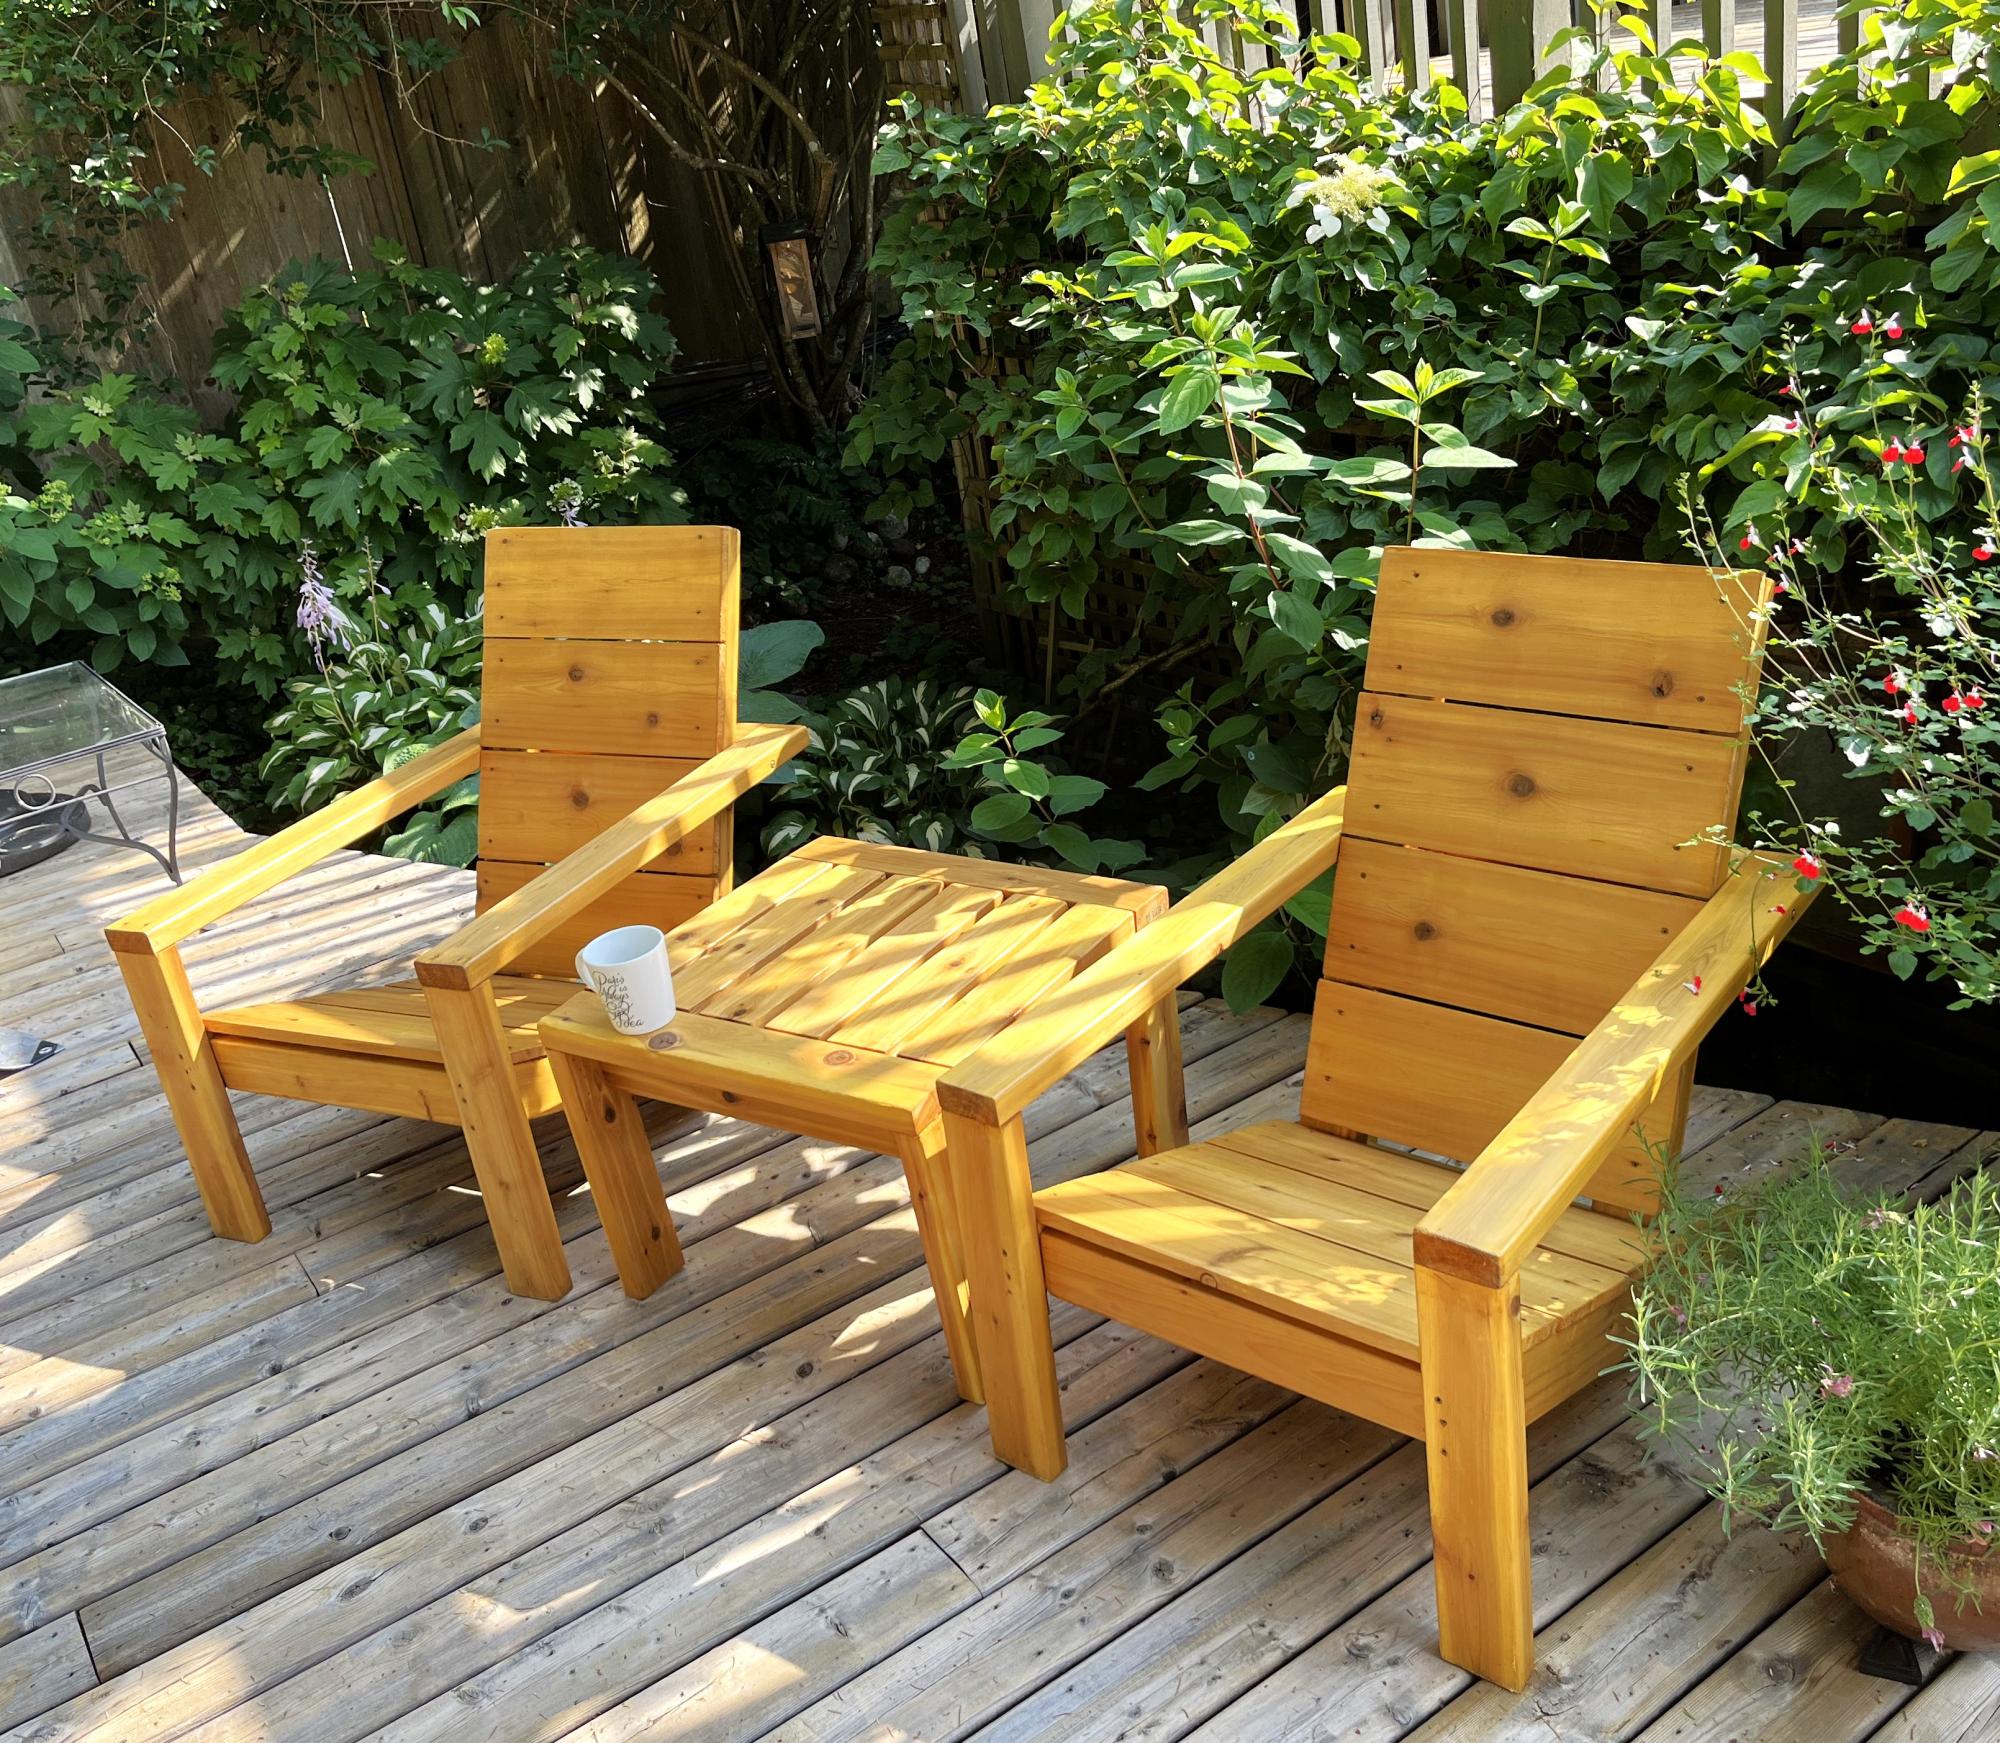
The structural elements of the "classic chair" are excellent and so adaptable. I simply lengthened the leg to produce a conventional 19” seat height and extended the back frame dimensions to provide a higher seat back. I also substituted 2"x4" framed seat bottoms featuring slat inserts for the plywood seat bottoms. Most of the frame materials are Doug-fir 2"x4"s ripped down to 1.5"x1.5"s. The slats on the seat-bottom and chair-back are cedar fence boards ripped down to 2.5" wide.

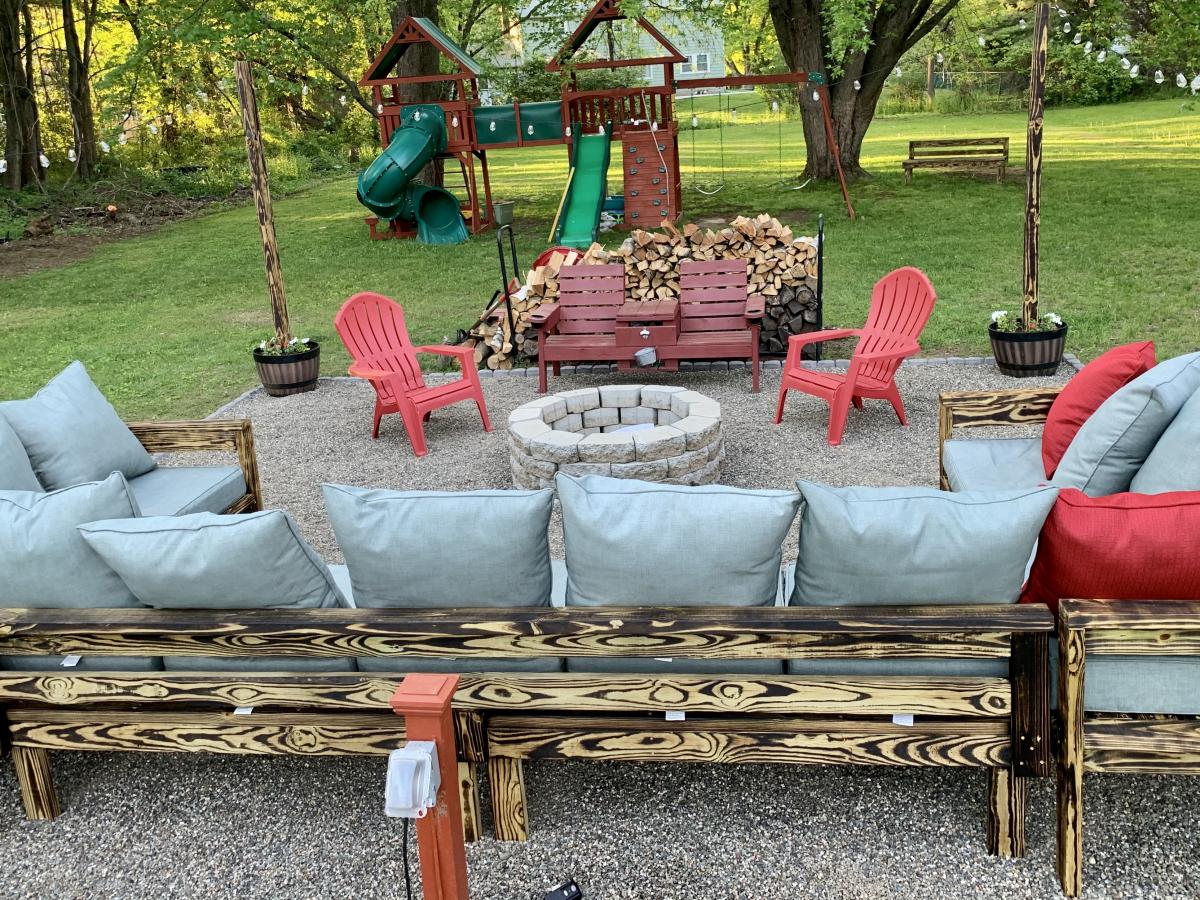
My husband and I made 2 outdoor couches and one armless. Tweaked the plans a little. The armless one is 10 ft and we made it from pressure treated. The plans were easy to follow and change to suit our needs!
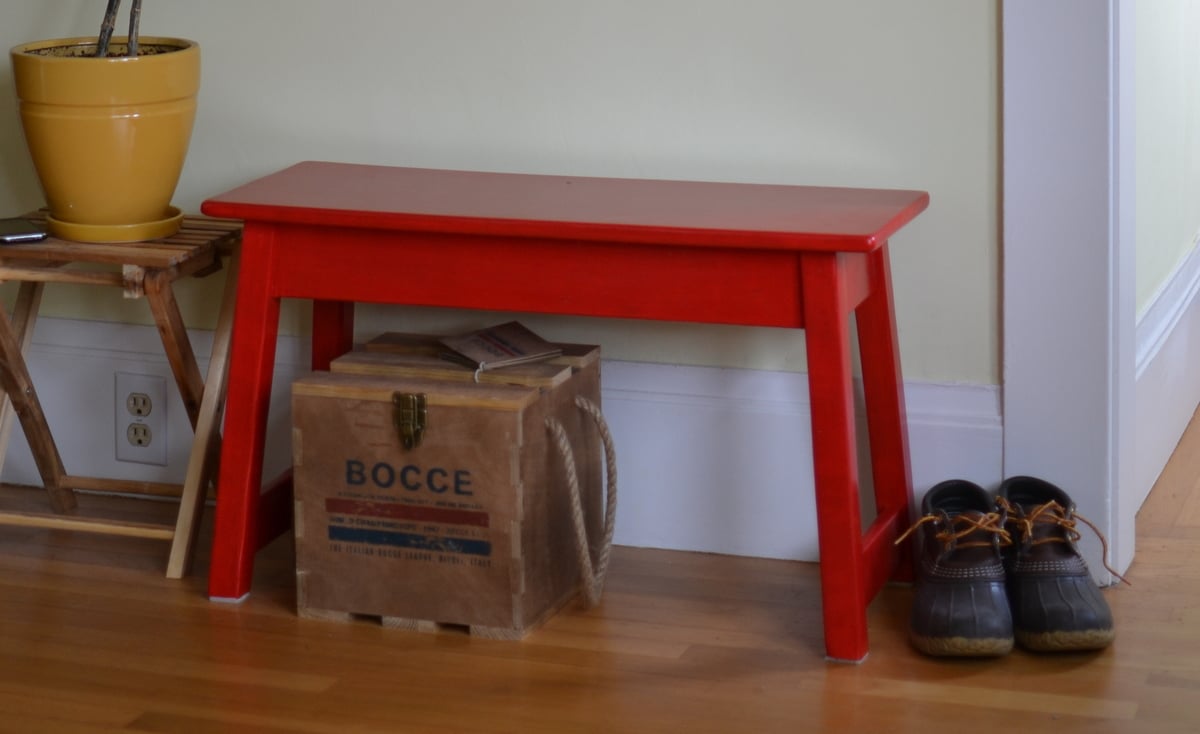
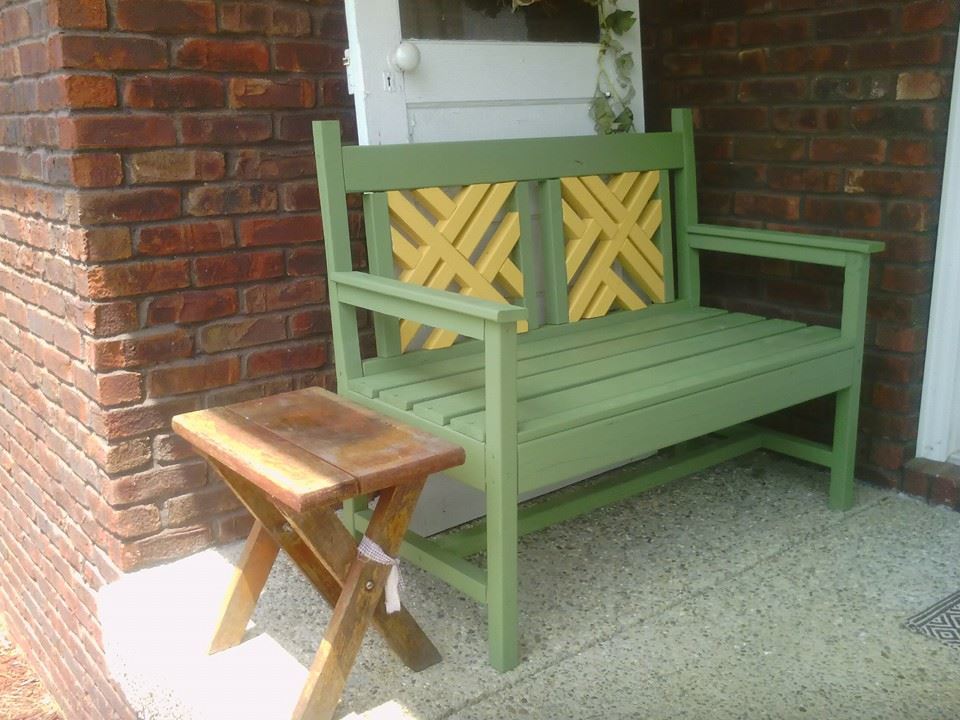
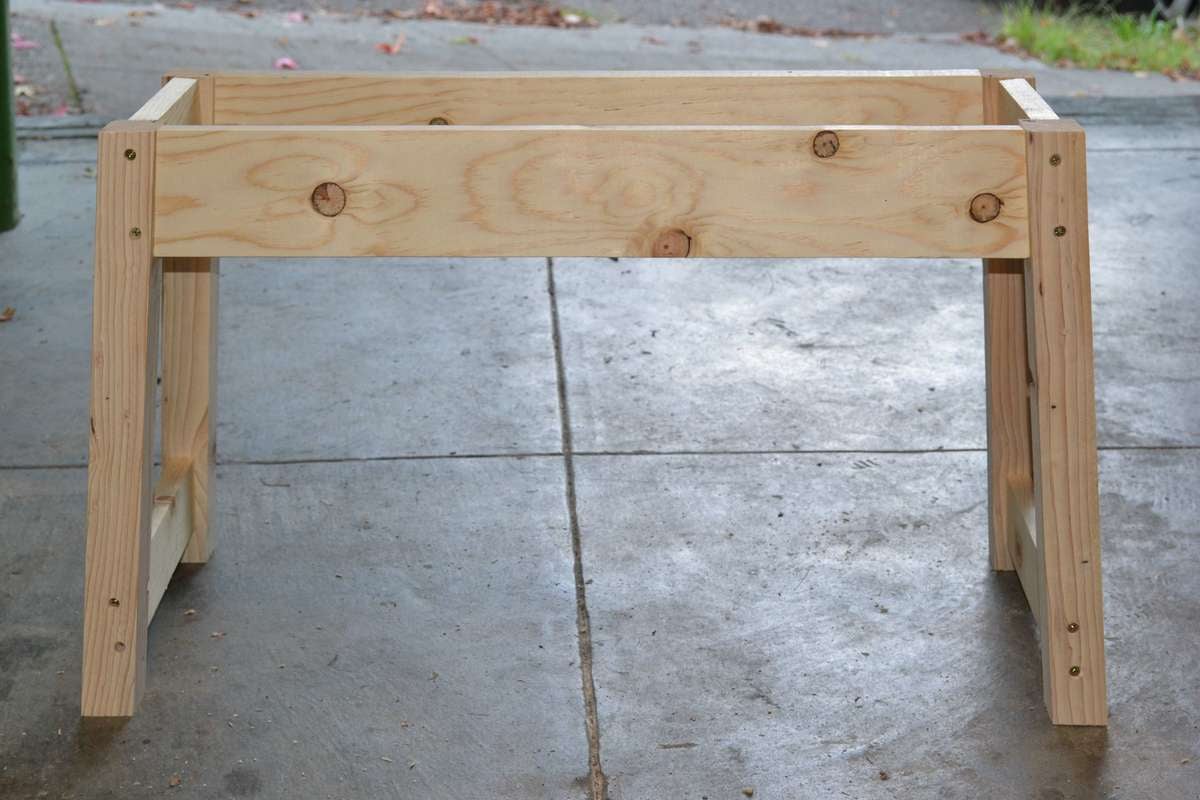
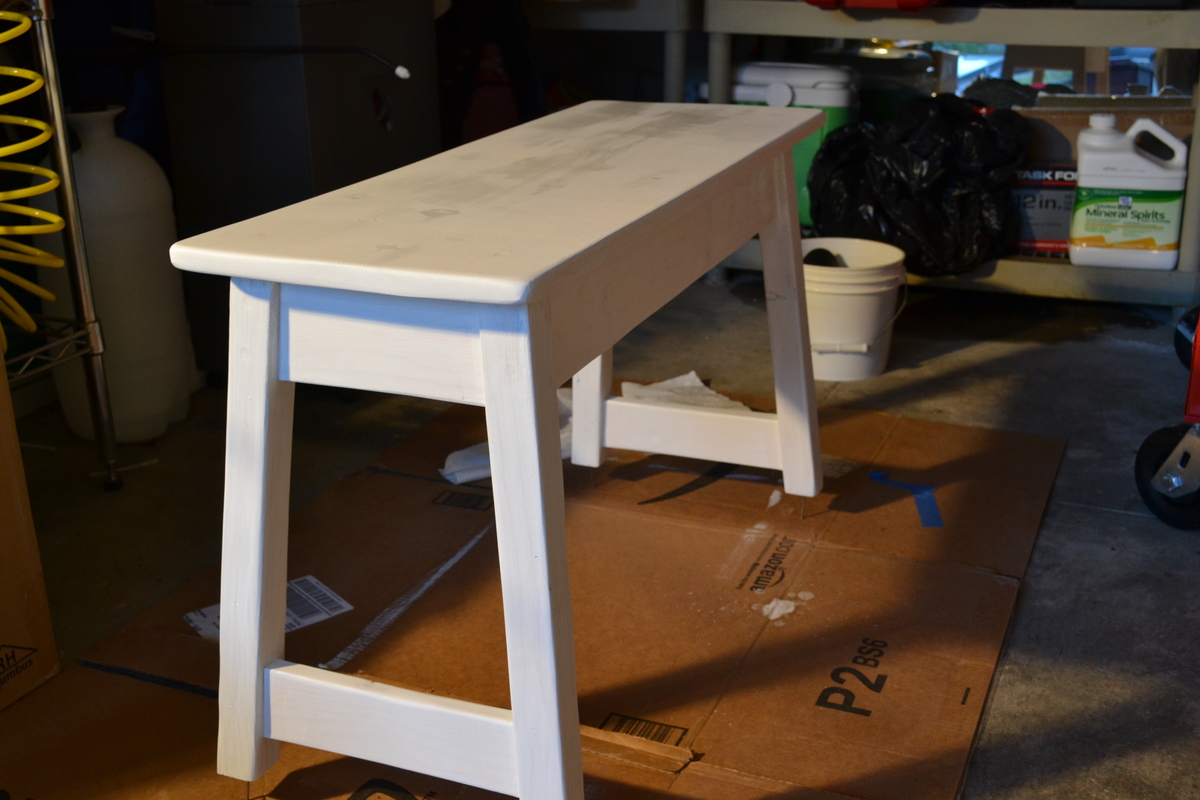
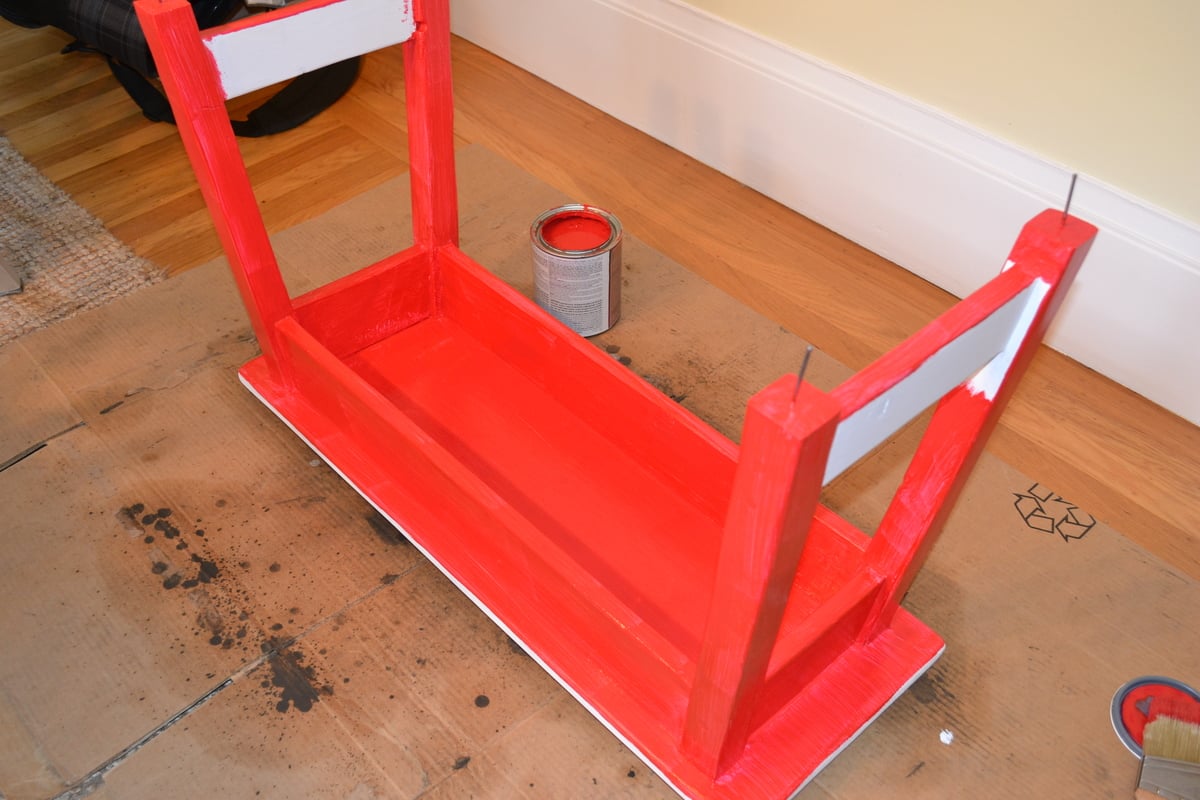
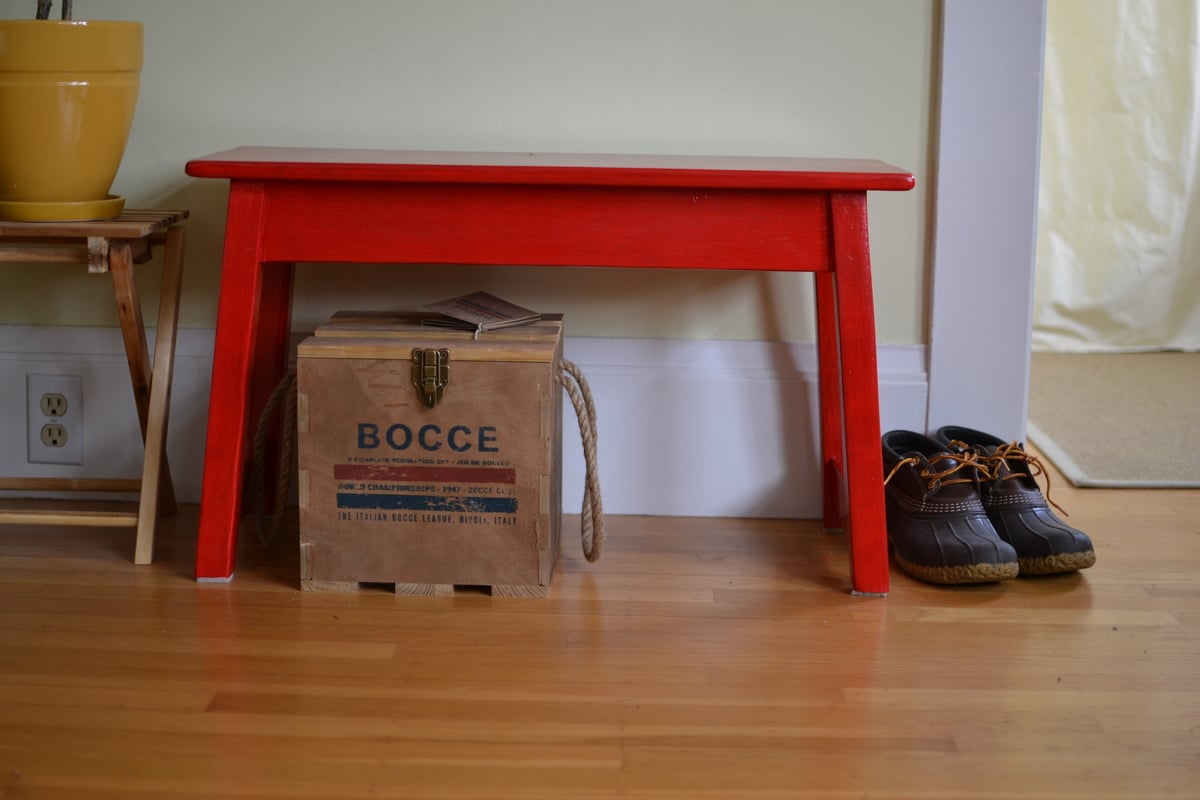
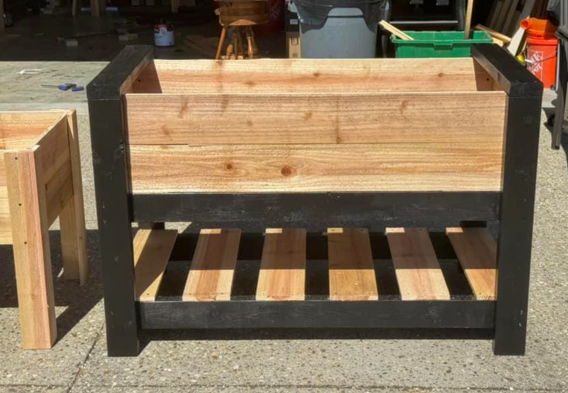
I loved this project as soon as I saw it on Ana's site. I made a few changes to the plans in order to suit my needs and also as an excuse to use my new tools. I left out the cross supports in order to accomodate storage underneath the stool and it still retains exceptional strength without the supports. I also used my new router to round the edges on the top peice to give it a more finished feel. I'm really happy with the results and have made multiple for friends and family, both painted and stained.

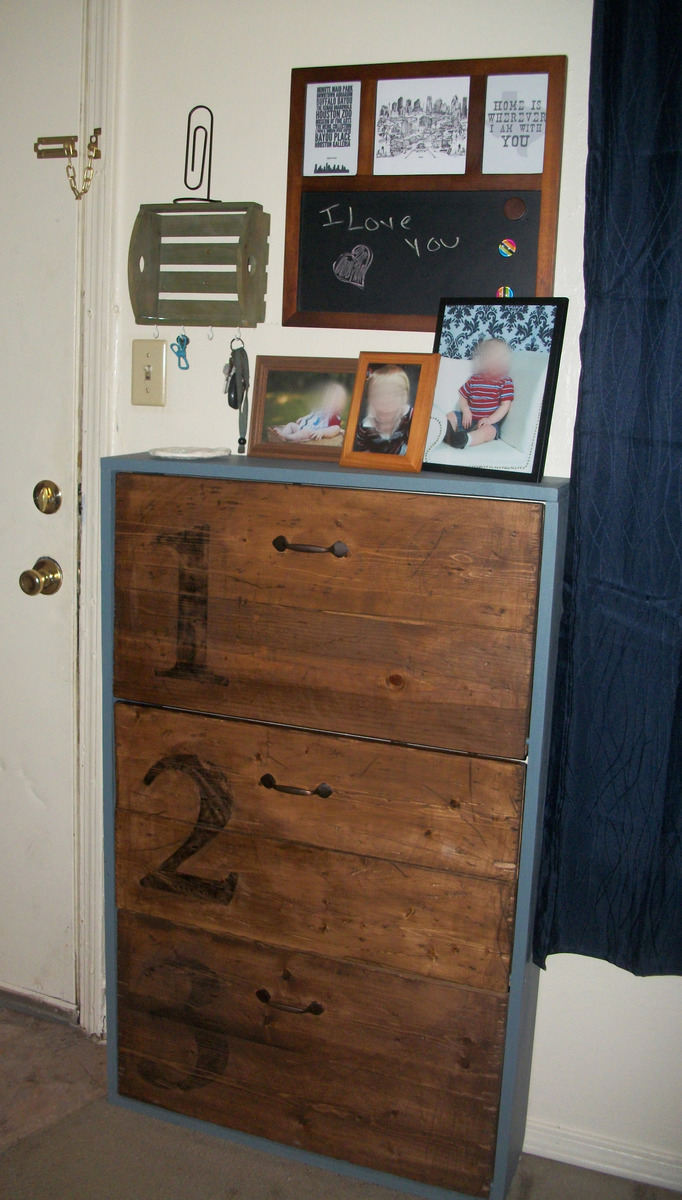
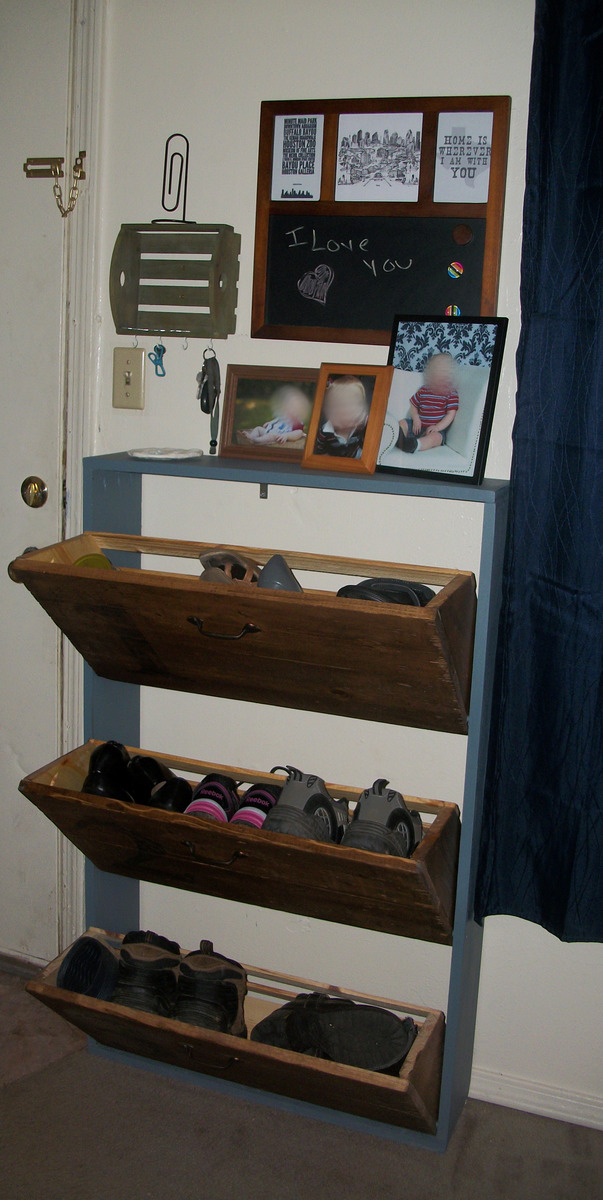
This started off as a project for spring break and ended up taking over two months to finish up (and it's still not completely finished... the third drawer needs to be poly'ed still)! I seriously overestimated how hard it would be to make everything fit right and dh had to help out some making things fit together, the dowel pins and the notches to make the drawers tip out and he made the stencil for the numbers but I pretty much did the rest myself. With a handsaw and a drill. That's it. We didn't have any other power tools at the time. If we had the proper power tools, a babysitter for the weekend and nothing else to do but work on it, I think it could be done in a weekend.
I needed something to fill the awkward narrow space by the door and we needed shoe storage so I modified Ana's plan to make it narrower and added an extra drawer. I was orginally going to put feet on it like the plans call for but we decided we liked it better without. We used a thrift store belt for the drawer catches that keep it from tipping all the way out. It is braced to the studs in the wall with corner braces. Everyone comments on it when they see it and we've had several people ask if we could make them one!
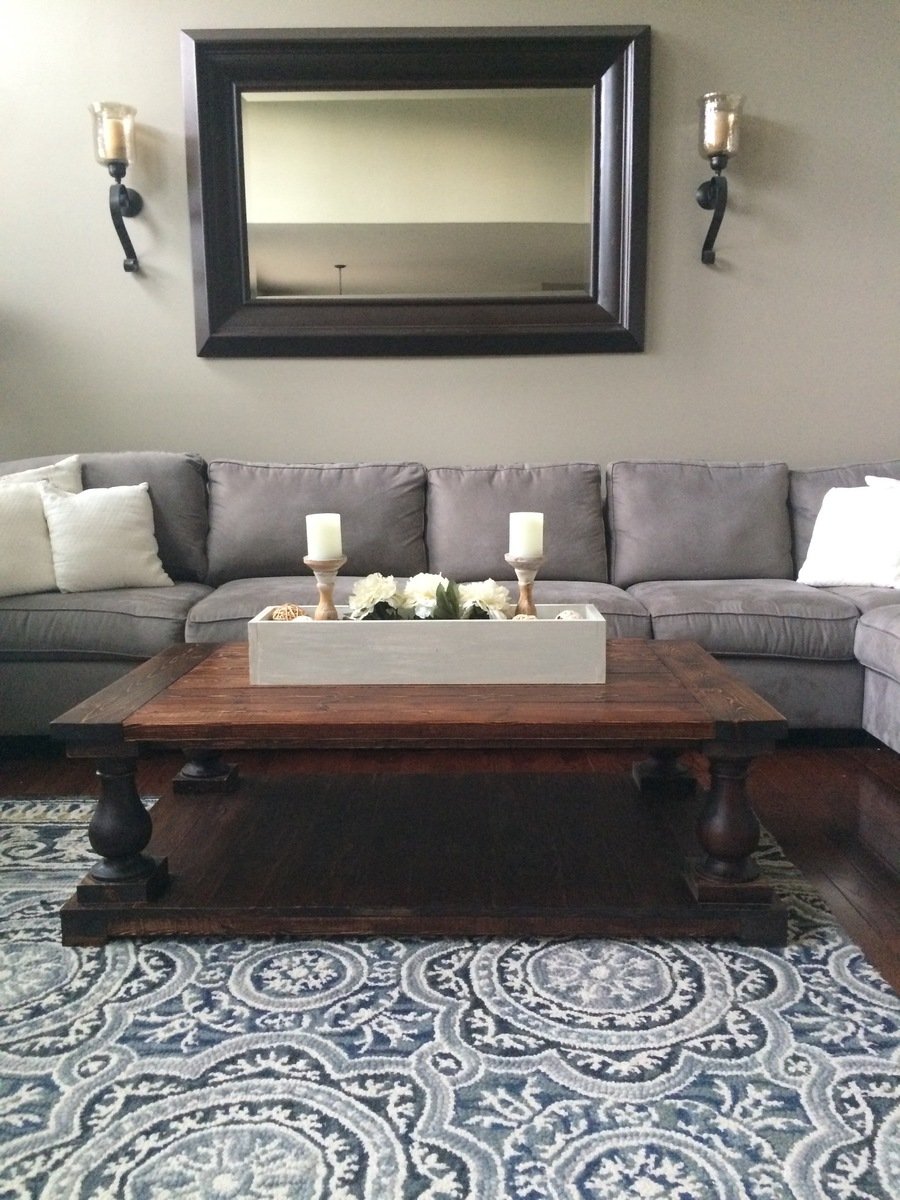
RH Balustrade Coffee Table
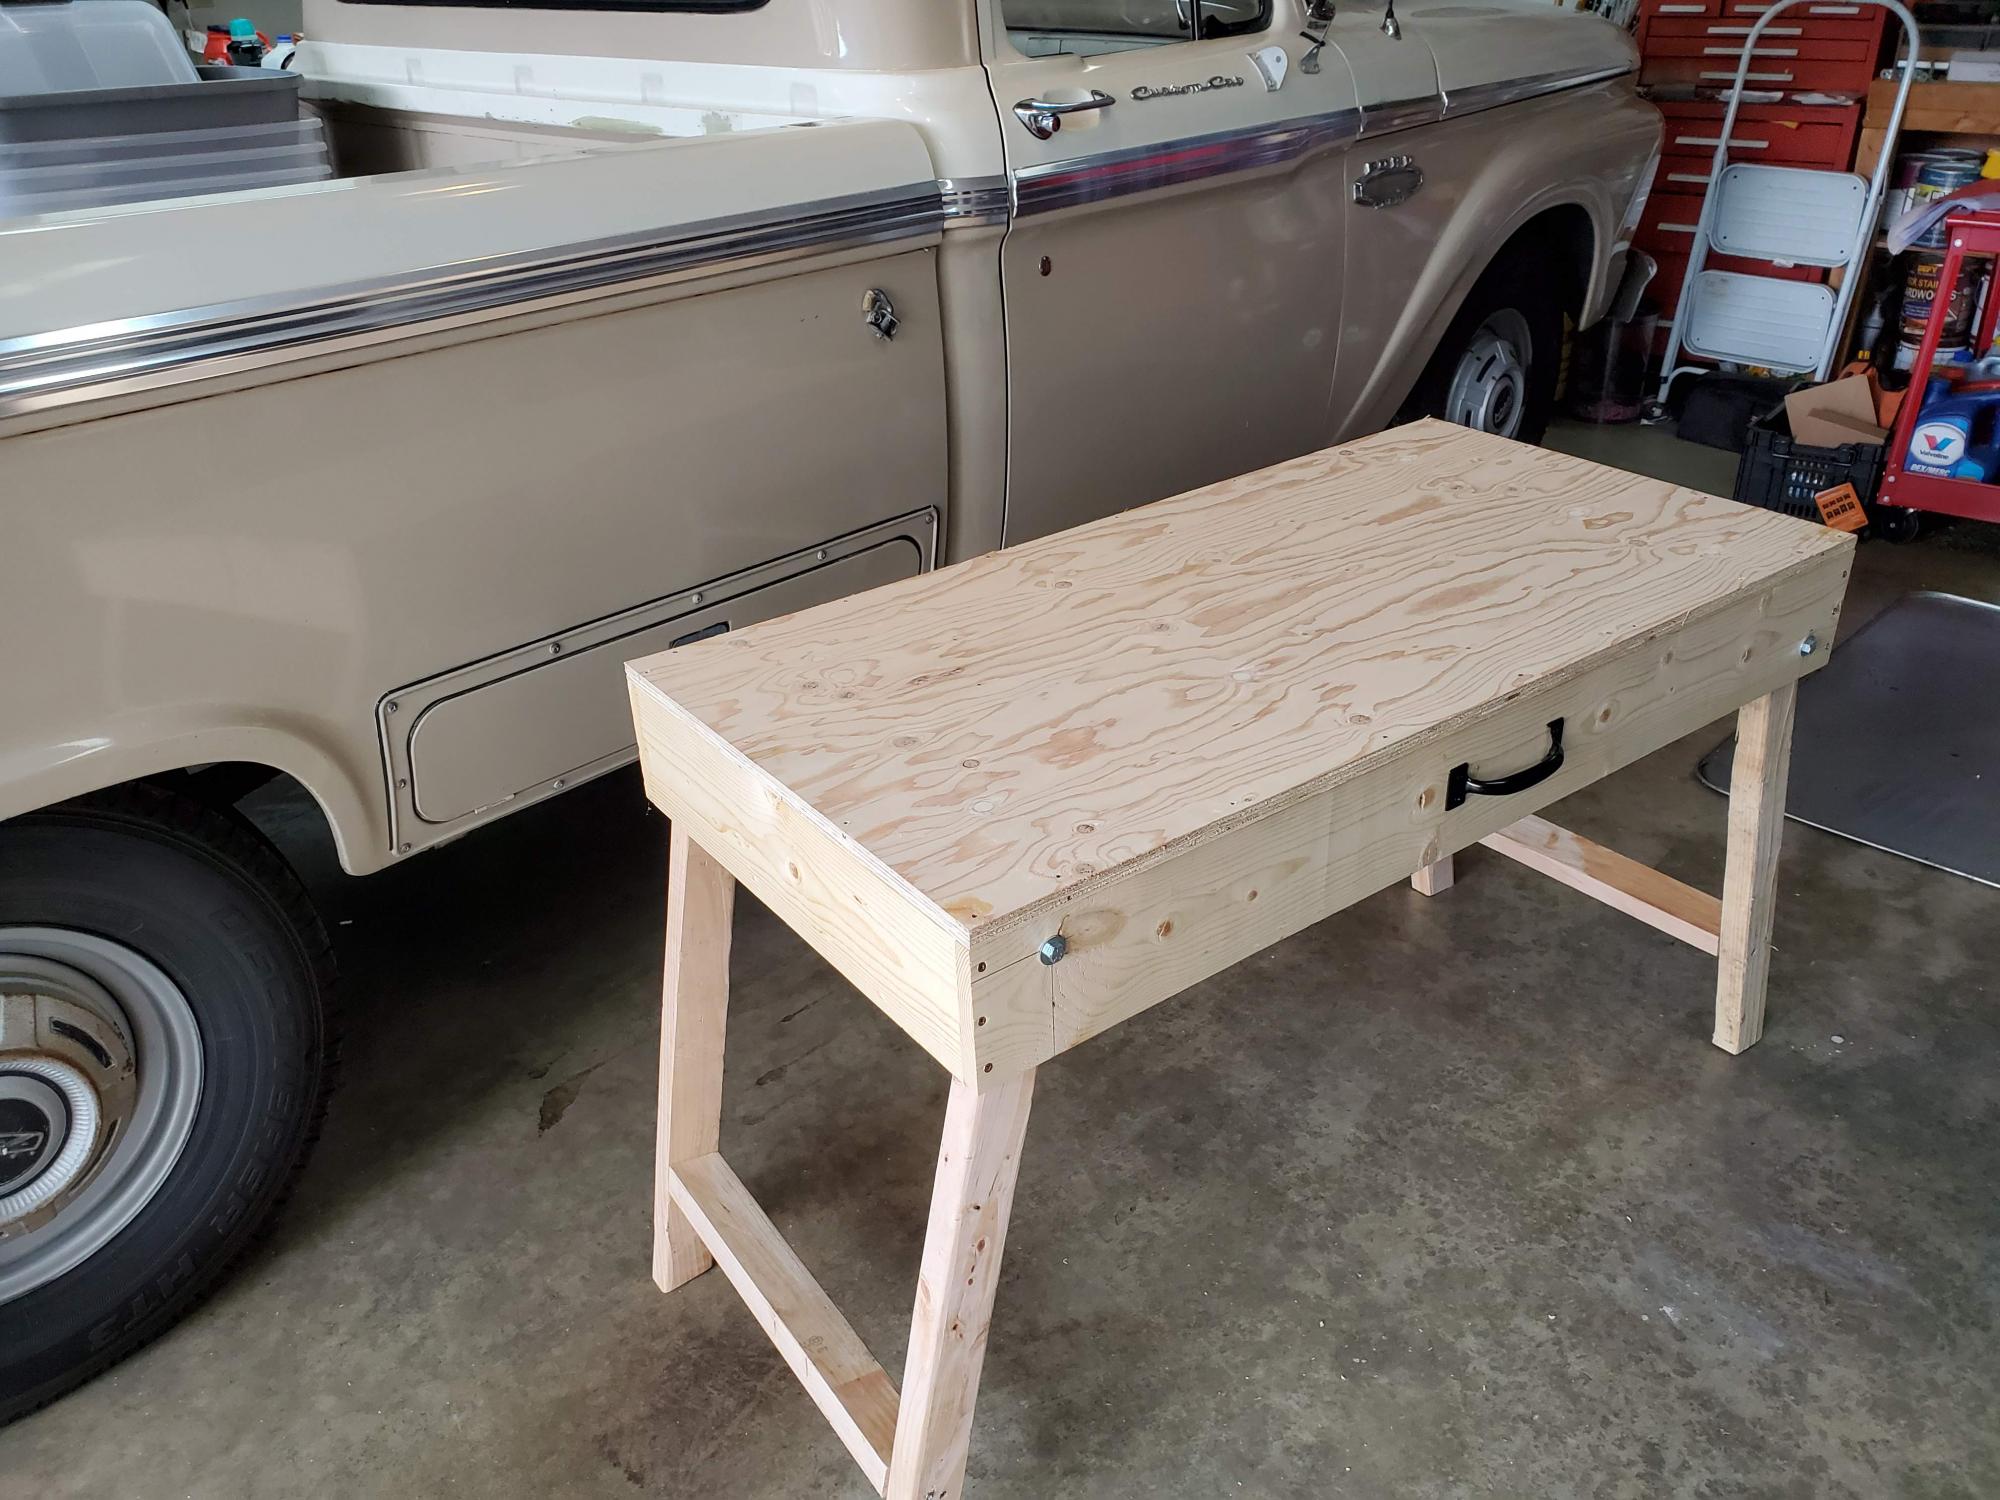
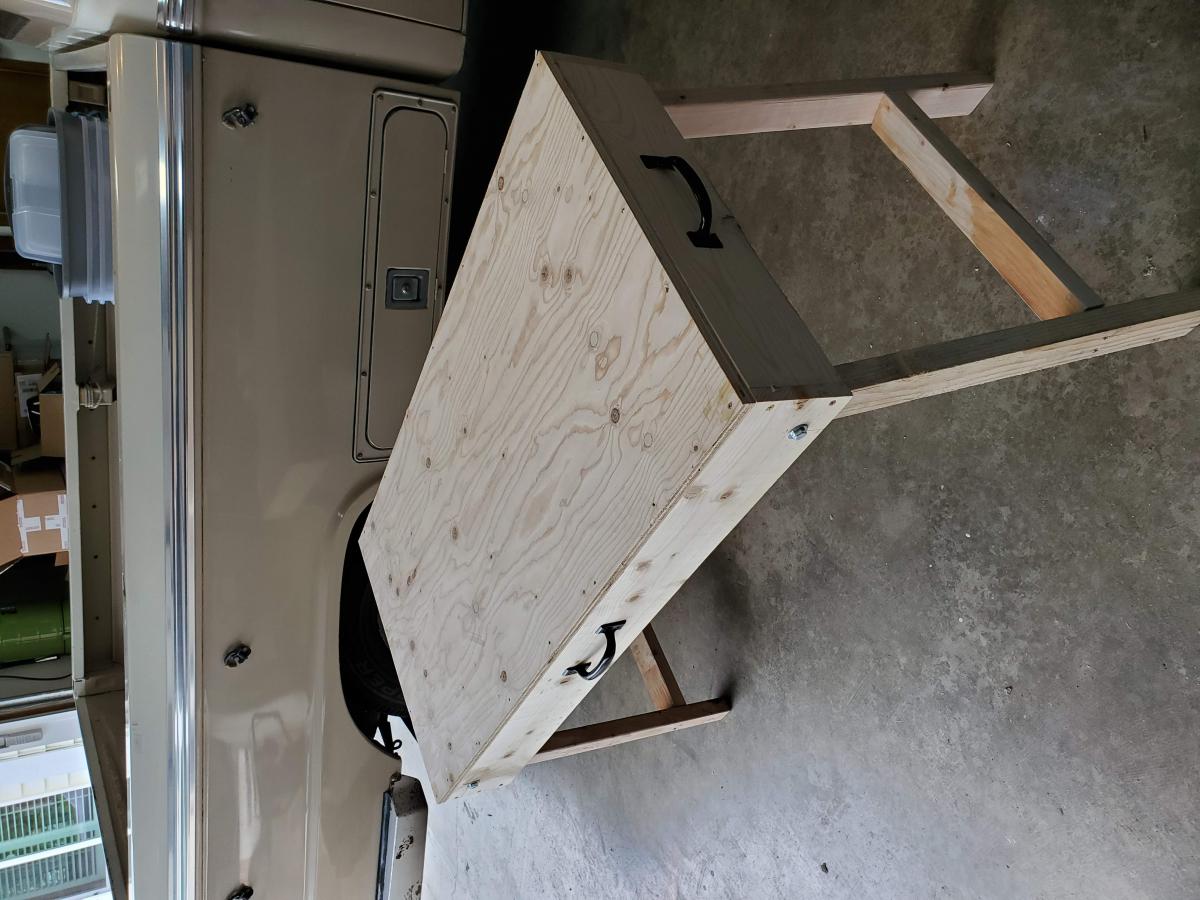
This is my first build. I thought making a work table would be the ideal first project. I'm very happy I came across Ana's Youtube channel and website. I made some rookie mistakes with the cut list. I t was my fault but a good learning experience. In the past I have dreaded any kind of woodworking project. I became very frustrated using the garage floor or some makeshift work table. This sores nicely in the garage and is very functional. I did add a handle on the side of the work table to carry it to the work site. I'm looking forward to many new projects.
I used cedar and treated 2x4 and painted them with exterior paint. Love the way it turned out.
Jason Stump
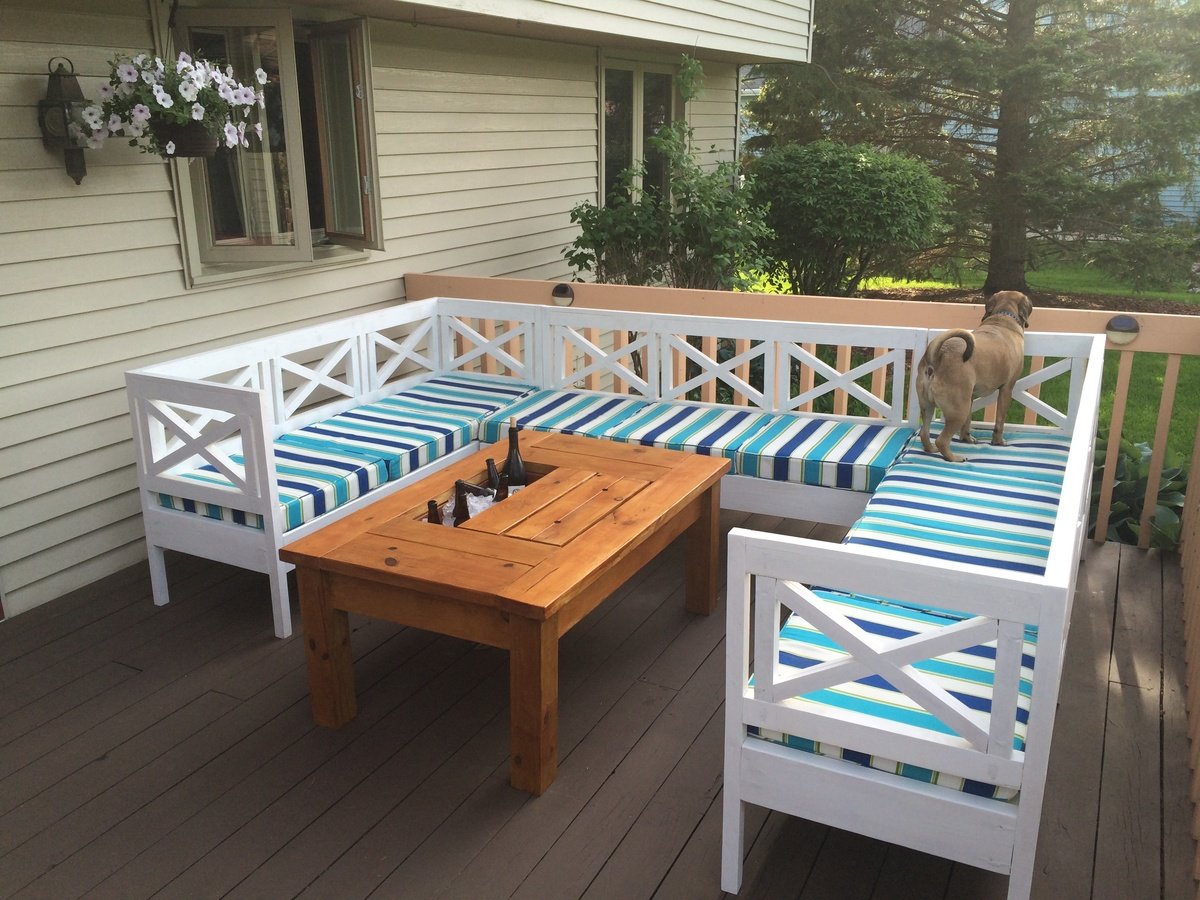
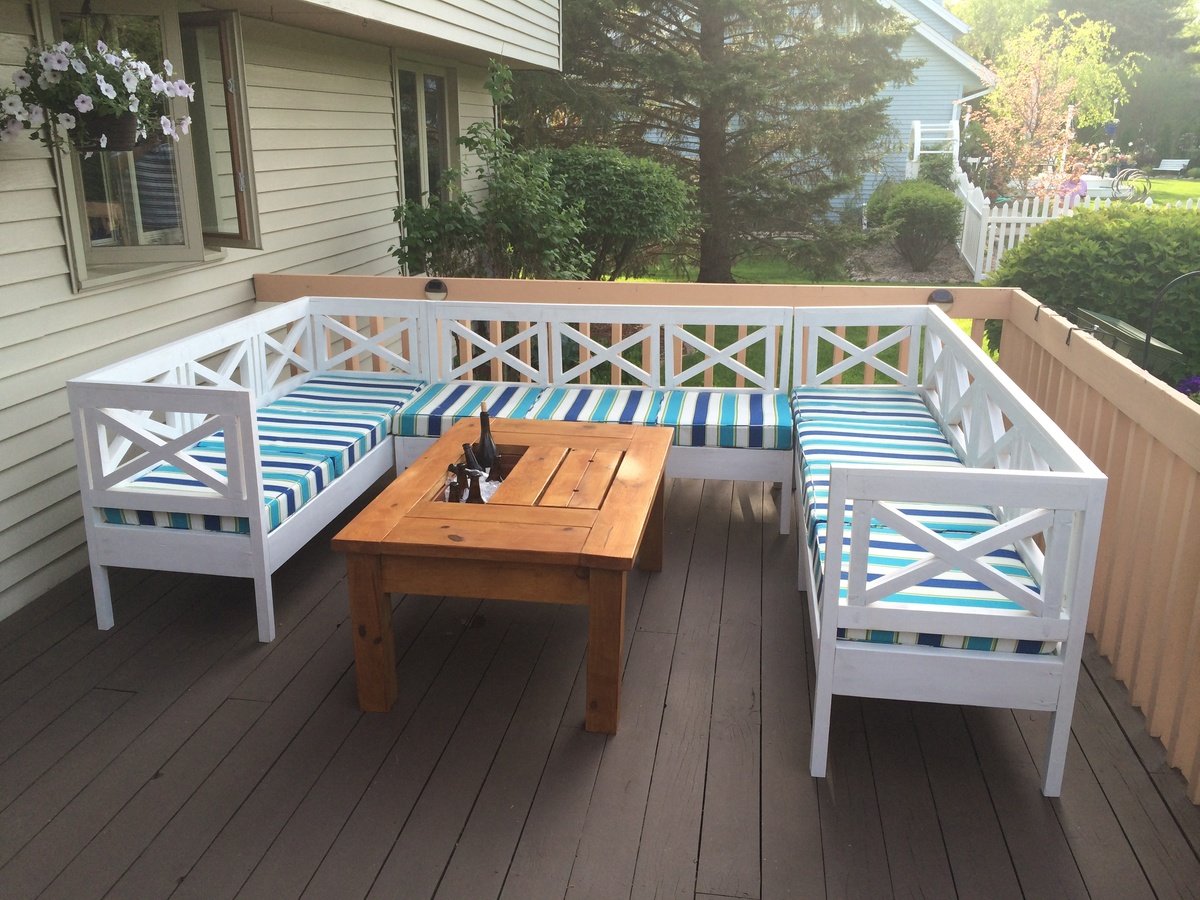
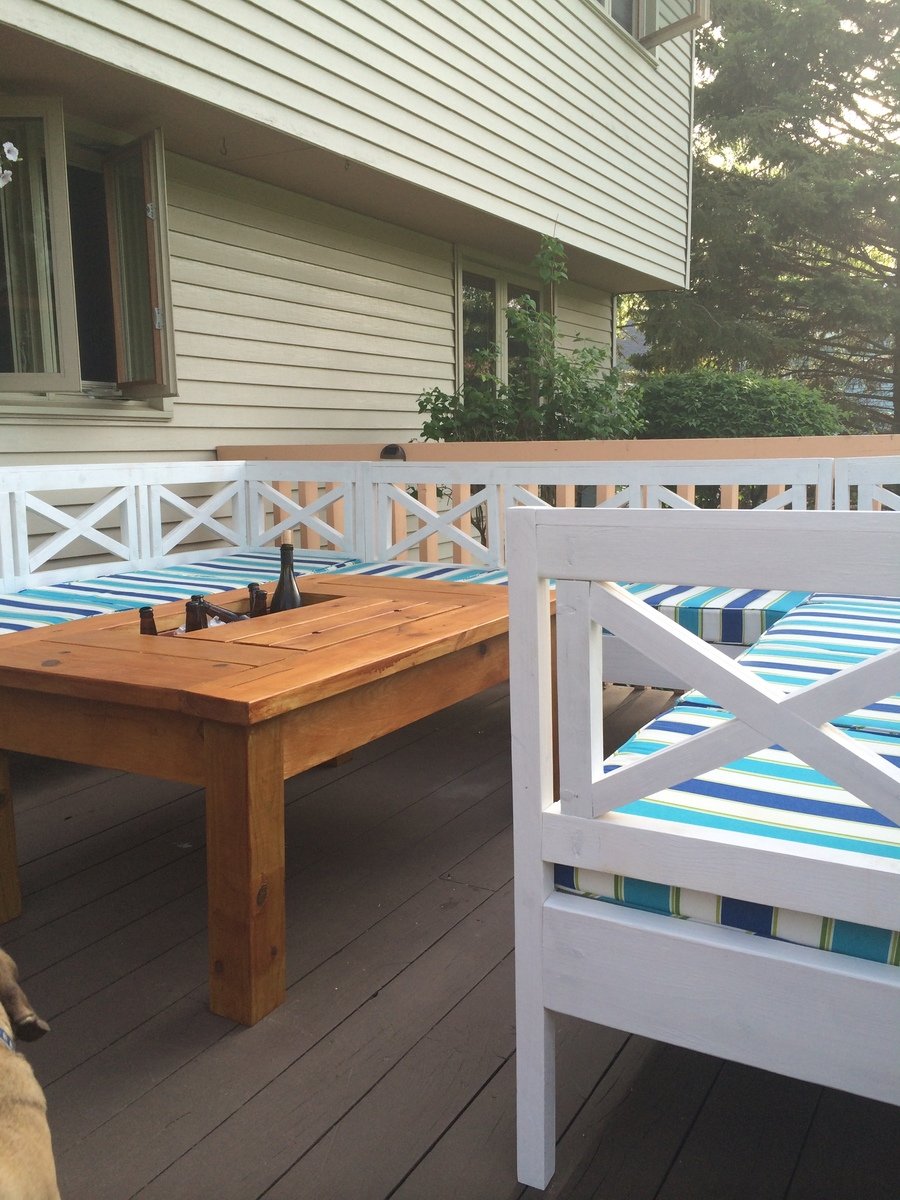
For whatever reason, right before spring, Pier One had these $45 cushions on clearance for $11.13. It took us trips to 4 different stores to collect all the cushions, but we had a new patio set for our new house (minus the sofas). As such, I modified Ana's plans to accommodate the smaller size of the cushions (22x22). Then, I used the savings from the cushions to justify buying a new table saw. It took a while to buy and cut all the lumber, kreg-jig everything together, fill all the holes, sand, seal all the wood, etc., but the work was well worth it. Nearing completion of this project, I built the pictured modified cooler coffee table to ensure that no guest ever has to get up from their seat for any reason during a summer barbeque.

Tue, 06/10/2014 - 08:01
Thanks ILoveDIYing! It's funny because I noticed the modified rectangles daybed project that you posted last night, and based on your awesome job, I wondered to myself whether I tackled the right project. All the "X" cuts on the back of the weatherly couch get a little tedious, but it is well worth it after you finish. One piece of advice (which I picked up from other commenters) if you do build the weatherly (which I forgot to mention above) is to create a slight slope for slats underneath the seat cushions from front to back. Otherwise, the couch is a little too upright for comfort.
Tue, 07/15/2014 - 02:07
I actually built (2) 45" love seats similar to this design, a 90" daybed with same backrest design and a two-seat bench with table in between to create an outdoor sectional... Would love to share the pics but I don't see a way to attach the file?
Tue, 07/15/2014 - 02:10
I couldn't see how to add pics for brags so I made my profile pic the pic of the sectional I wanted to share... If I'm missing something on how to share the project pics can someone, heeeelp lol
Wed, 07/16/2014 - 13:40
Jose, from the small picture you posted, your new white weatherly's look great! To post a brag, way down on the right-hand column, near your account info, there is a link to "Contribute a brag post." When you follow the link, there is a form that allows you to enter info about the project, link to the plans, attach photos, etc. Good luck!
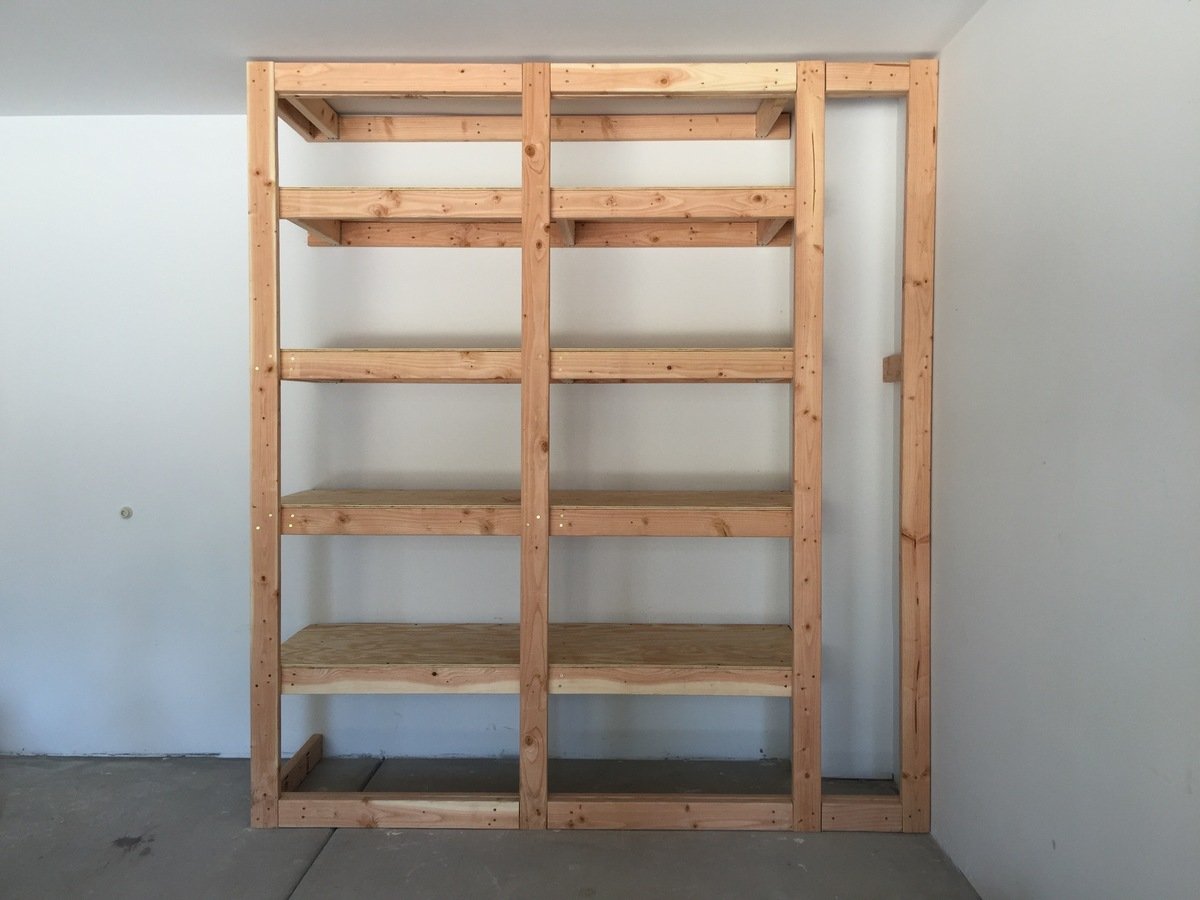
My floor-to-ceiling garage storage is 6' w x 8' h. I wanted to utilize the entire height of the wall for the rack. I also created a small cubby at the end for tall items like brooms, poles, etc. I also added 2x4 pieces on the top, sides and foot of the rack so I can add doors to hide the clutter stored on the shelves.
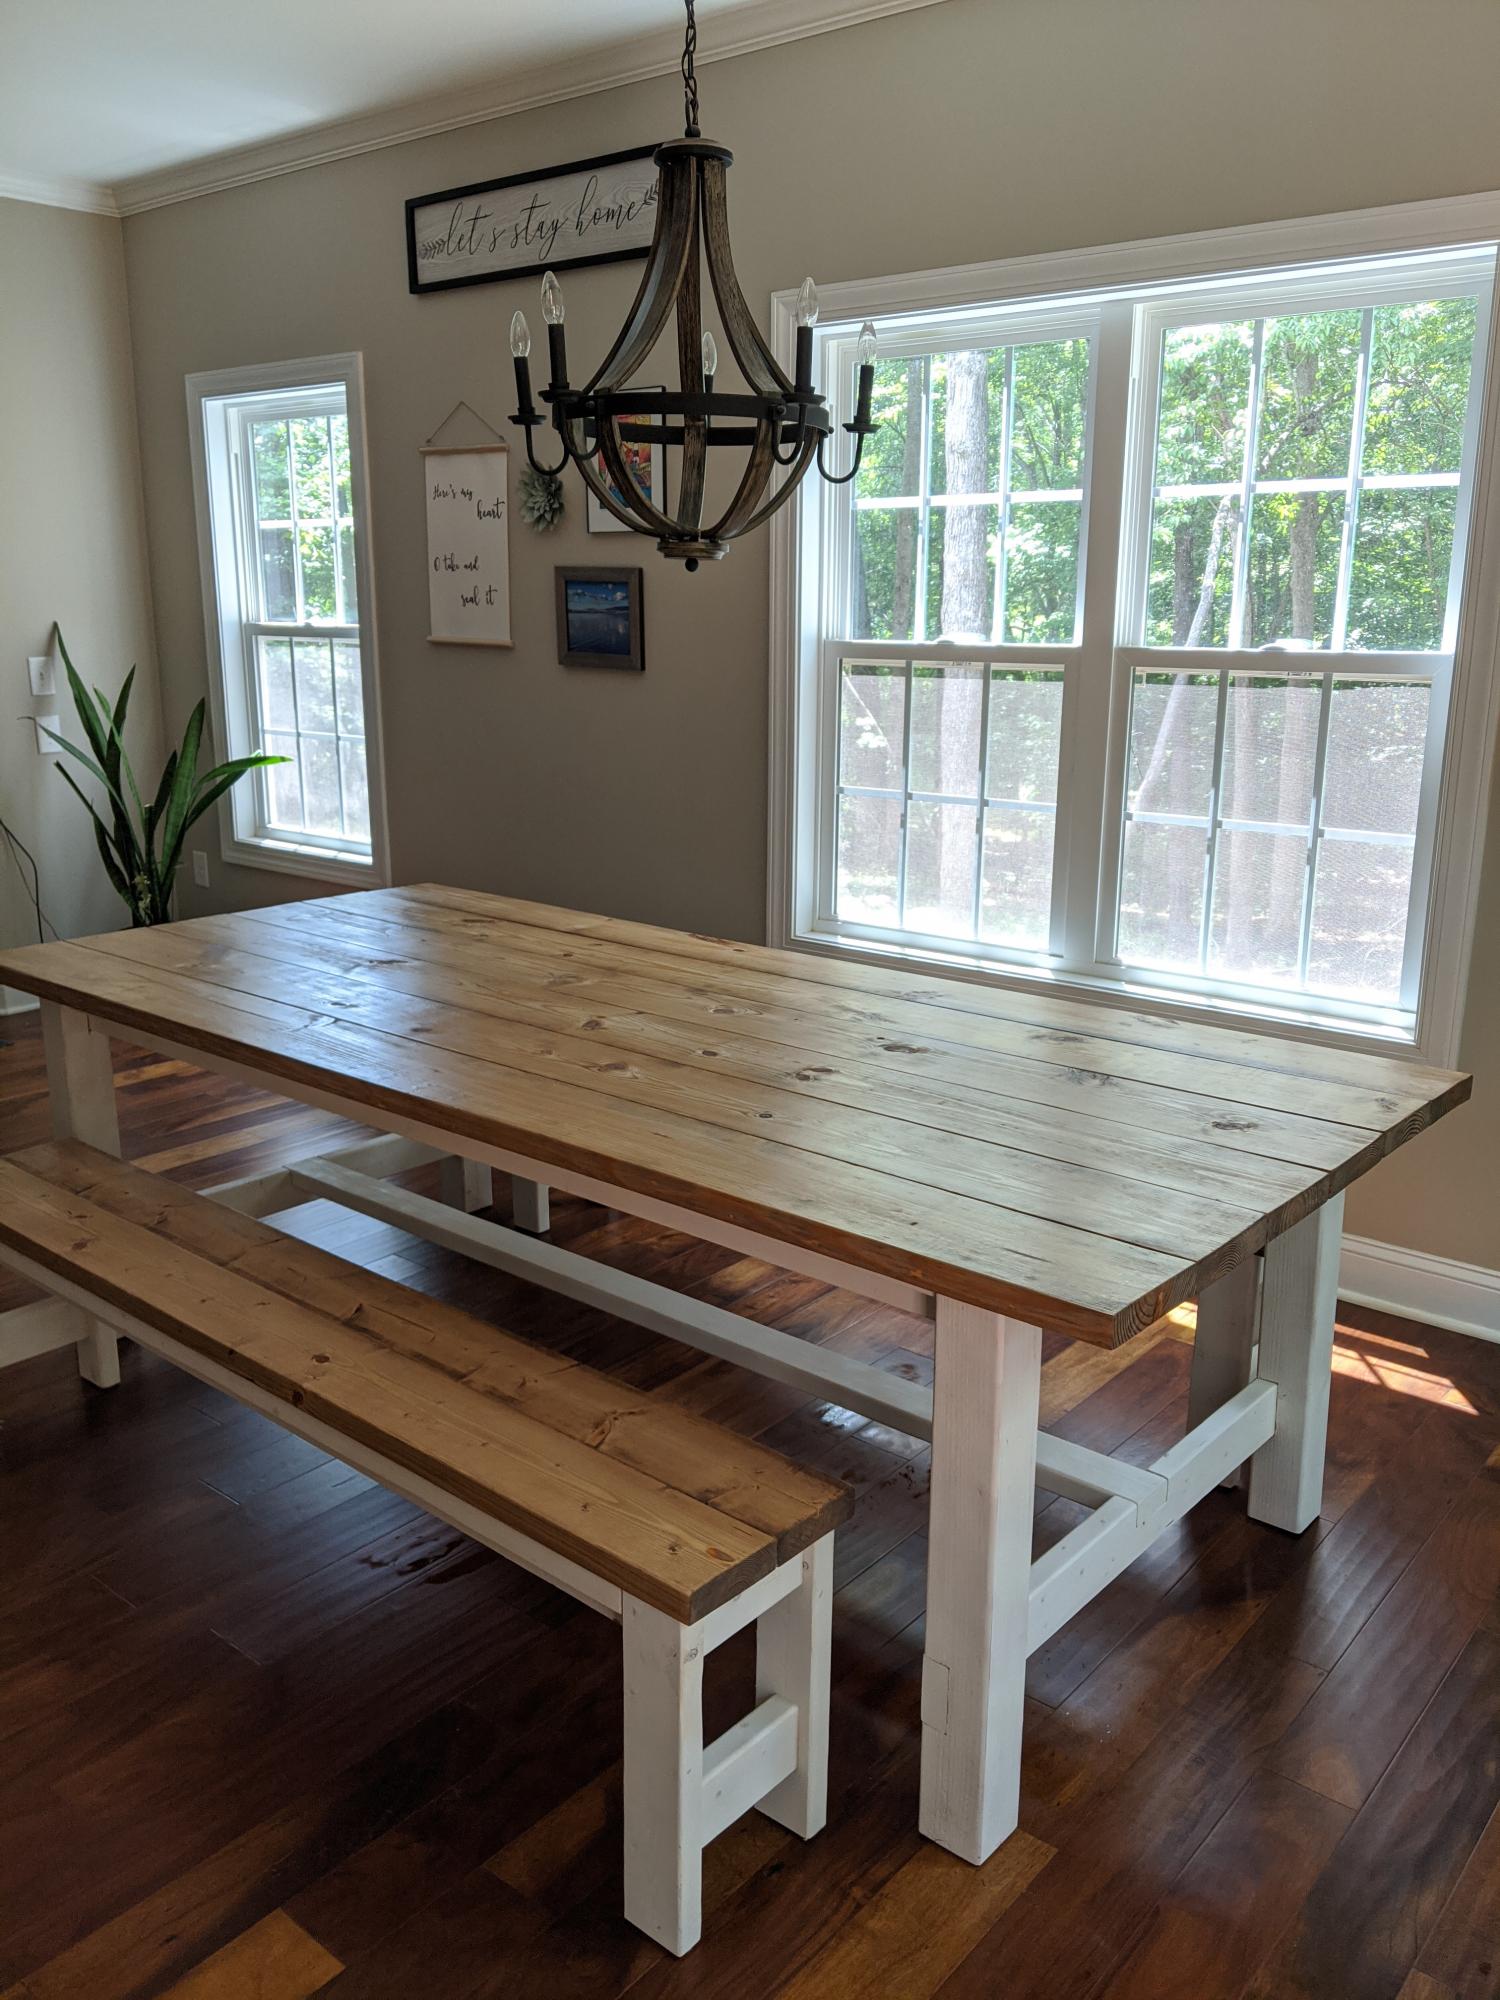
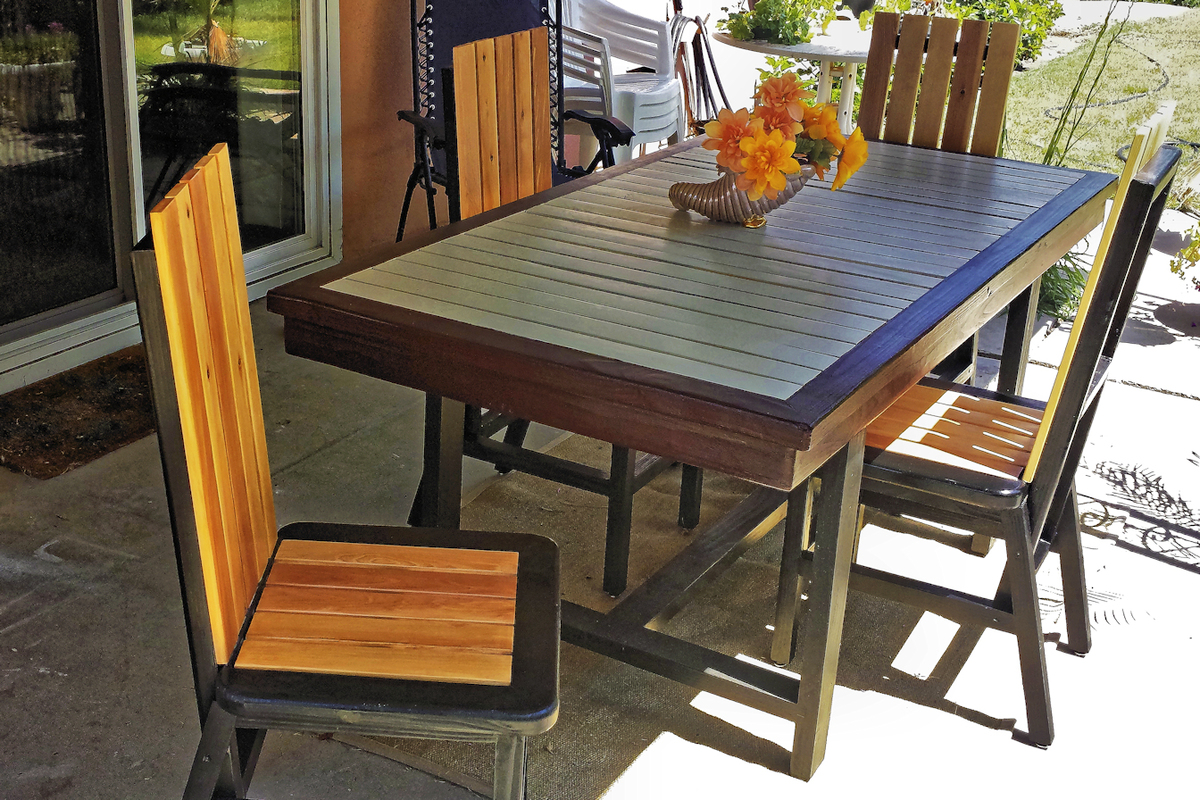
First table build! We modified the plans with no breadboard ends since we live with lots of humidity and wanted to allow the wood movement. We also used 4x4s for the legs. White chalk spray paint legs and custom mix of special walnut and weathered oak stains. We LOVE it!!