Farmhouse Queen bed
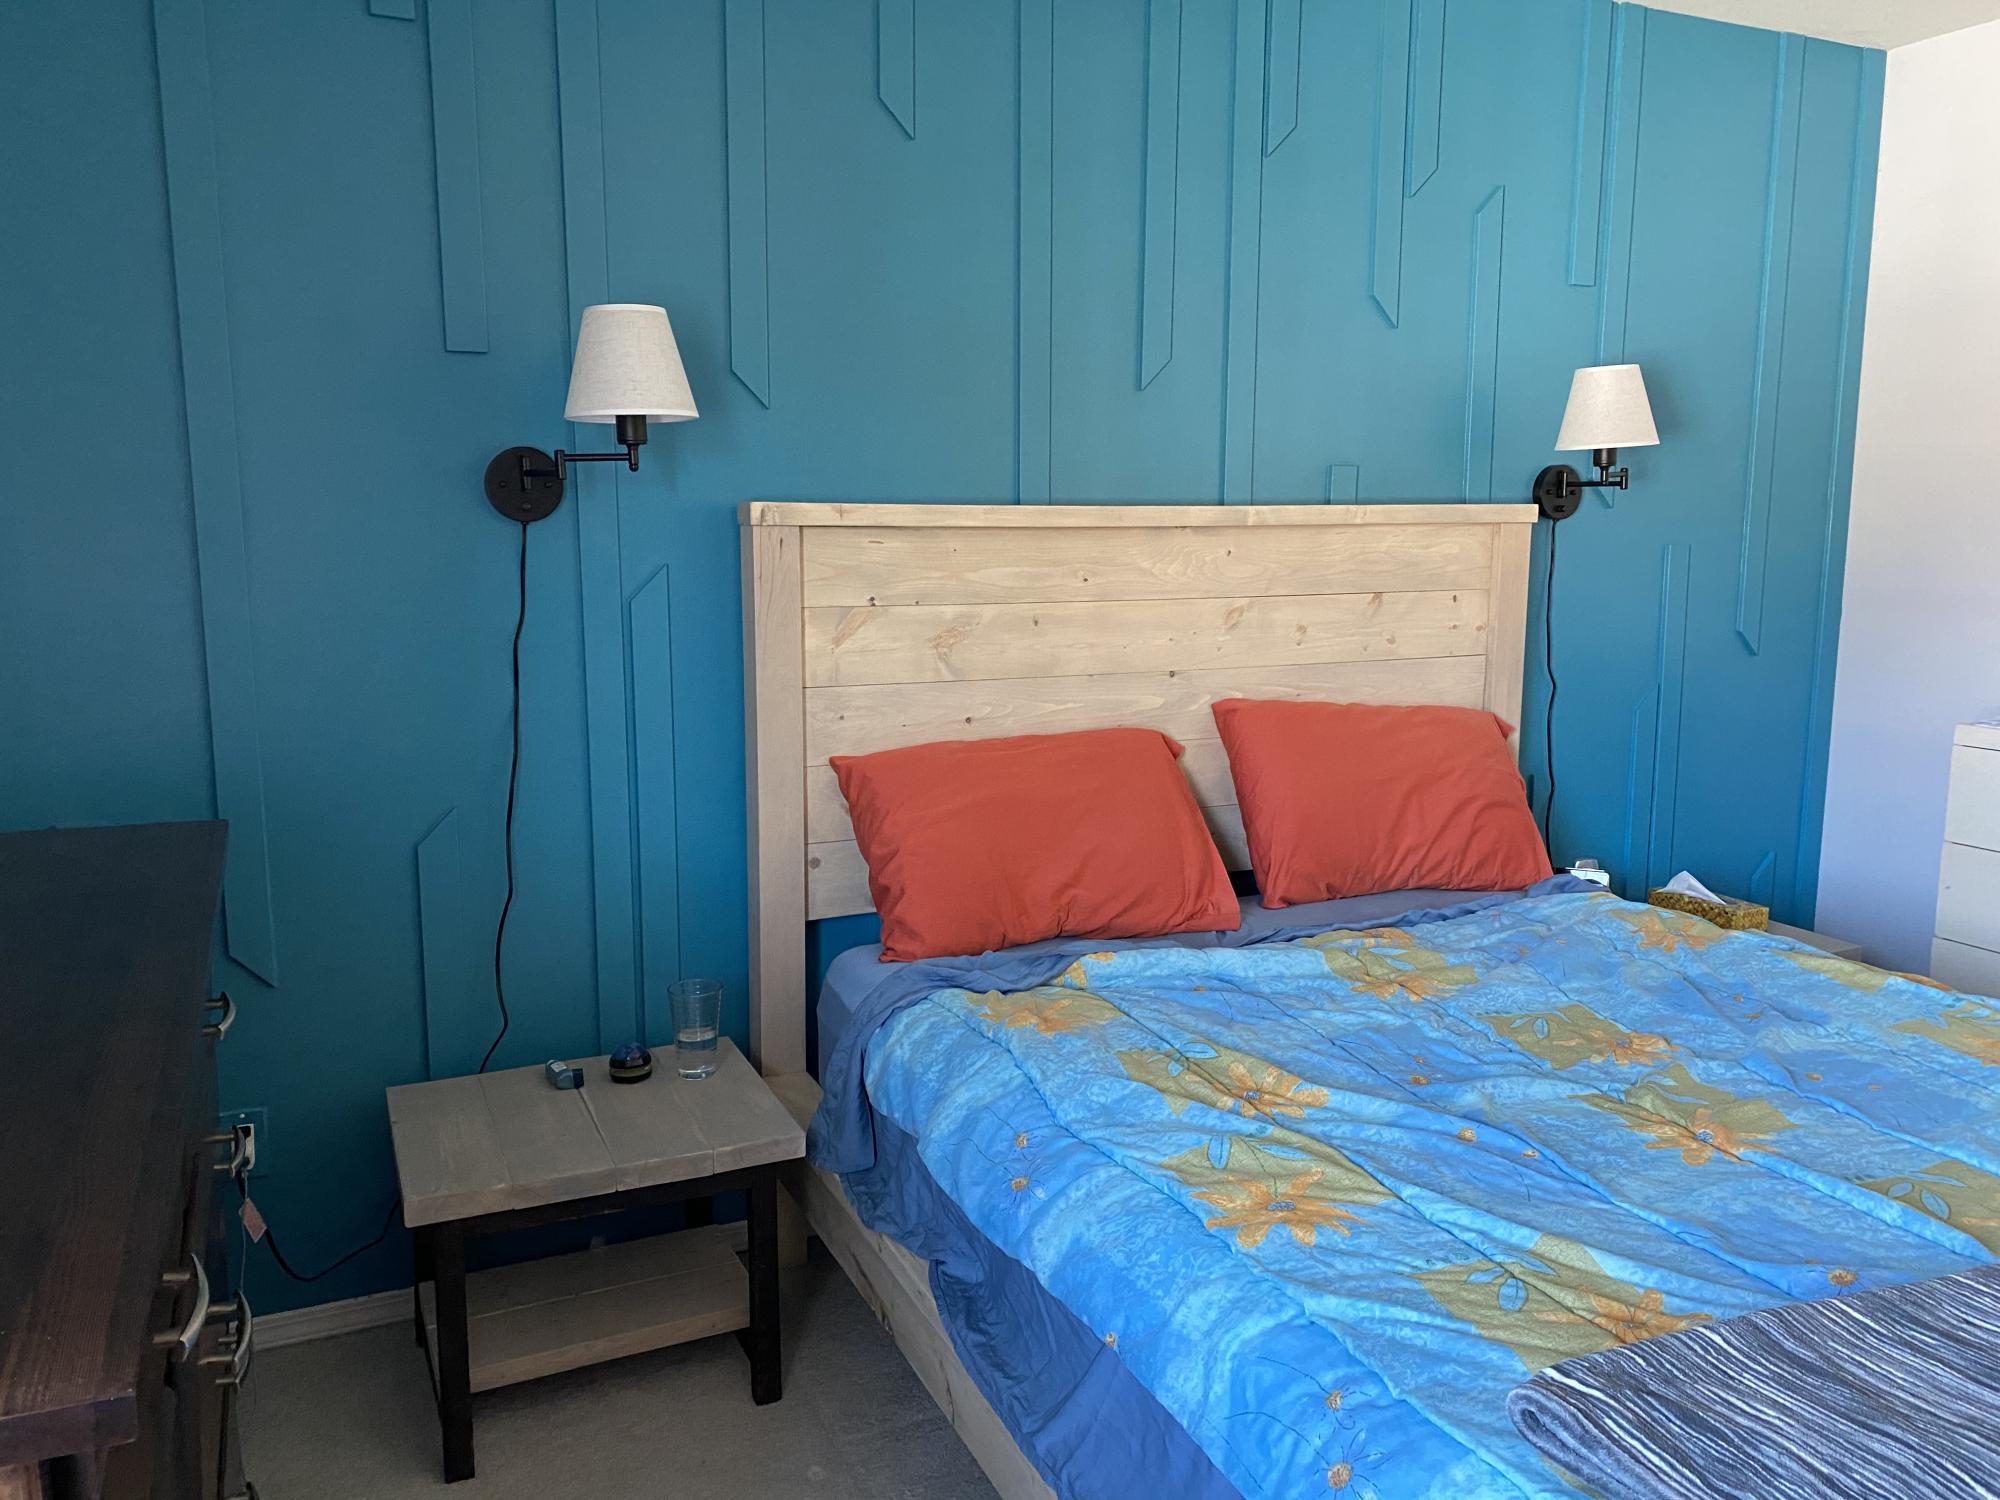
Built this farmhouse Queen bed as an anniversary gift to my husband 🥰
Built from Plan(s)
Built this farmhouse Queen bed as an anniversary gift to my husband 🥰
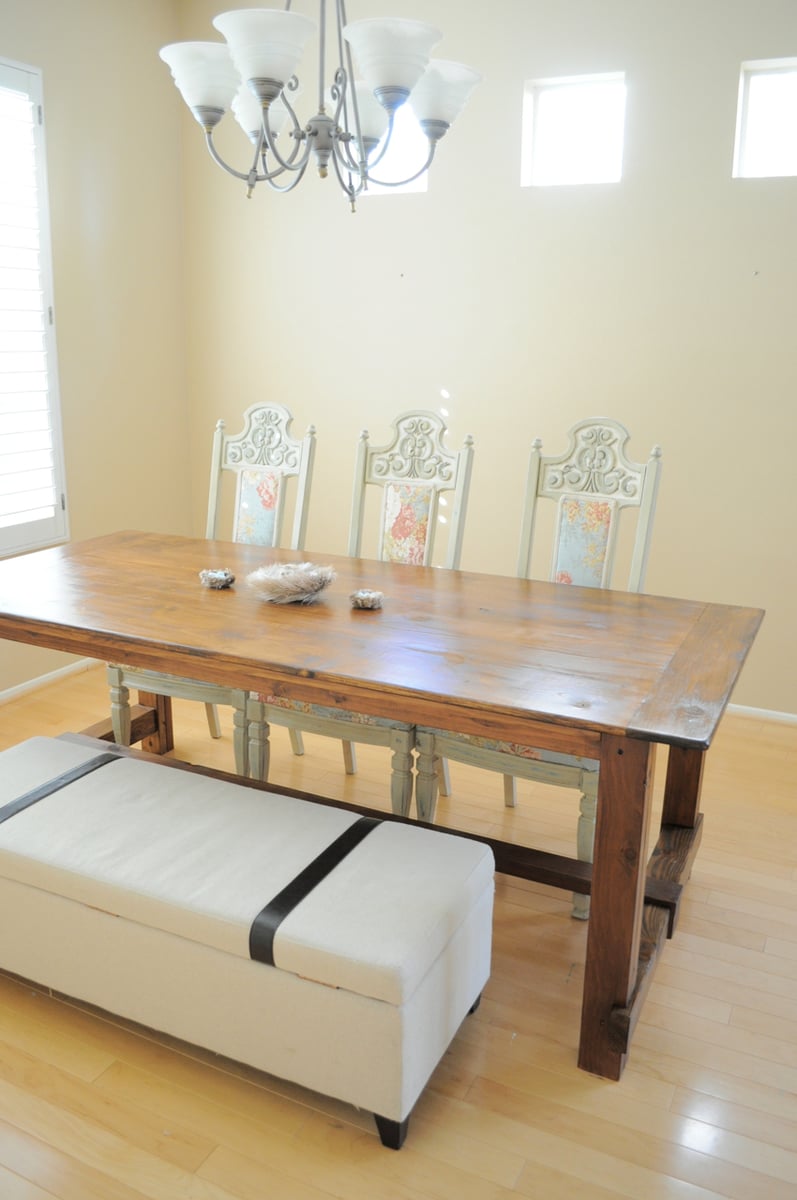
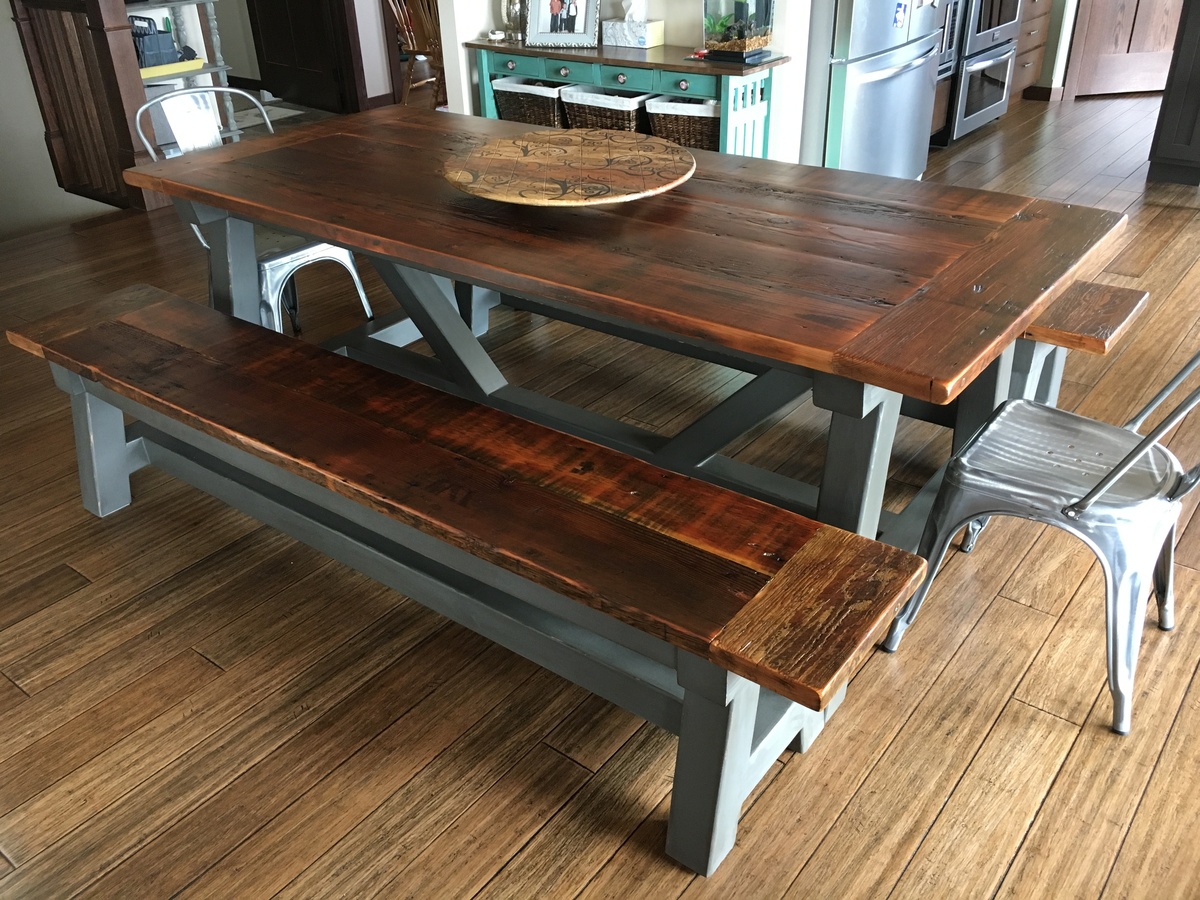
So the husband was not happy with the fancy x dining table he made and thus, within a short 4 month period, he made another dining table :/ This one, however, he loves, so no more dining table making for him anytime soon! He veered off plans by joining most of the projects using dowels. You can read more about the build at our blog:
http://tonyandkristine.blogspot.com/2013/03/diy-farmhouse-table.html
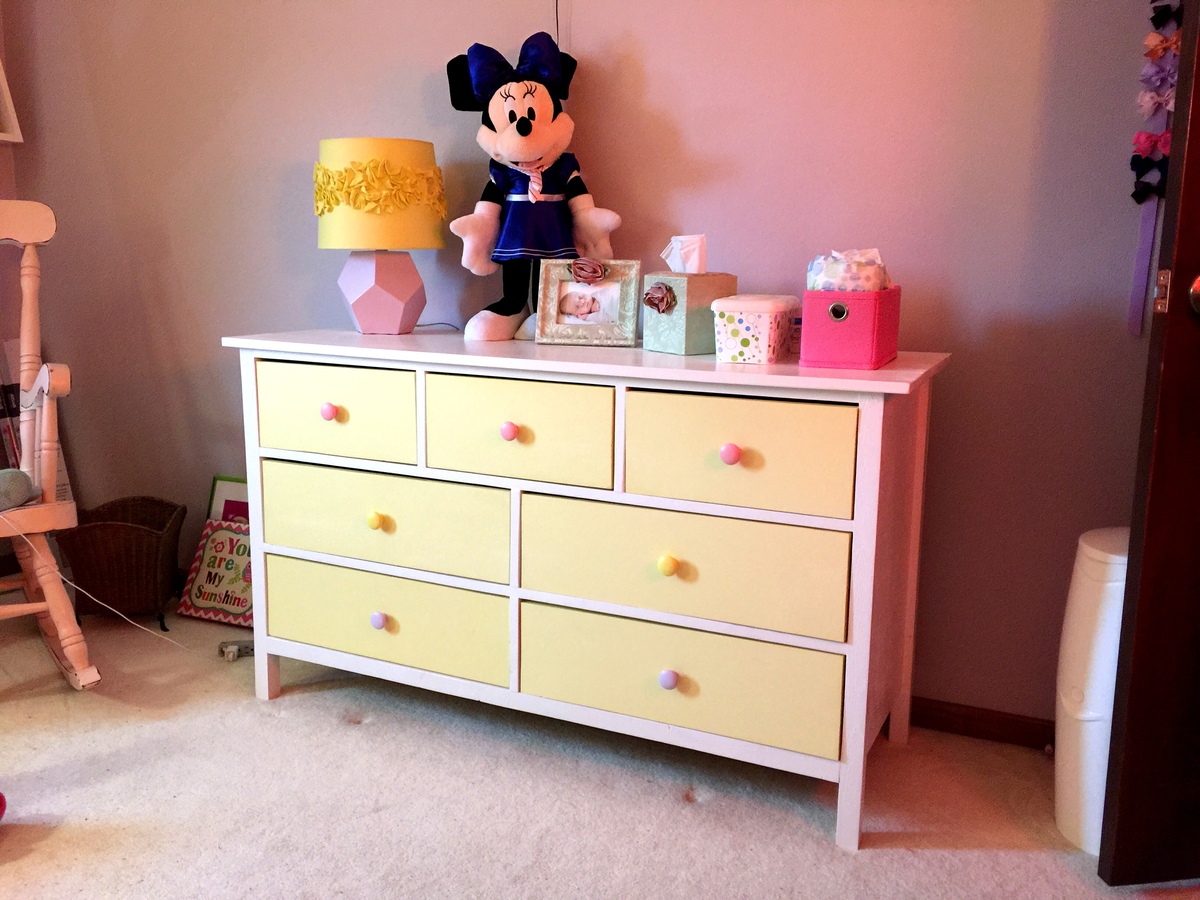
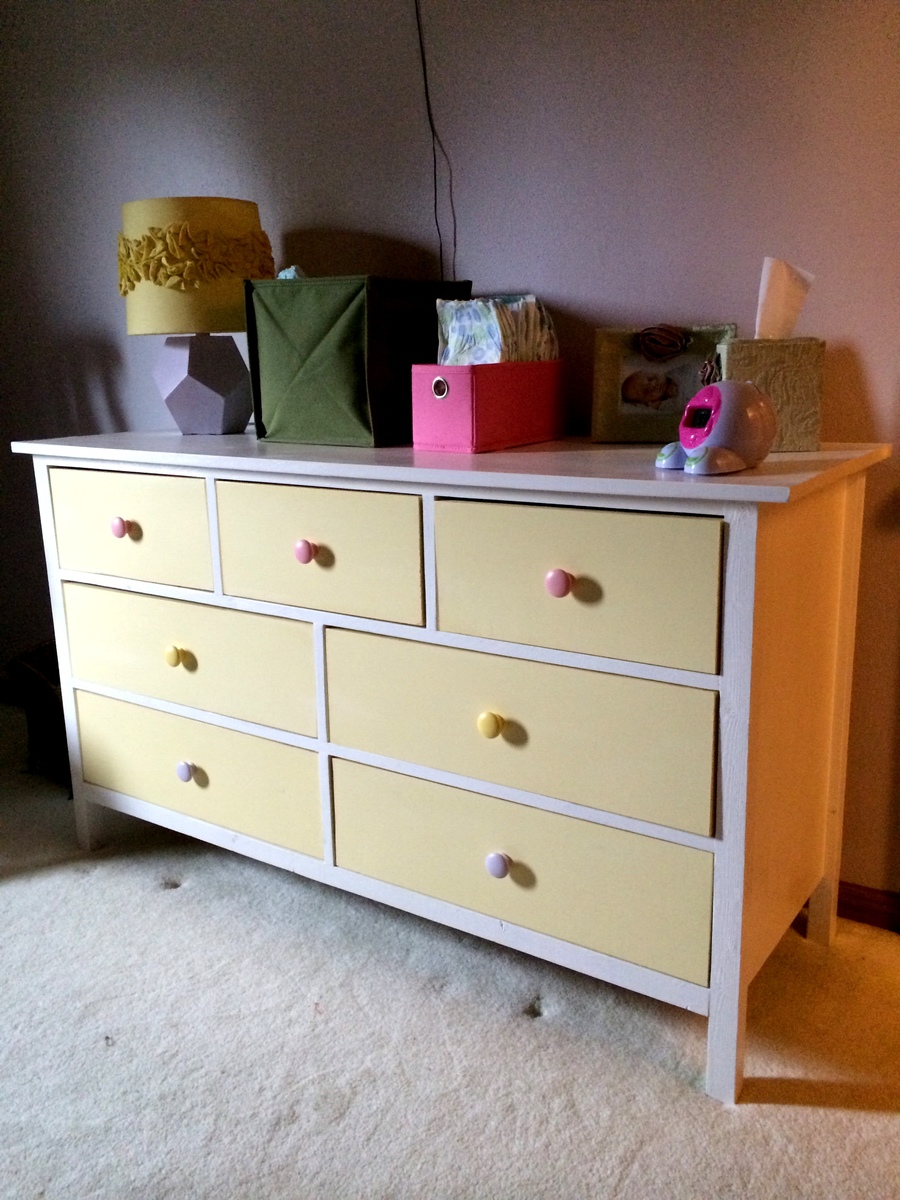
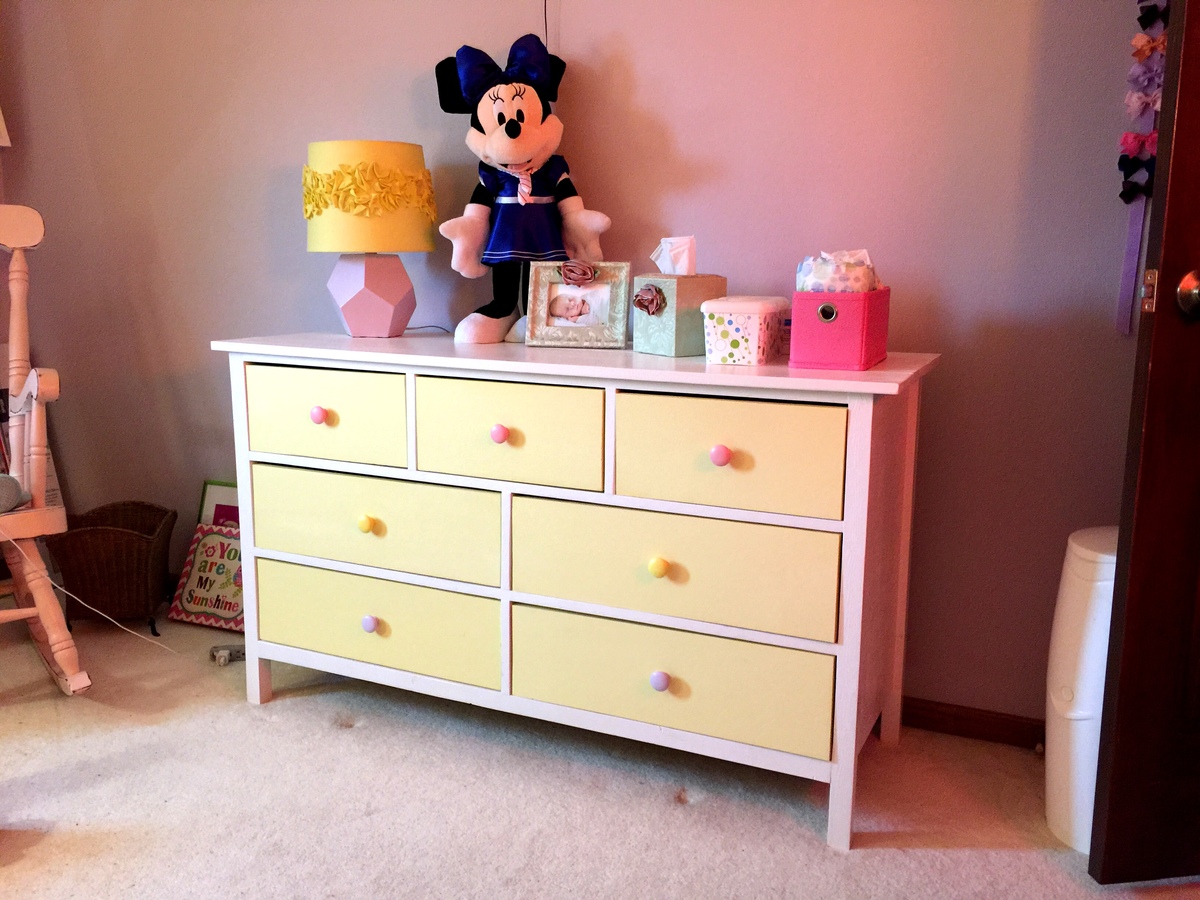
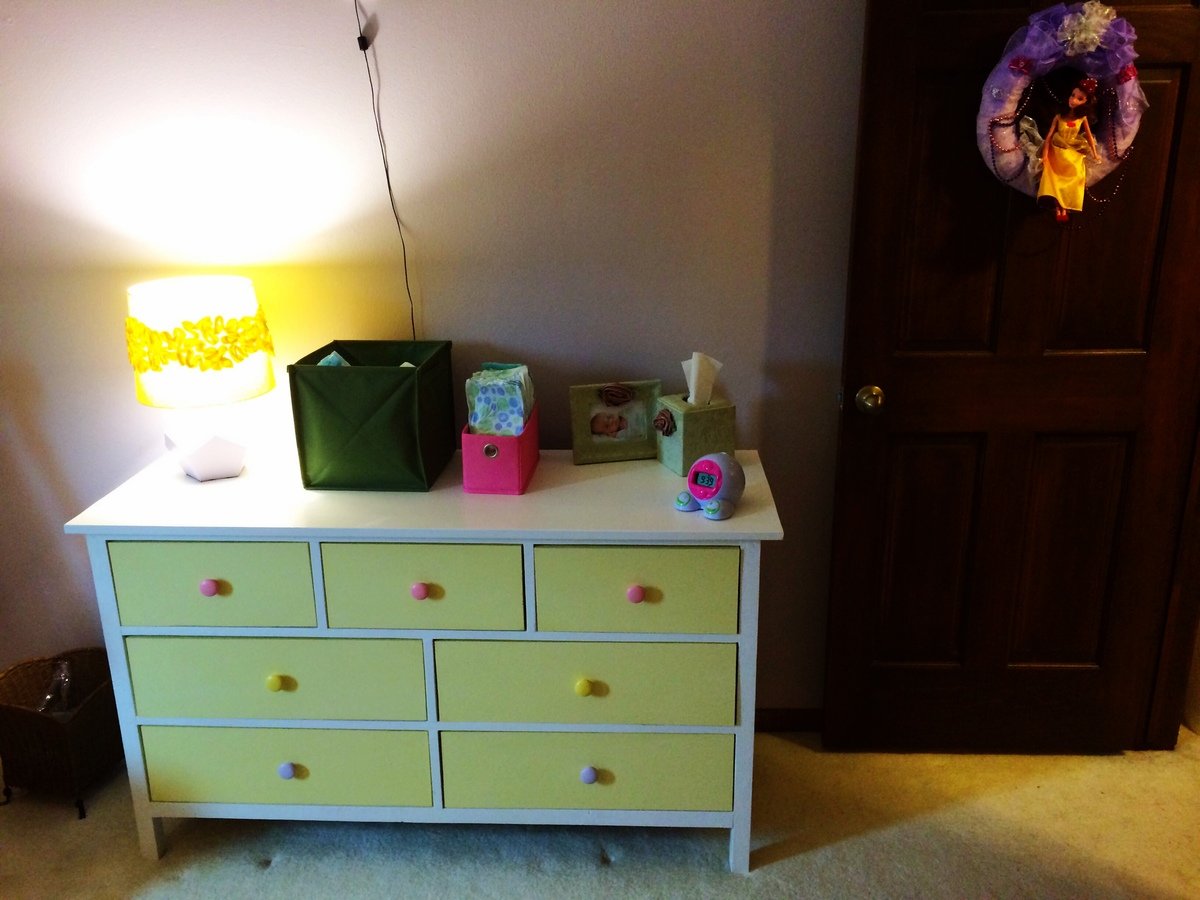
With another baby on the way in a few months, we decided to move our 2+ year old daughter across the hall into her first big girl room. I built big sister the Kendal Extra Wide Dresser, Traditional Wood Toddler Bed, Letter A Shelf and a Dollhouse Bookcase and matched the colors with her new comforter, lamps and princess canopy tent from the Land of Nod outlet.
While I have built drawers with other projects (with less than spectacular results), it took some time and trial and error, but this is the first project that I was able to install drawers with any sort of success in lining them up (kind of) and getting them to work properly. Of course, bookcase drawers in a child's room are succeptible to a lot of wear and tear, so hopefully, they will hold up on us. We definitely have been satisfied with the result and love how it turned out.
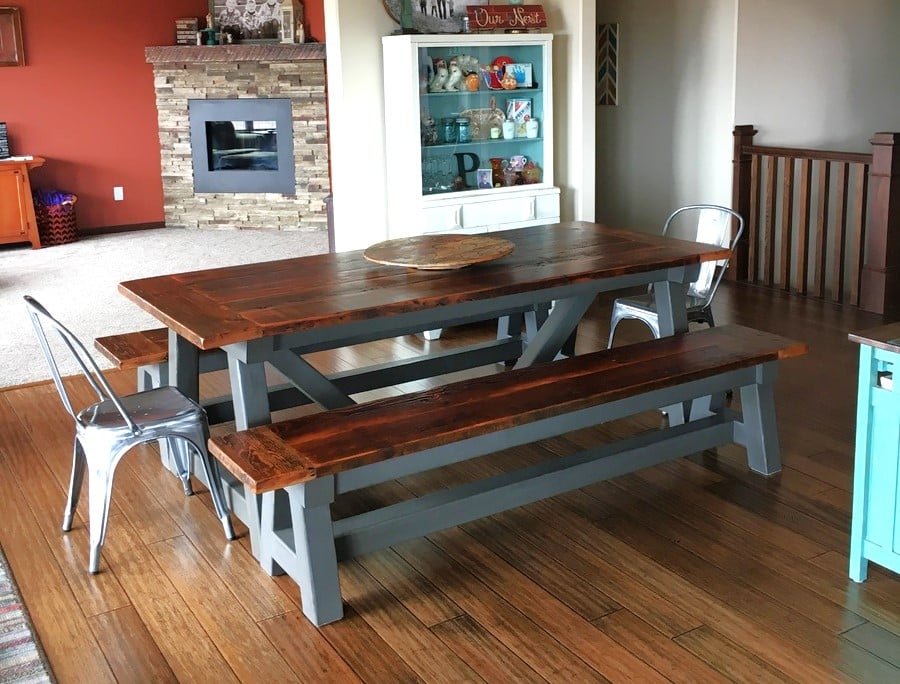
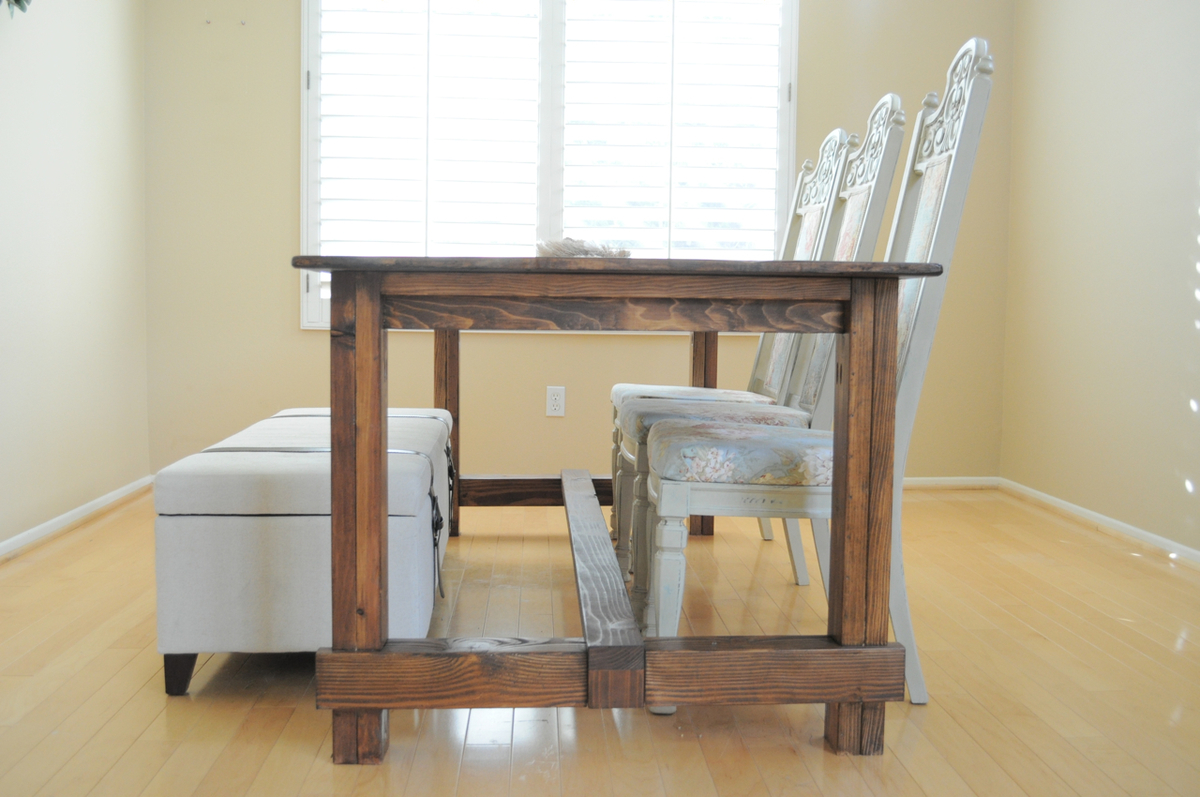
Dining Room table and benches tops built from reclaimed Douglas Fir and table and bench bases built from 4x4 posts.
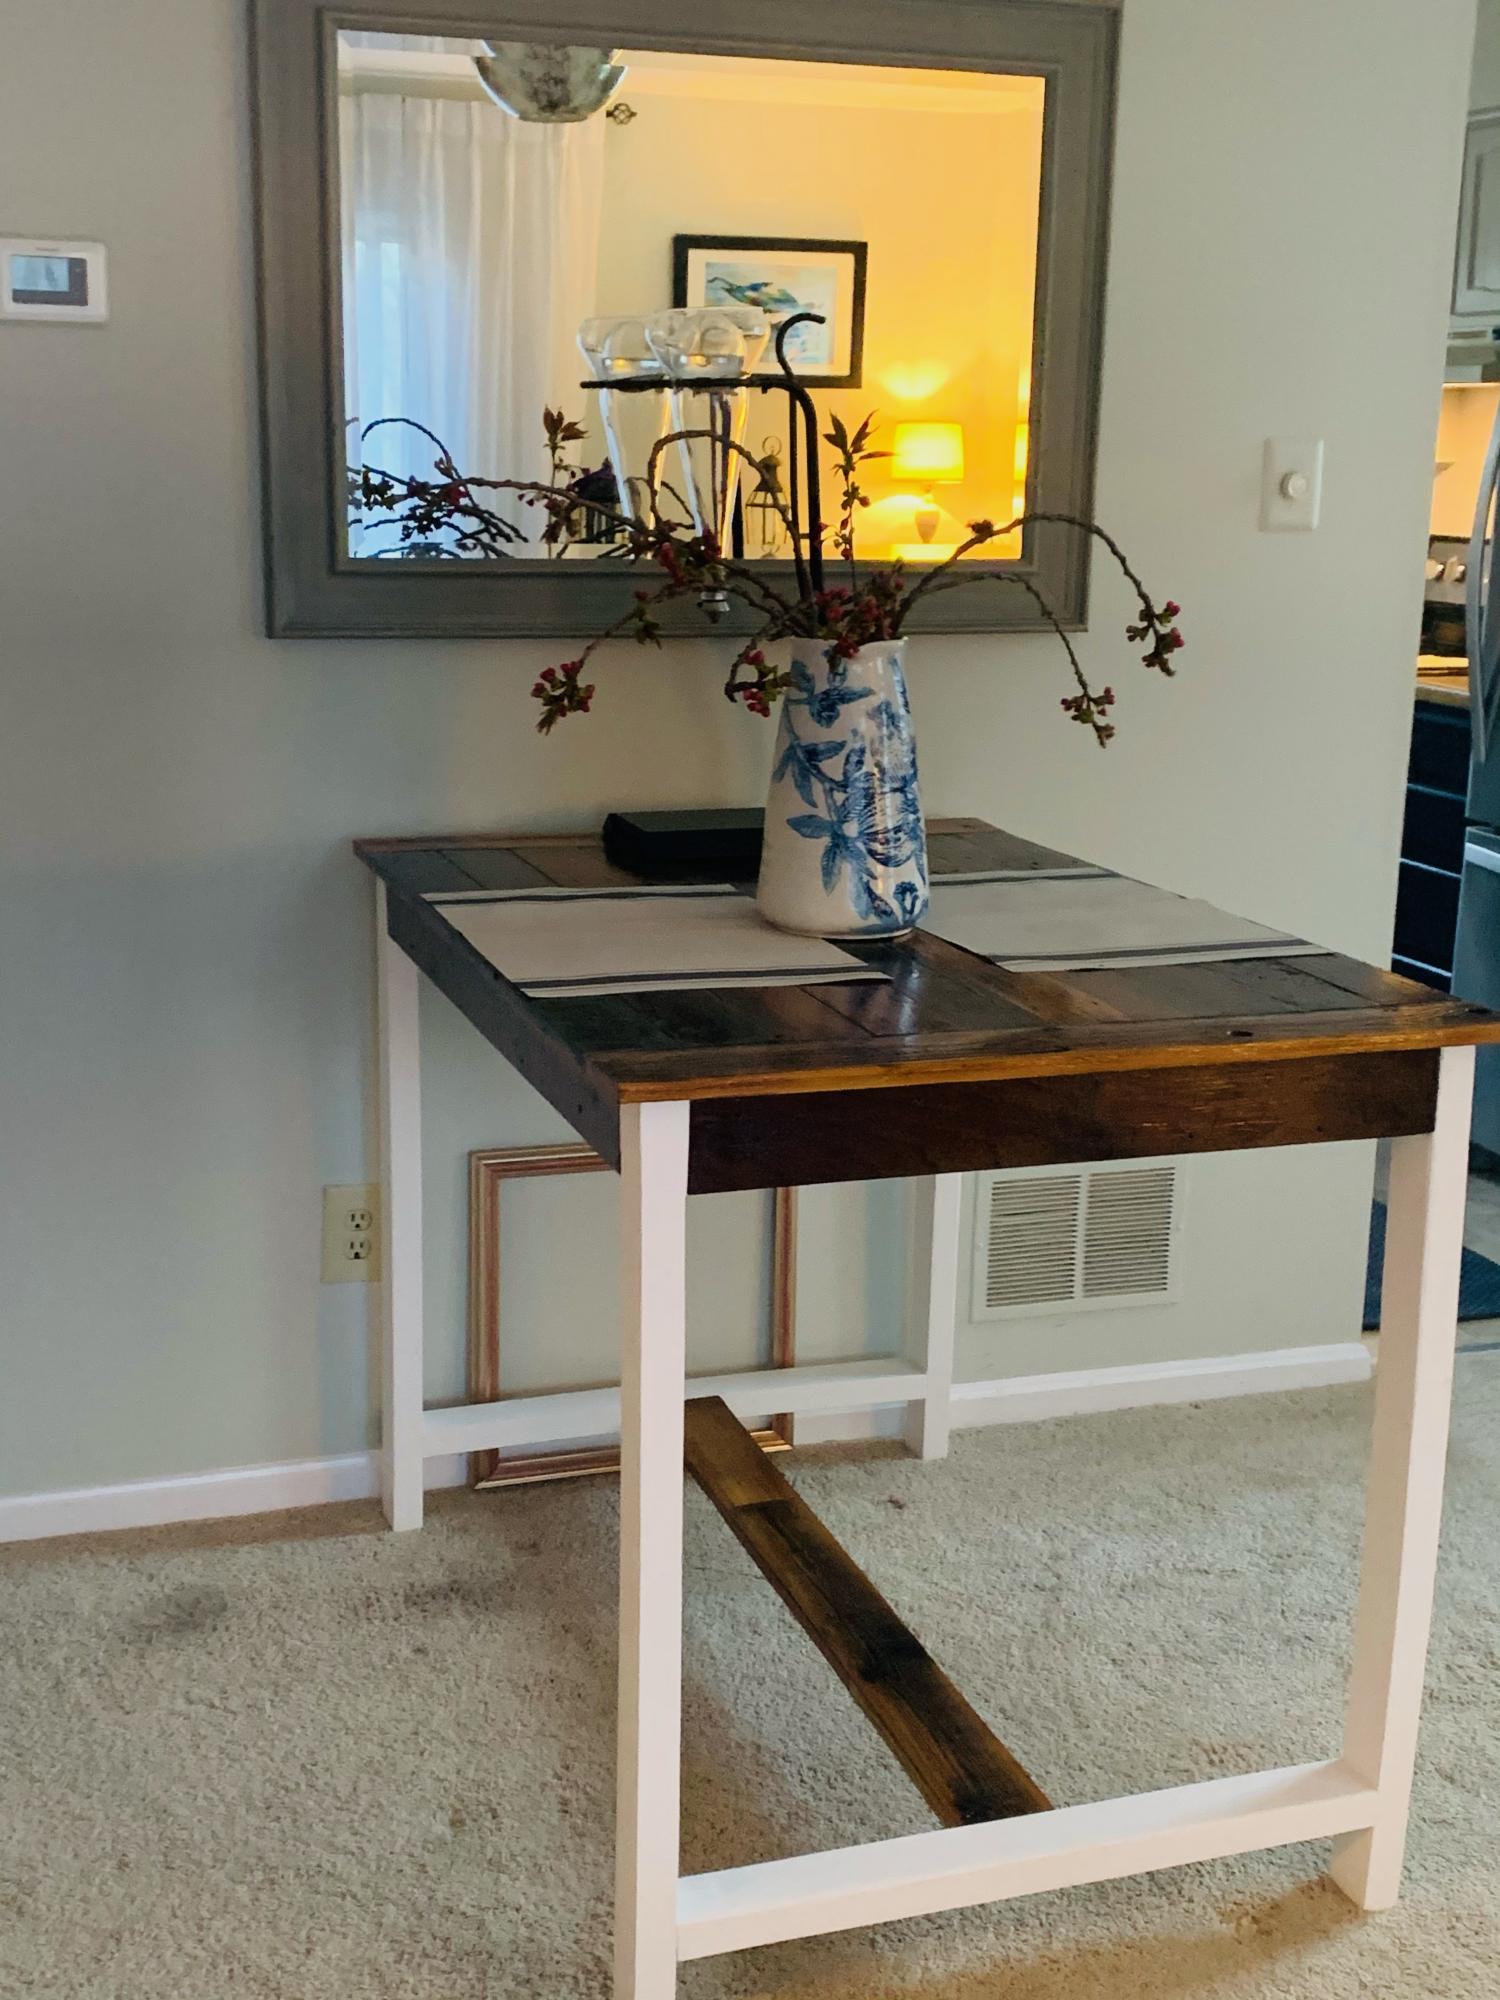
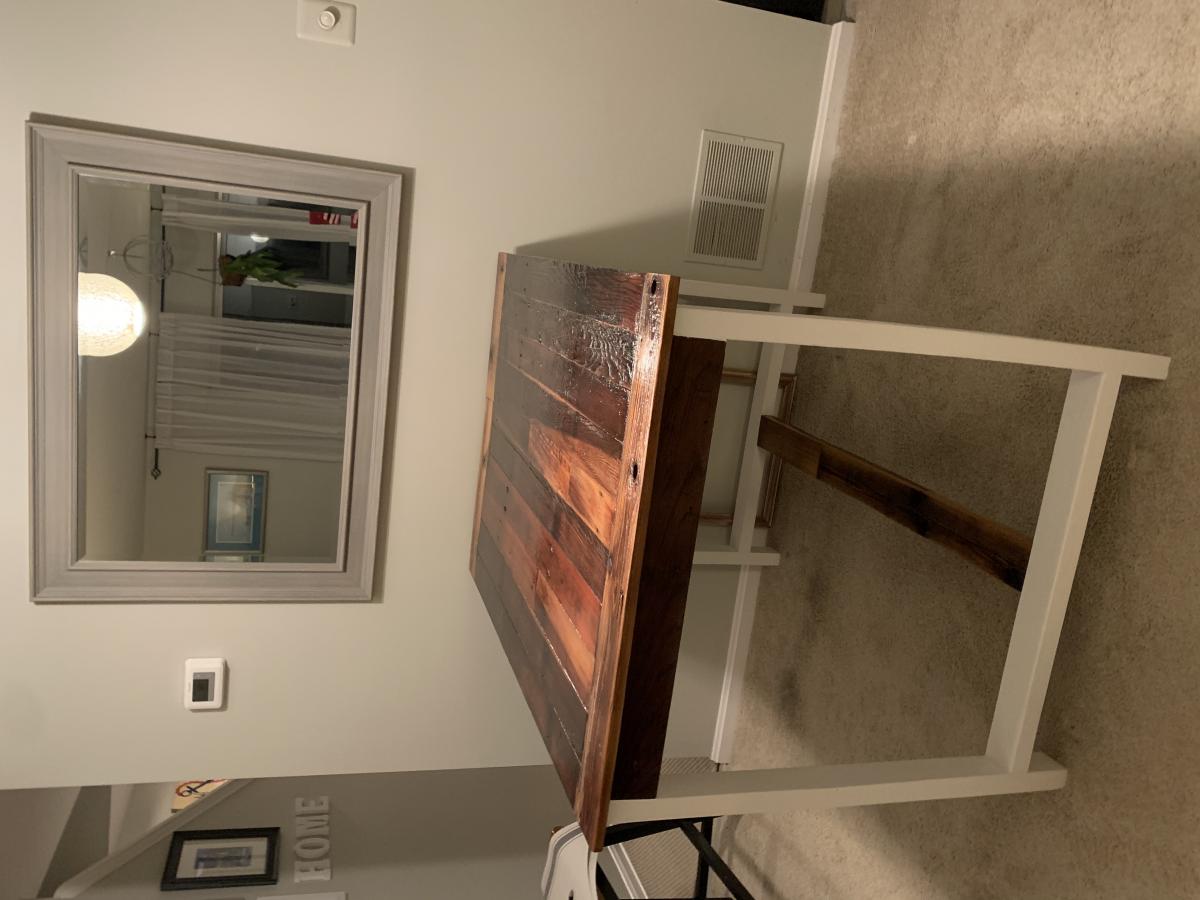
I used the outdoor bar plans to build this table. I have limited space in a living/dining room and had to fit the measurements to the space I have and the size of the pre-existing tabletop.
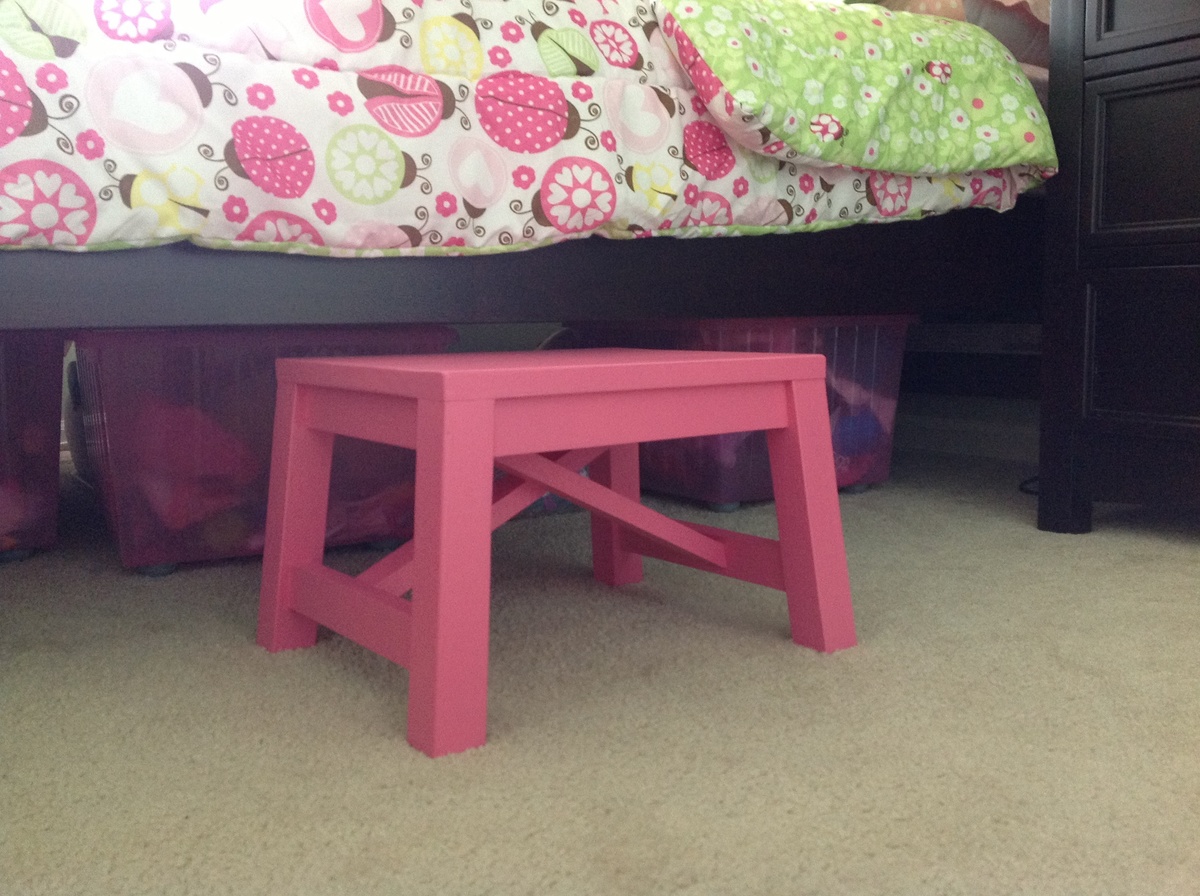
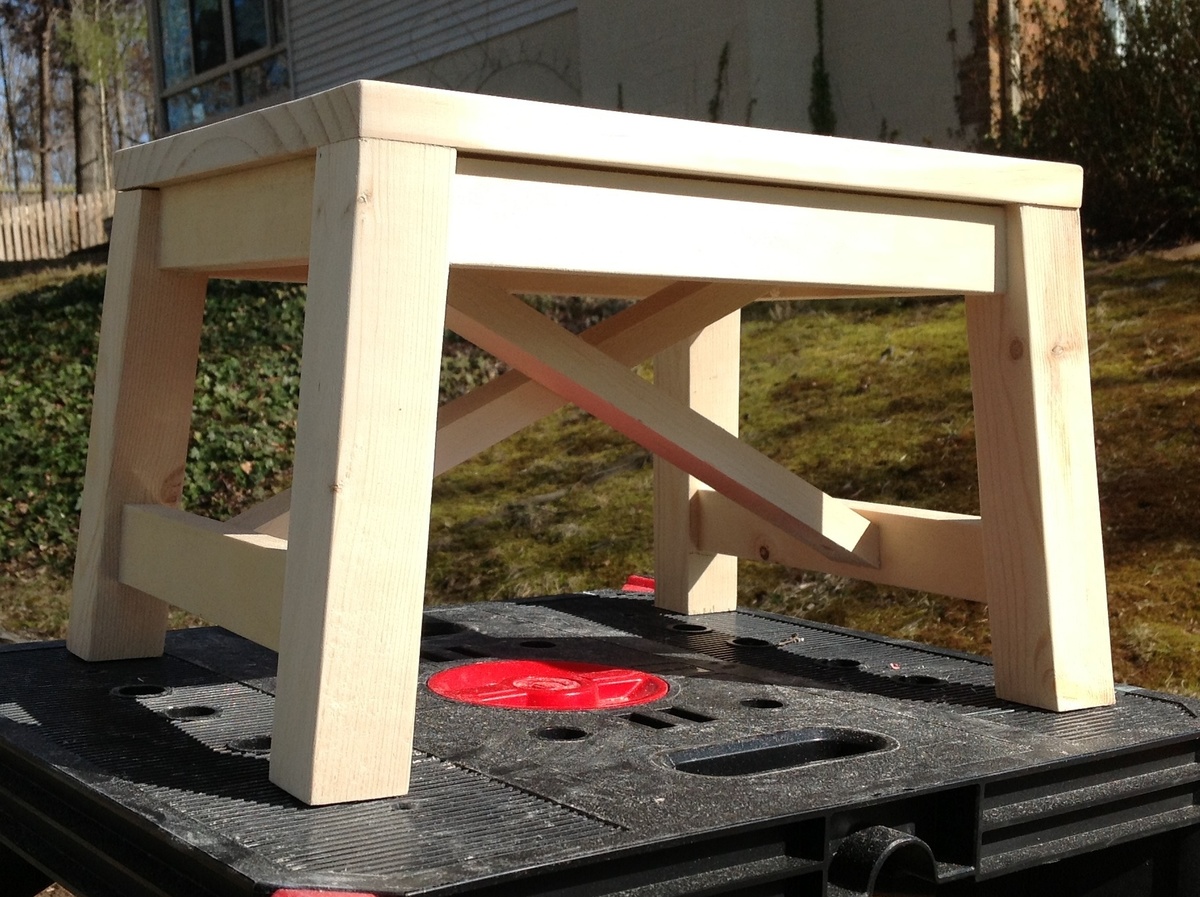
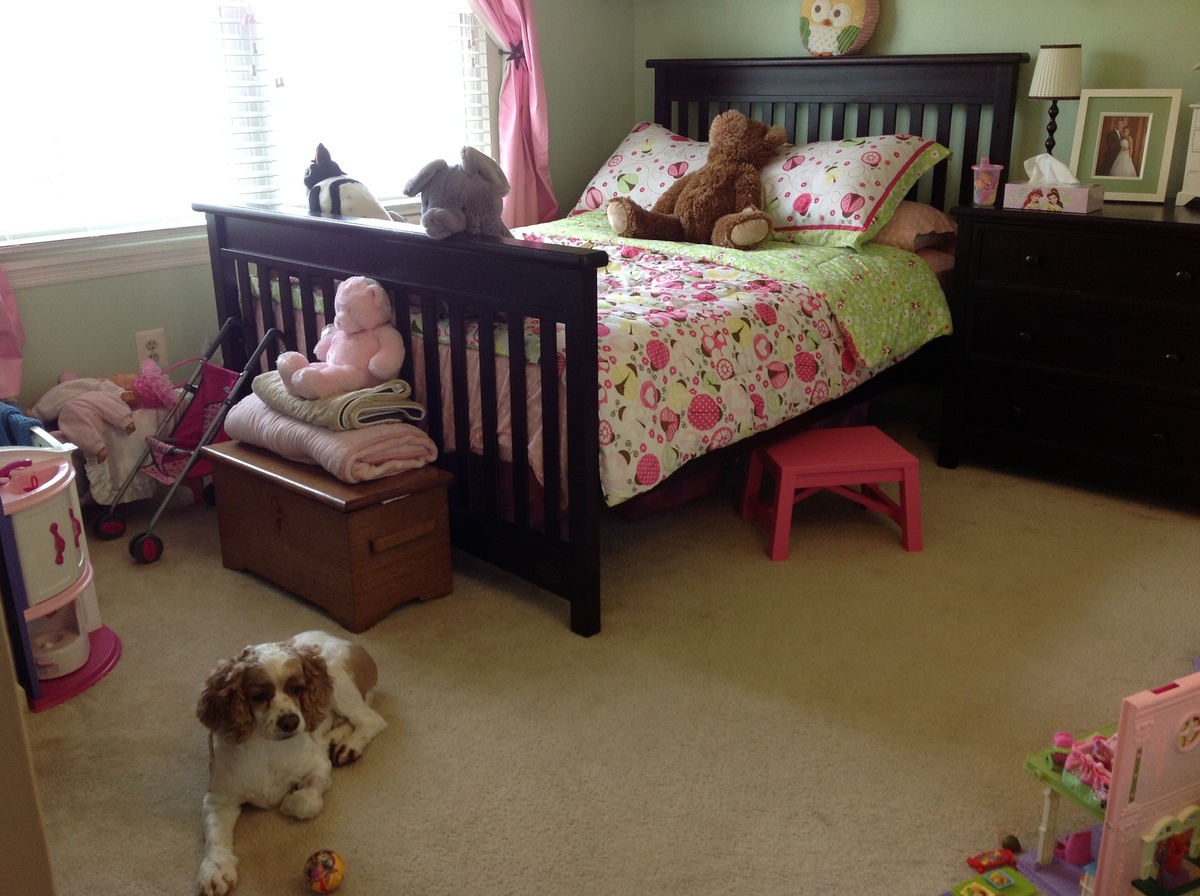
Moved our 3 year old into her big bed and she needed a stool. I loved the Rustic X Bench design and simply shrunk the measurements. The legs are made from 2x2s and were compound cut with the 5 degrees off center and 5 degree bevel. I used 1x2s for the aprons and other supports including the "X" support. Topped with a 1x12 cut 14" in length. Joined all together with countersunk 1 1/4" screws. Only added wood glue for the top piece. Stool measures 9 3/4" high which gives a nice 1/2" clearing to push under her bed when needed.

Fri, 03/29/2013 - 08:47
Love it! I have loved the full-sized bench since I first saw it. Miniaturizing it into a stool makes it even cuter! Thanks for the info on sizing. I'm going to have to make one!

This angle frame Twin over Full bunk bed with a trundle was made of yellow pine and stained with a dark minwax stain from Homedepot.
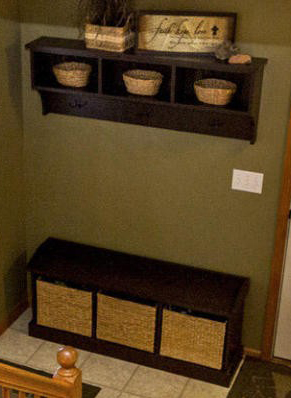
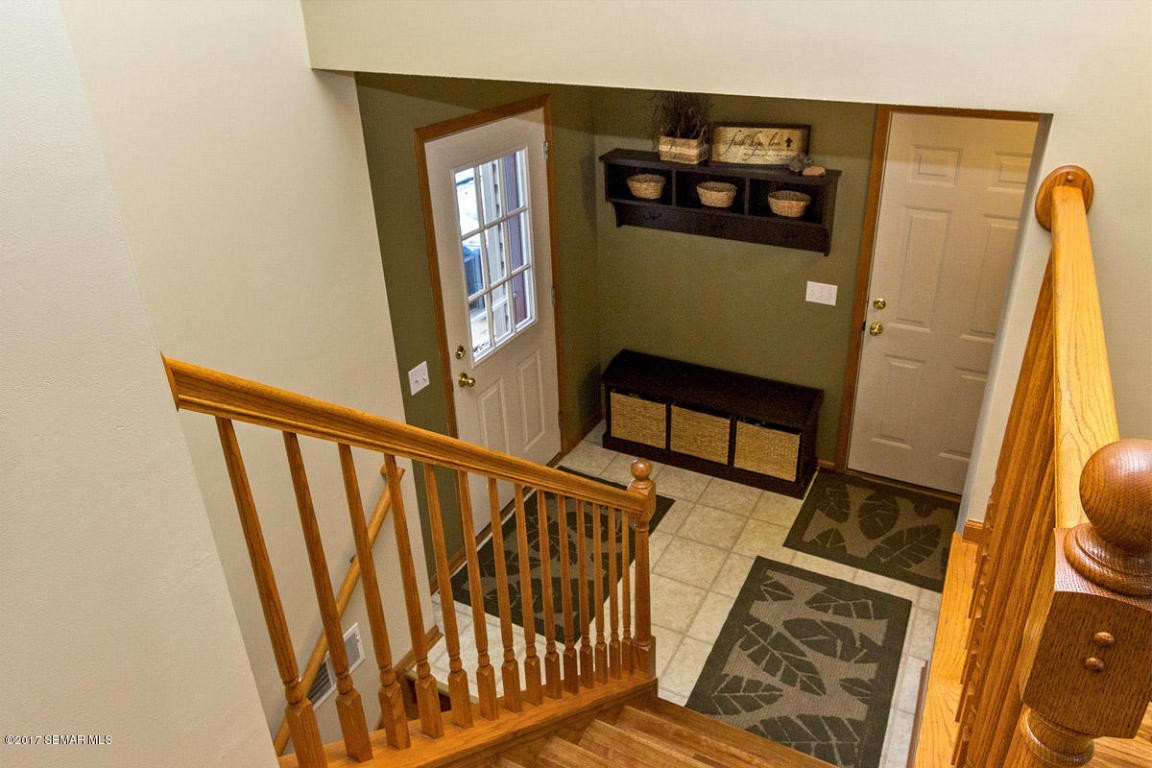
I believe I built this to spec from the original plans without much deviation using higher-grade pine boards (straight and not too many knots). It took an afternoon to build. I primed then painted with 3 coats of "Mocha" paint. There are 3 antique bronze hooks which are hard to see, but go well. The biggest challenge was finding baskets to fit, after the fact. I happened to get lucky with baskets for the bottom bench, but never did find anything to fit the top, at least in the way I envisioned. I wish I'd have located a set of baskets first, then measured and built the bench and shelf to suit the baskets. The bottom baskets actually stick out the back of the bench by about 3/4". Any rectangular baskets I found for the shelves seemed to stick out the front a couple inches. I highly recommend getting your baskets FIRST, then adjusting your measurements to accomodate them.
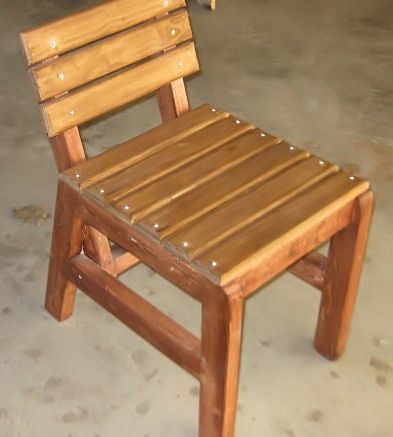
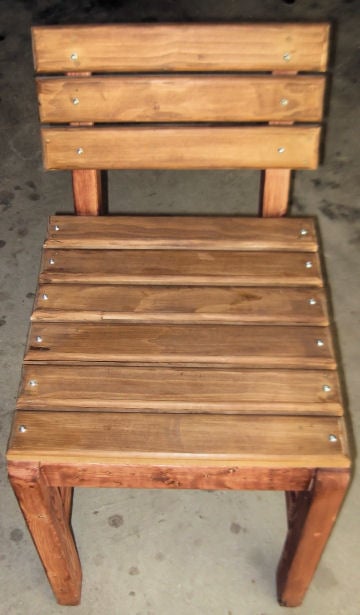
I saw this chair and was looking for something for back yard BBQ's I just beefed it up by using 2X3's instead of 2X2's left the measurements the same. I was playing around with Minwax Express Color to see how well it does and I like it helps control Blotching very easy to use except be careful when squeezing the tube or you like me will have a permanent shirt for staining

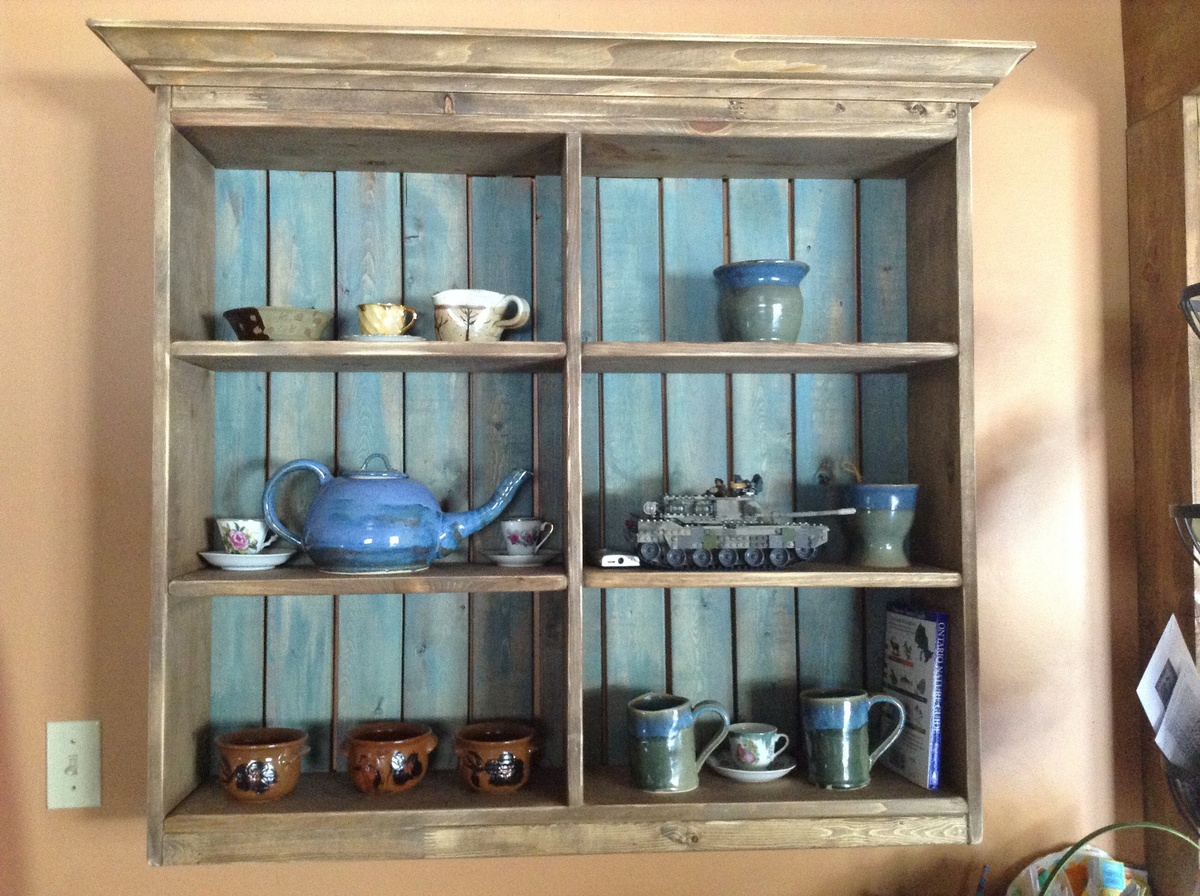
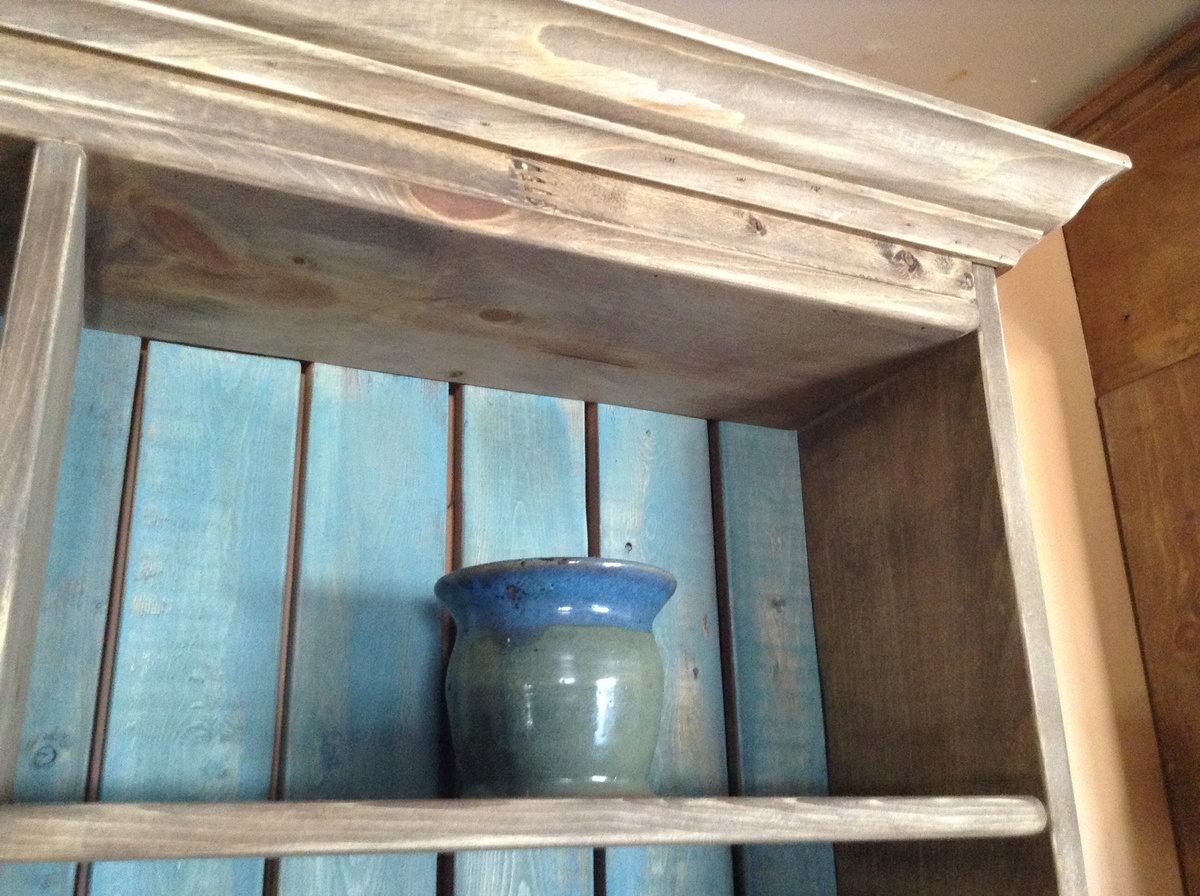
3x4foot wall unit for displaying pottery and your kid's Lego sets that took you 3 hours to put together. Back boards have been washed with diluted blue green latex paint and then stained with Minwax Special Walnut. The main frame is just stained, distressed and then waxed.
Hi Everyone
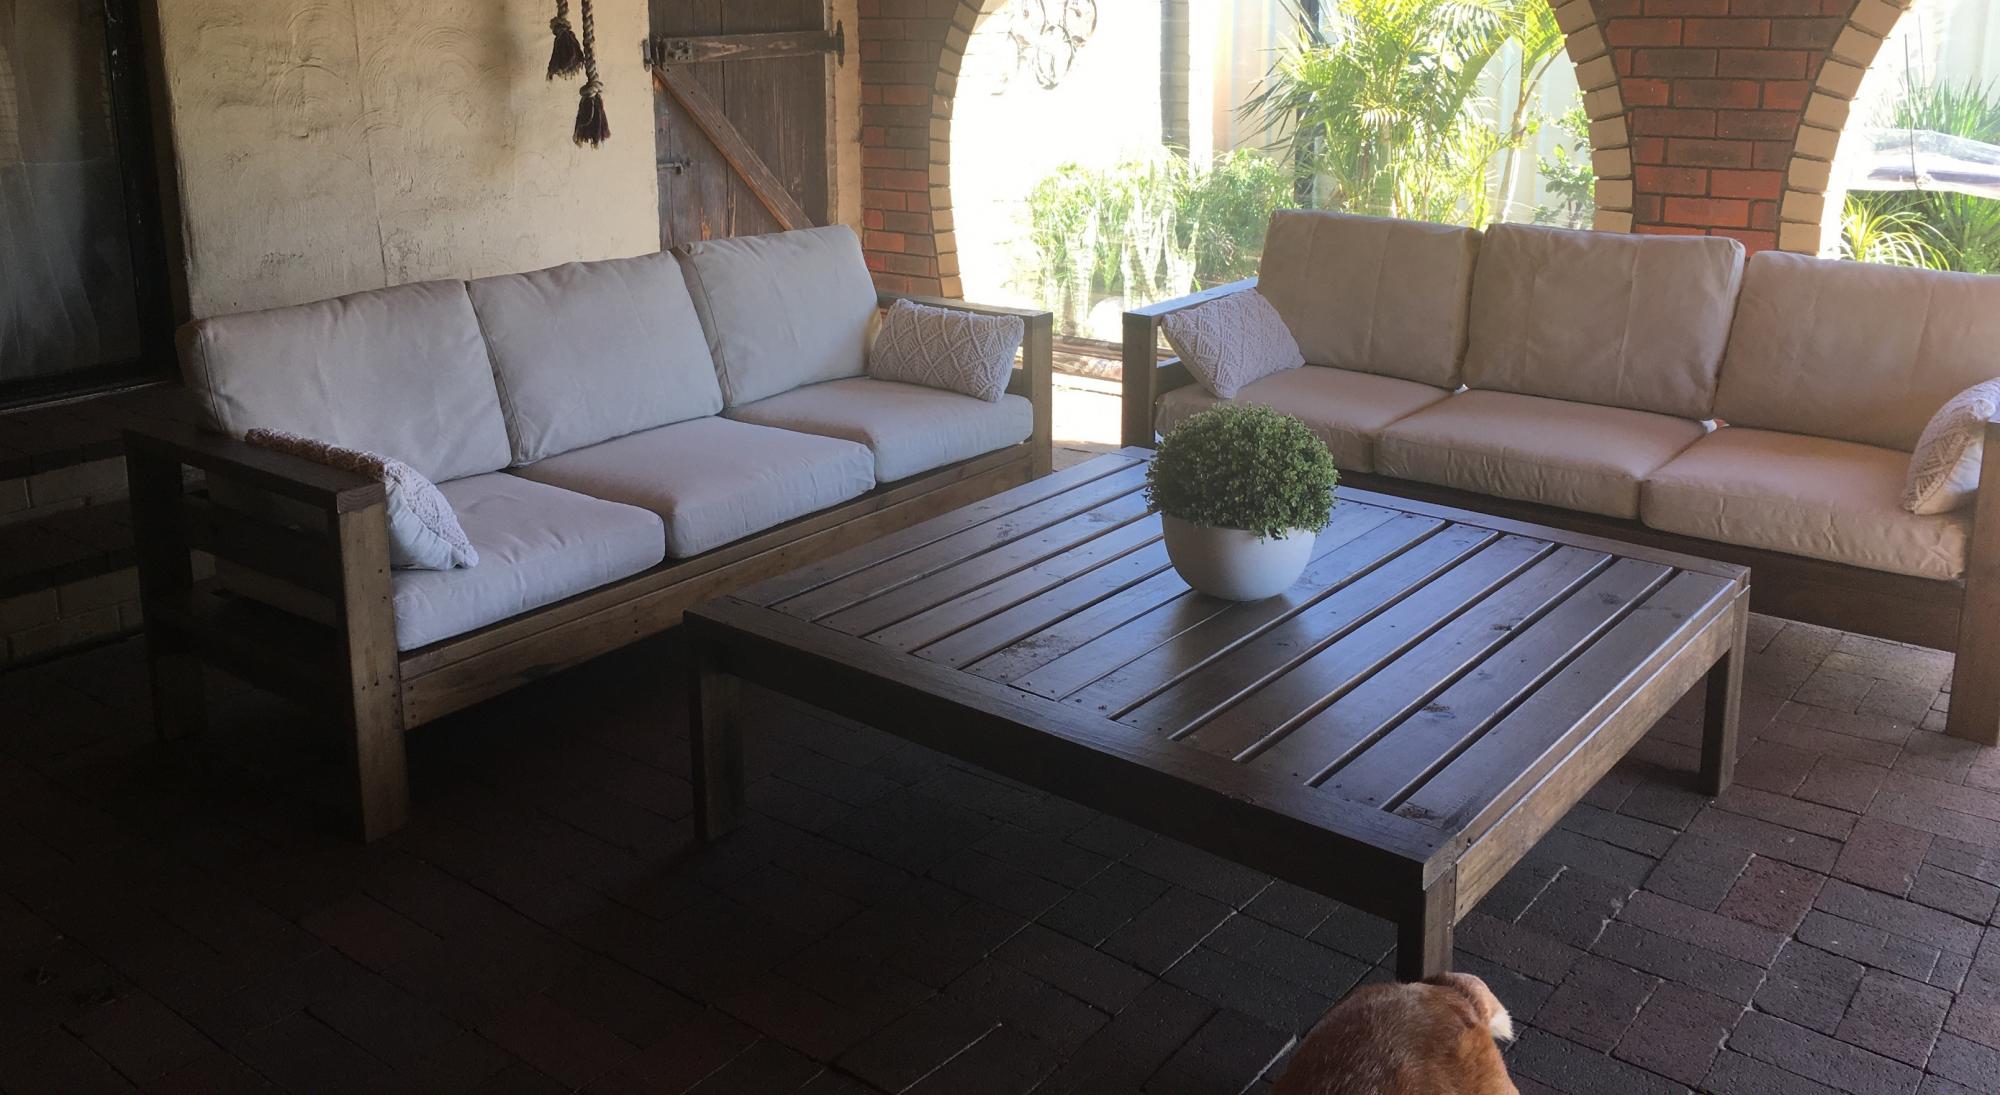
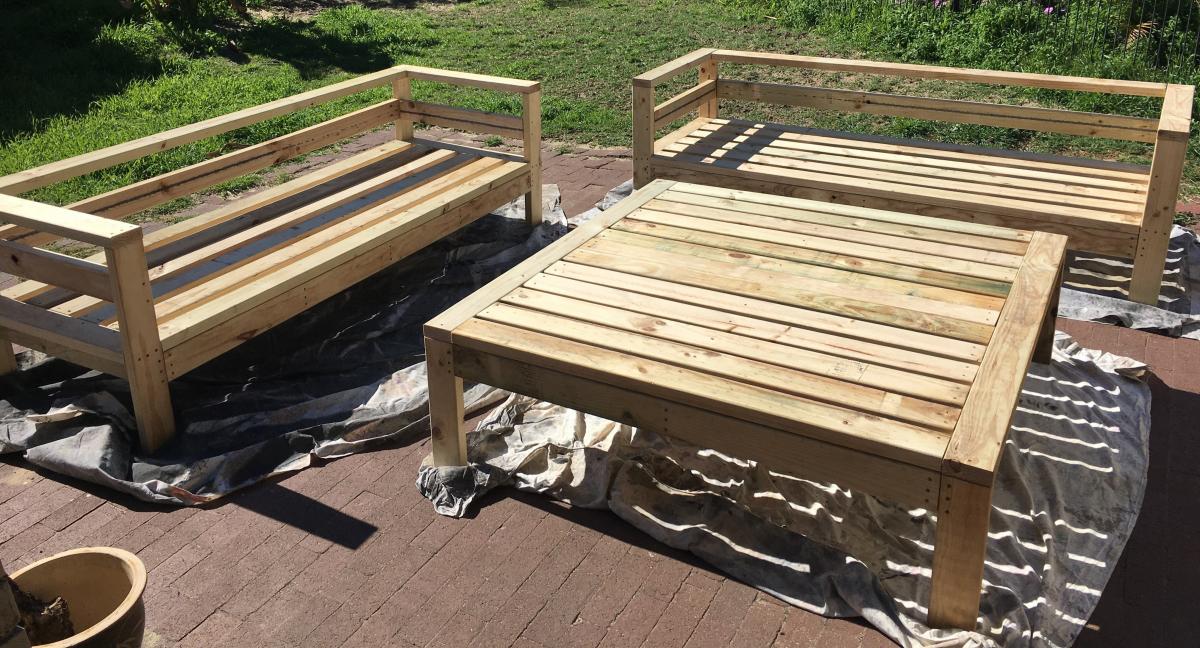
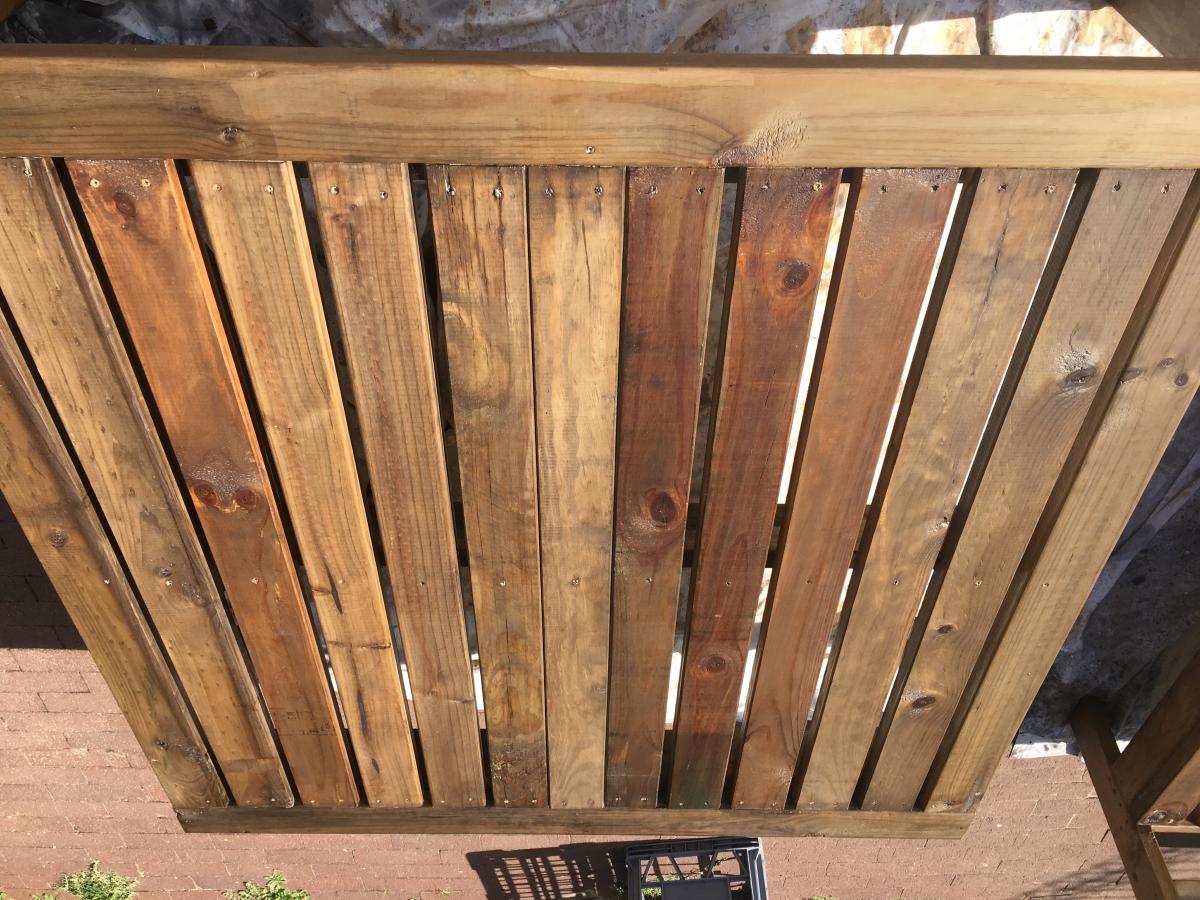
Ana, I love your work, so much, that I used your plans and adapted them to make this outdoor 3 seater setting and table, with cushions bought from Ikea. It's been a year and a half since built and is still holding up strong. I'm sure it will last a lifetime. Longer than the cushions will.
Thanks all
Jo
Fri, 05/14/2021 - 11:17
Thanks for sharing, it looks like a great space to hang out!
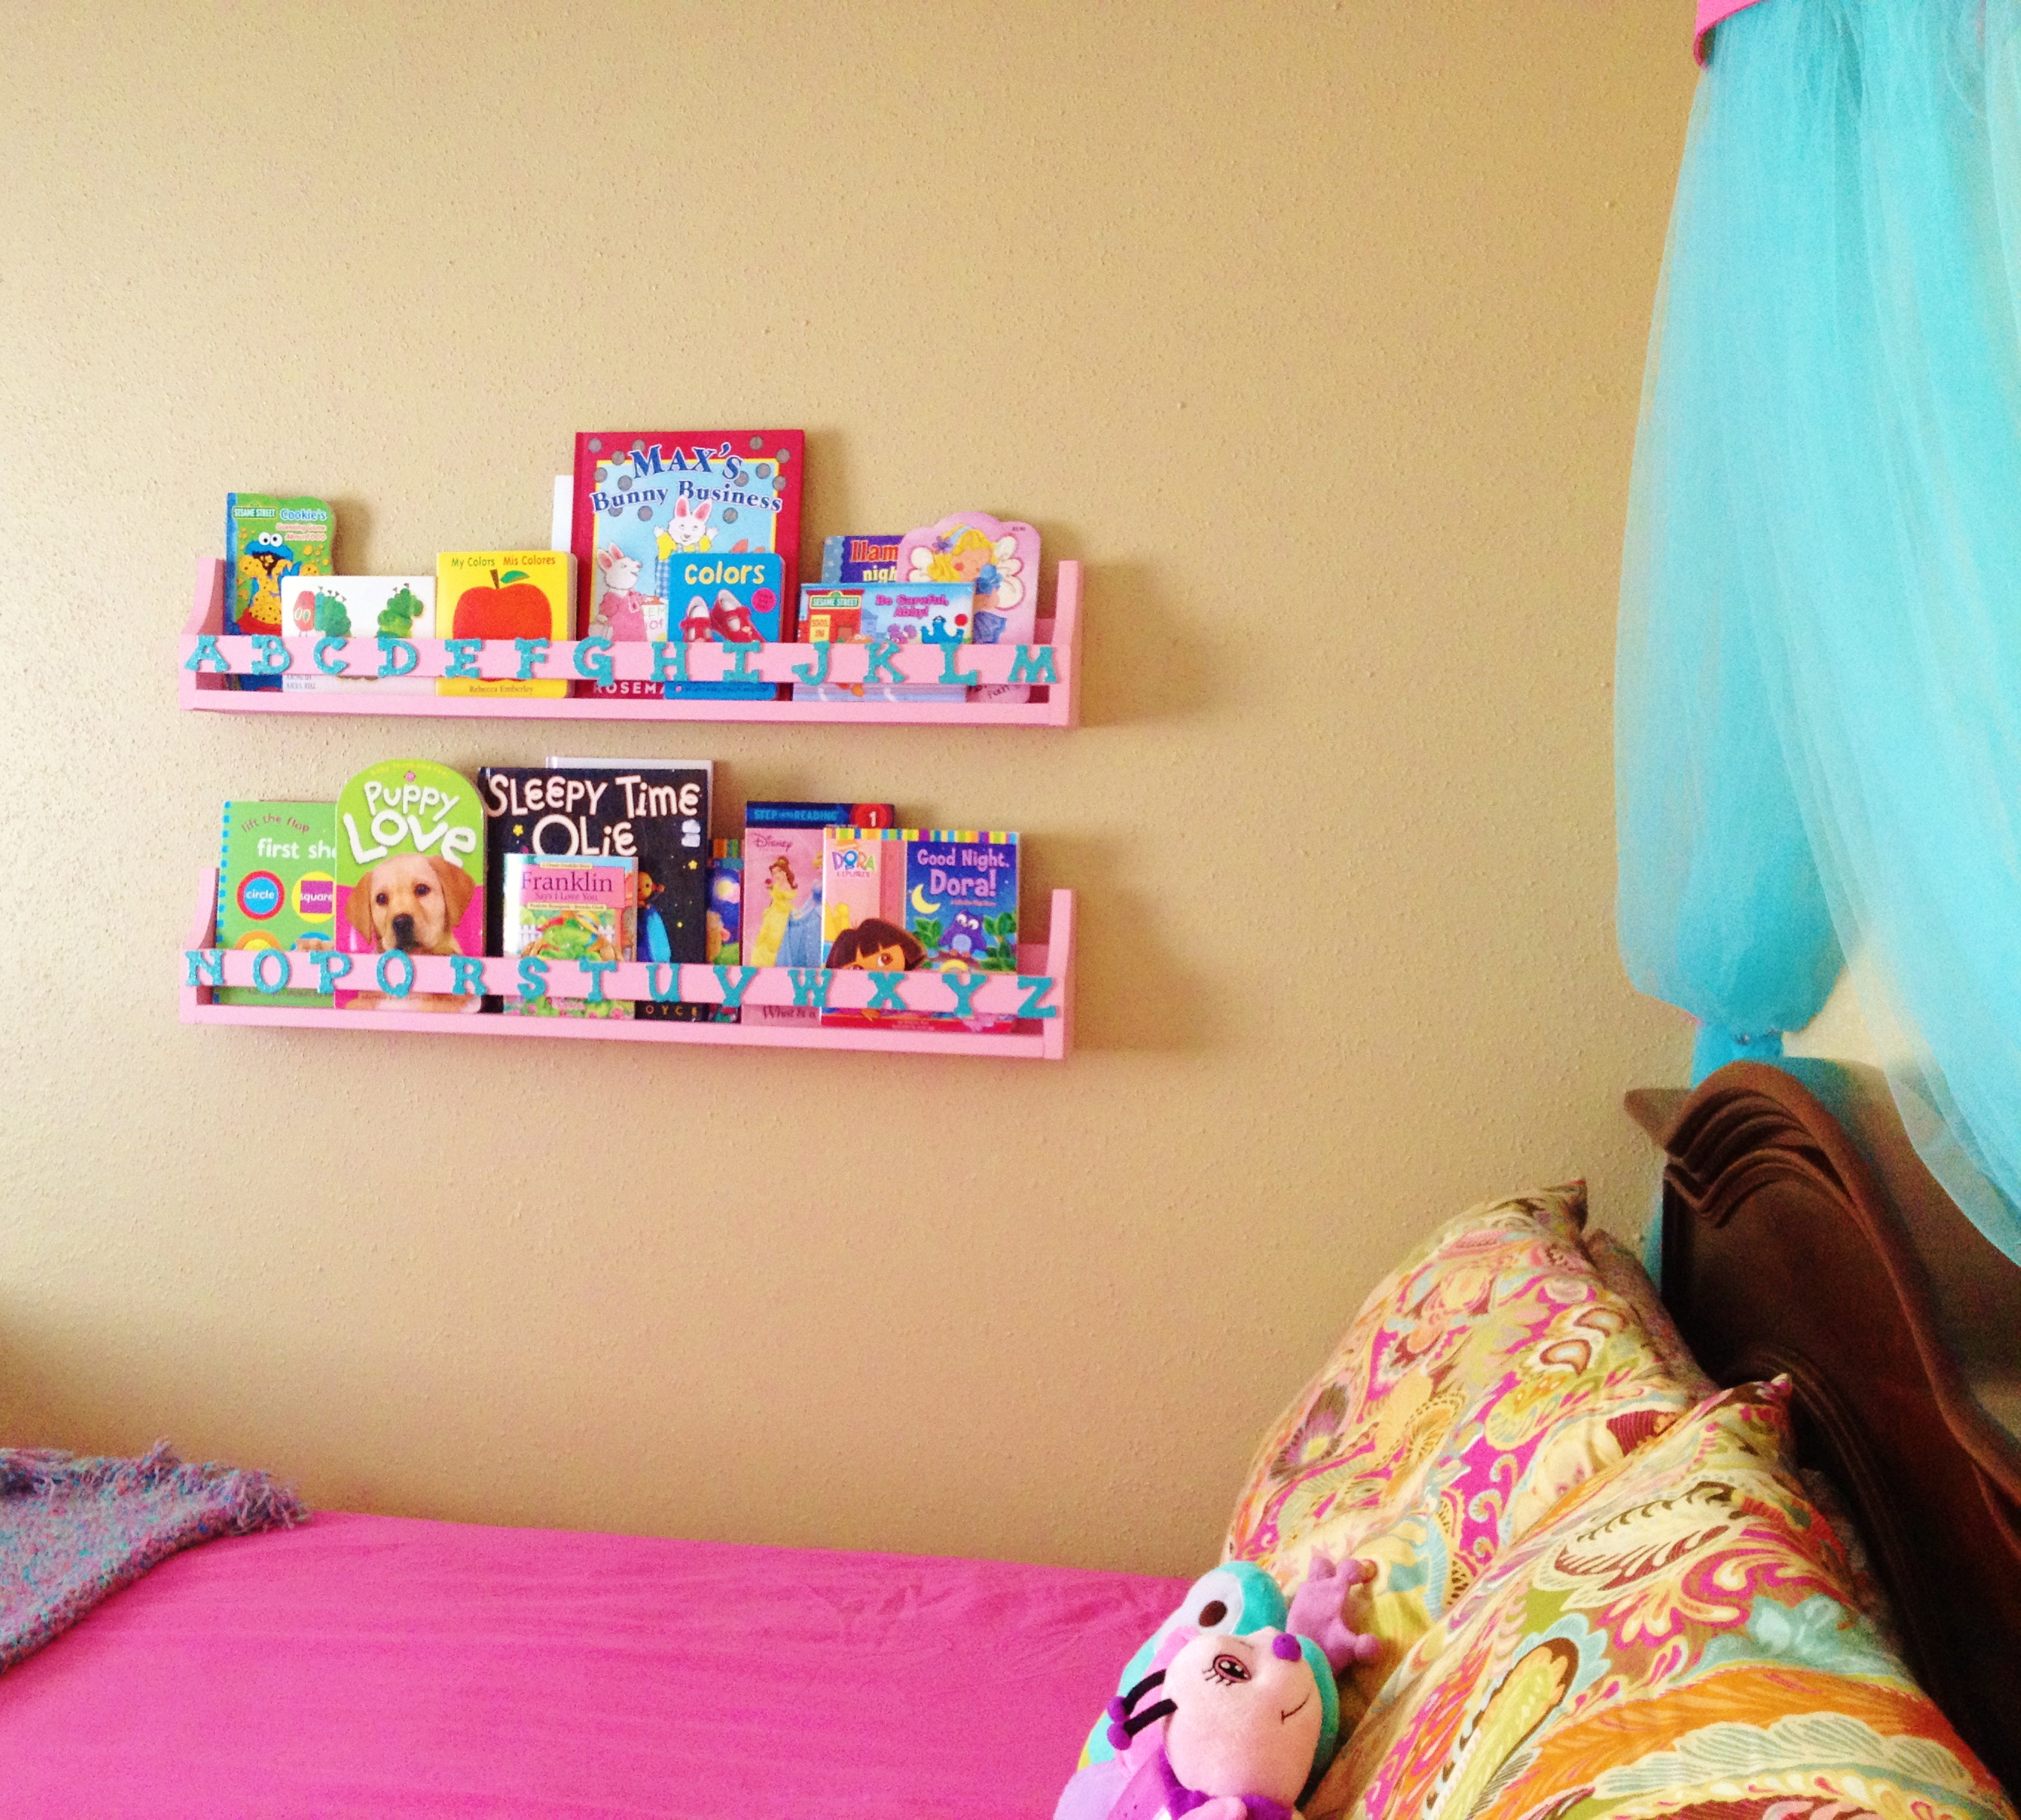
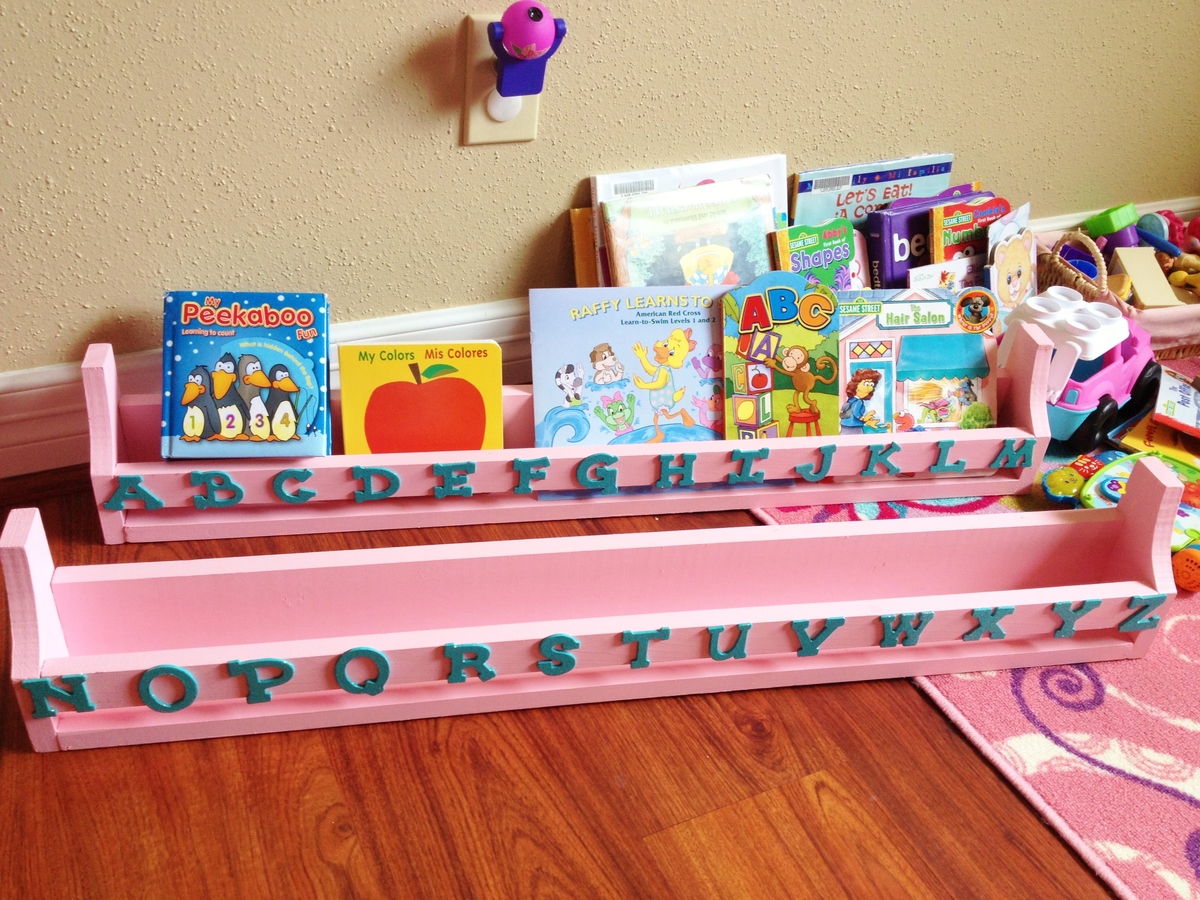
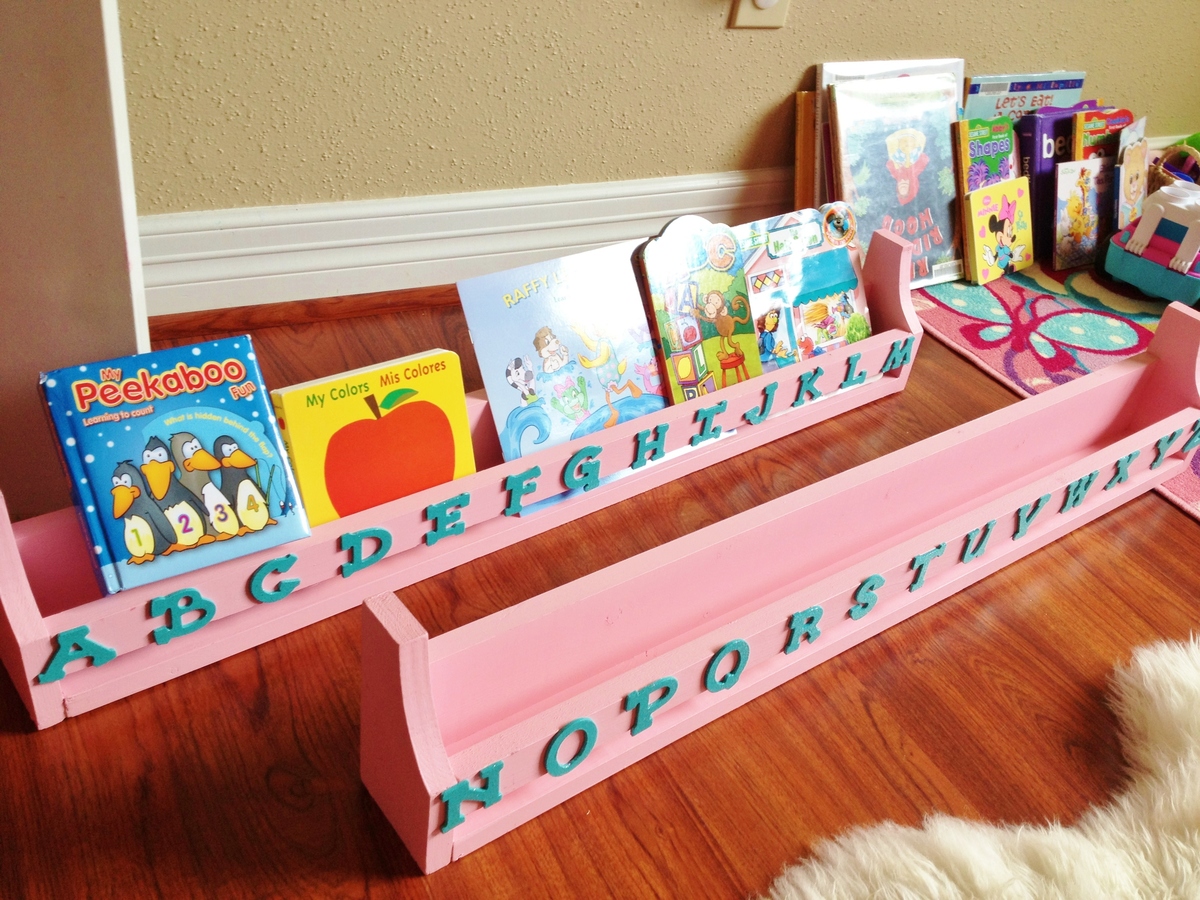
I used the longer book holders to make these. I painted it in a flat light pink and bought craft wood letters that i painted with Martha Stewart Glitter Turquoise craft paint and glued them to the front. Not only does this hold books that are in arms reach once its bedtime but its a nicer way to have the alphabet shown on the wall everyday to help my 3 year old learn her letters.
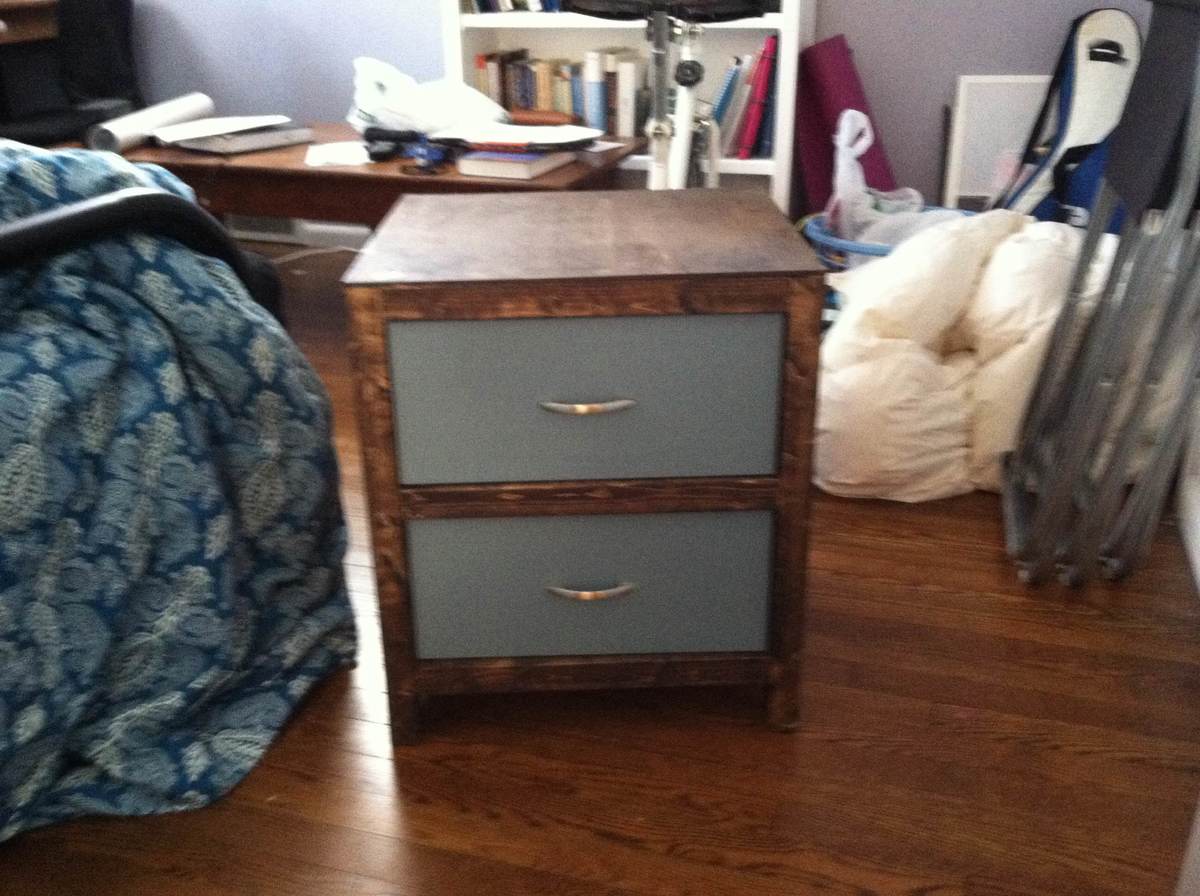
Built this set of Nightstands to match a bed that I made.

Mon, 02/16/2015 - 13:21
This is cute! I love the colors that you chose...:-))))))

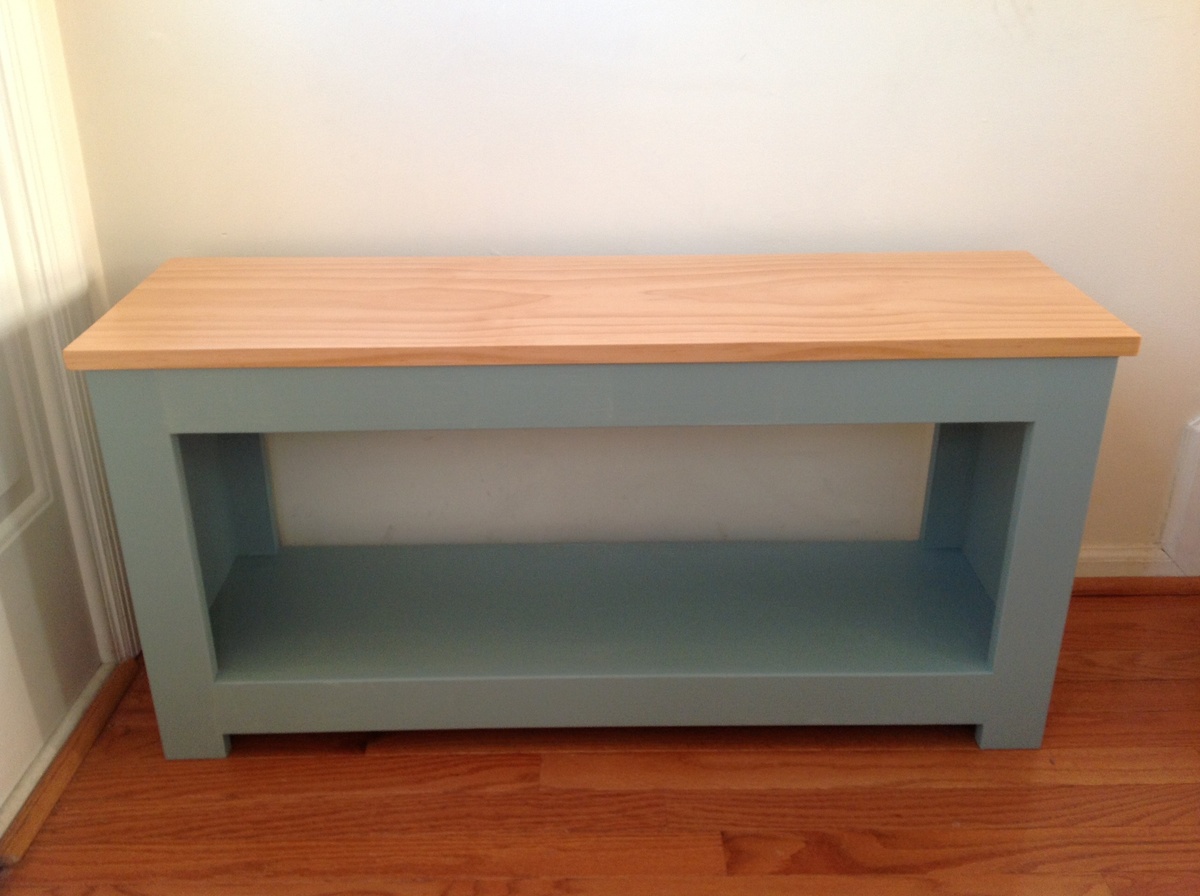
This design was straight forward and easy to modify - made the bench deeper and shorter, and added a shelf.
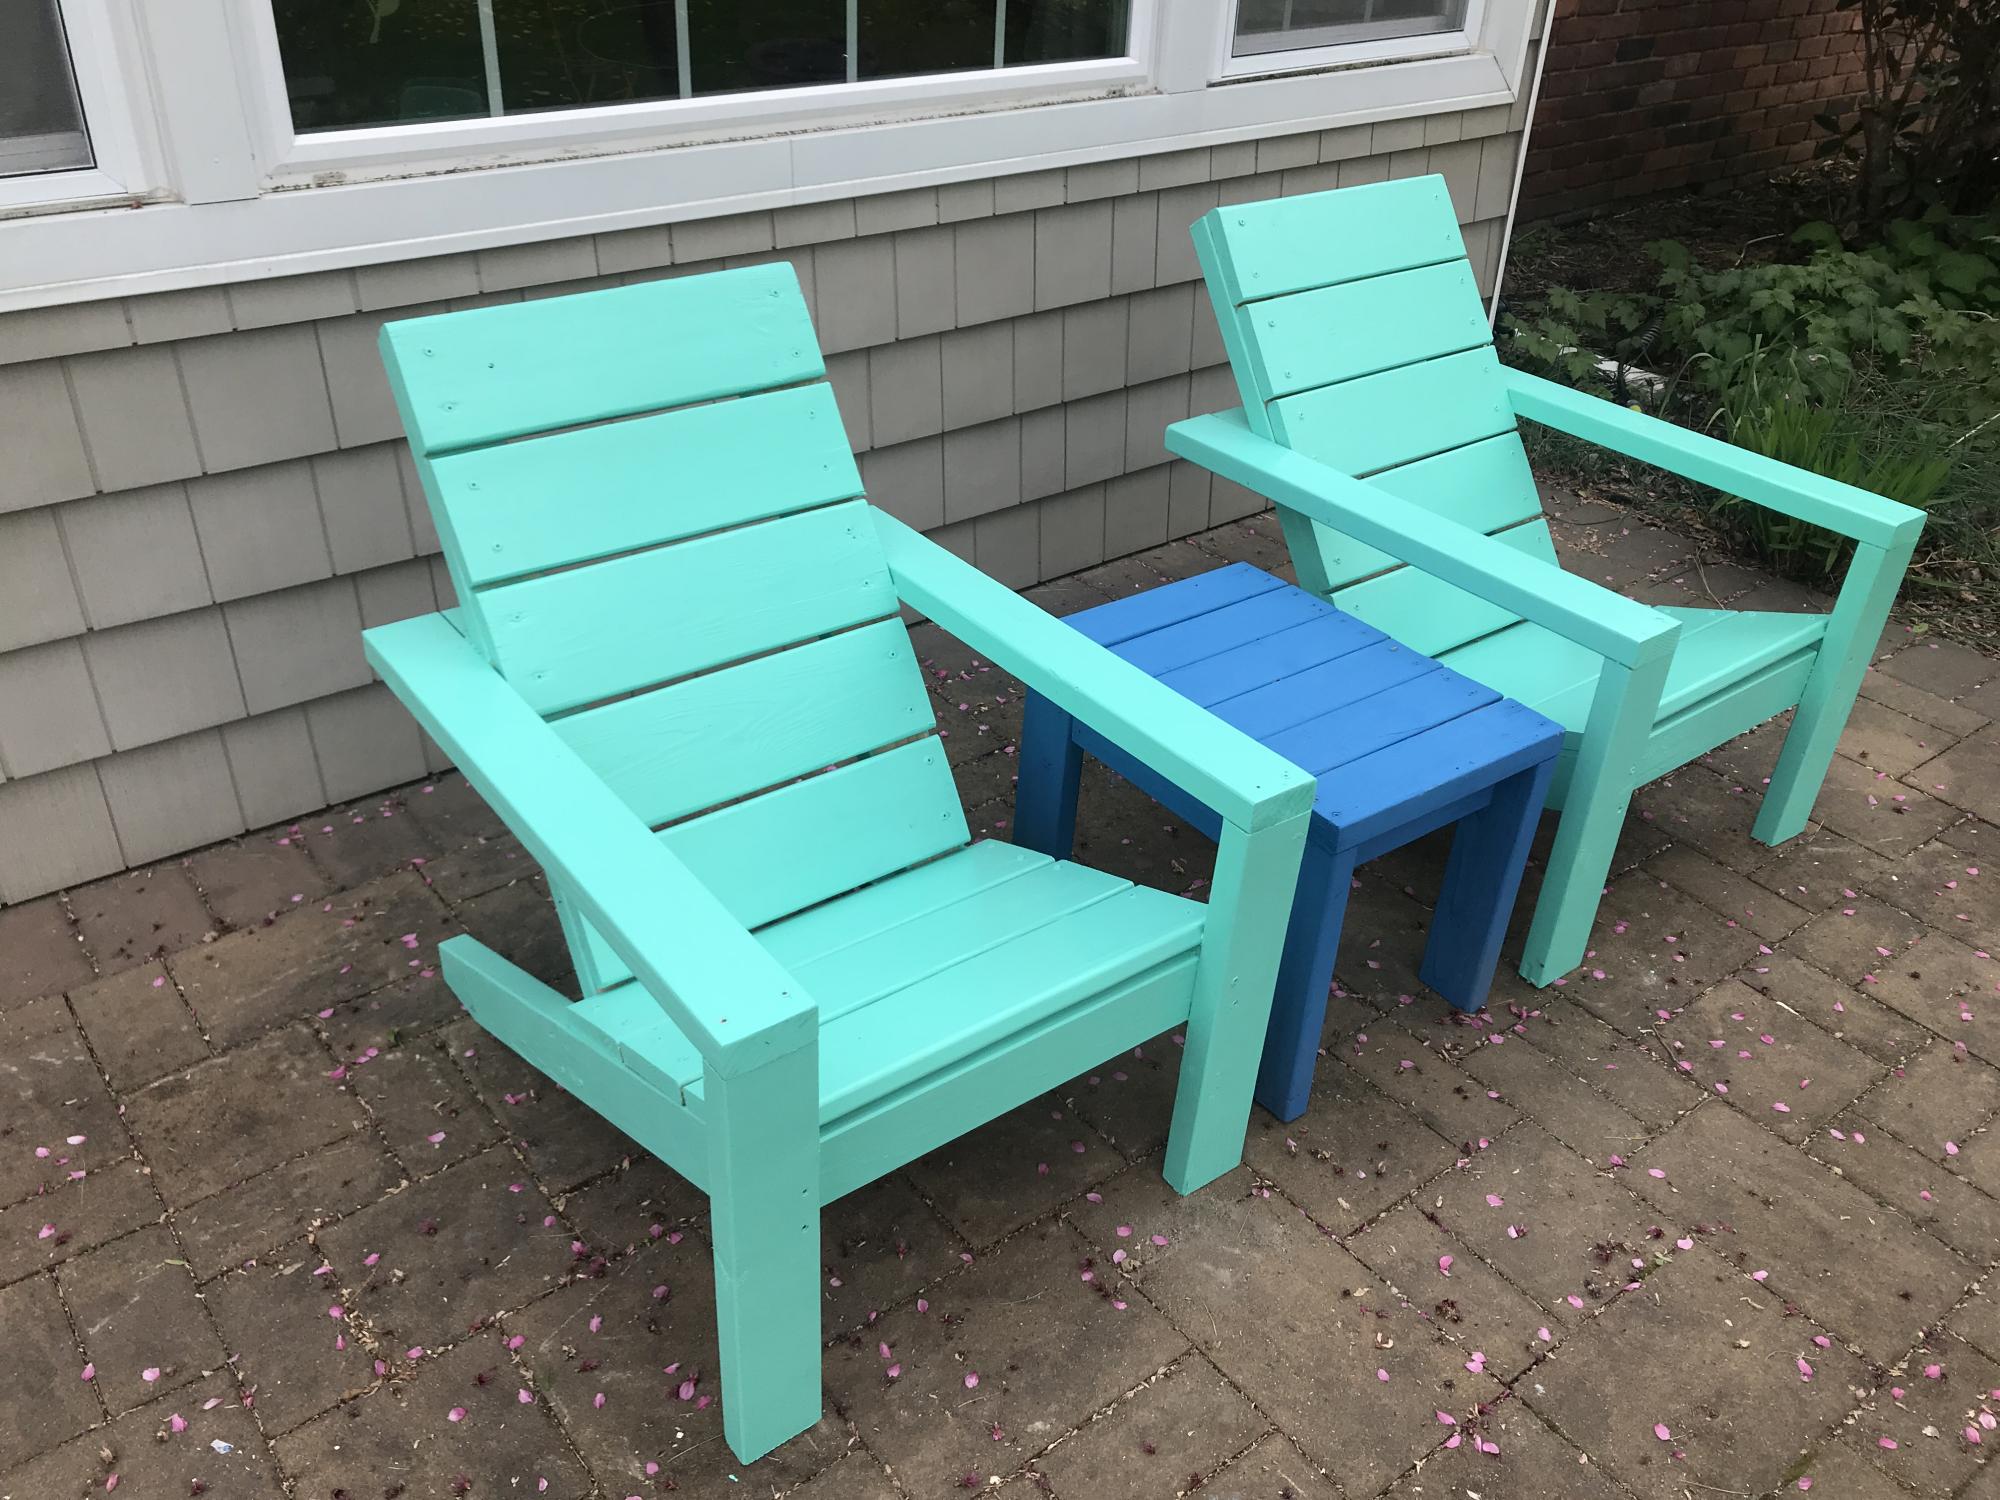
I'm a mom of two kids and new to wood working. The video instruction and the plan were so comprehensive! Thank you Ana, you inspired me to do more wood projects. I feel so accomplished and got so many comments on my new chairs. They are really really comfortable. My husband, who has a stiff back, loves the chair as it is also comfortable for him.
Mon, 05/24/2021 - 09:25
I am so happy you built them, and love the color choice! Happy building:)
Wed, 03/16/2022 - 11:54
Love it! Can you tell me what you used for the finish? Stain or paint and what brand? How is the finish holding up?
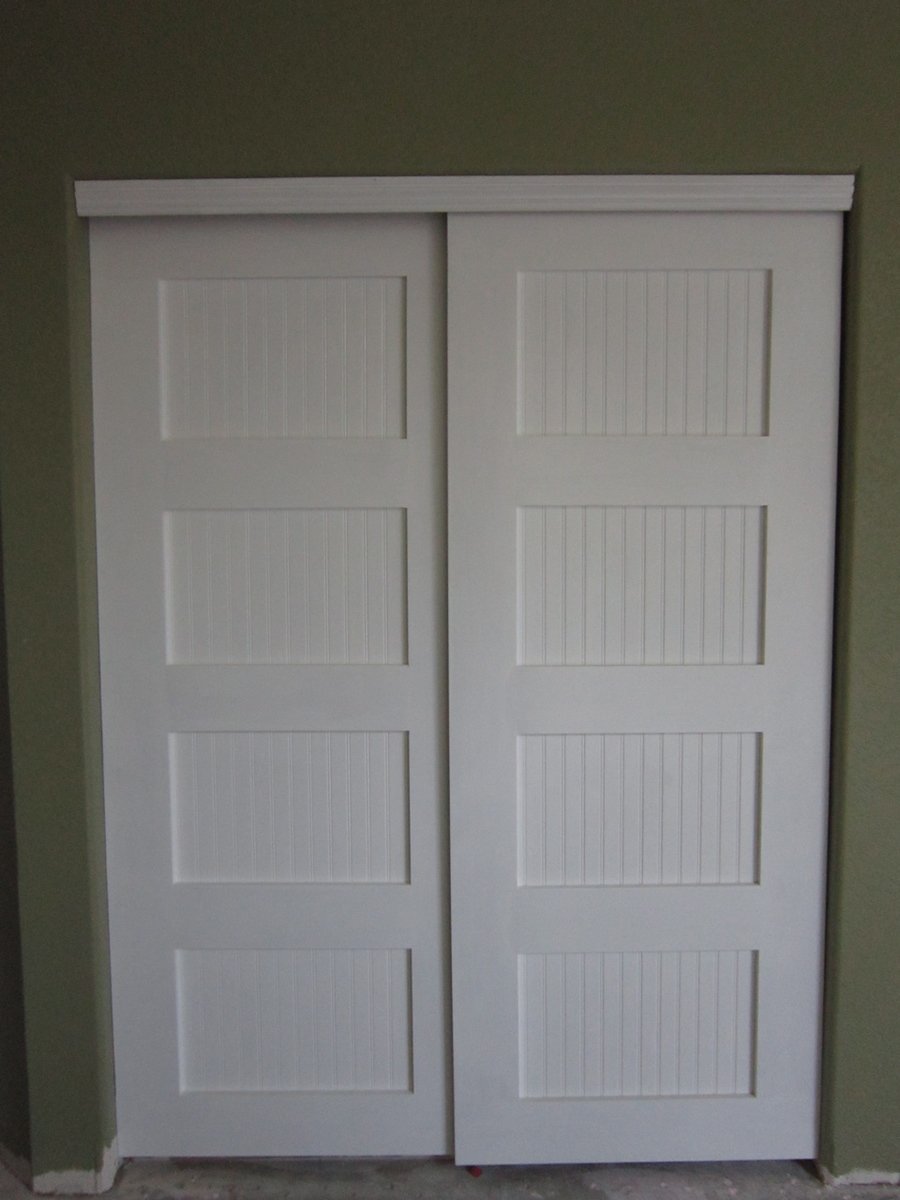
After discovering a leak, we are in the process of a master bathroom/bedroom remodel. In the bedroom, we had replaced all of the windows, painted and installed crown moulding with rope lighting in the bedroom. Then we looked at our closet doors leading to our walk-in closet, and realized they really needed to go to. They were heavy, mirrored with brass trim and regularly would jump off their track. Unfortunately the leak had caused more damage than we originally thought, and our remodel had expanded to replacing two exterior walls as well so we were over budget. Just to get an idea of how much it would cost to buy new doors, I got online and thankfully I found these plans. Although I used to watch my Grandfather build things in his wood shop, I had never actually built something all by myself. My contractor let me use his Kreg Jig and miter saw. After purchasing the wood, I quickly put together the door frames. Since we were on a strict budget for these doors, I decided to use bead board instead of glass. I bought a 4 x 8 sheet of beadboard and had the store rip it in half. I then attached it to the back of the doors with small wood screws and glue. I painted the doors with white gloss trim paint to match the other doors in the room. Since my closet is a walk-in closet, I did paint both sides. My closet entrance had no trim, so used a piece of moulding and attached it to the bypass door track. We are not finished with the flooring or baseboards yet, but once complete we will be installing guides along the bottom.
Fri, 04/05/2013 - 20:43
Beautiful! And so much better looking than mirrors and brass!
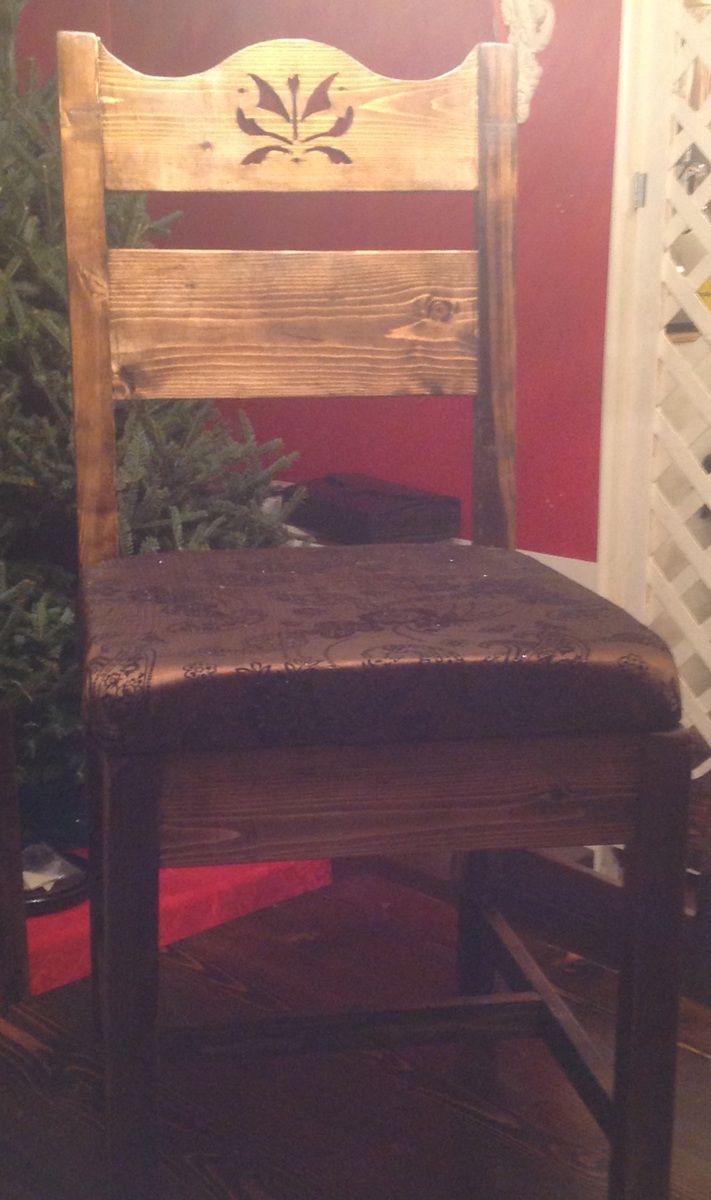
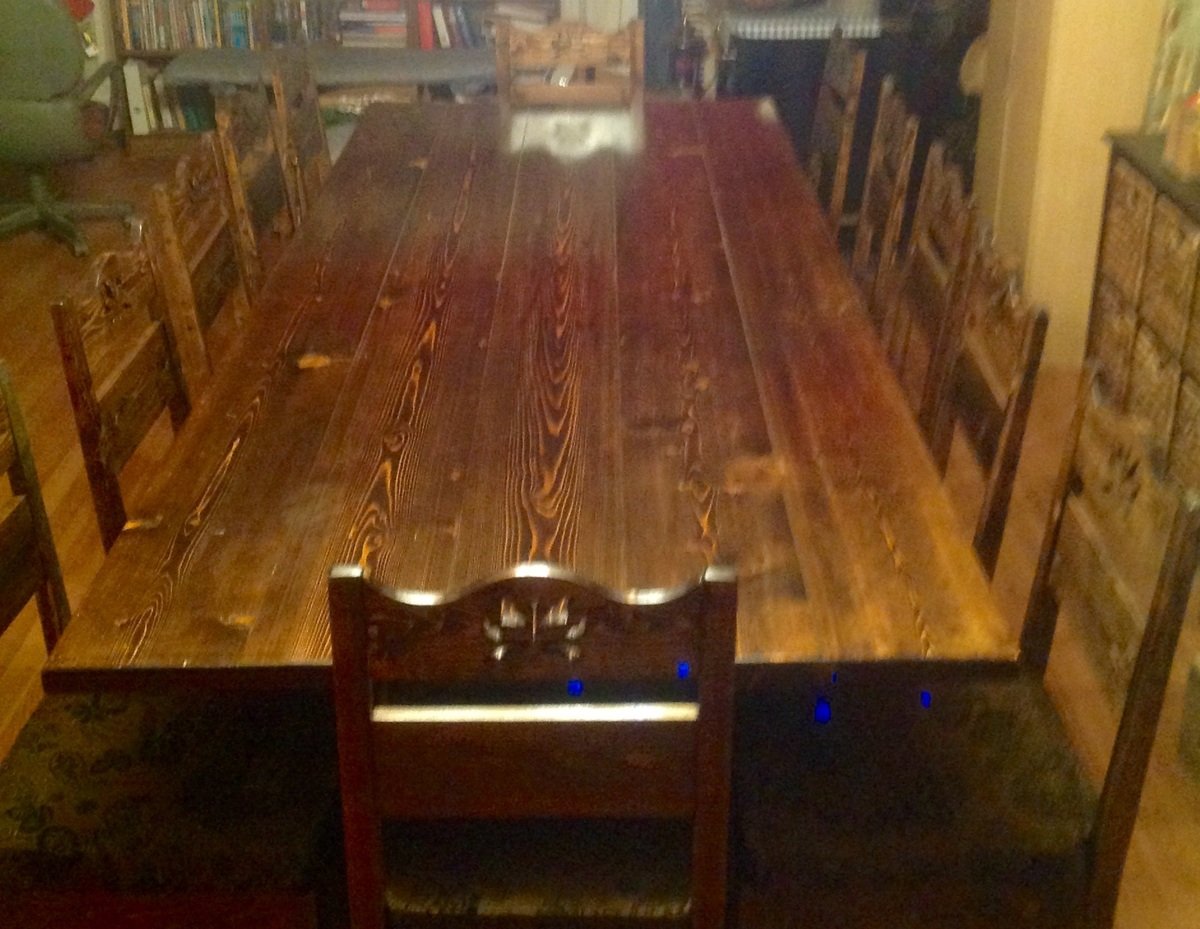
I needed chairs to go with the table I built the previous year. Thank you so much for sharing these plans. The plans are easy to follow and adaptable to any need.
I narrowed the seats to 17" wide and adjusted all measurements accordingly. I used a scroll saw for the backs, dark walnut stain and poly to finish. I was in a hurry so I managed to get all 12 chairs made, with off and on work, approx. 1 month.
Tue, 02/24/2015 - 14:44
Beautiful. I really like the detailed back. Nice job!
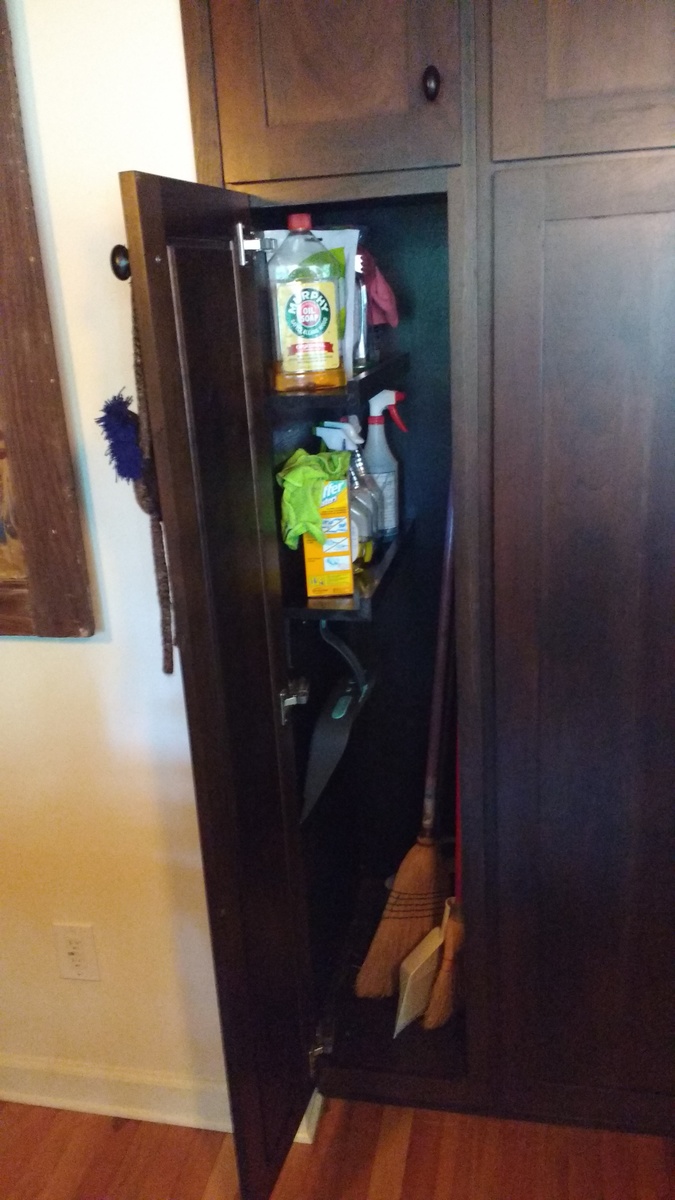
got a kreg jig for mother's day and tried it out on that dead space in my broom closet. I made $10 shelves, but in a "Z" shape instead of a "U" shape so I could attach from below and have more room on the shelf for cleaning supply storage.
I used a 1x6 for the shelf and spray painted them black with some paint I already had. So easy! I used a 1x4 with a block of wood to hold up one end of the shelf so I could screw it into the cabinet. Then leveled it and added second screw. Awesome first project! I learned a lot and got a place to put my spray bottles.
Sorry for the dark photo, my cabinets are black cherry.

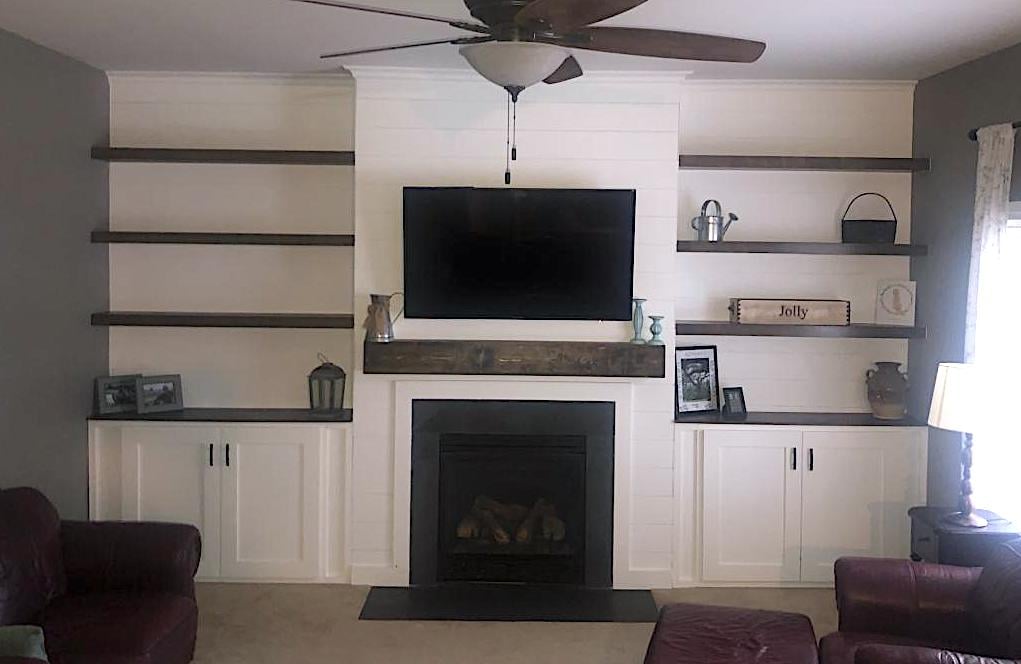
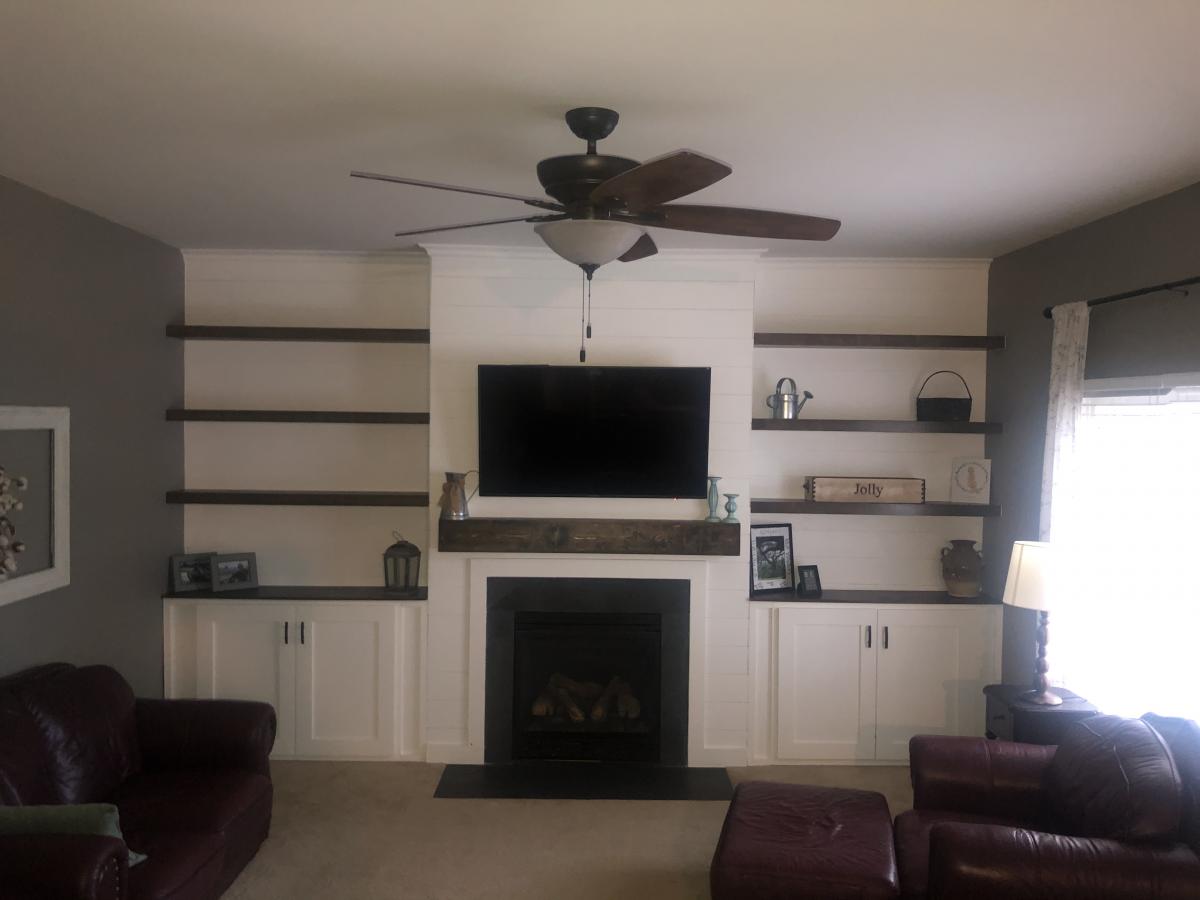
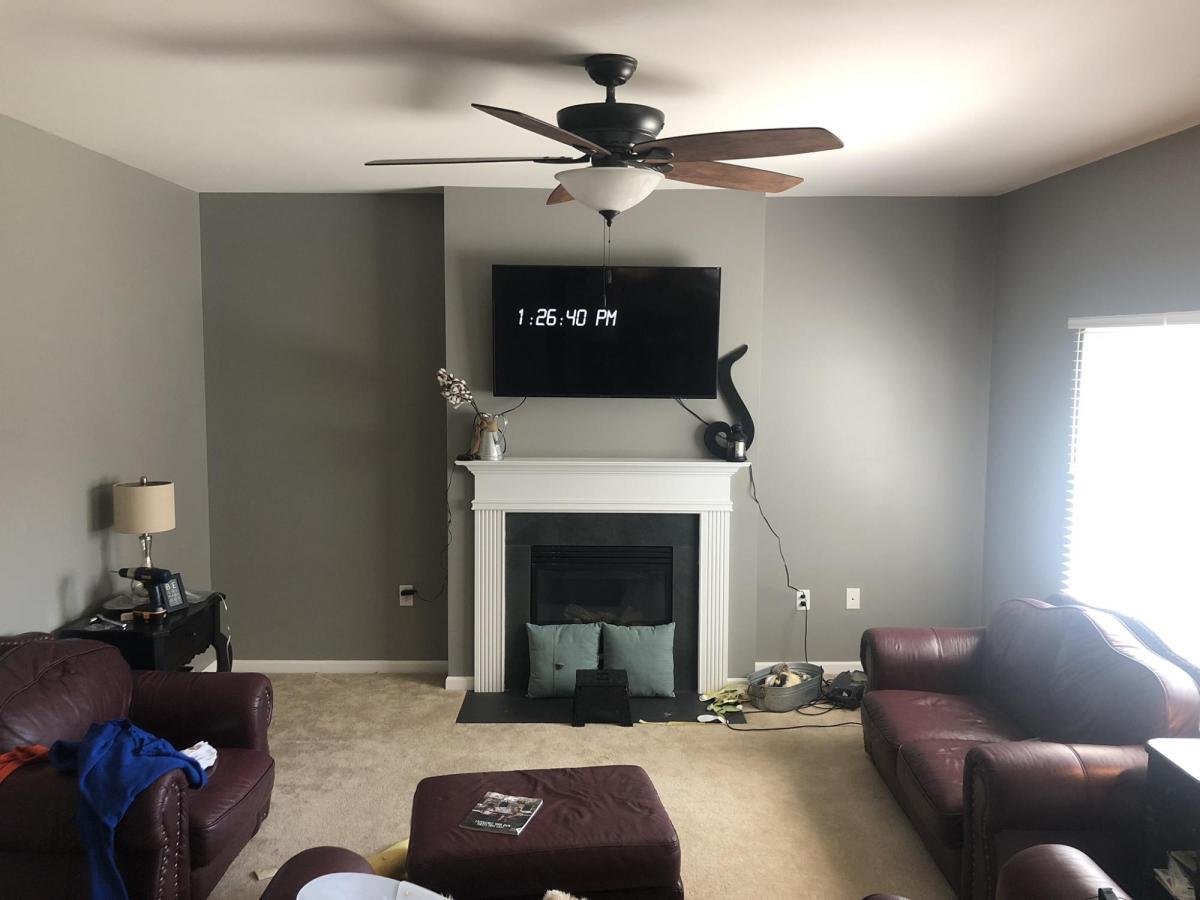
We have lived in our home for 2 yrs now and have been trying to figure out what we wanted to do with the plain boring wall with cords handing from out behind the tv due to no power outlet on that wall. We finally decided to do the whole wall in shiplap but the the cost of lumber going through the roof I went with 1/4 underlayment that I had ripped down to 6in strips at my local hardware store. I cut them down to size with my miter saw the painted them white before I attached them to the wall with 1 1/4 brad nails and used nickels for my space in between each row. The cabinets are 36 in tall. The carcass is made fro 3/4 in MDF and the face frames are made from 1x3 pine and attached with wood glue and brad nails. Cabinet doors are made from 1x4 pine for the frame and 1/4 underlayment for the center. I used my hand router to route out a 1/4 deep groove for the center to drop into the frame I used wood glue and brad nails to attach it to the frame and filled in any gaps with paintable caulk. They are attached to the studs in the wall with 3 in wood screws. The mantle is made from 1x6 pine boards and attached to a wall bracket made from 1x6 that are attached to the wall in each stud with 3 in wood screws. The mantle is attached with wood glue and 1 1/4 brad nails. The shelves were made out of 1/2 Poplar 4x8 plywood sheet ripped down to size. The wall brackets are made from 1x2 pine attached to studs with 3 in wood screws. And the shelves are attached with wood glue and 1 1/4 brad nails. I added 3 1x2 spacers to each shelf between the top and bottom board to prevent them from sagging before attaching the face of the shelves with wood glue and 1 1/4 in brad nails. This project took about a month to complete because I worked on it during free time. Also this was the first major build I have ever done so I was also learning along the way. Some parts were frustrating but most of it was fun and a great learning experience. Also this project evolved as I was building it. My wife loves the finished product. Now it’s time to find my next project.
Sun, 05/30/2021 - 11:05
What a beautiful space you created, thank you for sharing!
Tue, 12/05/2023 - 11:47
Surprisingly makes your living room appear so much larger compared to the before picture! Thank you for sharing your photos with us and congrats on a great result!
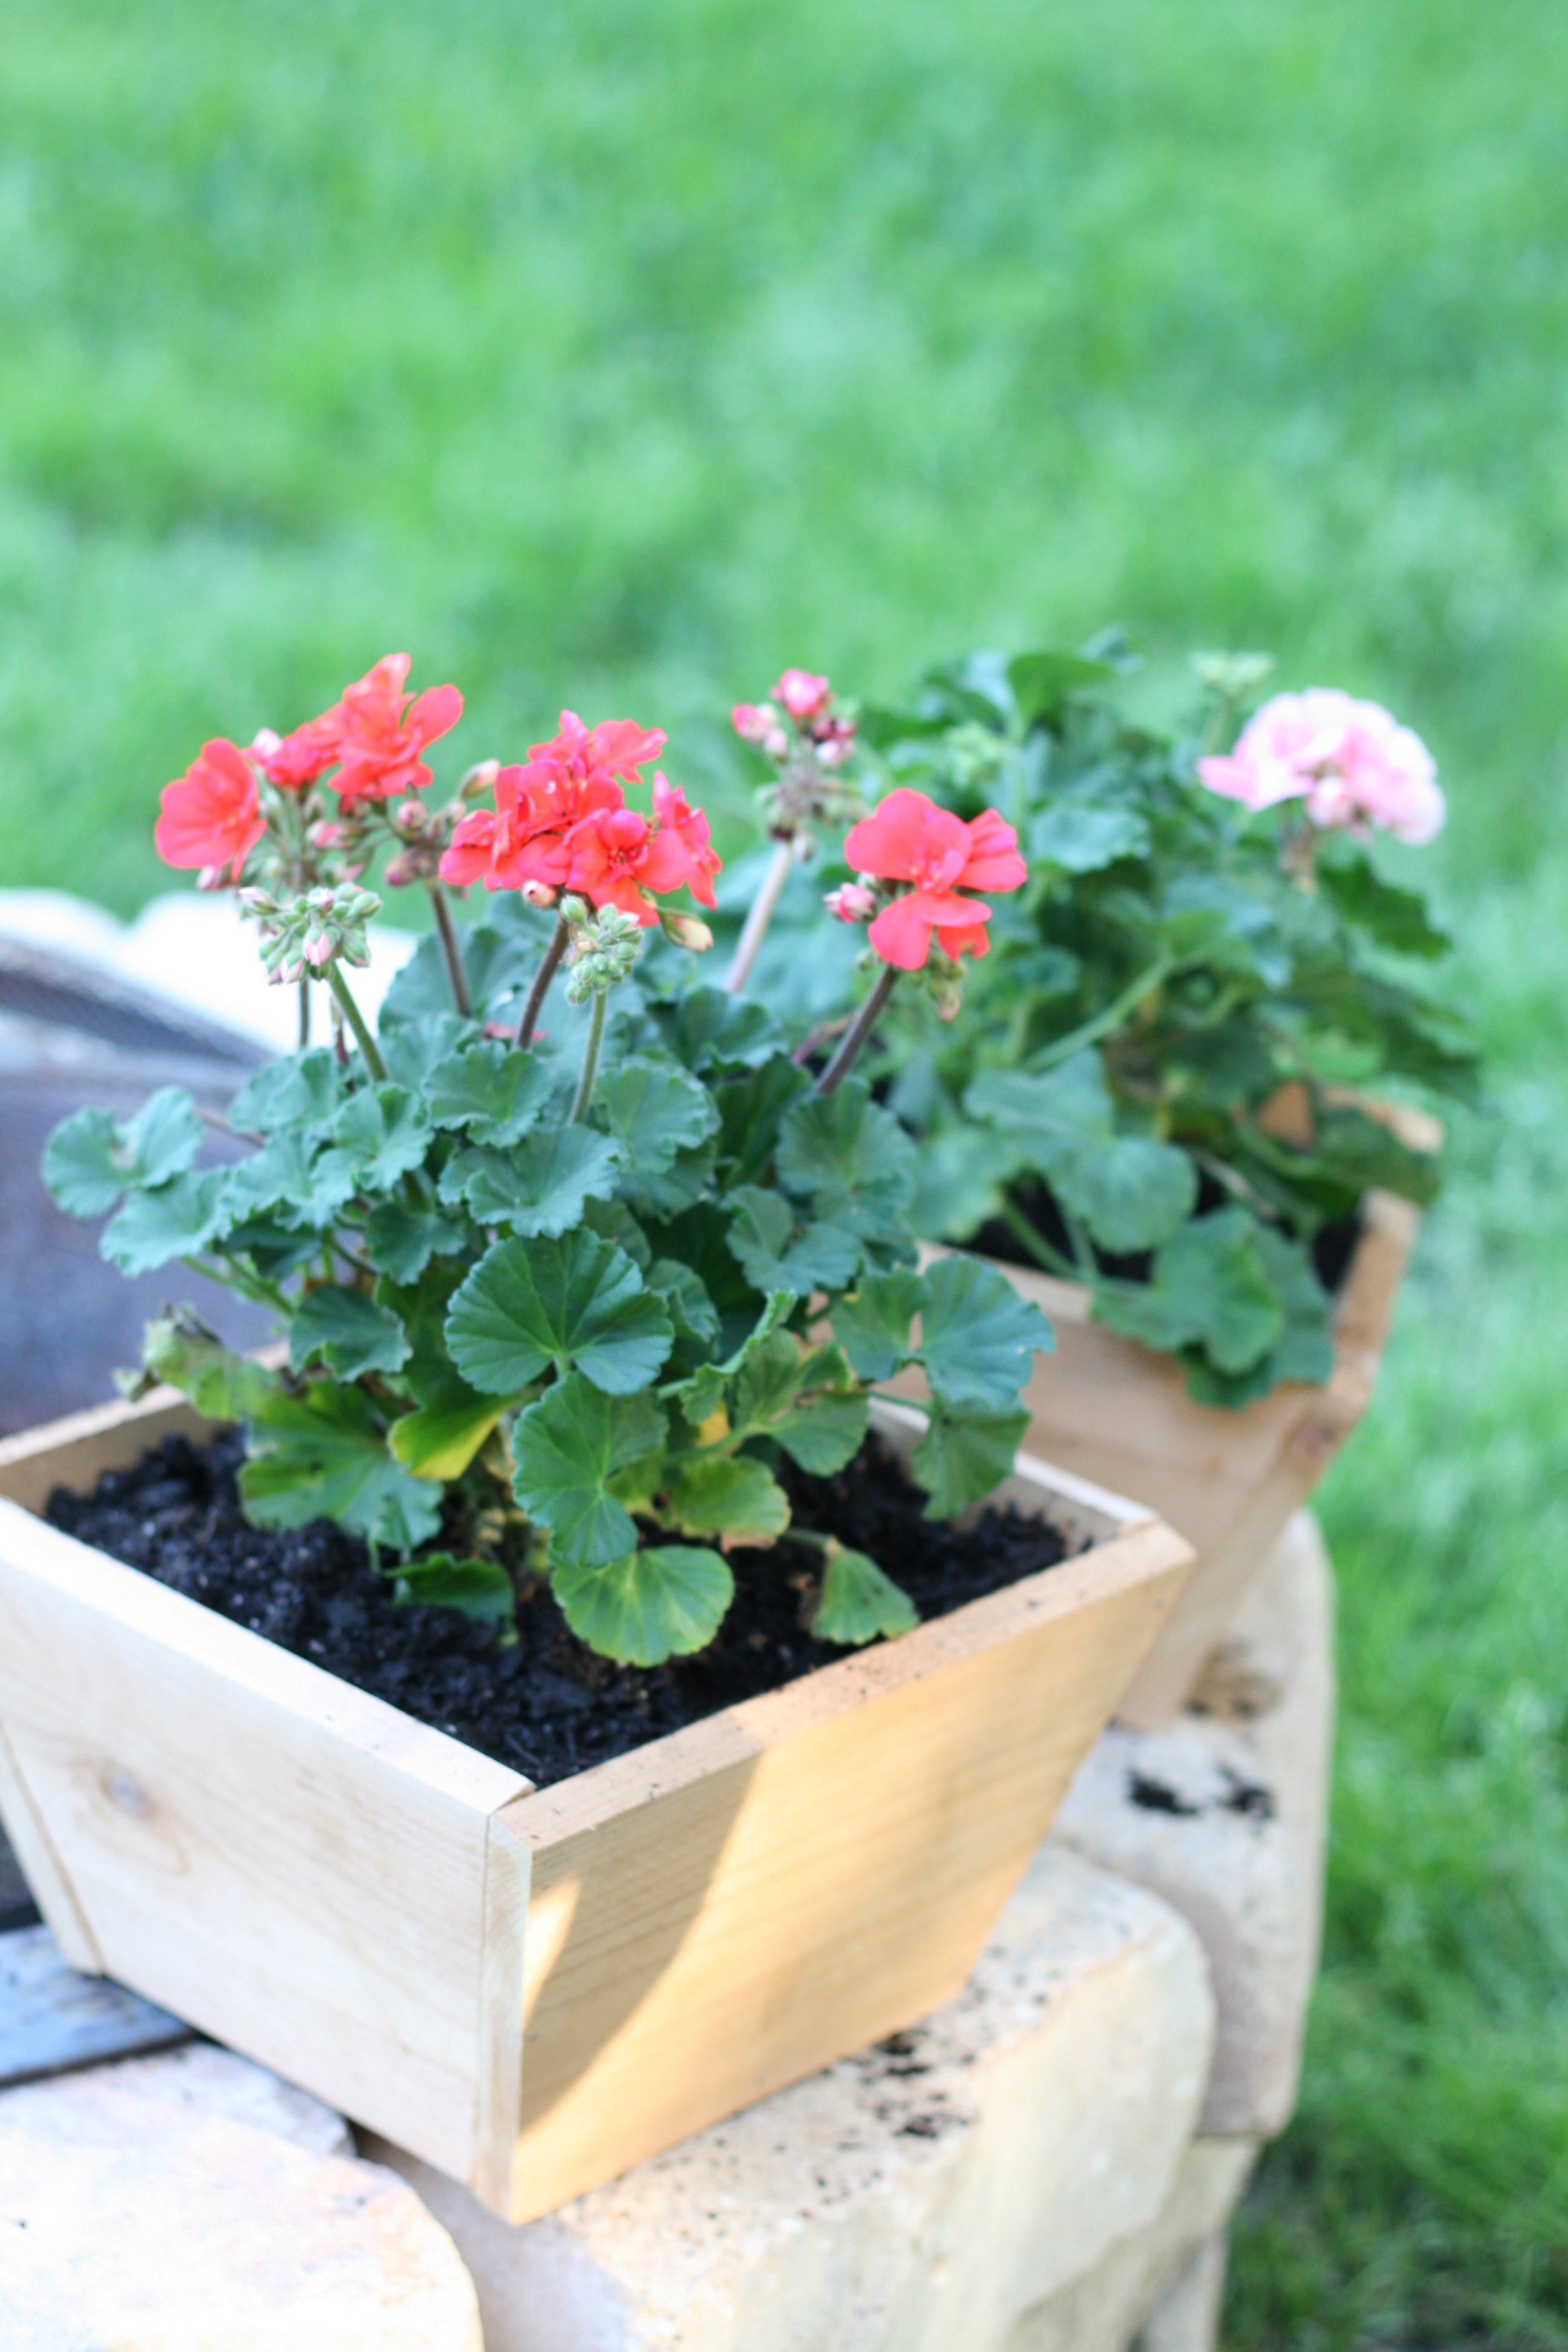
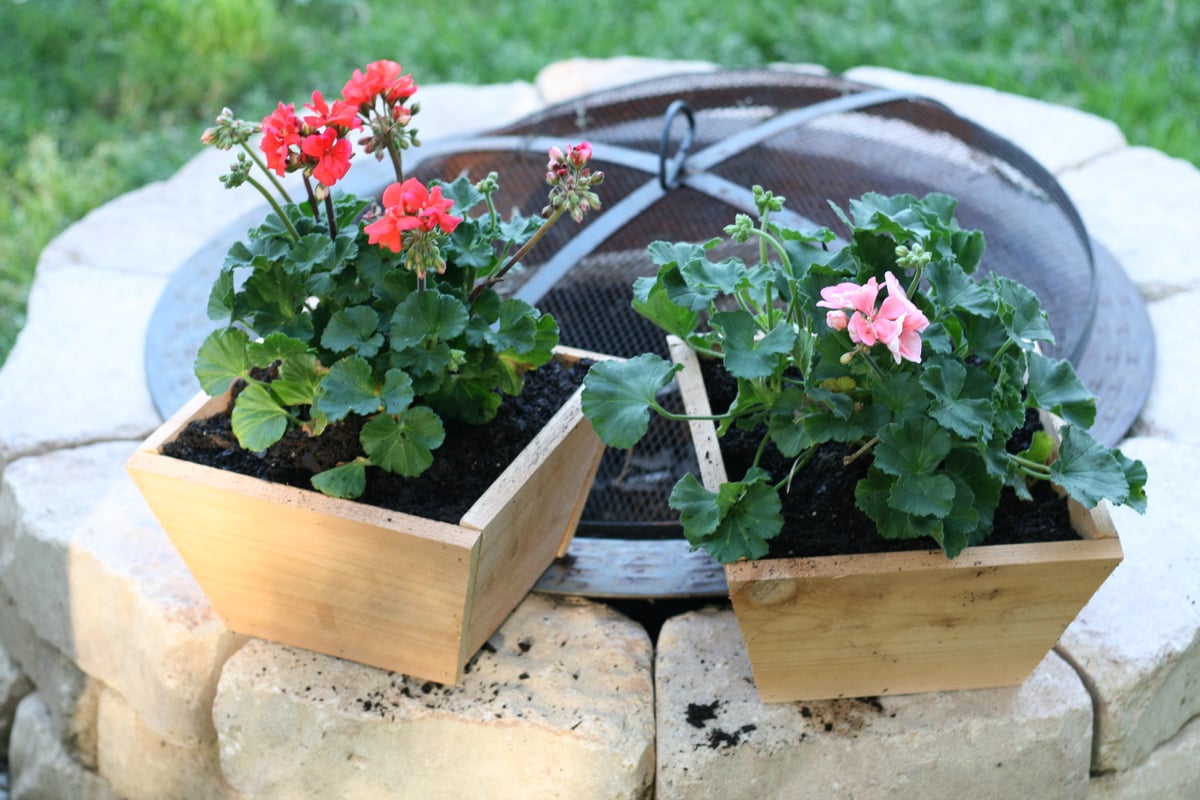
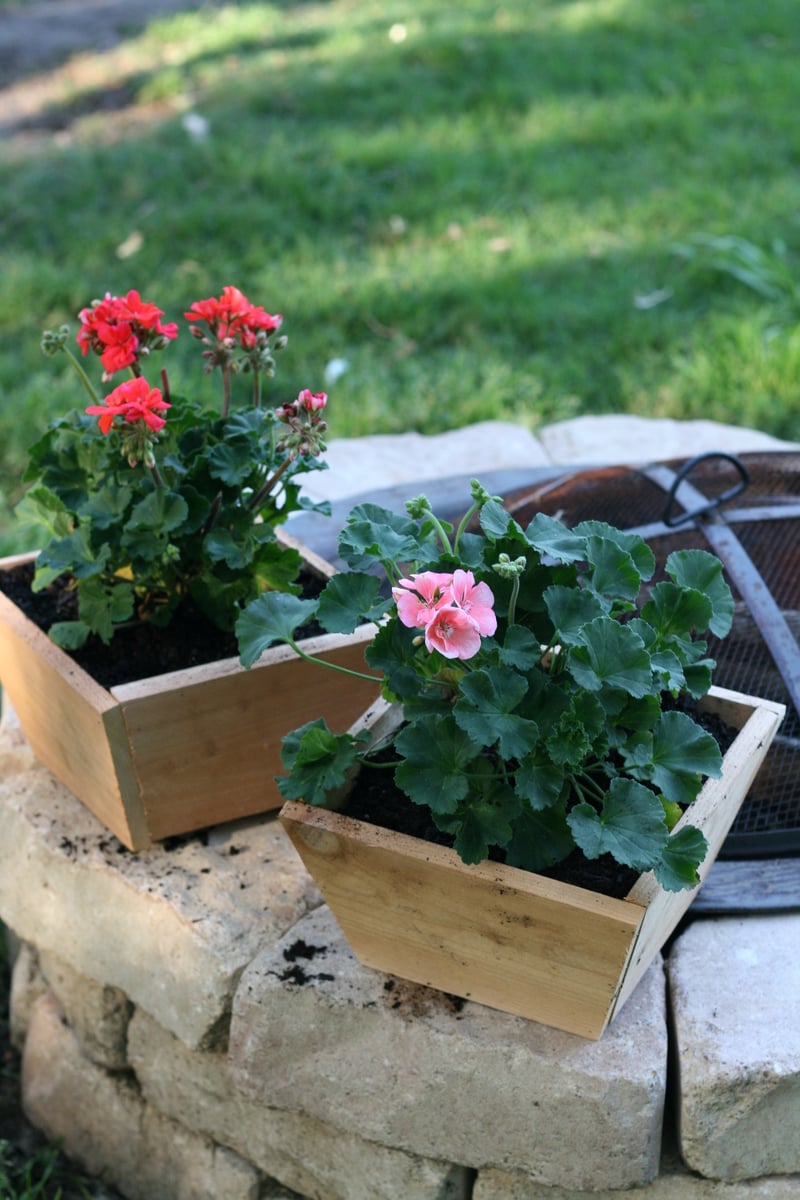
I'm still getting to know my Compound Miter Saw, so I wanted to get another small project under my belt. Not to mention I had a whole other picket and a half left over from yesterday's project. This just seem to be the perfect project to do. And needed since we actually needed a few more planters.

Comments
shwetzh
Tue, 04/20/2021 - 19:02
Loved building this! So easy…
Loved building this! So easy and quick! 🥰
shwetzh
Tue, 04/20/2021 - 19:02
Loved building this! So easy…
Loved building this! So easy and quick! 🥰
Ana White Admin
Wed, 04/21/2021 - 10:38
Looks awesome!
Great build, thanks for sharing!