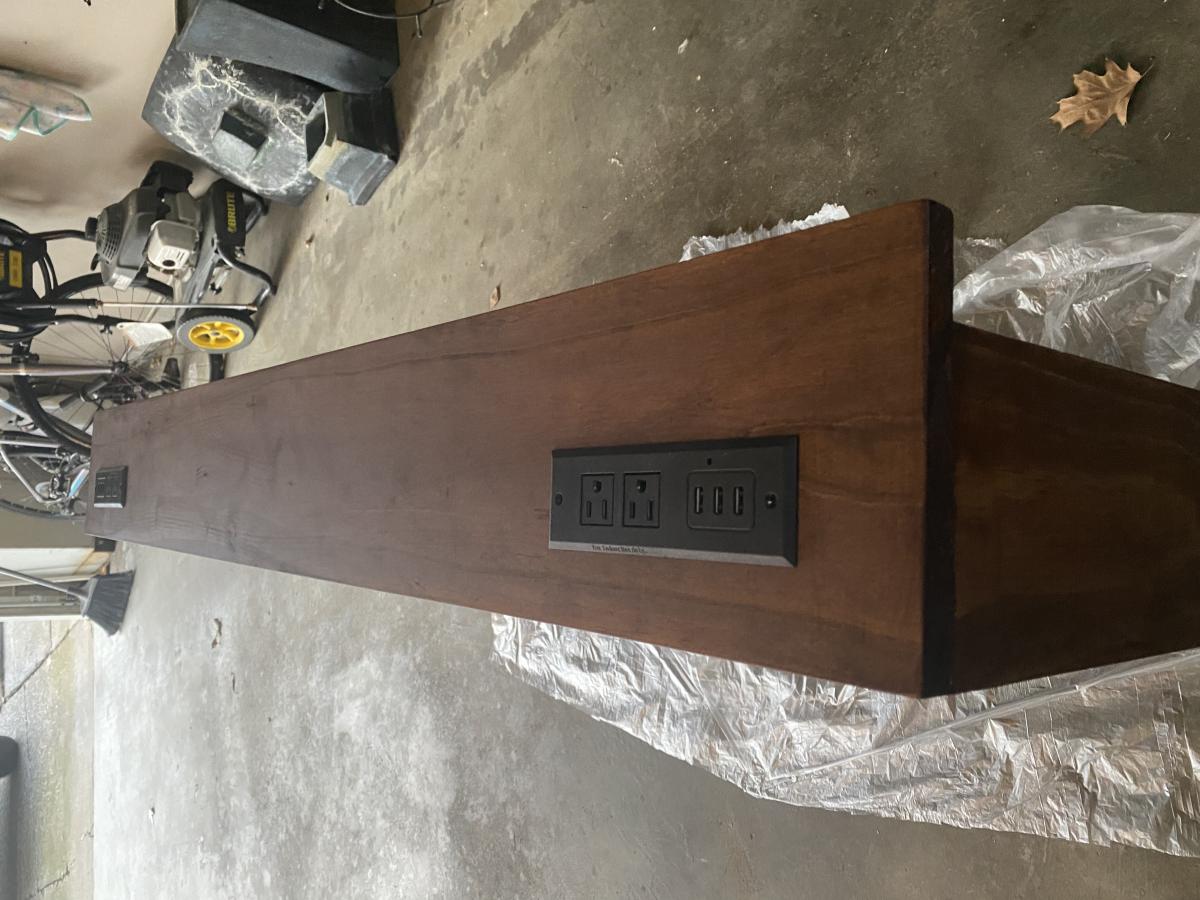
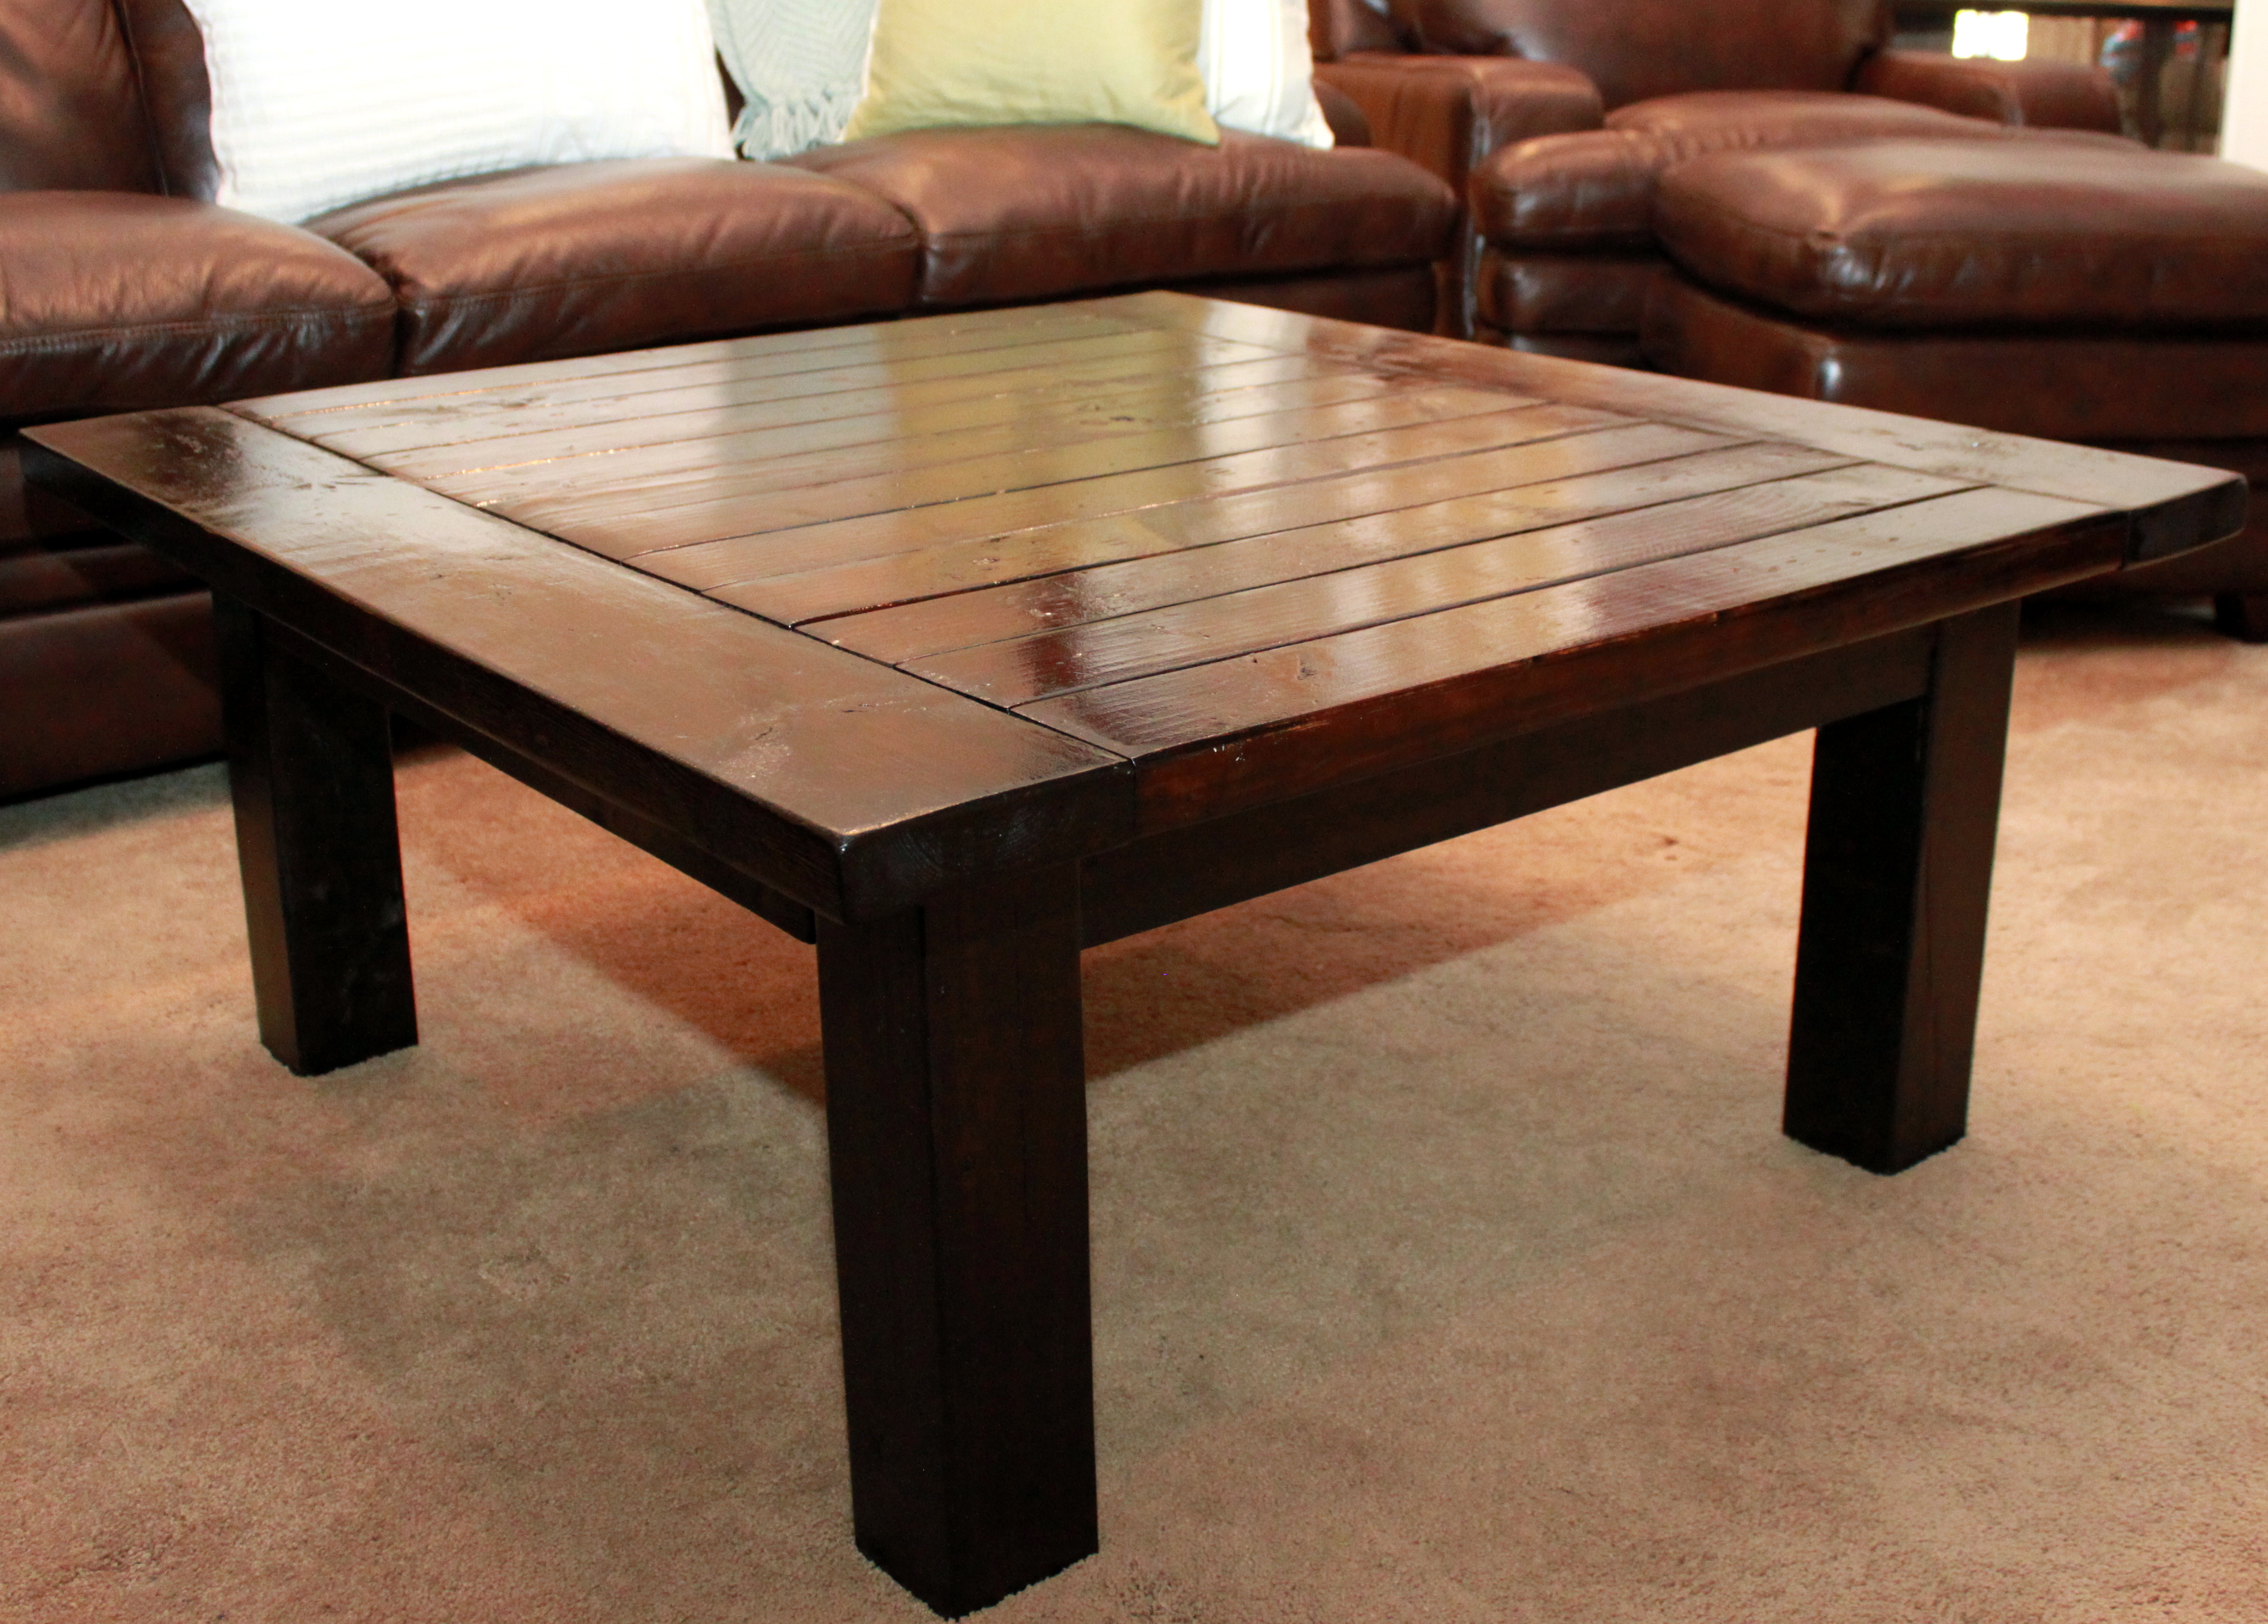
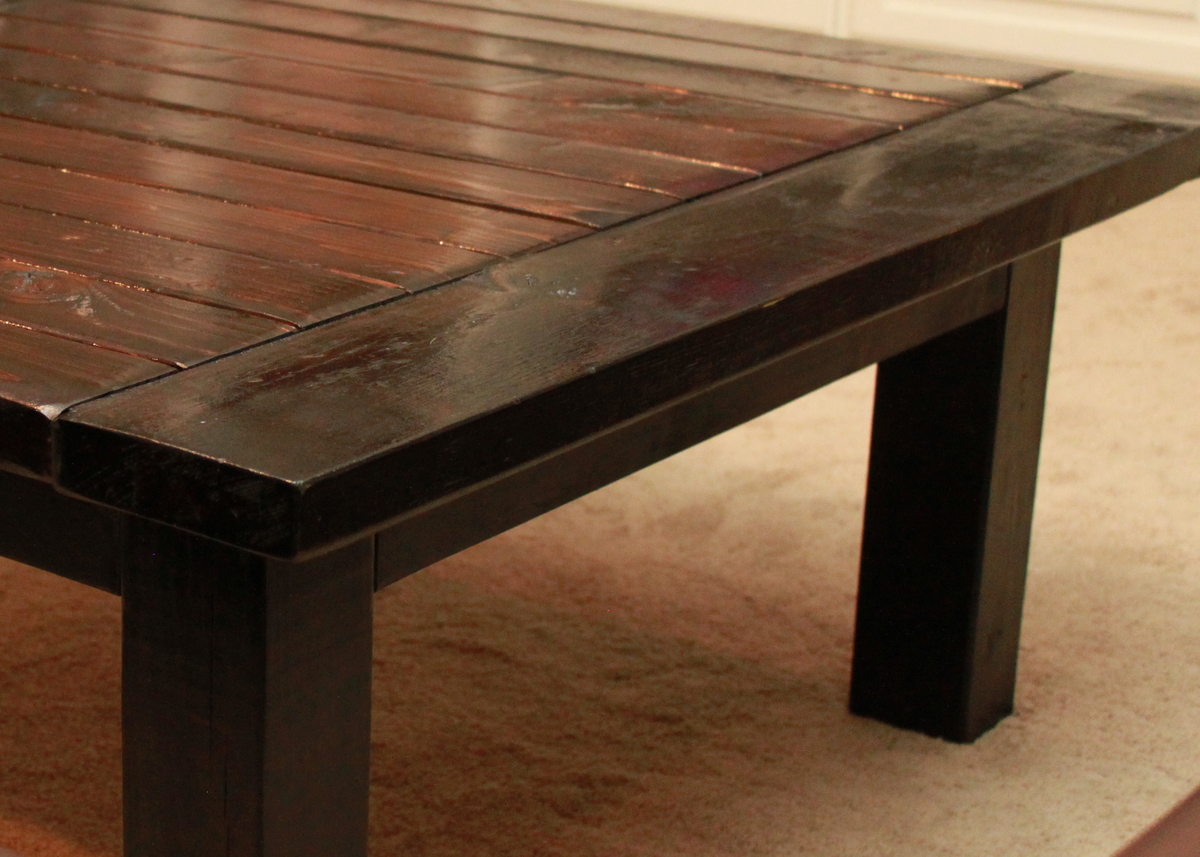
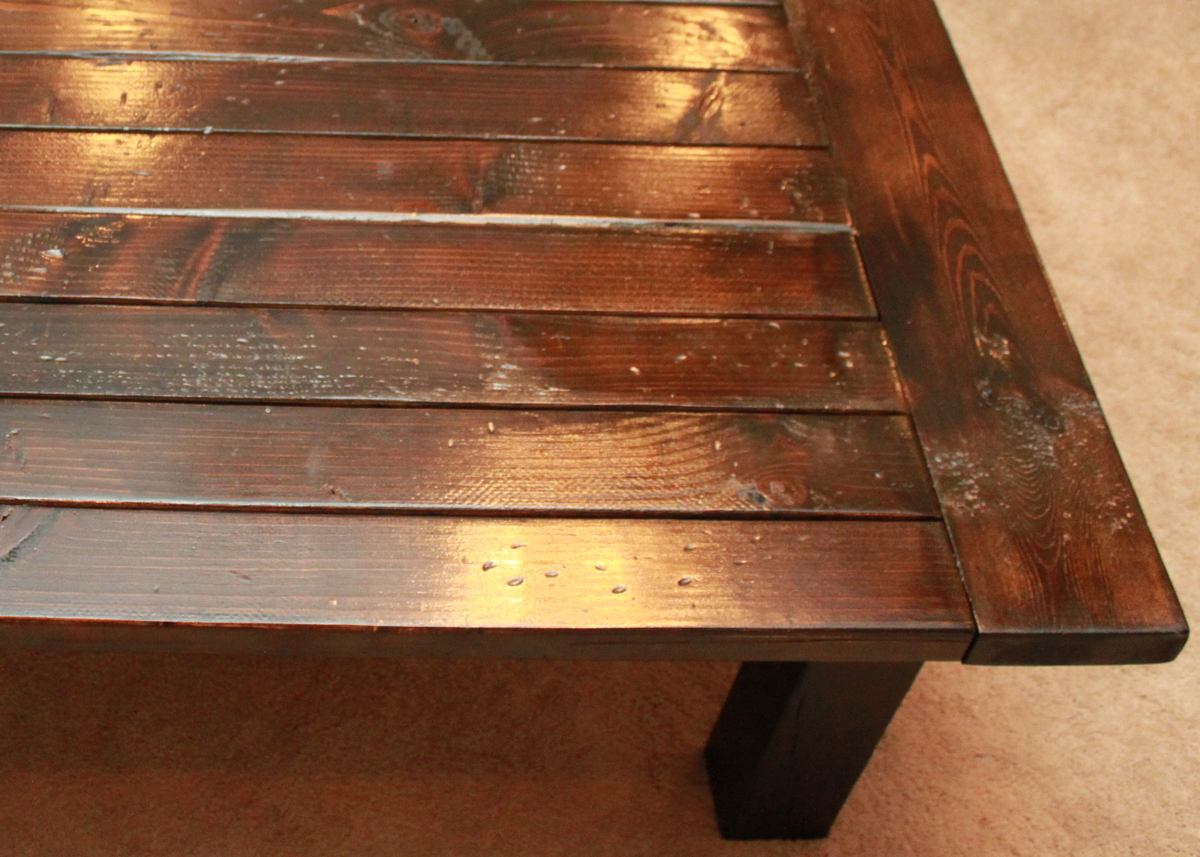
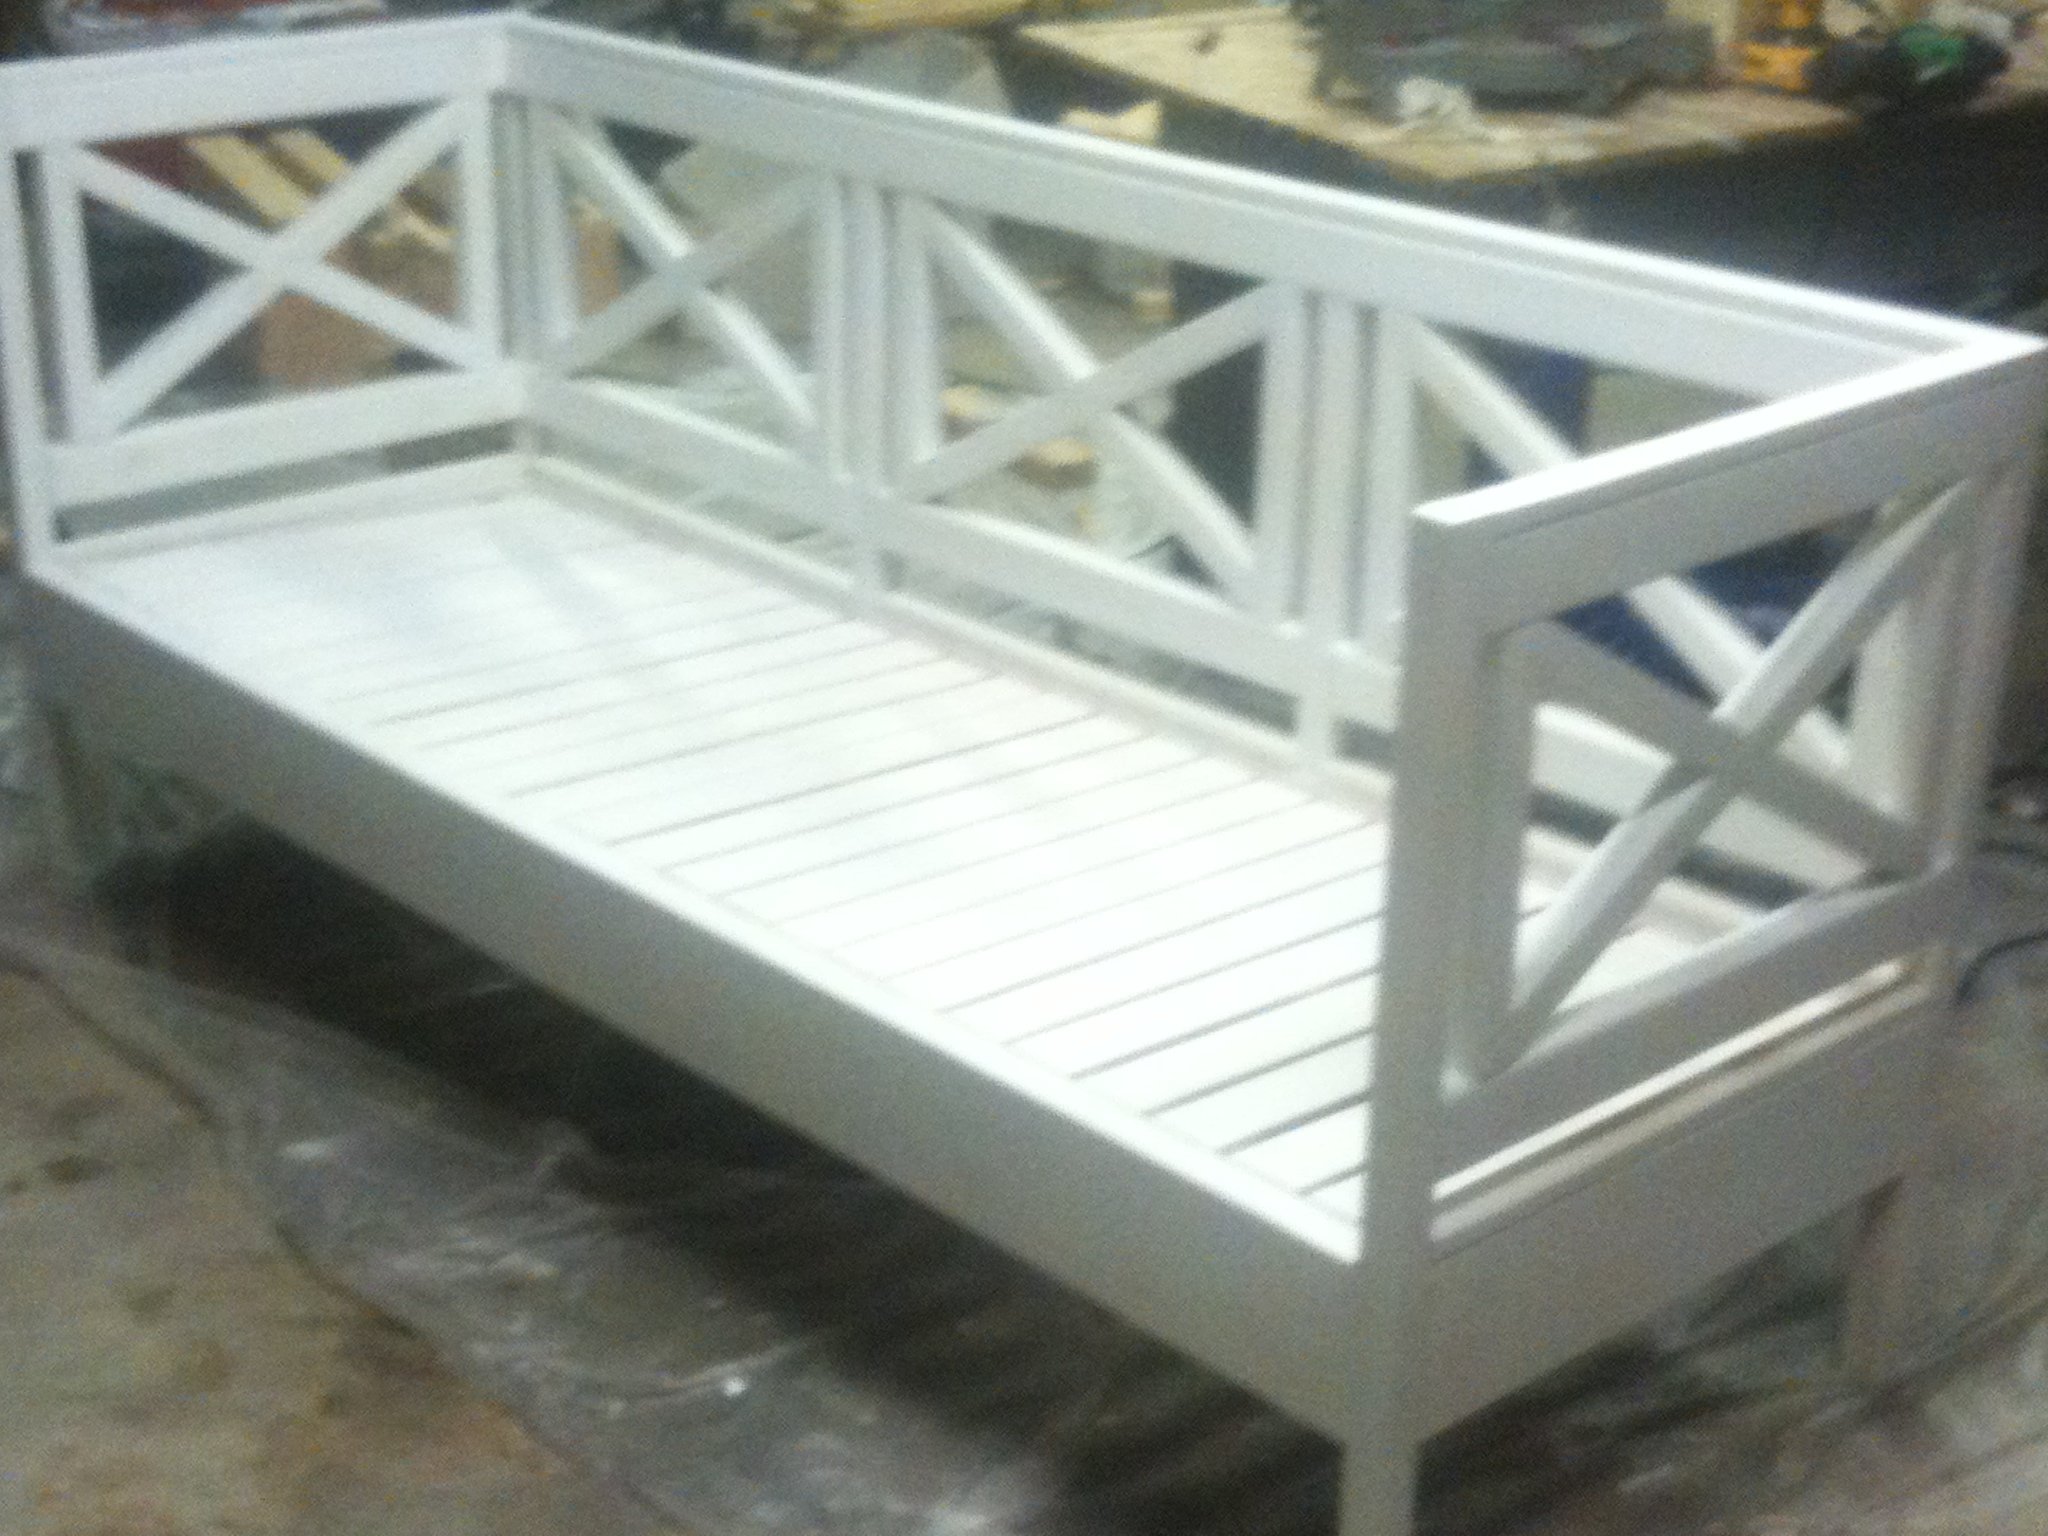
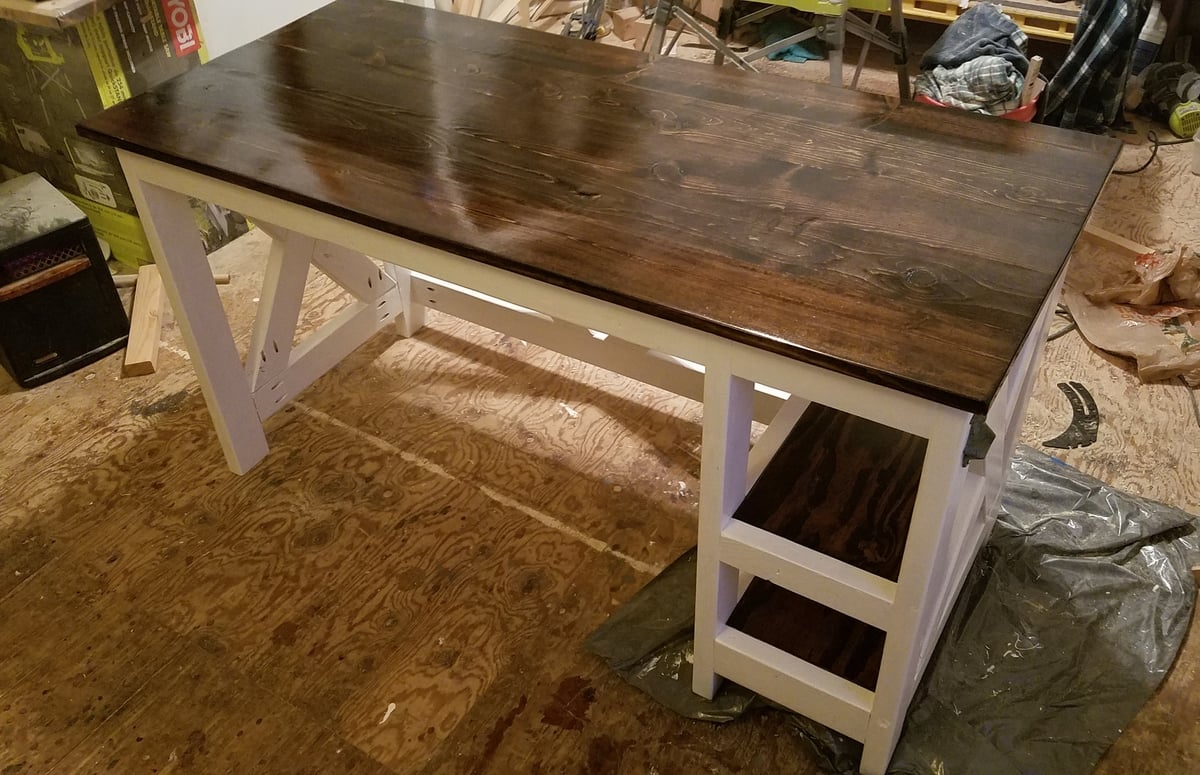
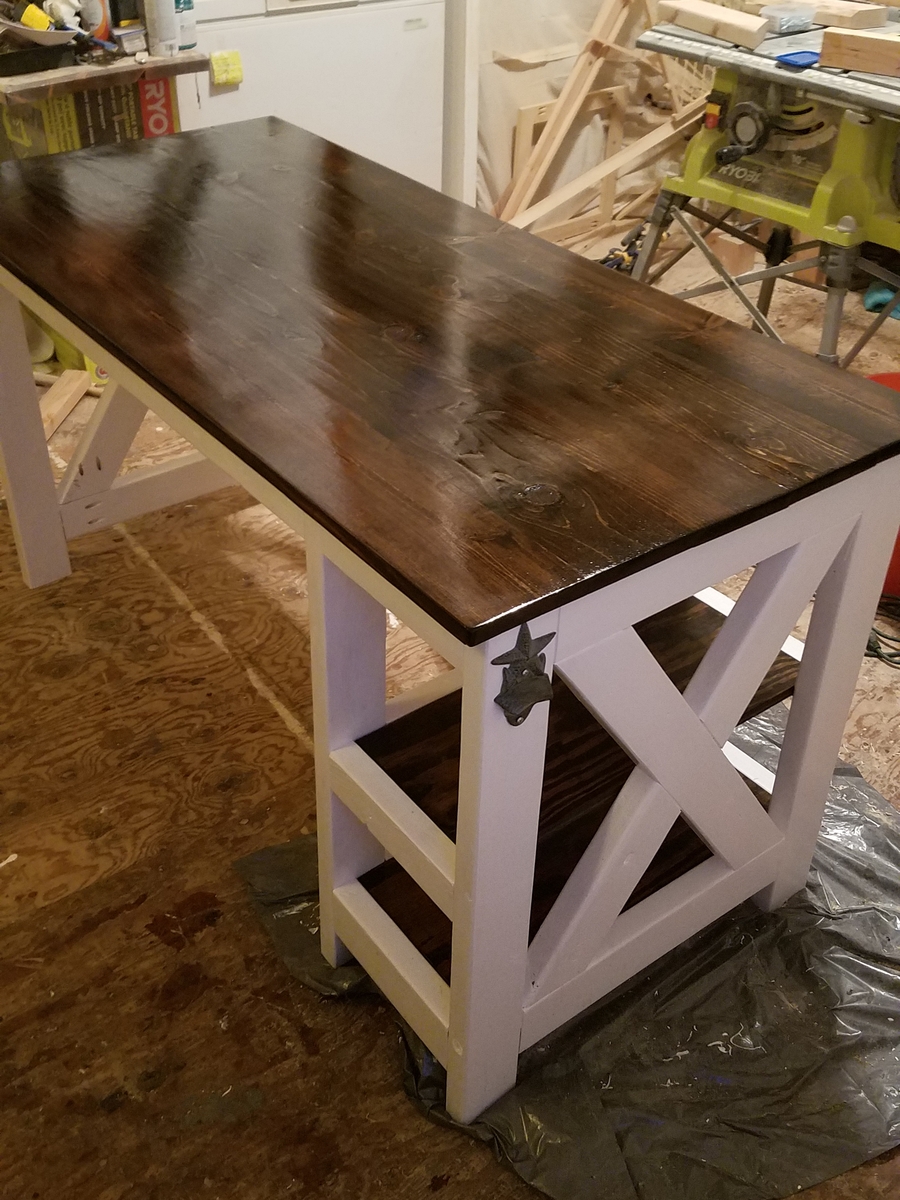
Community Brag Posts

Sofa table

Submitted by kgclark31 on Sun, 01/02/2022 - 18:33

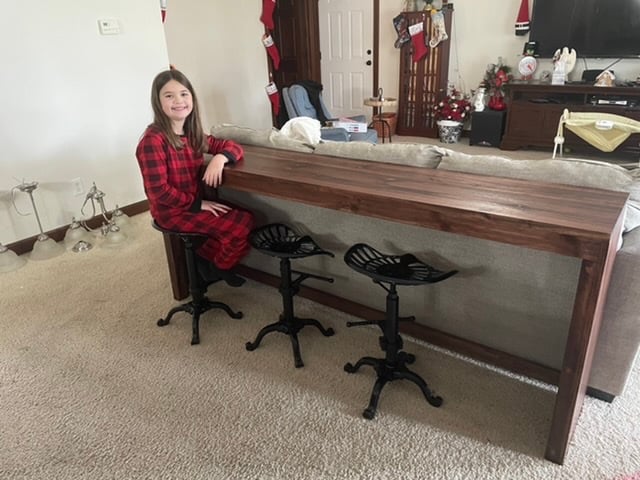
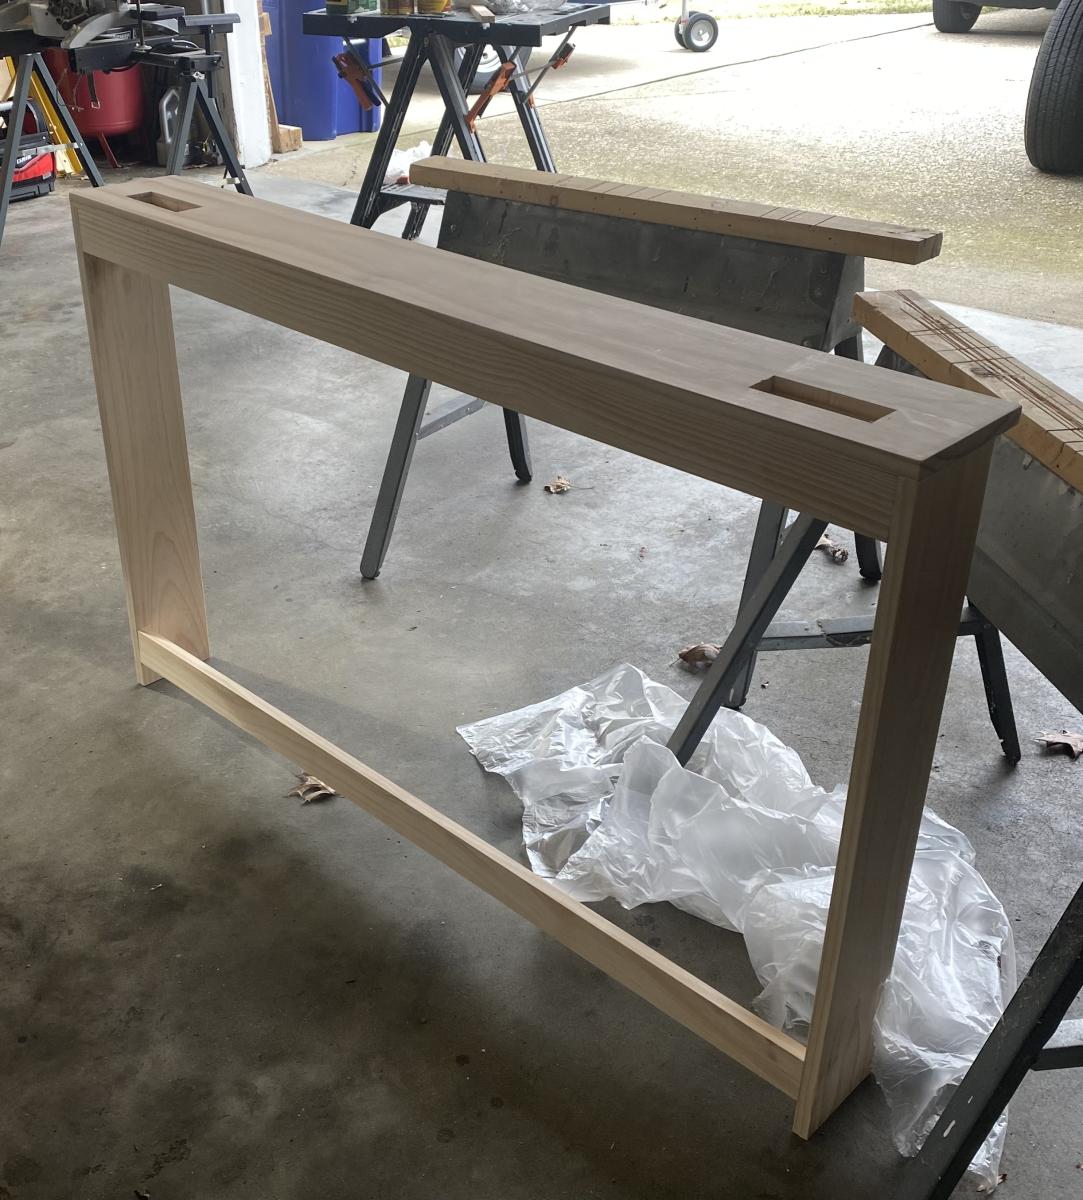
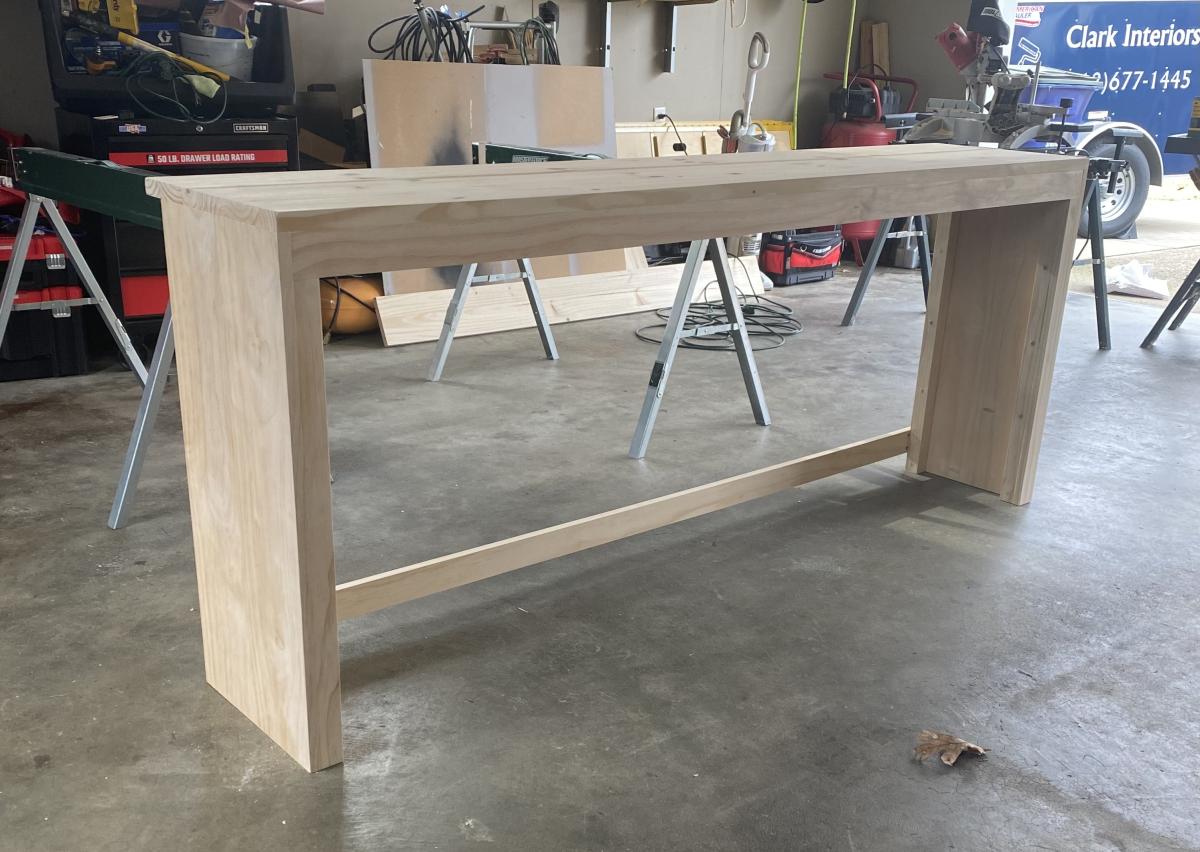
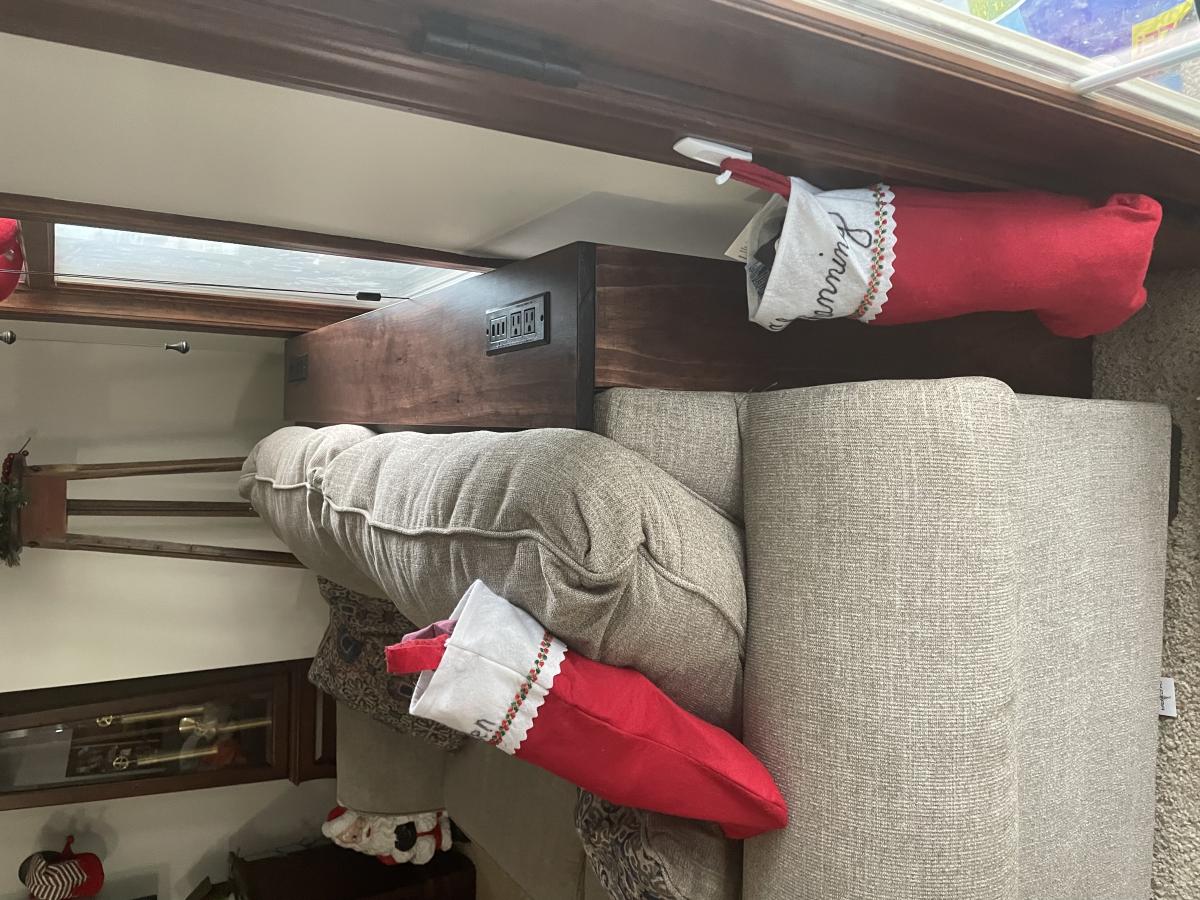
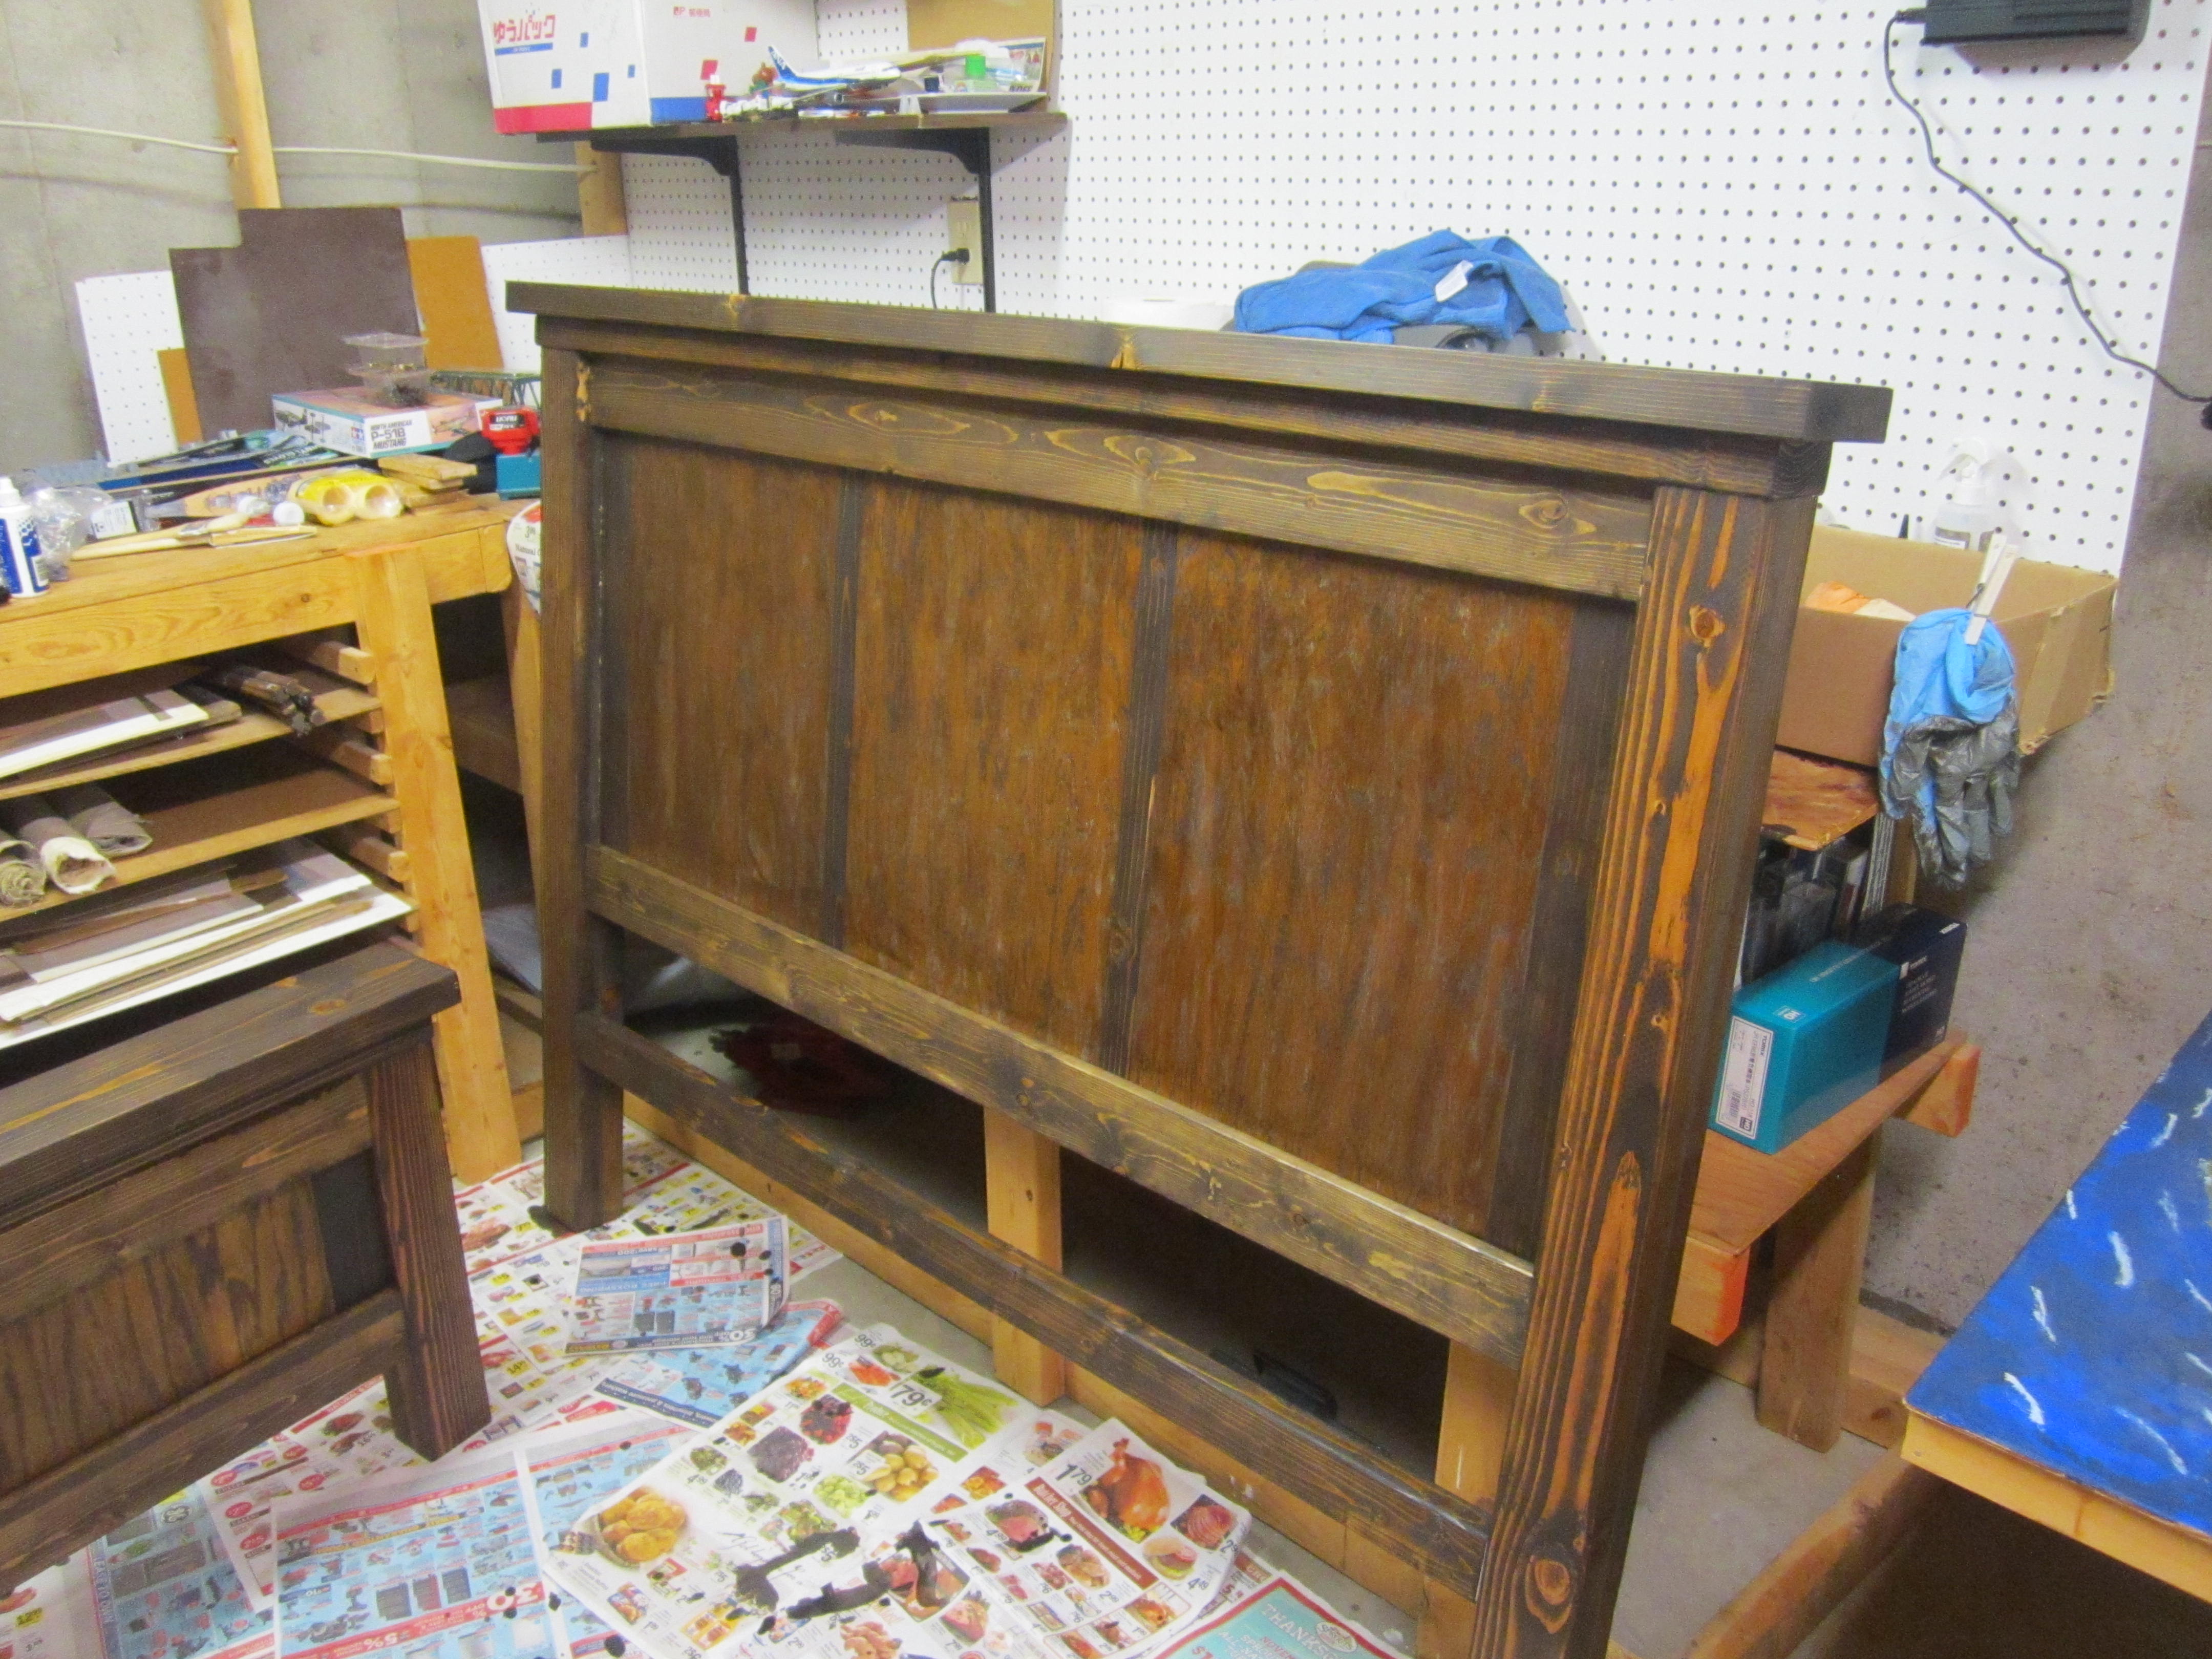
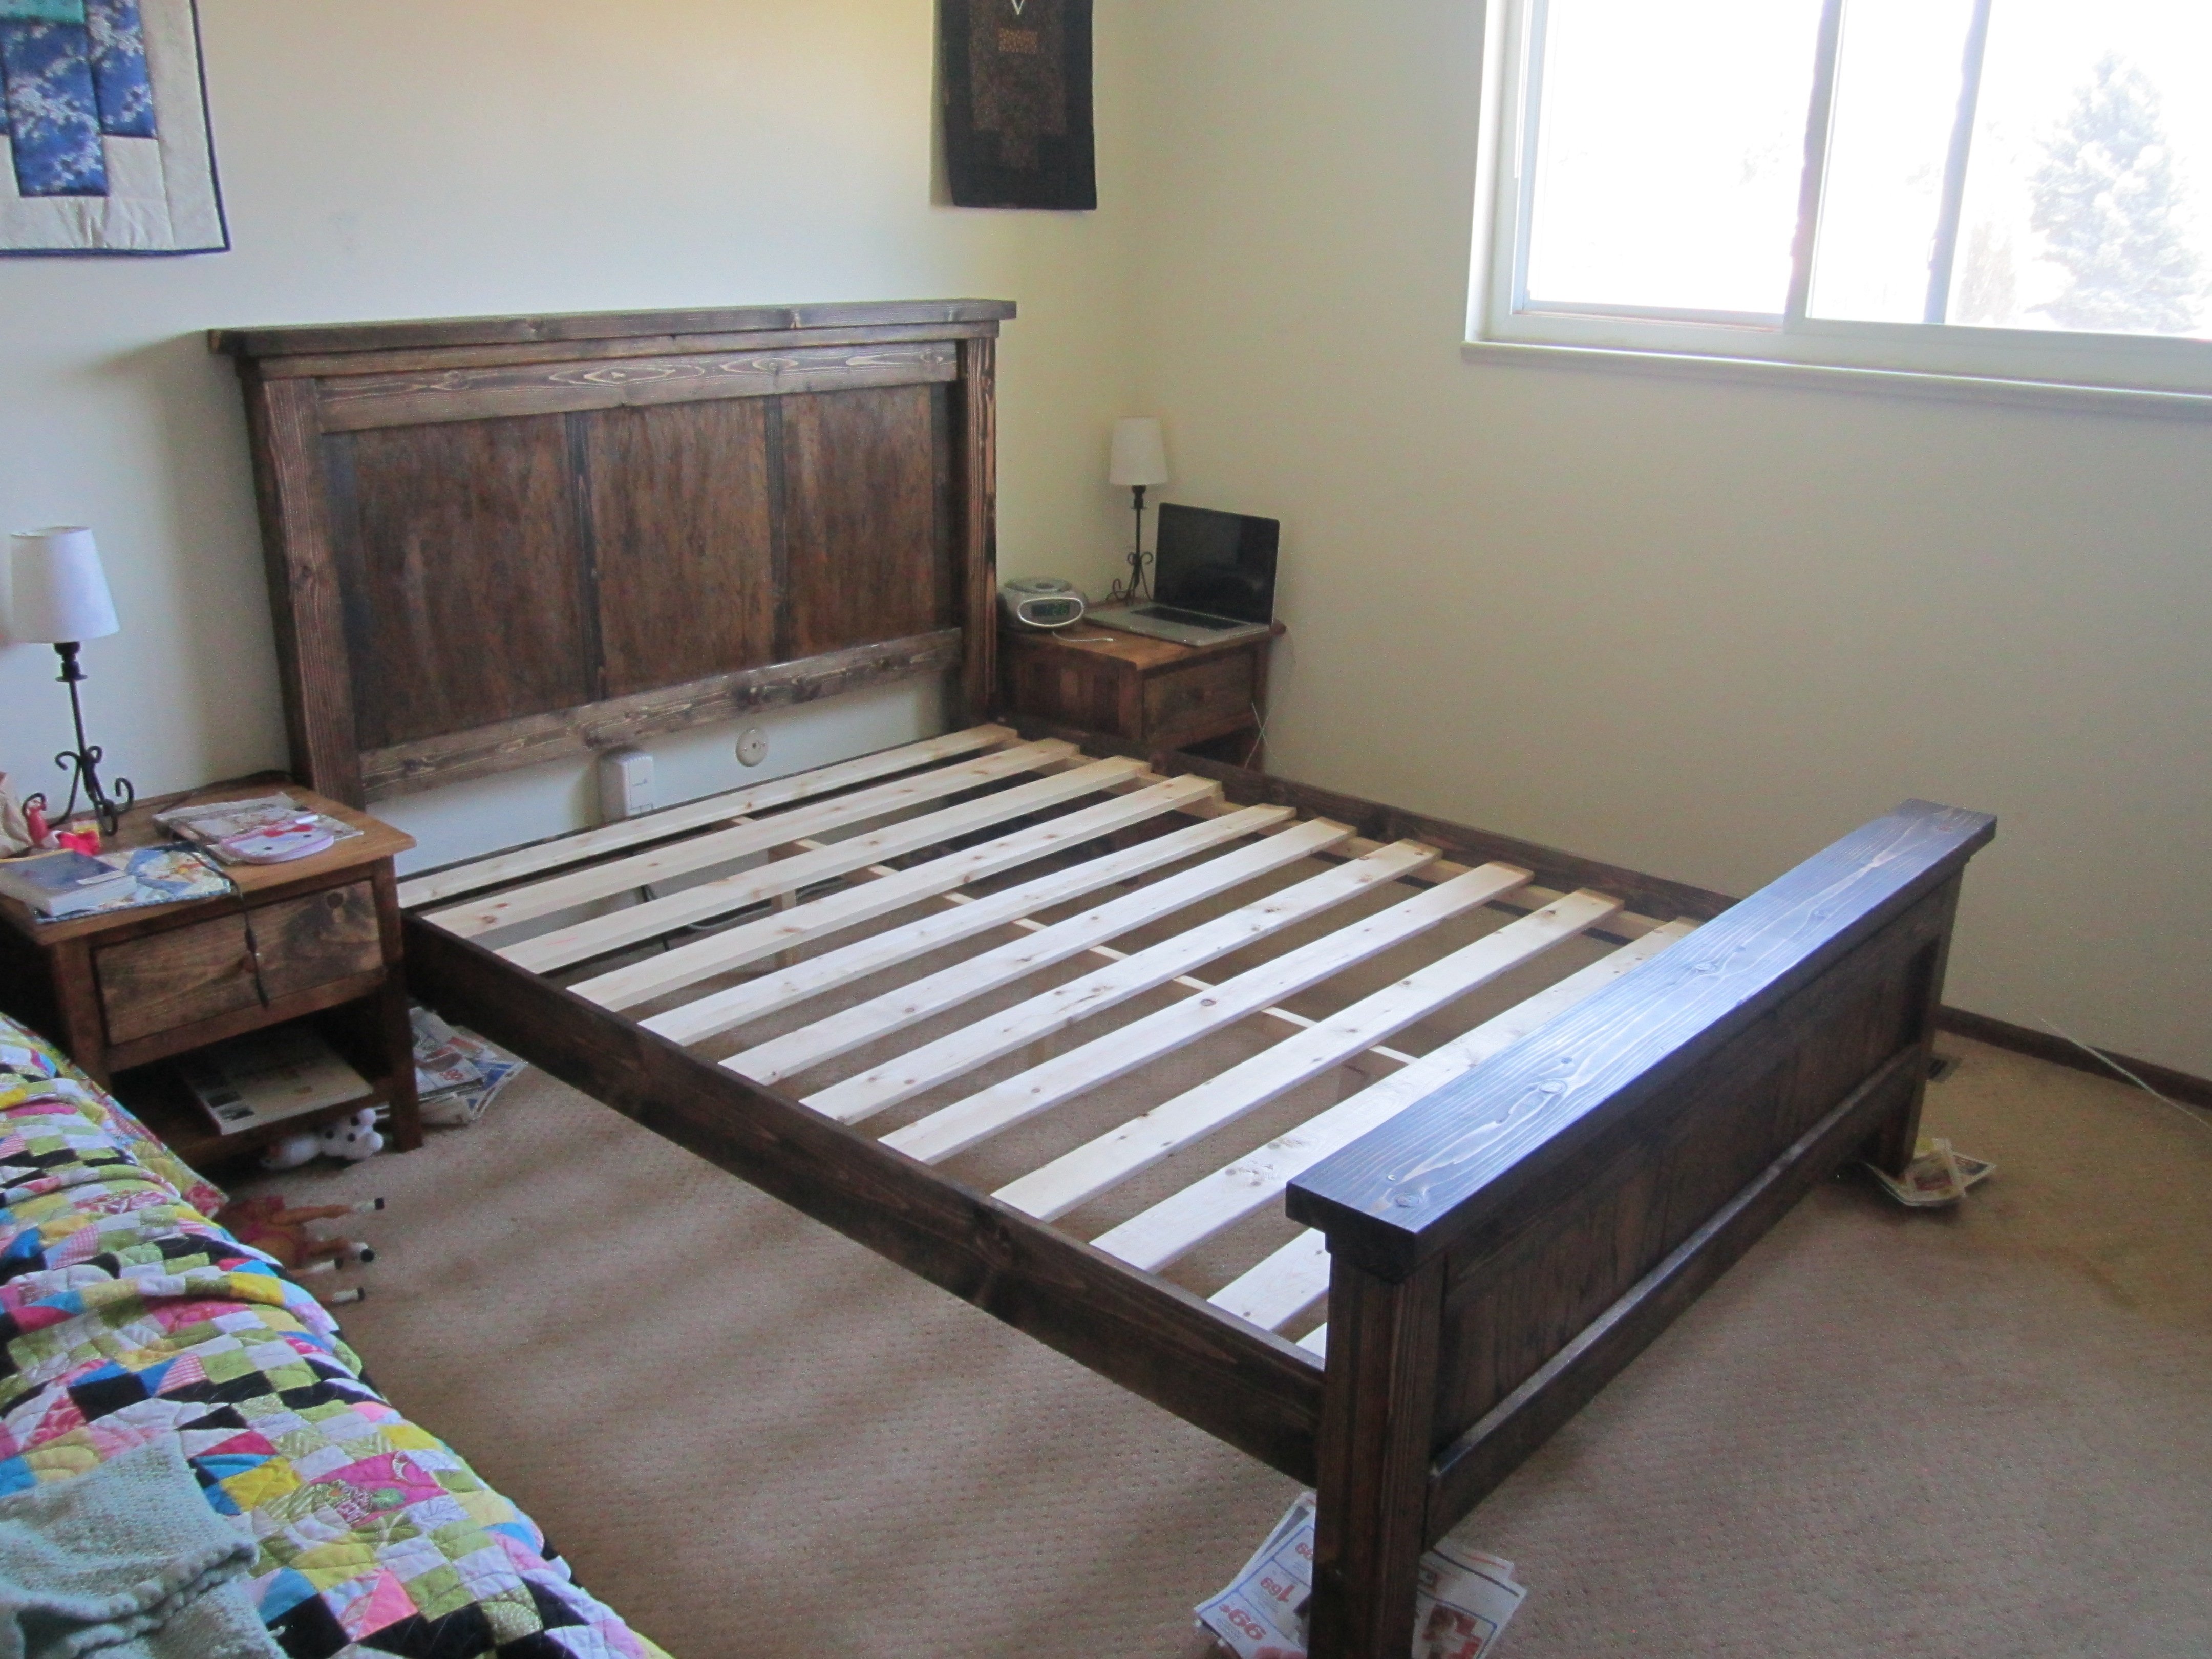
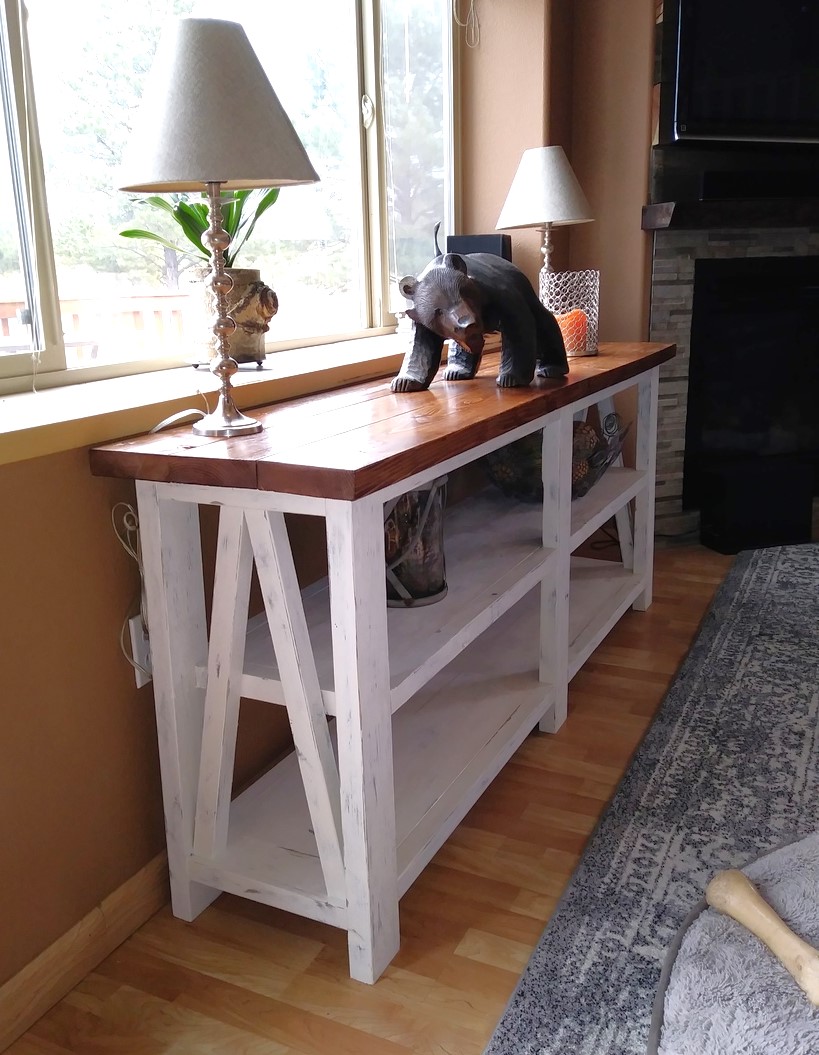
I built these sofa tables for my wife’s client. She has a interior paint business. Her client was talking about wanting she sofa tables, so she volunteered me to build the tables. I didn’t have a design for the tables, so I looked at several different designs and talked to the client on what she was looking for. So I just did some rough sketches and got some ideas from my wife. I used mostly 1 bys for the build, just depends on the size on what width and length of board you are going to need. The top of the large table is a 5/4 preglued board that Menards has in store, again depending on width and length on the size of board you use. I used the 5/4 board for better stability and strength. I used a red oak stain then applied several coats of poly to finish. On the top I used a 200 sandpaper after a couple of coats of poly to get the top smoother for more coats of poly. Over all the build was pretty easy if you have good woodworking knowledge. Used pocket holes (Kreg) to attach sides and frame to top. On the large top side I used two 1x8’s to get the width i needed. Joined them with pocket holes (Kreg). If you can dream it, you can build it.

Comments

Our pallet shelf

This was the easiest project EVER! And I love the look! The wall space I have for it wasn't long enough to accommodate the width of the whole pallet, so I cut it right after the center brace. Used another piece of the pallet for the bottom. Did a little sanding around the edges so it wasn't rough. That's it! Just wanted a shelf for a few bottles of wine and a cookbook. Voila!

Estimated Cost
zero
Estimated Time Investment
An Hour or Two (0-2 Hours)
Finish Used
No finishing required here as I loved the patina of the pallet.
Recommended Skill Level
Starter Project

Reclaimed shelving

Submitted by Bksmith on Tue, 07/09/2013 - 09:10

This is my first hand made project using reclaimed wood. I always liked the look of the wood and black gas pipe together.
Hope you enjoy it

Estimated Time Investment
Week Long Project (20 Hours or More)
Recommended Skill Level
Beginner

Comments

yurra-bazain

Tue, 07/09/2013 - 10:47

I love how you mixed reclaimed wood and black pipes, something I haven't even considered when building furniture yet. :)

Queen Farmhouse Bed

Submitted by Ktosaka on Fri, 07/03/2015 - 15:50

This bed is made using the Farmhouse Bed plan from page 136 in Ana's book. We just had our kitchen remodeled, so I took the cabinet doors and swapped those out for the 1x10's in both the headboard and foot-board. The cabinet doors took a while to strip the paint off and I used paint stripping sandpaper for that. Once the cabinet doors were stripped, I cut 1x2's for the two center dividers and 1x3's for the two outer dividers to get the desired width. I then stained the cabinet doors and dividers before attaching them to the 1x4 trim. I did not get 4x4's, so I cut 2x4's to length and glued and screwed them together.

Our mattress does not use a box spring, but slats, so I borrowed slat directions from Shanty 2 Chic's platform bed and our old IKEA bed frame. I used 2x2's for the supports and 1x4's for the slats. I used scrap 2x2's to support the center slat support and attached the side 2x2's to the bed rail (1x6 vs. 1x10 due to matress depth) with glue and screws.

Estimated Cost
Wood and screws were $130 total as I used low end wood and reclaimed cabinet doors. I also used stain from our local county recycle center.
Estimated Time Investment
Weekend Project (10-20 Hours)
Finish Used
Minwax Jacobean in two coats with cabinet doors stained before assembly to prevent gaps in color. I used Minwax Wipe-on Poly, also two coats to finish off the project. I followed the directions on all the labels and applied the finishes with old socks thanks to donations from my kids.
Recommended Skill Level
Beginner

Great table idea

Submitted by eburt4 on Sat, 01/20/2018 - 09:01

Made a few design changes as I went along, but overall the plans were great. And with my wife's finishing we have an antiquey farmhouse table. 

Estimated Time Investment
Weekend Project (10-20 Hours)
Finish Used
Early American stain on top with two coats of semi-gloss poly. Gray first paint coat and antique white on top coat for base. Lightly sanded with orbital sander to bring gray forward.
Recommended Skill Level
Beginner

Parson Tower Desk

Submitted by millpherd on Tue, 05/17/2011 - 11:25

I made a few modifications to the plans, but the overall simplistic design was what I was after. Thanks Ana!

Built from Plan(s)
Estimated Cost
$120
Estimated Time Investment
Weekend Project (10-20 Hours)
Finish Used
White paint with thick polyurethane.
Recommended Skill Level
Beginner

Project Complete!

Here is my patio sectional made of 2x4s. Used my Kreg Jig for the first time to complete this project. I used pocket holes in as many places as possible, then finished it with two coats of leftover fence stain and two coats of semi-gloss outdoor Varathane spar urethane for a nice sheen. I modified the dimensions to fit the cushions that my wife purchased before I began the project. I made the back substantially taller to support the cushions and left the arms off of both ends of the sectional so people could sit facing sideways too. I left the corner of the sectional without a cushion so people would have a place to set drinks.

Estimated Time Investment
Afternoon Project (3-6 Hours)
Finish Used
Two coats of Behr transperent weatherproofing all in one wood finish stain in "chocolate" (leftover from our fence) and two coats clear semi-gloss outdoor varathane spar urethane.
Recommended Skill Level
Beginner
Seasonal And Holiday

My snowflake

Submitted by mustpetdog on Tue, 01/18/2022 - 14:41

I decided to make several of these for family this past Christmas. I made mine from oak which was harder to work with, but more resistant to scratches and nicks. I primed and painted them white with some leftover wall paint. Then I added some craft paint that had glitter in it. While it was still wet, I dusted it with more glitter: white and iridescent. Then I sealed it to keep the glitter from going everywhere!!! Then I hot glued all the sides with a rhinestone like ribbon I found at the Dollar store. I was very please with the result. I also found pearl like stickers that I hot glued on the other snowflakes when my rhinestone ribbon ran out. I added felt stickers (those that are used on the bottoms of chair legs) on the back to prevent the wood from banging on the door every time it opens and closes.
Love this project! I thought it was pretty easy and it was a good practice with the jigsaw, drill and sander which are relatively new skills for me.

Built from Plan(s)

Comments

Vintage Step Stool

I loved making this! The depth and width of the treads are great. It is sturdy, safe and roomy. My little guy loves it!

Estimated Time Investment
Afternoon Project (3-6 Hours)
Finish Used
Wood Primer,can of mistinted paint that I scored for $5.
Recommended Skill Level
Starter Project

Larger, square version of the tryde coffee table

Submitted by bh2469 on Sat, 07/13/2013 - 13:29

When we bought new couches for our new house, we realized our existing rectangular coffee table would no longer work. We searched for larger, rectangular shaped tables in all the major furniture stores. We became disappointed in the limited selection as well as the high prices. The ones we found that could work were typically in the $800 to $900 range. I suggested to my wife that I could make something better and less expensive, which took her by surprise since I had never made anything before. That's when I stumbled unto Ana-White.com and found the tryde coffee table plans. After searching the brag post, I found where a few had modified the plans to the size and shape we were looking for. The plans and build were very straight forward and much simpler than I expected. The table came out great and fits in well in our new den with our new couches.

Built from Plan(s)
Estimated Cost
$200
Estimated Time Investment
Weekend Project (10-20 Hours)
Finish Used
Dark Walnut stain
Recommended Skill Level
Starter Project

Close to standard plan

Submitted by woodje12 on Tue, 01/30/2018 - 04:04

This is fairly close to standard other than I raised up the sides and footboard 2" from the plans. I also used a plywood platform in place of slats and a standard box spring (there are 3 2x4 supports under the plywood). This saved some money since we just bought a king size Casper mattress and we prefer the look.

The other modification is that I purchased "bed rail fasteners" from Amazon. These "clips" enable us to easily disconnect the side rails from the headboard and footboard (like you might find on a purchased bed frame) for when we decide to move or redo our floors or whatever. I thought that was better than having a semi-permanent connection with screws. 

Built from Plan(s)
Estimated Cost
~$200 not including new DeWalt drill and Kreg jig set!
Estimated Time Investment
Weekend Project (10-20 Hours)
Finish Used
The stain is two parts as we thought that the special Varathane product that Anna used had a blue or purple tint to it once we tested it (look into it, others had the same comments on Home Depot/Lowes sites). So instead we used the regular Varathane Weathered Gray stain as the base (we tested which looked better going on first) with a light top coating of Minwax Special Walnut brown stain to give it depth. Good luck and thanks Ana! 
Recommended Skill Level
Beginner

Comments

woodje12

Tue, 01/30/2018 - 04:12

I went back and added another modification I forgot. I bought bed rail fasteners from Amazon in order to be able to quickly disconnect the rails from the headboard and footboard. I prefer this versus having to disassemble the whole thing when we move/redo the floors/whatever. I'm happy with that decision even though it made the alignment a little trickier.

canuck

Tue, 01/30/2018 - 09:42

I love how you raised it.  What height does your mattress sit at?  I'm thinking of raising the rails by 2 or 3 inches as you did, but using 1x10 or 1x8 for the rails instead of 1x6s.  In your opinion, would this look good?  Or make the clean lines look too heavy?

woodje12

Fri, 02/02/2018 - 08:25

Sorry @canuck I tried to reply to your other post but it never posted apparently? I was going to do the same thing with 1x10's but then I lifted one at Lowe's and thought it would just be too heavy and cumbersome. As it is, the bed feels like it could take a direct mortar hit! Then I looked for 1x8's and they weren't in stock so I ended up just using the stock 1x6's. 

I think you could raise the rails/footboard another inch or two easily (I did 2" higher so 16.5" for the footboard posts because my wife wouldn't let me go higher) and still be fine aesthetically. The plywood platform sits a tad below the top of the sides of course and then the mattress is 10" tall so I think the final result is just above 25" from top of mattress to floor which was close to other beds in our house (our last bed was slightly higher [with a full box spring], at 26.5"). 

Thanks for the compliment and good luck!

emcgill05

Fri, 10/15/2021 - 06:10

We too have used the same modifications as you. However the bed fasteners I have bought seem to be too wide for the male connector ends on the 4x4.

Can you provide a link to the fasteners you bought?! I thought I was going to get this together today but doesn’t look like it.

Thanks,
Liz

nellerzicious

Thu, 06/18/2020 - 09:31

I also purchased bed rail fittings for the bed. How did you line everything up? Did you attach it to the cleats or the 2x6's on the side rails? I really wish that they came with instructions for installation, but they didn't, do you have any advice for me? Thanks!

My Boys Playhouse!

Submitted by Anonymous (not verified) on Fri, 01/28/2022 - 03:18

We made a few changes to fit our needs but love the design. Way better than any kit you can buy!

Comments

weatherly sofa

Love this sofa! Shown primed and in the process of painting a chocolate brown now. Super easy to make!

Built from Plan(s)
Estimated Cost
$35
Estimated Time Investment
Weekend Project (10-20 Hours)
Recommended Skill Level
Beginner

An heirloom for the youngest grandson

I used 5 inch wheels  as I wanted the wagon to sit a little higher. http://www.harborfreight.com/5-in-polyurethane-heavy-duty-swivel-caster-69852.html and http://www.harborfreight.com/5-in-polyurethane-heavy-duty-rigid-caster-61757.html    We bought these metal pieces for the straps http://www.lowes.com/pd_44138-37672-11662    Our Lowes didn't have snow blower parts in July. But we were able to find a shear pin  in the draawers where much of their specialty hardware connectors are located.  . I opted to screw everything together and not use nails.  Thanks so much for plans that include a seperate shopping list and cutting list and easy to follow directions.  The wagon was a huge hit with the birthday boy.

Built from Plan(s)
Estimated Cost
$69
Estimated Time Investment
Day Project (6-9 Hours)
Finish Used
The body of the wagon was finished with homemade chalk paint. The metal pieces were spray painted in black satin.
Recommended Skill Level
Beginner

Comments

Trestle Desk

Submitted by JenM on Sat, 02/03/2018 - 08:29

I made this for my son; he loves it!  I don't have the tools to bevel edges so I did my angles with a cheap jigsaw and I think they turned out just fine.  Thinking of adding a narrow shelf on the bottom.

Super easy and inexpensive build!

Built from Plan(s)
Estimated Cost
$20
Estimated Time Investment
Afternoon Project (3-6 Hours)
Finish Used
Dark Blue paint for the legs; Minwax Golden Oak stain for the tabletop.
Recommended Skill Level
Beginner

Ayla Cabinet

Submitted by srodge1 on Wed, 02/16/2022 - 20:56

OMGSH ... I'm in love with this project!! My brother had given me some left over lattice that he had, and I was wondering what project I could use it on. This turned out so precious. However, I must say that drawers aren't for the faint of heart. Feeling defeated, I took the cabinet over to my brother's workshop and he helped me (or maybe he just did it for me). Anyway, as with all of my projects, it's going in the annual church auction and I can't wait to see how high it goes!!

Again, thanks Ana for your blog ... you're such an encouragement!!!

Built from Plan(s)

Comments

My First Project

This is my first ever wood working project. I had a blast learning how to use the Kreg Jig. I learned a lot!! I finished it in about 6 hours, then sanded it and painted it the next day. It is not perfect, but I like it.

Estimated Cost
$45
Estimated Time Investment
Day Project (6-9 Hours)
Finish Used
Black Statin Paint
Recommended Skill Level
Beginner

loft bed and daybed combinations

Submitted by amifischer on Wed, 07/17/2013 - 06:46

When we moved to our new home, our three boys wanted to share a very small room so we came up with this combination. The daybed is actually two stacked beds because we needed more storage space. We plan to create the desk/shelves under the loft bed soon!

Estimated Time Investment
Week Long Project (20 Hours or More)
Recommended Skill Level
Intermediate

Ash Trestle Table with benches

Submitted by Bbova on Sat, 07/18/2015 - 19:40

The Ash for this table was sitting at a friends house out in a field for years. There were several 8/4 x 8' boards with various widths laying in the dirt. After many hours of planning and sanding I brought the Ash back to life. 

Estimated Time Investment
Week Long Project (20 Hours or More)
Finish Used
Mix of Min Wax stains applied 3 light coats with a Waterbased poly (matte finish).
Recommended Skill Level
Advanced

Comments

Farmhouse X Desk

Submitted by Malka on Thu, 02/08/2018 - 11:12

My fiance wanted a new craft desk so I sent her some ideas from Anas site, and she loved this one.  I had her pick out paint  (bright white by behr) and stain (minwax dark walnut), then got to work.  Easy build overall, though I strongly recommend people measure the X brace angles they'll need before cutting them, because using the angles provided in the plan left gaps I wasn't happy with and had to redo the cuts. 


Built from Plan(s)
Estimated Cost
$120 for lumber, paint, stain and kreg screws.
Estimated Time Investment
Weekend Project (10-20 Hours)
Finish Used
Minwax clear gloss poly
Recommended Skill Level
Beginner