Community Brag Posts
Mahogony Chaise Lounge

took me a week to build, lots of compliments, already making them for family and friends!


Estimated Cost
$125
Estimated Time Investment
Week Long Project (20 Hours or More)
Finish Used
bombay mahogony, minwax polyshades, helsman poly to seal.
Recommended Skill Level
Advanced
Apothecary inspired coffee table

I did not personal make this. My 74 year old father did. Very happy with the result. Only thing I asked him to change is there is no drawer. The top lifts up for my to store my daughters toys easier.
Estimated Time Investment
Weekend Project (10-20 Hours)
Finish Used
Dark walnut stain for top.
Recommended Skill Level
Advanced
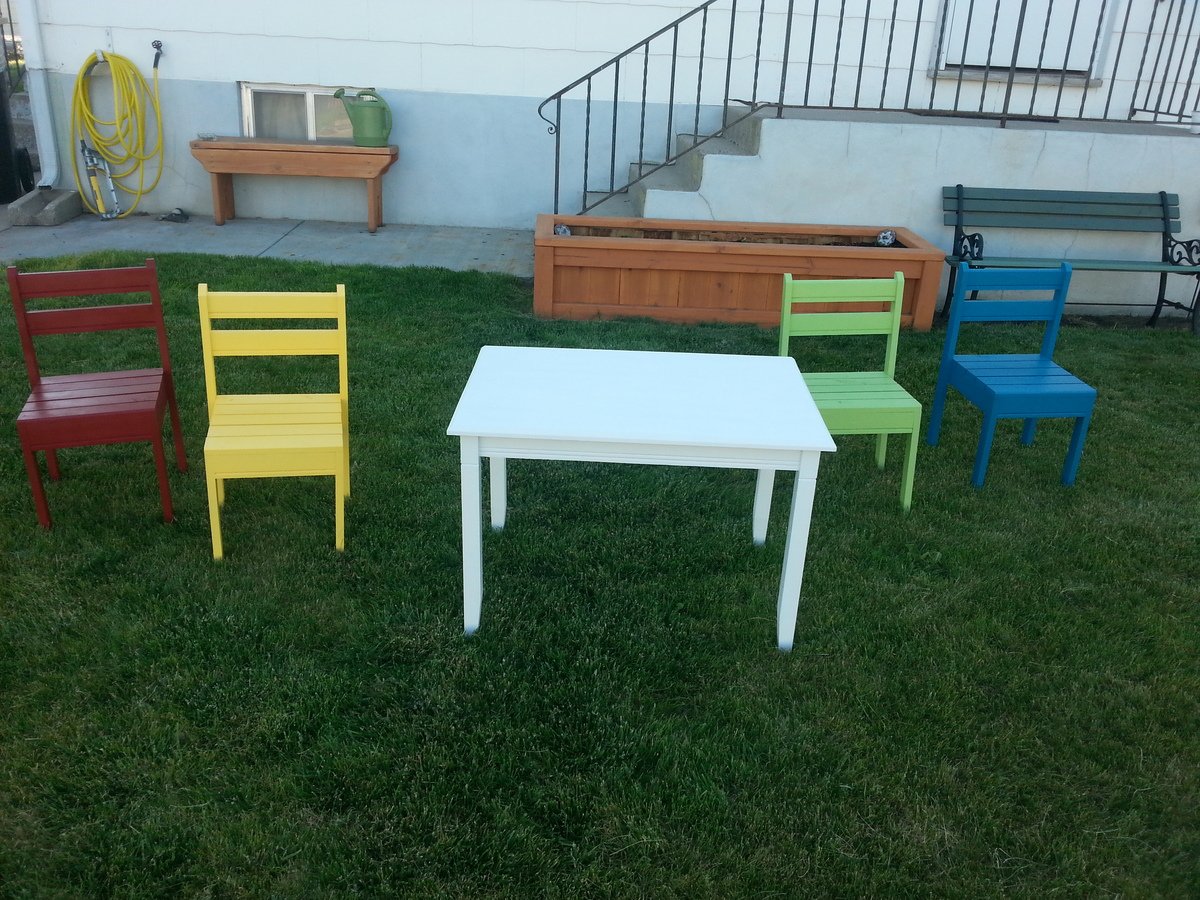
pop of color + shelves = sanity

I have been looking for shelves to add to my bathroom however nothing stood out. The leaning bathroom shelf was the project that I needed! I changed the plans to fit the area and it looks great!
Pop of color ✔️
Knit storage baskets ✔️
One of a kind hand drawing from Paris ✔️
Built from Plan(s)
Estimated Time Investment
Afternoon Project (3-6 Hours)
Recommended Skill Level
Beginner
Comments
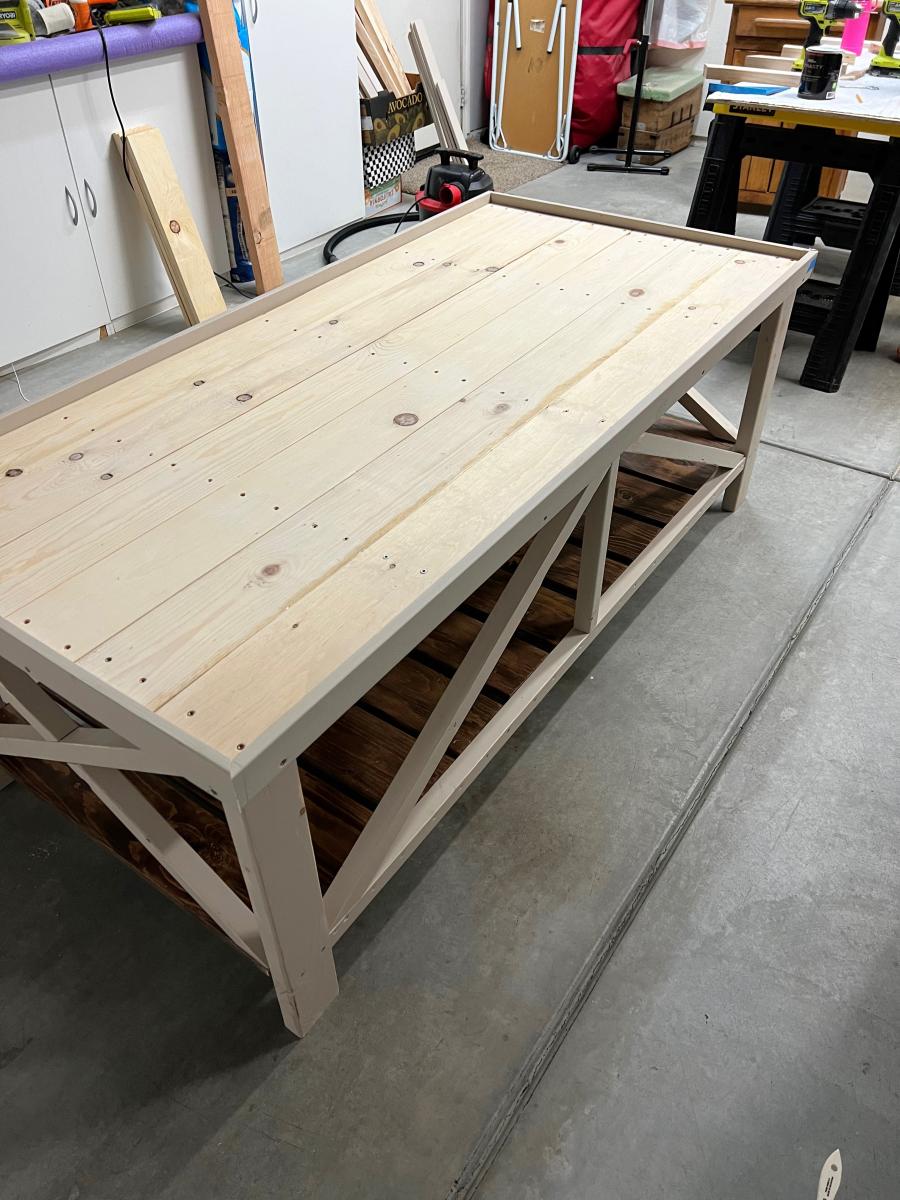
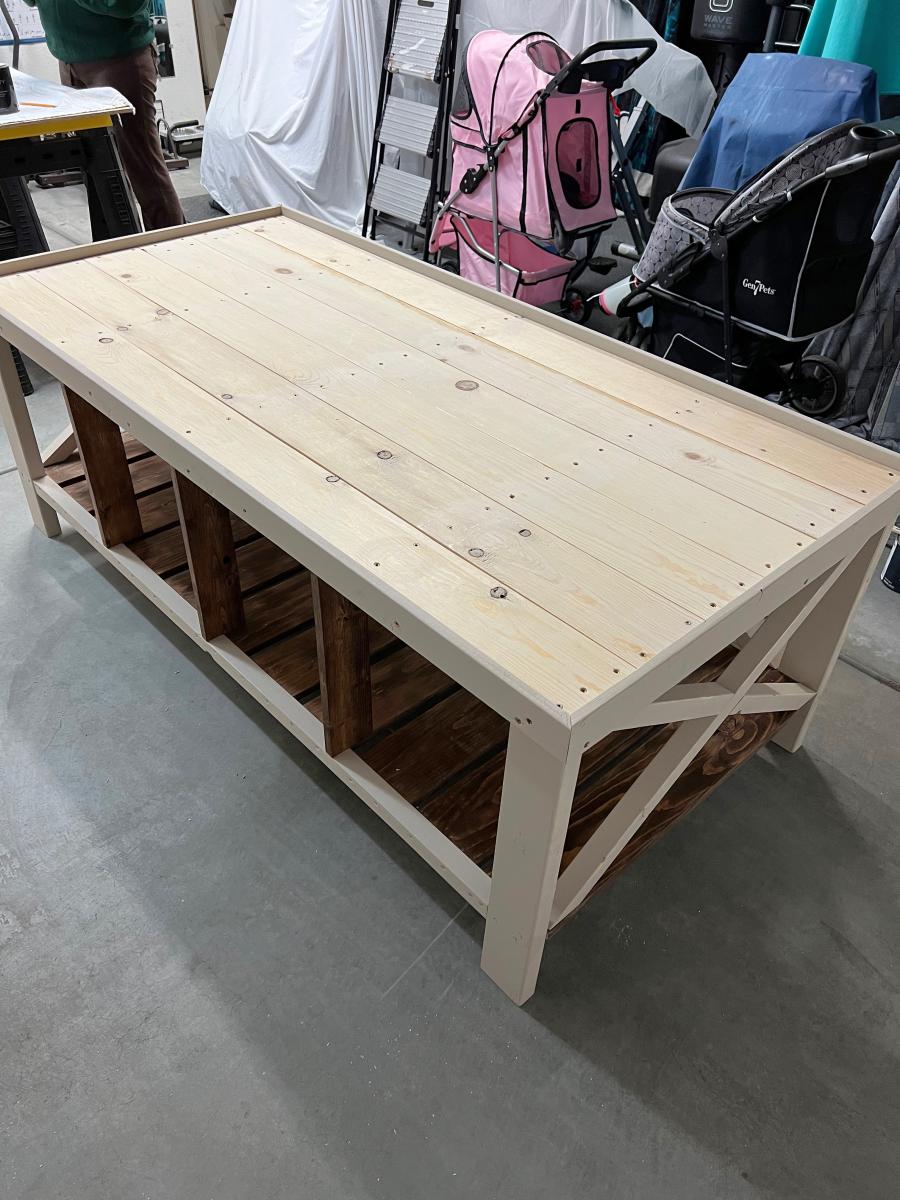
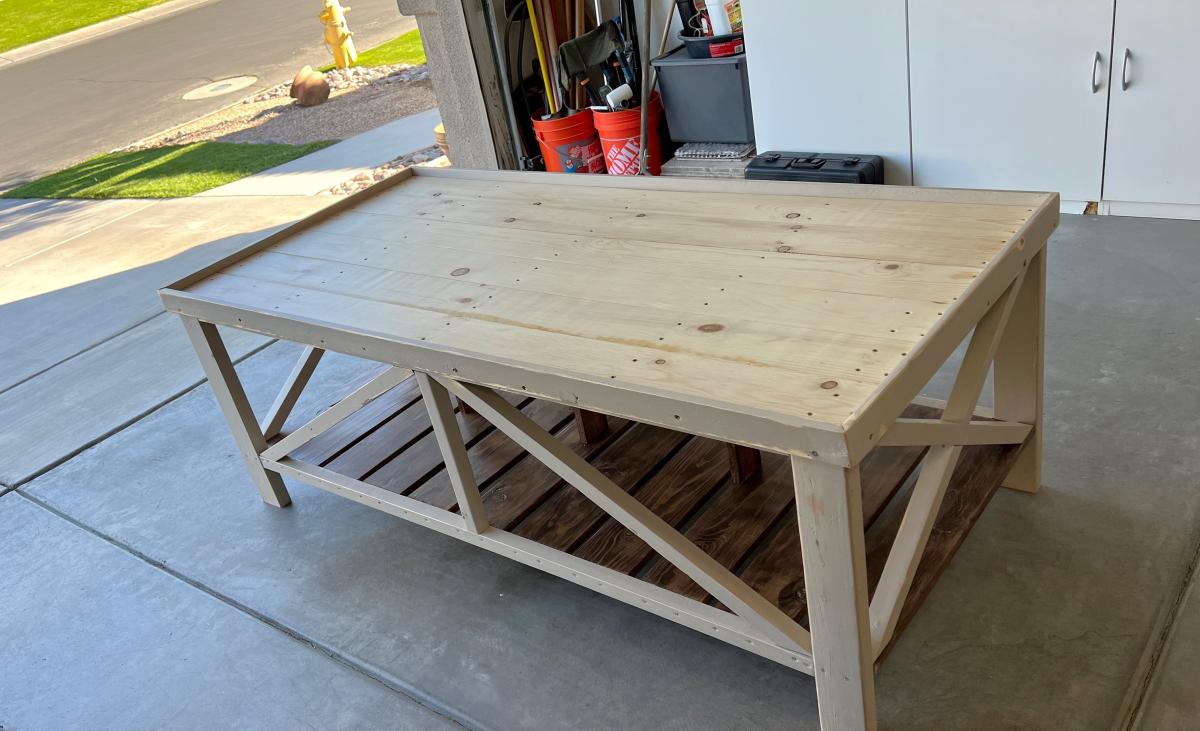
Modern outdoor furniture from Ana white
Loved this plan!!! It was my first furniture project (before all I did was mantels and shelving) amazing easy to follow build plans. Can’t wait to browse Ana White’s other posts! Thank you for providing this plan!
Built from Plan(s)
Estimated Cost
$120
Estimated Time Investment
Weekend Project (10-20 Hours)
Finish Used
Behr stain and sealer in slate
Recommended Skill Level
Beginner
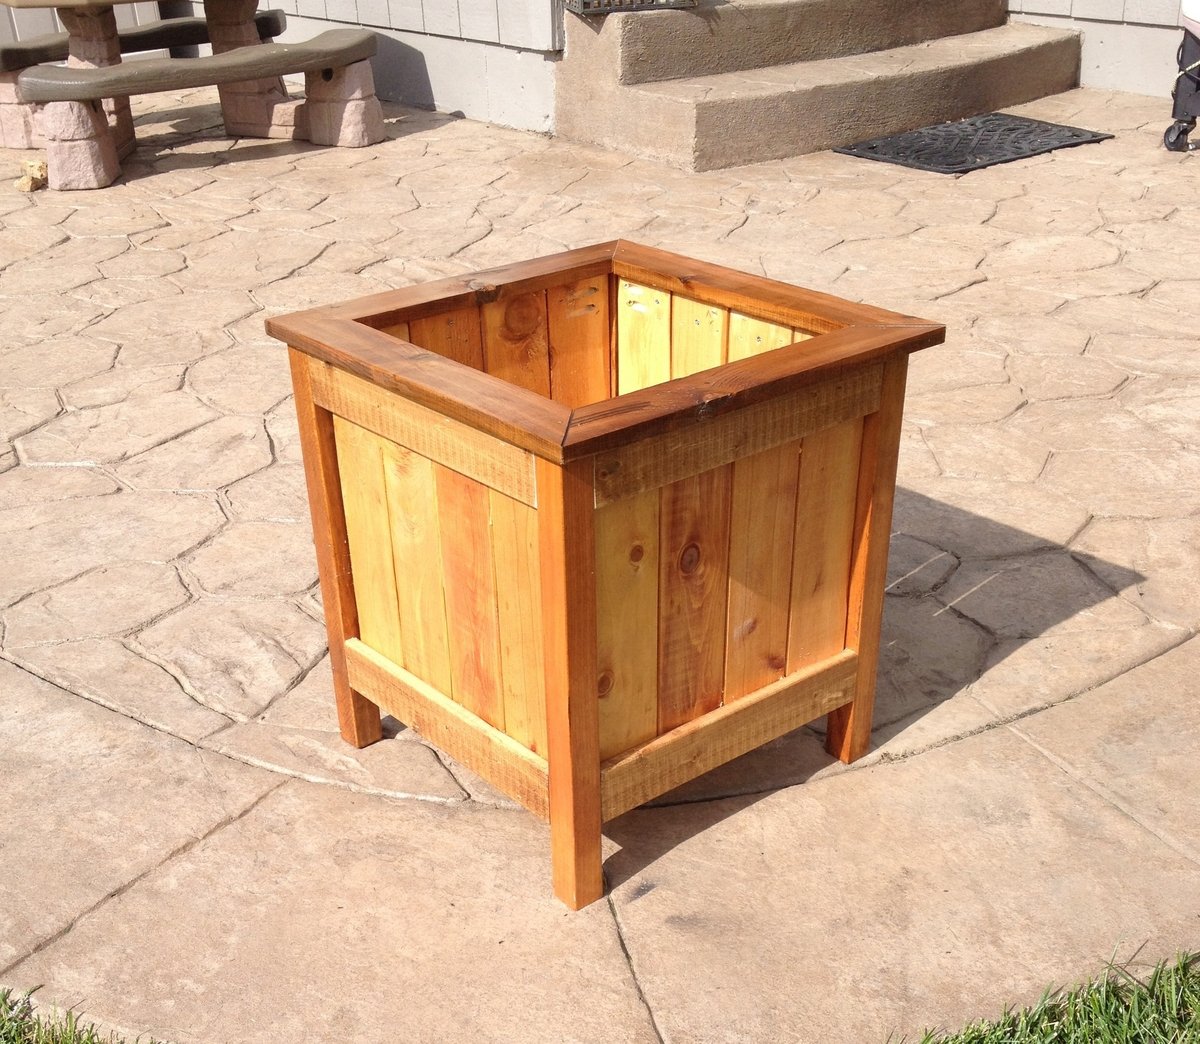
Raised Planter Box with Bottom Shelf
Just built this today, very easy build. I used cedar tone treated lumber for the frame and the cedar pickets. I modified the size some, little smaller than the plans. Total material cost about $70.
Built from Plan(s)
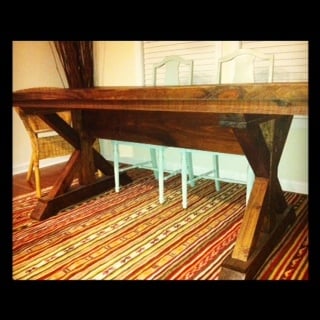
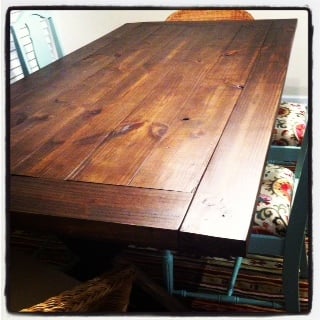
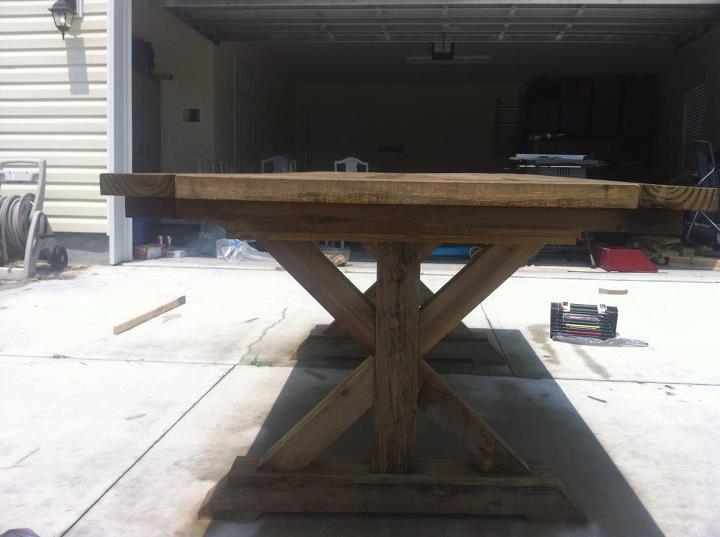
Dinning Table
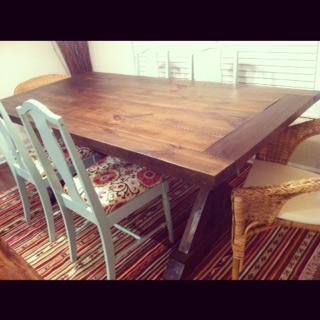
I decided to make this table about three weeks before this plan came out! I wanted a dinning table so I found one at William Sonoma that I loved and figured I could take several pieces from other table plans to make this one from WS. Then sure enough out comes this one after I had already started my plan! So, its not exactly the same but it is close and I do love it so much. I was afraid it wouldn't be secure enough with just the top boards running across the legs so I added a frame to support underneath like one of the other table plans does. This was yet another learning process so it took awhile and the boards aren't as perfect as I'd like them to be but I think that adds to the character I tried to give it! Overall, not an awful project.

Built from Plan(s)
Estimated Cost
100.00
Estimated Time Investment
Week Long Project (20 Hours or More)
Finish Used
antique treatment of tea and vinegar/steal wool followed by honey oak stain and satin polycrylic.
Recommended Skill Level
Intermediate
Comments
Fri, 11/09/2012 - 14:52
What size boards did you use?
I love the look of your table, what size boards did you use? I wanna copy. :)
Sat, 11/10/2012 - 07:18
Remember I was copying a
Remember I was copying a table I fell in love with, so I ripped 2x8's down to exactly 6 inches for the inside boards and the outside boards are 2x6's ripped to 5 inches. I know that sounds wasteful but I did use all the scrap from the 2x8 boards on other projects. This is obviously not necessary. I insisted on having an odd number of boards so I could have a middle board that showed the heart of the pine, but I needed to keep my dimensions as close to the original table (so I felt). This was one of my first projects for my little family so I got a little sentimental! You could very easily use four full 2x8's in the middle and two full 2x6's for the outside pieces and the table will only be an inch wider then mine. I'm so thrilled you like it! Let me know if you have any other questions.
Sat, 11/10/2012 - 21:07
Are there 4 by 4s on the legs?
I really do love your version, and thanks for taking the time to respond! One more question, did you use 4x4s on the legs? They look a little beefier, but it's hard to tell from the photo...
Mon, 11/12/2012 - 15:44
I did! But I, again, ripped
I did! But I, again, ripped the angled sections down until they looked right. Wish I could tell you what the measurements came out to but I just cut until I liked it! It was something like 3.25x2.75 or pretty close. Leaving all the peices of the legs the standard 4x4 looked too bulky to me but I thought 2x4's were too thin so I made my own something in the middle!
Clara Table / Four Dollar Chairs
This was a seriously fun project to build. I am very pleased with the results. Painting is not something I usually do with my projects, and I learned a lot about spray paint in the process. I used the original plans, but double tapered the table legs, chamfer routed the top edges, and added v-grooves to the aprons. I incorporated v-grooves in to the chairs, and angled the tops.
There is a lot of pilot-holing and screwing involved with the chairs. I used pocket holes and glue to attach the seat slats from the bottom.
I would like to thank the site for making these plans available.

Built from Plan(s)
Estimated Cost
$40
Estimated Time Investment
Weekend Project (10-20 Hours)
Finish Used
Spray Paint/Primer
Recommended Skill Level
Beginner
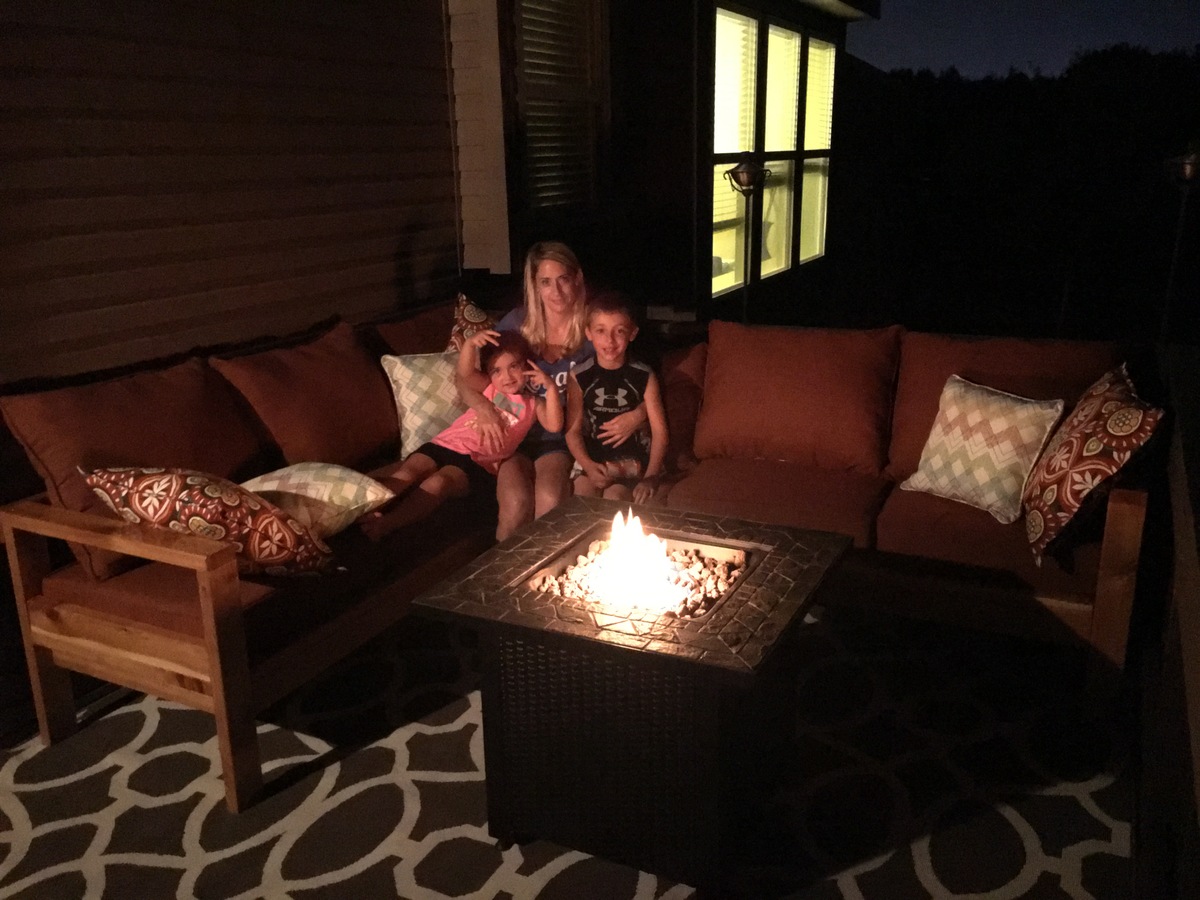
Family Made Sectional
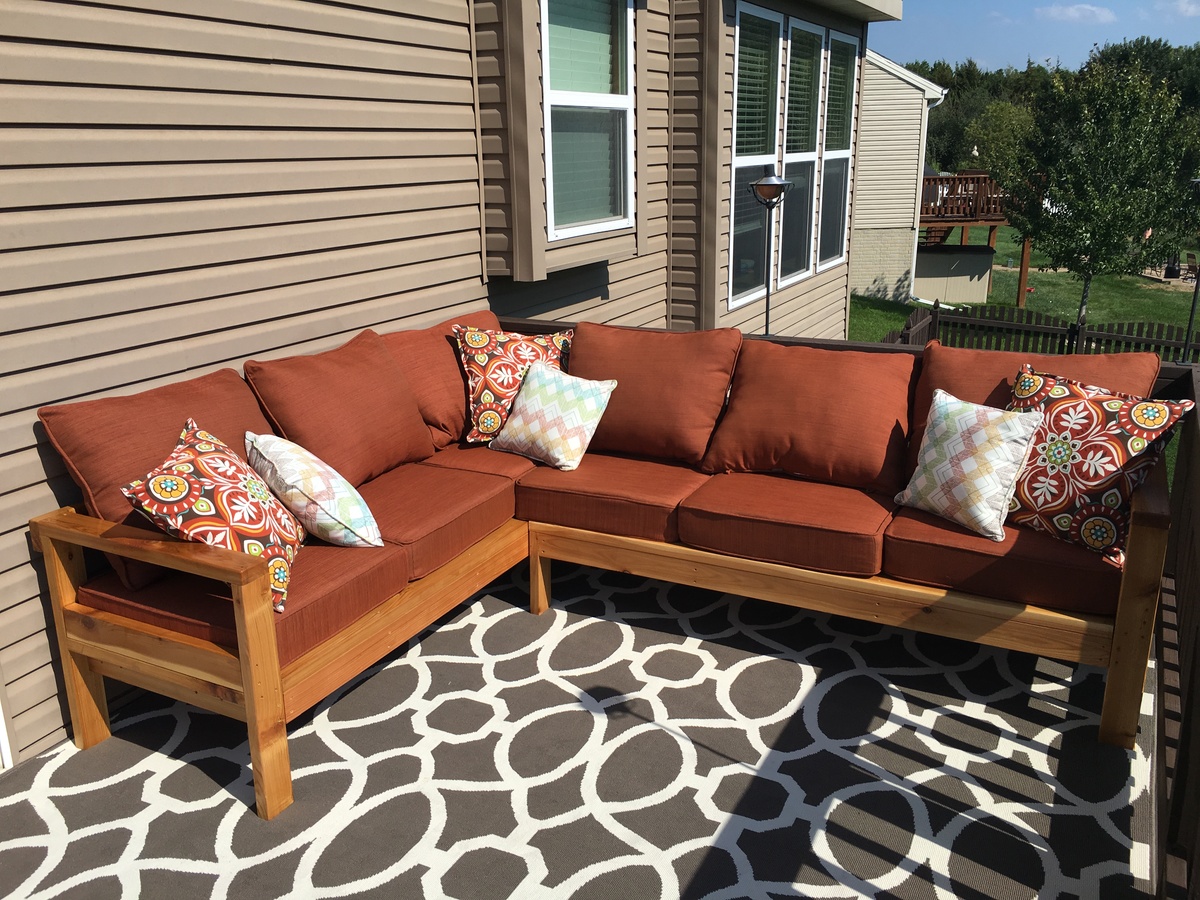
My wife sent me your YouTube video of making the sectional. She asked me if I would make her one. It was perfect timing because our 9 year anniversary was just around the corner. So my 5 yr old daughter and I went to Lowes and purchased the supplies on a Friday night. Her 8 year old brother and her helped me measure, and assemble (I did all the cutting;). We enjoyed the project as a family and were very proud to present to mommy for a gift...
thank you!
Jack Christensen
Built from Plan(s)
Estimated Cost
$600
Estimated Time Investment
Weekend Project (10-20 Hours)
Finish Used
Semi transparent stain
Recommended Skill Level
Beginner
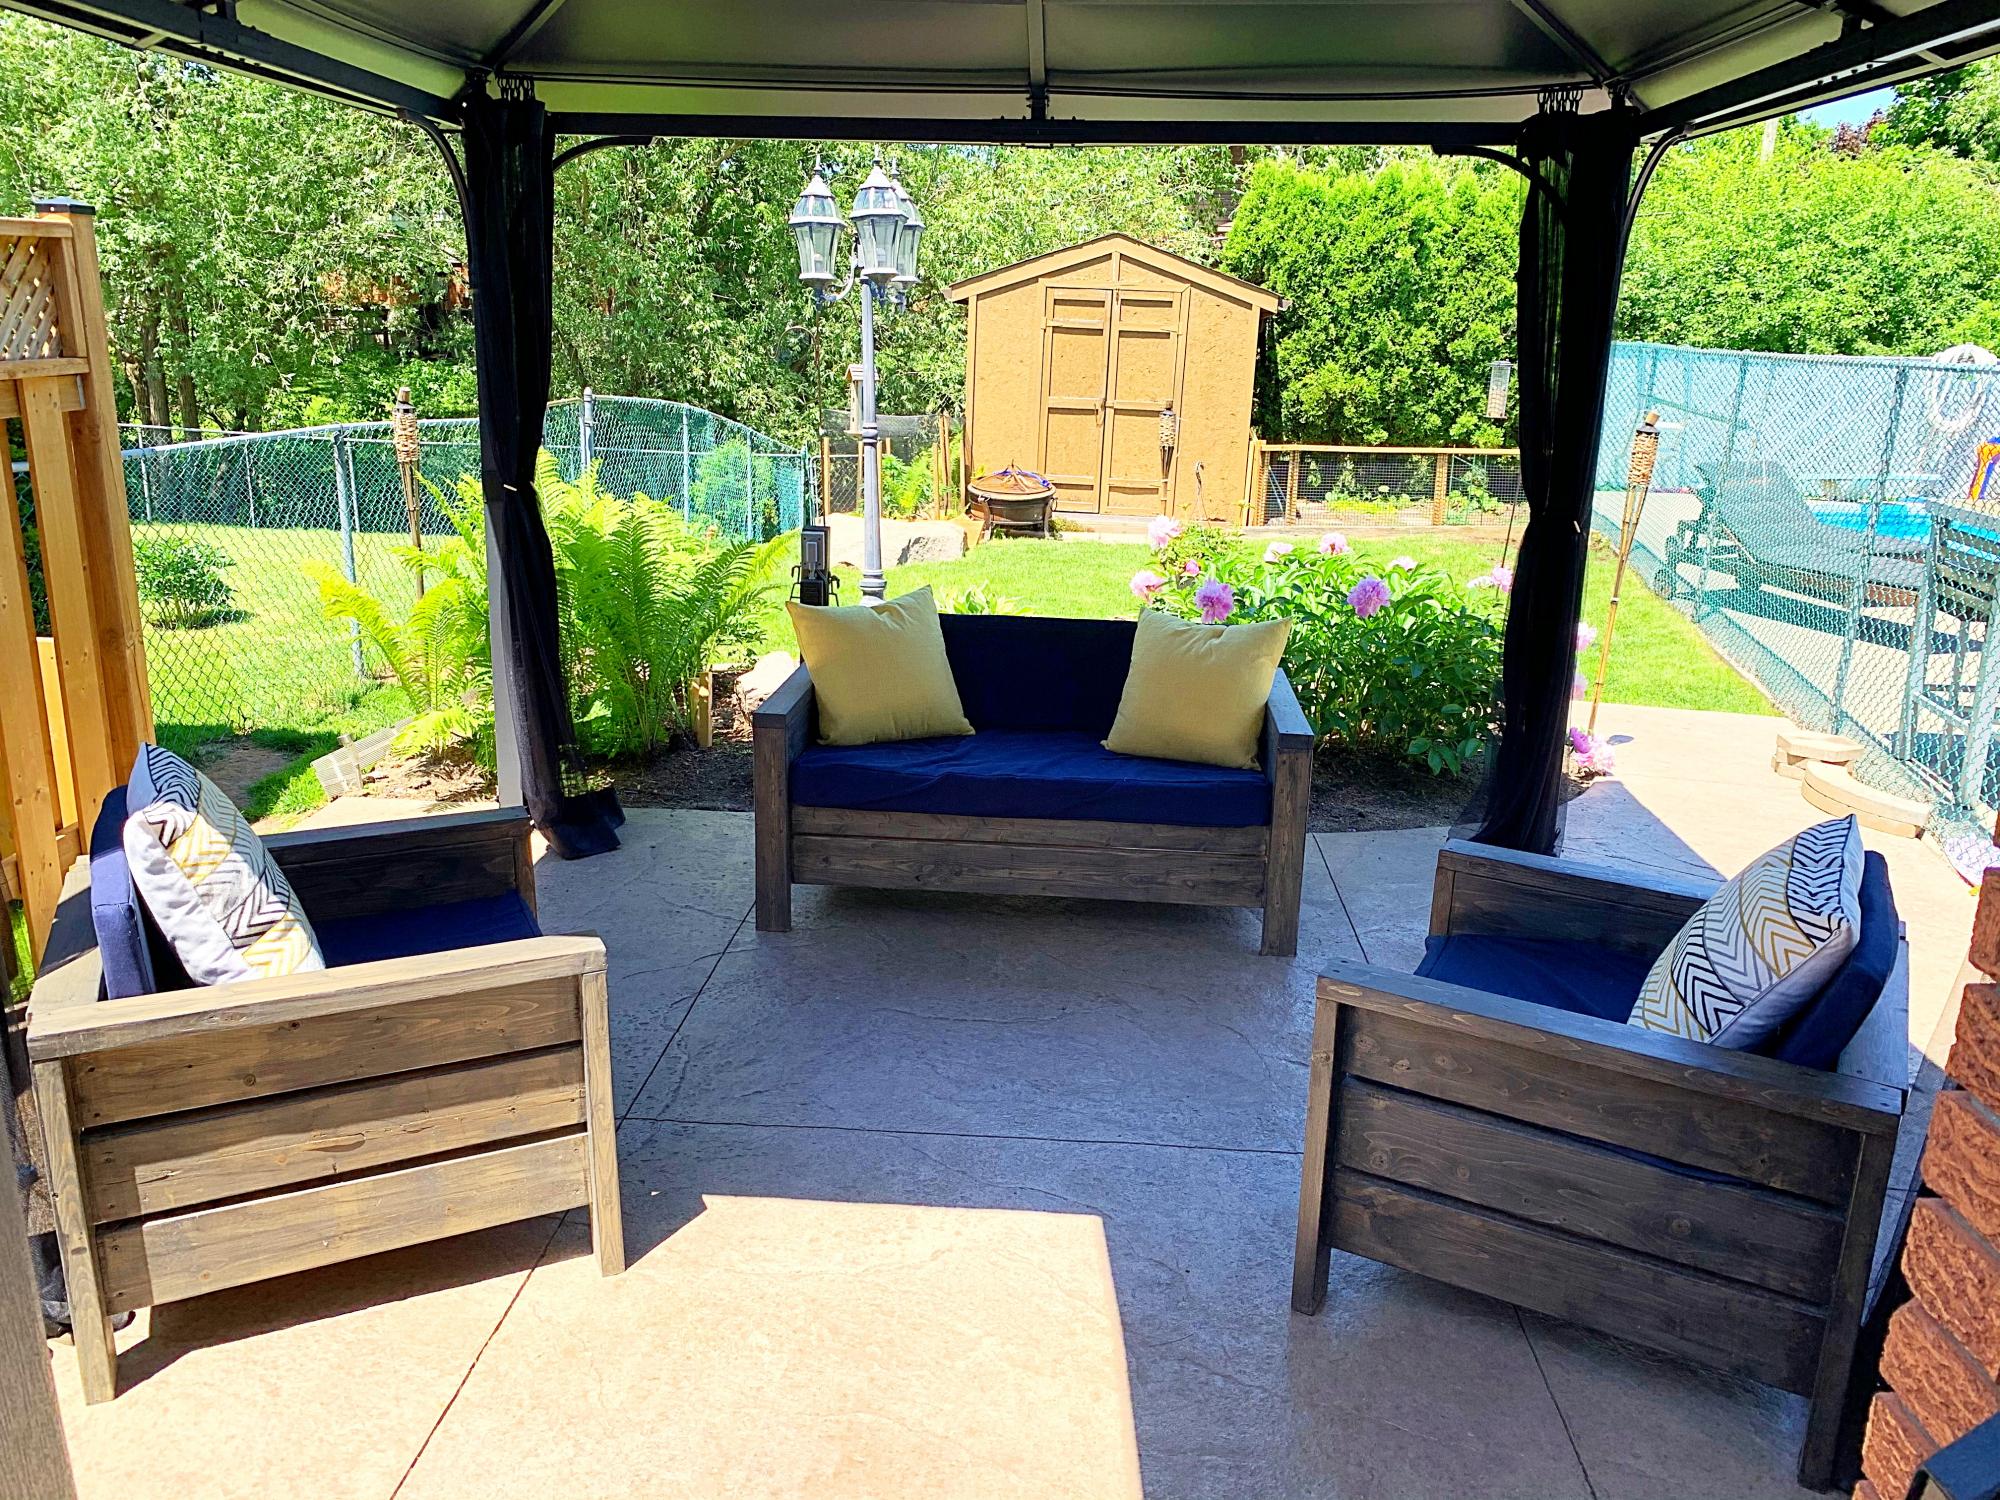
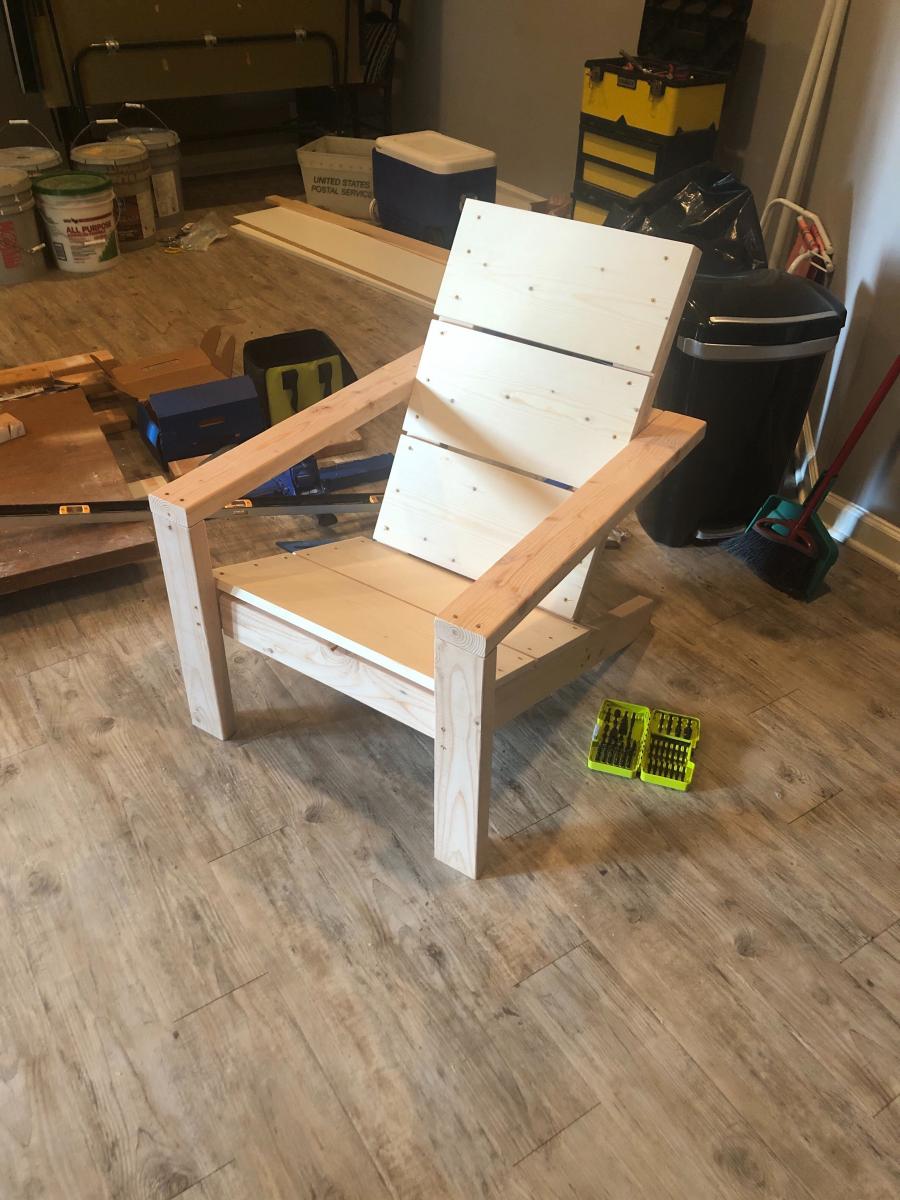
Modern Adirondack Chair
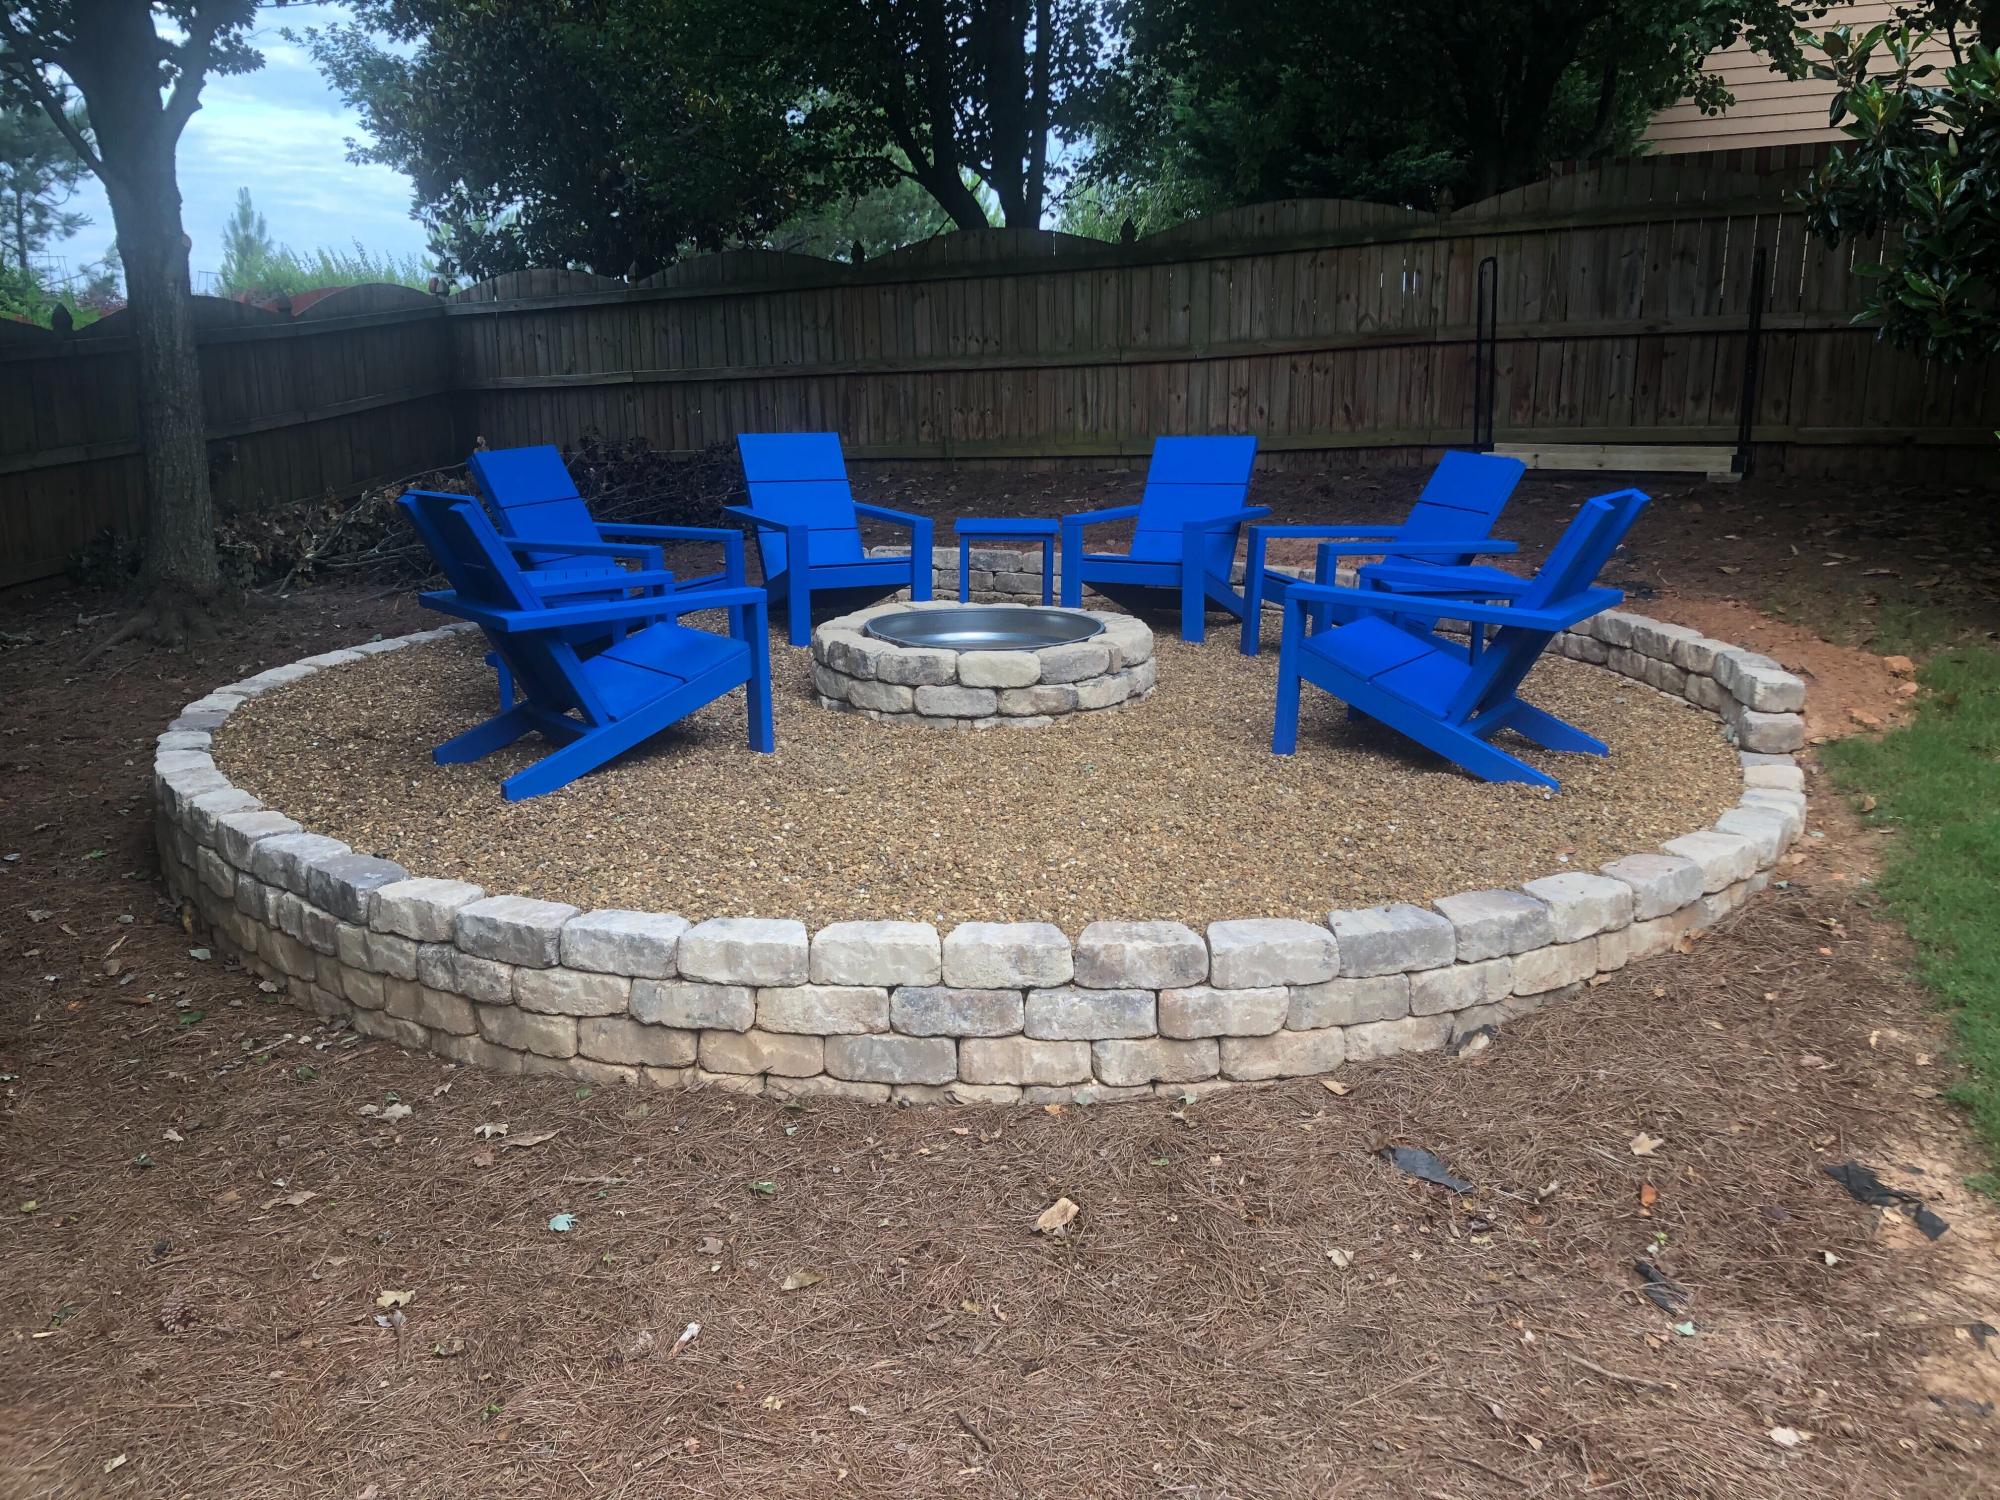
My little quarantine project all started with a three foot circle in the back corner of my yard and turned into this. After finishing the structure, we were looking at different furniture and considered either going on the cheap ($20 plastic chairs) or the expensive route ($1200) for this same setup. That was when I came across your site Ana. Your amazing plans and community's brag posts gave me the confidence to give it a go and we could not be happier with the result.
The chairs and tables went together super easy as everyone had mentioned. I sanded everything before cutting and then just sanded the cut ends. I did not have the stain on hand (not did we know the color) so we waited until after assembly to stain, which ended up not being too bad, just a lot of little nooks and crannies to get into. I used a small foam pad to get in between the boards.
Overall, I would say that the build, from start (rough lumber) to finish (sanded and assembled) took me about 2-3 hours per chair, and about the same to do two coats of stain on top and one on the underside, bringing the total time per chair to about 5 hours.
Now on to the landscaping... ;) I am also planning to build some planters to hold posts to hold some string lights around the perimeter. Boy how these little projects have a domino effect...but in the end, there is nothing better than sitting back and enjoying the fruits of your labor.

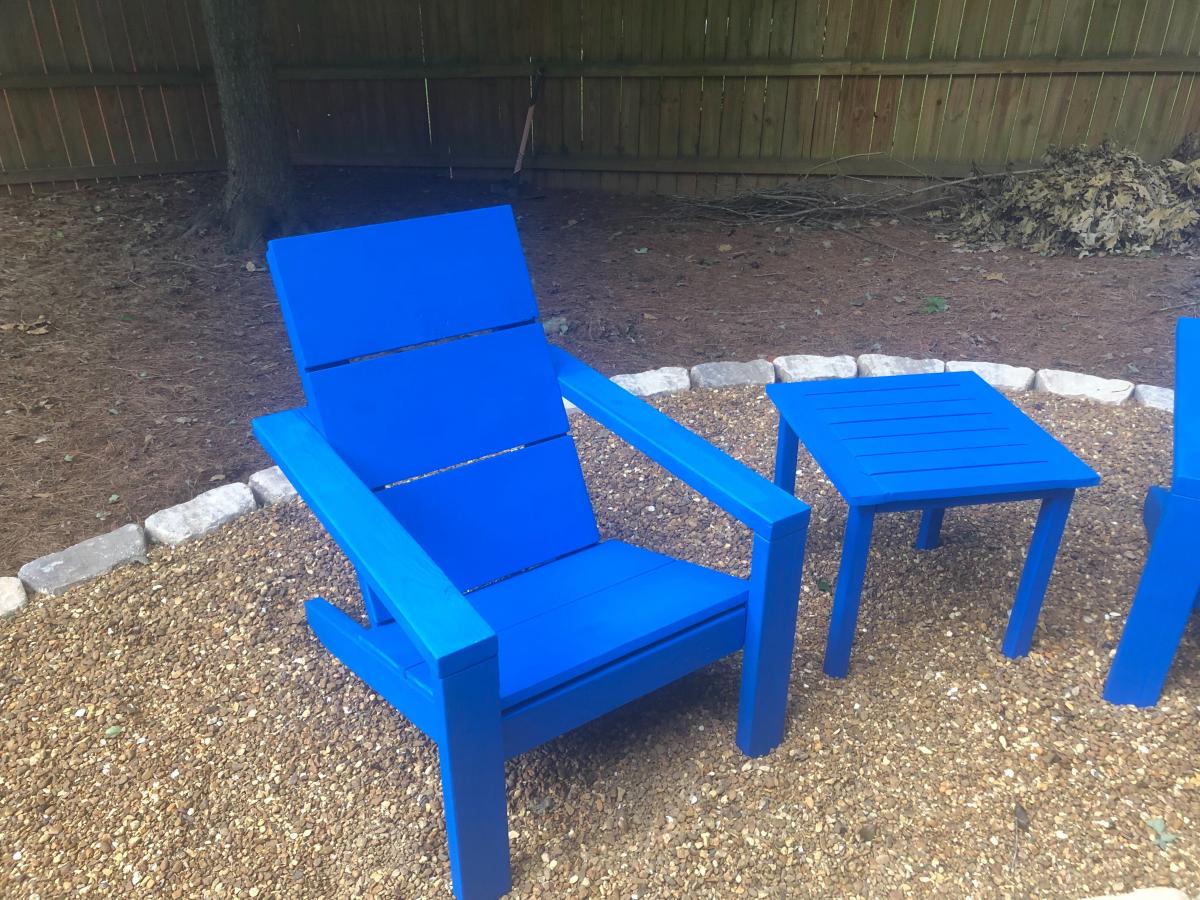
Built from Plan(s)
Estimated Cost
$40/ chair and $10/table. Total Project (including fasteners and stain): ~$300
Estimated Time Investment
Weekend Project (10-20 Hours)
Finish Used
SW6965 - Hyper Blue Solid Deck Stain
Recommended Skill Level
Beginner
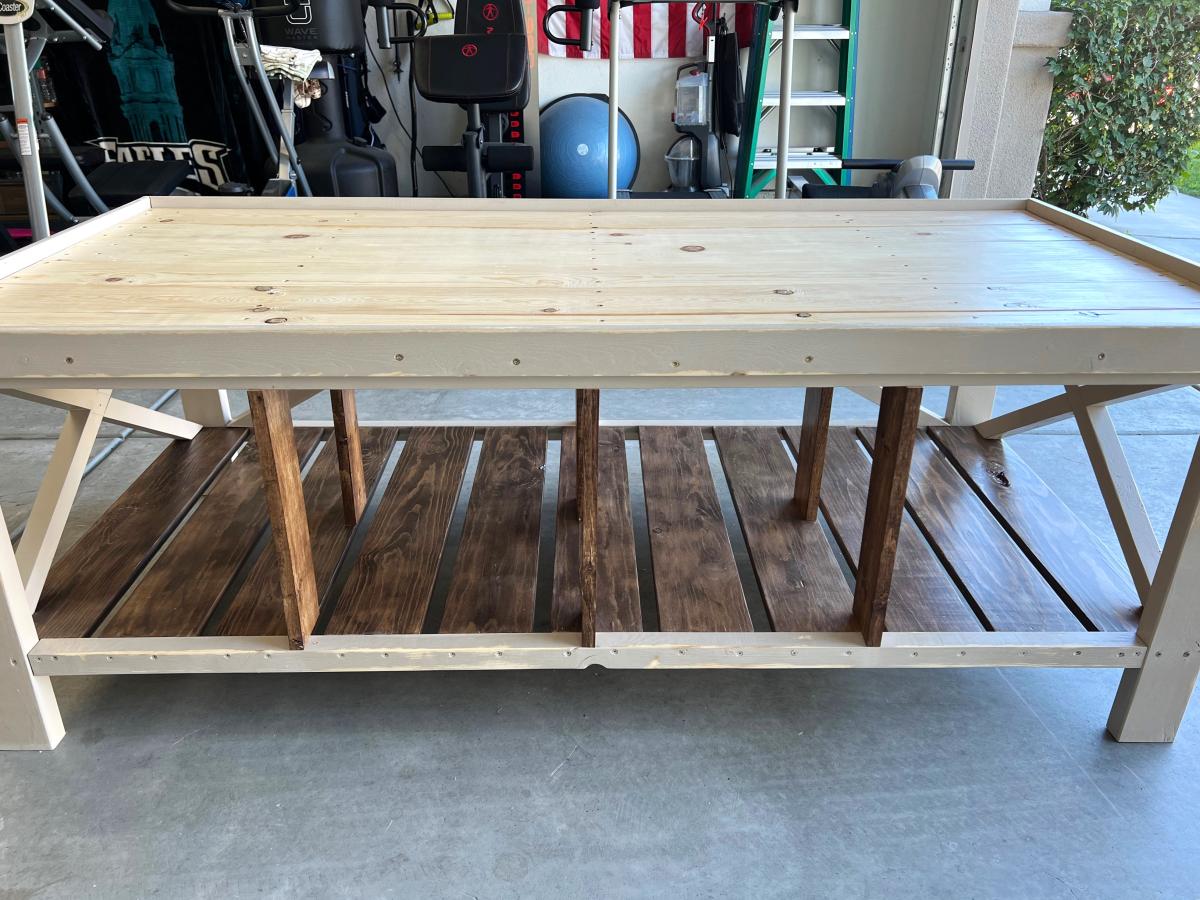
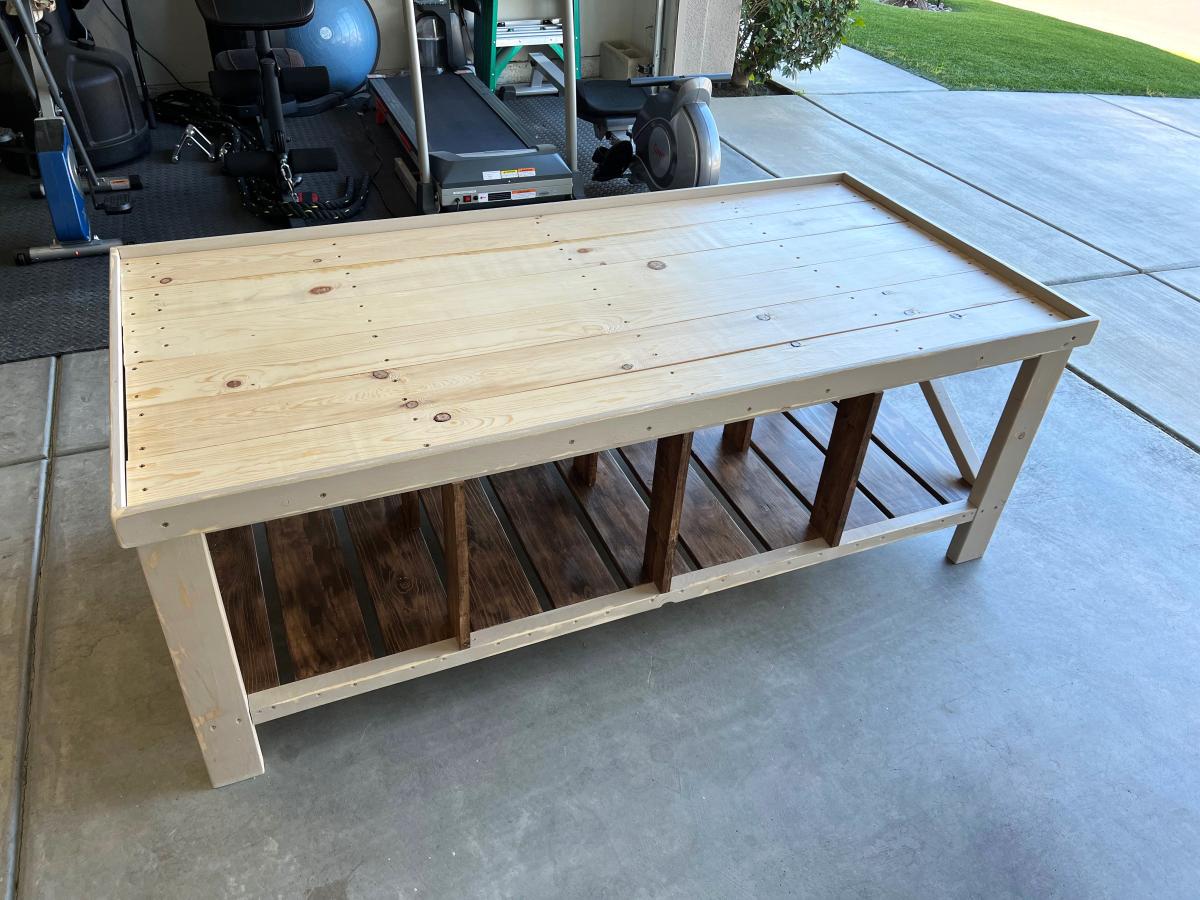
Farmhouse Daybed with Dividers
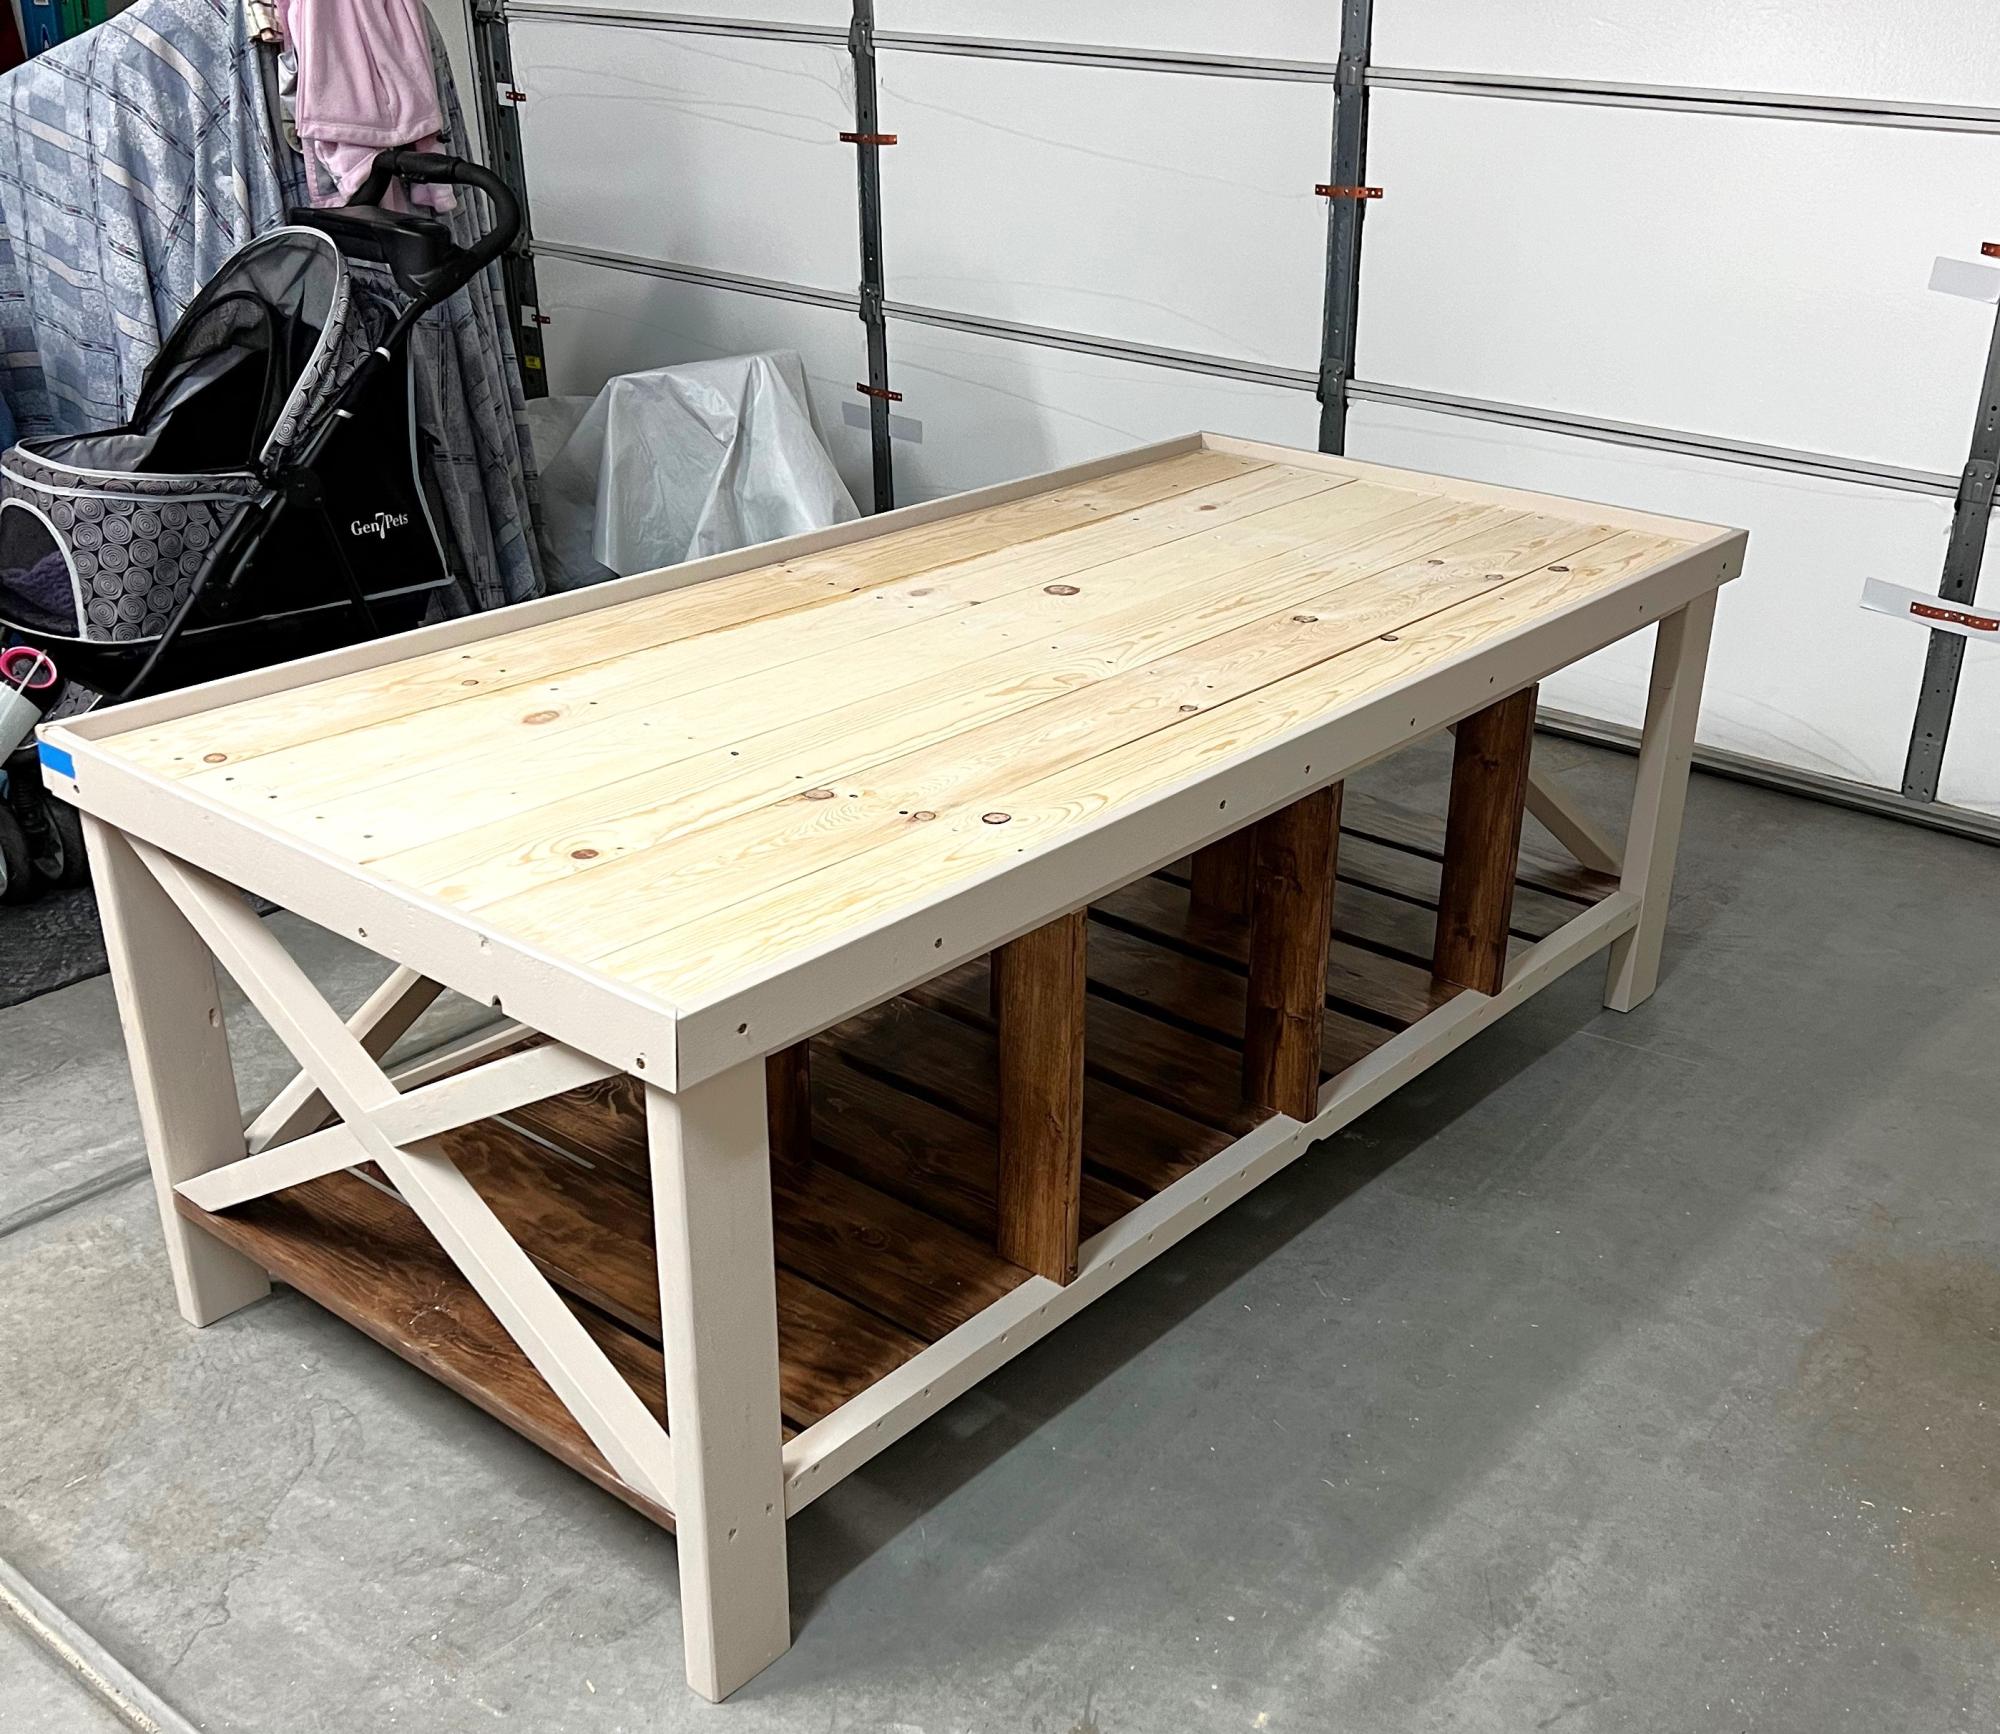
I made this day bed with dividers for a friend who requested it mirror the farmhouse table. I think it turned out wonderfully! I replaced the 2x6's with 1x6's to cut down on weight since it was being fit for his 5th wheel trailer.
Michelle H.
Built from Plan(s)
Large Pet Kennel (My First Project)

I used the project as shown except that I changed the door. Our pups love a more cozy environment and so I made the panel on the door from leftover 1/4" plywood, and I used a doggie bone and puppy cookie cutter and traced the outline of the shapes and then cut them out with a jigsaw. I used Whiteboard from Lowes, and with stain, screws, materials the total cost was about $90. Doggie biz downtown wanted $800 for one like this. One comment about the Kreg Jig, Best Money Ever Spent!
Built from Plan(s)
Estimated Cost
$90 USD
Estimated Time Investment
Weekend Project (10-20 Hours)
Finish Used
Minwax Toffee - Water based, one coat of stain, 2 minutes on wood, with 3 coats of Minwax Polycrylic
Recommended Skill Level
Beginner
Comments
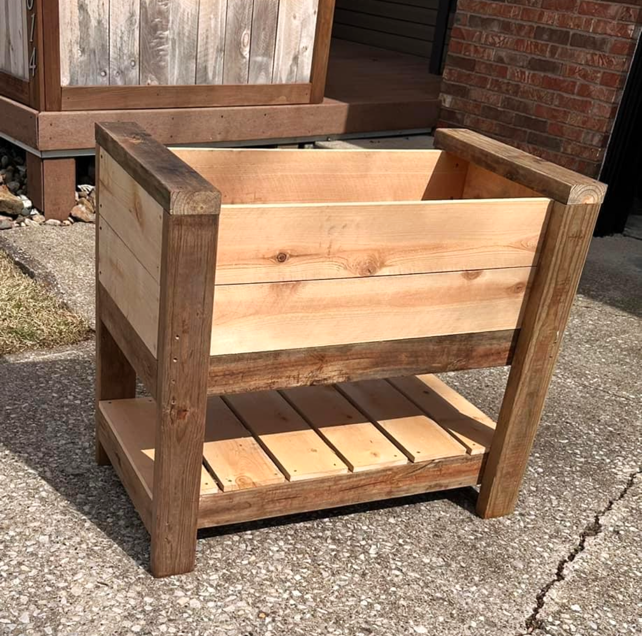
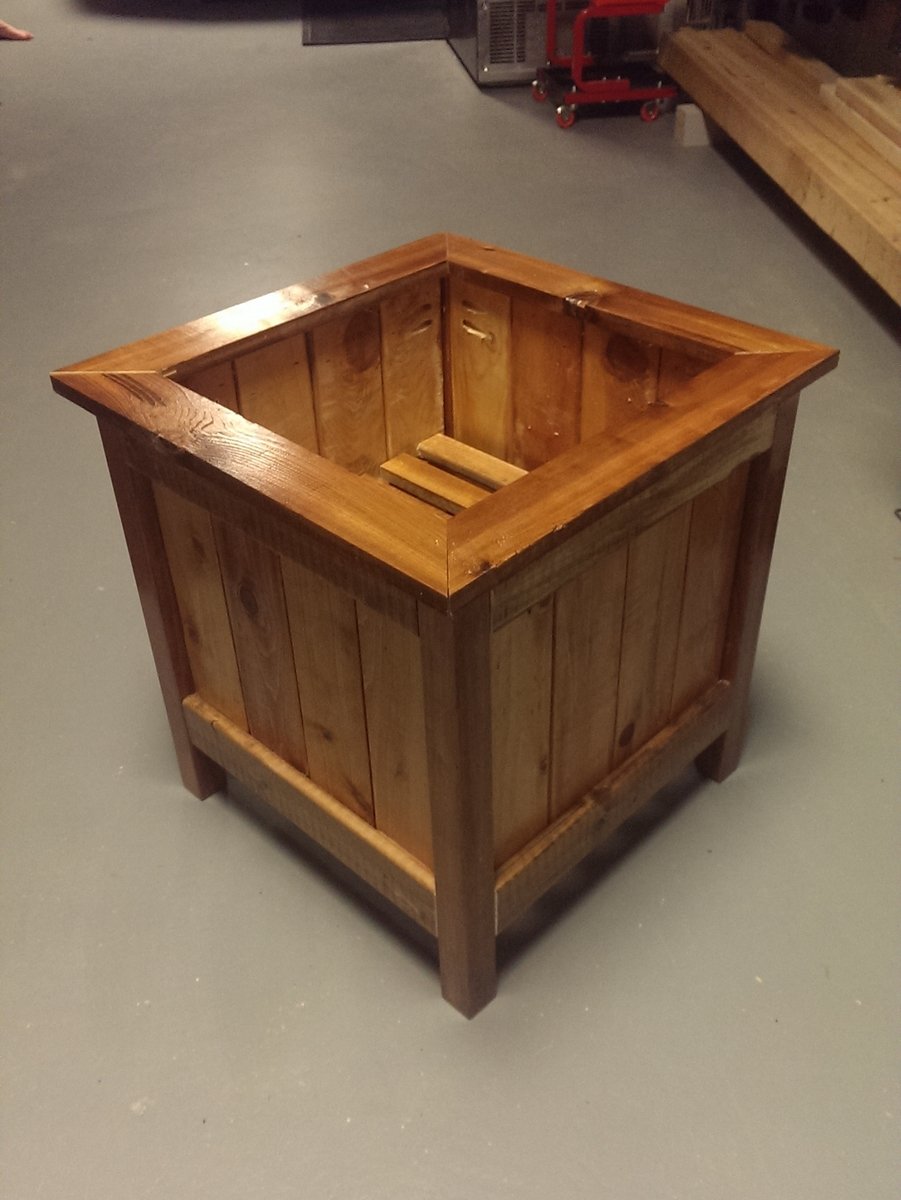
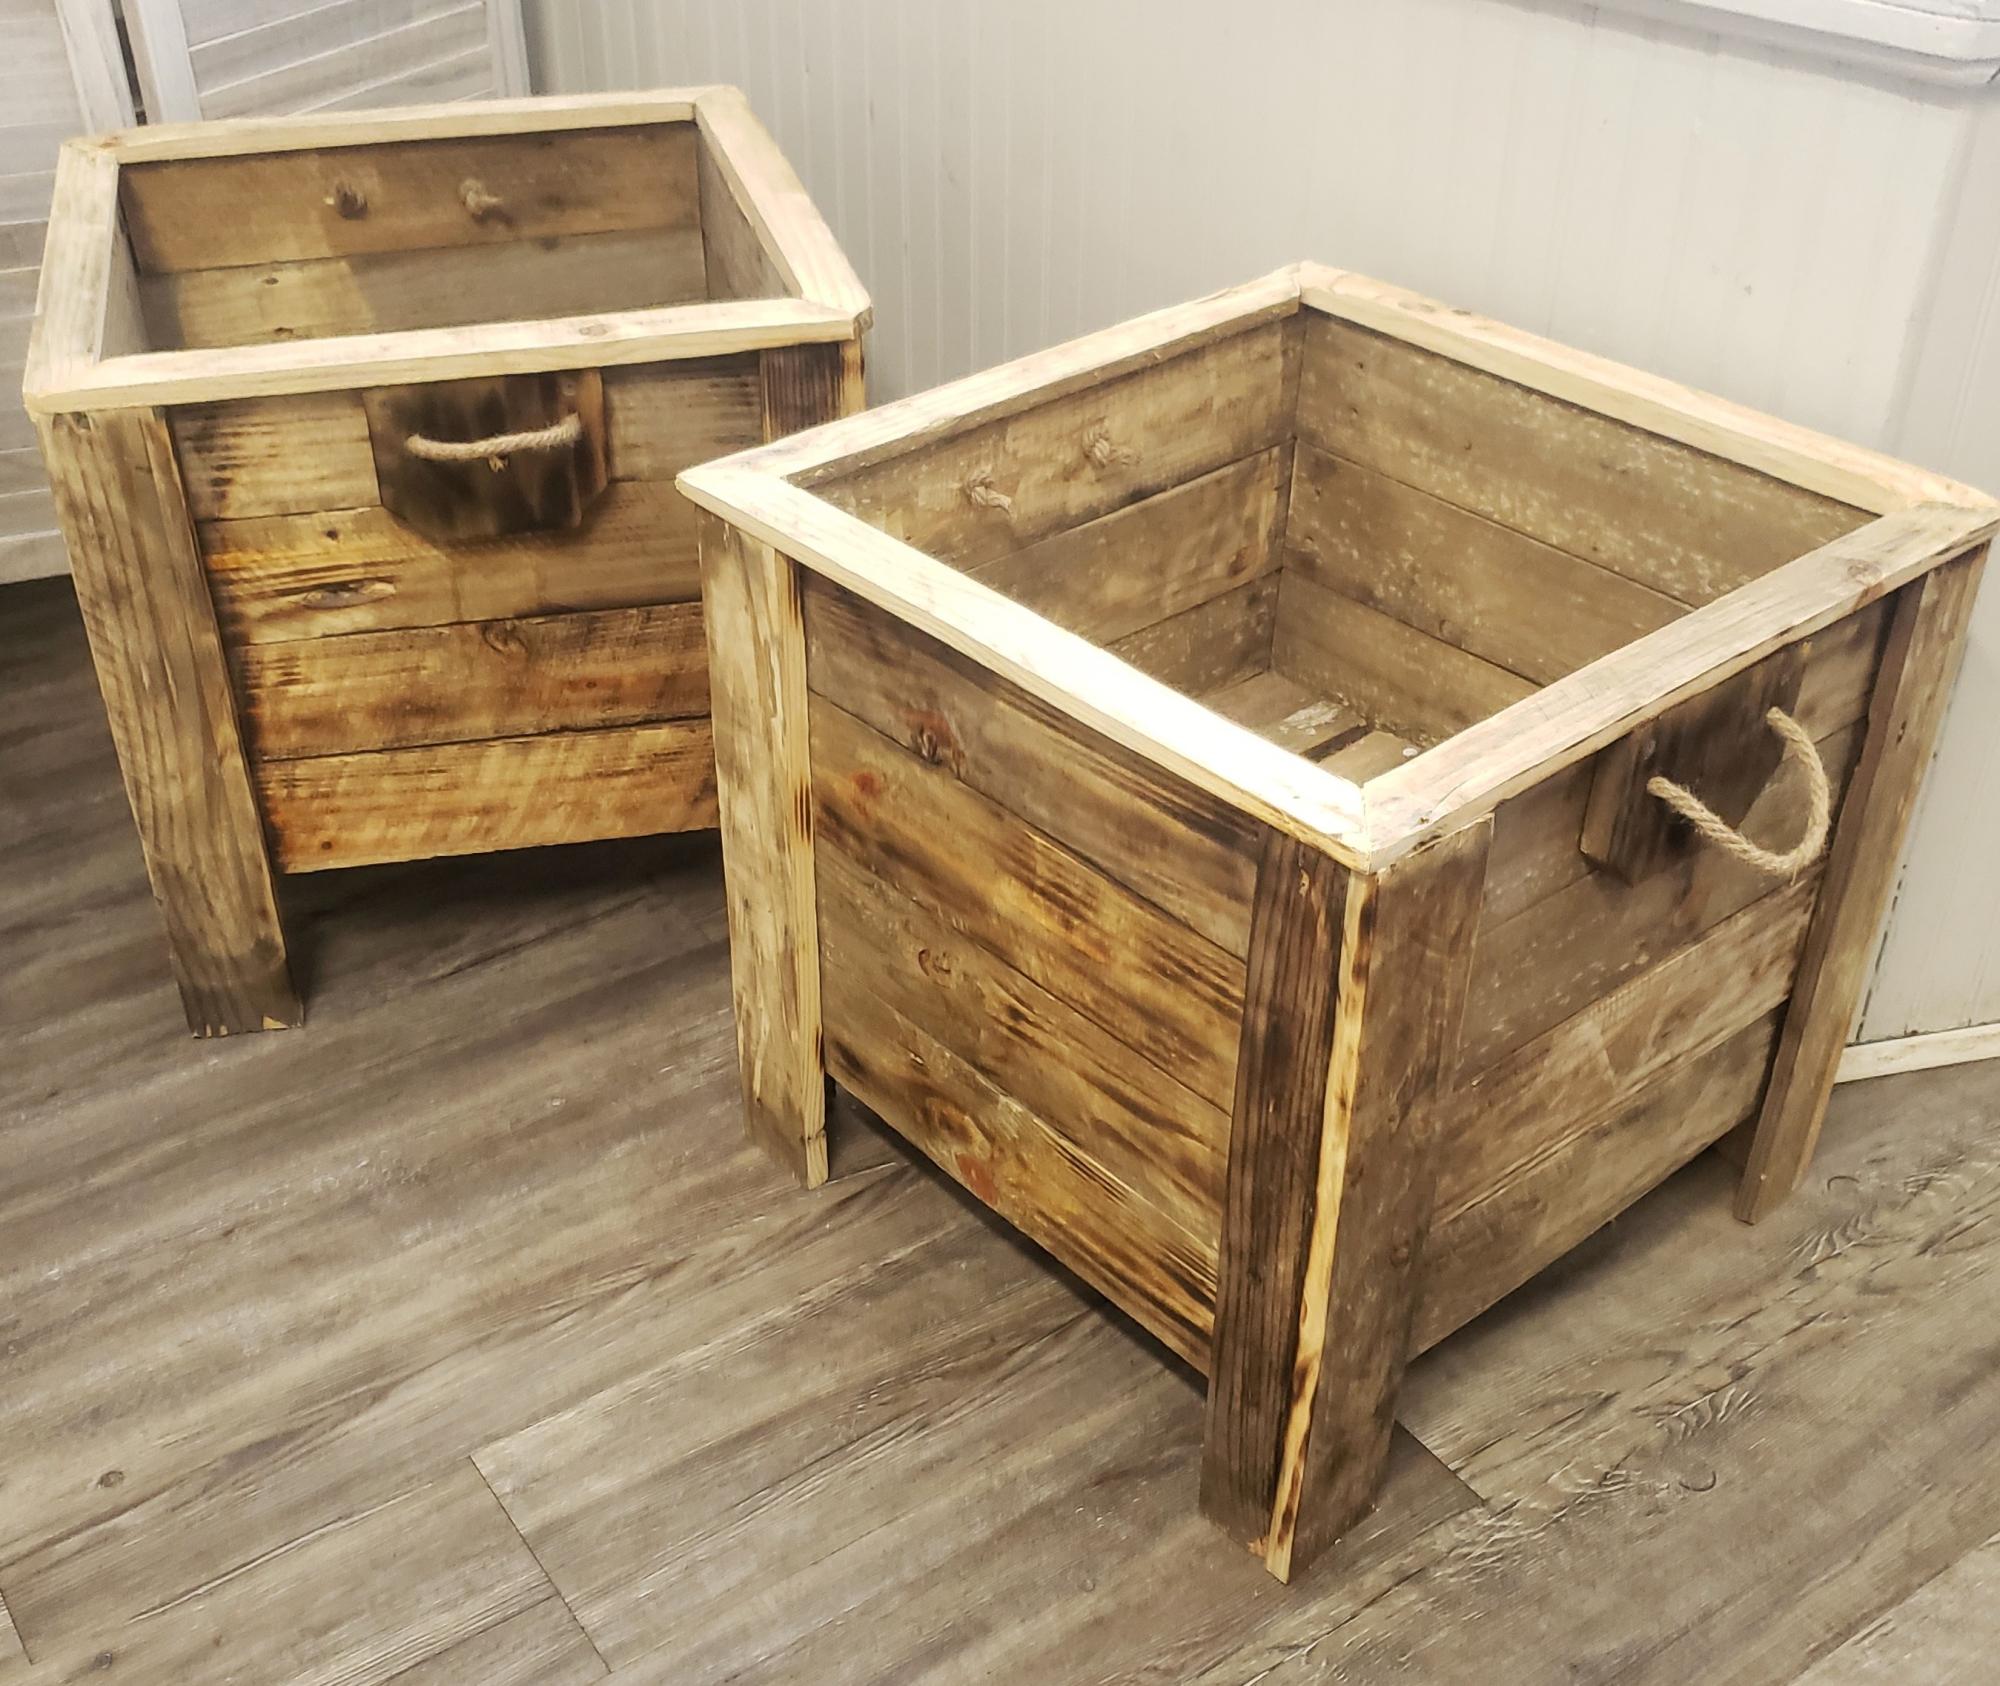
Cedar planter boxes
I used the main plan for ideas, but opted to use 3.5 inch pickets instead, which allowed for a smaller planter that wasn't as big. Also chose to miter 1x3s for the top which I think really finishes it off. Sanded everything with a belt sander to 220 grit. Used min wax golden pecan plus three coats of poly inside and out. Finished size was about 17x17. Tile spacers work great to keep the gaps even!
Built from Plan(s)
Estimated Time Investment
Afternoon Project (3-6 Hours)
Finish Used
Min wax golden pecan
Recommended Skill Level
Intermediate
Comments
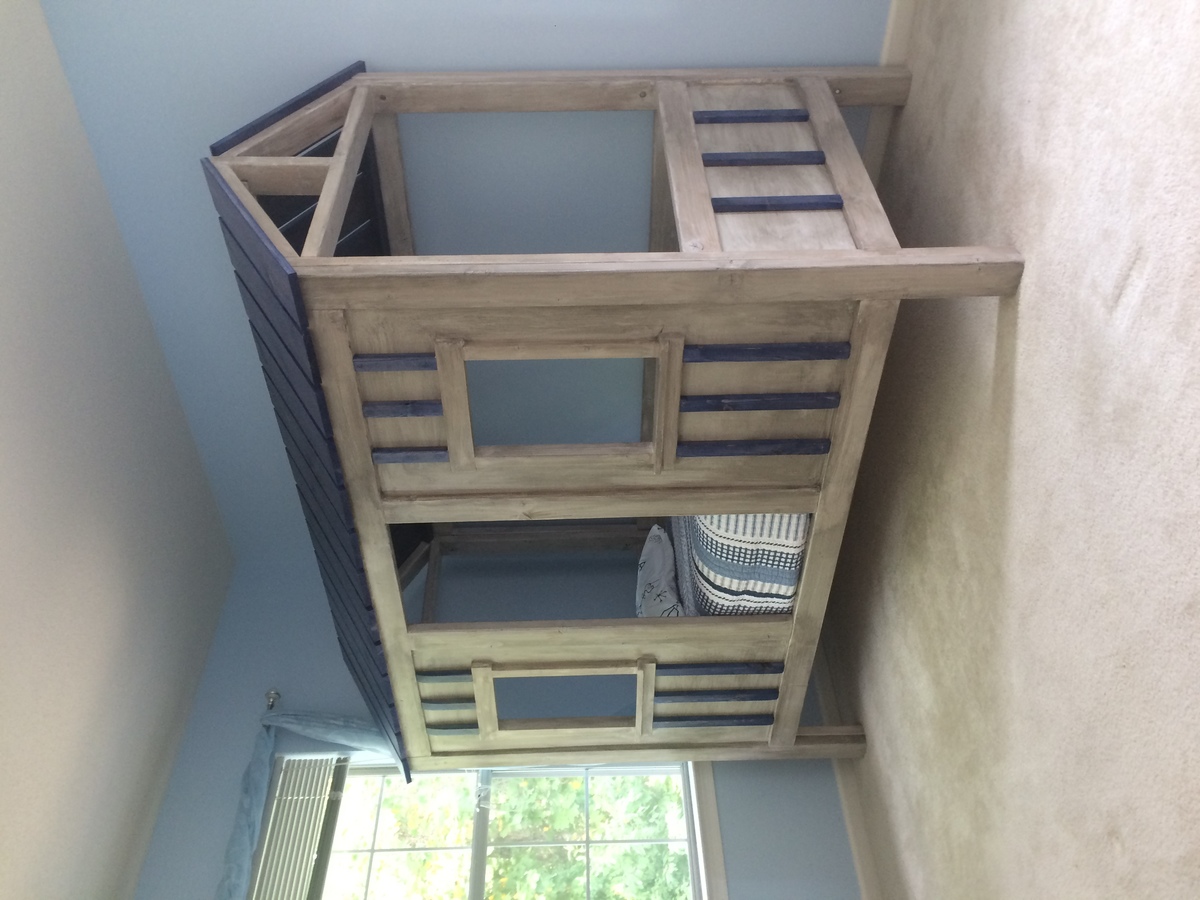
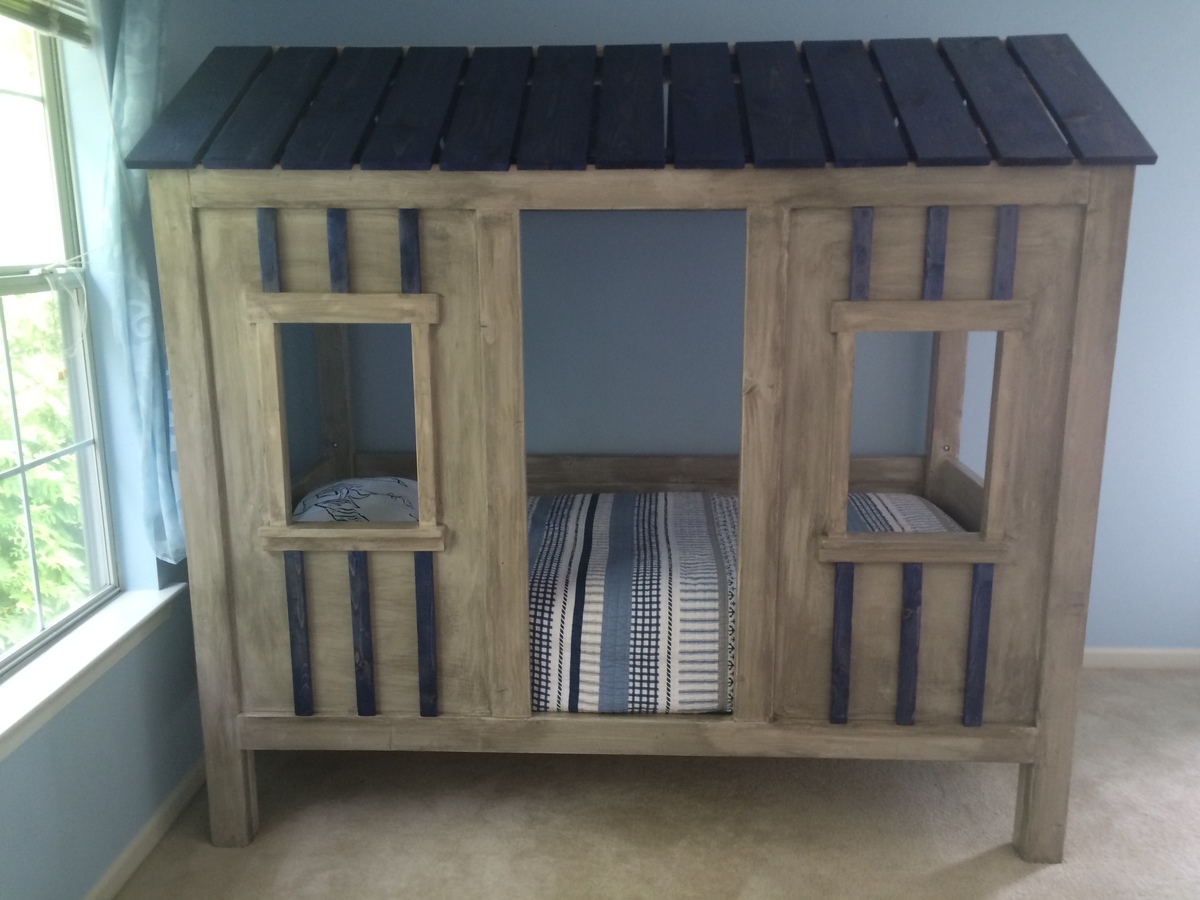
Cabin bed
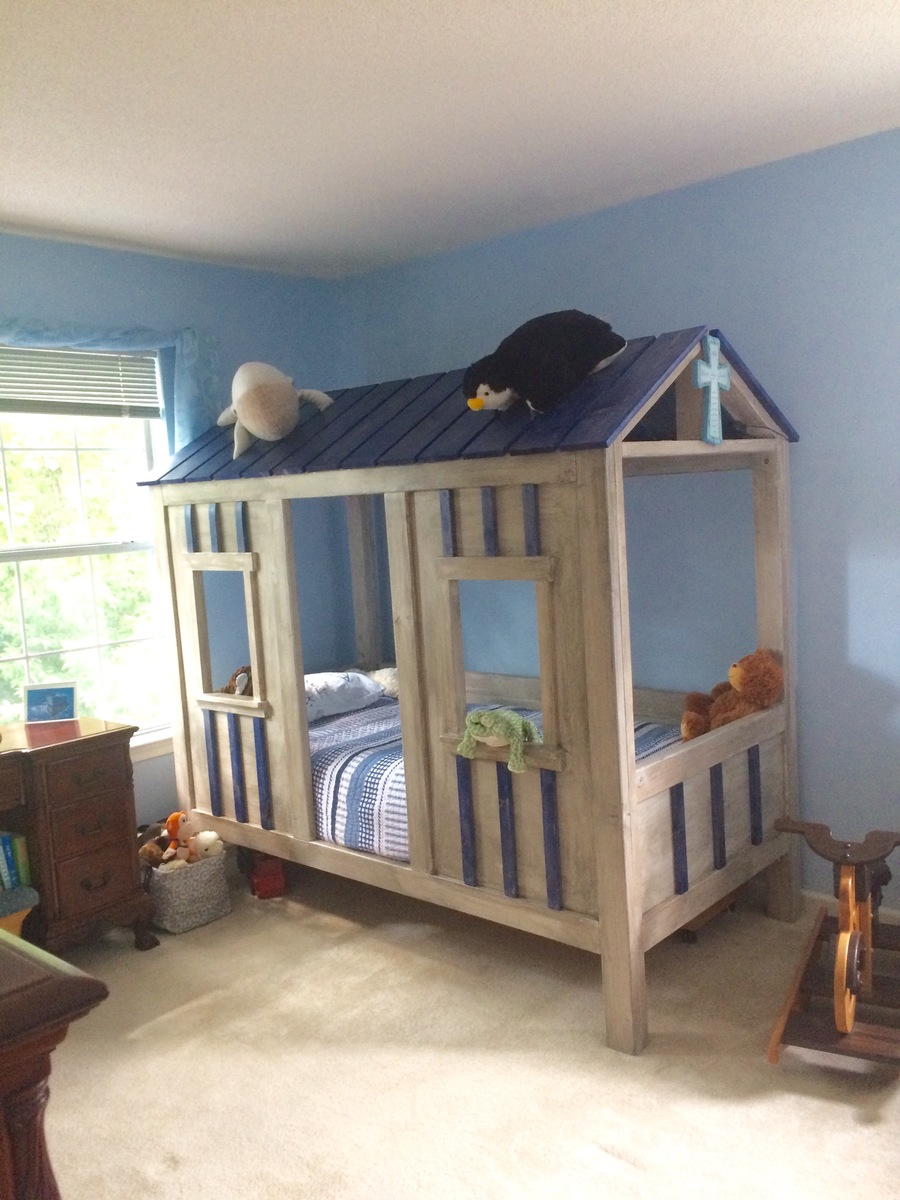
Took my husband, stepdad, and I about 6 days to complete the project. Ended up following the plans to exact and the twin mattress is a great fit, I was worried the measurements would be too small. We did the main cabin in whitewash with antique glaze and the roof and batten board a blue with antique glaze.
Built from Plan(s)
Estimated Cost
$300
Estimated Time Investment
Week Long Project (20 Hours or More)
Finish Used
Whitewash and antique glaze.
Recommended Skill Level
Intermediate
Rustic X Console Table
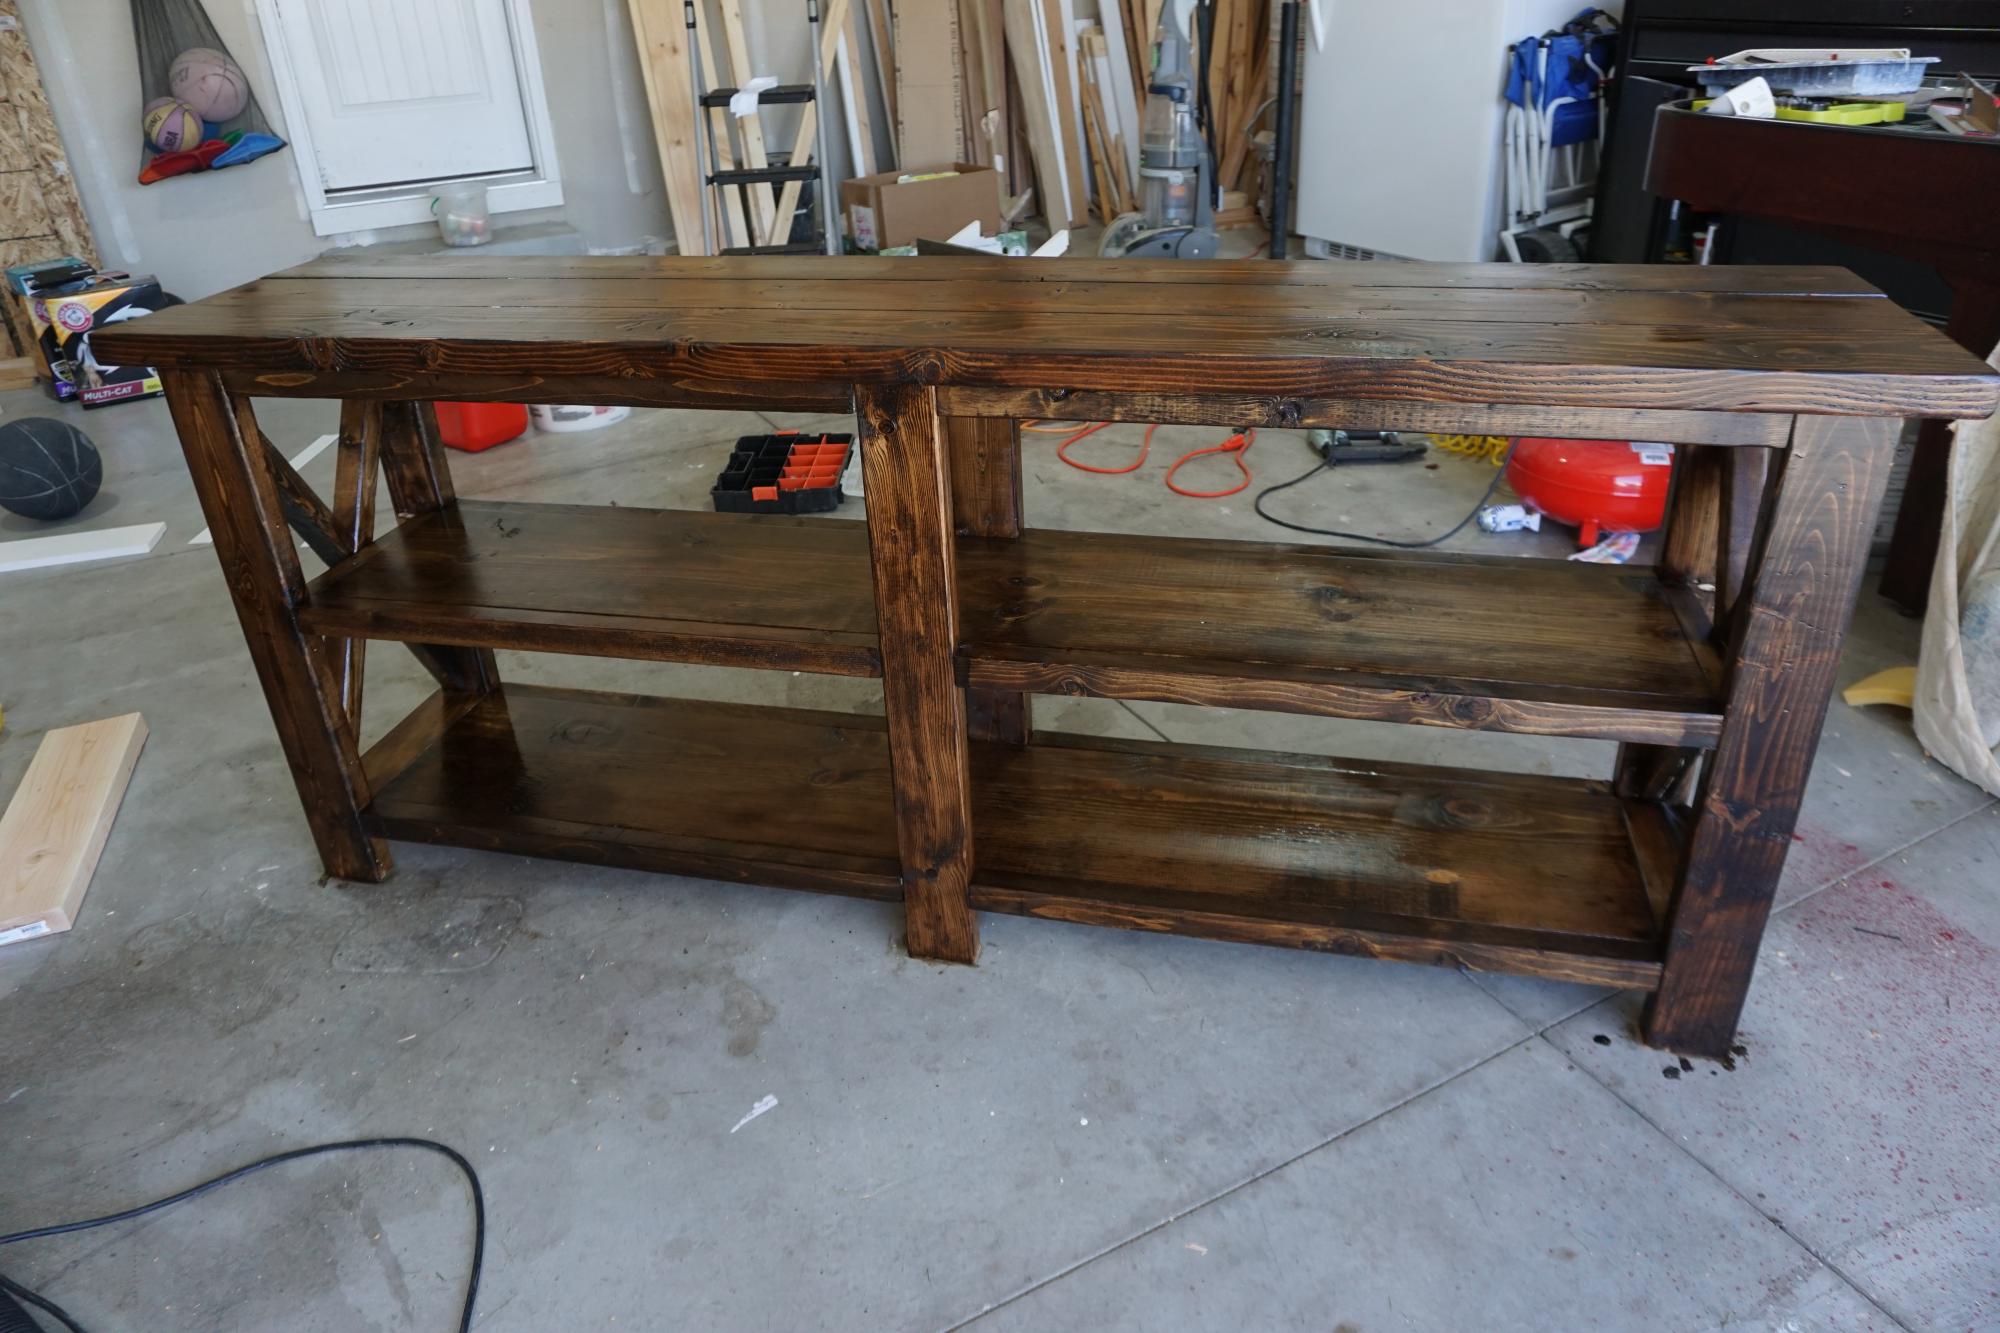
I built the Rustic X Console Table. This is my second time building this table. So much fun! I posted our process and more pictures on my blog.
Built from Plan(s)
Estimated Time Investment
Weekend Project (10-20 Hours)
Finish Used
Varathane Dark Walnut
Satin Polyurethane
Satin Polyurethane
Recommended Skill Level
Beginner
Pallet Wood Planters
Did them for a friend that owns a bakery.
I don't have access to new lumber unfortunately.
The bulk of what I make is pallet. That's why there are four instead of 3 slats.
Same plan though. Pretty easy to follow.
I did add some handles to make it easier to move
since they will be brought in and out daily.
Yun
Built from Plan(s)
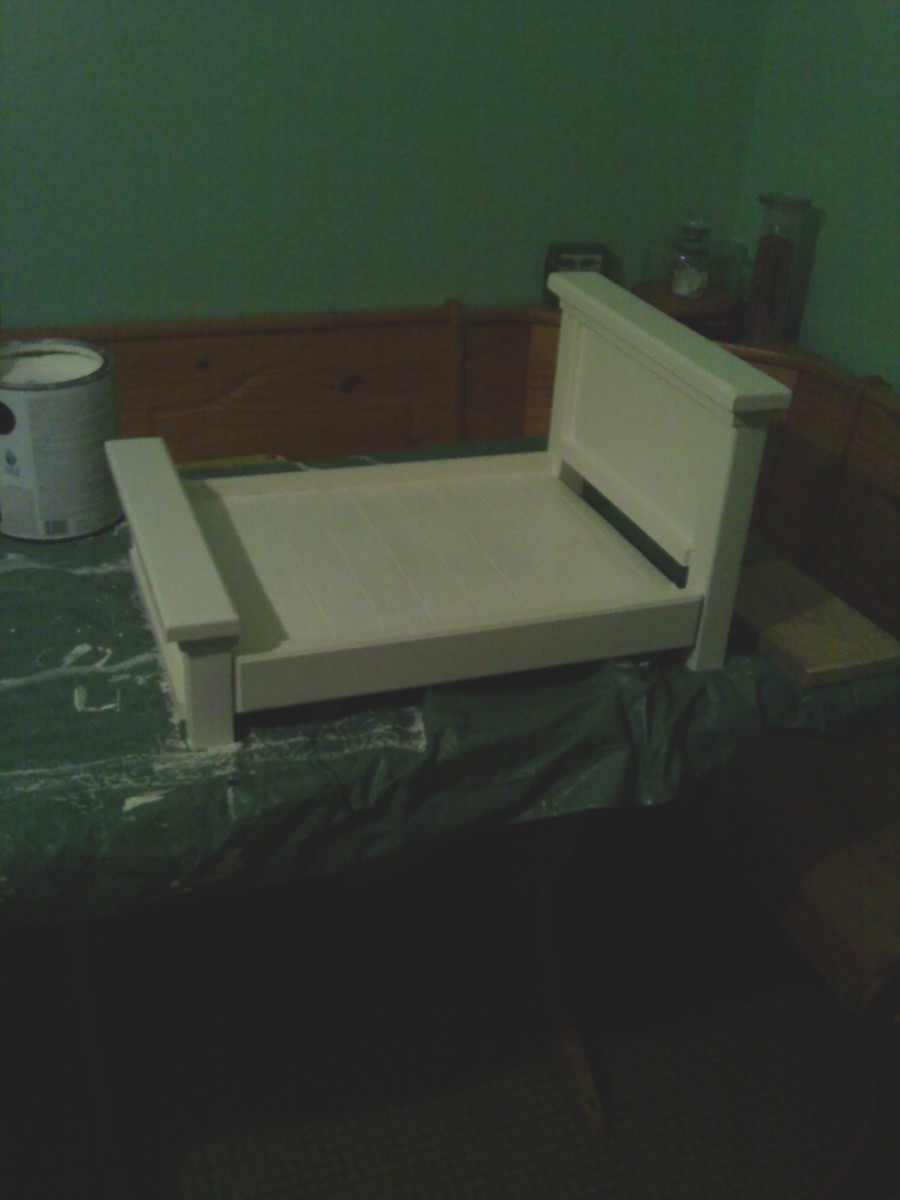
farmhouse doll beds
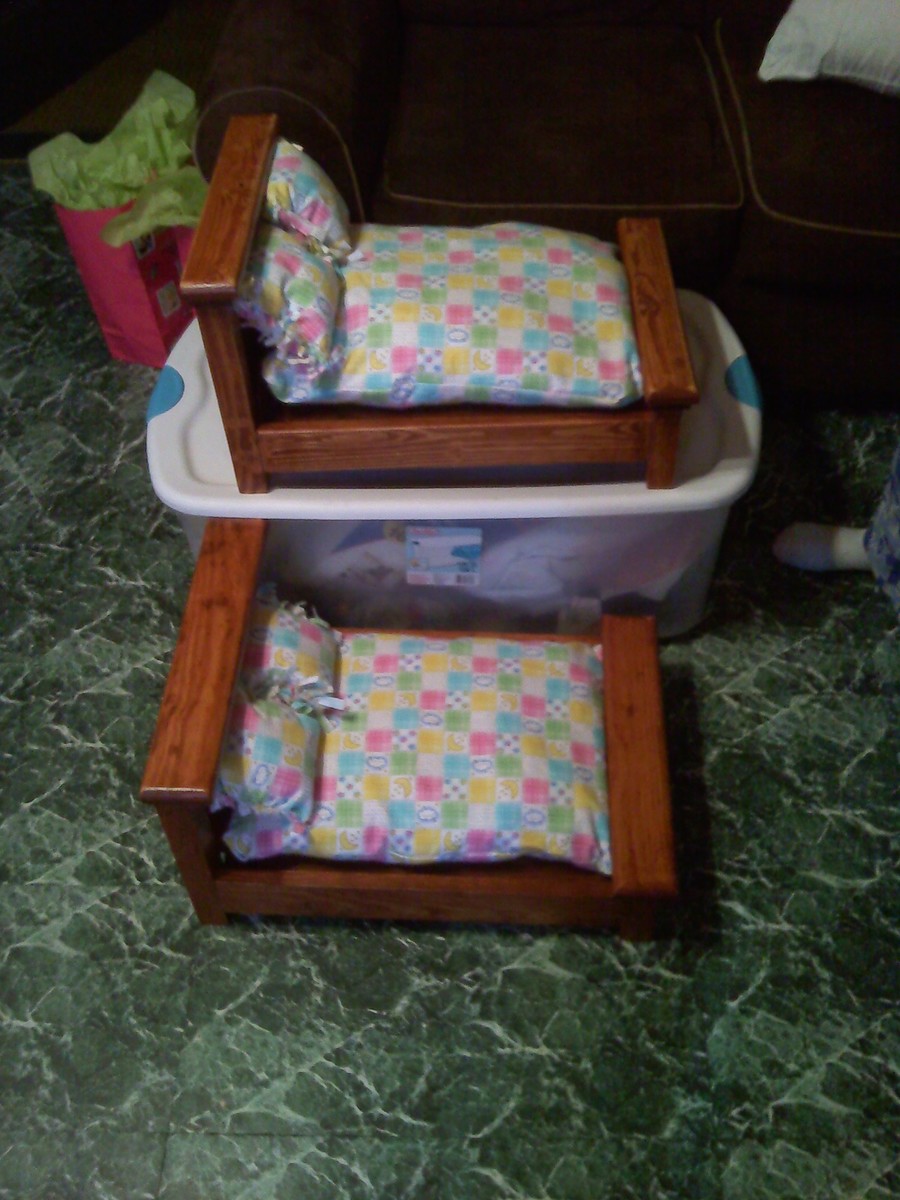
The 2 doll beds are birthday gifts for my granddaughters. They are built out of white pine. I stained them by rubbing on minwax gunstock and finished with 3 coats of polyurethane. The white bed is a donation to relay for life raffle and has 2 coats of valspar with 1 coat of polyurethane finish. The single bed is a Christmas gift and is finished just like the first 2. My sister sewed all of the bedding.

Estimated Time Investment
Day Project (6-9 Hours)
Recommended Skill Level
Beginner
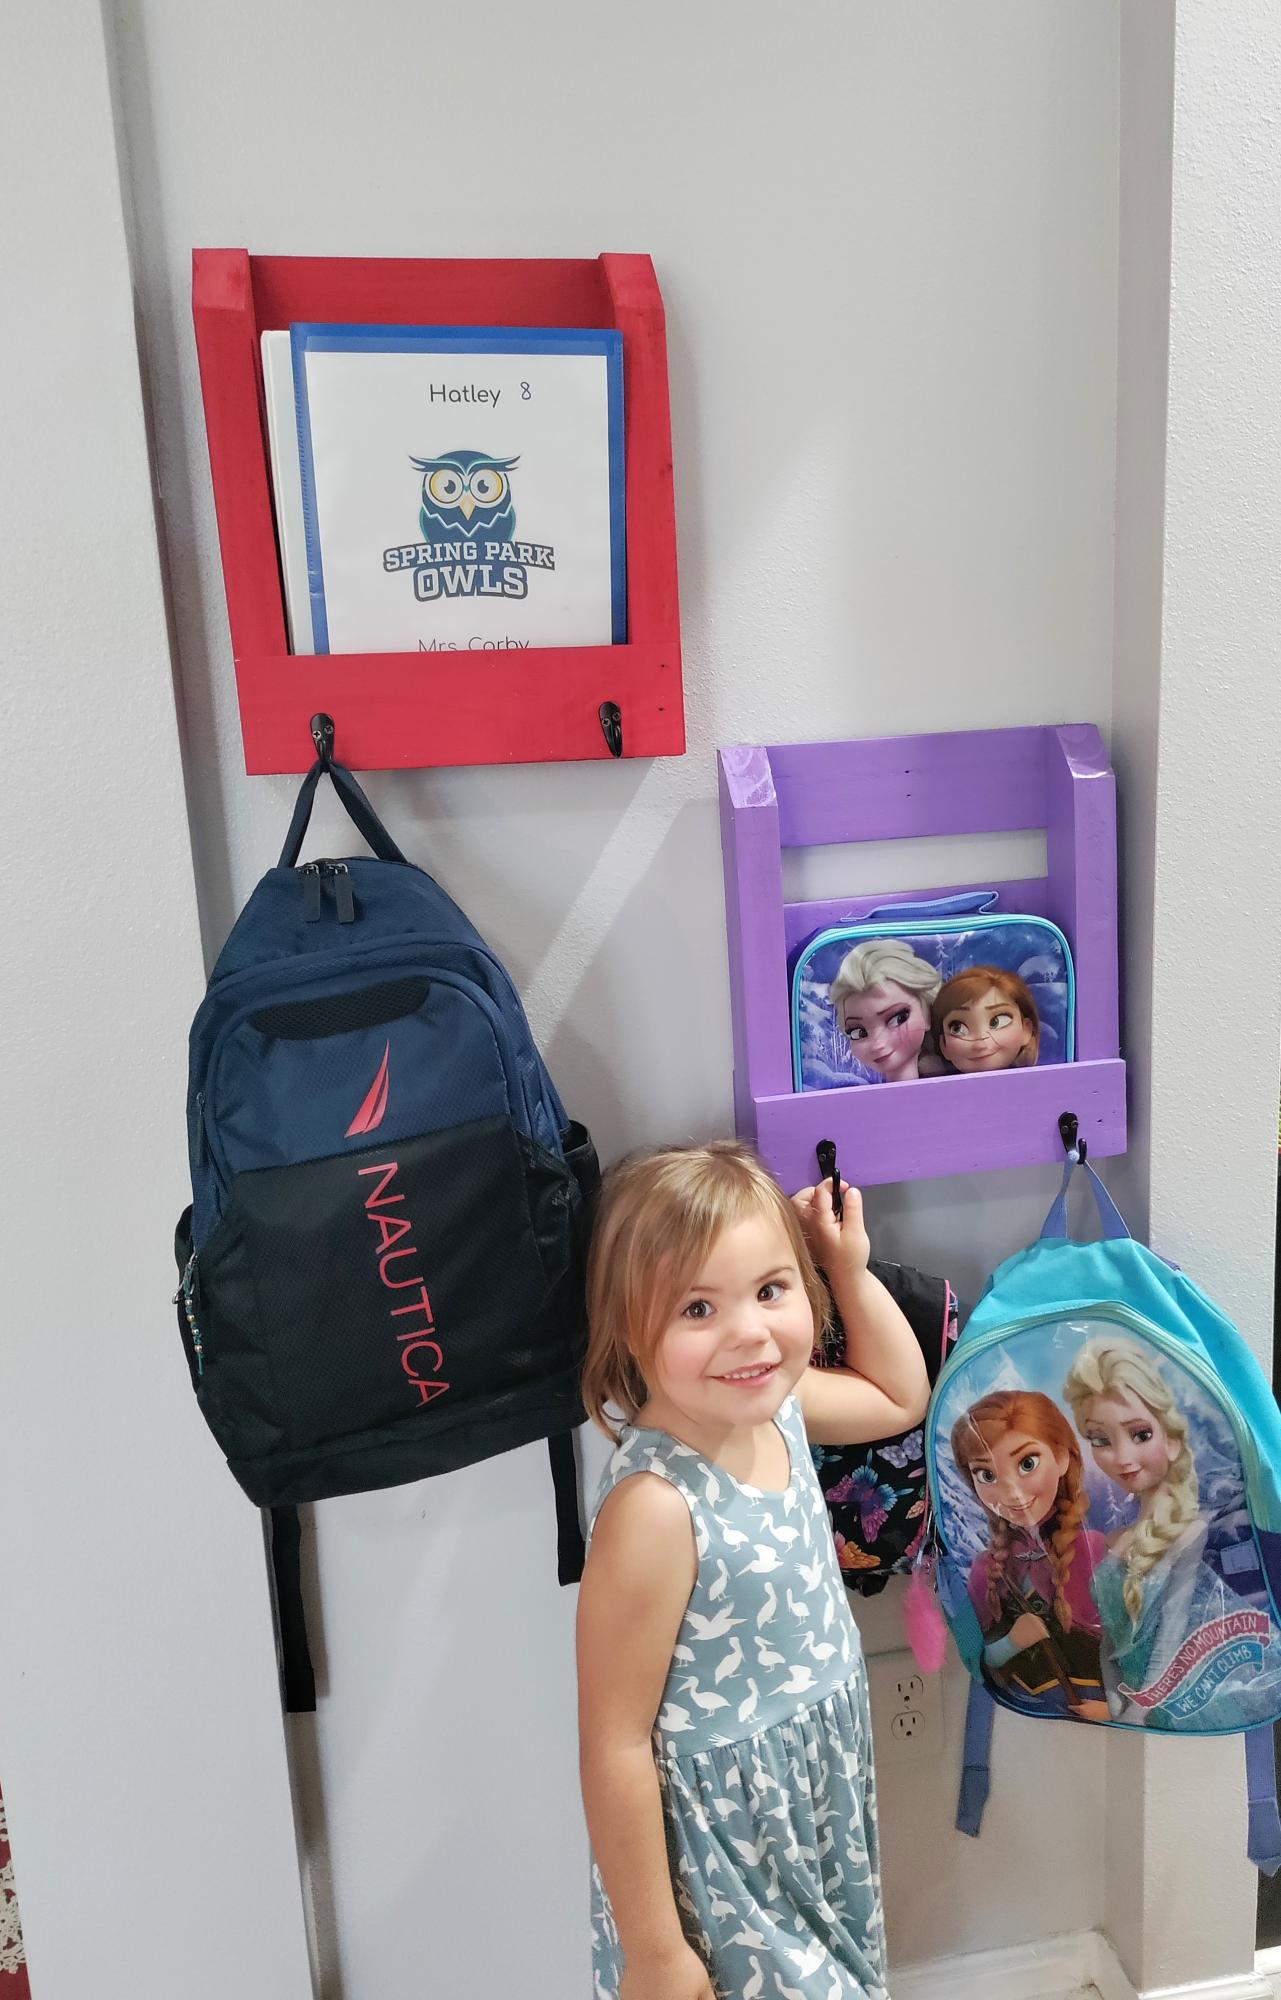
shelf w/hooks

My beautiful wife showed me this picture and asked me if I could make it. I didn't see any reason I couldn't so I went to HD and grabbed the lumber and hardware I needed and Presto we have a shelf in our bathroom. I made this shelf 48" with 4 hooks any bigger would of looked silly in my bathroom. However this shelf can be built any length you wish. I used pine for this shelf and painted it white and the hooks I also painted oil rubbed bronze to match our fixtures. I am very pleased with the result. You can contact me if you have any questions or would like me to build one for you.


Estimated Time Investment
Afternoon Project (3-6 Hours)
Recommended Skill Level
Intermediate
Leaning Bathroom Shelf

I built a shorter wider version of the bathroom shelves for storage. Stained with Minwax Early American.


Built from Plan(s)
Estimated Cost
$20
Estimated Time Investment
Afternoon Project (3-6 Hours)
Finish Used
Minwax Early American
Recommended Skill Level
Starter Project
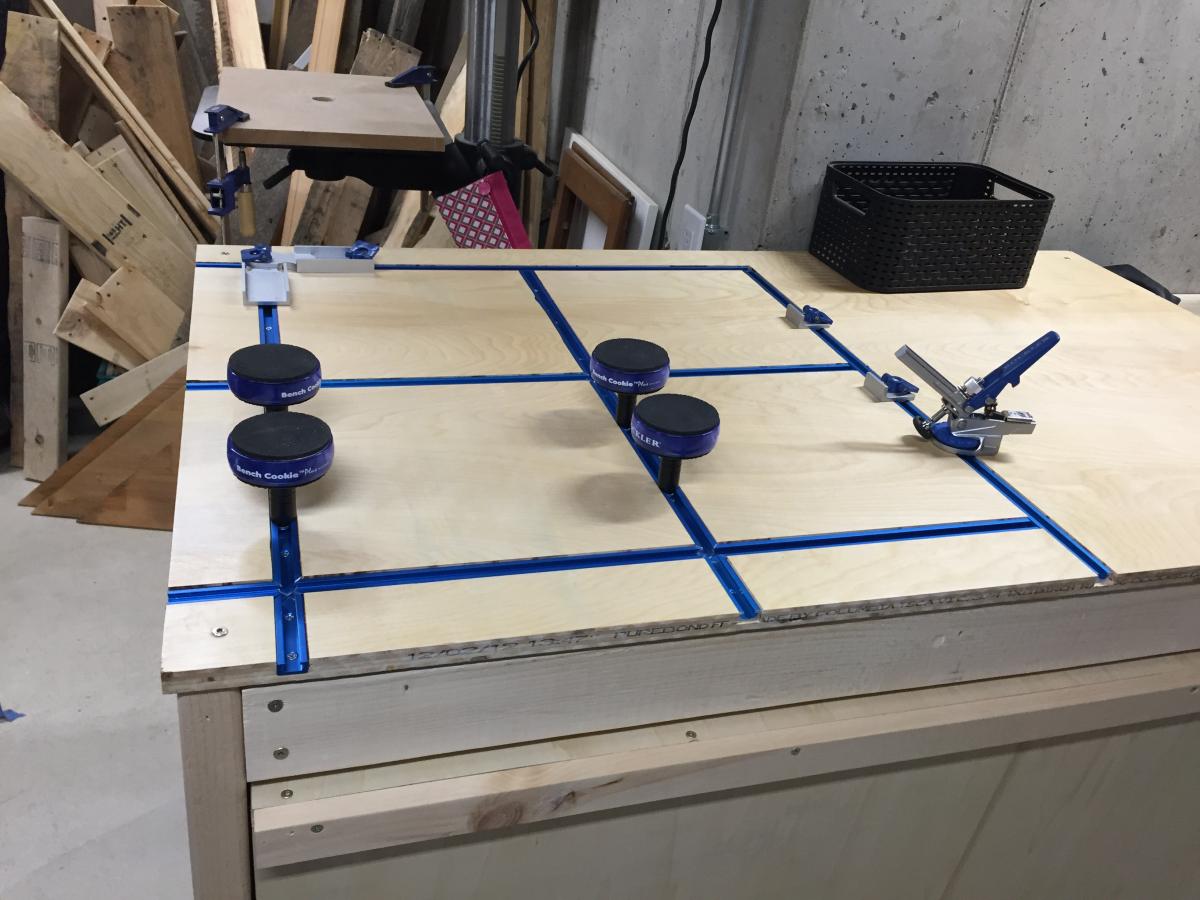
My piece of heaven!
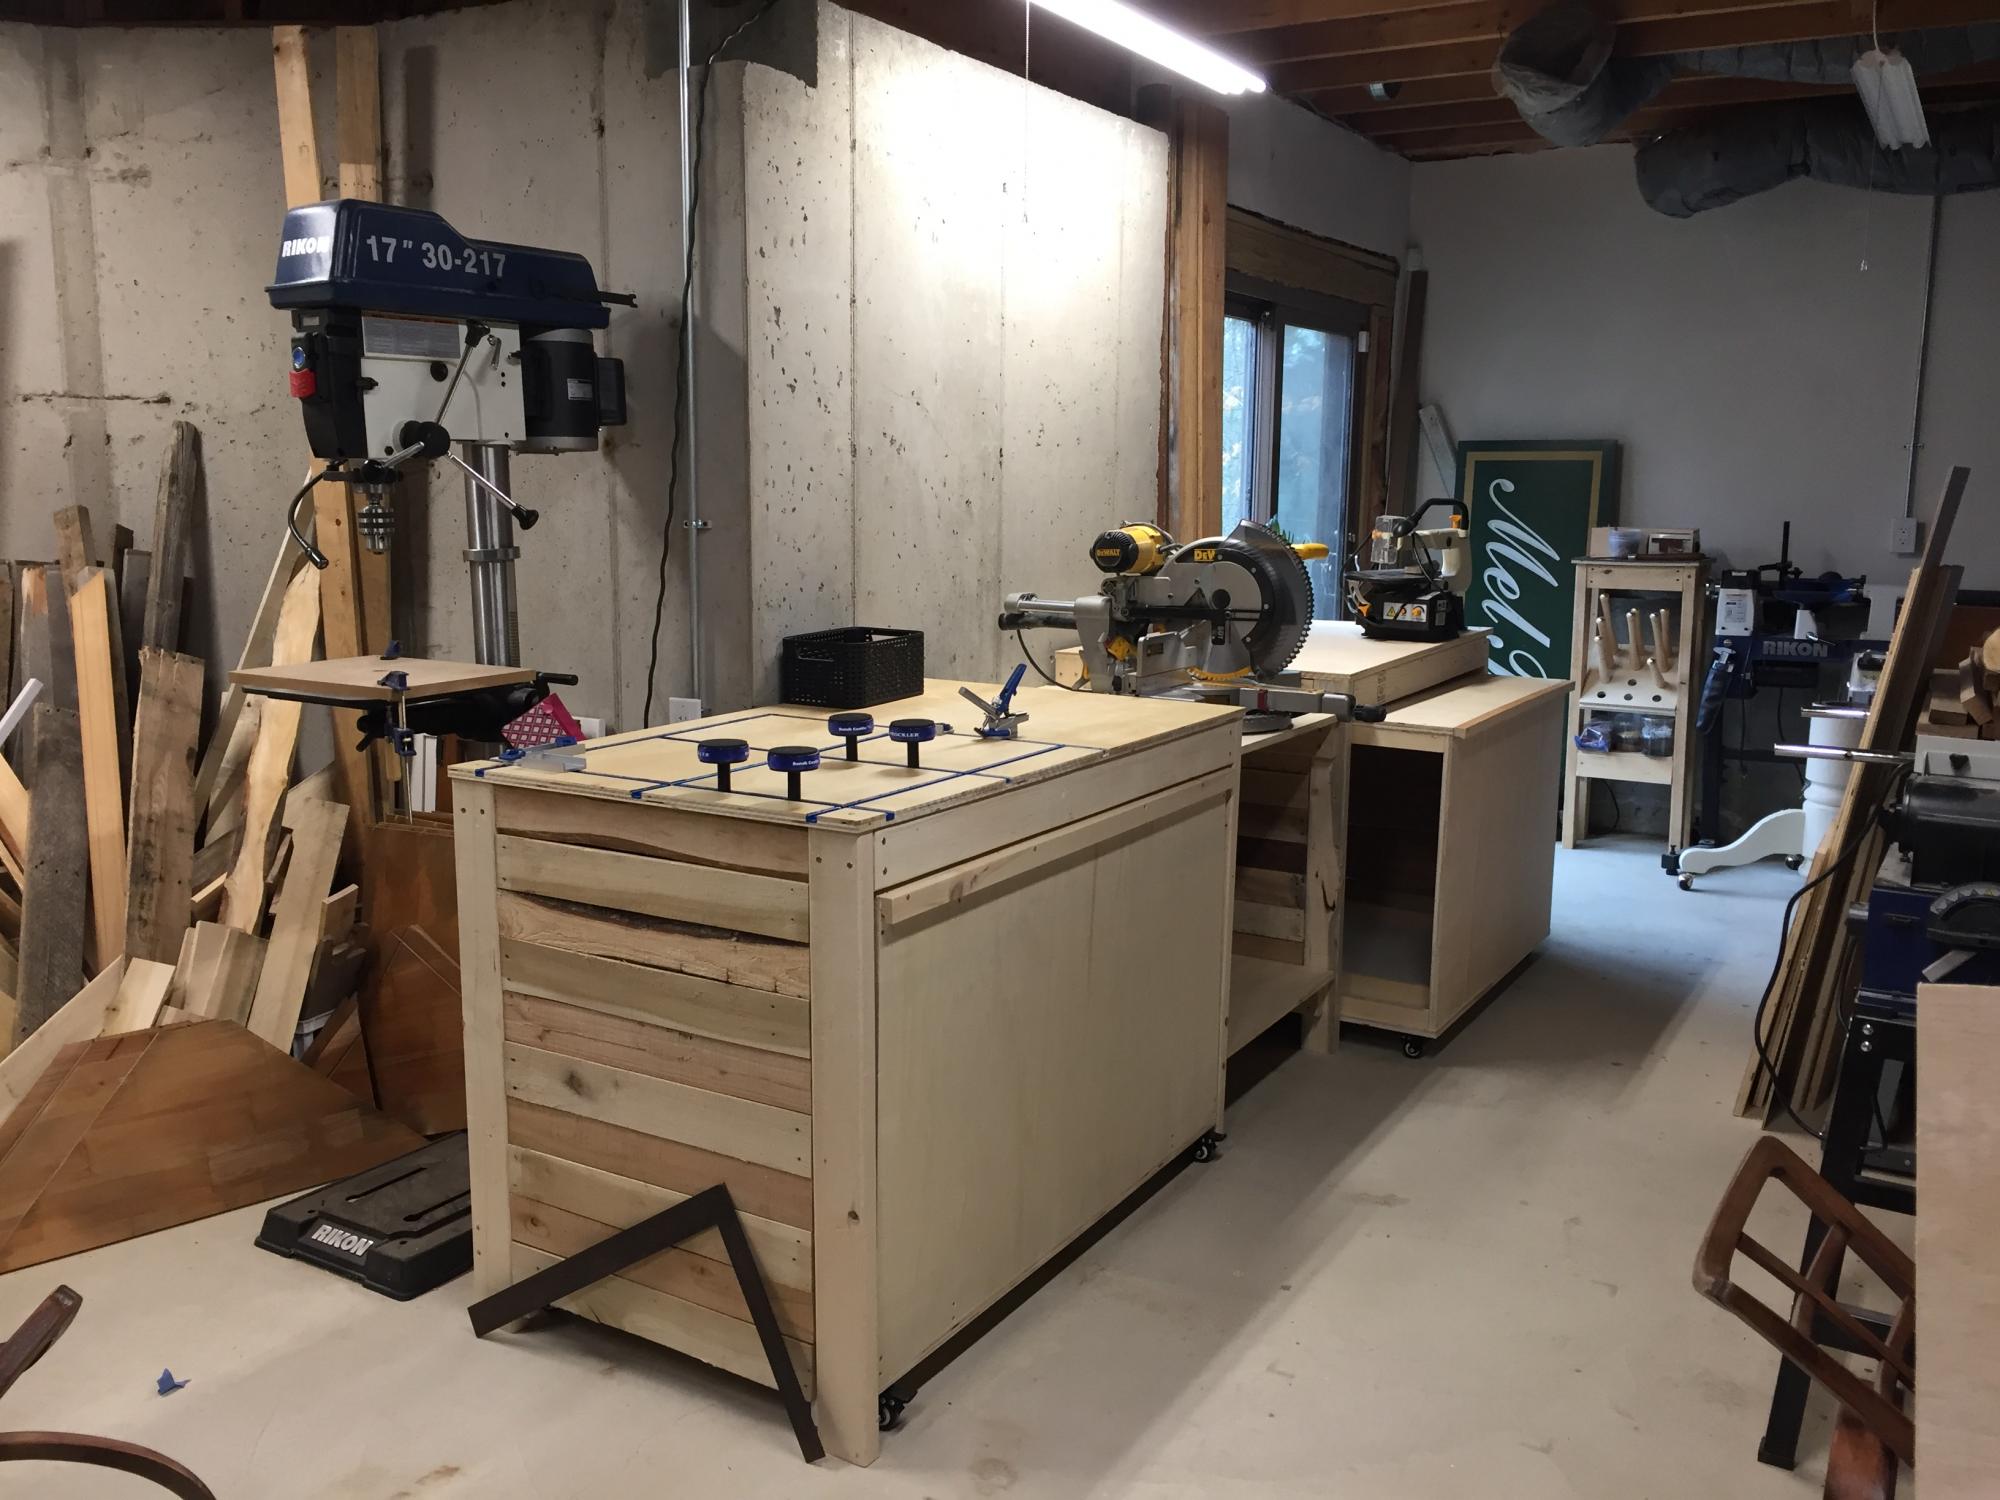
I saw Anna’s and said I can do that, right? I made it mine with a couple of edits. The sides I used old pallet wood. I used Rockler tracks put a track system for many different uses. I had cut all the shelves but haven’t installed them as of yet. Using that space in the mobile carts to hold wood for now. Probably shouldn’t have cut all shelving yet but who knew!! I love this space now. My husband was like wow!😃
Thank you Anna. I love how your mind works. Your such a great teacher, I have learned so much from you.
Thank you!
Melissa
Estimated Cost
$240.
Estimated Time Investment
Week Long Project (20 Hours or More)
Finish Used
Urethane
Recommended Skill Level
Starter Project
Outdoor Wood Sectional
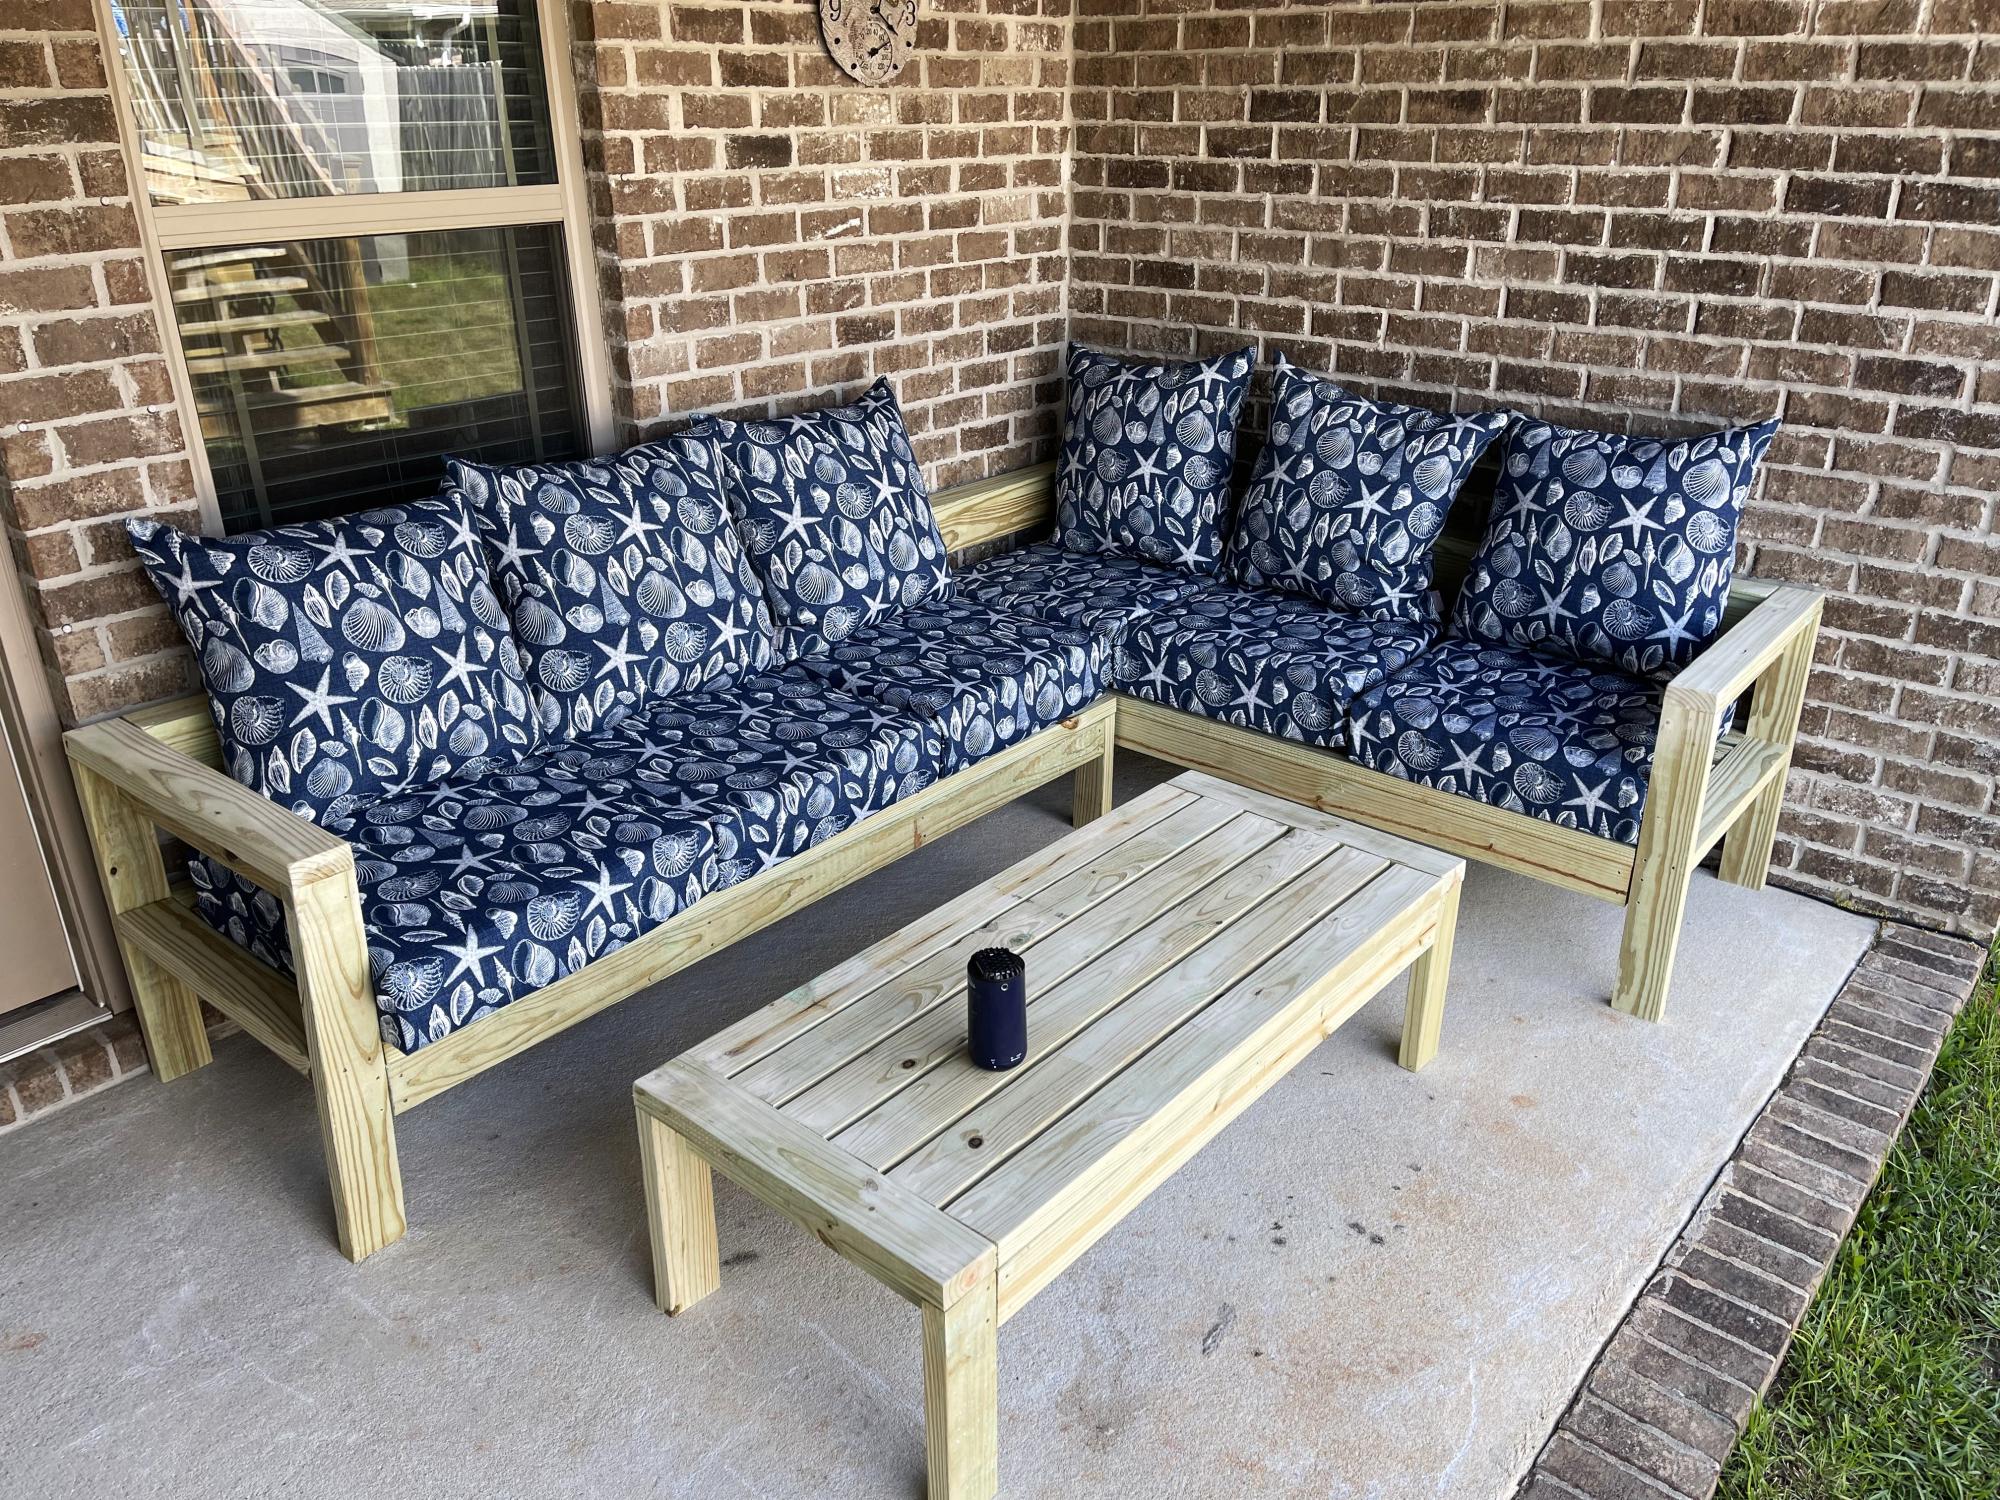
Love Ana’s 2x4 patio loveseat sofa sectional, it was easy to follow. I have made 3 sets for my close neighbors.
Todd Ellis
Built from Plan(s)