Community Brag Posts

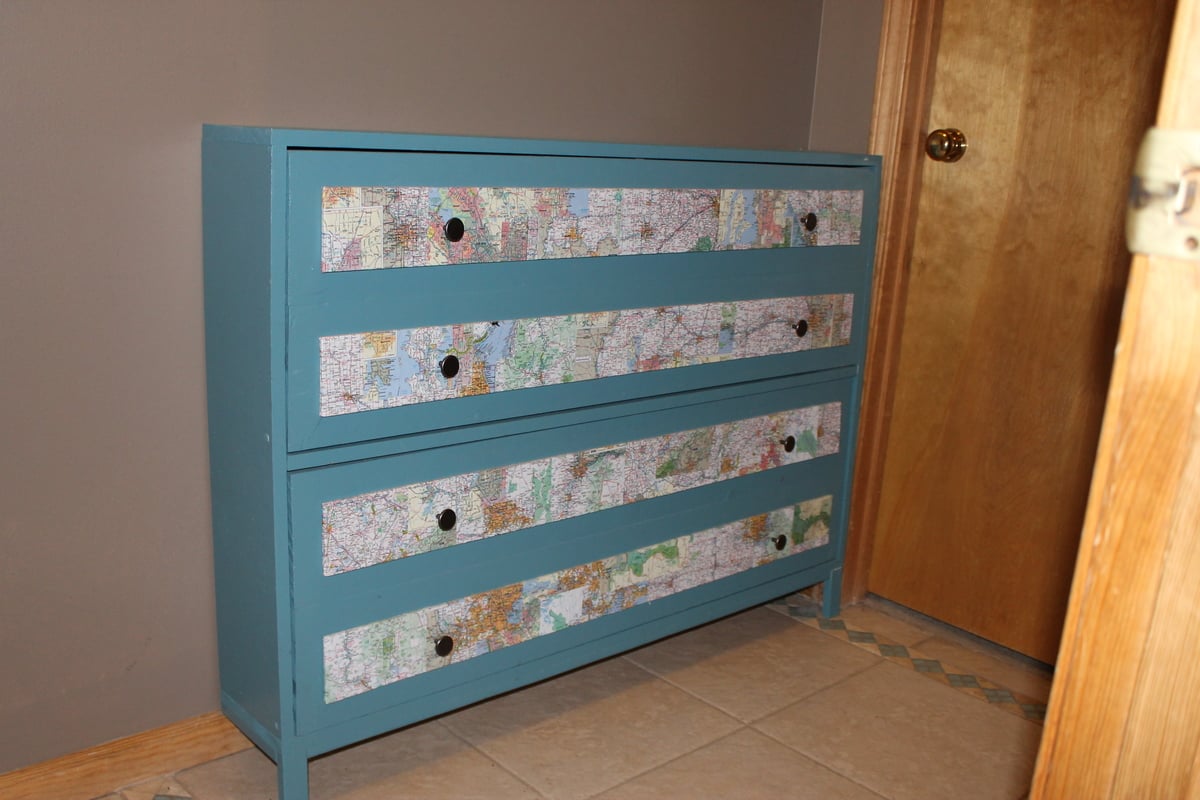
Shoe Dresser
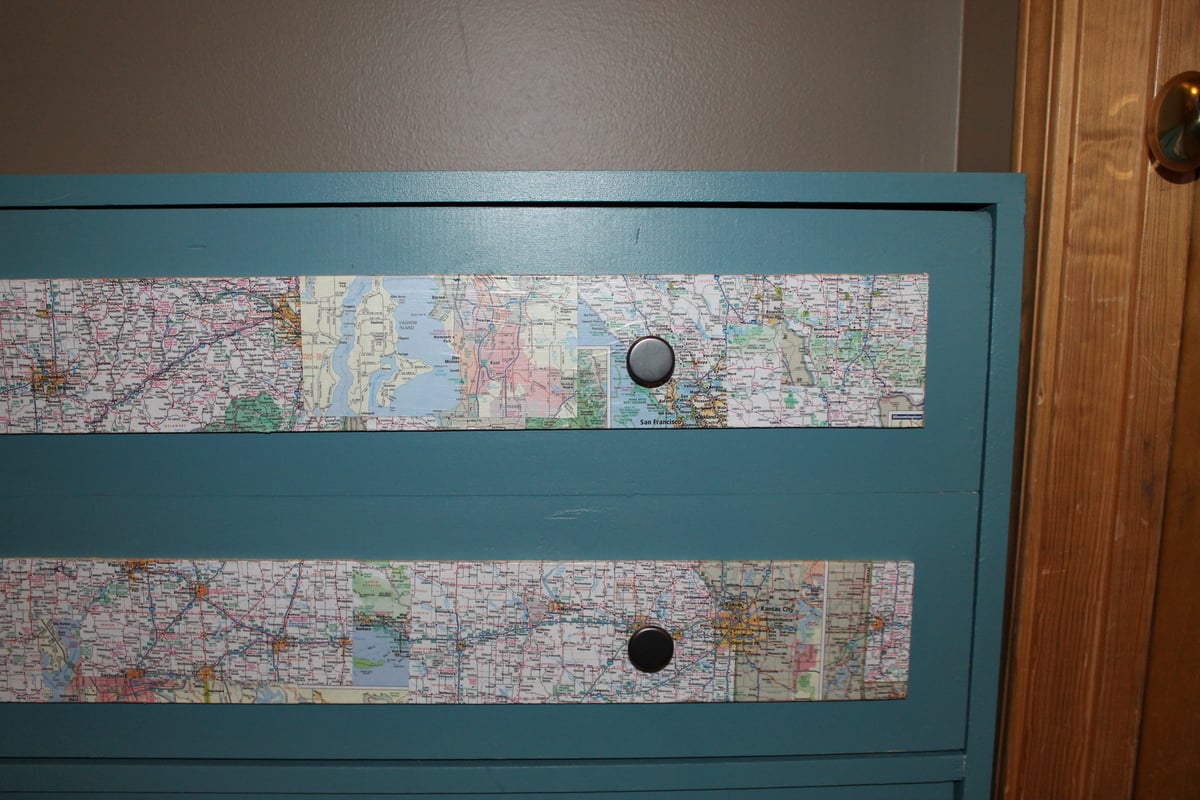
I really loved this plan when I saw it and am so happy that I built it! It has helped solve our shoe problem and fits really nicely in a small space.
I decoupaged some maps from an atlas onto 1/4" mdf scrap pcs that I had and screwed them onto the front through the backside of each section.
You can definitely see some imperfections with the close up pictures, but I still like the way it turned out. It was one of my first builds.
Built from Plan(s)
Estimated Time Investment
Weekend Project (10-20 Hours)
Finish Used
Oops Paint and decoupage atlas pages
Recommended Skill Level
Beginner
Comments

Tue, 02/26/2013 - 08:10
Pretty! The maps really give
Pretty! The maps really give it a finished look.

Wed, 07/24/2013 - 22:29
Wonderful, wonderful, wonderful!
Foot traffic, and maps? Nice pun, and great job too.
Farmhouse Toddler Bed
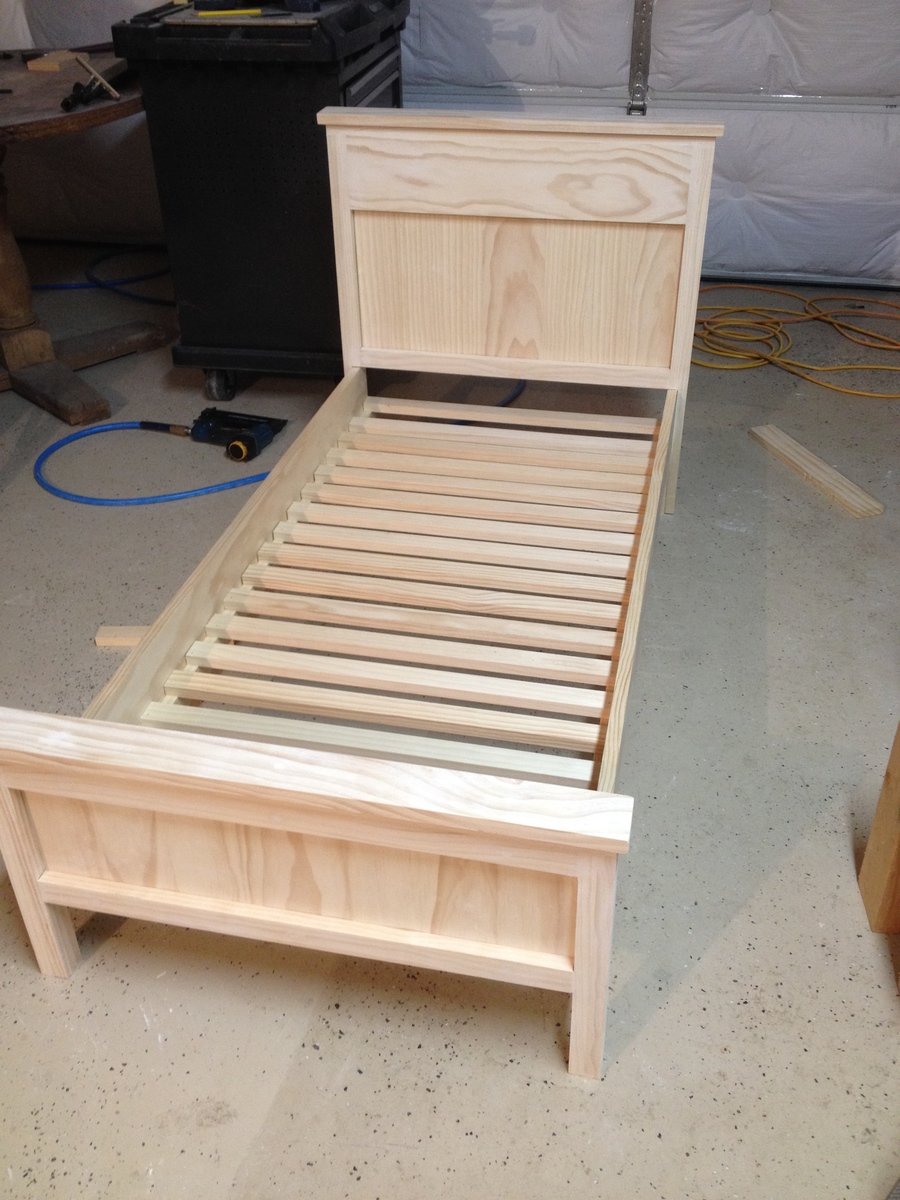
We saw the Farmhouse Toddler Bed on pintrest and fell in love with it! Our sons room is rustic so it was perfect. We printed out the plans and my husband said they were perfect and very easy to follow.
Built from Plan(s)
Estimated Cost
$140. We chose pine due to two children needing this bed. We have a 2yr old that will use it and then a newborn after him!
Estimated Time Investment
Weekend Project (10-20 Hours)
Finish Used
I stained it.
Recommended Skill Level
Beginner
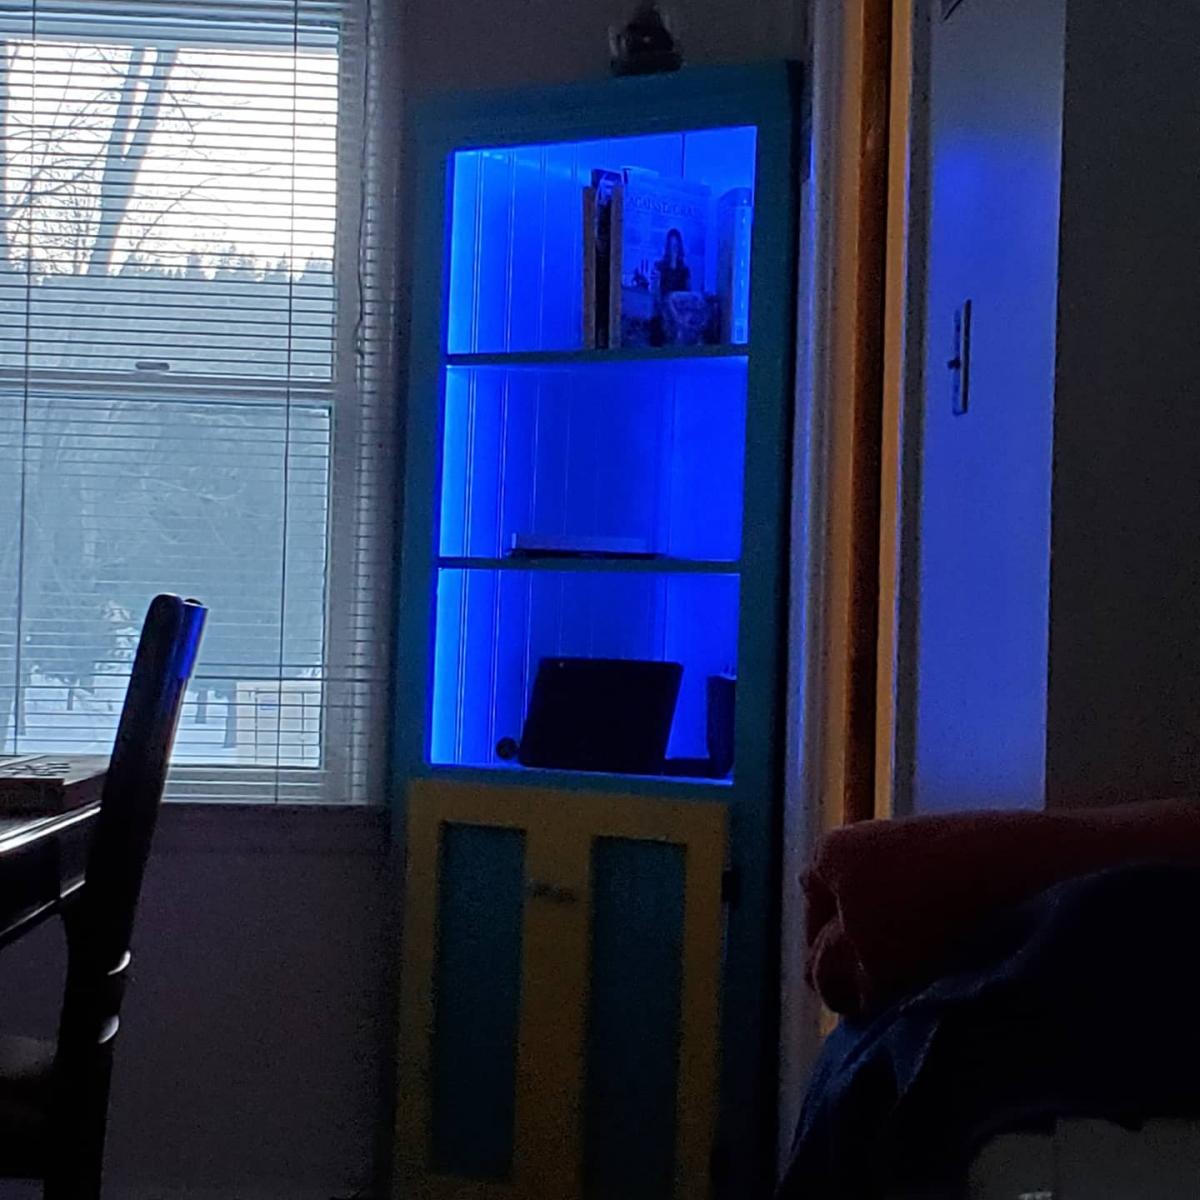
Homeschool contained
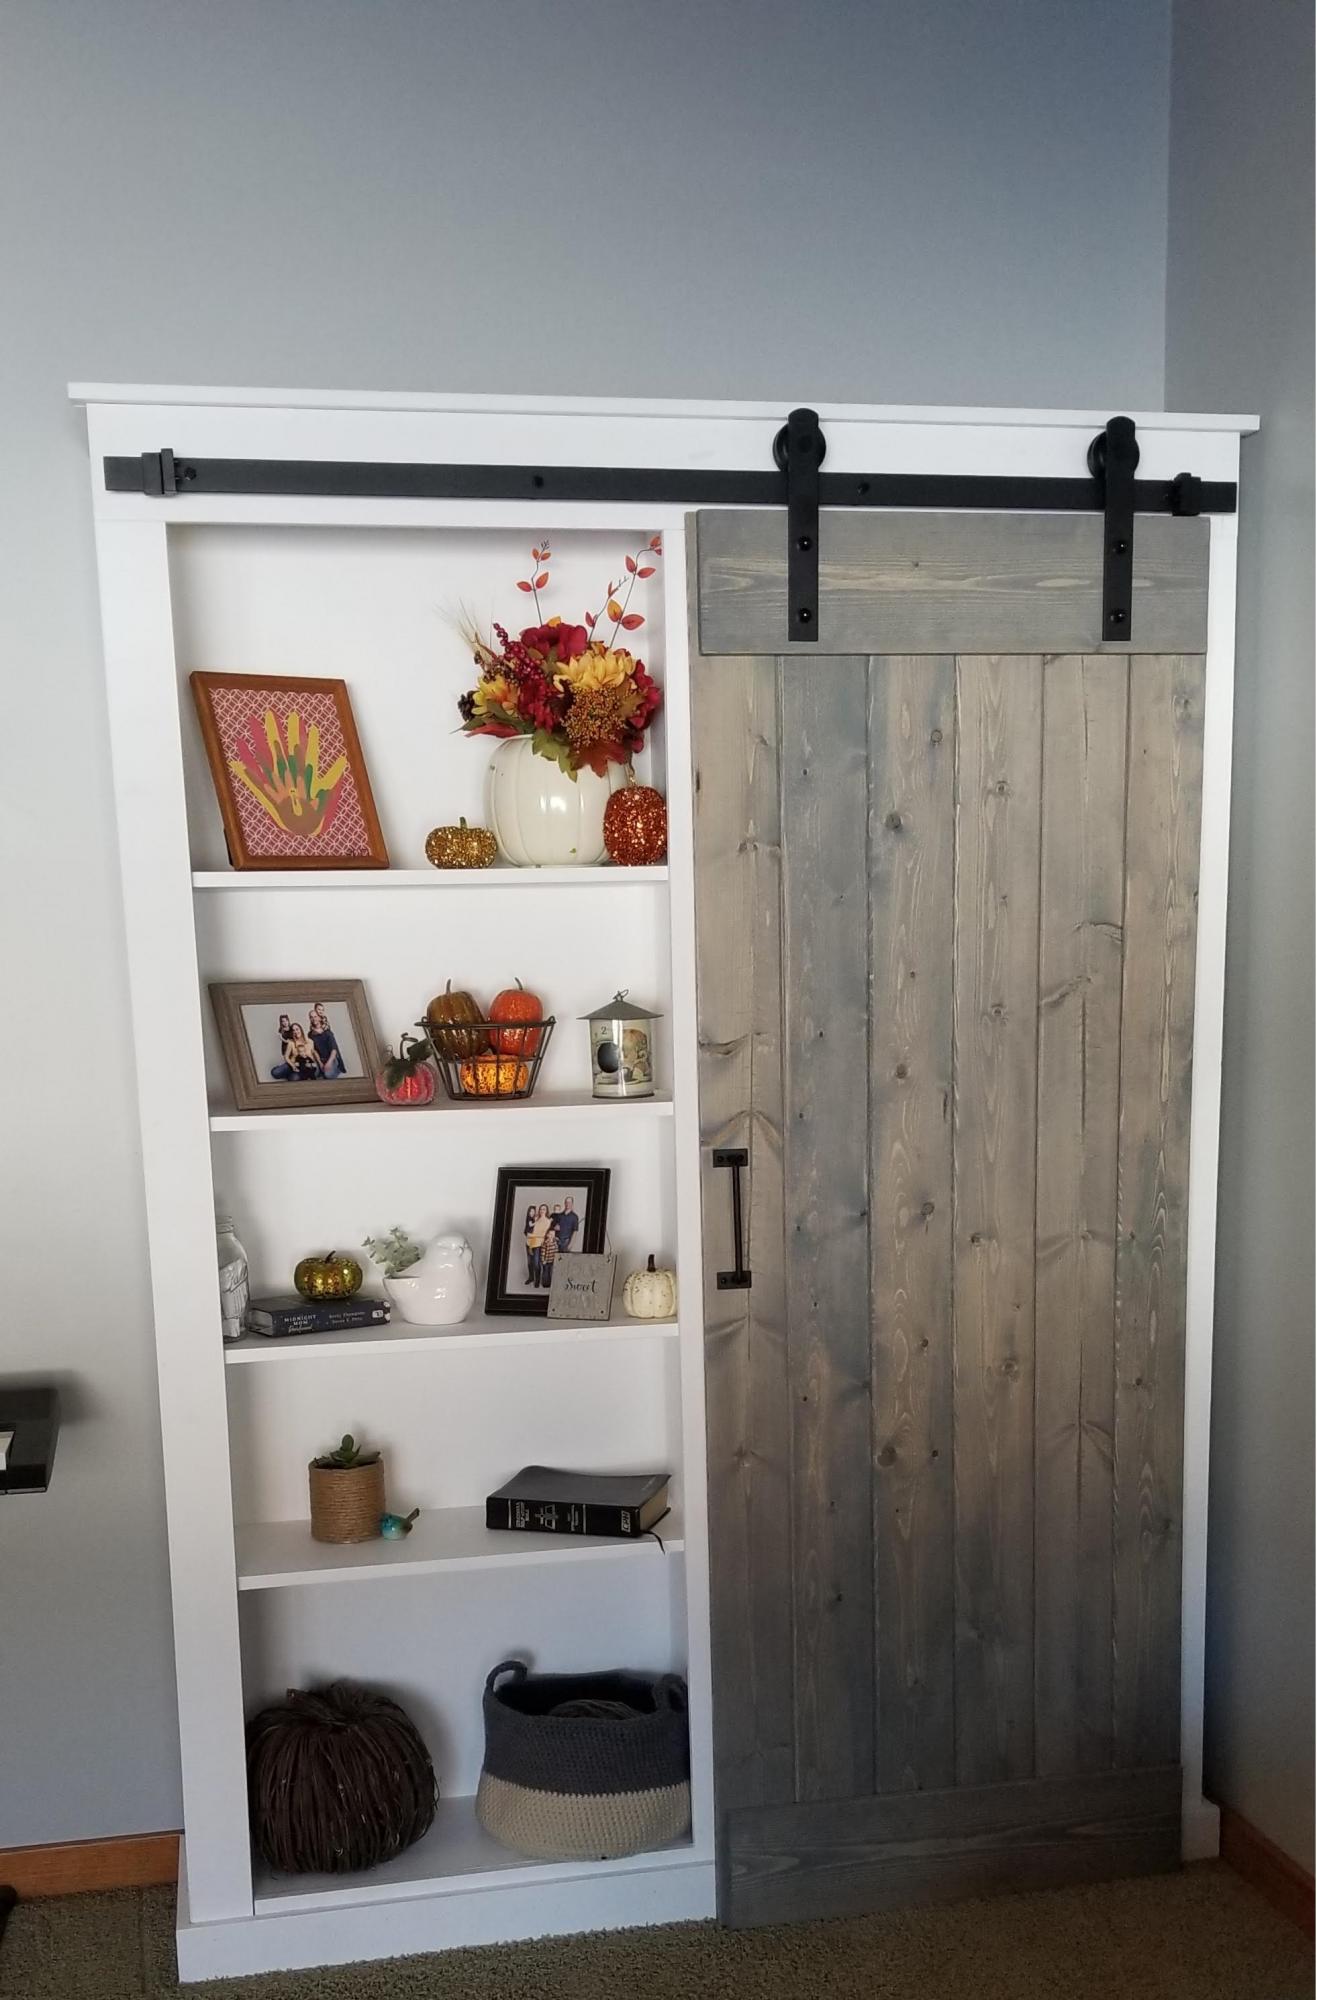
I needed a cabinet to contain and conceal our homeschool supplies, especially since this it is located in our main floor living room. This Barn Door Cabinet plan- modified to fit our space did the trick. I absolutely love it.
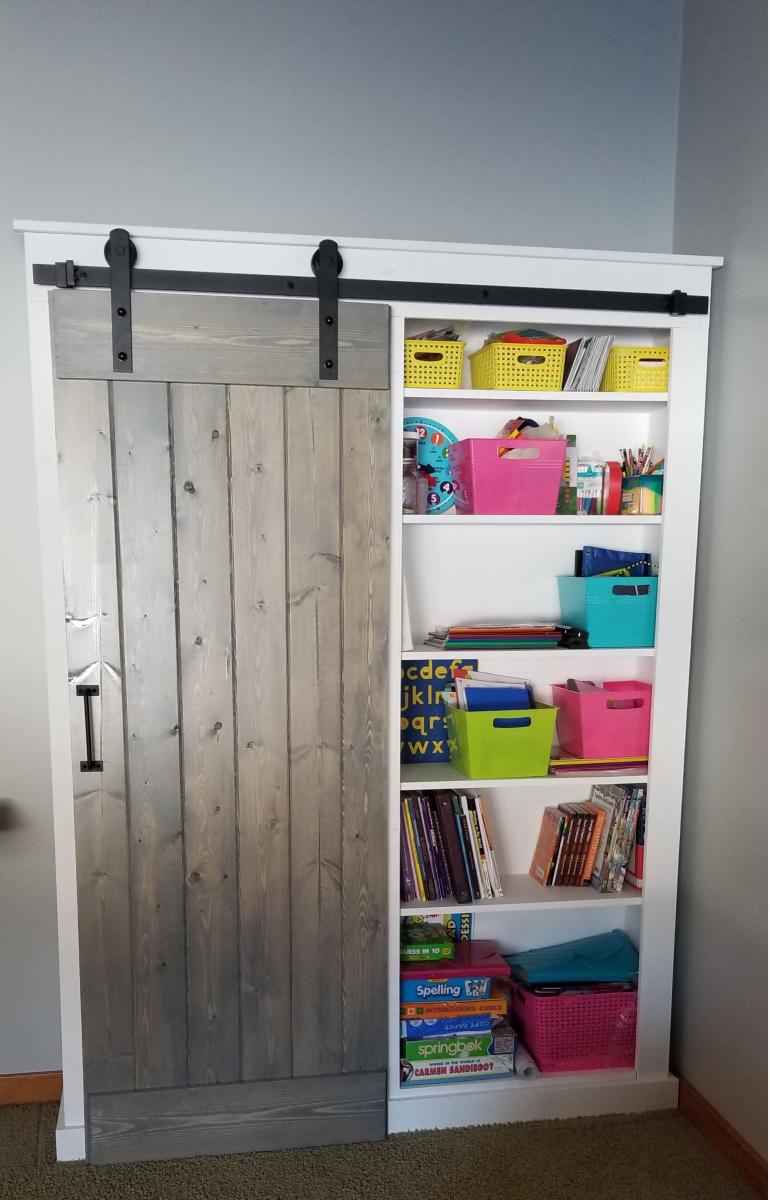
Built from Plan(s)
Estimated Cost
400
Estimated Time Investment
Week Long Project (20 Hours or More)
Finish Used
Rust-oleum Weathered Gray for the door
Recommended Skill Level
Intermediate
Comments
Seasonal And Holiday
Printers Triple Console Cabinet Converted...

I took the original Printers Triple Console Cabinet plans and adjusted it to fit an executive desk size of 30" height x 60" wide x 24" depth. Purebond birch plywood was used as the sides, top, drawer faces, and doors. Select pine was used for all other parts.
The hutch was made off of the Brookstone Desk Hutch plan adjusted to 48" height, 12" depth, and 60" length. I used select pine boards and trim. Minwax dark walnut stain and gloss polyurethane was used in the final product.
Estimated Time Investment
Week Long Project (20 Hours or More)
Finish Used
Minwax dark walnut (2 coats) and 4 coats Polyurethane high gloss.
Recommended Skill Level
Intermediate
Comments

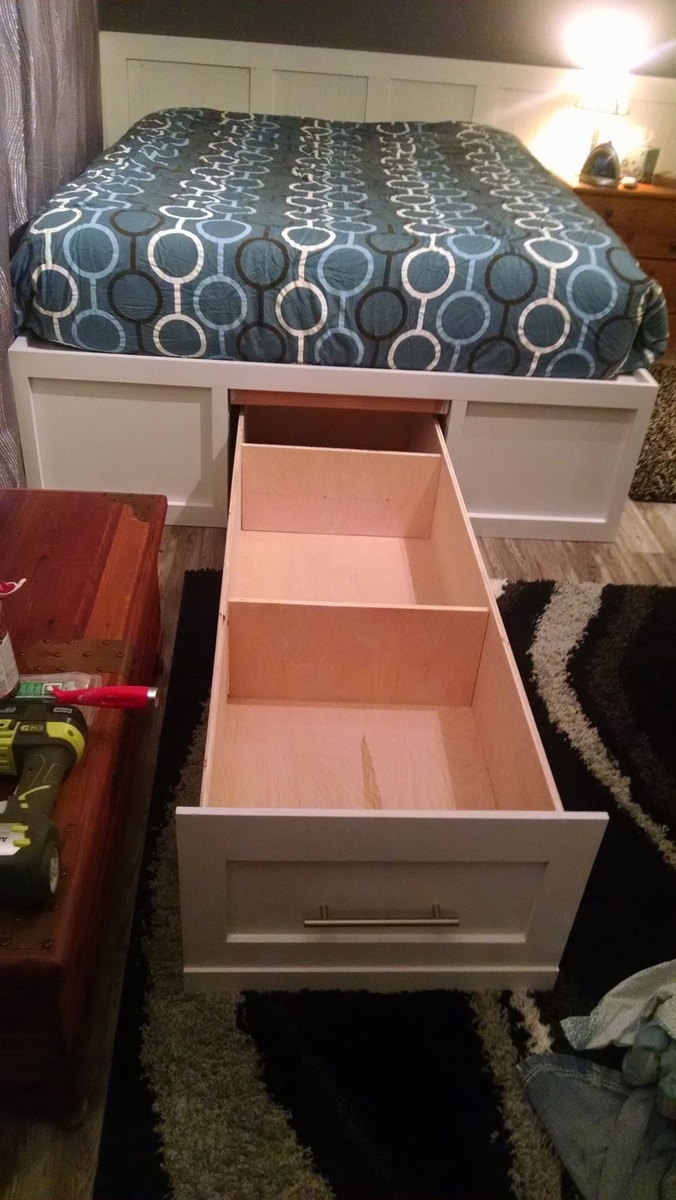
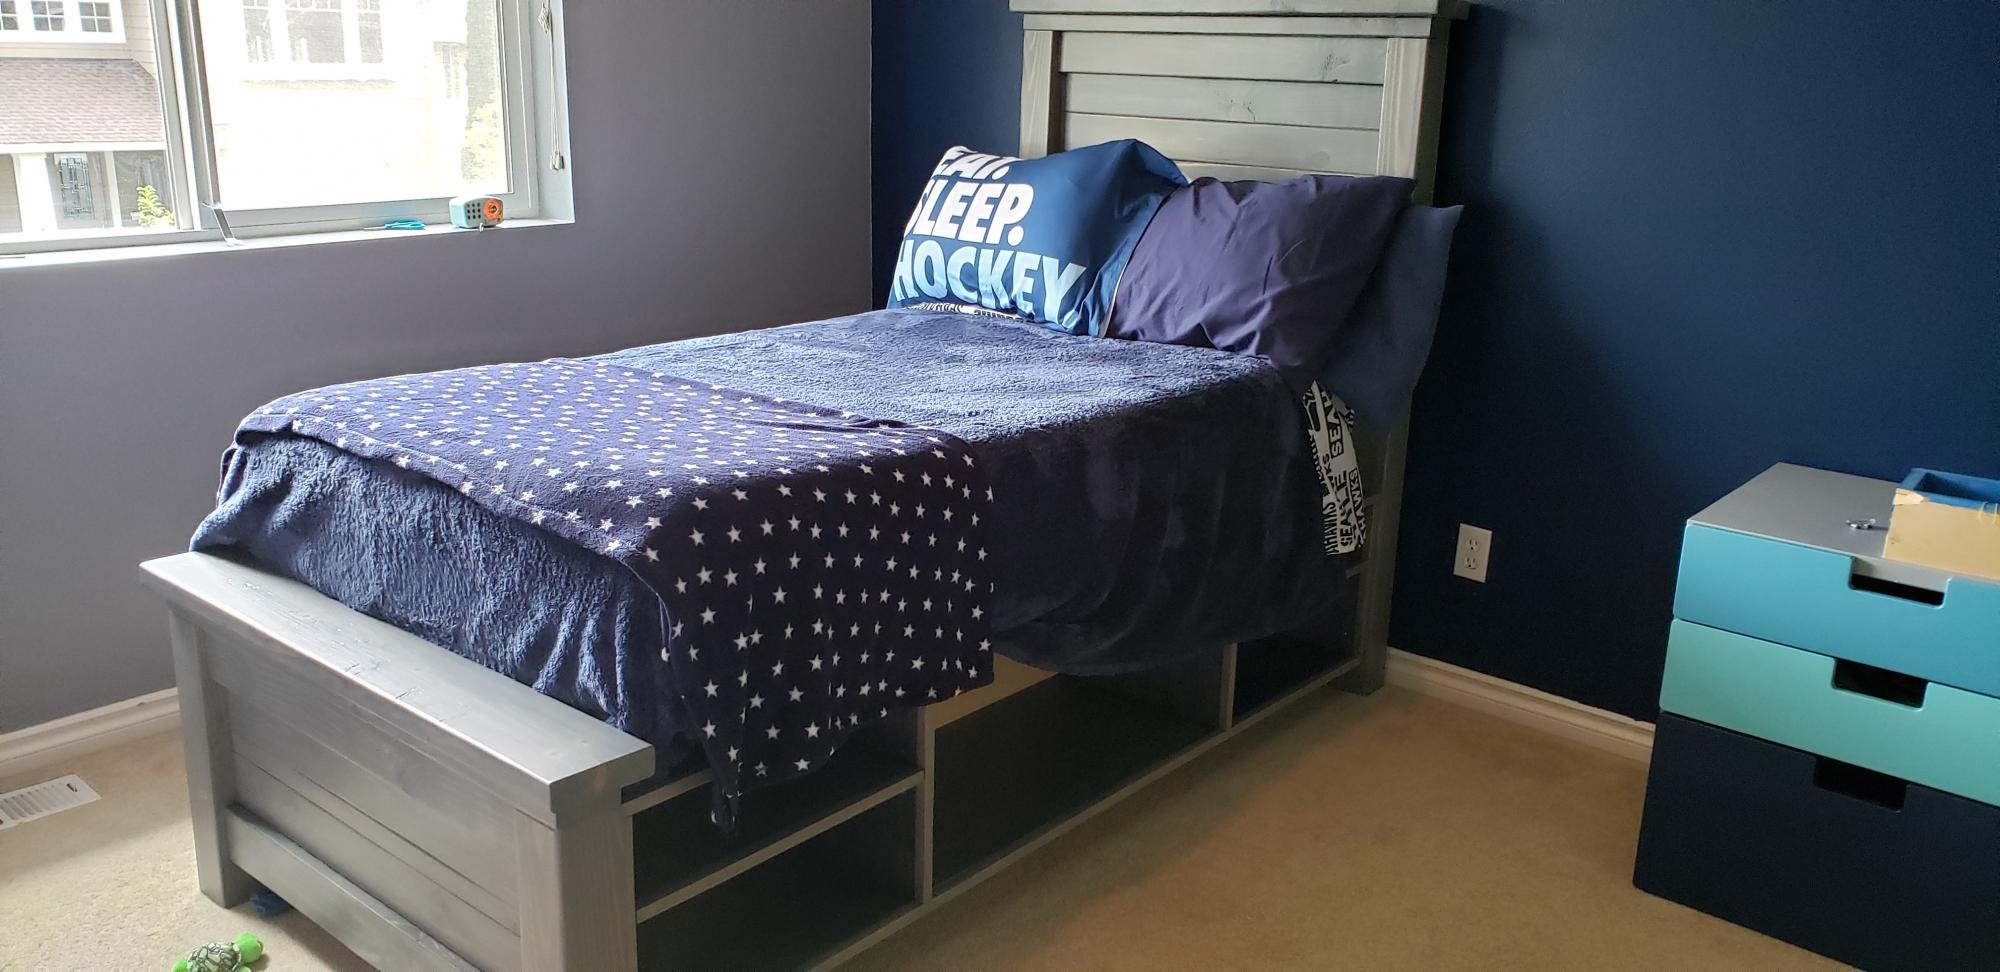
Bed with storage
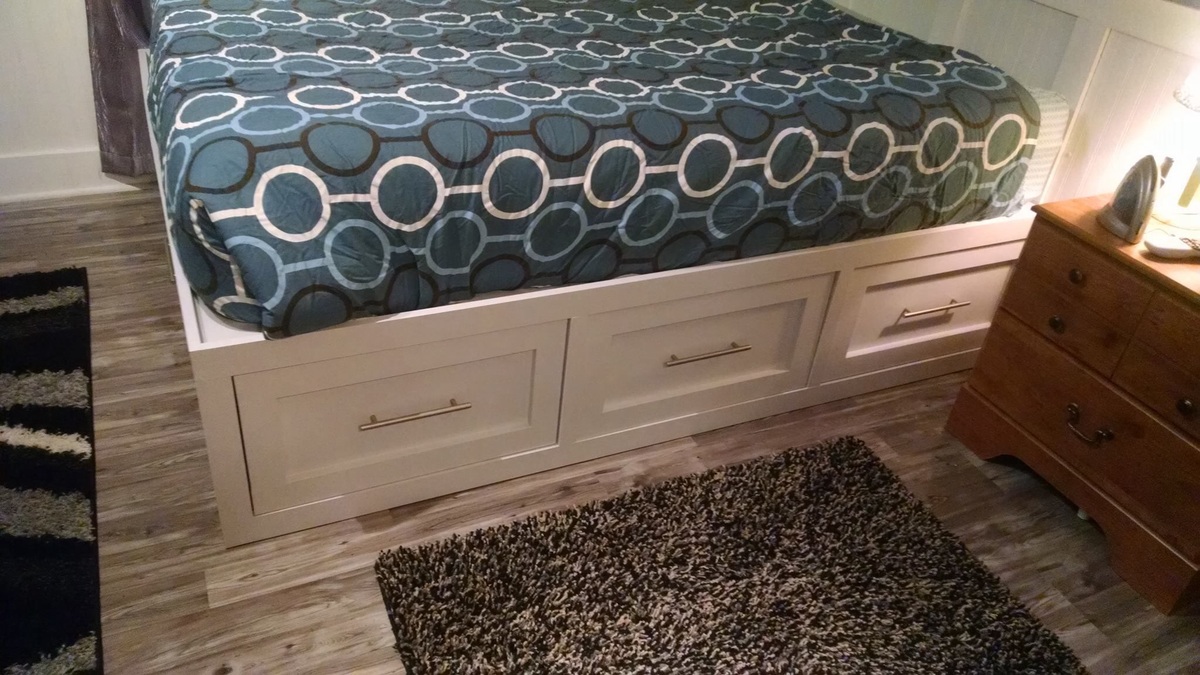
I used two benches on each side attached the two with 2x4s and built a drawer on wheels for the middle
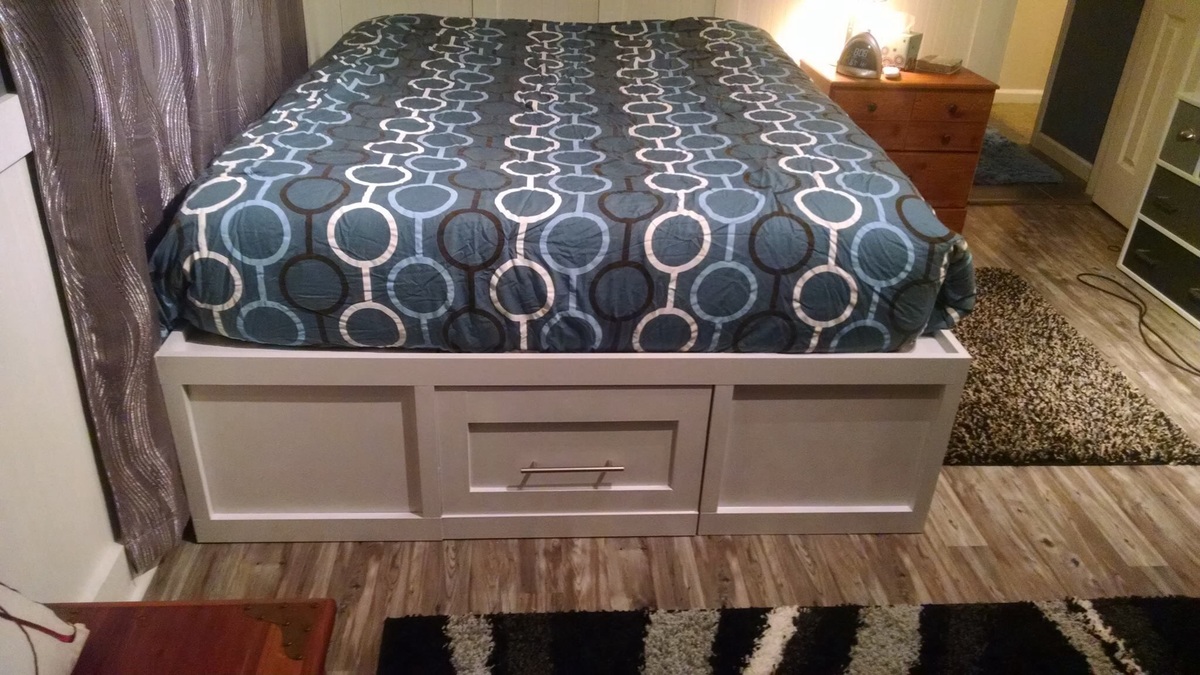
Built from Plan(s)
Estimated Cost
$300
Estimated Time Investment
Weekend Project (10-20 Hours)
Finish Used
Sutle touch hi gloss
Recommended Skill Level
Beginner
Comments

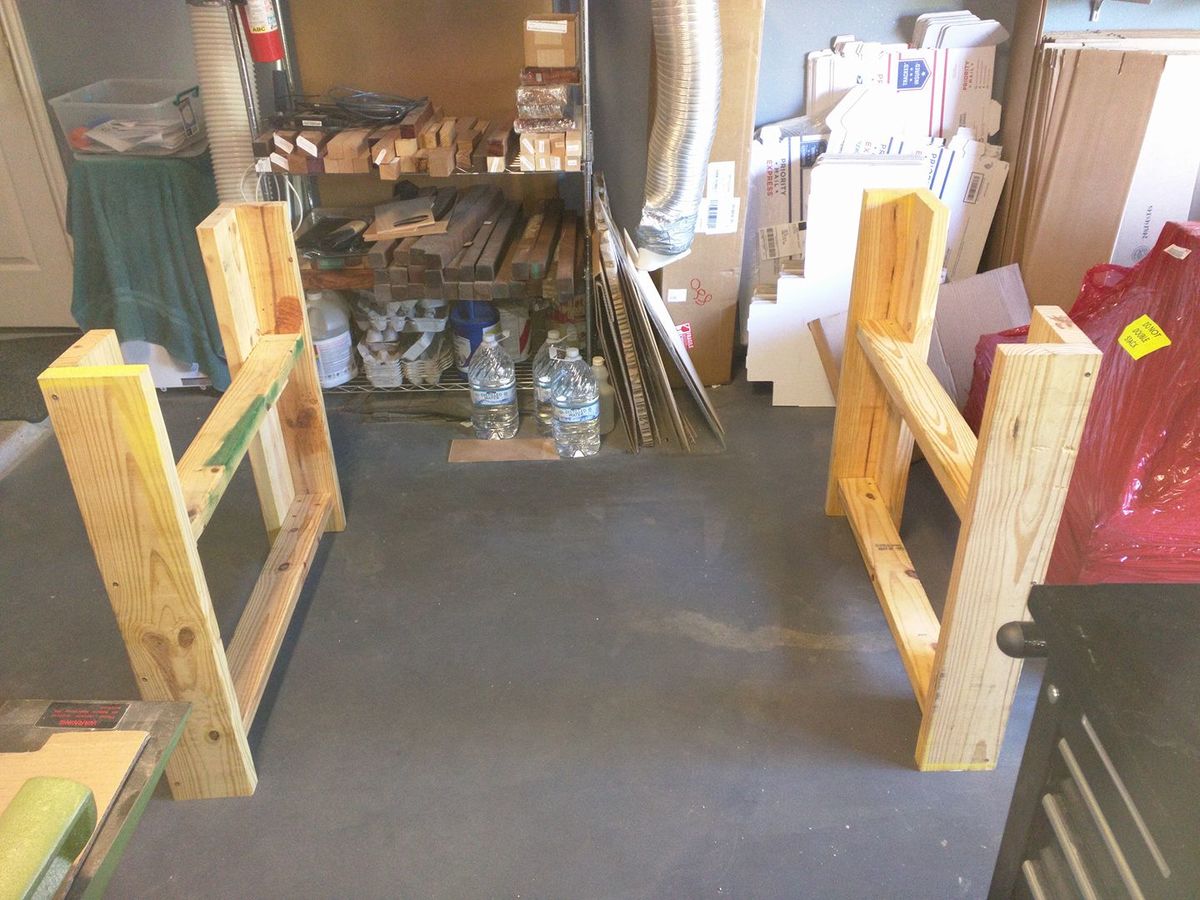
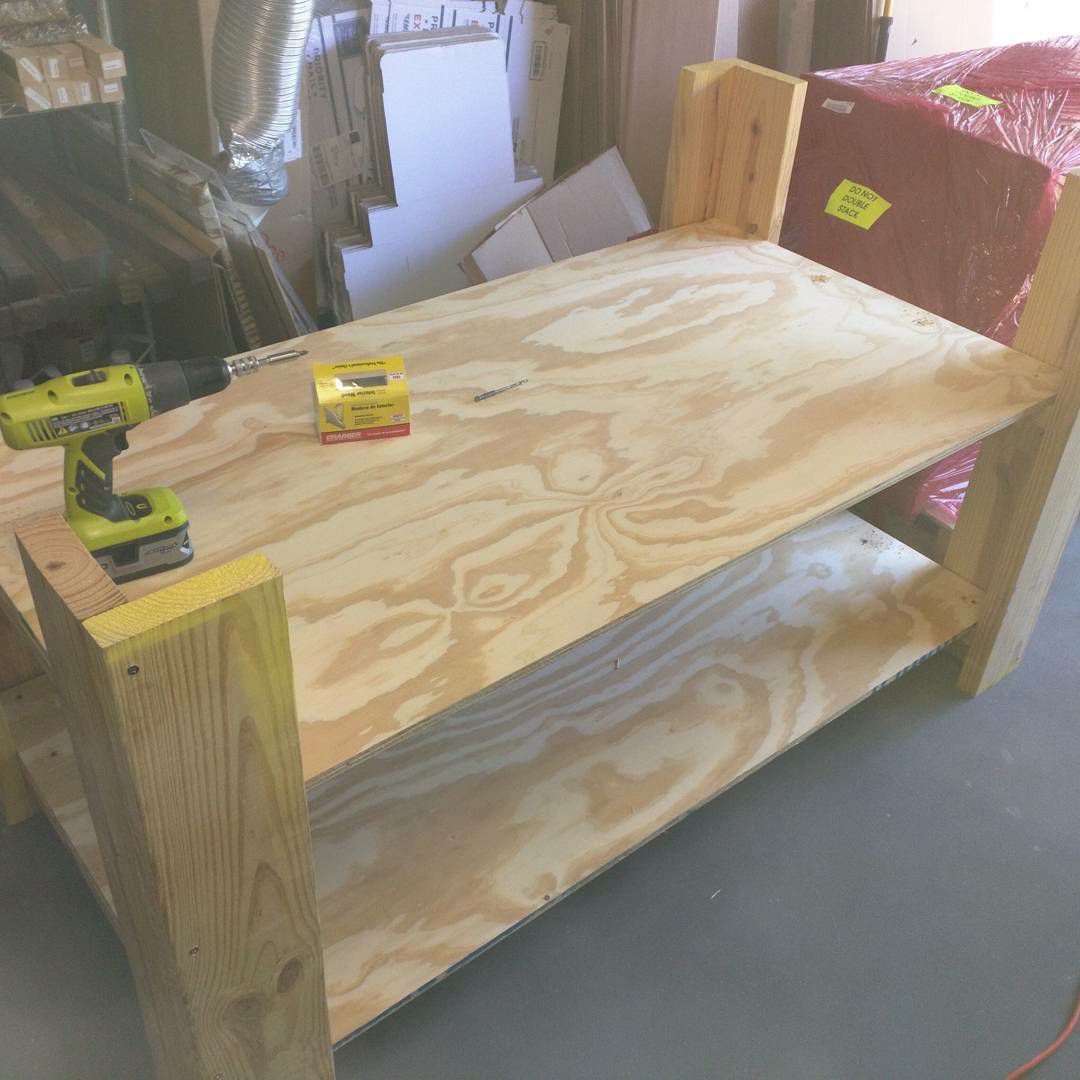
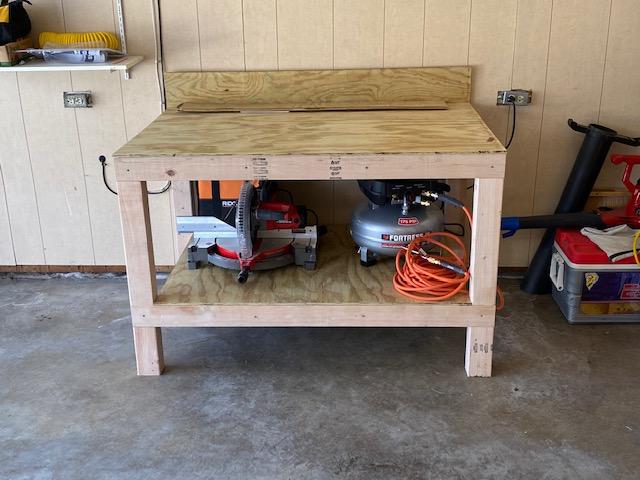
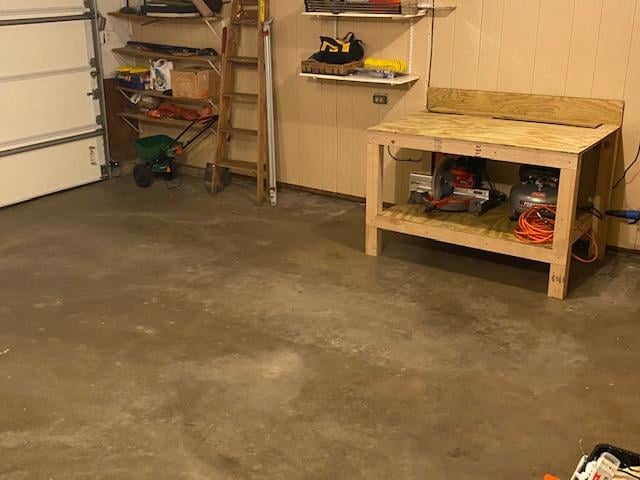
Large Shark HD4 Extended Bed Workbench
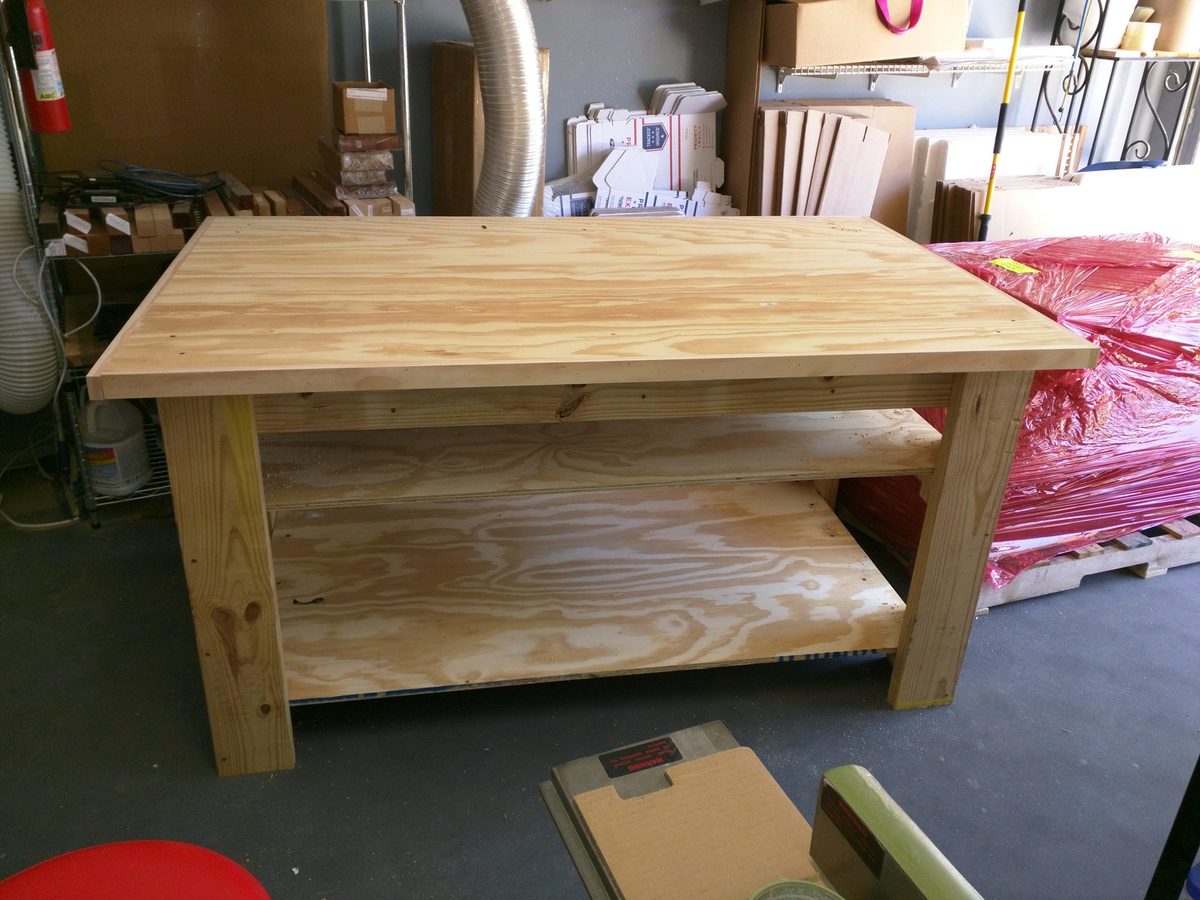
I started with the sturdy workbench plans ( http://www.ana-white.com/2011/03/sturdy-work-bench ) but enlarged it to 38x64x33 to accommodate my new CNC machine. The plans give you enough enformation so that making a size change it very easy. I used scrap wood I had and Plywood so the project only cost $85.00 to build. I didn't have many 2x4's so I used the 2x6's I had instead. Very sturdy table that took about 4 hours to build.
Thanks,
Janet Fox
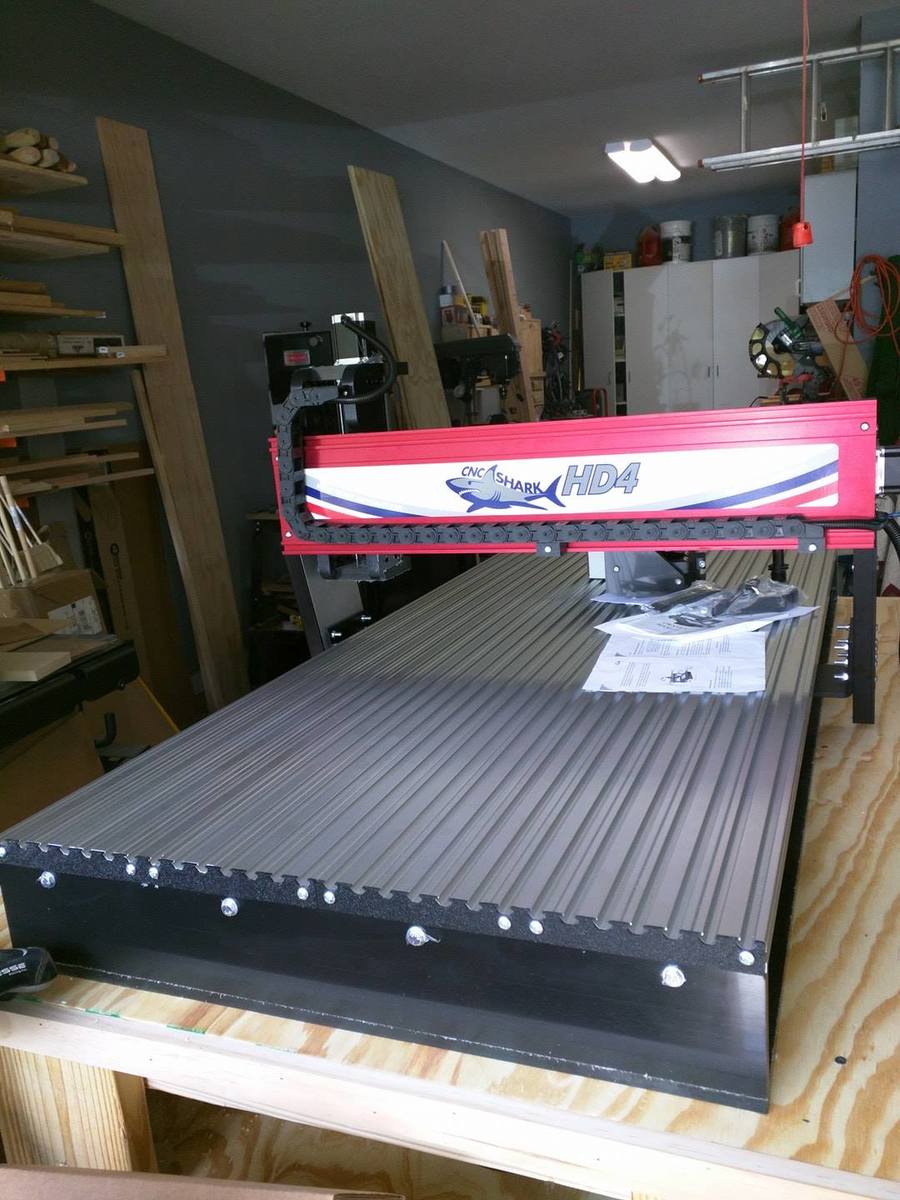
Built from Plan(s)
Estimated Cost
85.00 in plywood
Estimated Time Investment
Afternoon Project (3-6 Hours)
Finish Used
left raw
Recommended Skill Level
Beginner
Small Pantry Renovation
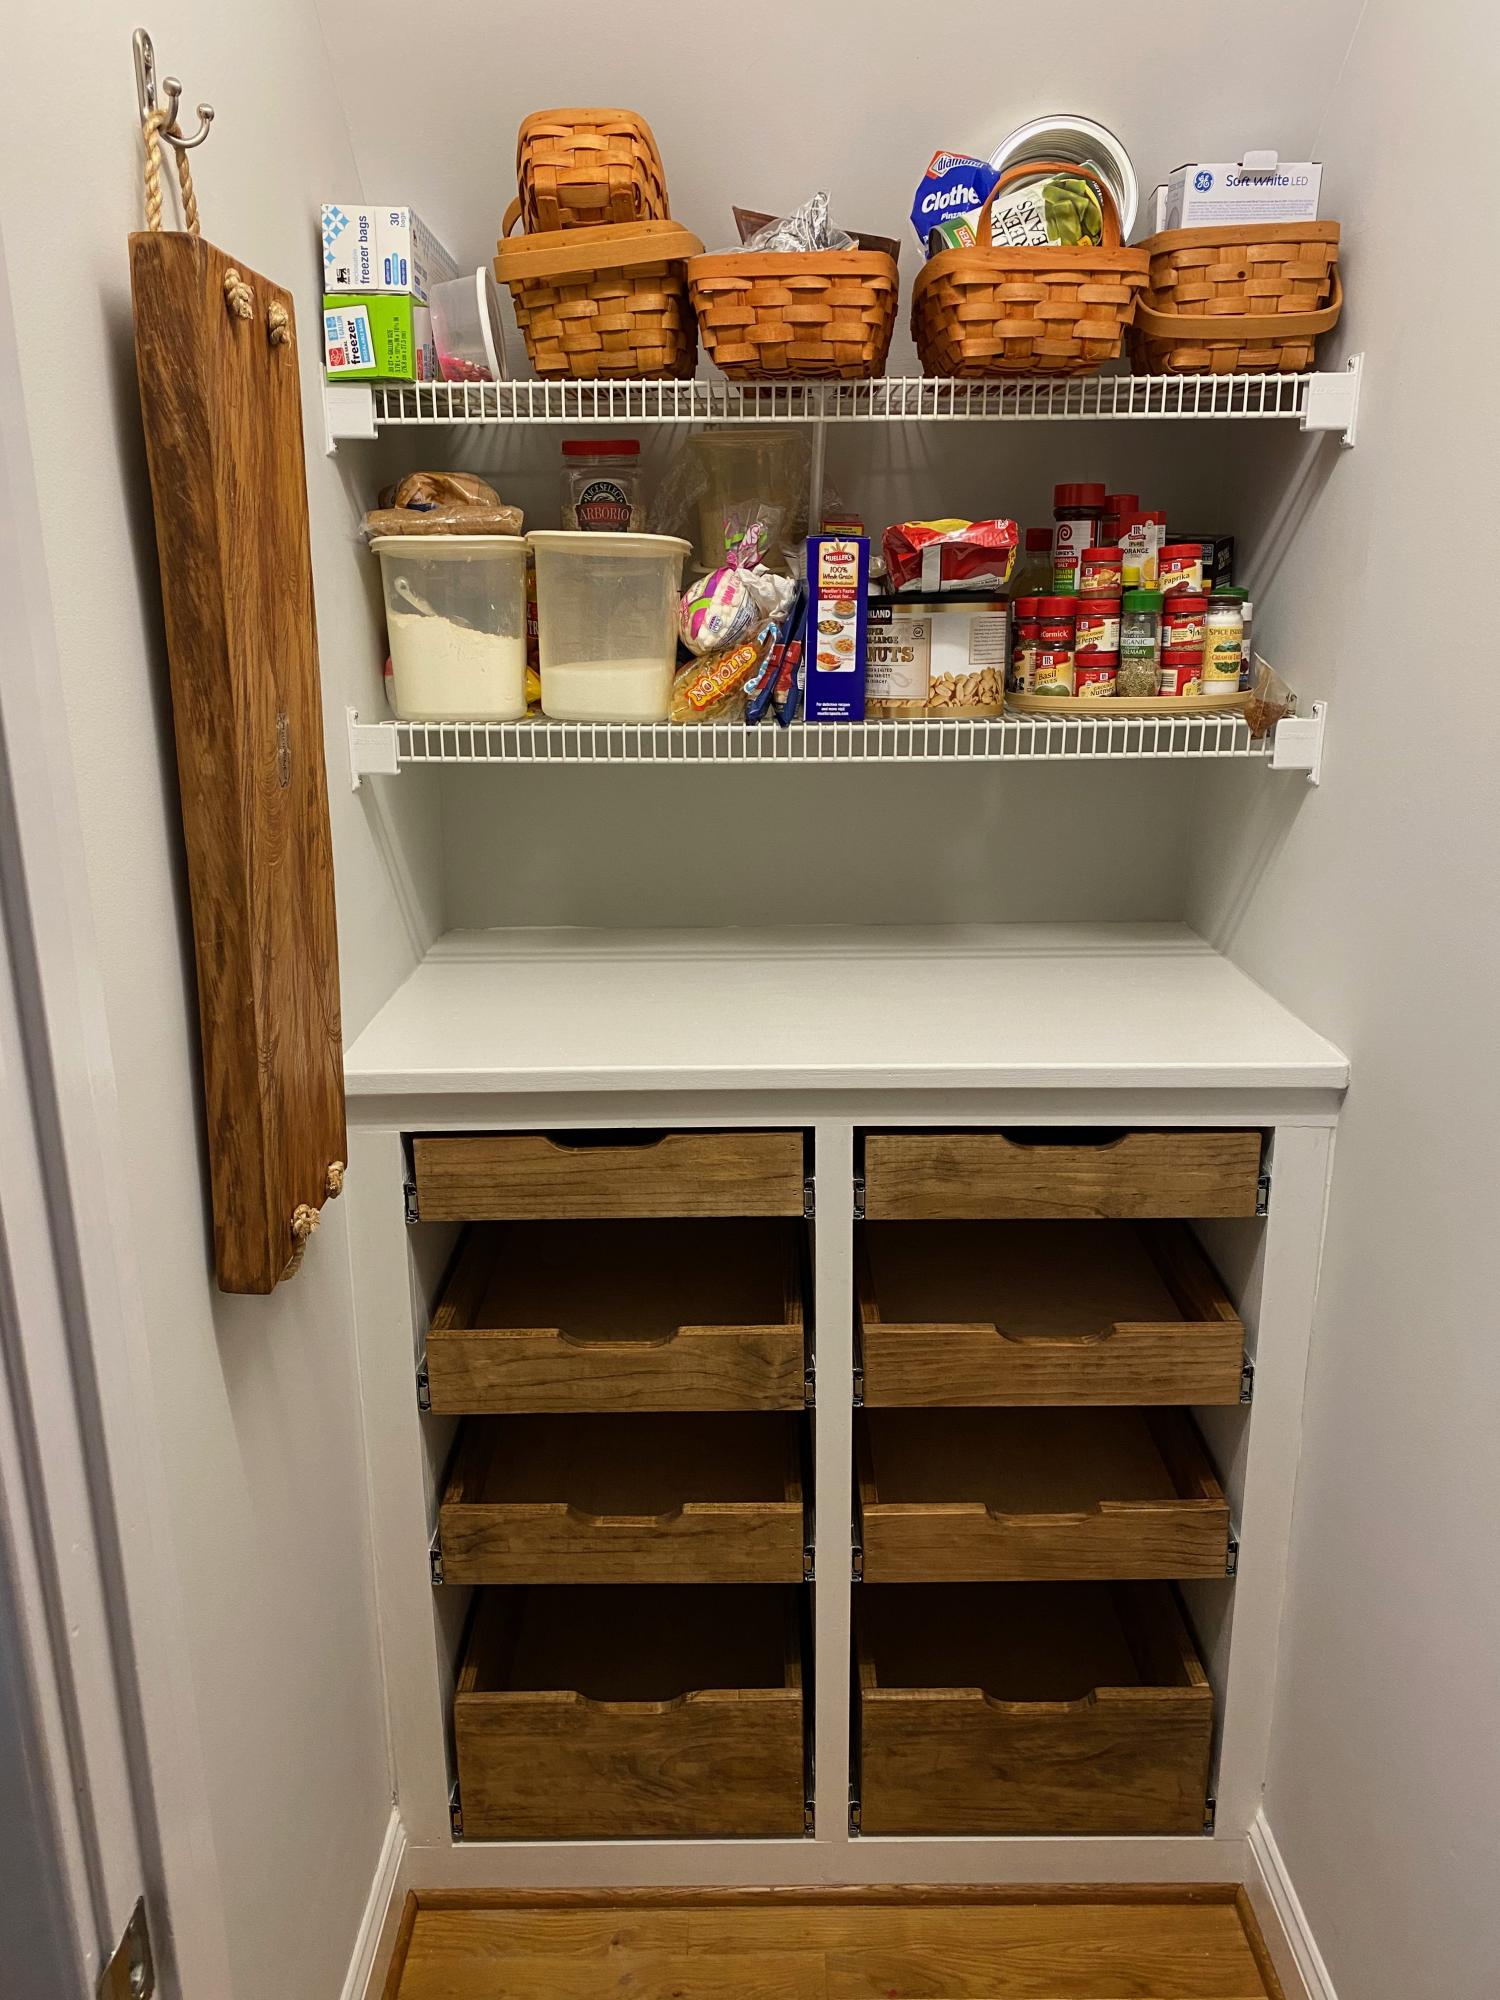
We had a small walk-in kitchen pantry with wire shelving. The shelves were packed.....and so was the floor! We lost things in the clutter and I built base cabinets that were 40" tall x 22" deep and installed full extension pull-out drawers. Bottom drawers are tall enough for canisters, tall boxes, etc. The top drawers contain all of our cooking spices so that we can see each and every item. The full extension drawers makes things easy to access and organized. Next step is removing the 2 remaining wire shelves. Pleased with the transformation with the base cabinet!
Related: How to Install Full Extension Drawer Slides
Estimated Cost
$350
Estimated Time Investment
Weekend Project (10-20 Hours)
Finish Used
White paint and Early American stain for the drawers
Recommended Skill Level
Intermediate
Comments
Sat, 02/27/2021 - 09:53
Fantastic solution!
So much more organized, I can't wait to see the finale! Thank you for sharing:)
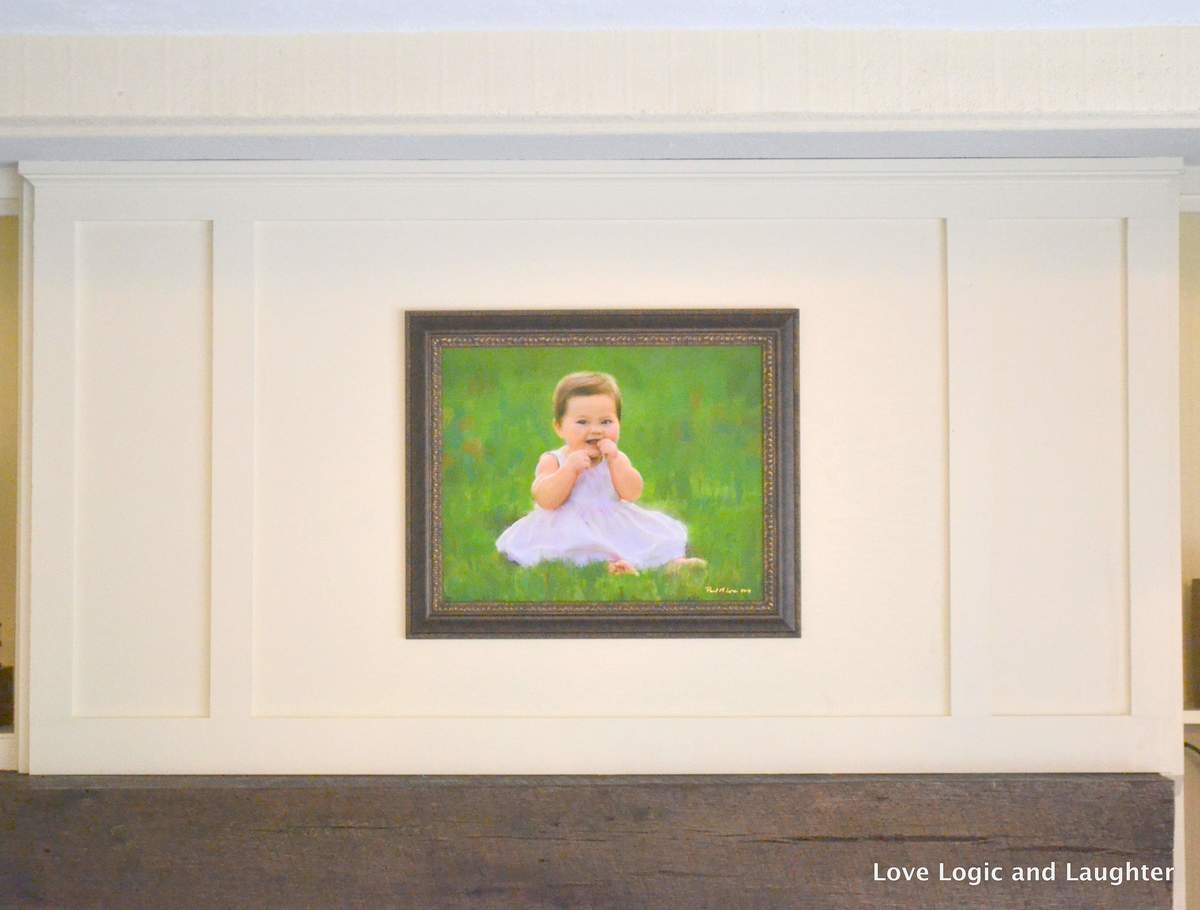
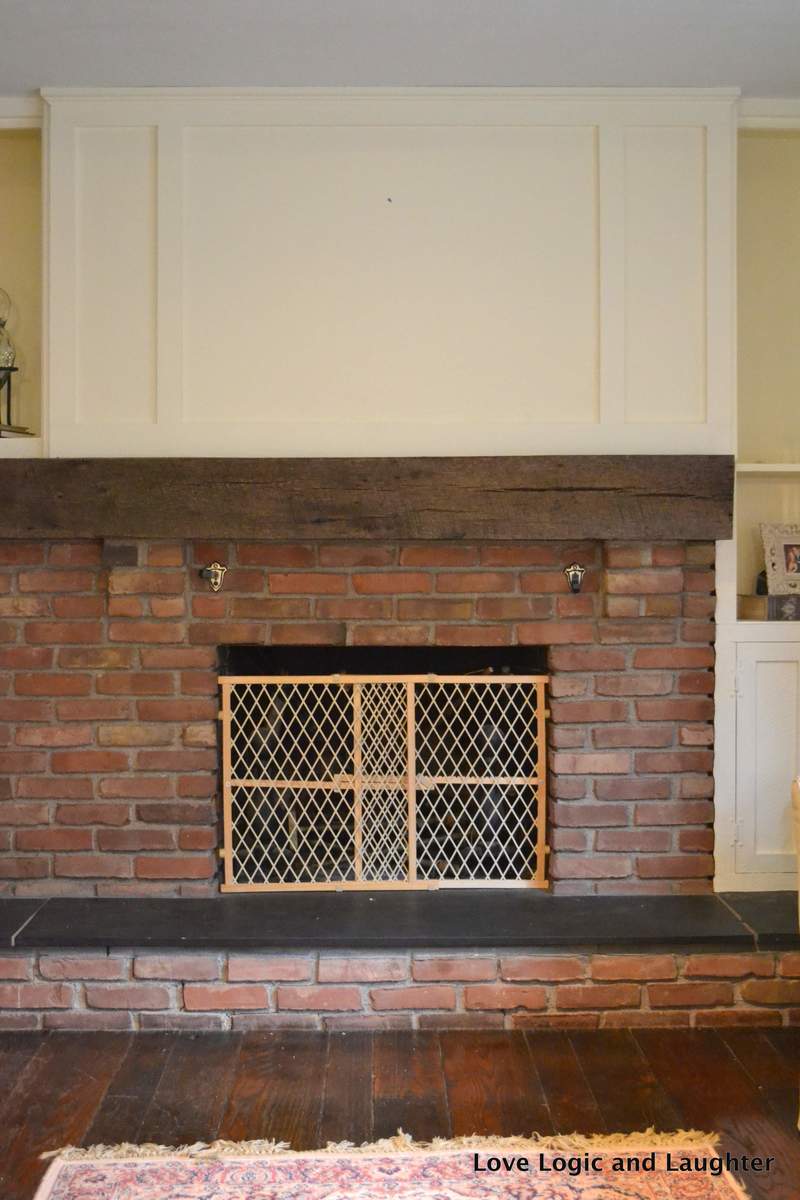
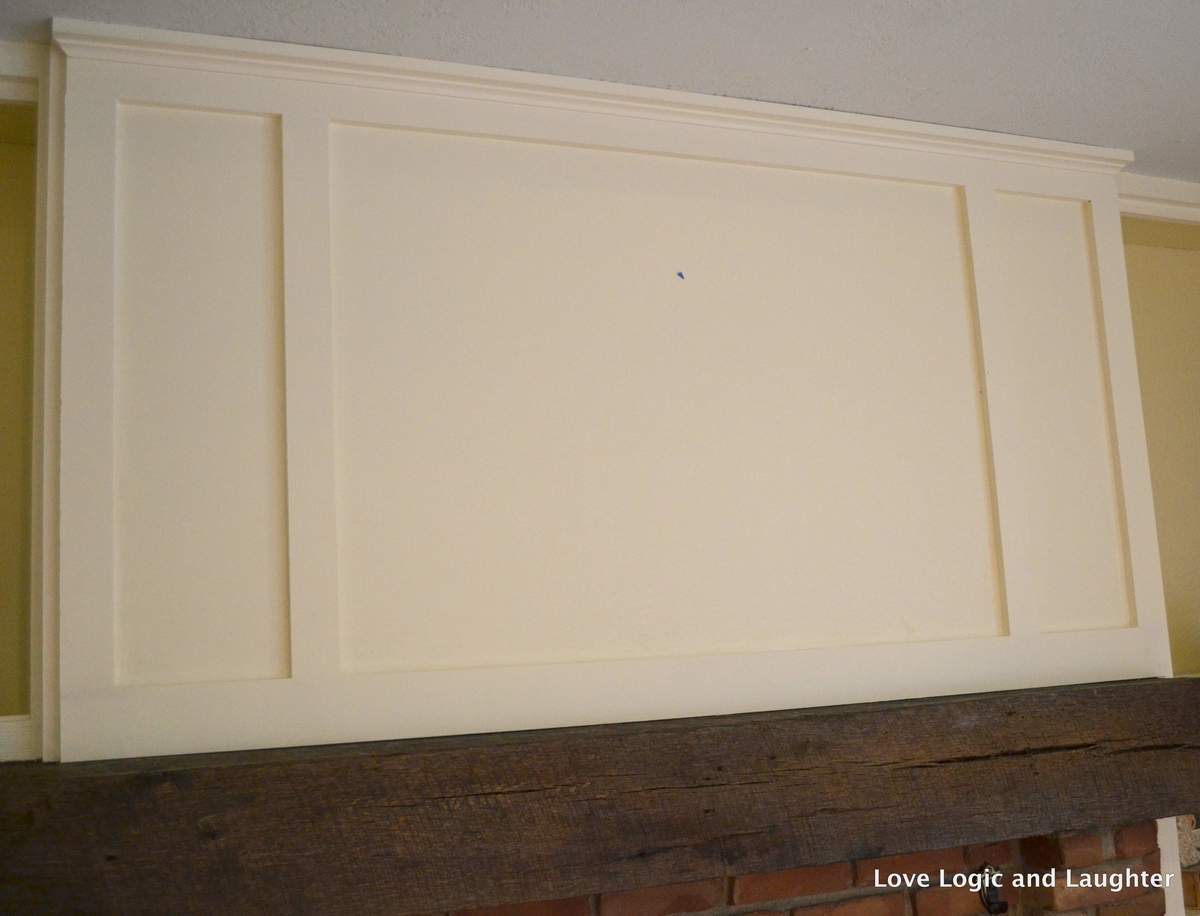
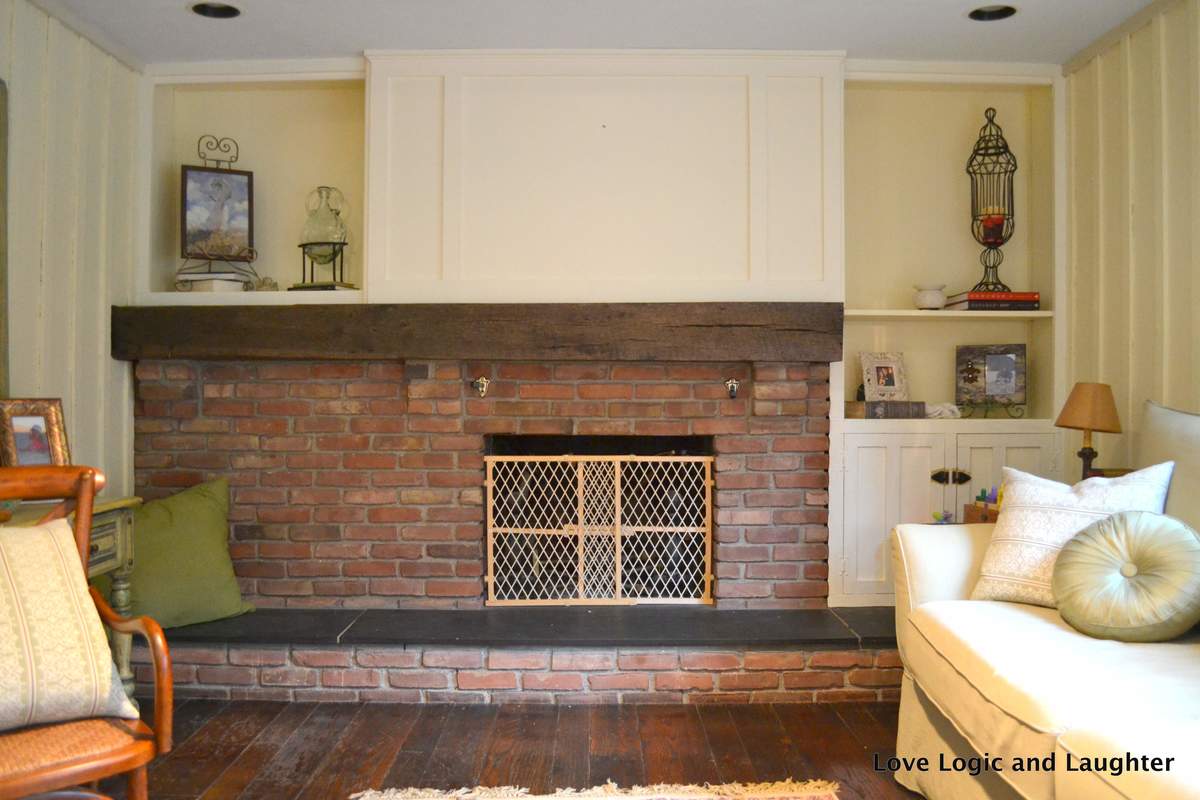
Board and Batten Fireplace Surround
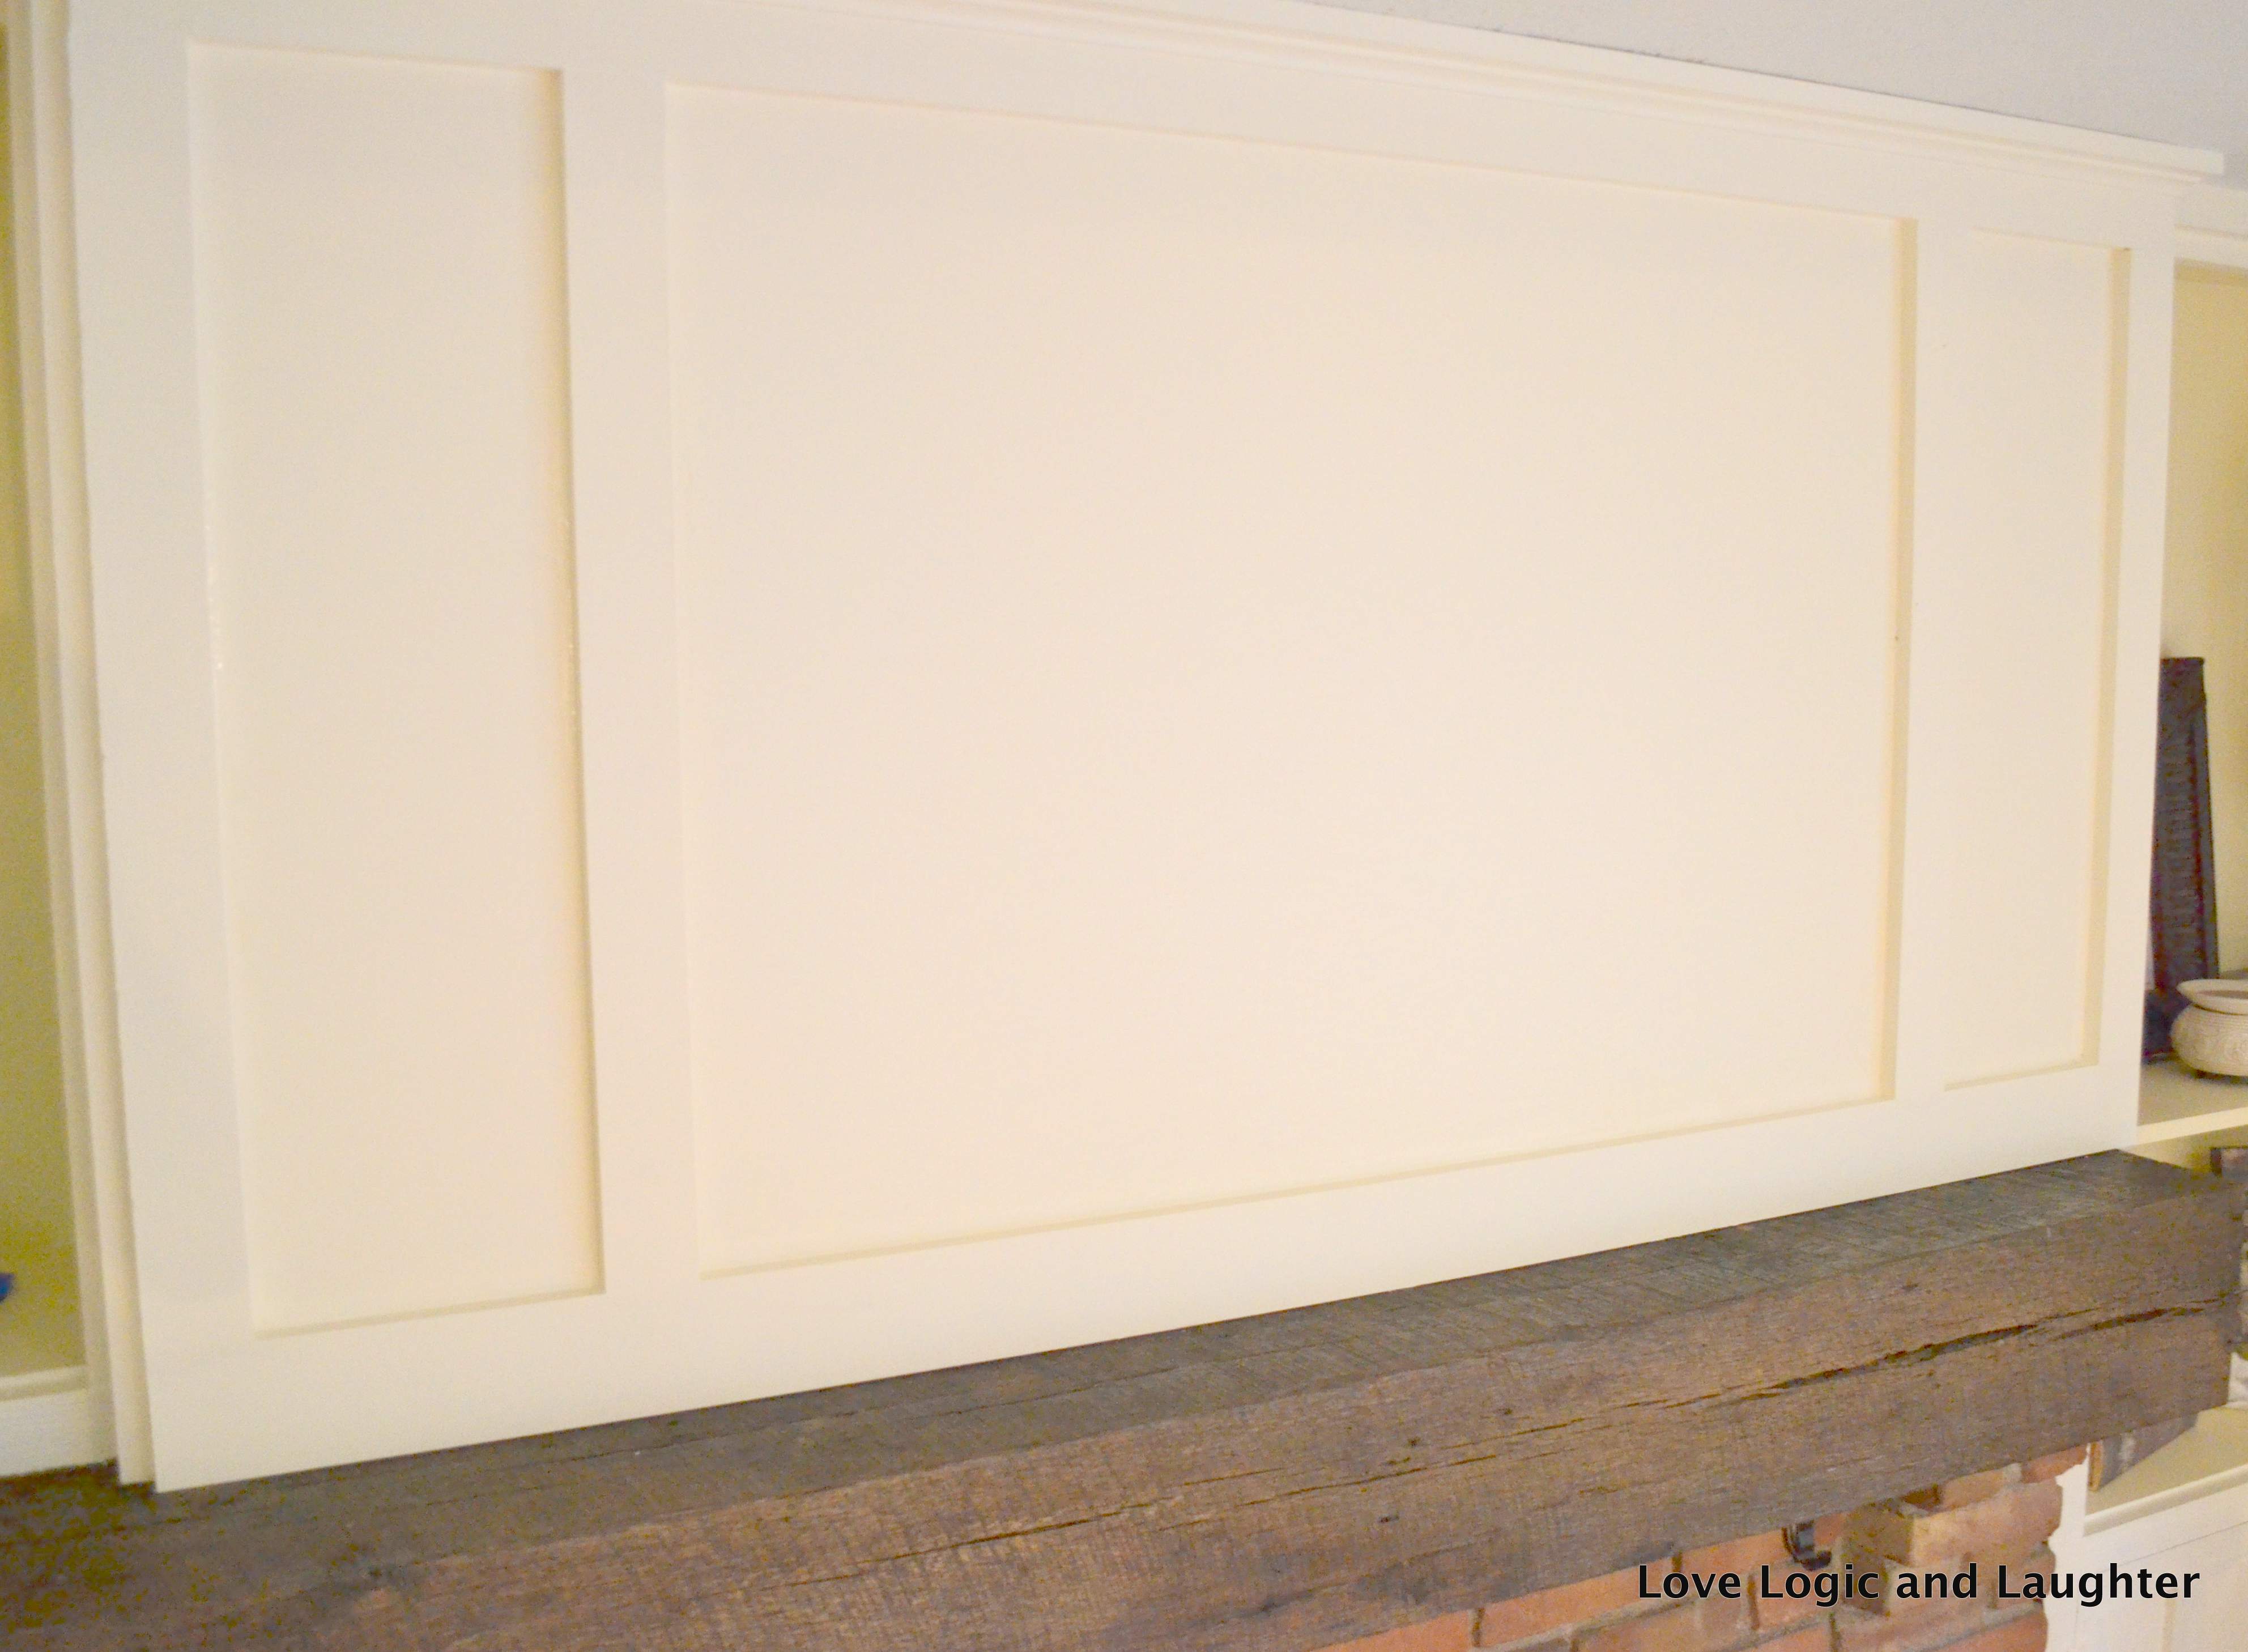
There was brick above my fireplace. I decided that I needed to lighten it up, but didn't want to necessarily paint the brick. Instead, I decided to panel above the fireplace using a board and batten style. I am so happy with the results! It is lighter and brighter in the room and goes with the style in the rest of the room (walls have board and batten as well).

Built from Plan(s)
Estimated Cost
$50
Estimated Time Investment
Day Project (6-9 Hours)
Finish Used
Painted white ("Linen White")
Recommended Skill Level
Intermediate
Comments

Cascading cedar planter
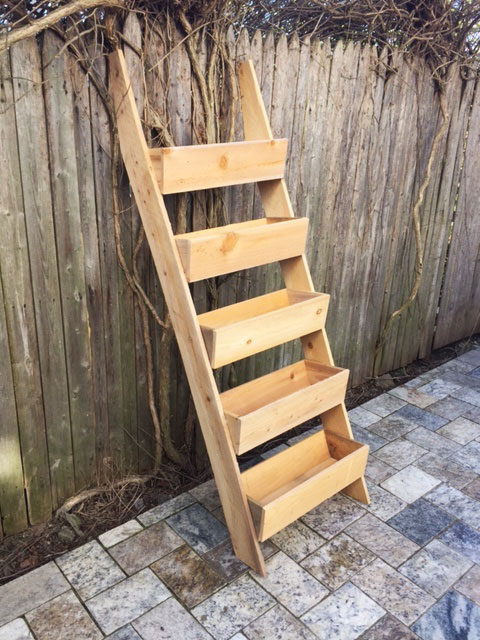
Instead of the 2X6, we used an additional cedar board to complete the sides and the ends of the planters. This was more cost effective and still provides enough support to hold the planters. This is a great alternative to the more expensive items we found online. We will be building multiple to put in an unused space in our yard. Great project!!
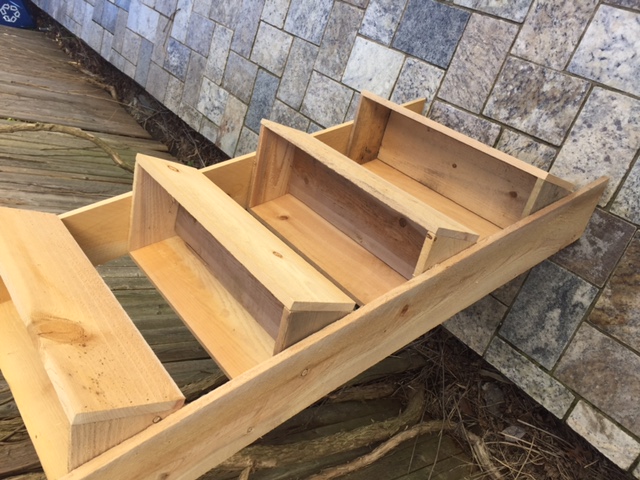

Built from Plan(s)
Estimated Cost
15 each
Estimated Time Investment
An Hour or Two (0-2 Hours)
Finish Used
no finish, we prefer the look of aged cedar
Recommended Skill Level
Starter Project
Workbench Plans by Ana

Thank you for the plans for this workbench. I’m new to this and they worked like a charm. The scraps I had, fit perfectly for upper and lower shelf backboards. In doing so, I did square up and nail the full sheet of plywood to the table. Then cut with a circular saw with guidance from a fence. Doing this on length and width gave me perfect backboards for the top and bottom levels. The only scrap was the 2x4’s and they were minimal. Thanks again. It turned out perfect!
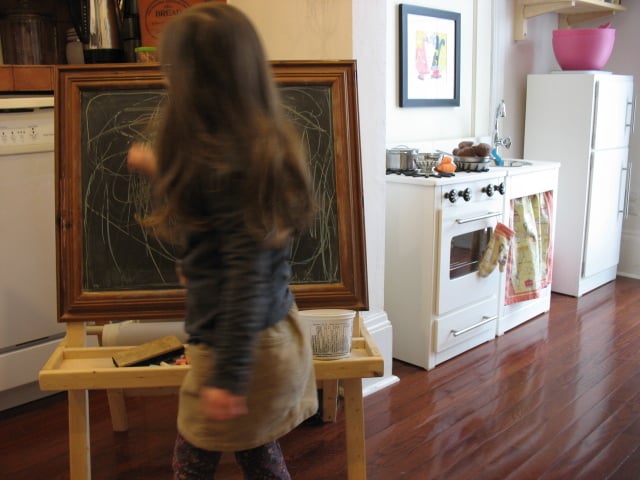
Toddler Chalkboard Easel
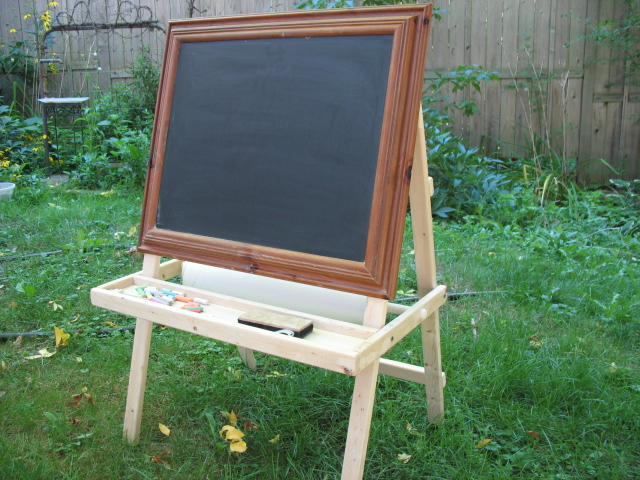
This easel was my 2nd Ana White project.
I decided to use an old picture frame to surround the chalkboard portion of the easel. I picked it up at an antique shop for under $5.
The wood was left unfinished, mostly because I ran out of time (I still haven't sanded the putty spots!). But now, I actually prefer it that way because it blends better with our furnishings. The legs of the easel are hinged so that it can fold up when not in use (I added removable pins on the tray support to make this happen).
This easel has been used every day - It has been such a great addition!
Thanks Ana for the great plans!
Built from Plan(s)
Estimated Cost
less than $10 including antique frame
Estimated Time Investment
Afternoon Project (3-6 Hours)
Finish Used
Natural finish.
Recommended Skill Level
Starter Project
Vintage American Girl Doll Bed
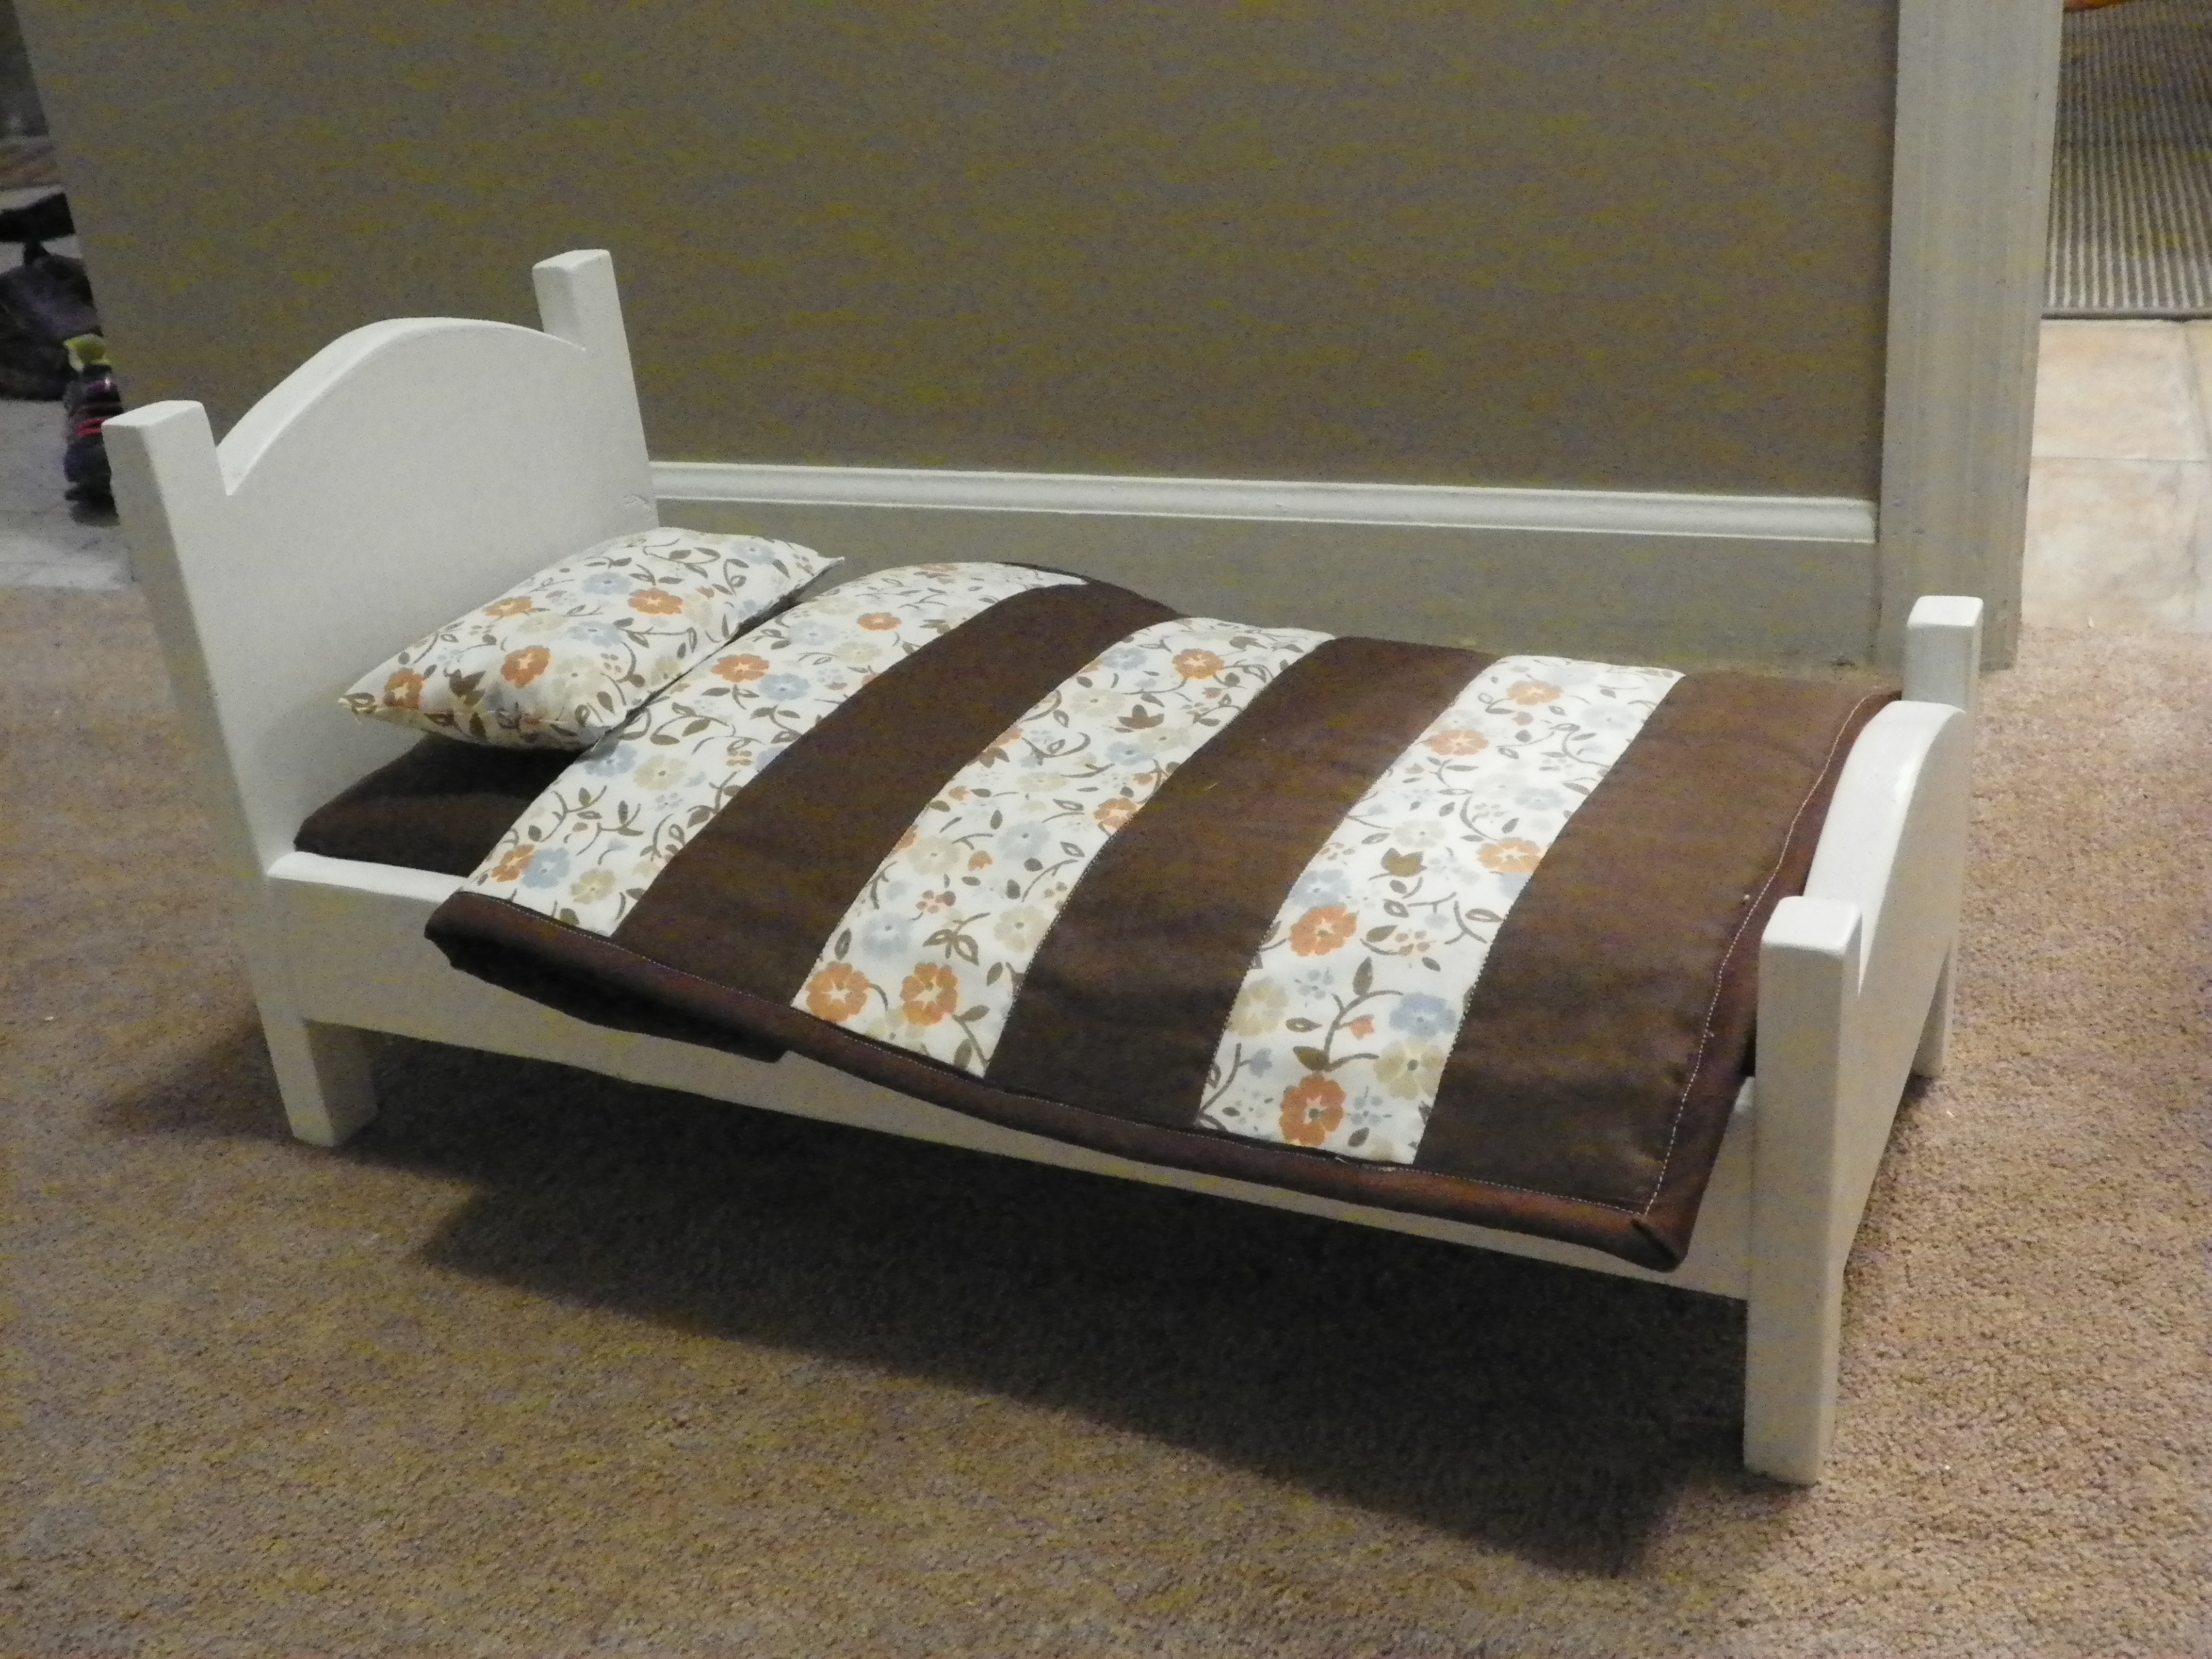
I made this as a Christmas present for my little cousin. I was looking for something fast and last minute and found this. The plans were super easy to follow. The only change I made was the headboard is a little shorter than the plans because I used all scrap wood for this. It was a hit at Christmas! Thanks Ana!

Built from Plan(s)
Estimated Cost
Free
Used Scraps
Used Scraps
Estimated Time Investment
Afternoon Project (3-6 Hours)
Finish Used
White trim paint I had hanging around.
Recommended Skill Level
Beginner
Mini & Modified Planked Sideboard
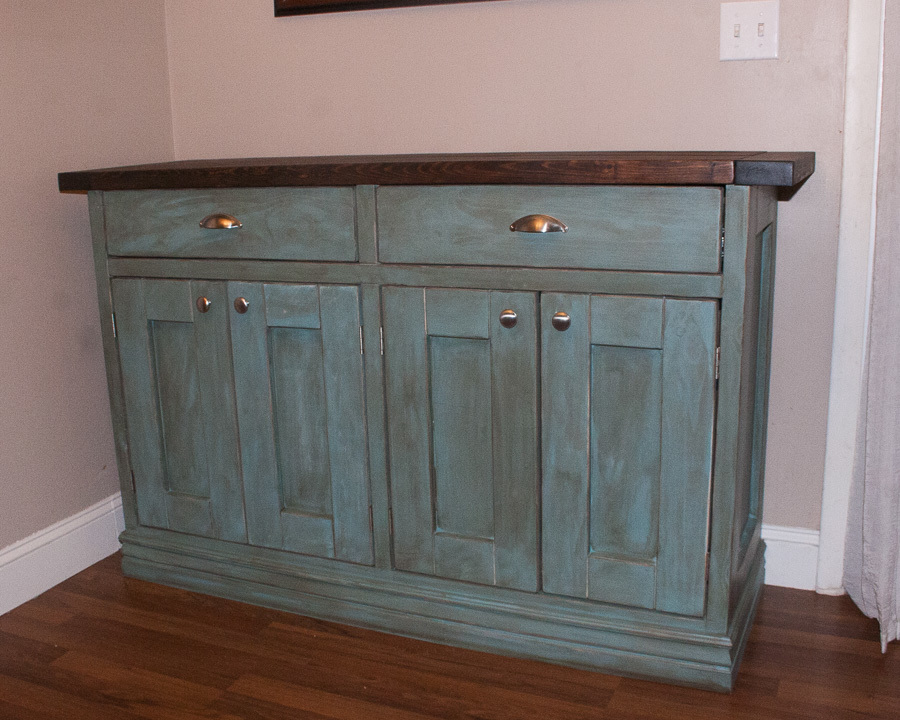
My husband did the build and I did the finishing. This would have been much easier with the correct tools such as clamps and squares but he got by. We did have a Kreg jig that made the assembly much easier. This took about 15-20 hours over the course of a week long spring break.
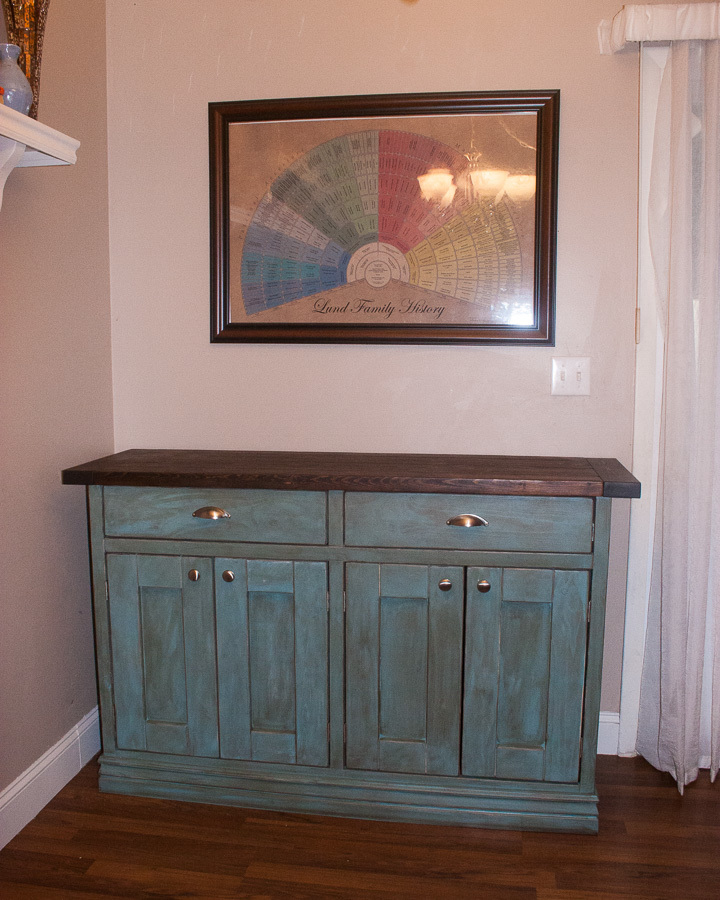
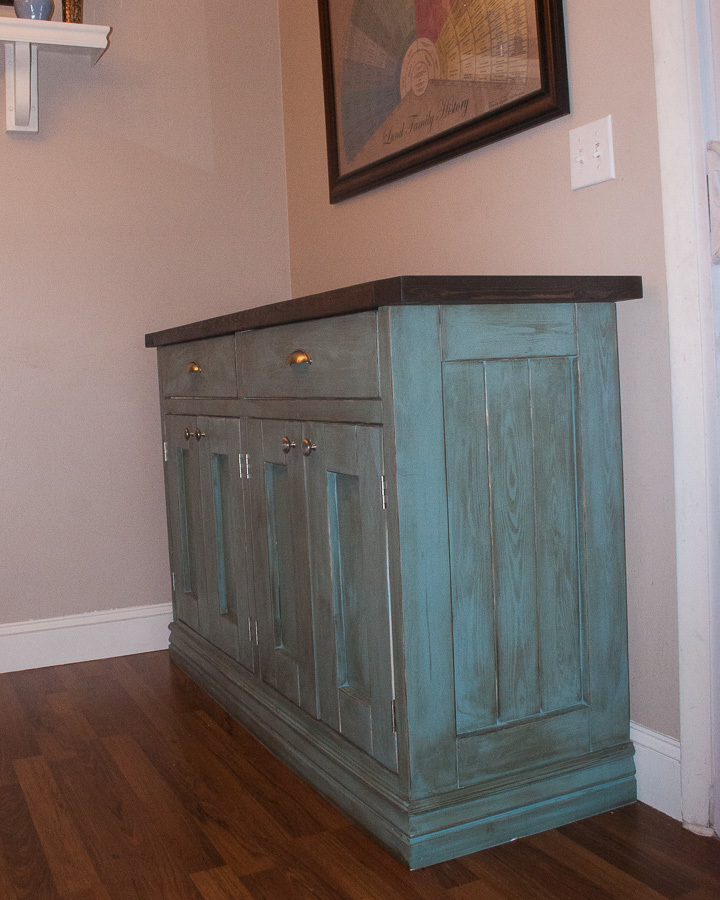
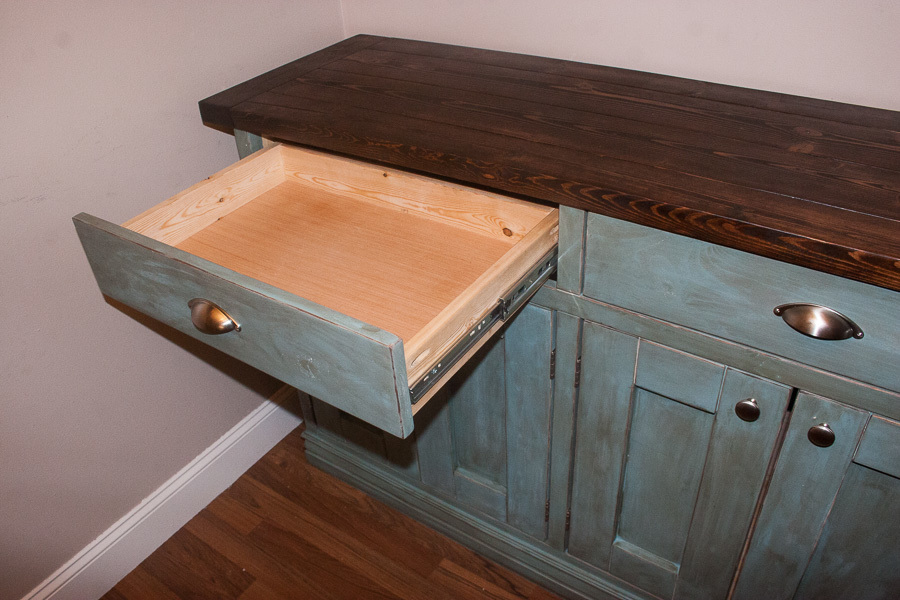
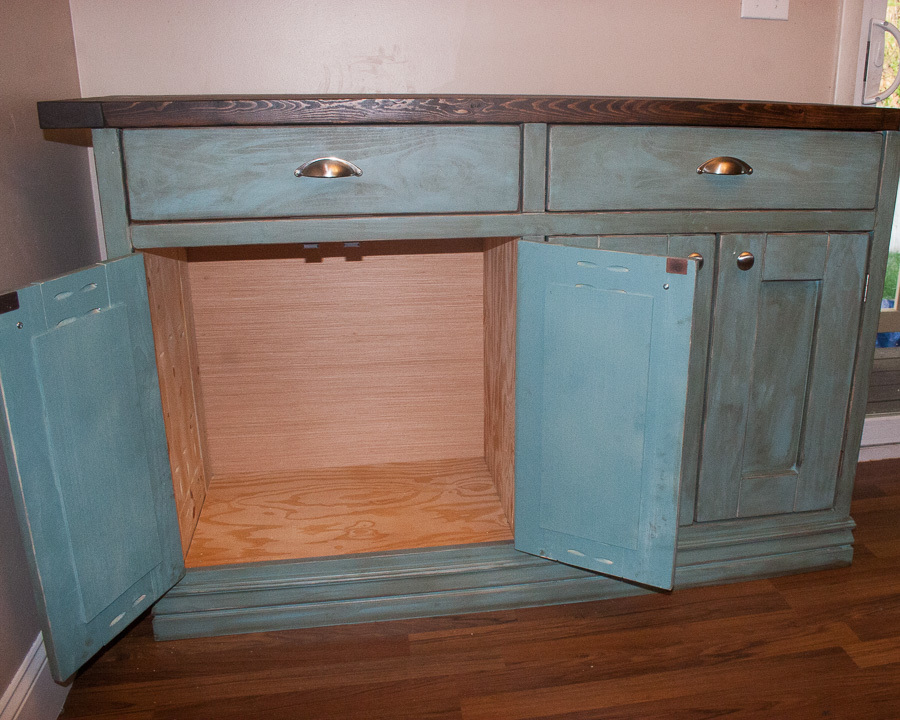
Built from Plan(s)
Estimated Cost
About $325
Estimated Time Investment
Weekend Project (10-20 Hours)
Finish Used
Except for the stain I used spray paint which made the finishing process go much faster and made it easy to get into all the grooves.
For the top:
Two generous coats of Minwax Wood Finish Penetrating Stain in "Espresso 273" using a cloth to apply and then a clean cloth to wipe off the excess after allowing some time for the stain to soak in. Added two top coats of Minwax Fast-Drying Polyurethane in "Clear Satin".
For the base:
Primed with Valspar spray paint in white. Then added two coats of Valspar spray paint in "Secluded Garden" Satin finish. Sanded the edges a bit and then went over it and quickly wiped off with the same stain as the top. This soaks into the exposed wood on the edges and leaves a bit of residue on top of the paint itself. Sealed over the top with a coat of clear satin top coat. Also used just the clear spray seal on all the exposed wood on the inside of the base.
Recommended Skill Level
Intermediate
Twin Farmhouse Bed
I've been looking at this bed plan for several years, wondering if I had sufficient skills to scale up from small items to furniture. I finally did it! It was a family project, with 2 of my 3 kids getting involved. My son has been sleeping on it for several months now, and it's still rock solid. Now to settle on a desk plan for him. Thank you for all the great plans and inspiration!
Finish Used
Varathane weathered gray and worn navy.
Comments
Closet Storage
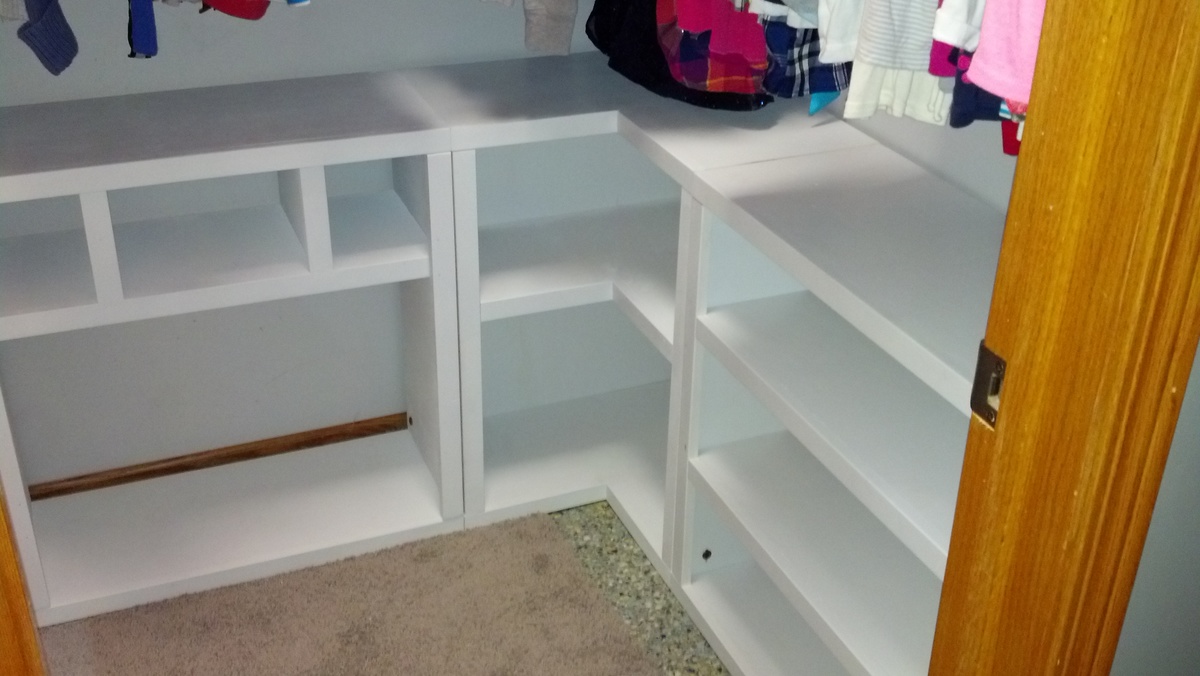
My daughter has a small walk-in closet, so I wanted to make some storage bases. I had a full sheet and half sheet of plywood each ripped into 4 pieces, with each piece 11 3/4" wide. I then built the sides and corner shelves separately and connected them with connector bolts. I have since added doors to the shelf on the left.
Estimated Cost
$75
Estimated Time Investment
Weekend Project (10-20 Hours)
Finish Used
Rustoleum flat white primer and flat white paint
Recommended Skill Level
Beginner
Comments

In reply to Wow! by Lady Goats
Fri, 03/08/2013 - 14:53
You're right Gina - it's
Good catch Gina - it's actually a sheet and a half of 3/4" ply, with some to spare. I forgot that I had to make another trip to get the extra half sheet (I made this a month ago). The corner unit also has 1/2" ply for the back, and since I was painting it, I bought the cheapest plywood I could. The vertical dividers are also made with scrap pieces of 1x pine I had lying around.
Modified Doll Bunk Bed
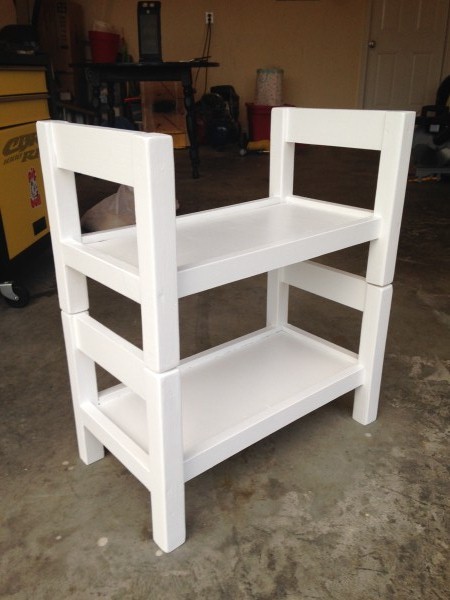
I made this bunk bed for a friend's daughters. I modified the plans by using 2x2's for the bed posts instead of 1x2's. It made it harder to hide the screws but in the end I think it looks better.
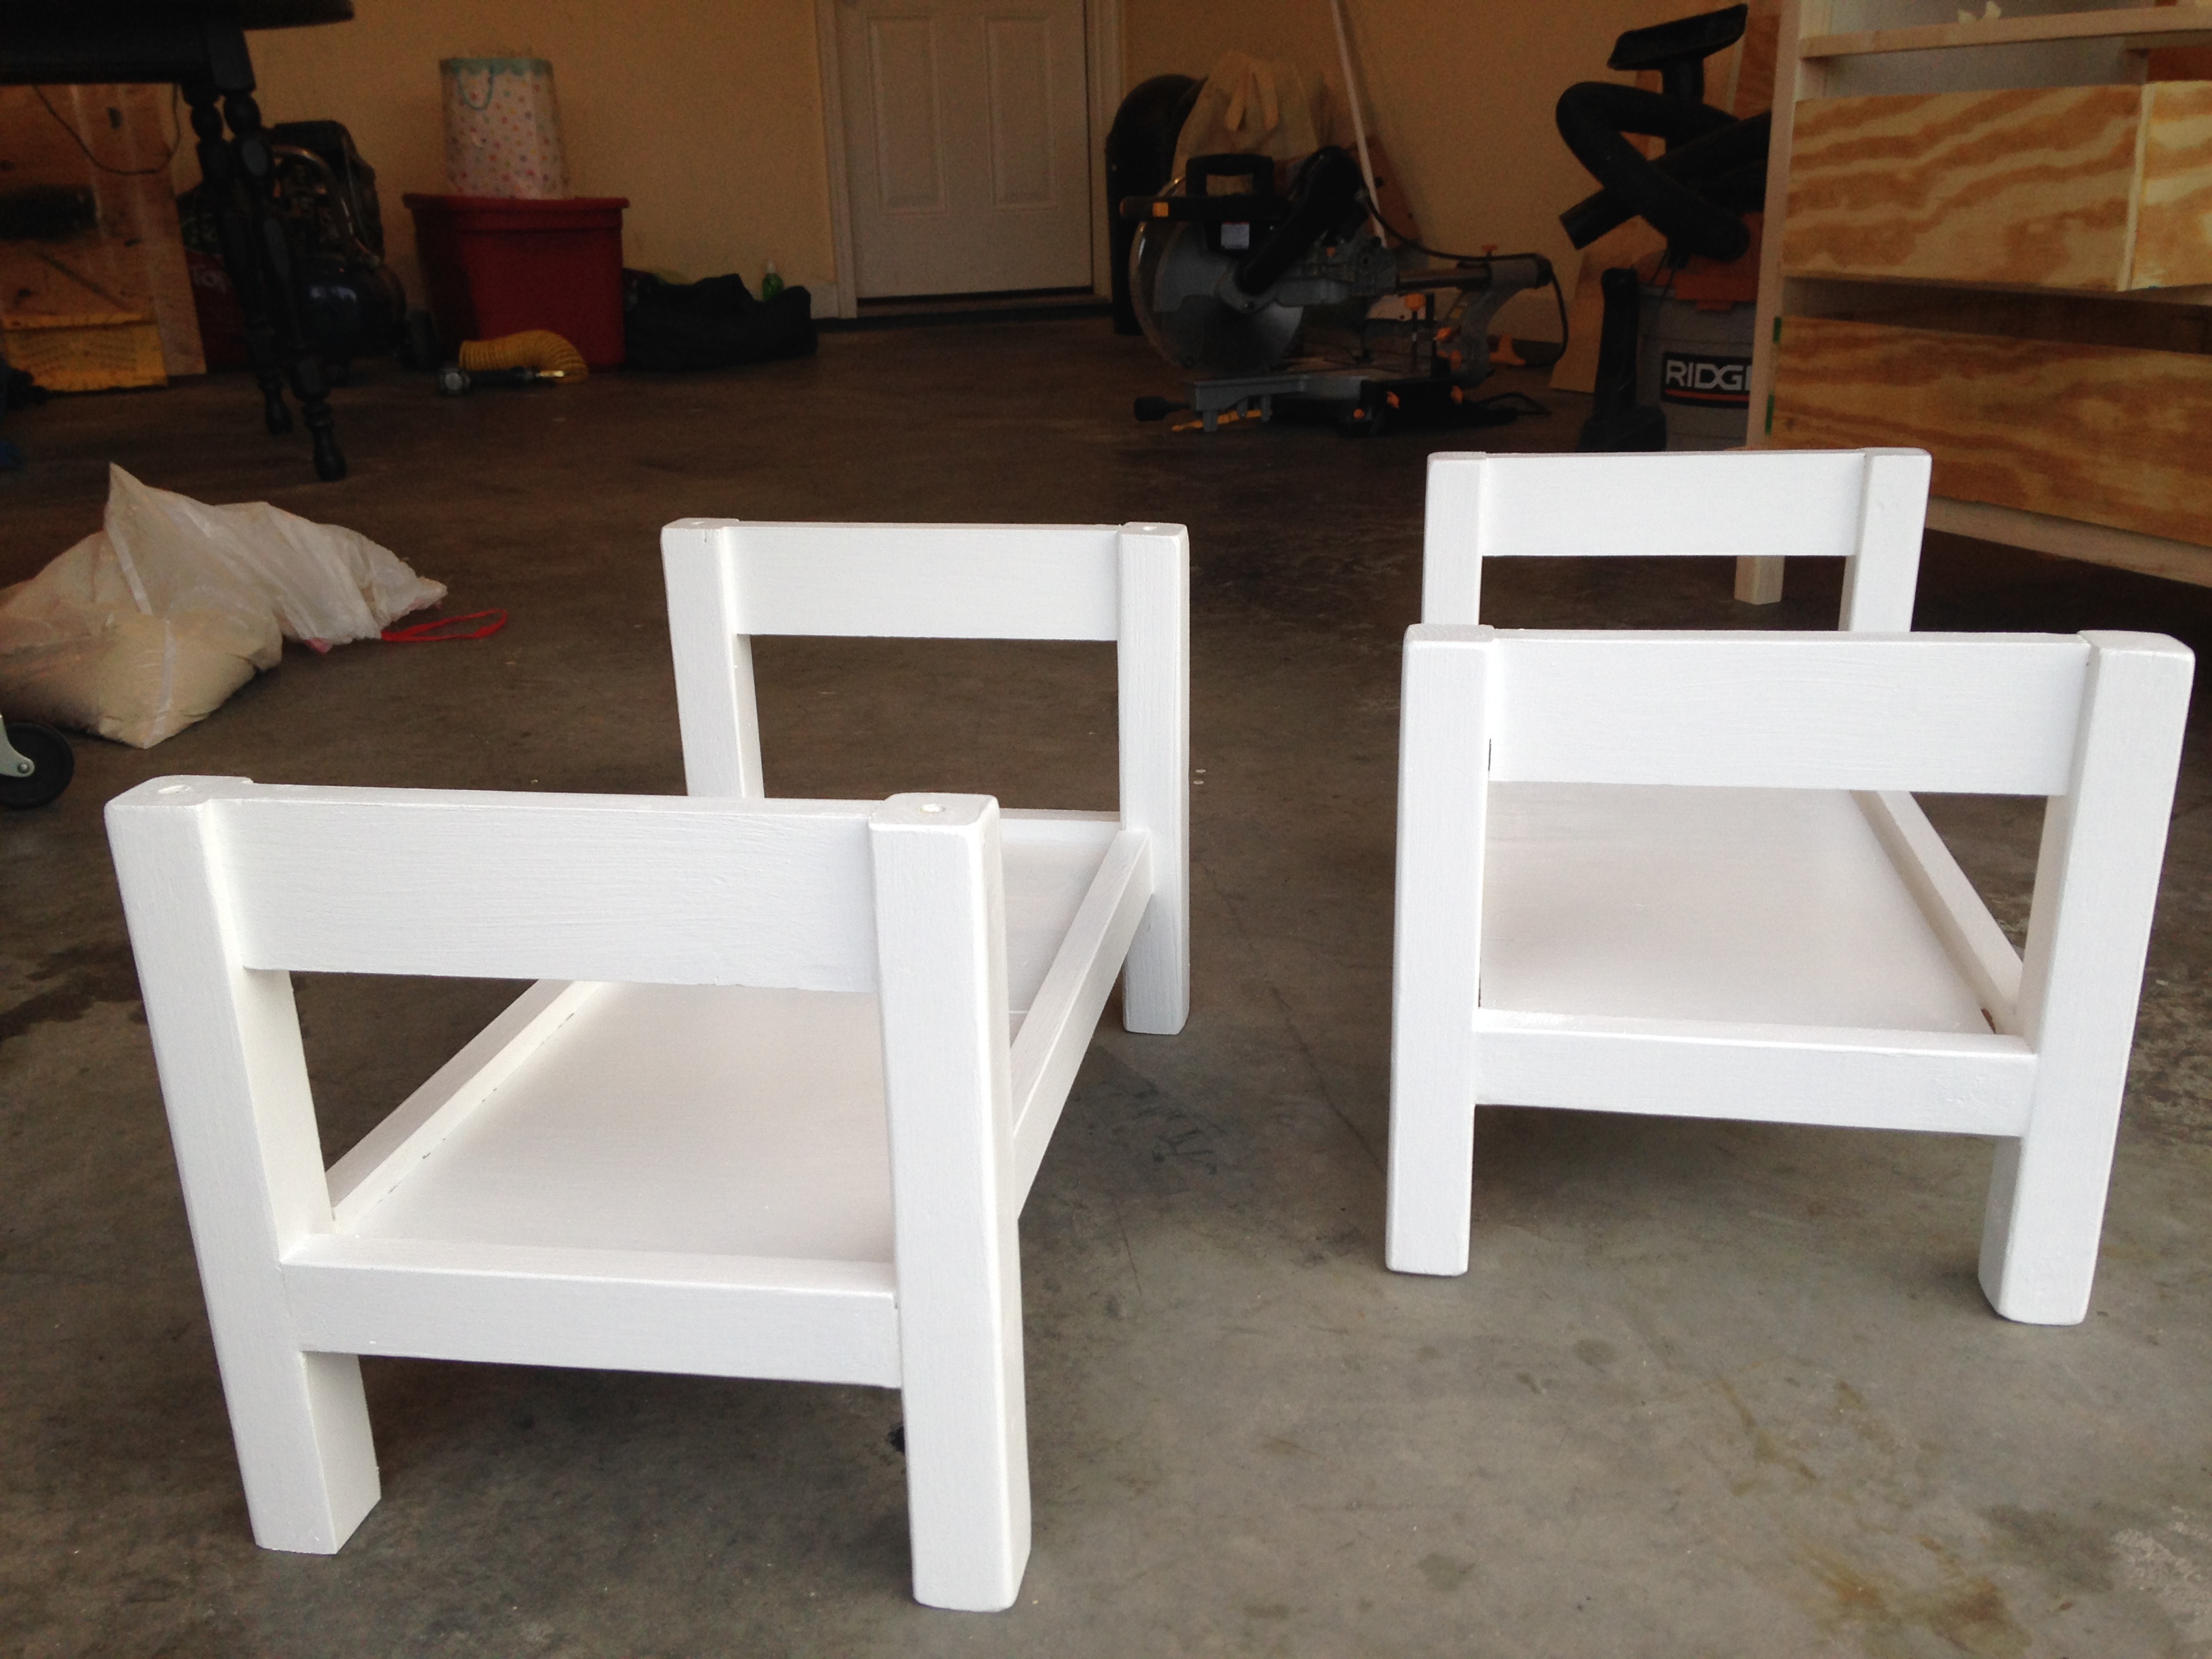
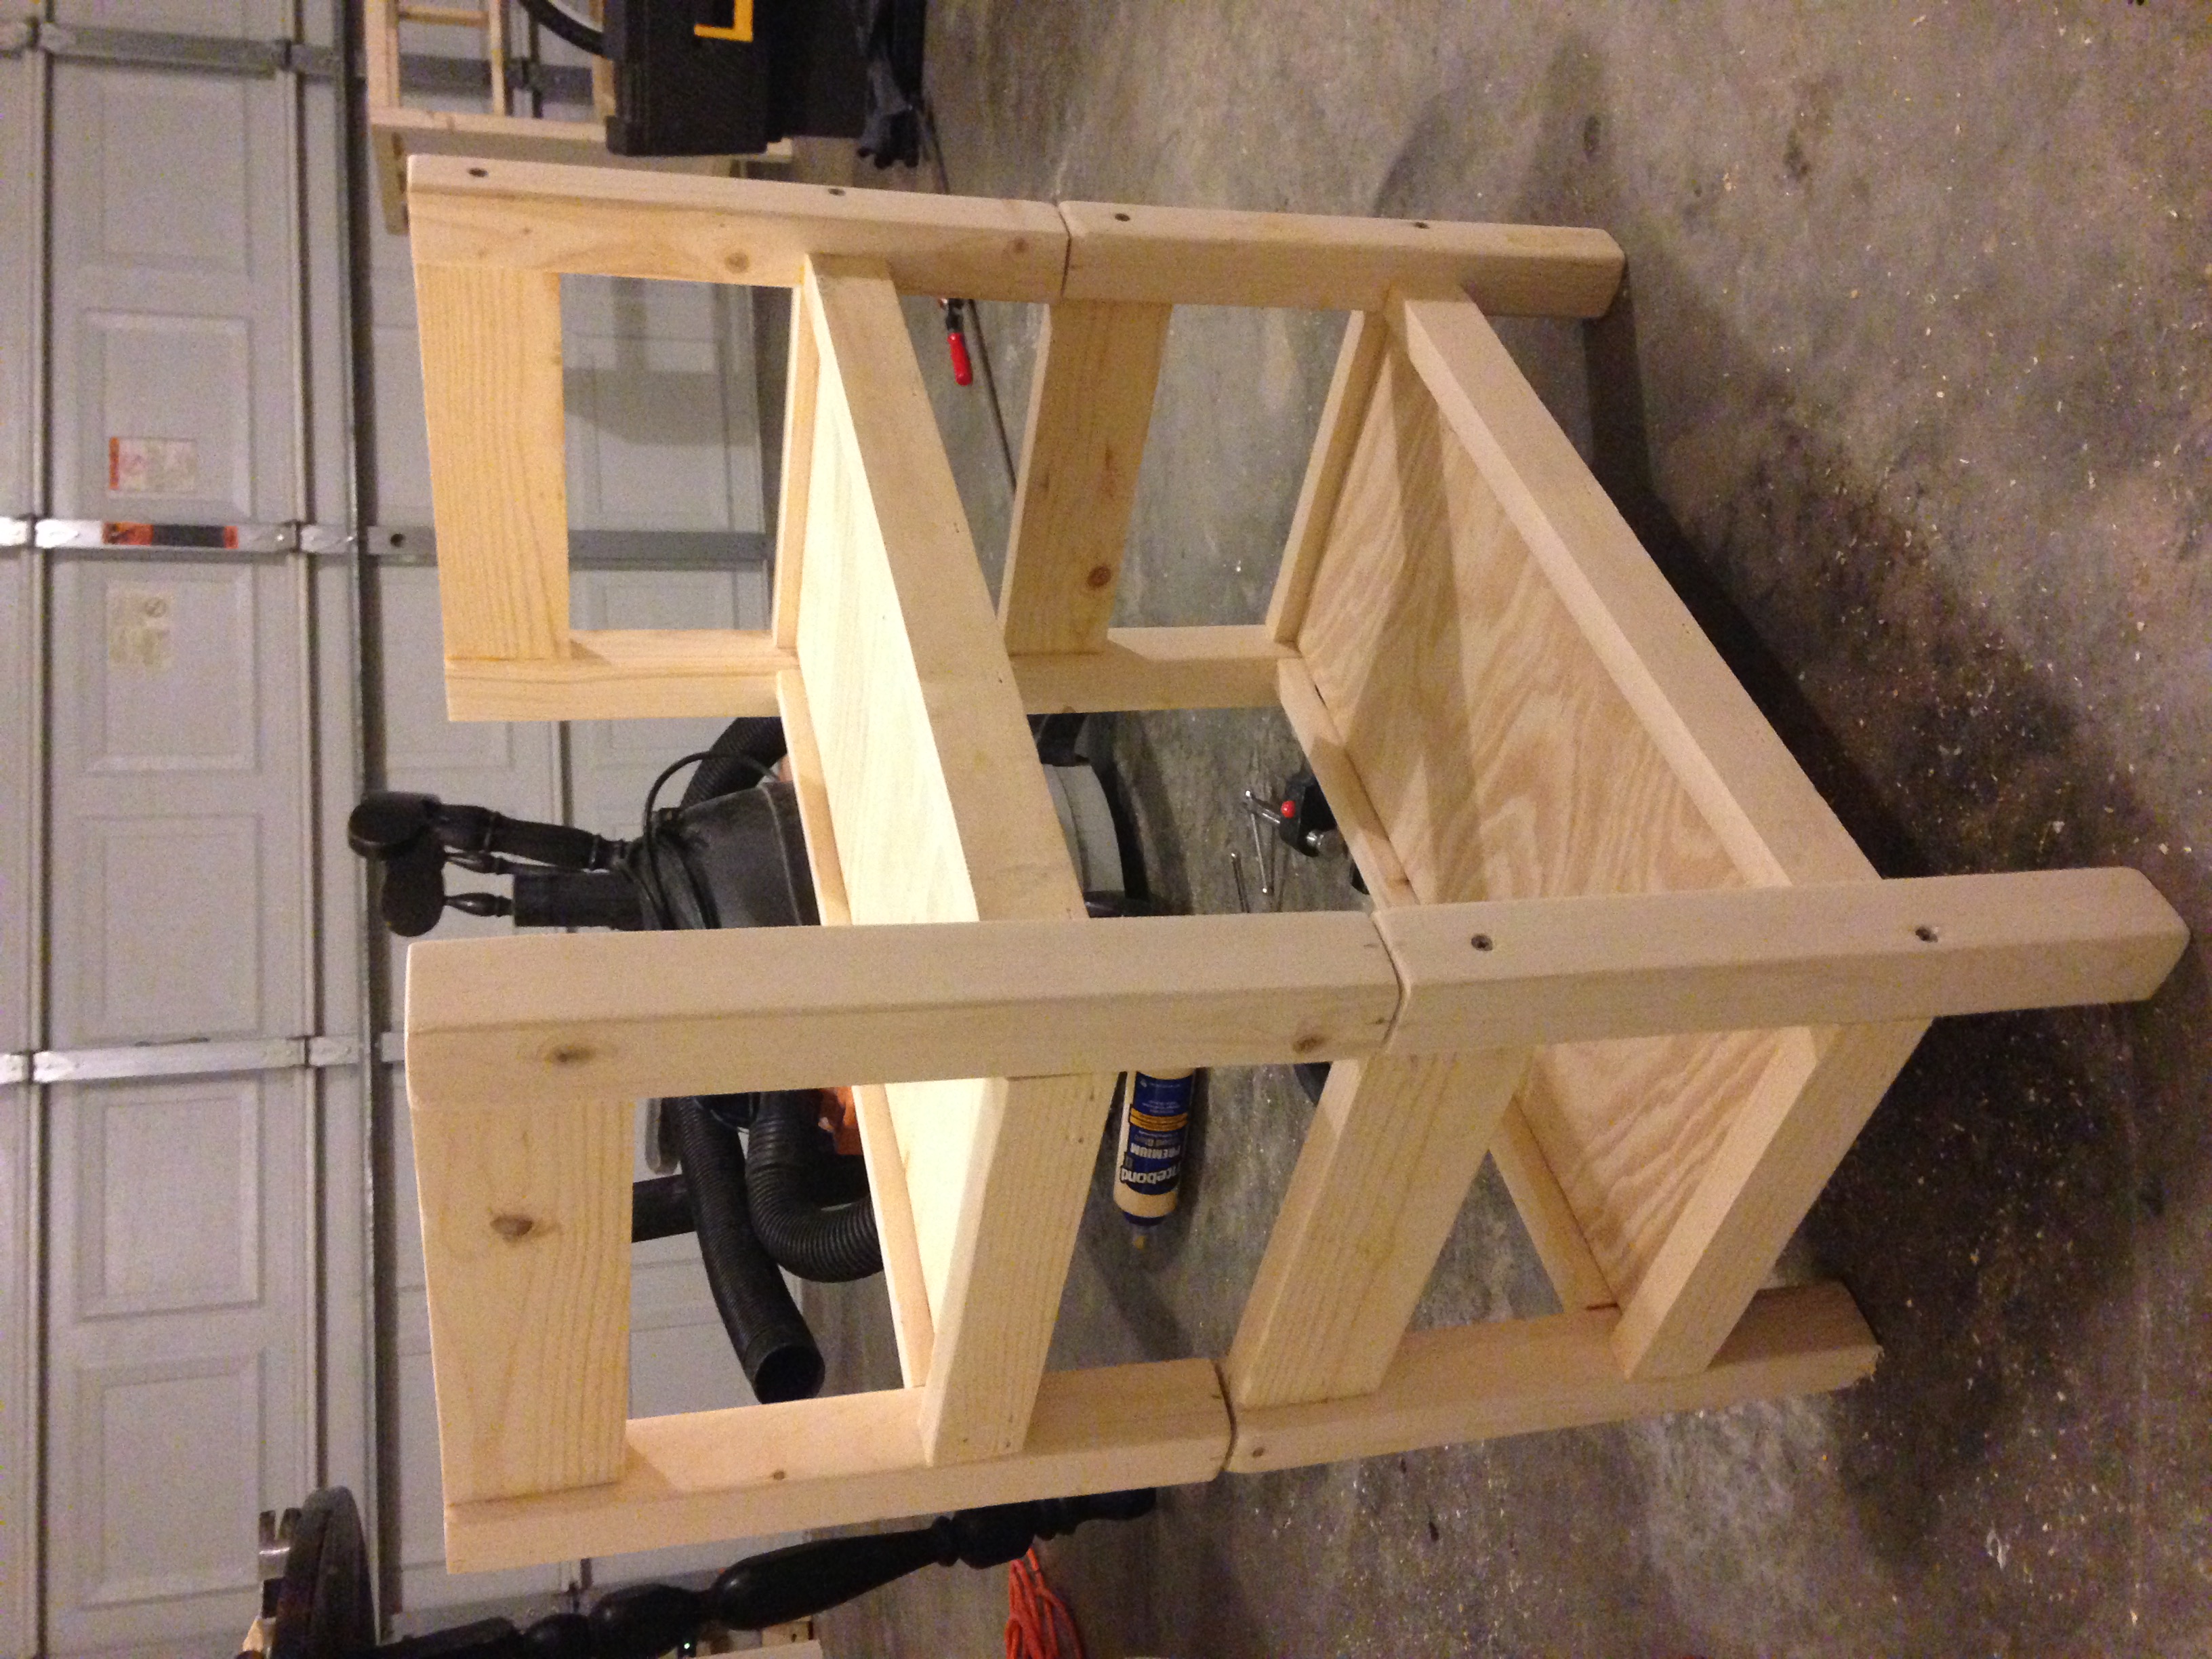
Built from Plan(s)
Estimated Cost
About $20.
Finish Used
I painted the wood with white paint.
Recommended Skill Level
Starter Project
Tv stand
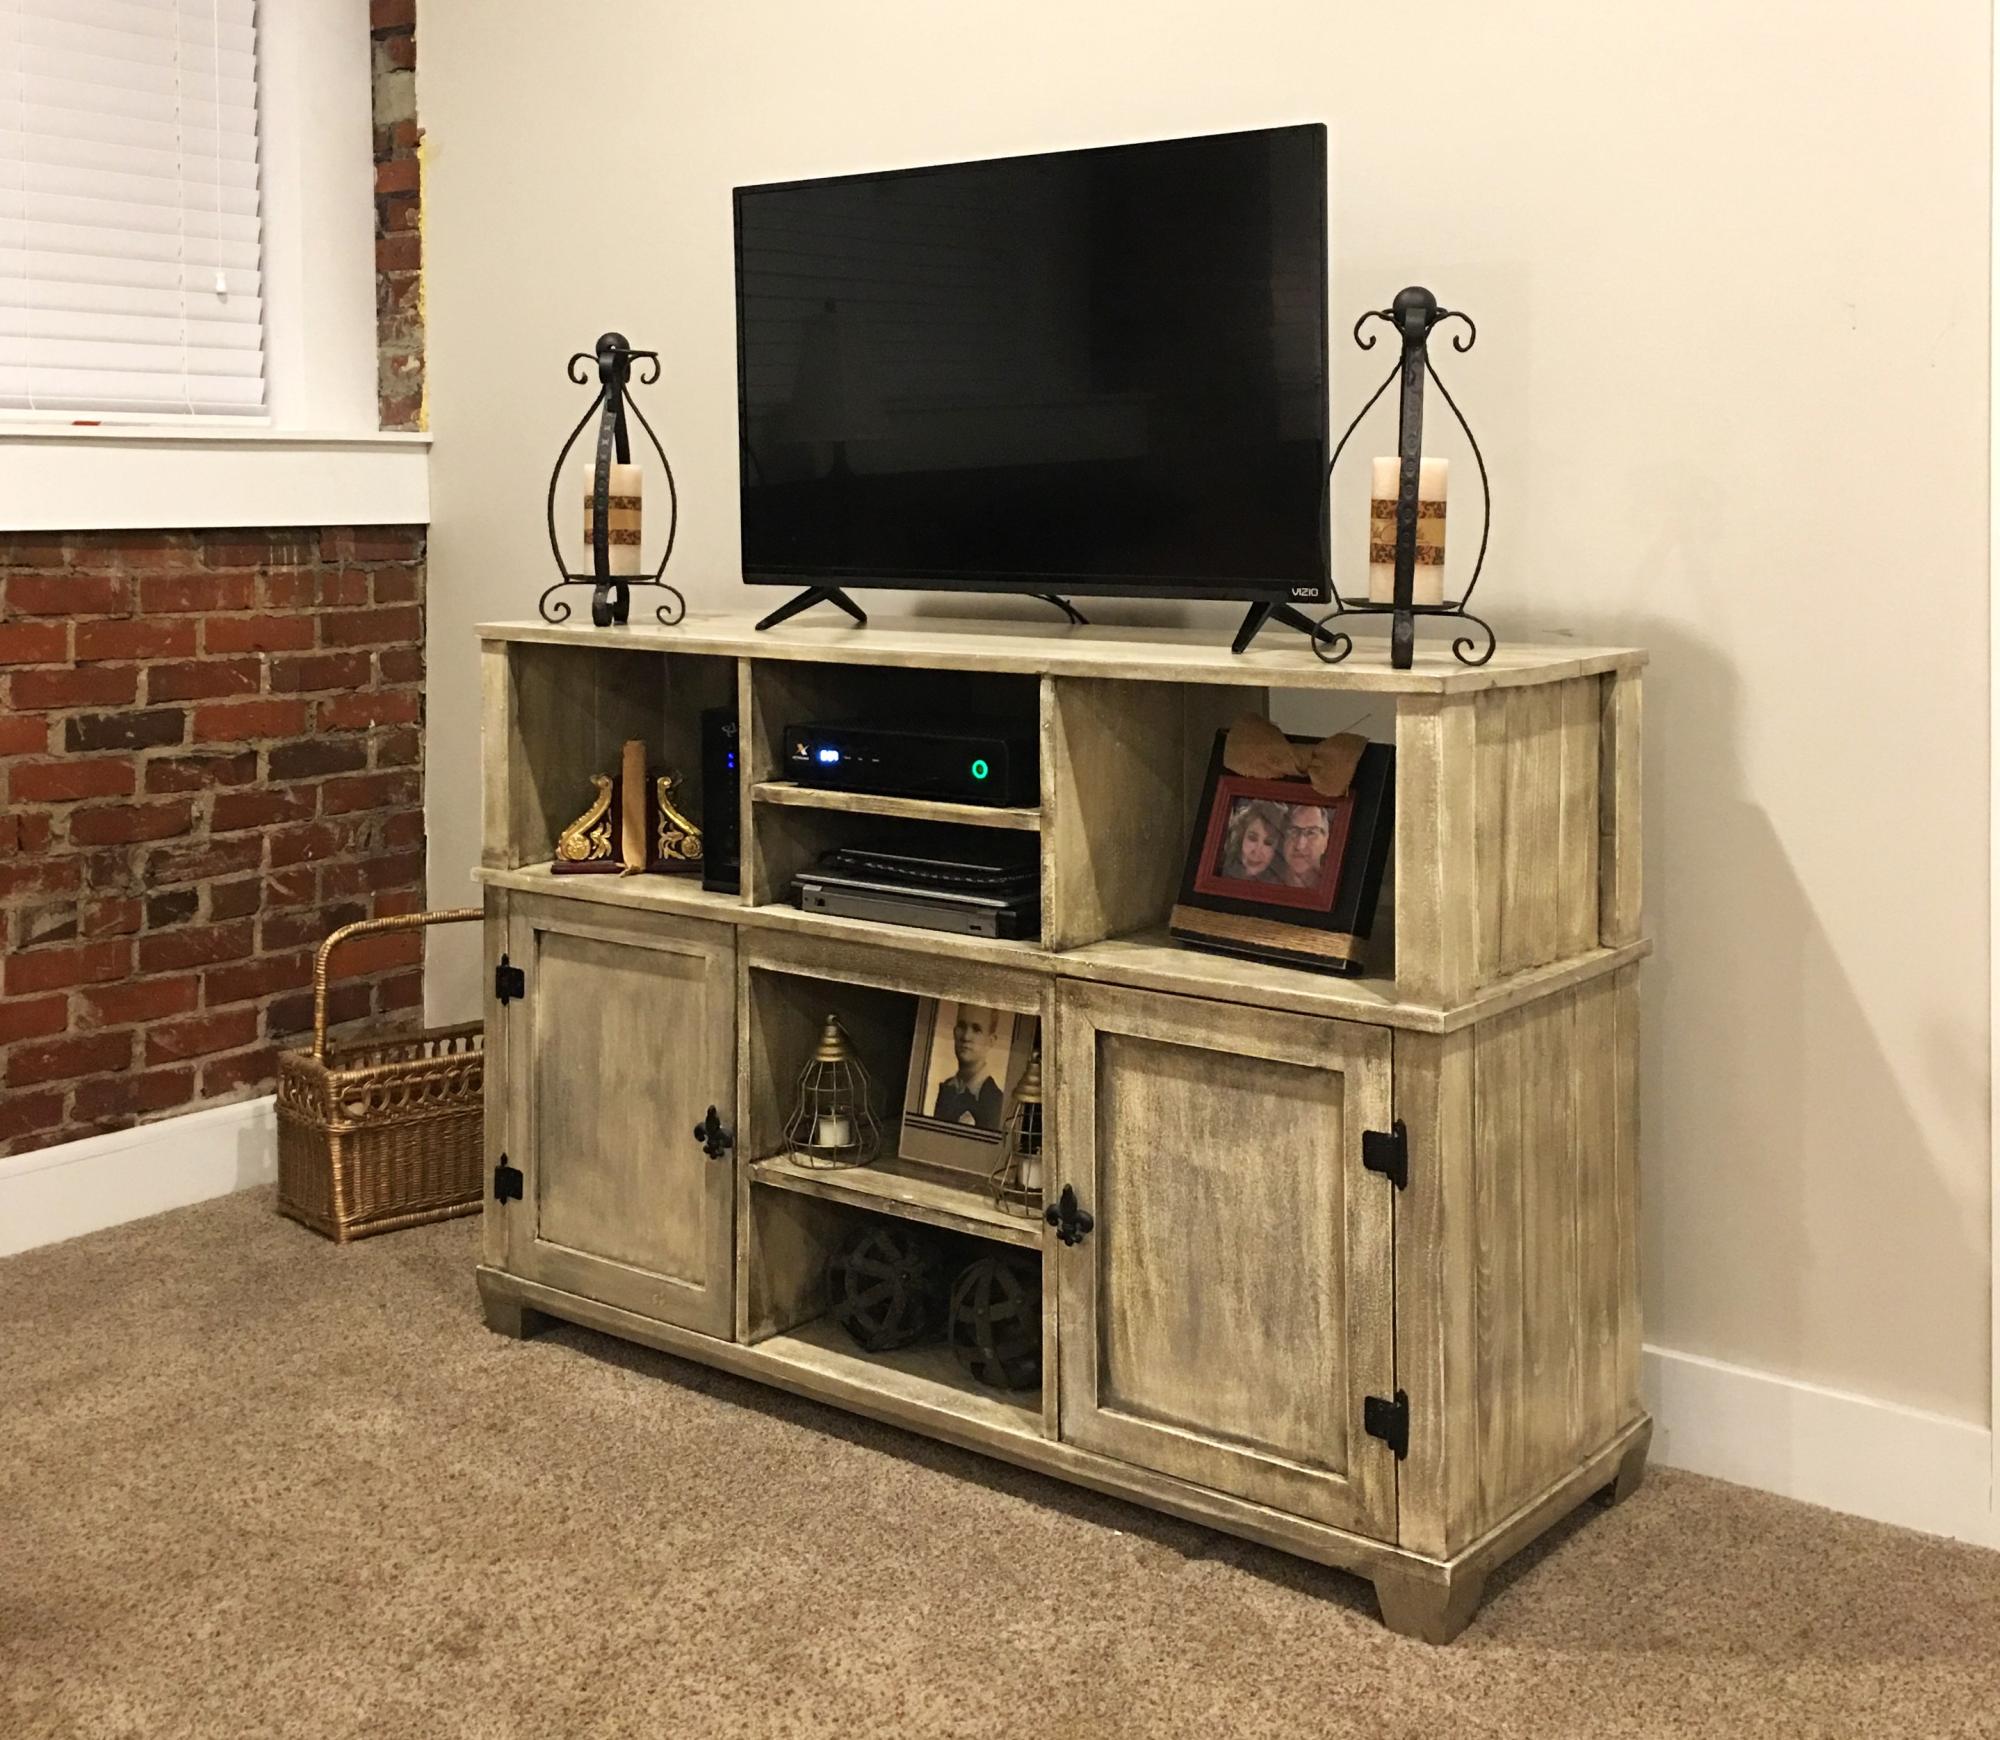
I had an idea of what I wanted and this plan helped me get started.
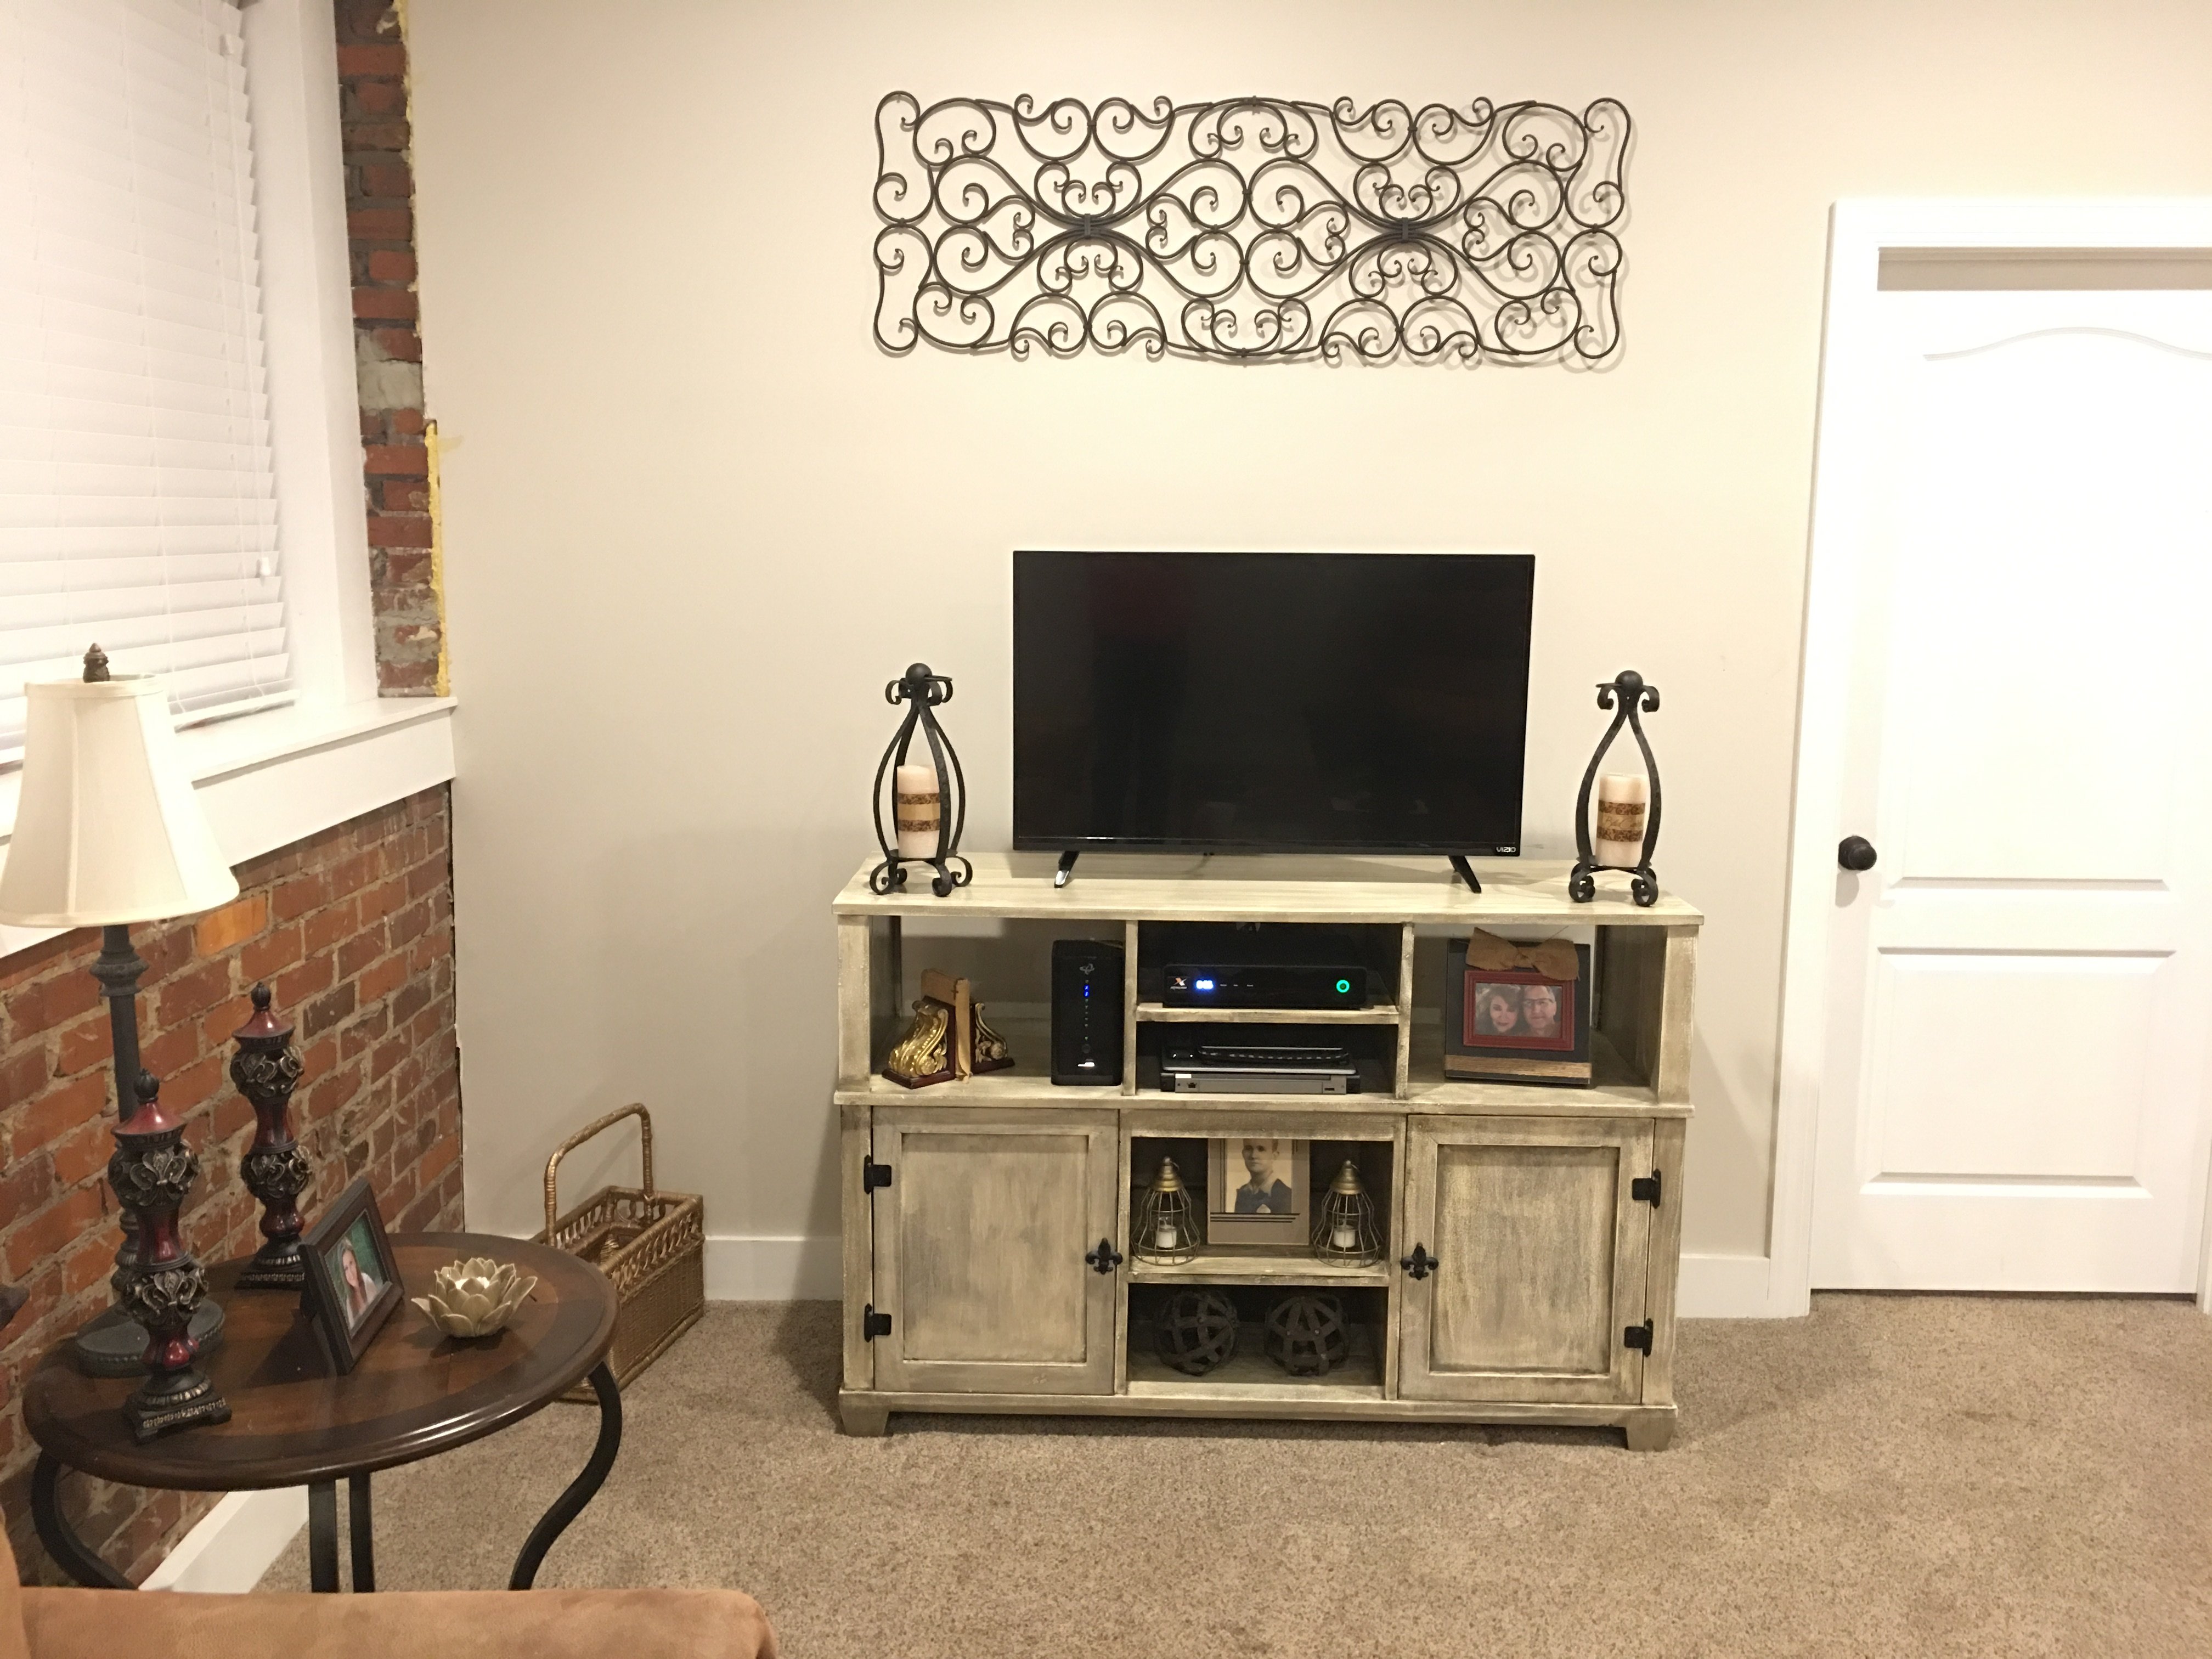
Built from Plan(s)
Estimated Cost
$125
Estimated Time Investment
Week Long Project (20 Hours or More)
Finish Used
Country white paint. Black glaze.
Recommended Skill Level
Intermediate
My projects.

These are my finish projects, I made with Ana Whites plans. Thank you very much Ana White.


Estimated Cost
100.00
Estimated Time Investment
Weekend Project (10-20 Hours)
Finish Used
Home Depot building department has scrap wood with some flaws but still great too use for projects.
Recommended Skill Level
Beginner
Comments
Wed, 03/17/2021 - 09:40
You've been busy!
Fantastic job on all of your builds! Thank you for sharing:)
Twin Headboards with Barnlight from Reclaimed Headboard plans

I built our boys matching twin sized headboard based on the reclaimed headboard plan. I added some height to the headboard to account for the lights (to avoid them smacking their head on the light) but that's about it. You can read more about the beds here: http://thehouseoflists.wordpress.com/2013/03/10/twins/ The build time was ridiculously quick. I just measured once, set the guide for the saw and cut both sets of all the pieces. The majority of the time was waiting for the poly to dry in the basement. It was a bit too chilly and damp I think, but eventually it dried.


Built from Plan(s)
Estimated Cost
$60 each, $120 total
Estimated Time Investment
Weekend Project (10-20 Hours)
Finish Used
Painted Benjamin Moore Puritan Gray with one (poorly applied) coat of poly.
Recommended Skill Level
Beginner
Closet storage
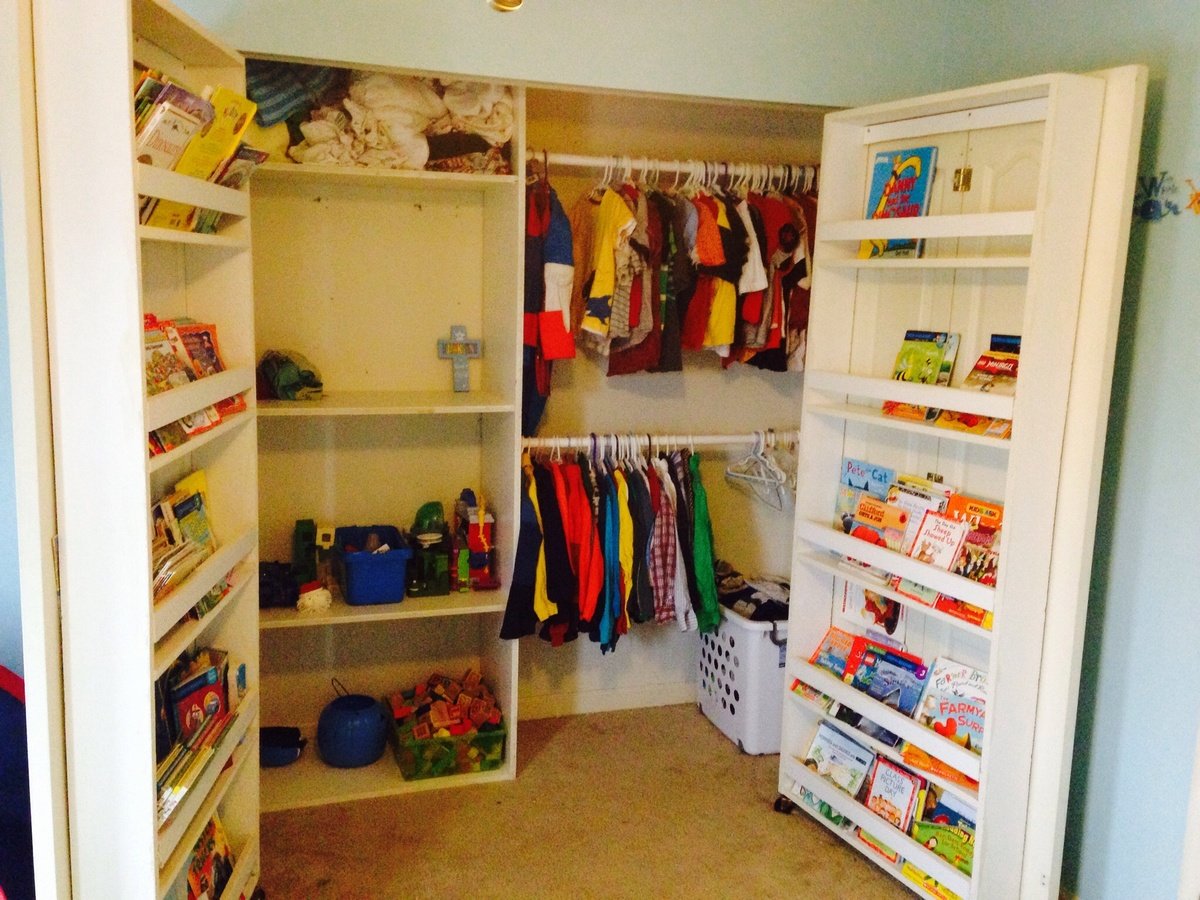
Great storage idea which makes things easy to see and get to
Built from Plan(s)
Estimated Cost
$150
Estimated Time Investment
Day Project (6-9 Hours)
Finish Used
Sherwin Williams paint
Recommended Skill Level
Intermediate
Comments
Wed, 01/28/2015 - 18:50
Thank you very much, Ana you
Thank you very much, Ana you have inspired myself and my wife to undertake woodworking projects that I thought were unattainable. You have made these projects easy, fun and affordable