Side Table
![](/sites/default/files/table2.jpeg)
I love this table. I modified it to fit my needs.
![](/sites/default/files/table%201.jpeg)
![](/sites/default/files/table3.jpeg)
I love this table. I modified it to fit my needs.
My first bench ever, i like it
I built this toy box for a friend who just had a baby. I followed the plans, except I used pocket holes for the main box. Instead of the base moulding I used 1 x 4's and carved out the shape with my jigsaw. I also used quarter rounds instead of cove moulding because I couldn't find that.
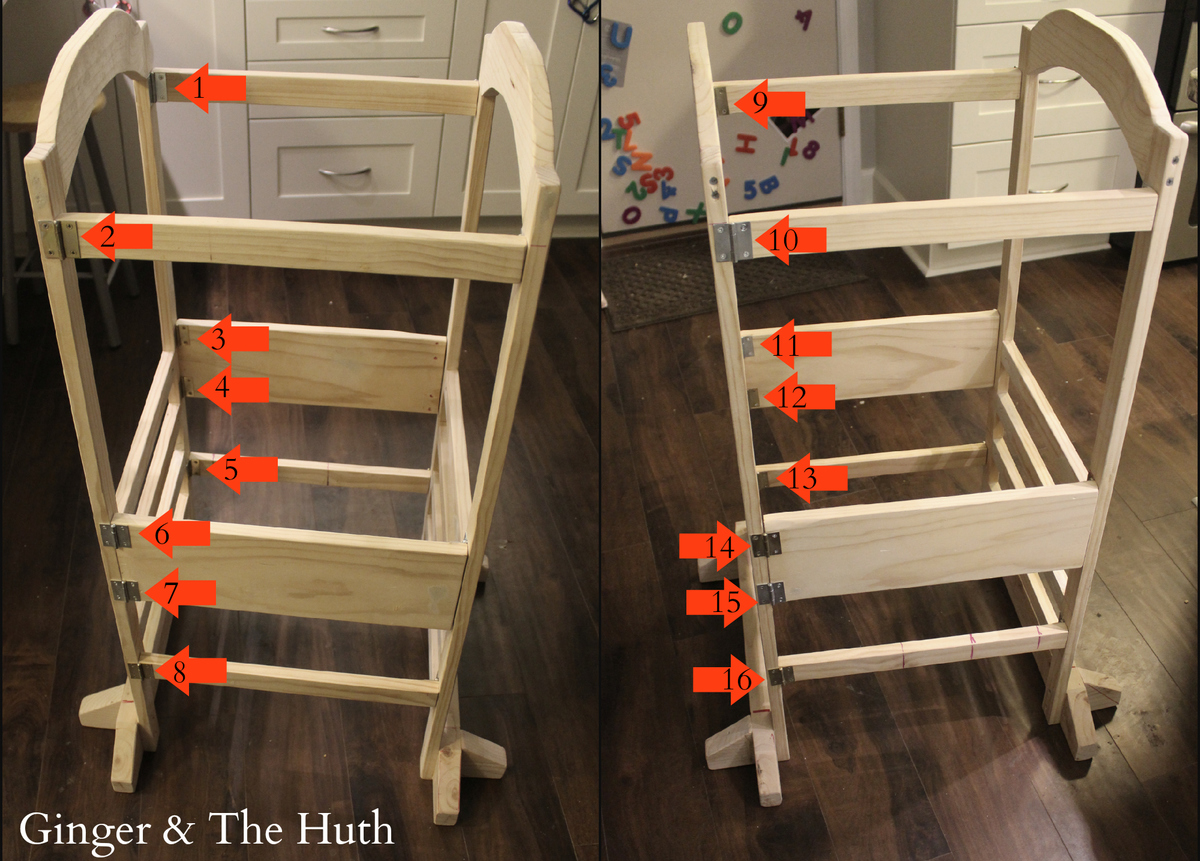
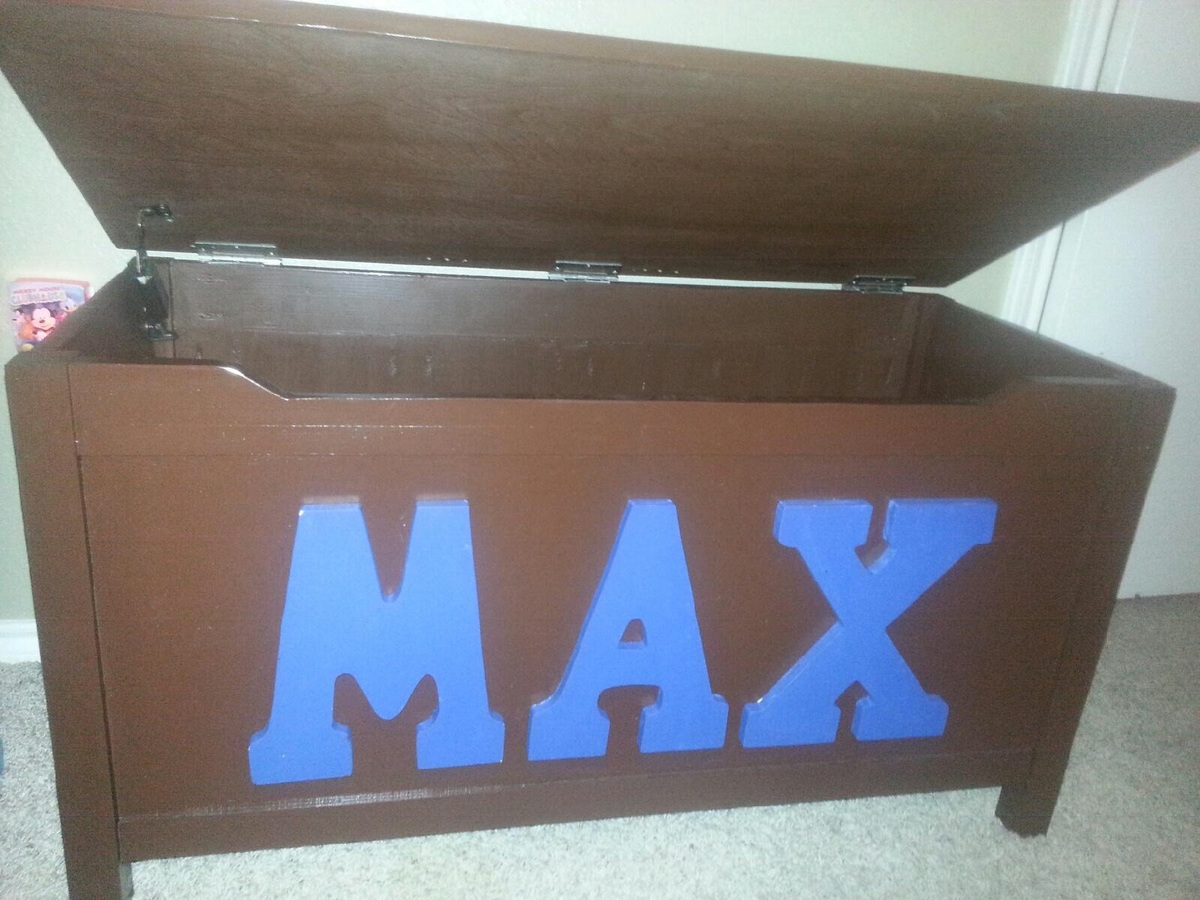
Ana's plan called for using 8 hinges (I'm not sure on the placement of those). I used a total of 16 to ensure sturdiness. I put two hinges on each corner of the 1x8 piece and a hinge anywhere the corners connected. I used Narrow Utility Hinges (1-1/2" Zinc plated). The pack of 2 cost $2.27 and comes with screws. My biggest regret is not painting the hinges before I put them on. I waited until after screwing them in and it was a pain and makes my paint job look sloppy.
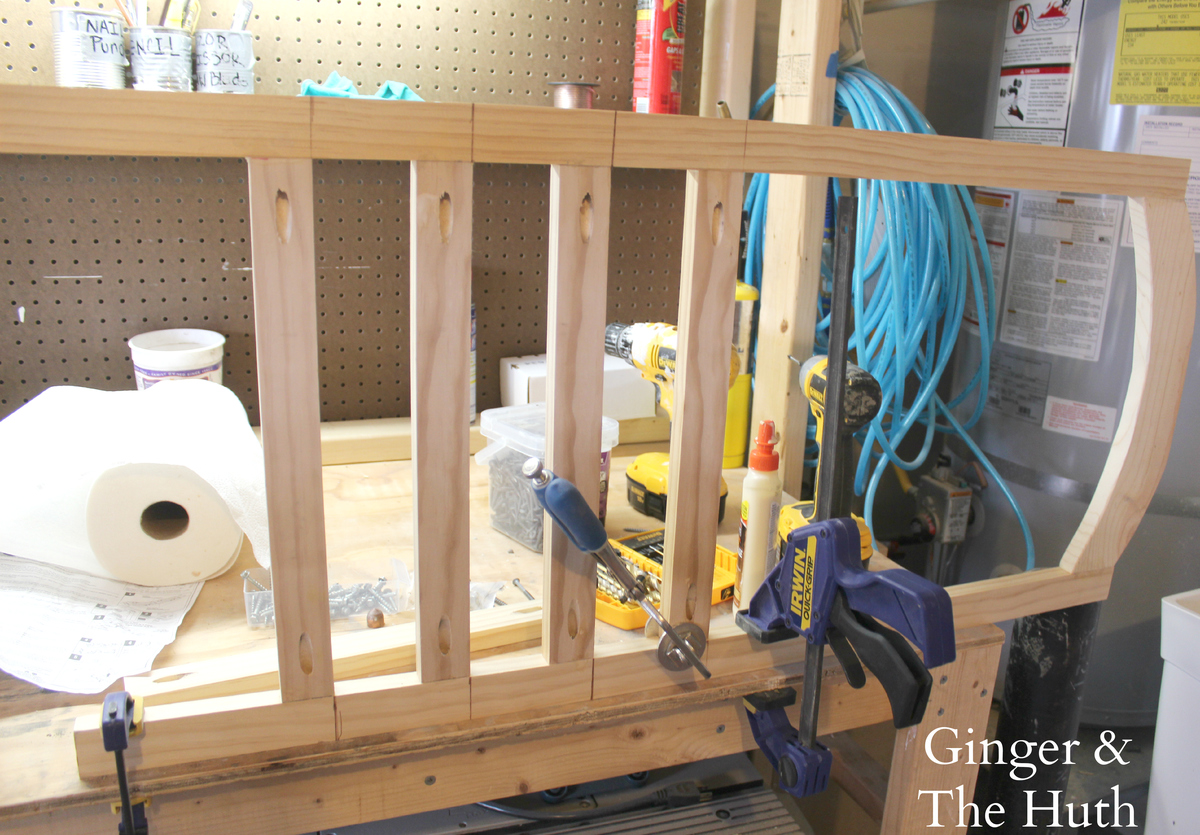
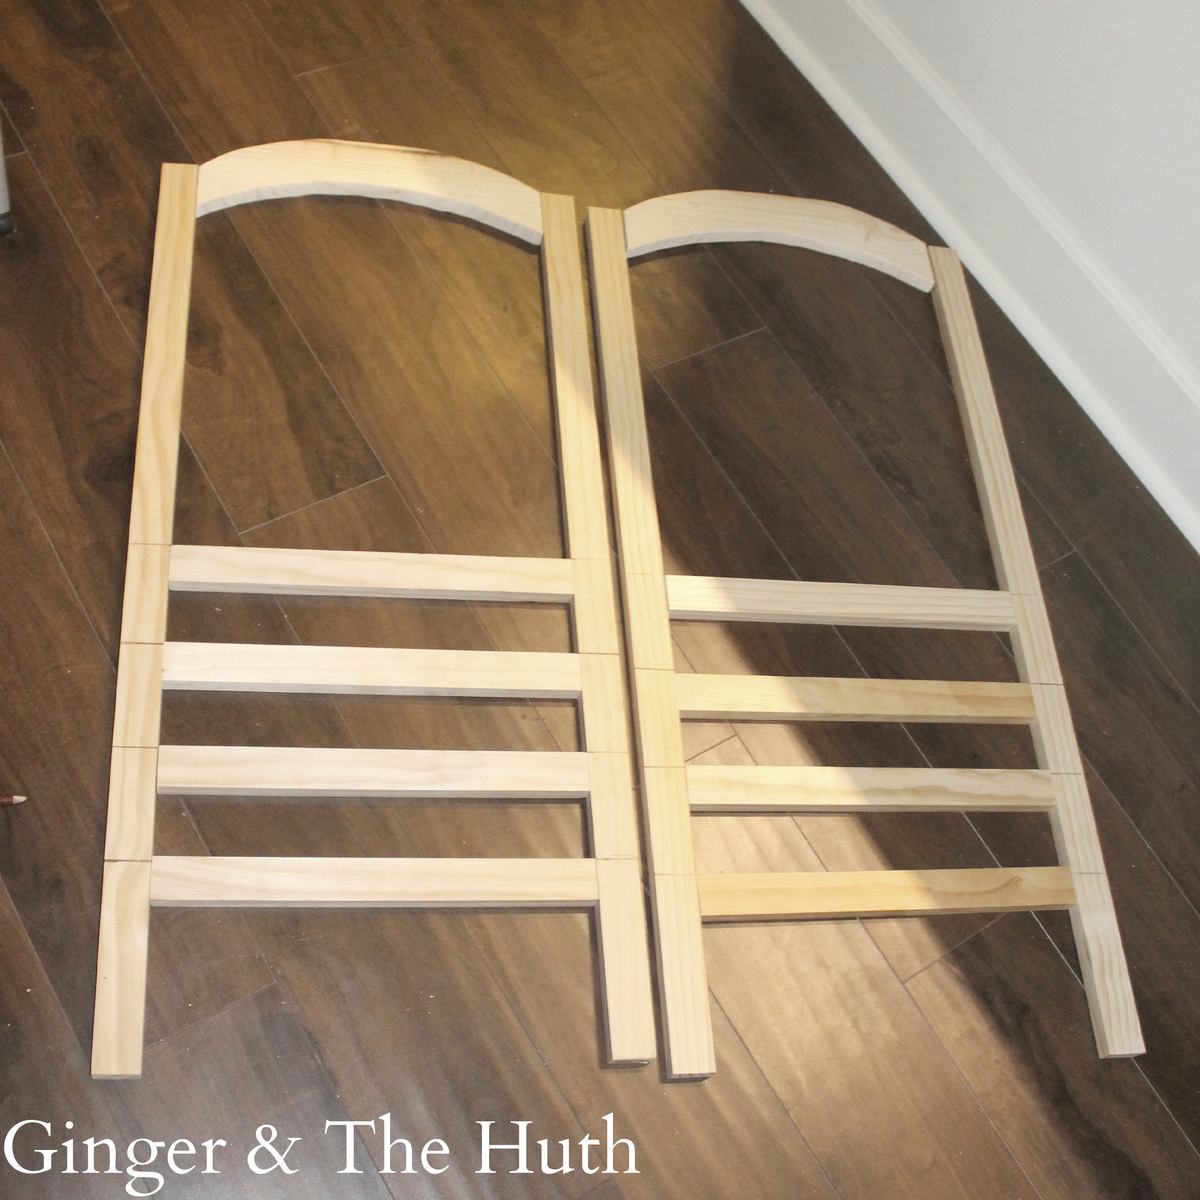
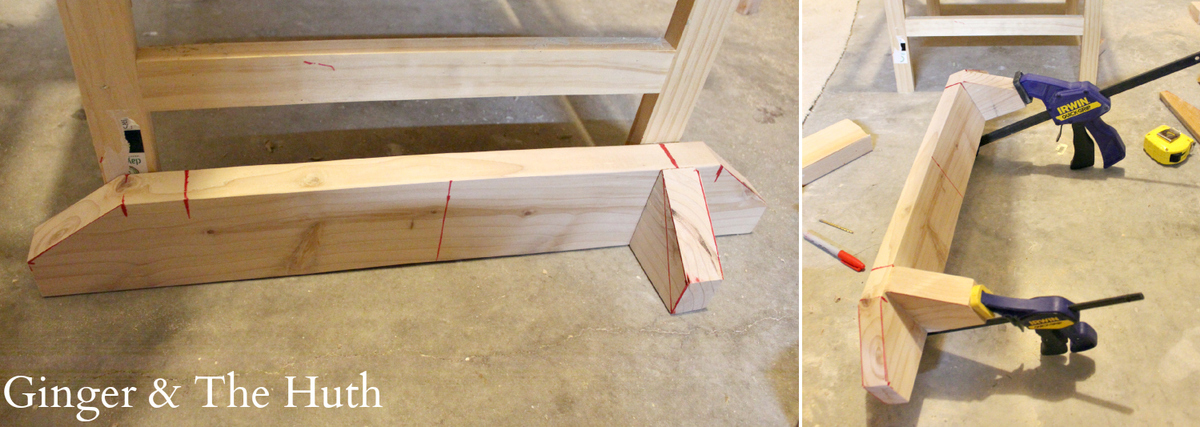
Although I priced this build out, I ended up using wood I already had in the garage. I didn't have enough 1x3 to make the anti-tipping feet so I used a 2x4. I also didn't make the rounded edges, just a few angled straight cuts.
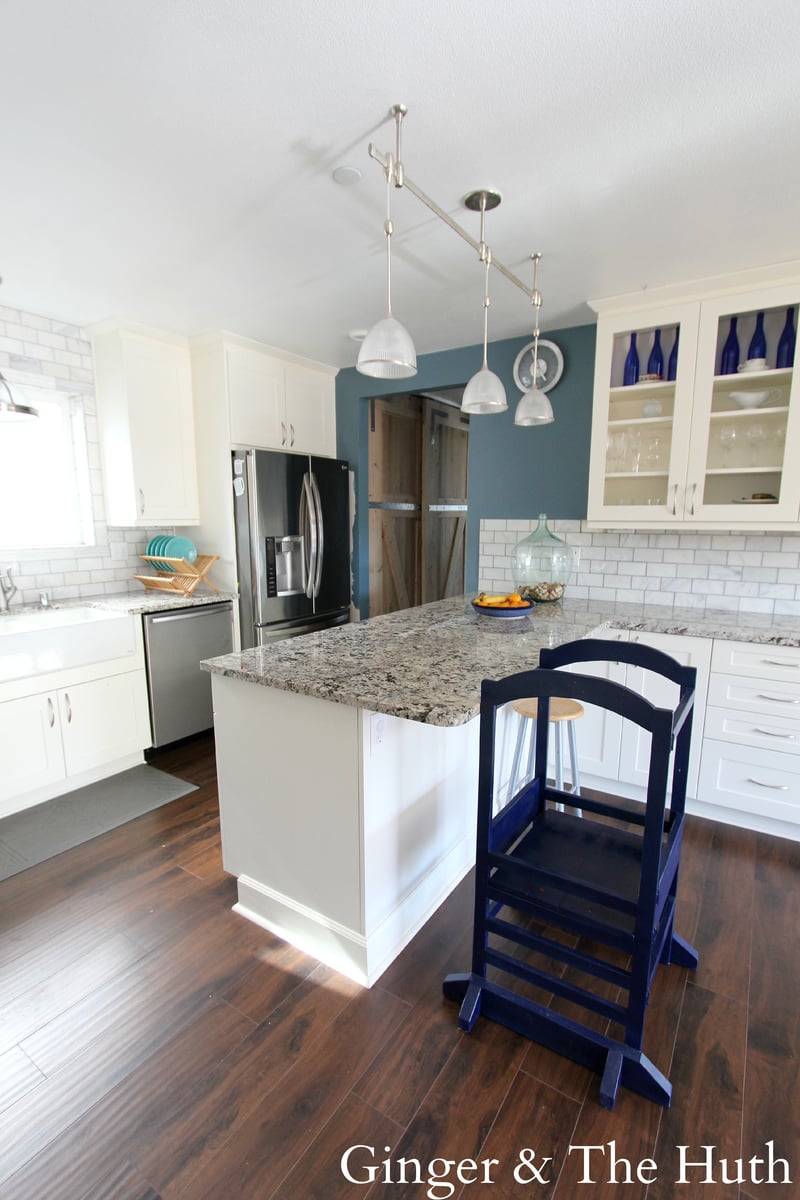
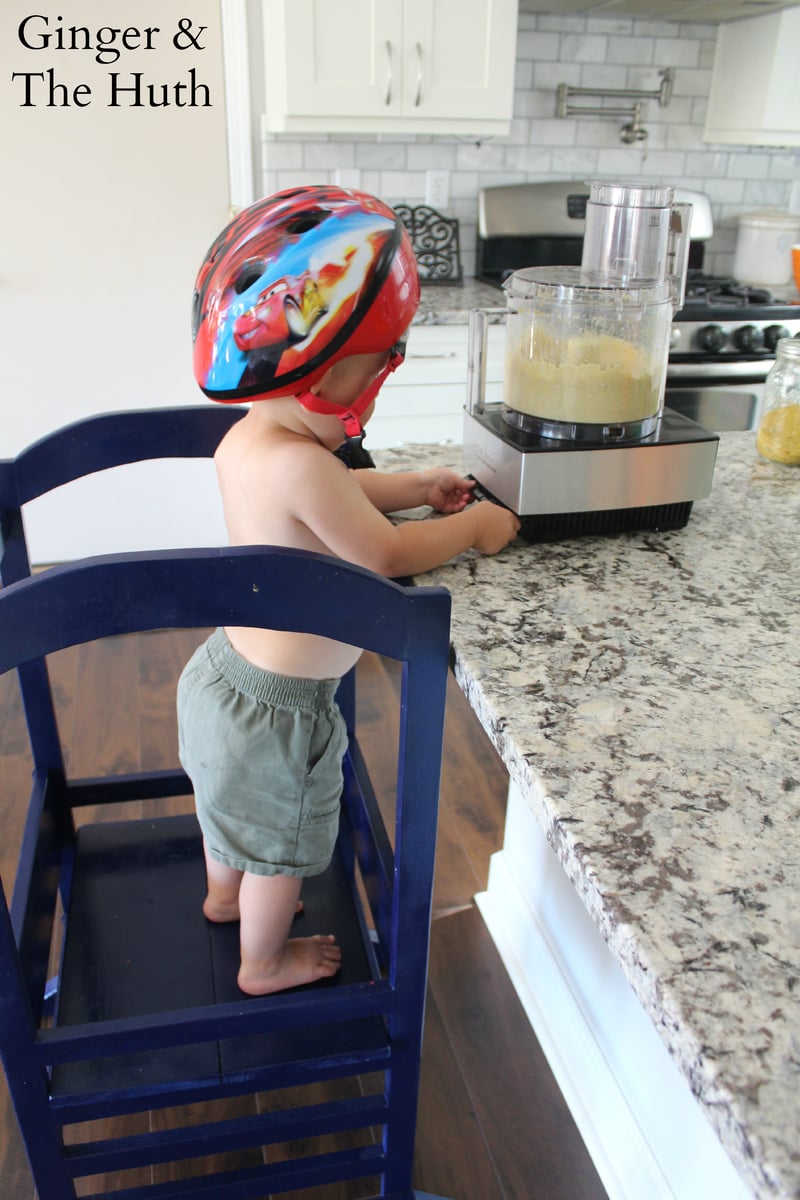
THESE ANTI-TIP FEET ARE A SAFETY MUST, DO NOT SKIP THEM!! I've seen a few commenters say they skipped the anti-tip feet, but for us they were a must. My kid would have easily knocked his tower many times if it weren't for these anti-tip feet!
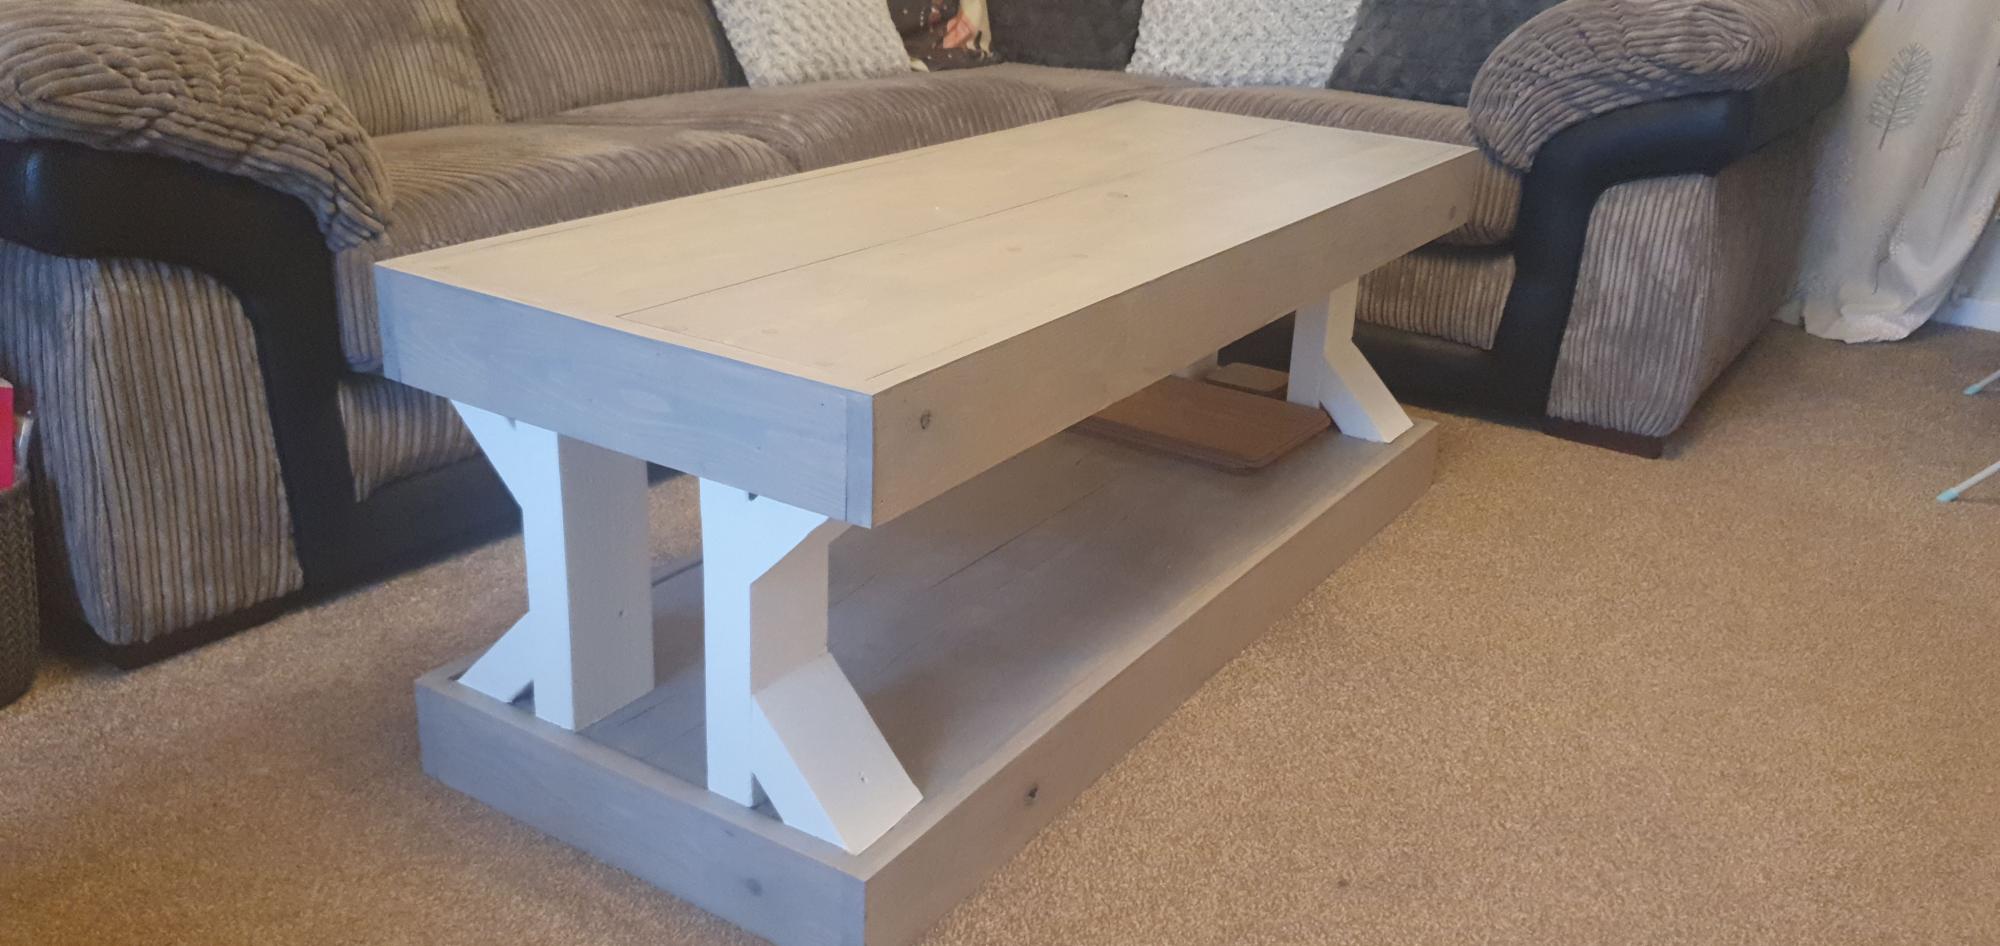
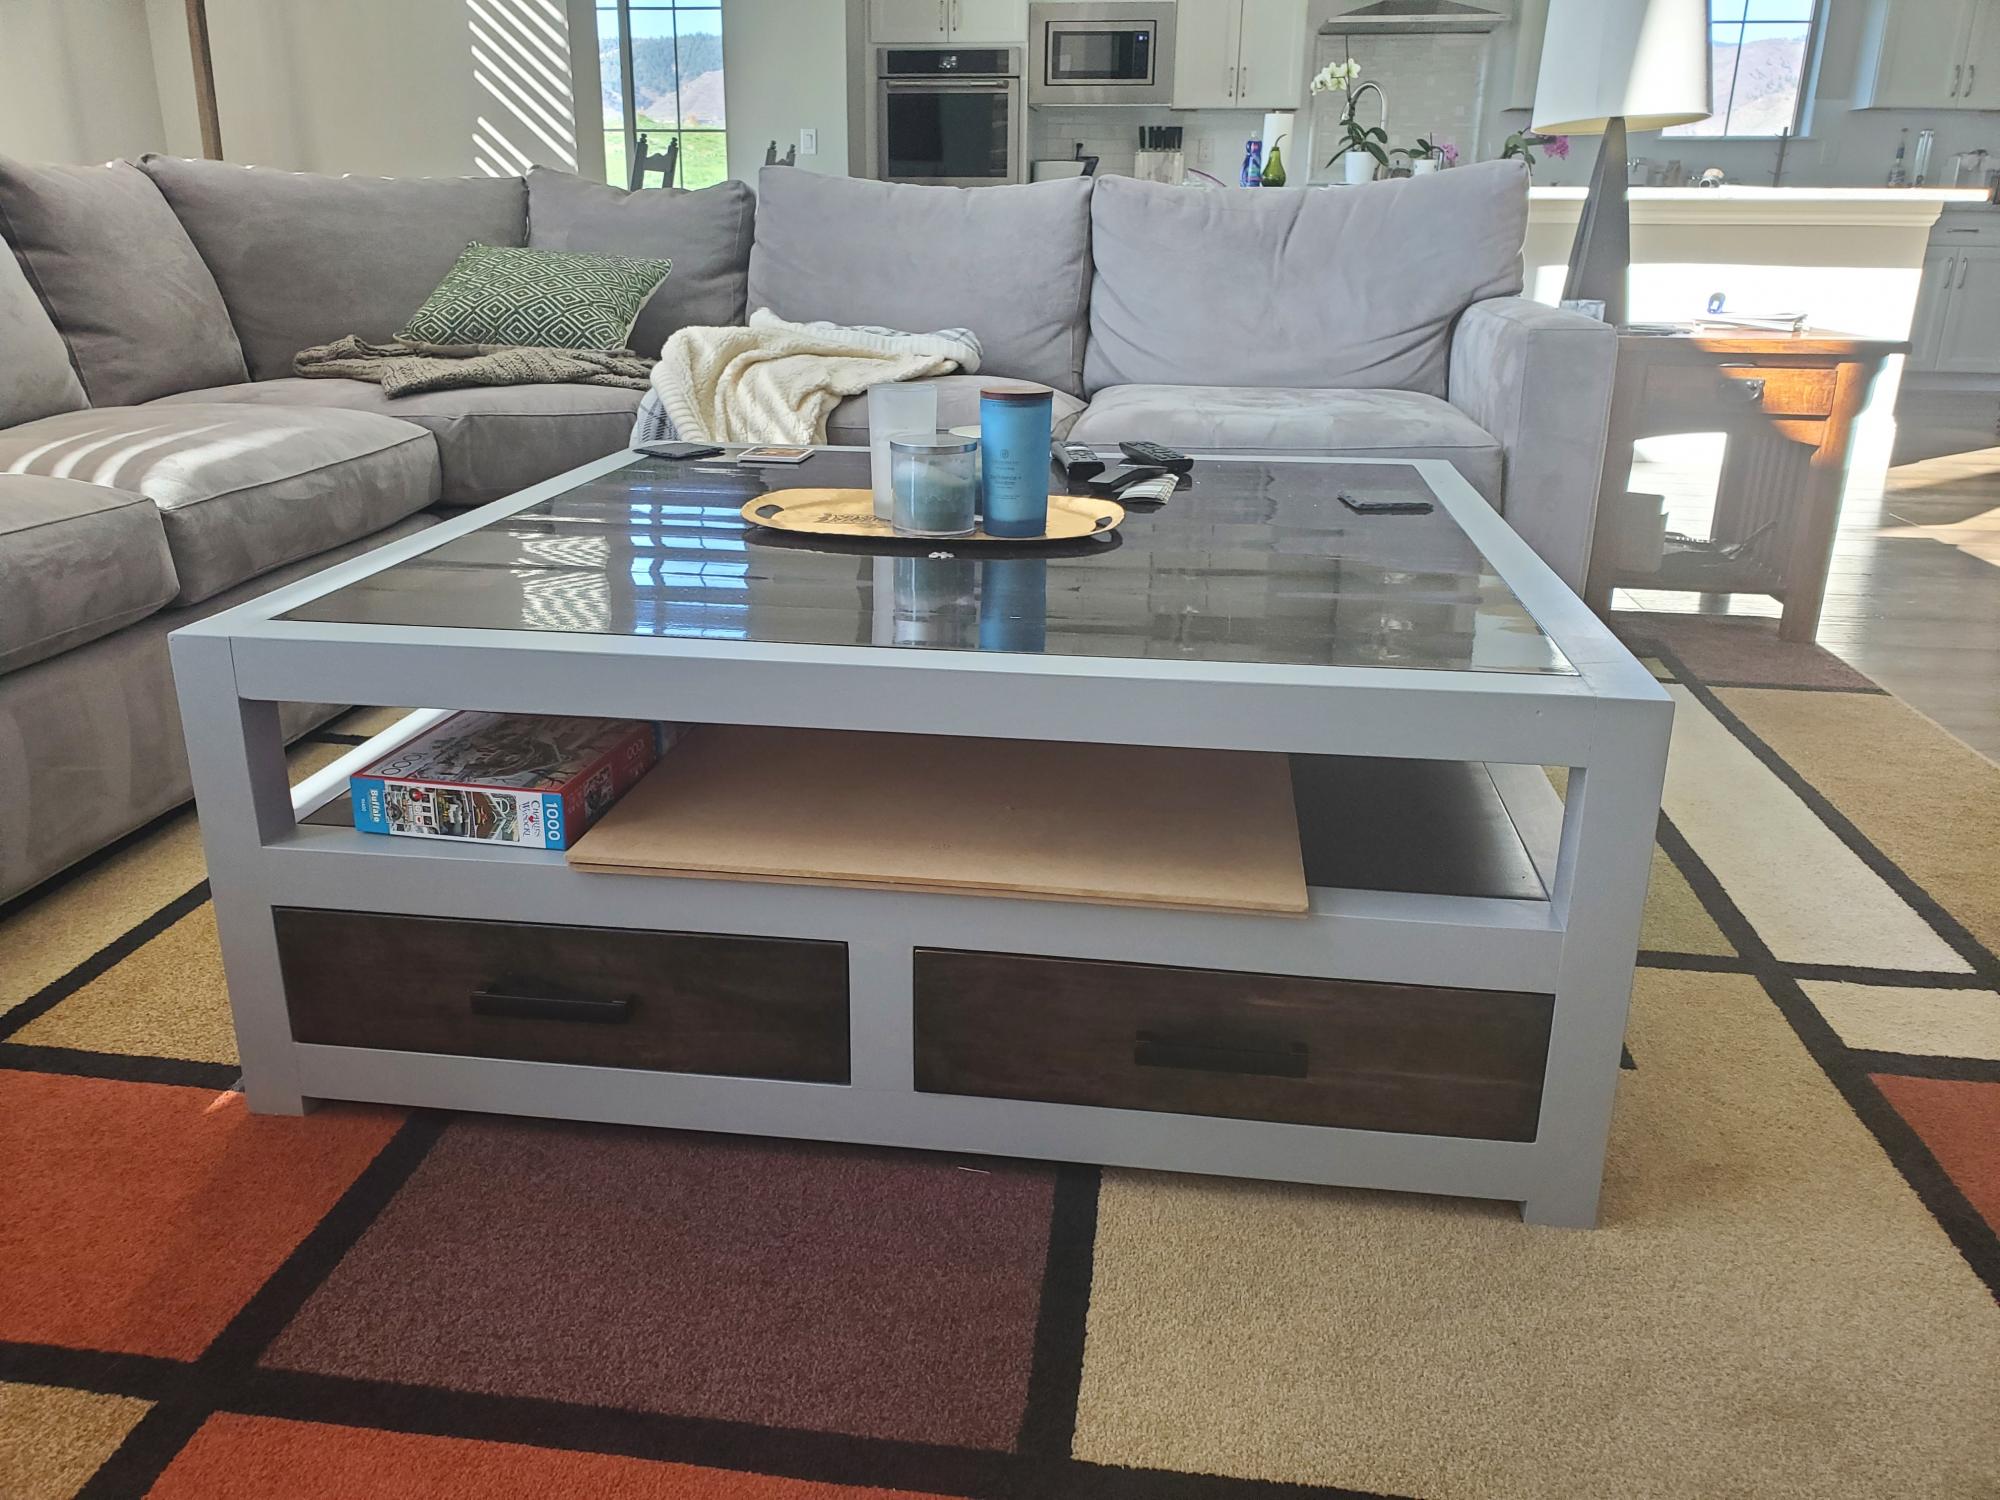
Couldn't be happier with this build. Totally worth every penny. Hands down my favorite kitchen addition!
Wrote about this on the blog too: http://thehuth.blogspot.com/2014/11/ana-whites-little-helper-tower.html
Not much to say here other than THANK YOU ANA! I built it right to the plan, used plain dimensional spruce for the drawer box, and reclaimed fir for everything else. Had fun using my thickness planer to save many hours on the belt sander.
Just under a year ago, I decided to put together a small project using up a few of my scrap wood pieces I had. This "quick" project ended up sitting half finished in my shop until this past week. I'm on a mission to finish up the remaining unfinished projects I have and this one was higher on the priority list. I based it on the Alexia bench with a couple modifications. The only thing I ended up purchasing to complete it was the drawer slides and pulls.
We made eight of these benches for Christmas gifts this year. It was a lot of fun and we learned so much along the way. We made 5 benches in the standard 30" length, 2 in 36" and 1 42" bench on request.
Suggestion for building: Make jigs so that the legs and side boards are the same size. It doesn't exactly matter if the measurements are a little off from the plan, as long as they are consistent in each bench.
We chose to paint the bottoms off-white and stain the tops for an elegant rustic look. However, we fully stained a couple of the benches as well because we thought they would look best for a few of our family members.
It was hard to tell exactly how long each bench took because we worked on all eight at once when we had free time, but one bench shouldn't take more than an afternoon if you are new.
I also added a picture of the one bench we chose to distress.
Mon, 01/14/2013 - 11:10
Love!Love!Love! these!!!!! I so badly want to make some of these benches, but have too many more important projects to complete first. You did a great job on them. How do I get on your Christmas gift list ;-)
Wanted to give my great-nephew something handmade for his 2nd birthday and hopefully something he can enjoy for years to come. Spent the weekend with my hubby doing this and loved every minute and thrilled with the final outcome
I present the "Castle Loft Bed" with minor modifications. Finished in a "Frozen" theme.
It was time to upgrade my youngest to a "big kid bed" and she was insistent on a frozen bed. After searching for various options we settled on the "Castle Loft Bed" from the Ana White catalog of plans.
We left the slide off, due to available space. Also we changed the steps to be more of a usable toy box/storage and hamper area. I also modified the internal bookcase to have a small "secret" cubby for her "valuables". We also added color changing LEDs to fit the little princess's mood.
I hope you like my rendition and keeps in spirit the DIYers quality.
Loved the design. As I live in the UK finding 1x10 is difficult so I used scaffold boards(6×1) fixing 2 side by side using my nice new kreg pocket hole jig(which is amazing, thank you Ana). I then used a light grey stain applied using a sponge and painted the legs a off-white. Due to having to spend 1 day sanding the scaffold boards it took a little longer, however the construction was quick.
Thank you Ana
Tue, 11/17/2020 - 22:38
Absolutely love this and that you were able to accomplish what you needed! The kreg jig is a fantastic tool, thanks for sharing:)
I shortened this table to fit the space, it works perfectly. Thank you again Ana for your wonderful plans.
I changed the plans some. I started with a large pallet crate used to transport train windows. So with the used palletwood i had to put the boards in sideways and pockethole screwed them together. With going on the cheap iwent with a 1x4 and 1x6 top so i could use the pallet wood. I ended up torching it with a torch to bring out the grain and it looked good with the rustic look of table.i plain to eventually clear it when ohio weather permits. I only had to buy i 8 foot 1x4 and 1 8 foot 2x2. Have less then 15 dollars
Modified the Rhyan Coffee Table plan for a square, 4-foot by 4-foot coffee table. Used poplar 1 x 3s glued together and then planed down to 2.25-inch square for the structural members. The stained wood portions are glue-ups make from Hemlock 1x 6s from Lowe's.
We were looking for bookshelves for our children's bedrooms, but with 3 kids the cost was going to be astronomical. So I found a bookshelf I liked, googled the name and stumbled across Ana's plans. So glad I did!
Made based on a picture i was shown,and used the kids andarondac plans on this site
Whenever I see vintage metal letters in antique stores my instinct is to buy them all…that is until I look at the price! I was determined to figure out a way to make them myself for a fraction of the price. Here is what I can up with. I am excited to try other colors and fonts.
For the full process check out the post on my blog.
http://re-storedesign.com/2013/01/14/faux-vintage-metal-letters/#
This was such a great project and not too complicated for my first large one. I loved using the milk paint to create the old world distressed charm.
I built this 7 months pregnant and couldn't be happier with it. The plans were excellent and easy to follow. I was intimidated by the hard ware at first but that was also very simple. Overall very happy with this project build.
I made 4 of these to go with a farmhouse table I built. The only thing I changed was the walnut seats for the chairs
Rustic X End Table with a dark stain.
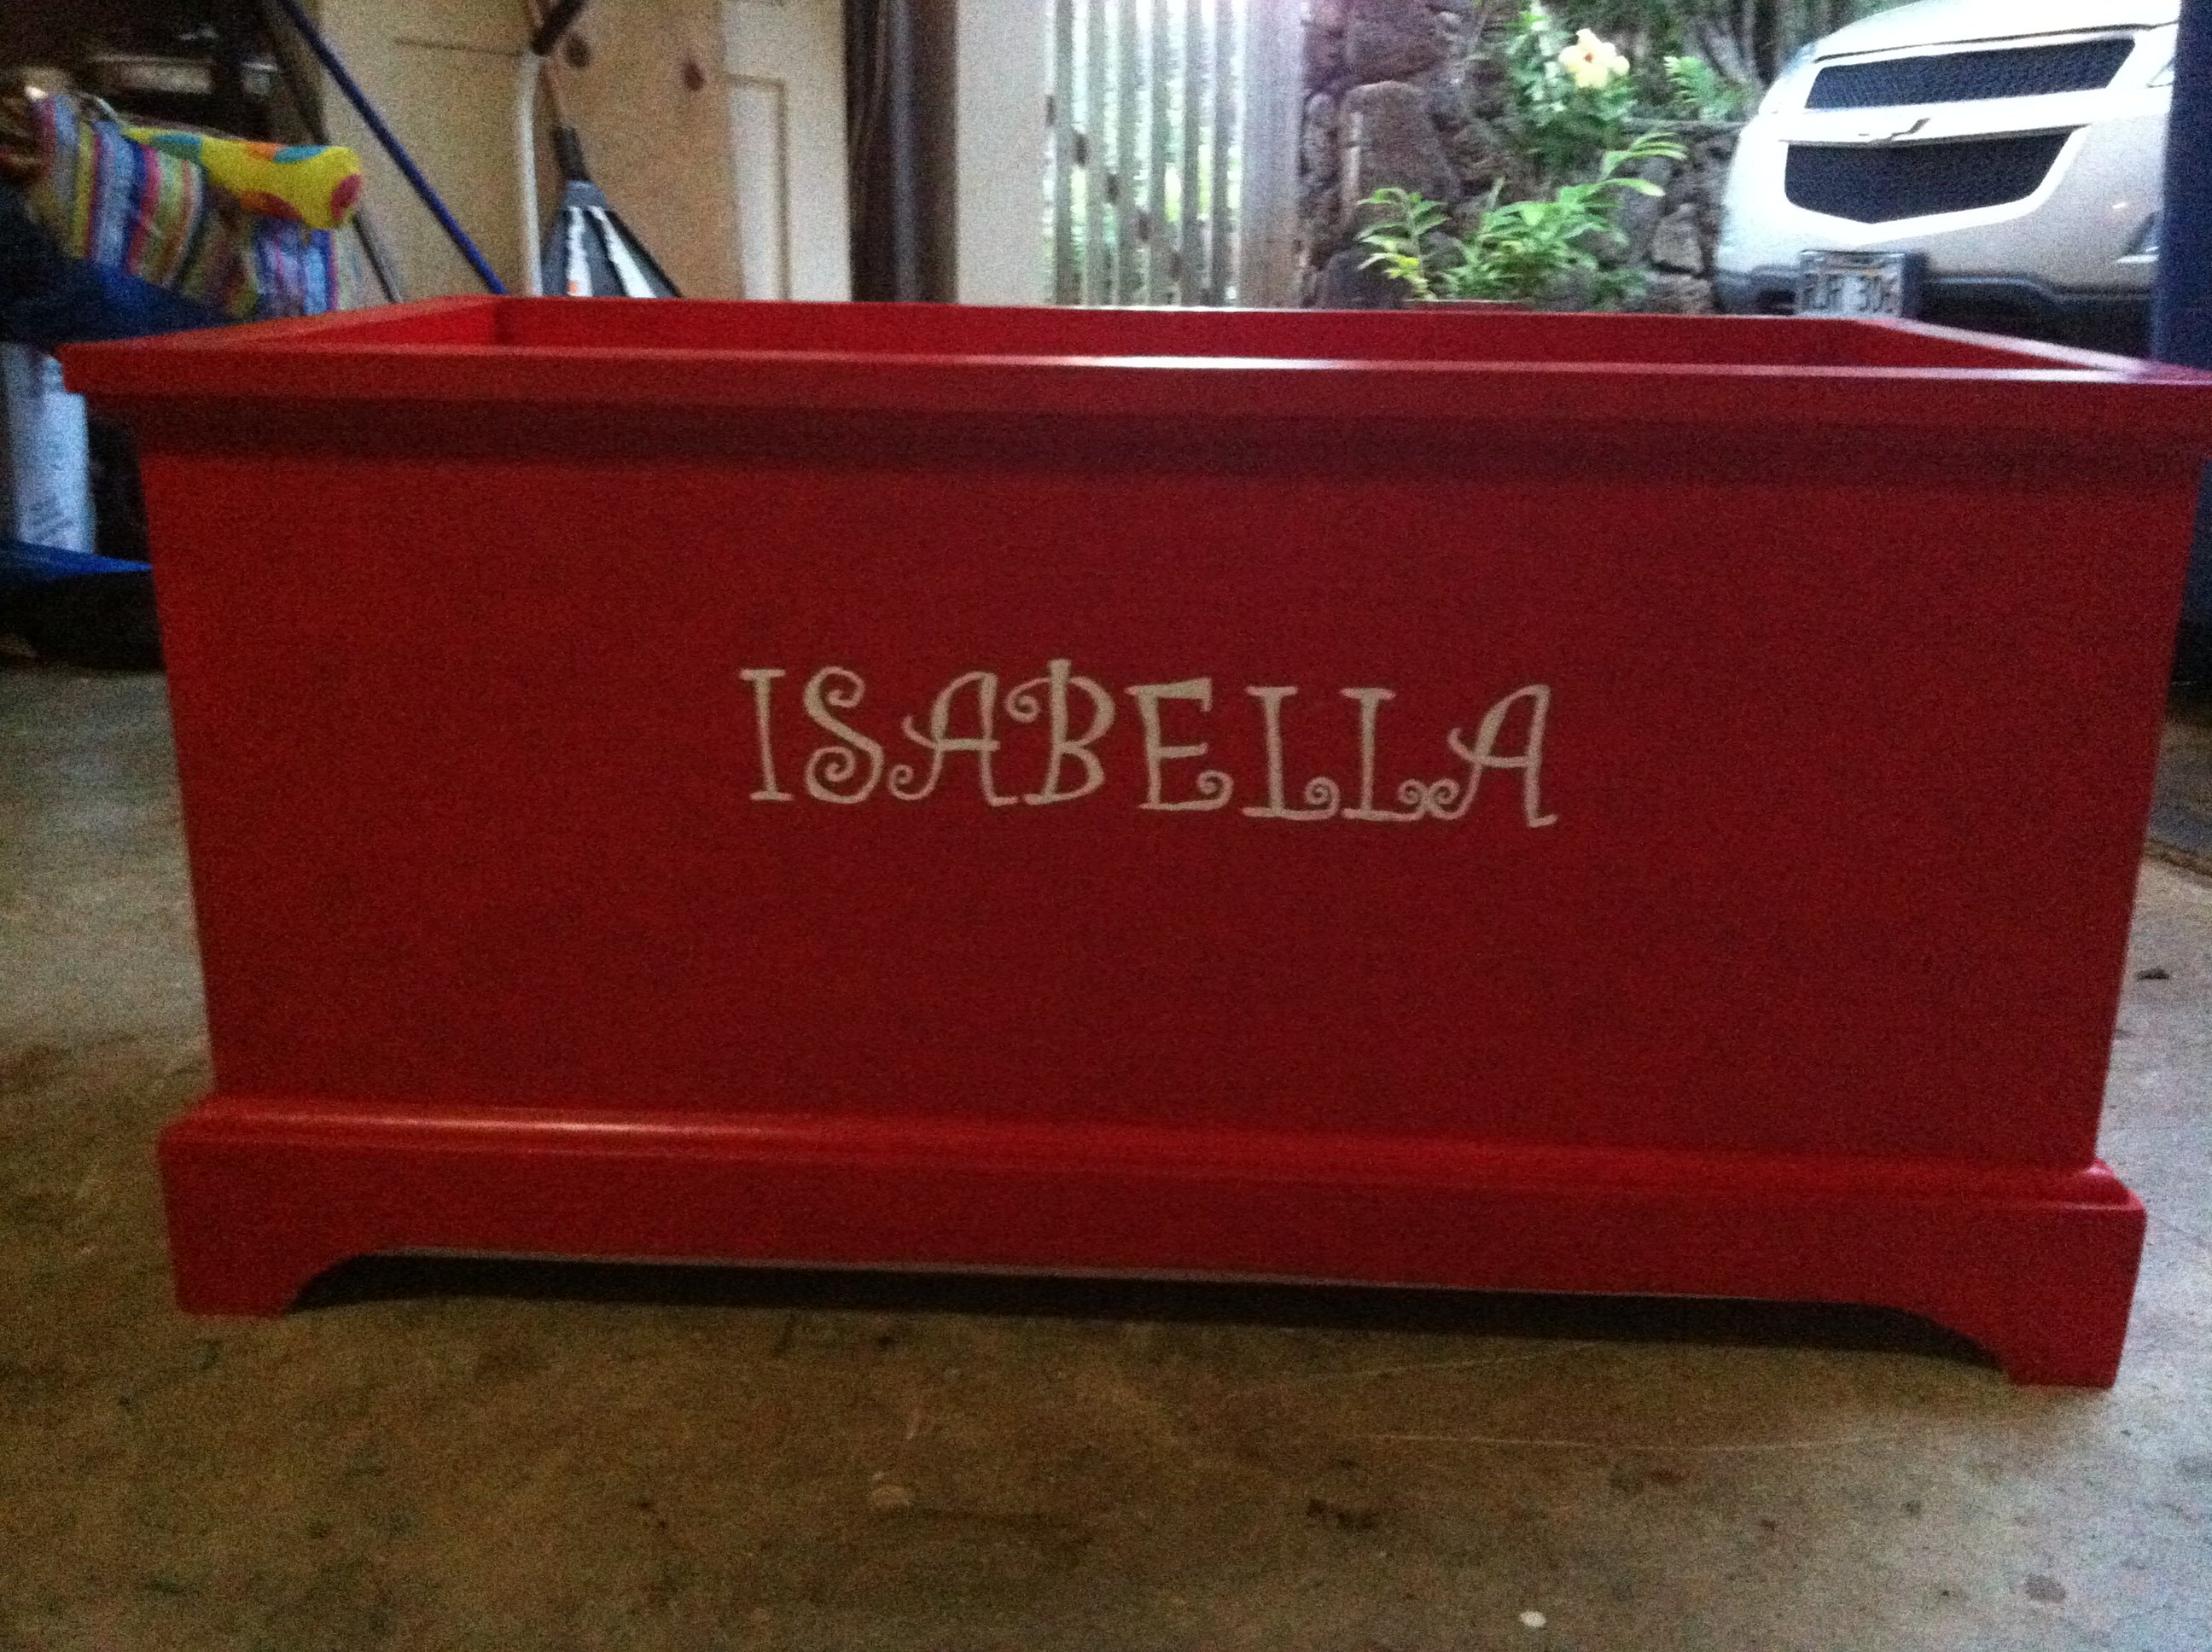
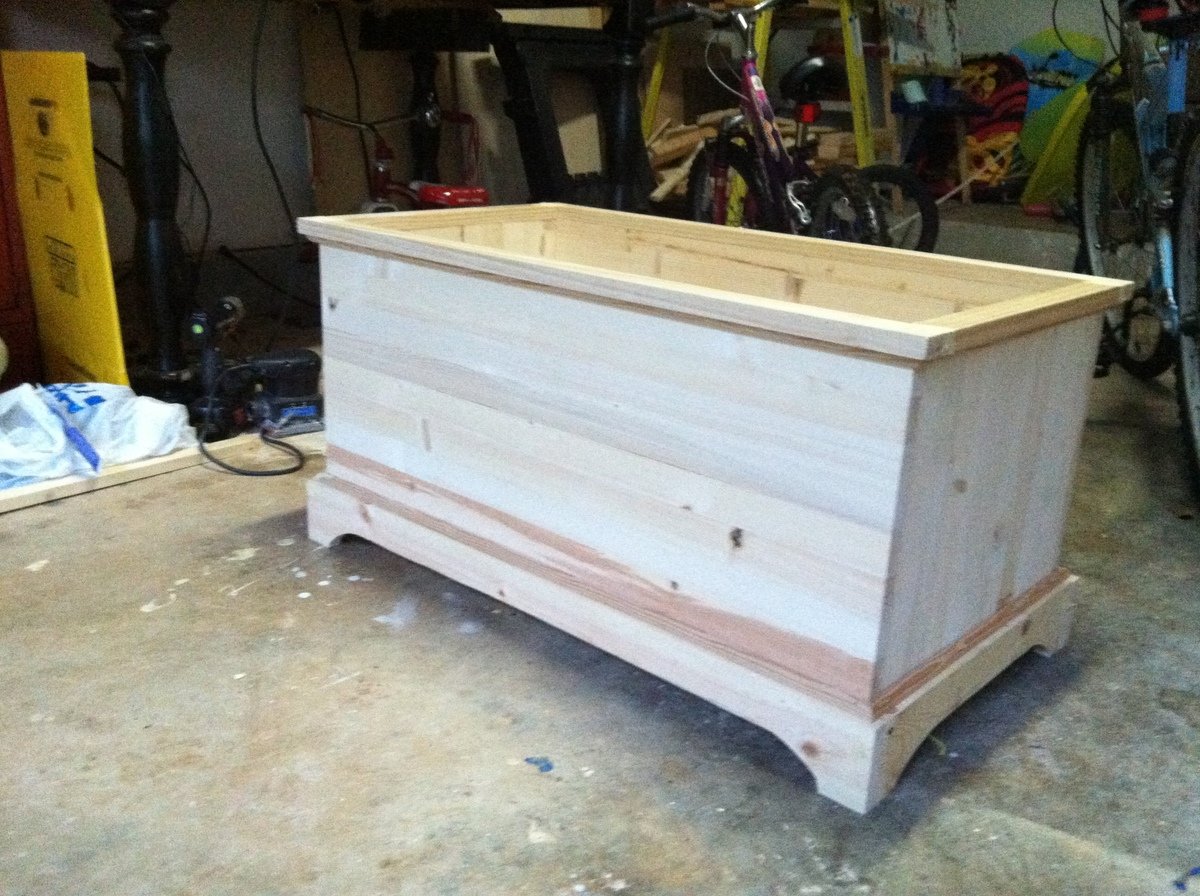
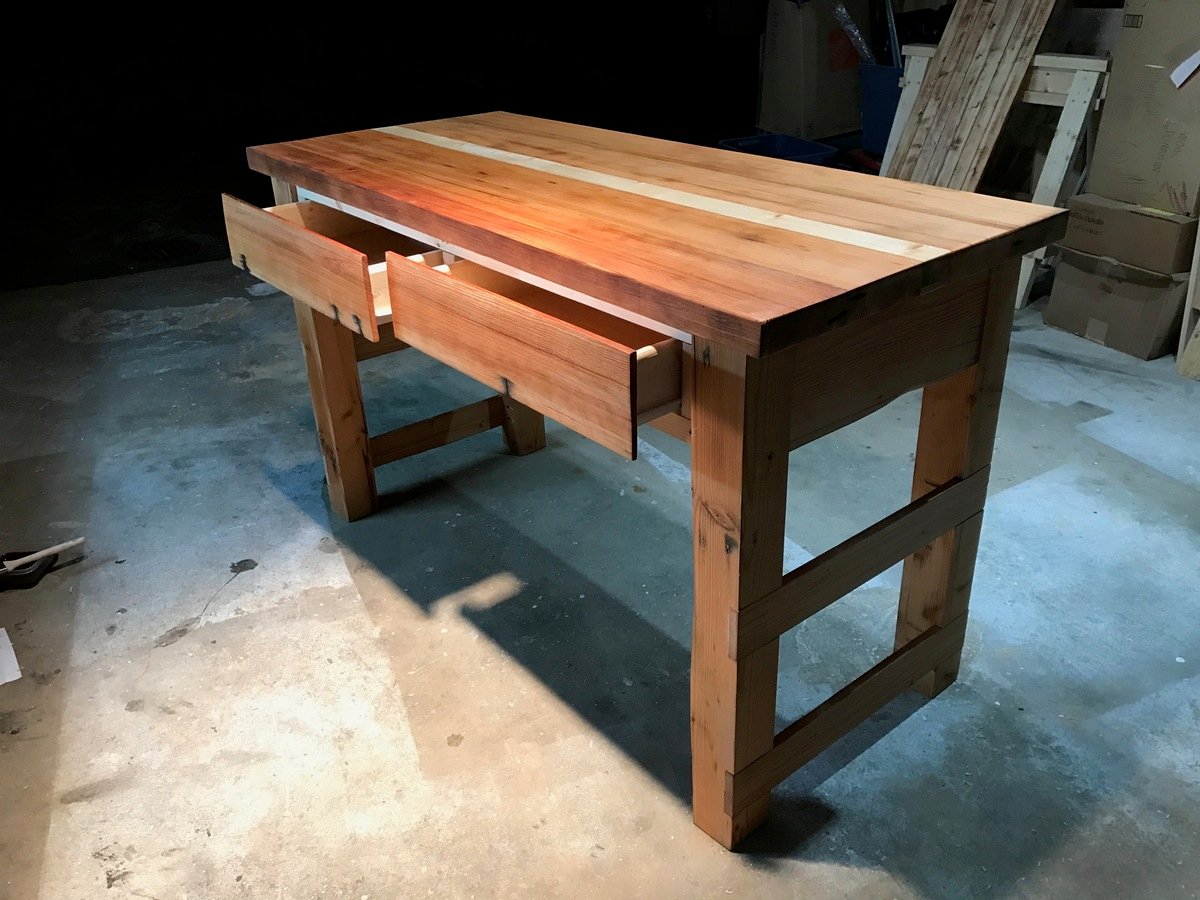
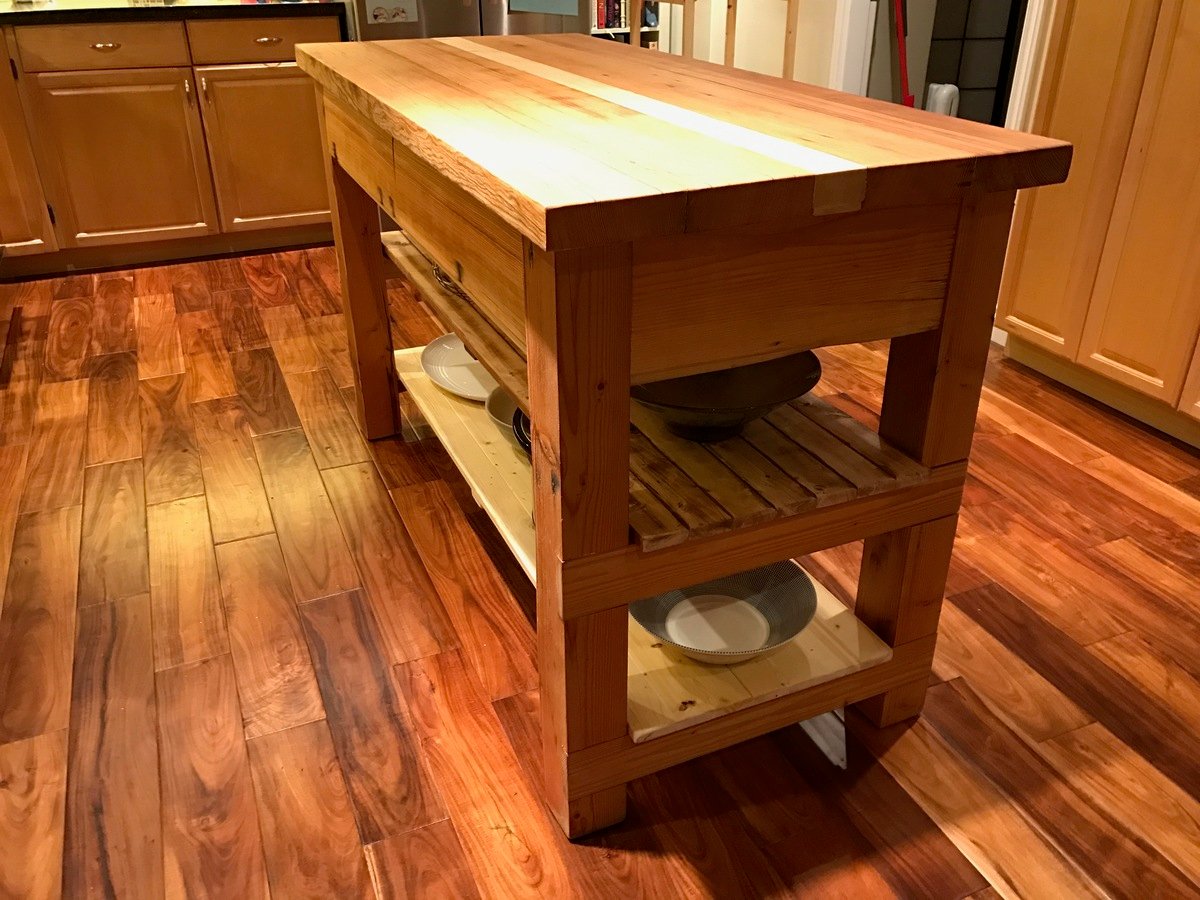
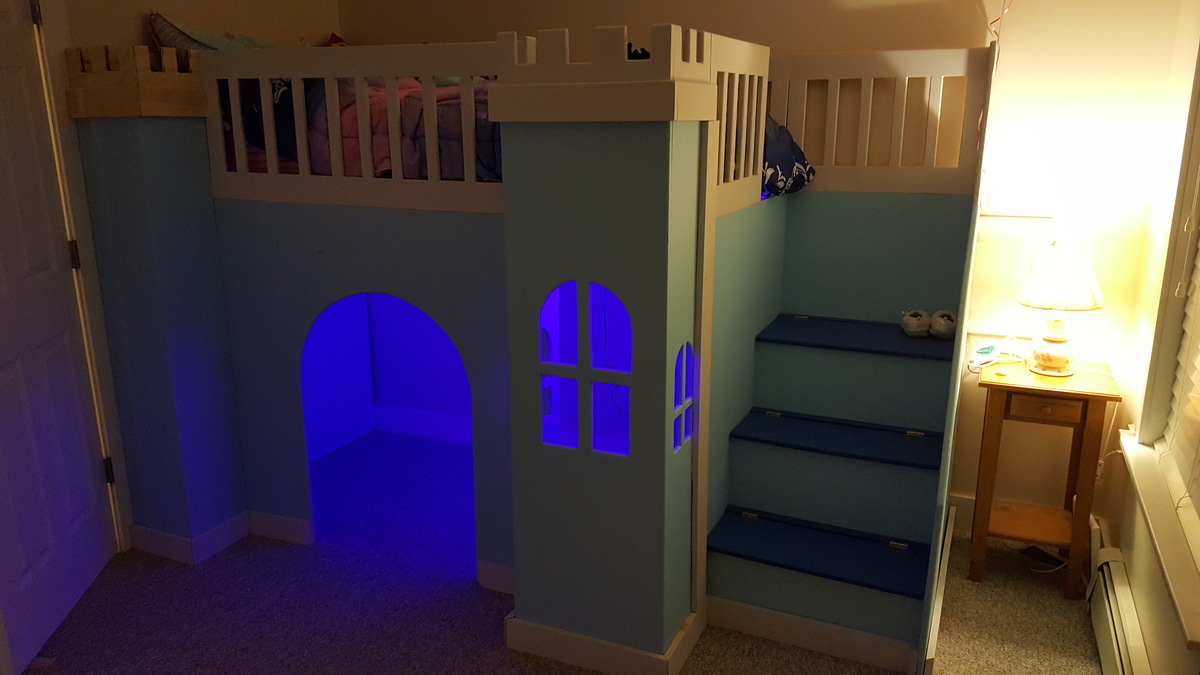
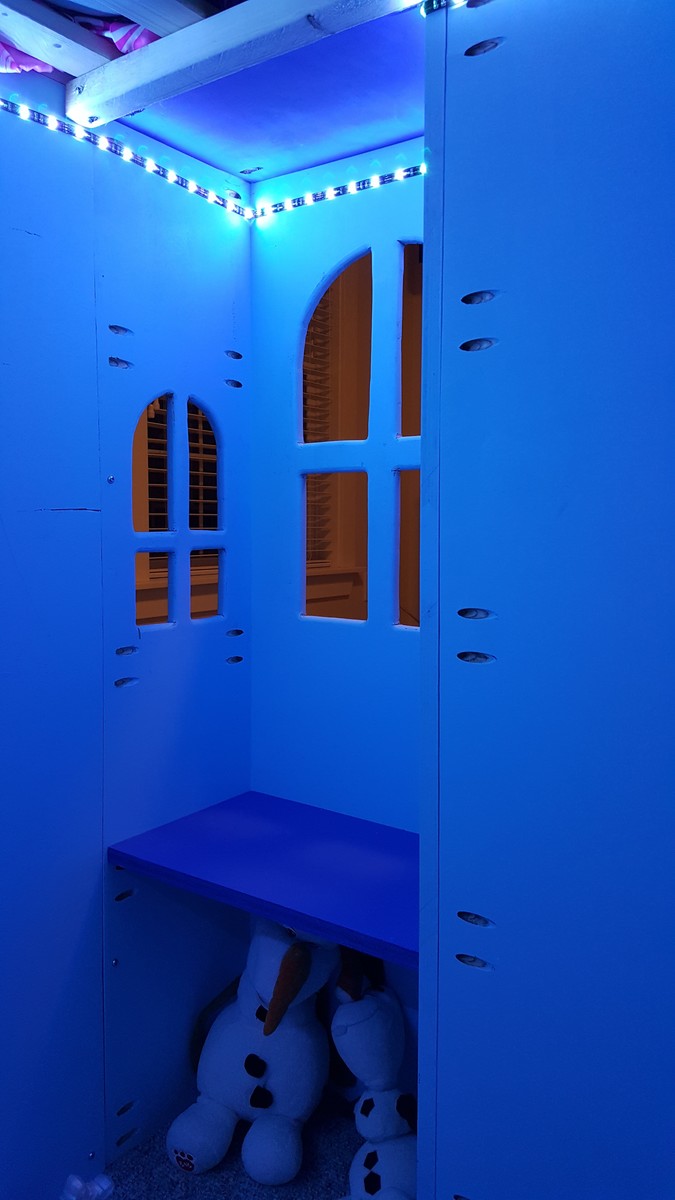
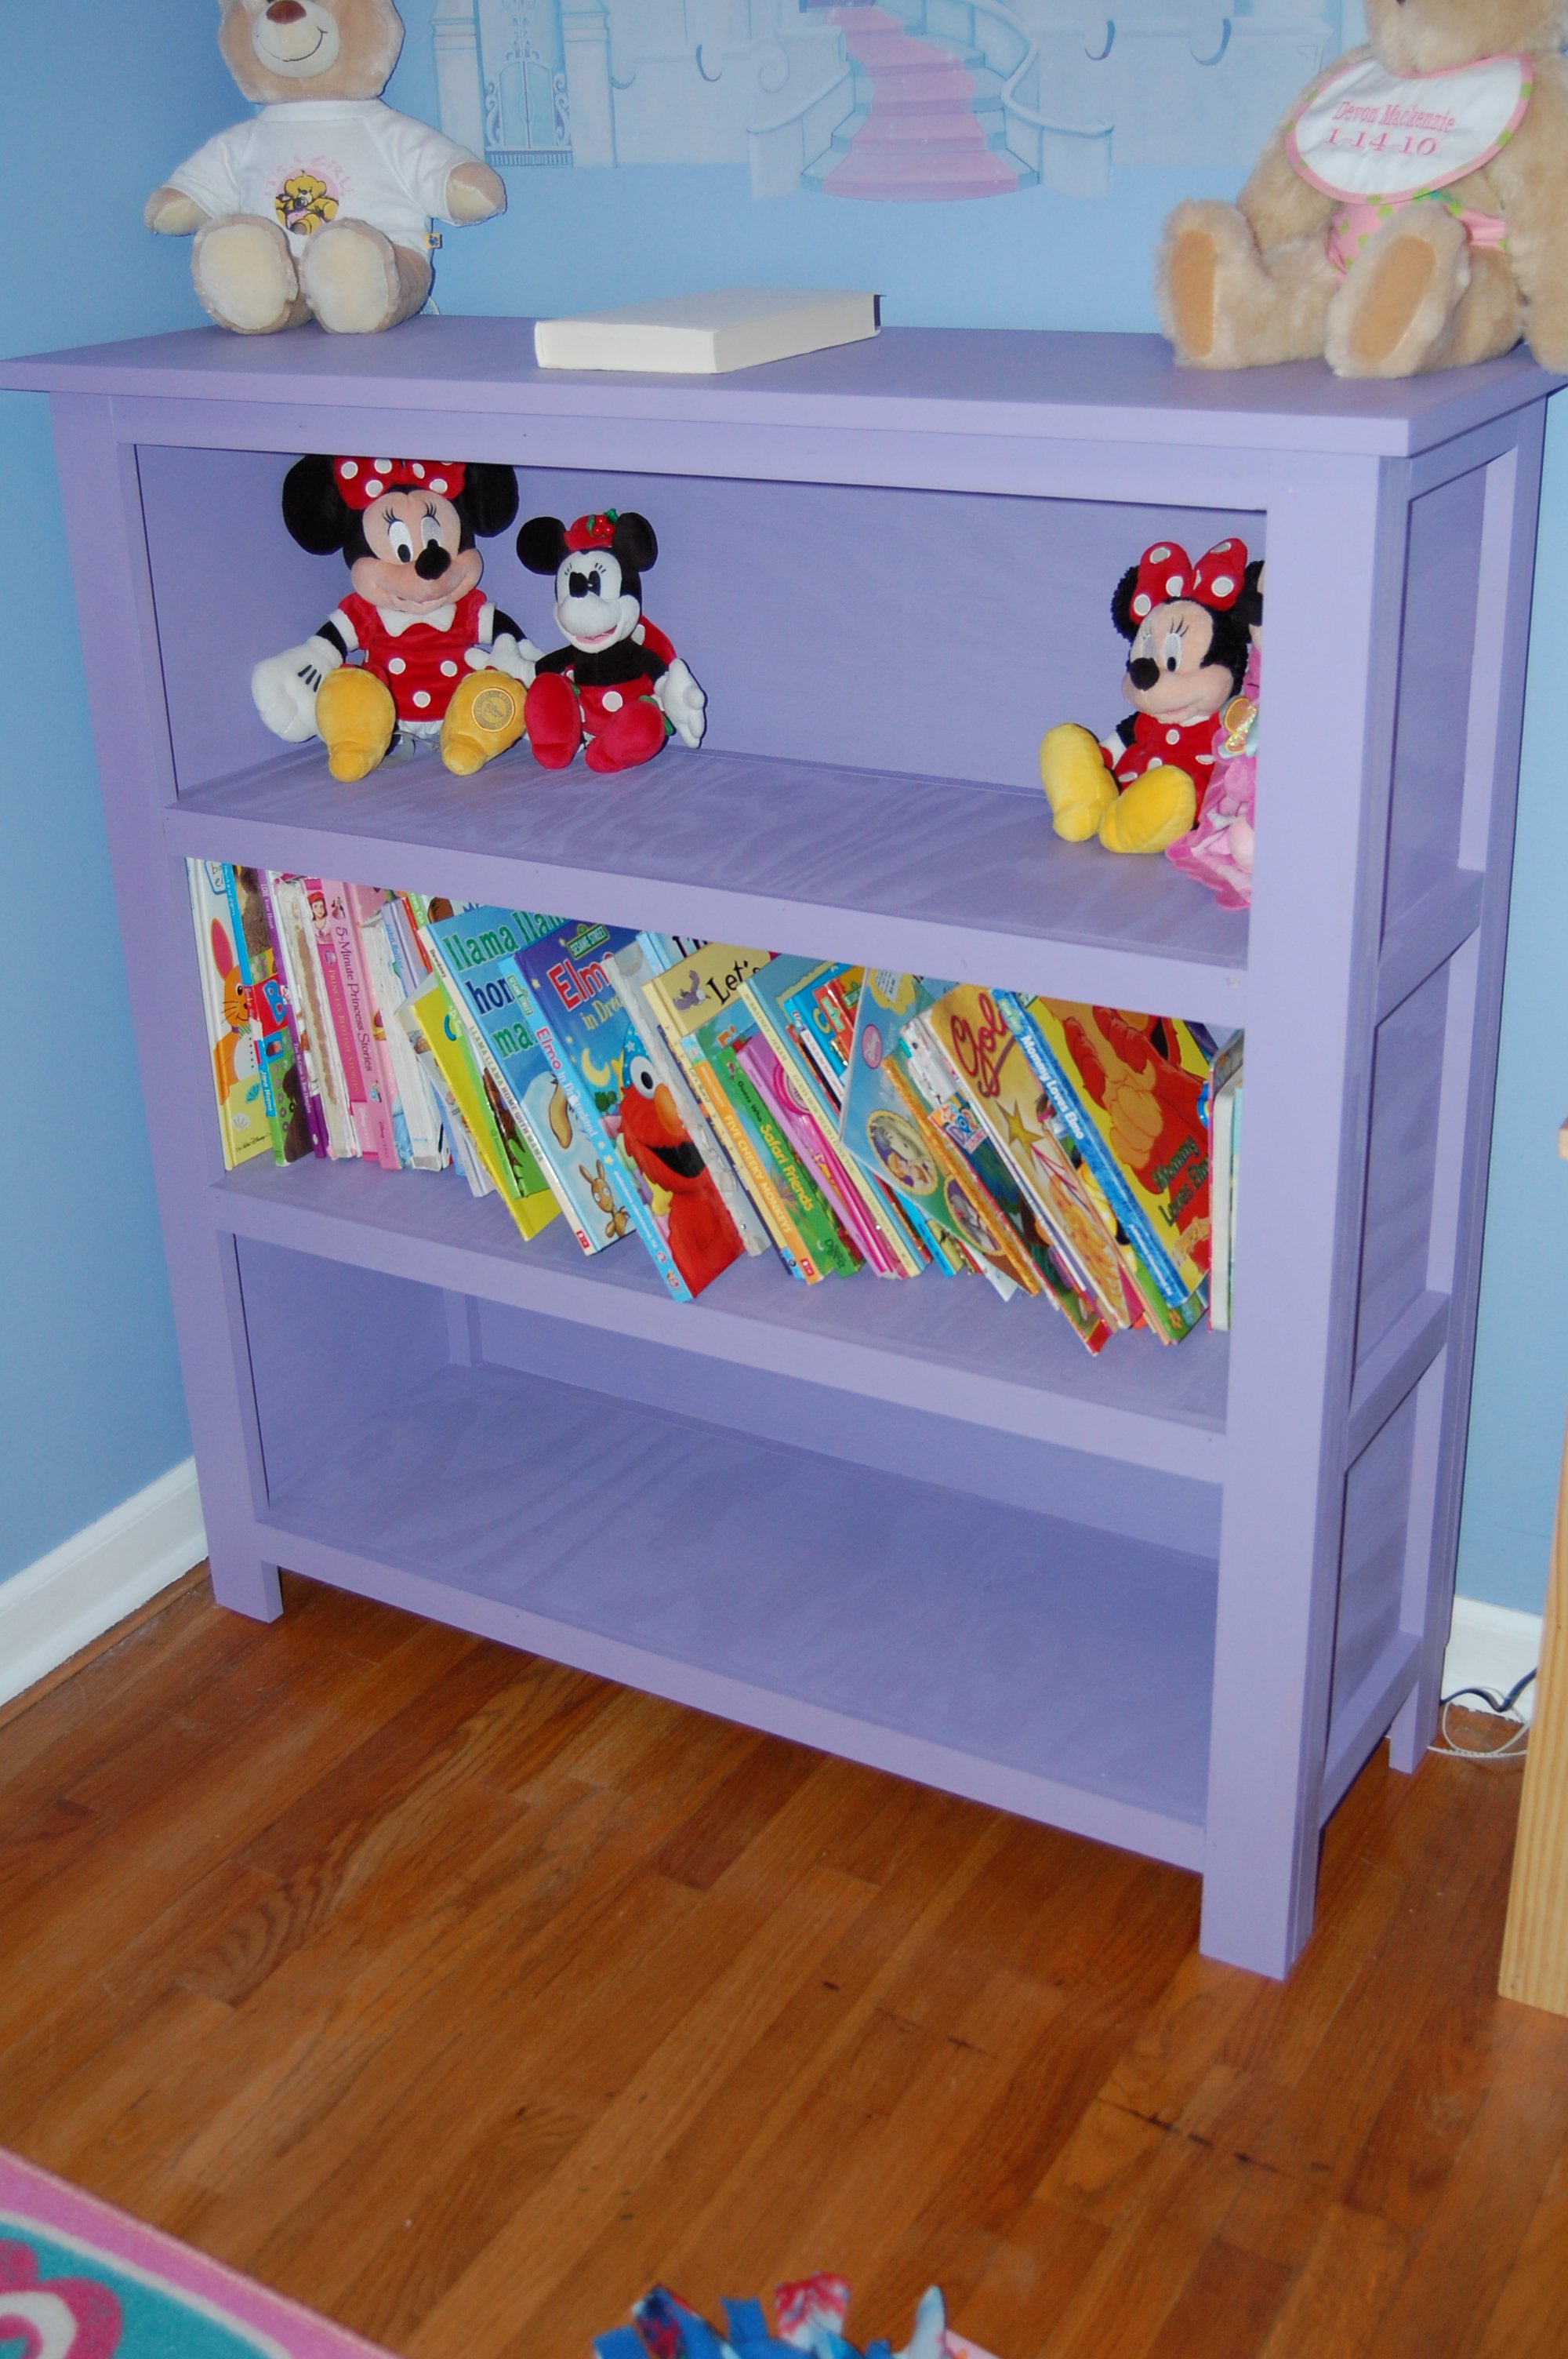
My FIRST carpentry project! Good thing my husband was willing to help as it was a little heavy and I was googling terms like "counter-sink." It would have been so much easier if we hadn't made it a birthday surprise for my daughter. She LOVES it!
I purchased choice 2x4s and was so sad to see how much sanding the planks still required, even with an electric rotary sander. That added a few hours-perhaps because I am such a beginner!
We used a white nylon rope which matched her room better, but again, increased the cost a bit.
I am really proud of the results!
Thu, 11/20/2014 - 17:44
You should be VERY proud of the great job you did on your first building project, it looks awesome! Love the color, and that smiling face says it all! Well done!!
Fri, 11/21/2014 - 09:26
Wow what a great idea for this wall space! Your daughter has a really cute room!