Gable Greenhouse
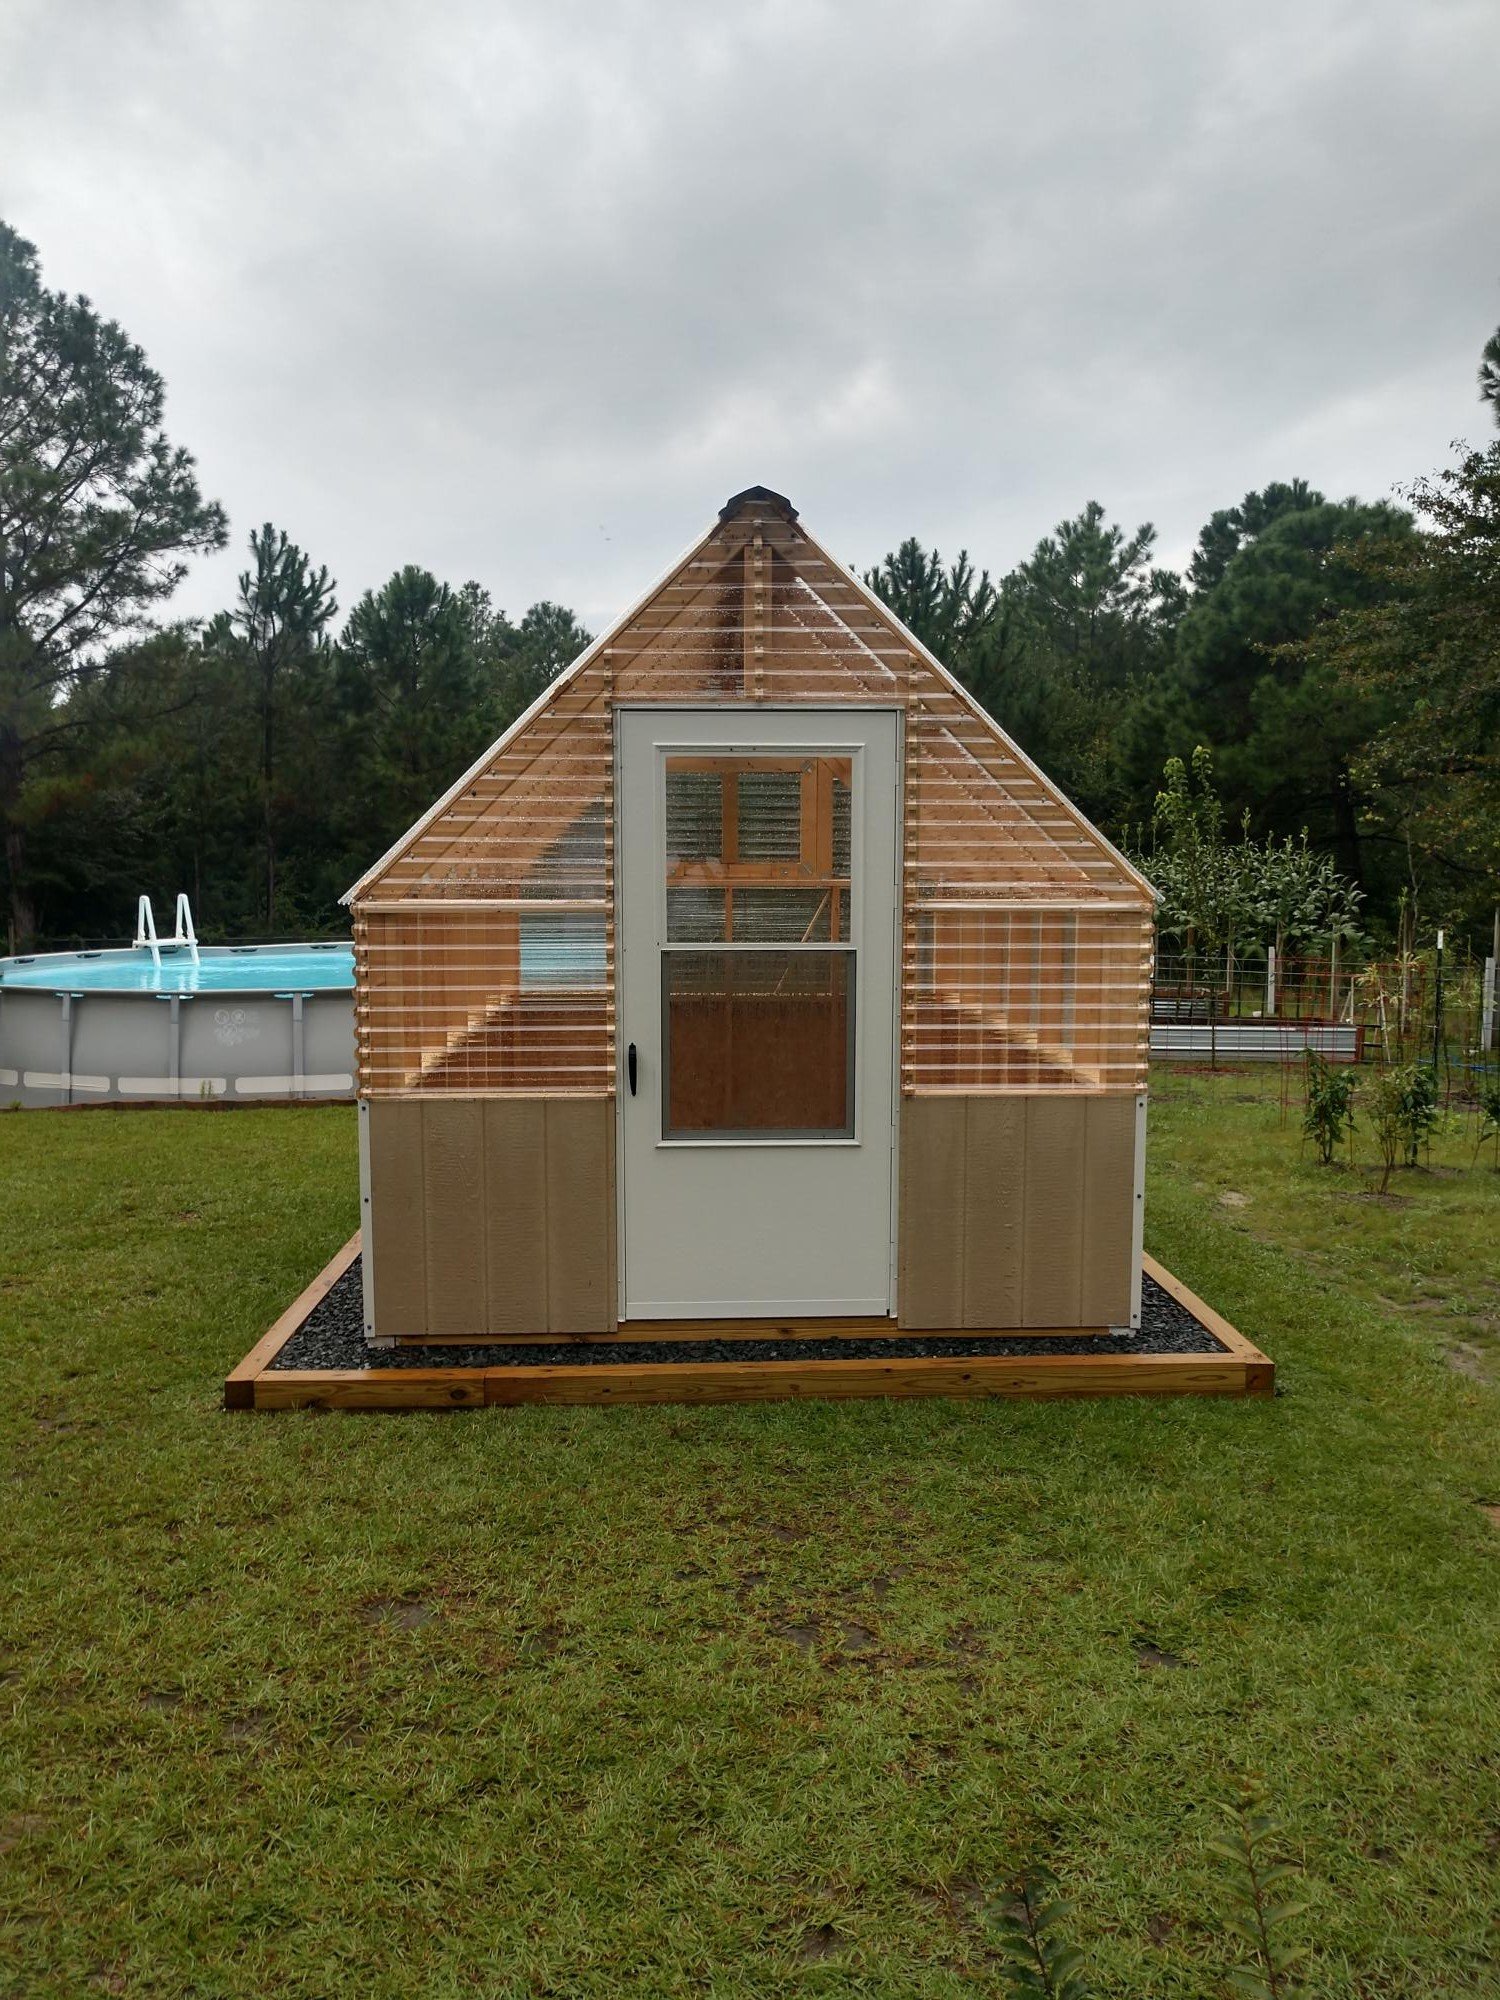
Gable Greenhouse by William
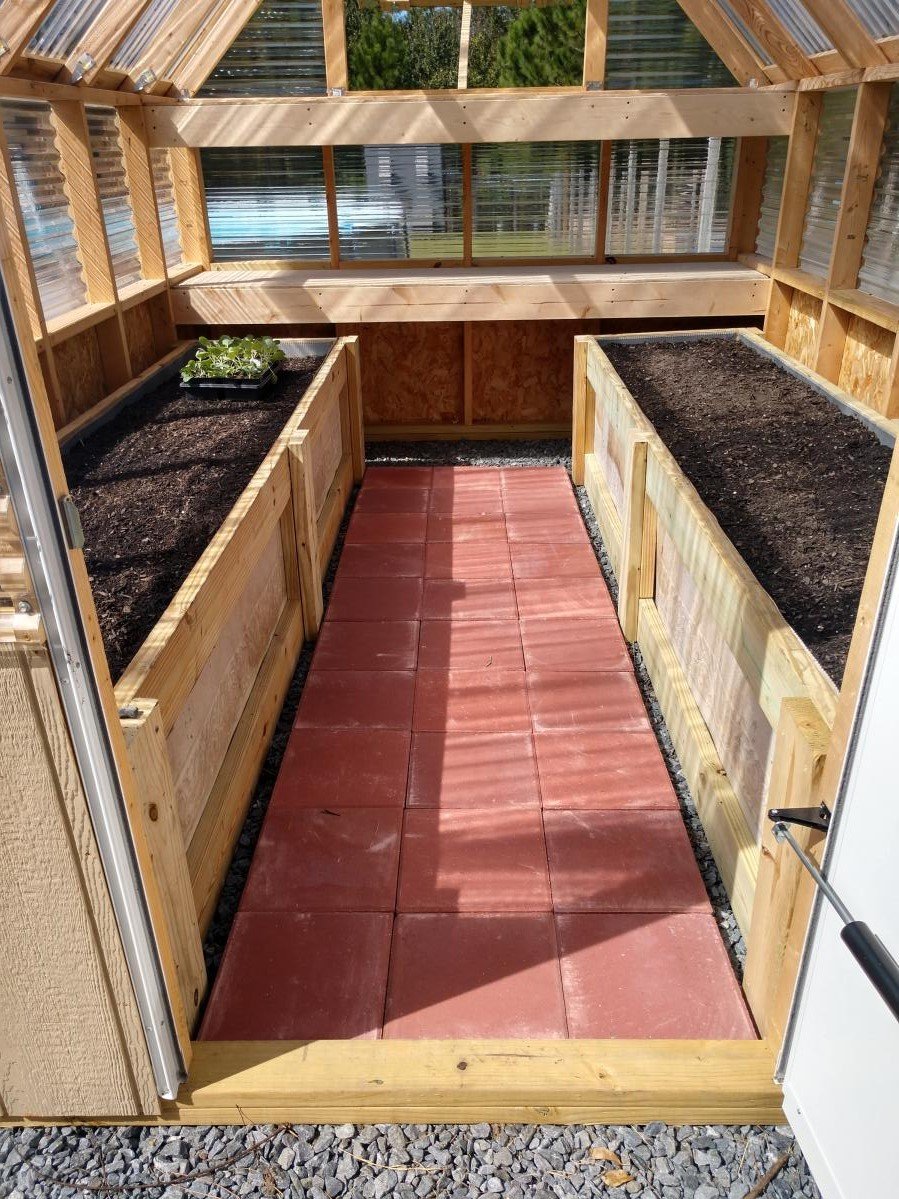
Built from Plan(s)
Gable Greenhouse by William
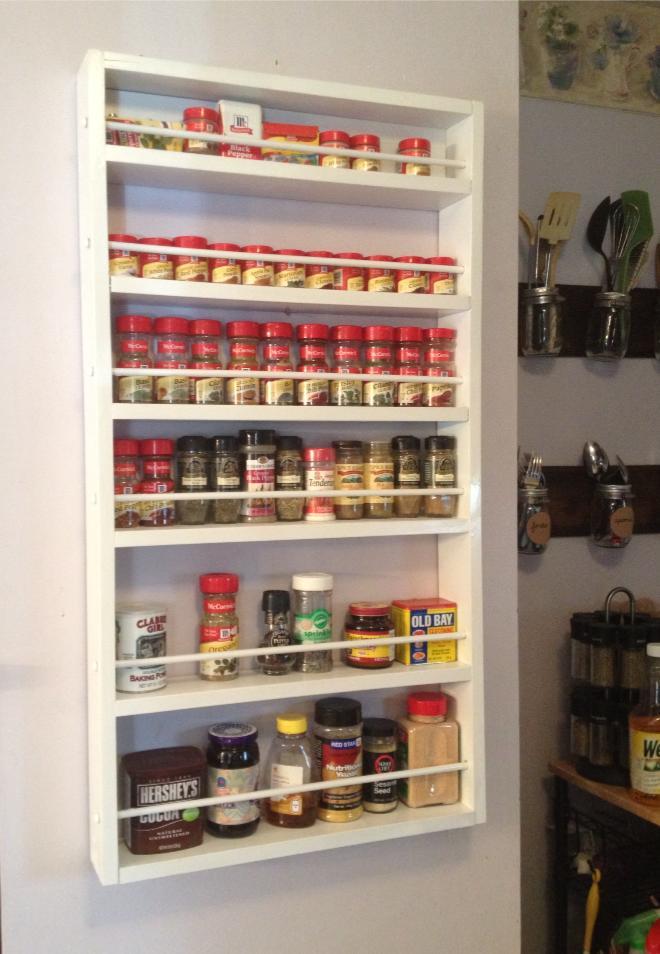
I absolutely love this project. I do not have a pantry with a door so I just placed this spice rack on my wall and it really looks great! We have a ton of spices so I might need to make another!
Sat, 09/21/2013 - 10:33
hi - I'm thinking of building this to hang on a wall like you have. Do you think the dowels are necessary? Seems like it would give a little more shelf room without the dowels - but do you feel like the spices would fall out without them?
thanks!
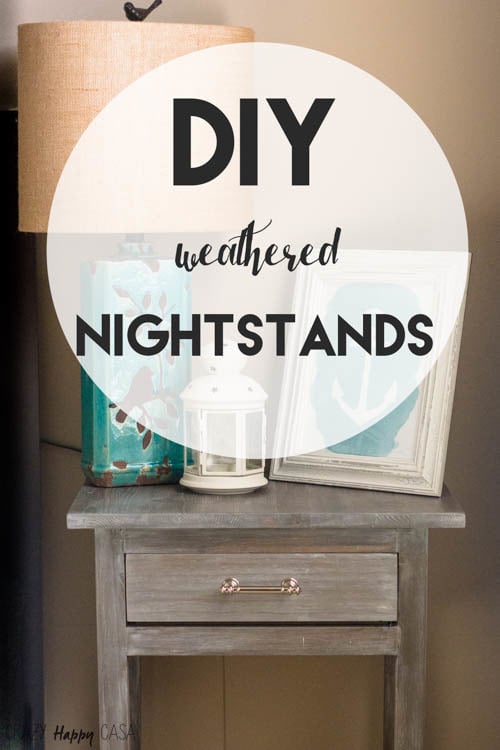
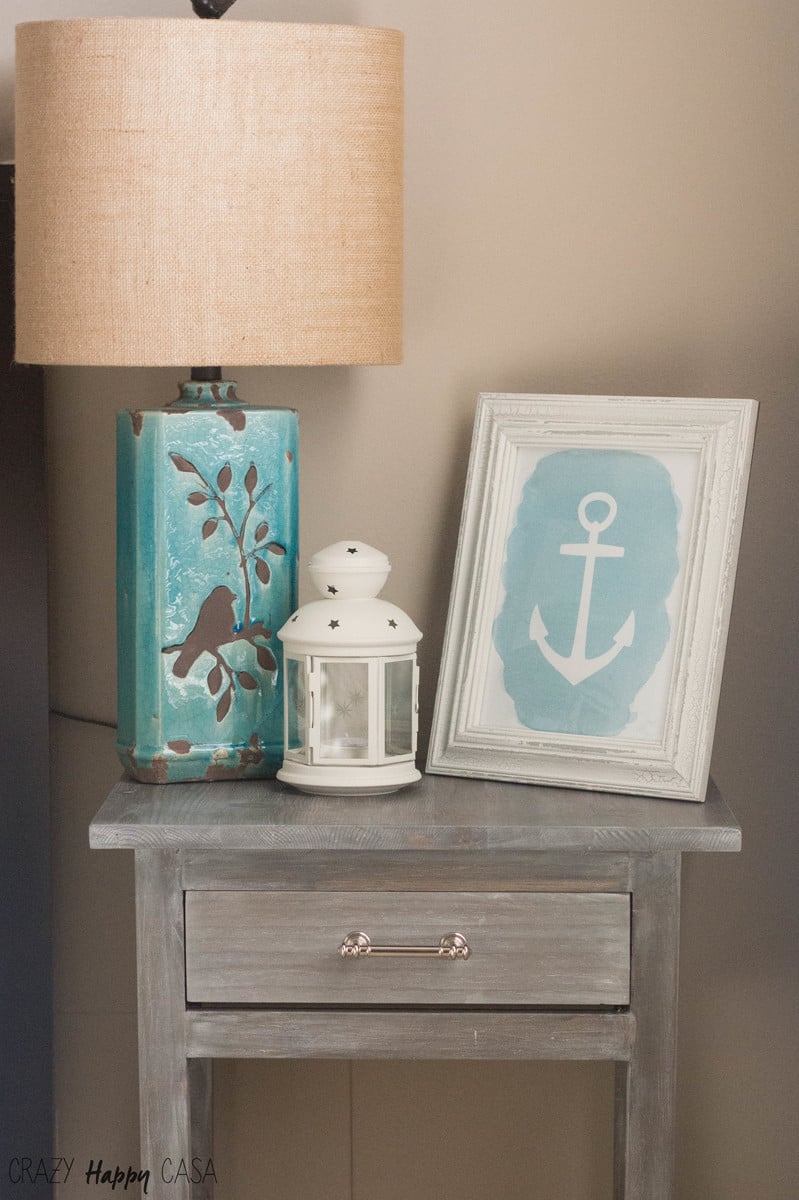
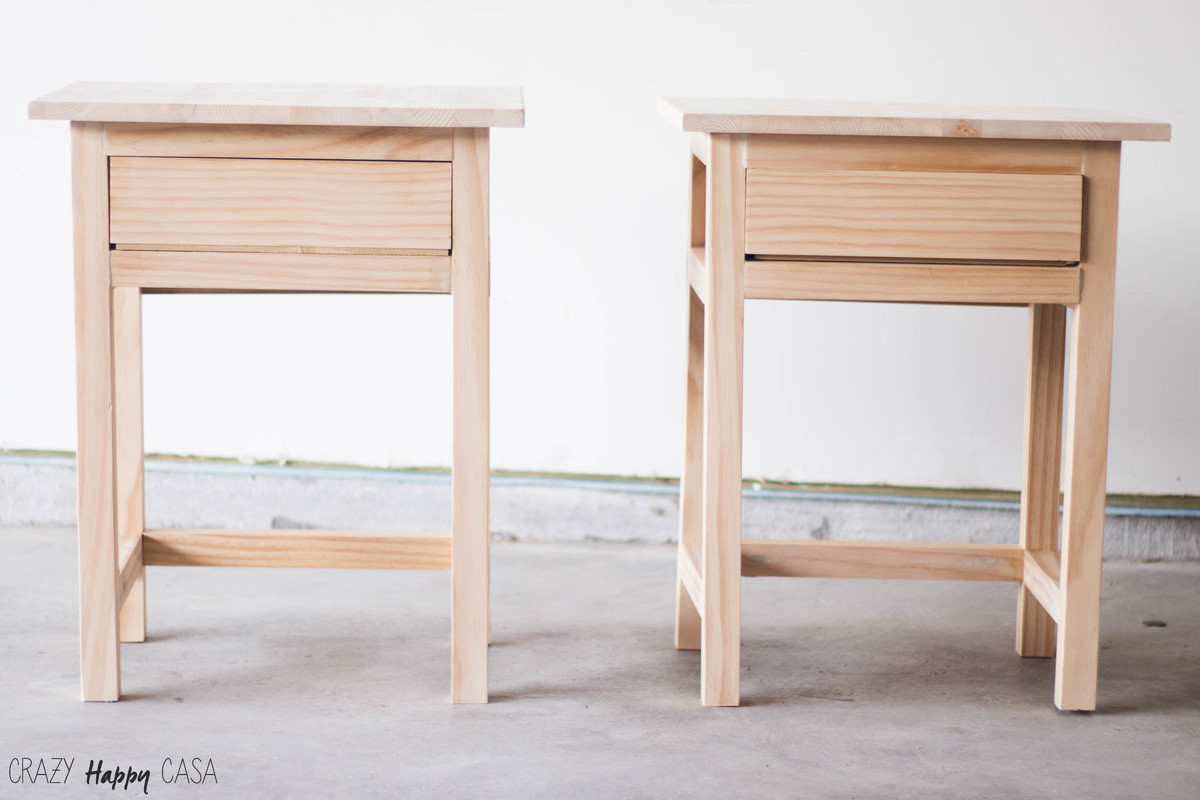
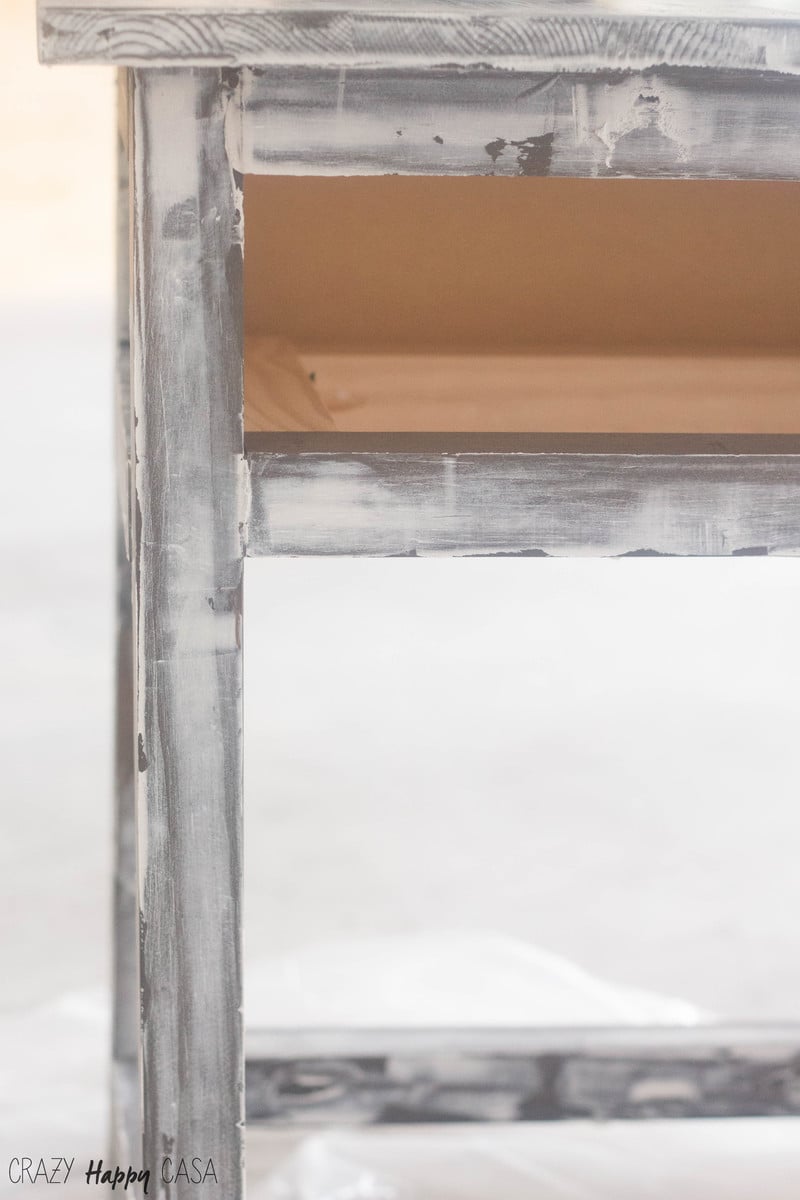
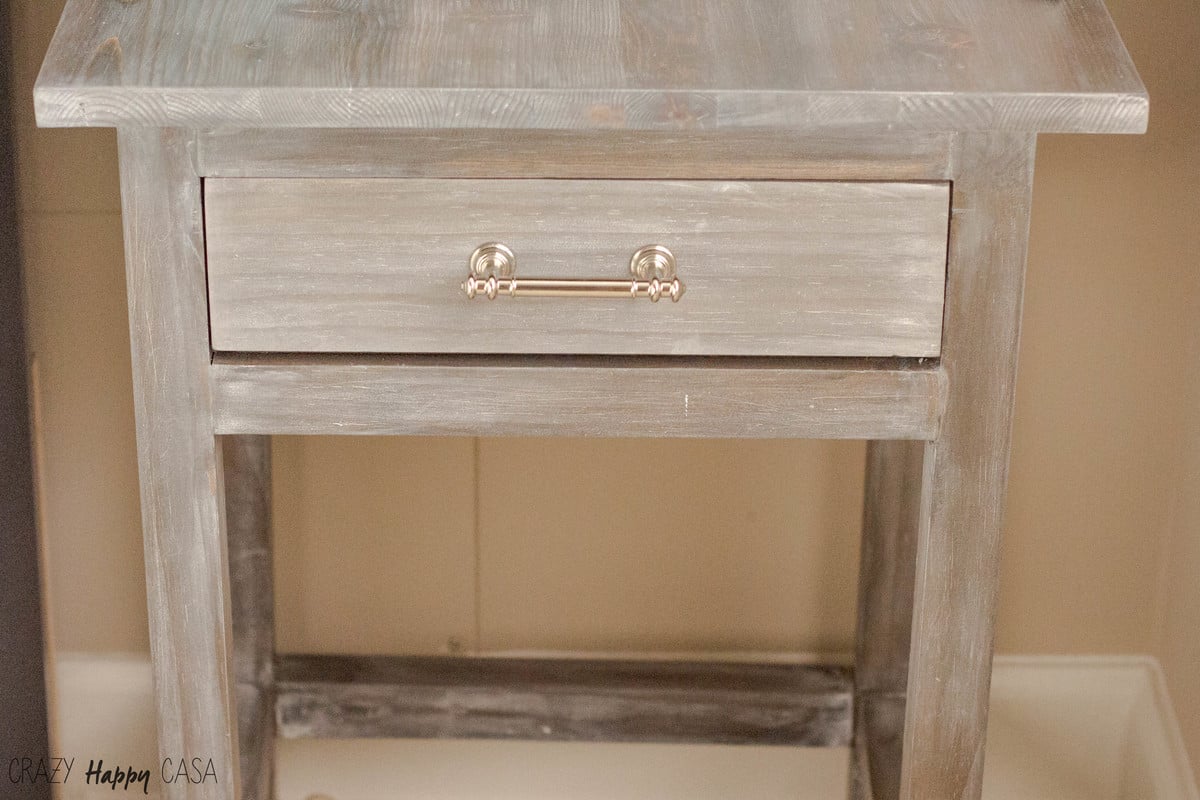
For several years now we’ve put the guest bedroom at the bottom of our home decorating priorities, but a couple of weeks ago we decided to give the room some love and built these nightstands.
You can see all the details in my blog.
Tue, 08/25/2015 - 13:24
I really love the finish. Thanks for the detailed post on your website.
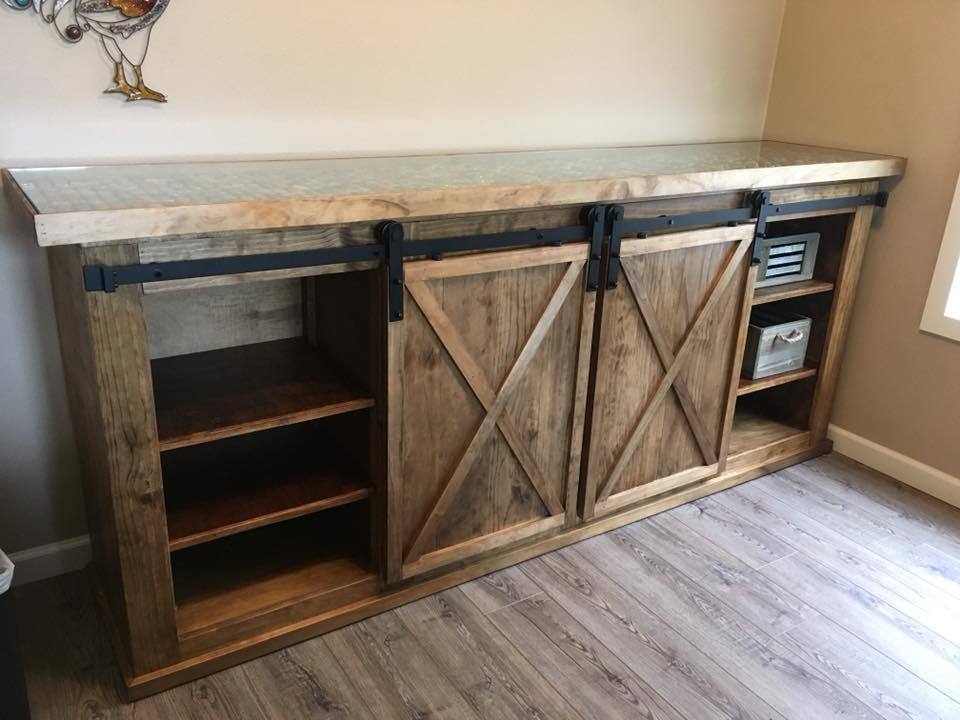
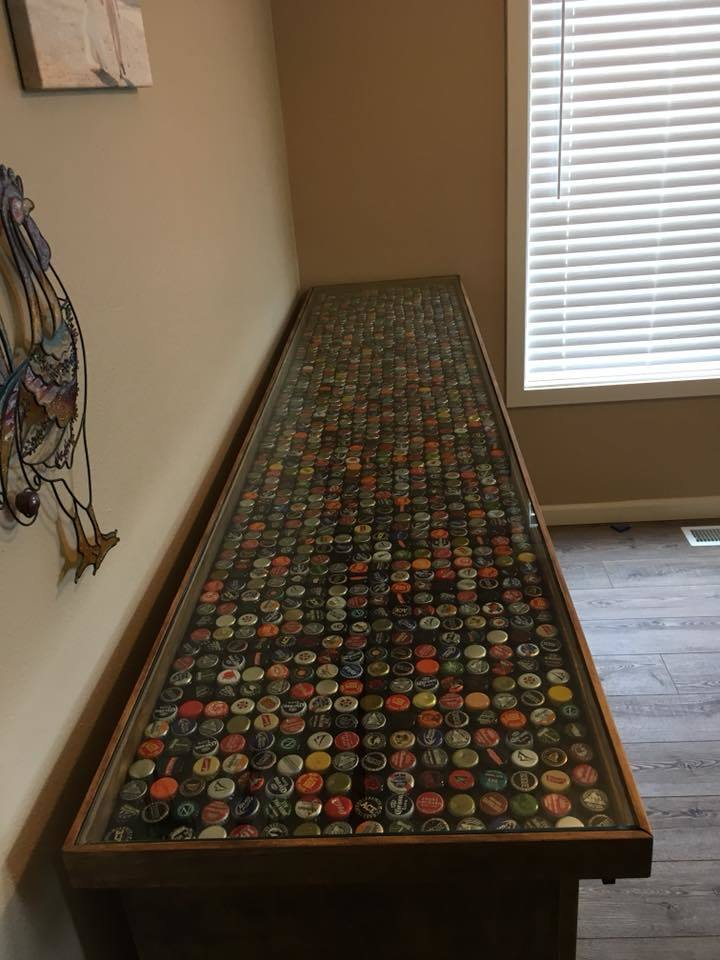
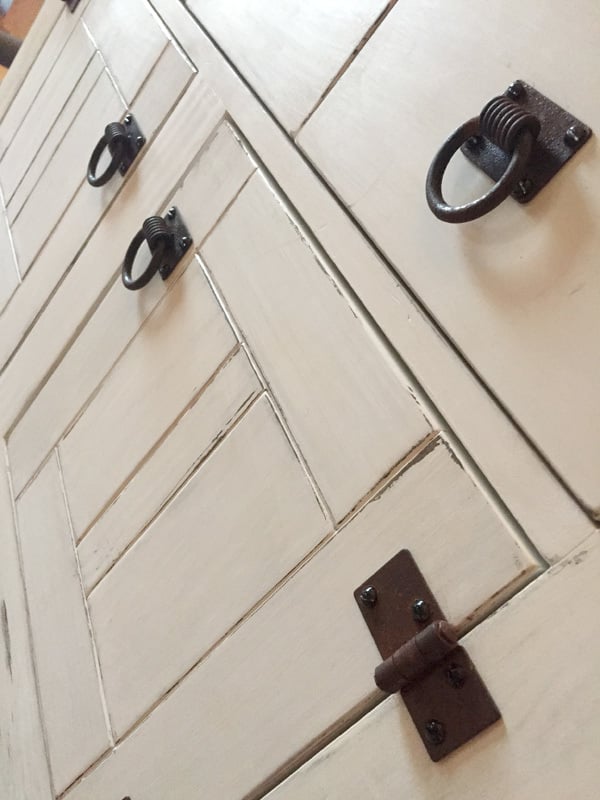
Built the project from the original plans. Modified by creating a shadow box style countertop. Also decided to make the shelves movable rather than just being static. Purchased the mini barn door hardware kit from Amazon.
Perfect vanities! When I couldn’t find exactly what I was looking for, I searched online for vanity plans and thankfully your site and these vanities popped up. I love all the storage with these, so much better than ANYTHING pre built we looked at online. We had seen vanities that I was going to settle for but they were around $3,000, and I didn’t love them, so my husband said he could build something and this was the result using your plans. I am so thankful and the whole project was a fraction of the cost! I stained them with a vinegar and steel wool stain with poly over it. I couldn’t be more grateful for you and your generosity of plan sharing. Thank you!
Wed, 01/11/2023 - 05:25
These are very pretty. Any chance he recalls what type of wood used?
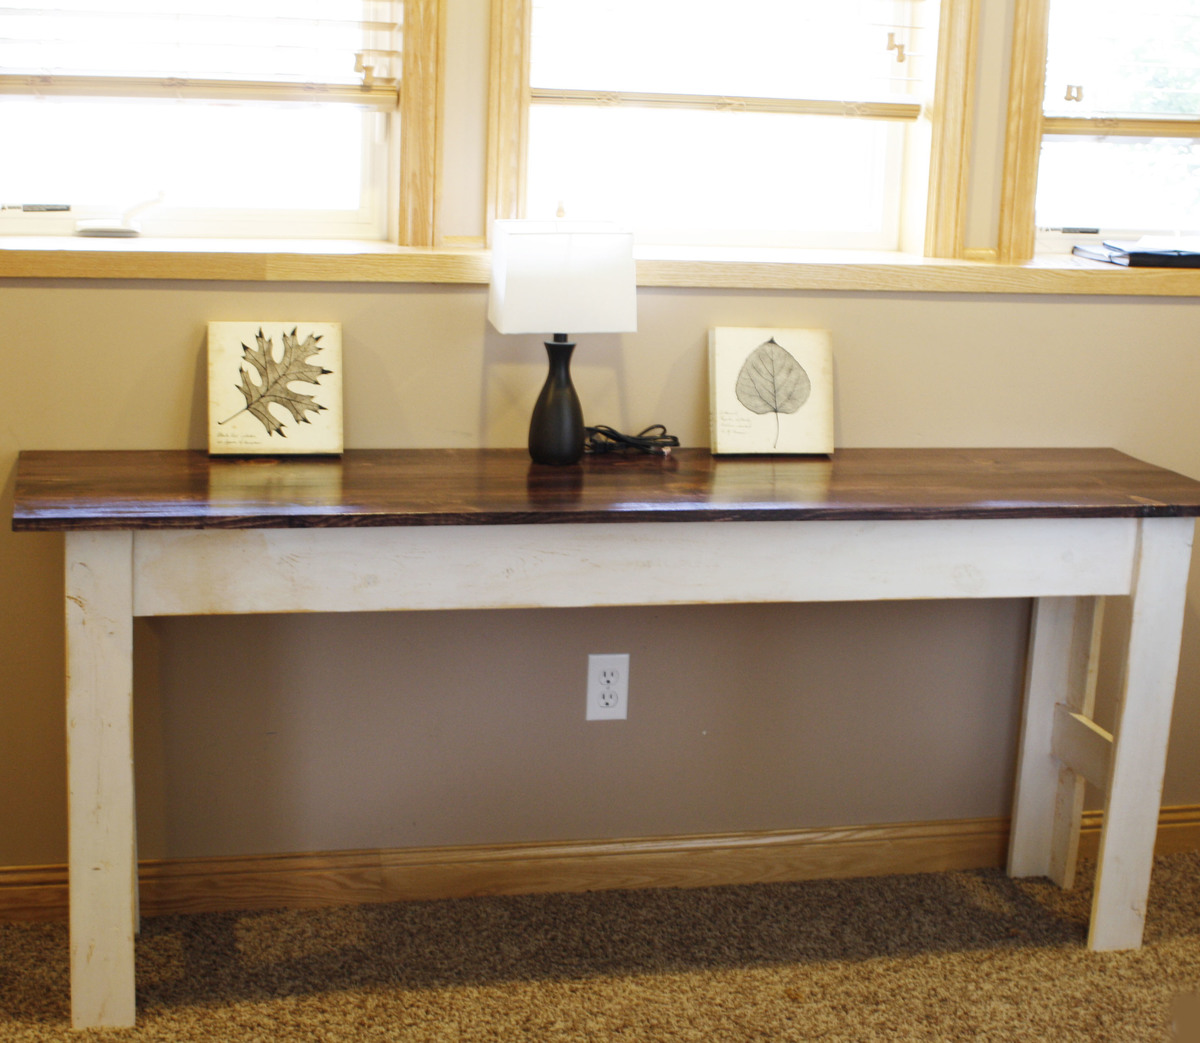
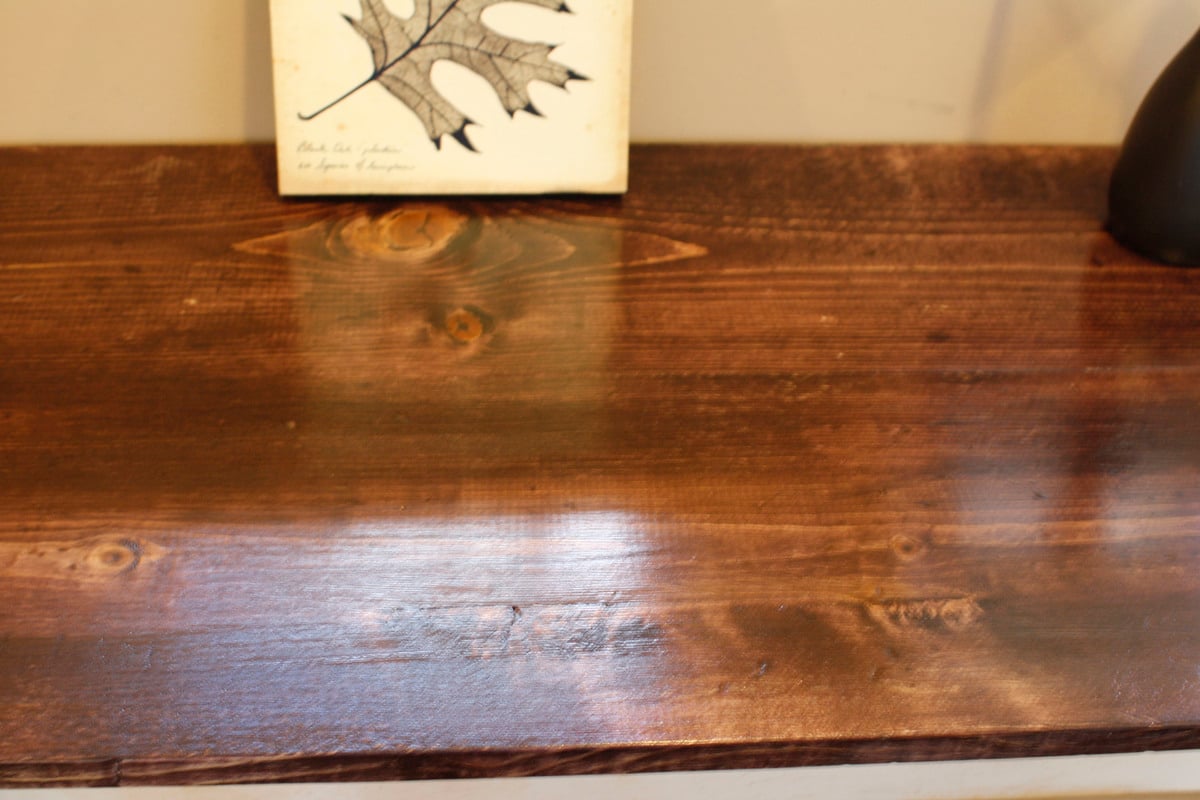
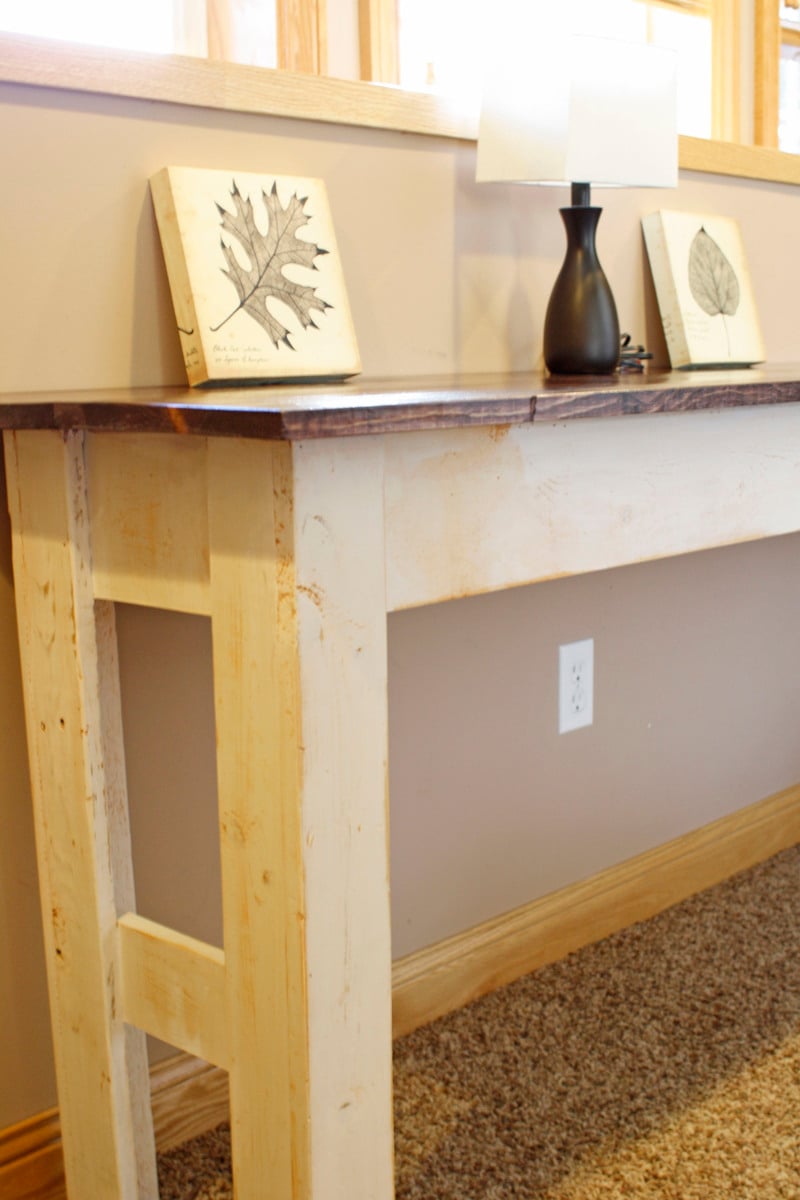
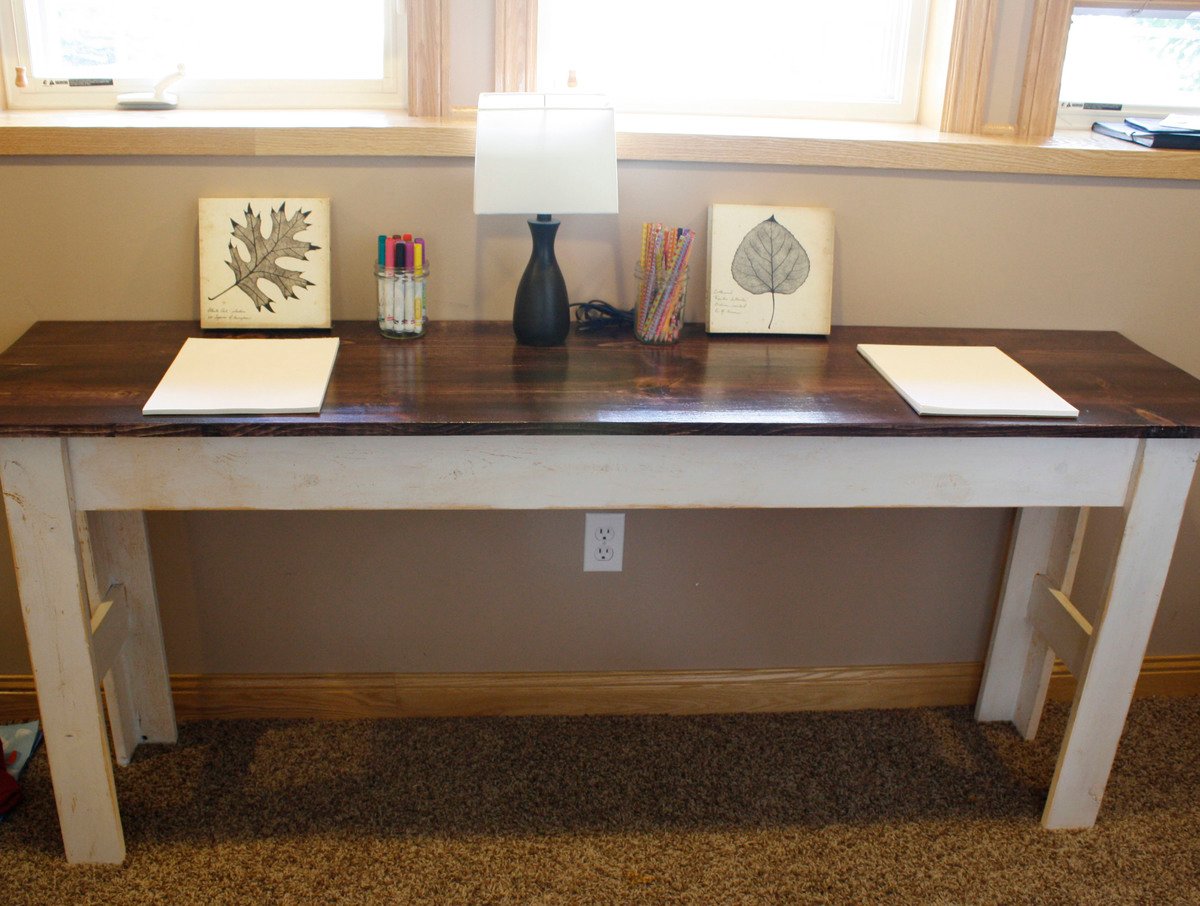
This is a shorter and more narrow version of the Farmhouse table, it works perfectly for 2 kids to sit and do homeowrk or color at.
Most of teh legs are built out of reclaimed pallet wood, driving the cost way down, I did not include the stain and wax into my total cost since I had these on hand.
Mon, 10/17/2011 - 09:18
Hi, I am building a table for a teacher who wants it to be a 3 seater. Your table looks just right. I am wondering how stable it is. It looks like you didn't taper the legs, which is what I think I am going to do too. Basically I need to know if you feel it is stable enough for a teacher to use as a writing center.
Thanks, Alecia
Mon, 10/17/2011 - 12:07
Hi Alicia-
Yes it is very stable, my kids use it everday as their homework table.
THanks and good luck!
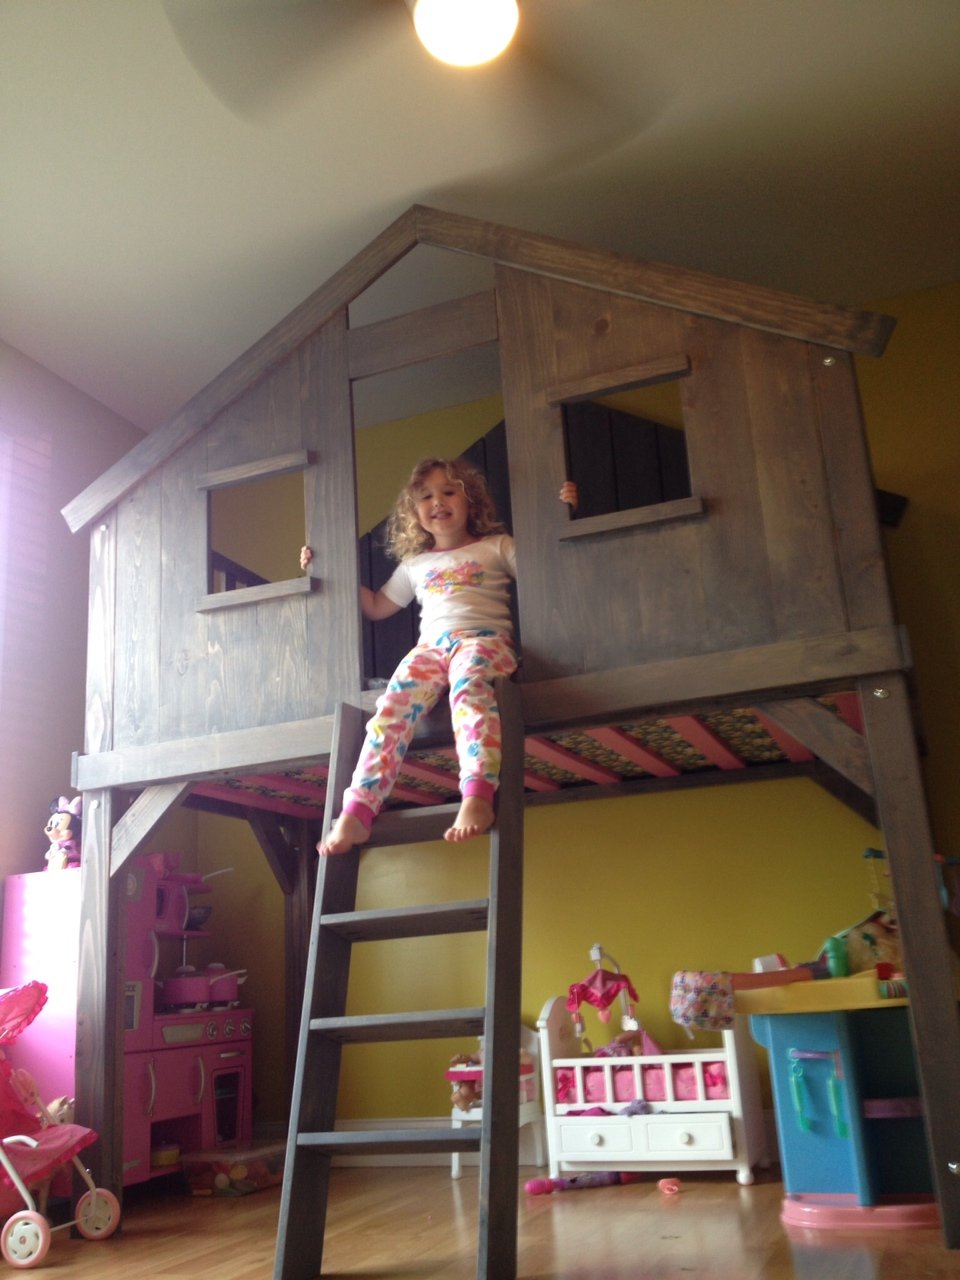
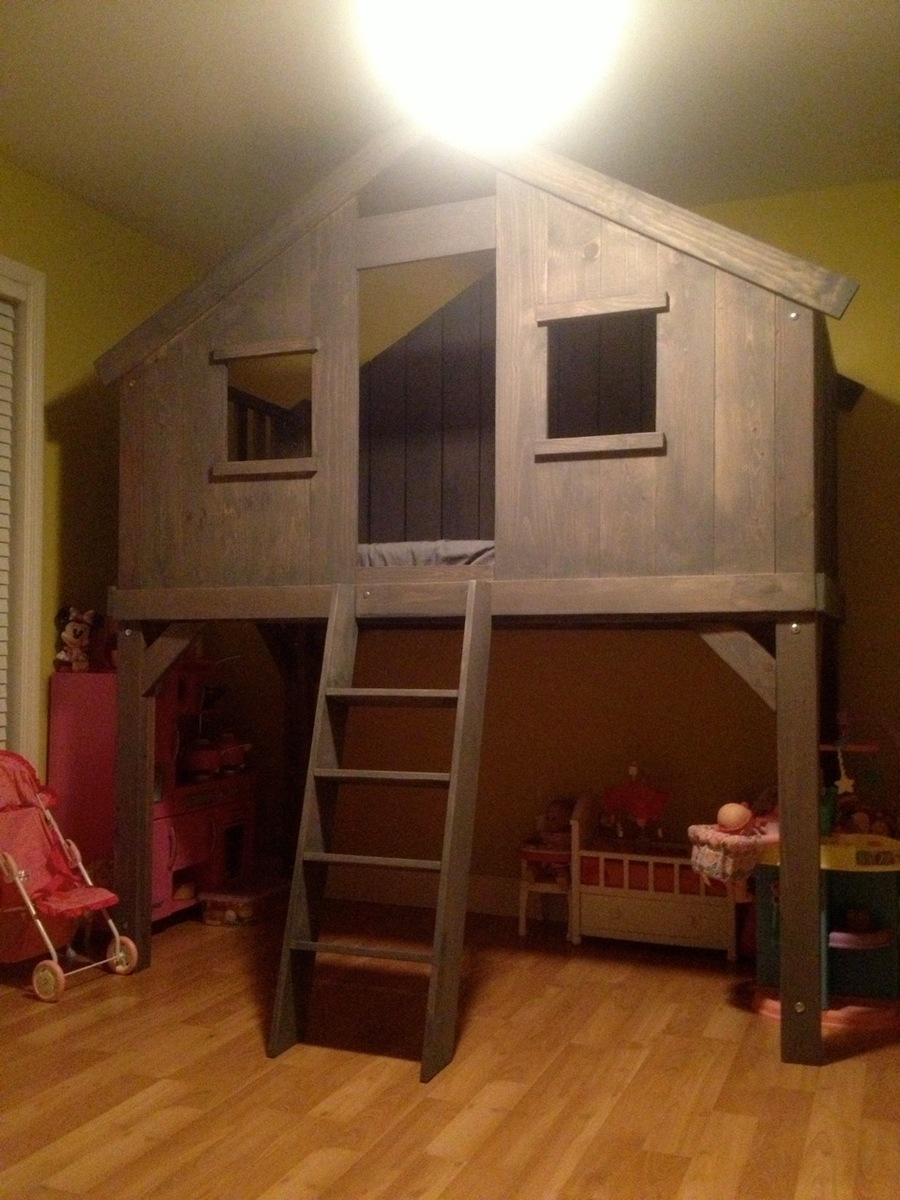
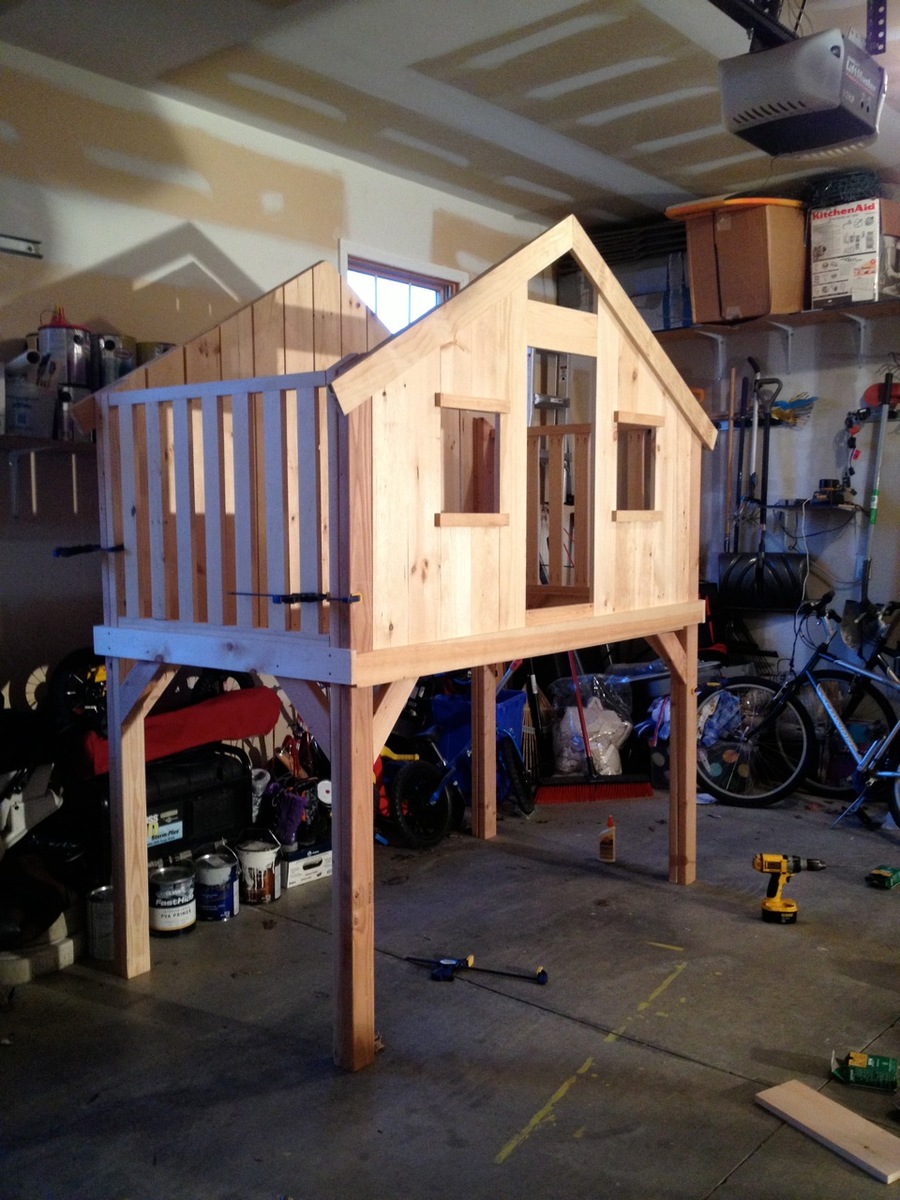
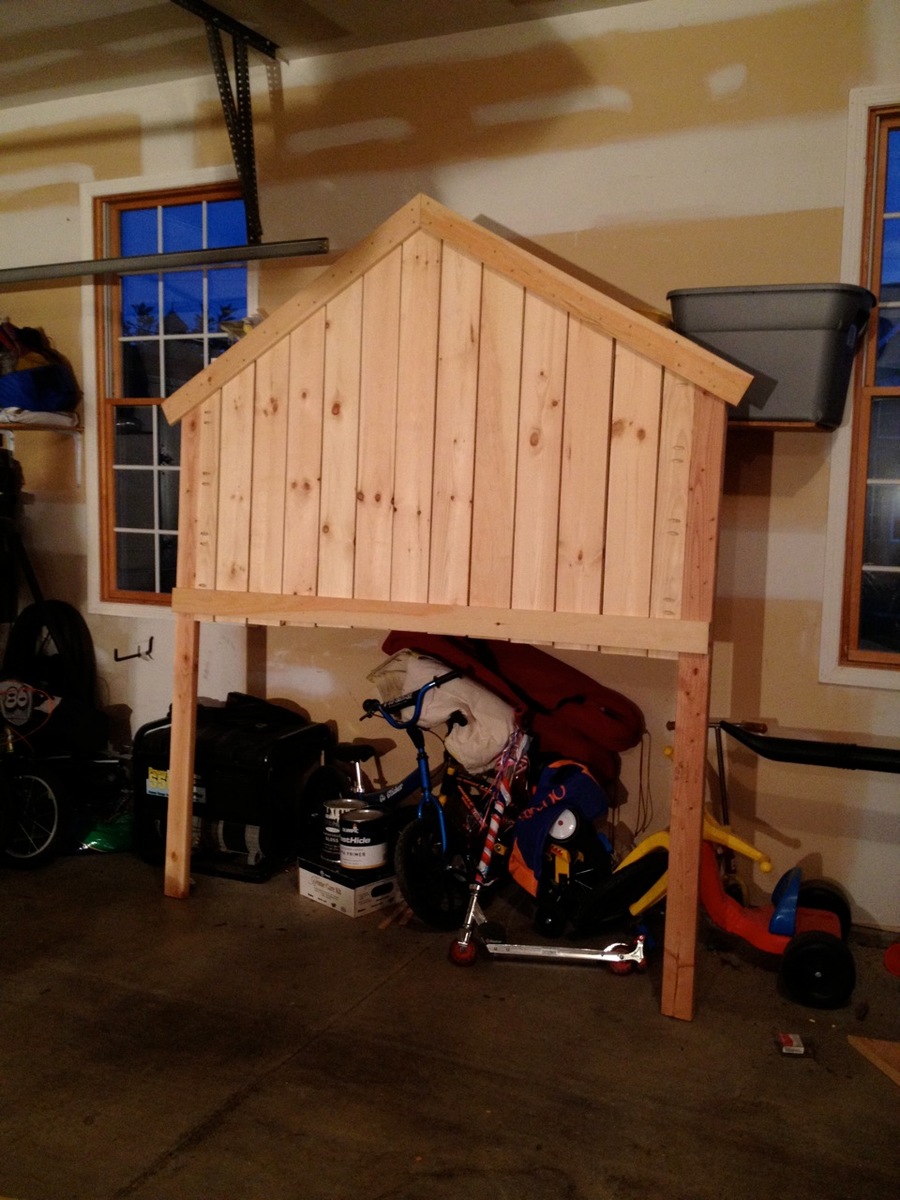
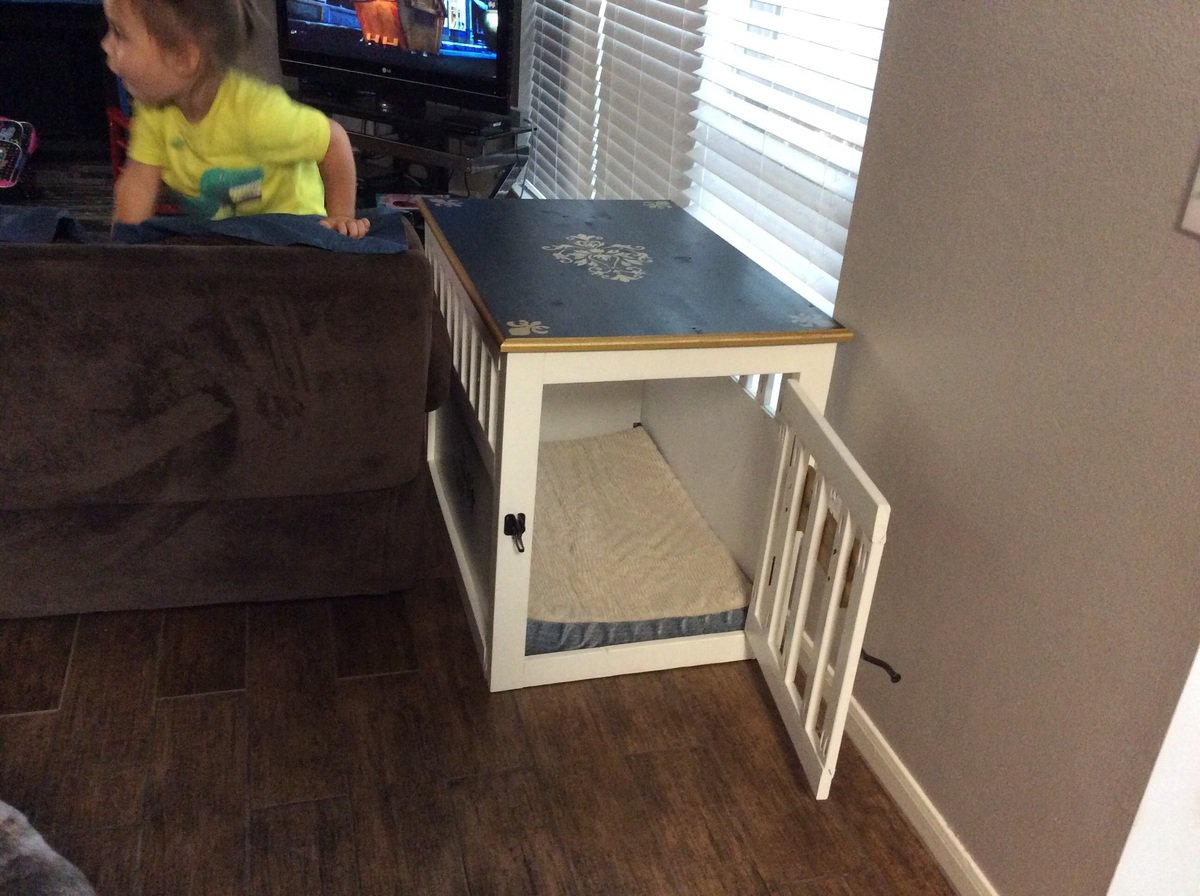
My kiddos LOVE this clubhouse. We use it in the playroom, but also could be an extra bed.

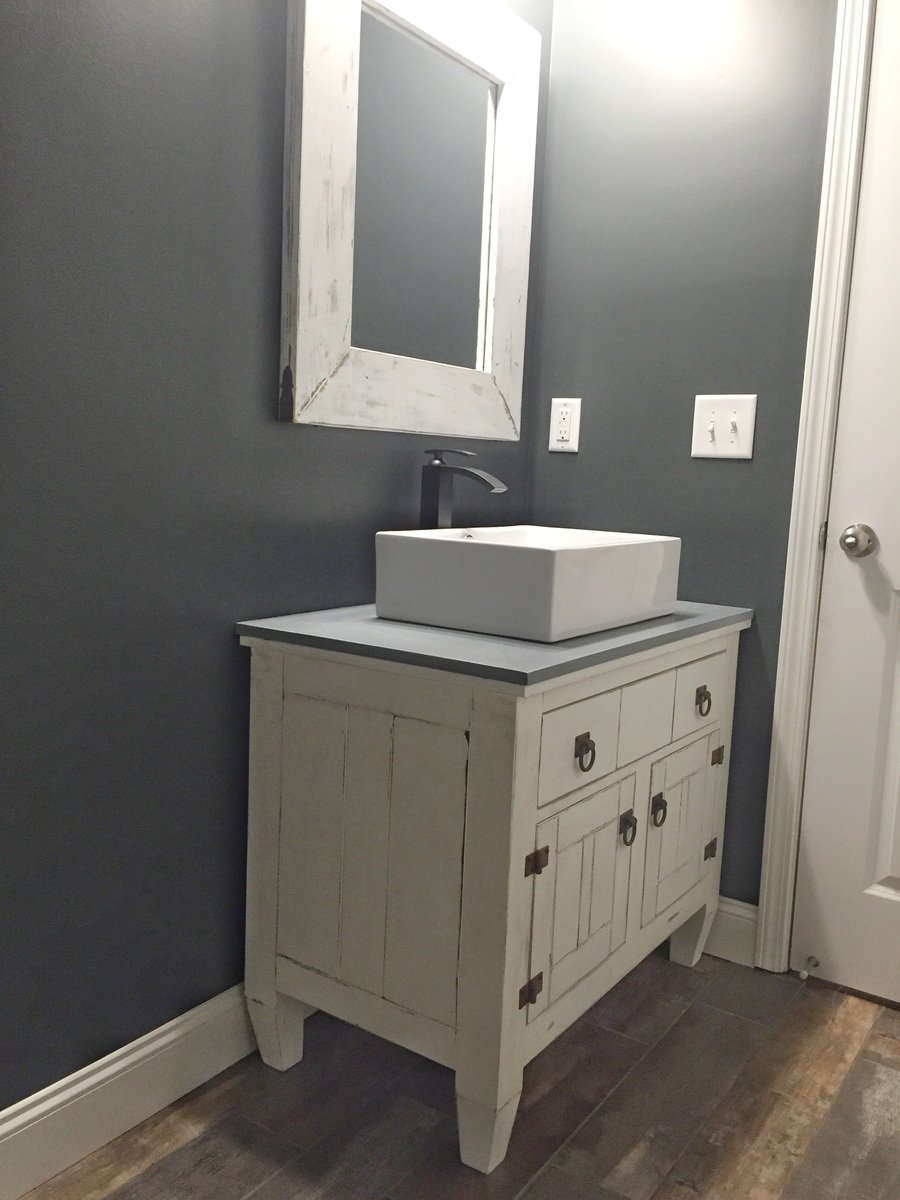
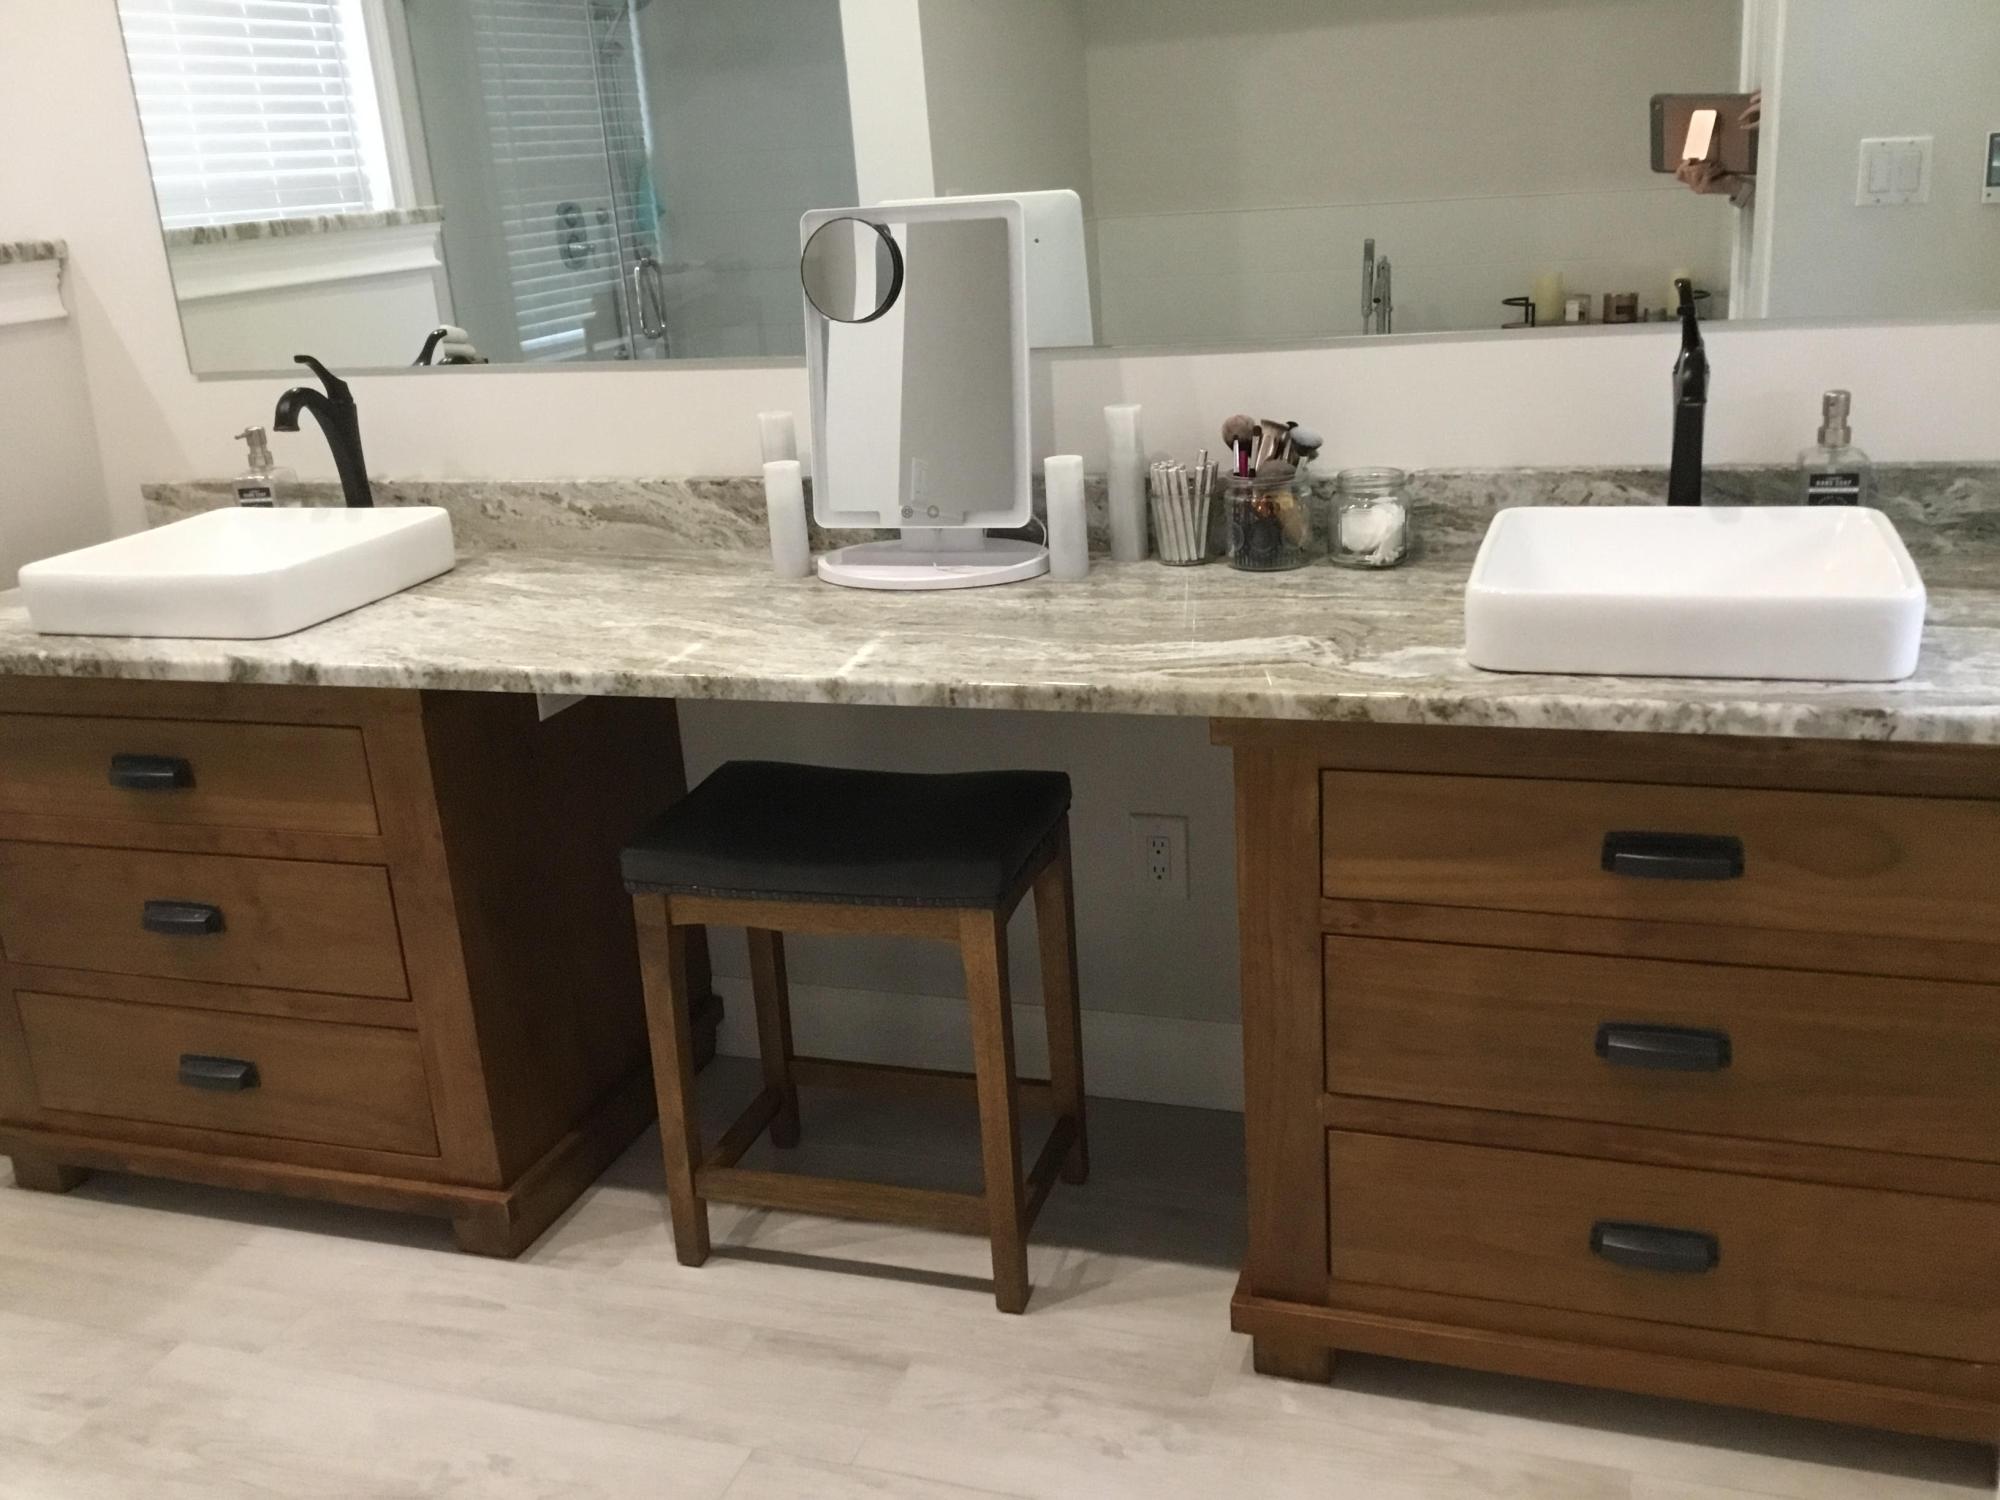
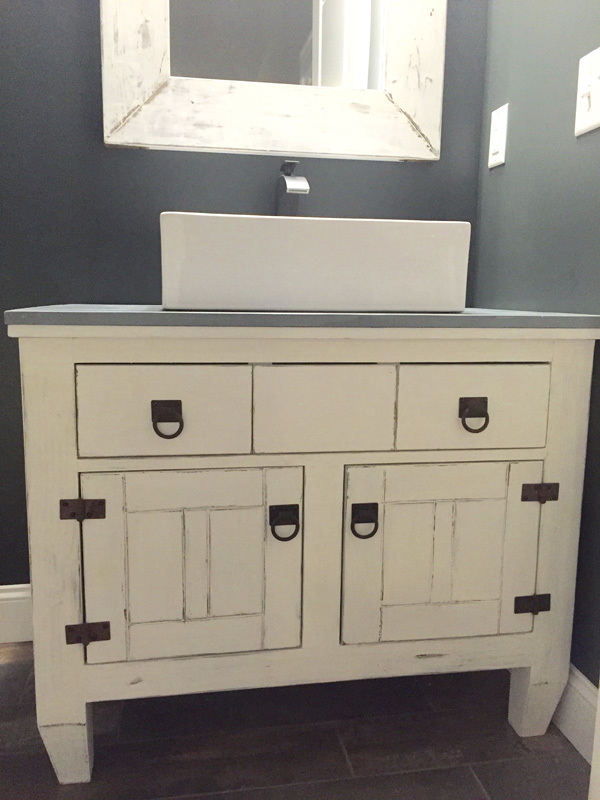
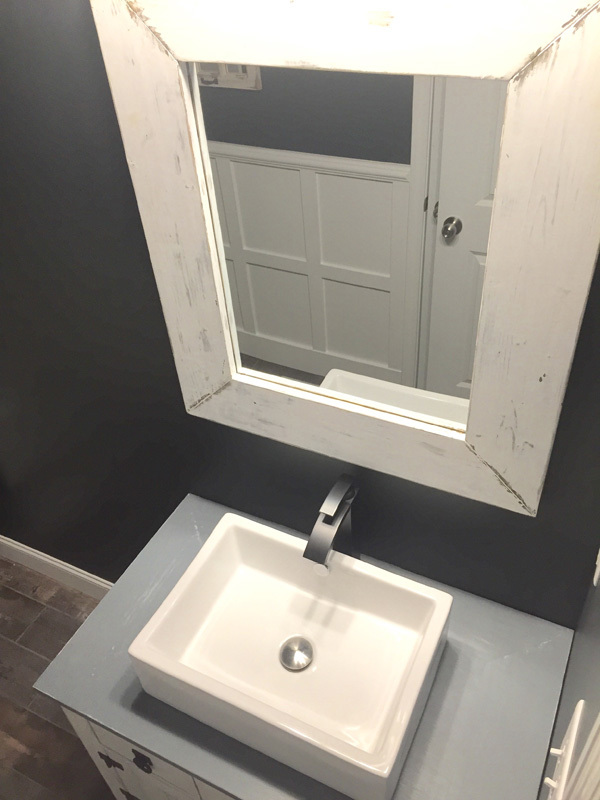
Bathroom vanity with vessel sink. Made 32 inches high to have a vessel sink on top. 37 inches wide and 22 inches deep.
Tue, 07/09/2019 - 18:27
Looks really beautiful how can I get the plans to do this for my parents?
thanks
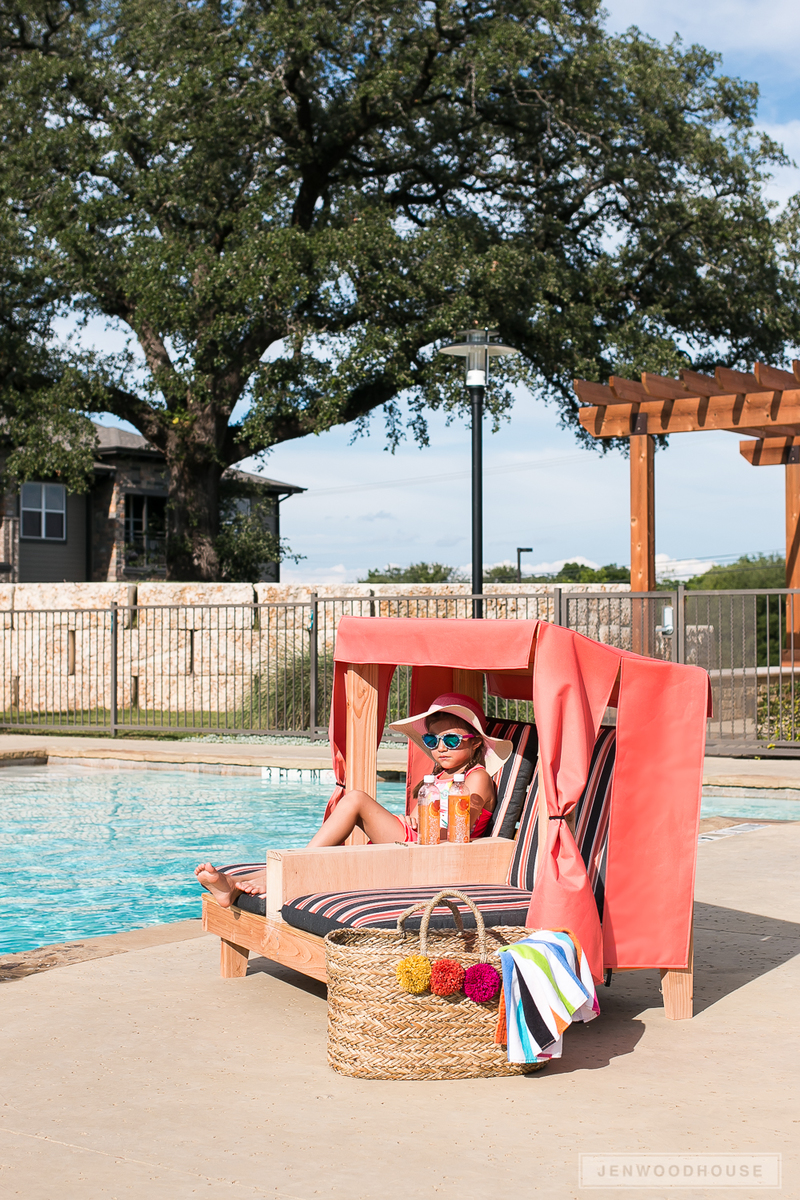
Hi friends!
Jen Woodhouse here, sharing this adorable summer project with you! I'm in the mood for all things outdoor, so I thought I'd share this build I created last year. This Kids Outdoor Double Lounge Chair made my kiddos so happy. They spend a ton of time at the pool and this Lounge Chair offers them a little bit of shade, and cup holders too for their drinks!
Be sure to tag me @jenwoodhouse if you share photos of your build on social media.
You can get all the details and the plans for this build on JenWoodhouse.com!
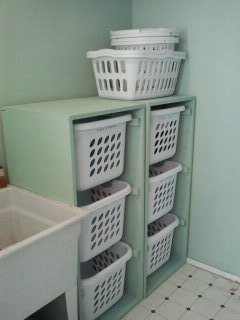
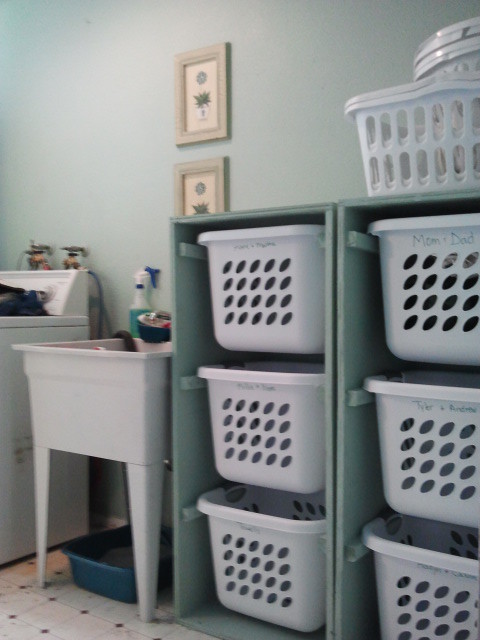
We had a very limited area for these to fit, so my hubby had to change the dimensions to fit these square baskets. We needed enough spots for our family of 10! I LOVE THEM, thanks; Ana!
Wed, 01/11/2012 - 14:53
We are going to have to turn the baskets the same way due to the space in out laundry room. Do you happen to remember the dimensions of them? Thanks.
Thu, 02/09/2012 - 07:08
Do you have the dimensions for the square baskets? These would work much better in my home.
Tue, 02/14/2012 - 16:42
We did something similar when our family was 8 (6 foster children). We bought 4 baskets (2 people per room) and then just had them on regular shelves. I LOVE the look of these! Unfortunately baskets give out over time and I can't ever seem to find baskets that once again are the same size as previous baskets. Did you order the baskets on-line someplace that you can consistenly get the same size for when the baskets wear out?
Wed, 02/22/2012 - 12:35
I have all the same laundry baskets that I bought at wal mart for like 3 or 4 bucks a piece. I would think that just meausring out the size according to the laundry baskets would work out fine! they have never stopped selling the ones that I buy, i find them at every wal mart I go to
Thu, 03/08/2012 - 05:13
Seriously? $50 for these plans. Get real. Fine woodworking plans don't cost this much. Take some wood, make a box, and put slats in it to fit the baskets. The entire set wouldn't cost $50!
Thu, 03/08/2012 - 06:18
The plans are free. The build costs $50. See the plans on the link above the cost.
Thu, 03/08/2012 - 07:50
Thanks David. Didn't read well as you can see. My mistake, and apologies.
Sat, 03/17/2012 - 20:54
once again can anyone please give the measurements for this square basket design and the basket model number as well. i am very challenged when it comes to building things, but with the idea of home depot doing the cutting i think i could manage if i had the measurements. i need the square size to work for my space though. thanks in advance.
Sun, 04/01/2012 - 09:18
I have tried clicking on the link above the cost to get the Plans...however it brings me back to the ORIGINAL Plan rather than YOUR plan (skinnier and taller)...Im sorry if I am being dense but I would really love to get the dimensions of YOUR plan but am having trouble accessing them?? Help please!!
Fri, 04/20/2012 - 14:05
If you use the large wire baskets made by elfa they would not break like the plastic. The initial investment would be more but would save money over time.
Tue, 07/24/2012 - 04:34
Easy and awesome! My teenage children and I made these over the week-end! Super easy and great looking! Our first project was the laundry pedestal and these are a great compliment. We let Home Depot cut the wood due to time restraints and assembly was a snap! Thanks for the great family projects. My husband passed away in April and these projects have really helped us in the healing process (excellent for constructive bonding time).! Thanks again
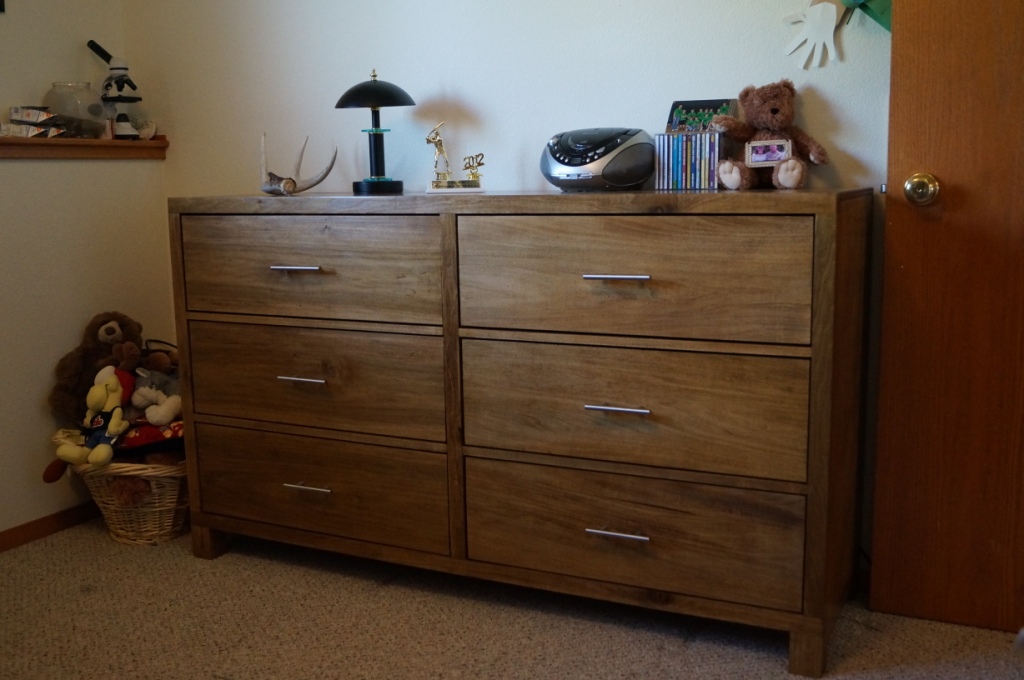
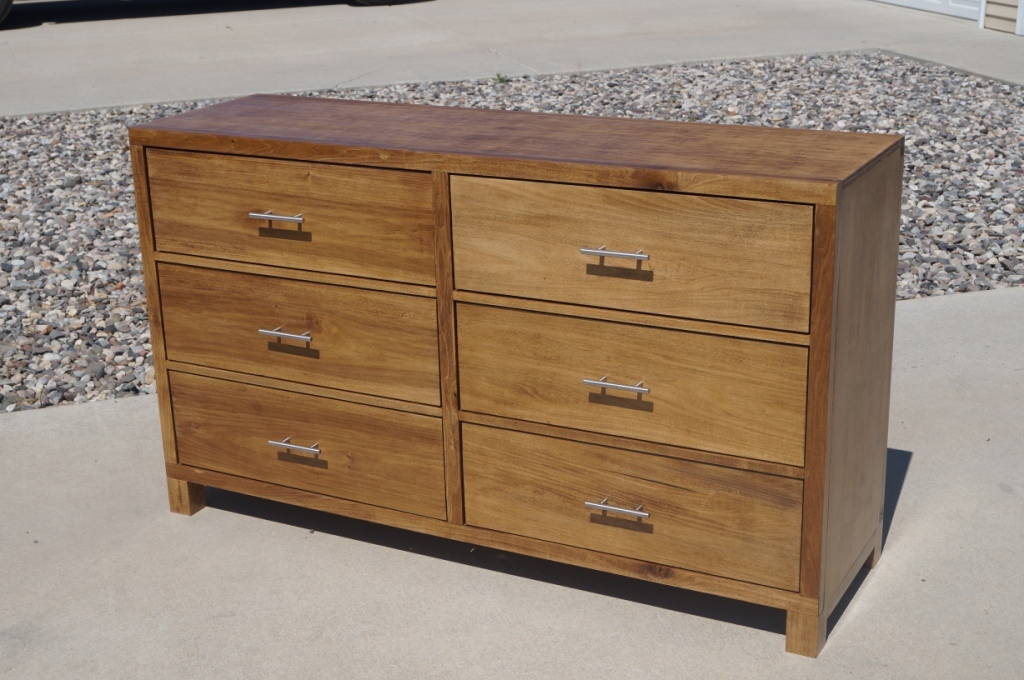
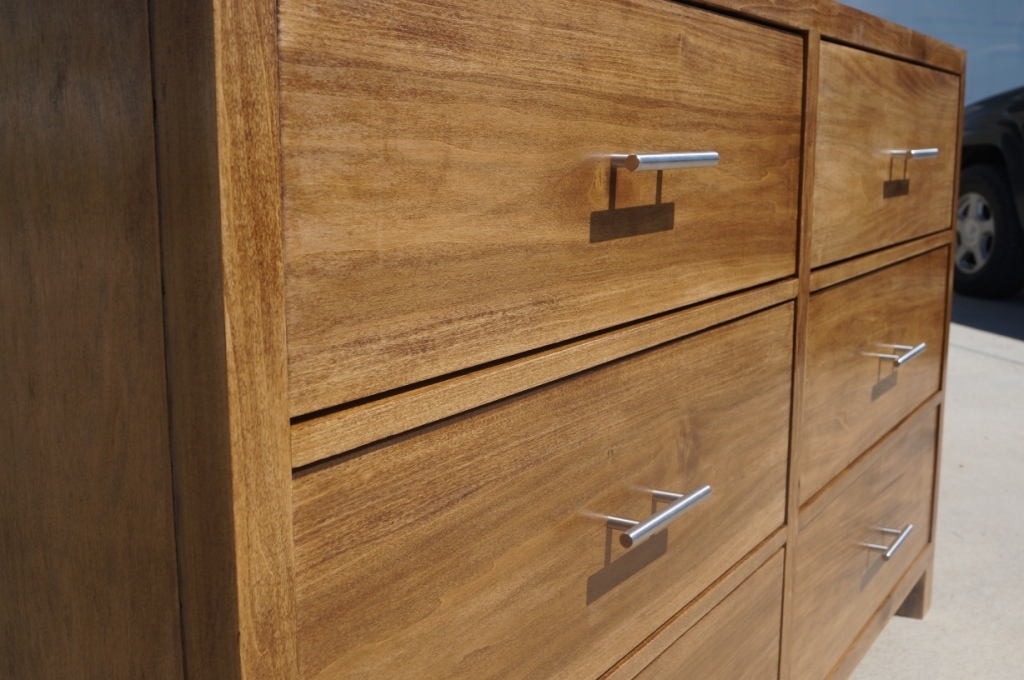
I modified Whitney's (Shanty2Chic) Rolling Rustic Wood Dresser slightly because I didn't want to have mine on wheels. Other than that, I basically followed her plans and advice! I used Maple plywood with poplar boards. With a dark stain they are a good match. I did use 3/4 maple plywood for the dresser drawers instead of 1x8" boards to save money. My wife is happy and my boys love their new dresser--that's all that matters!
Thanks, Anna, for this great site!
Wed, 08/14/2013 - 06:07
Really love how this came out! How big are those legs? I'm thinking of copying this design for my new place!

In reply to Awesome Job! by Adam Colburn
Mon, 08/19/2013 - 20:23
Thanks, Adam. The legs are 3x3 poplar you can get a piece at lowes or home depot (can't remember which) but they are actually 3 1x3s glued together but you'd never know it. Anyways, they are 3 1/2" tall and I put an additional piece of my 2x2s underneath to support them, then the strip of 1x2 between the legs on the side that are pockethole screwed into them as well--this is where the true strength comes in.
good luck!

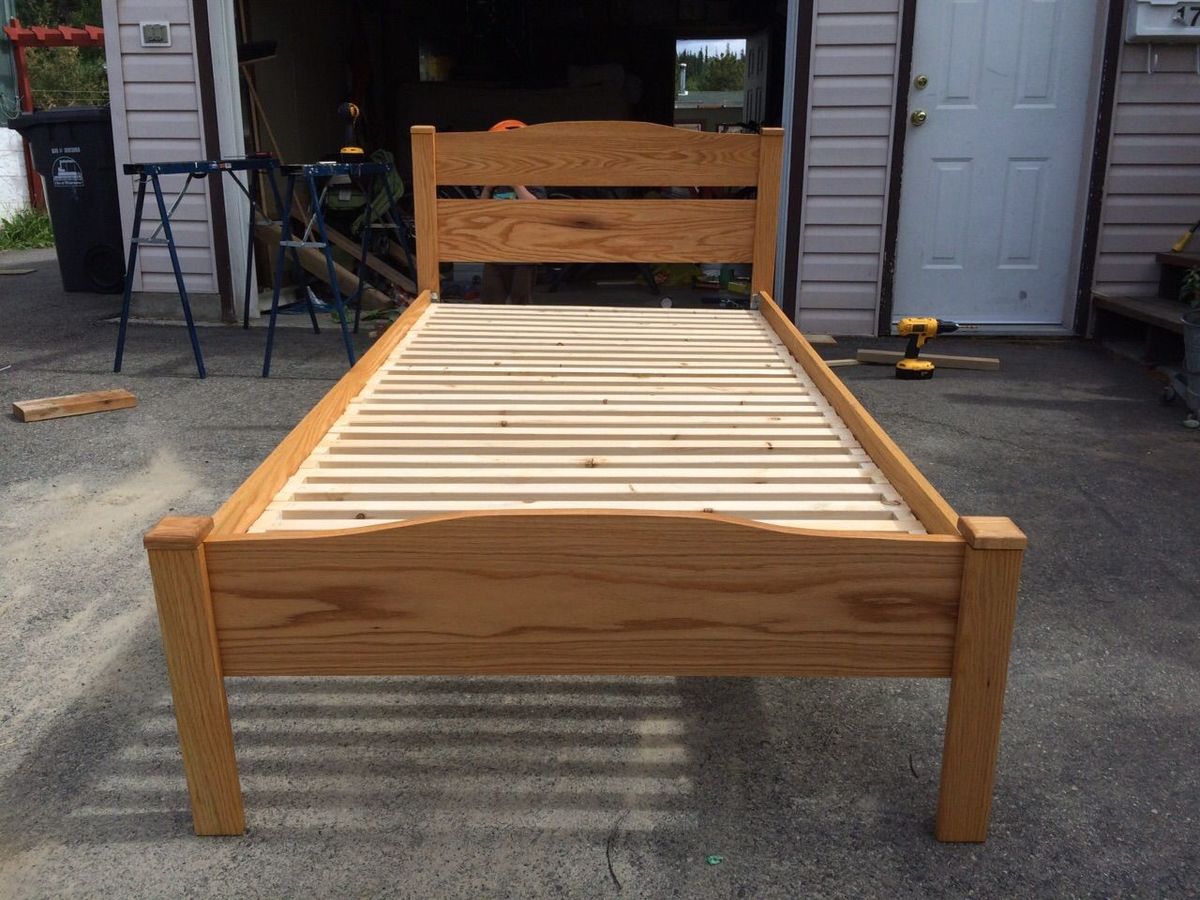
I used red oak for this bed and finished it with danish oil (golden oak colour). It turned out pretty well. I decided to go without nails and screws, glue and biscuits for the joints and I used small dowels to hold the caps on the posts. First project that I tired using only glue and biscuits and it wasn't that hard. I also bought some bed rail hangers from Lee Valley to make the bed easier to take apart and put back together. I used 2x2 for the slats because I don't have a box spring in the bed (to keep it lower since my son is only 2 1/2 at the time I built it). If I put a box spring in there later, I'll change out the slats to something thinner. Thanks for the plans, it worked out great.
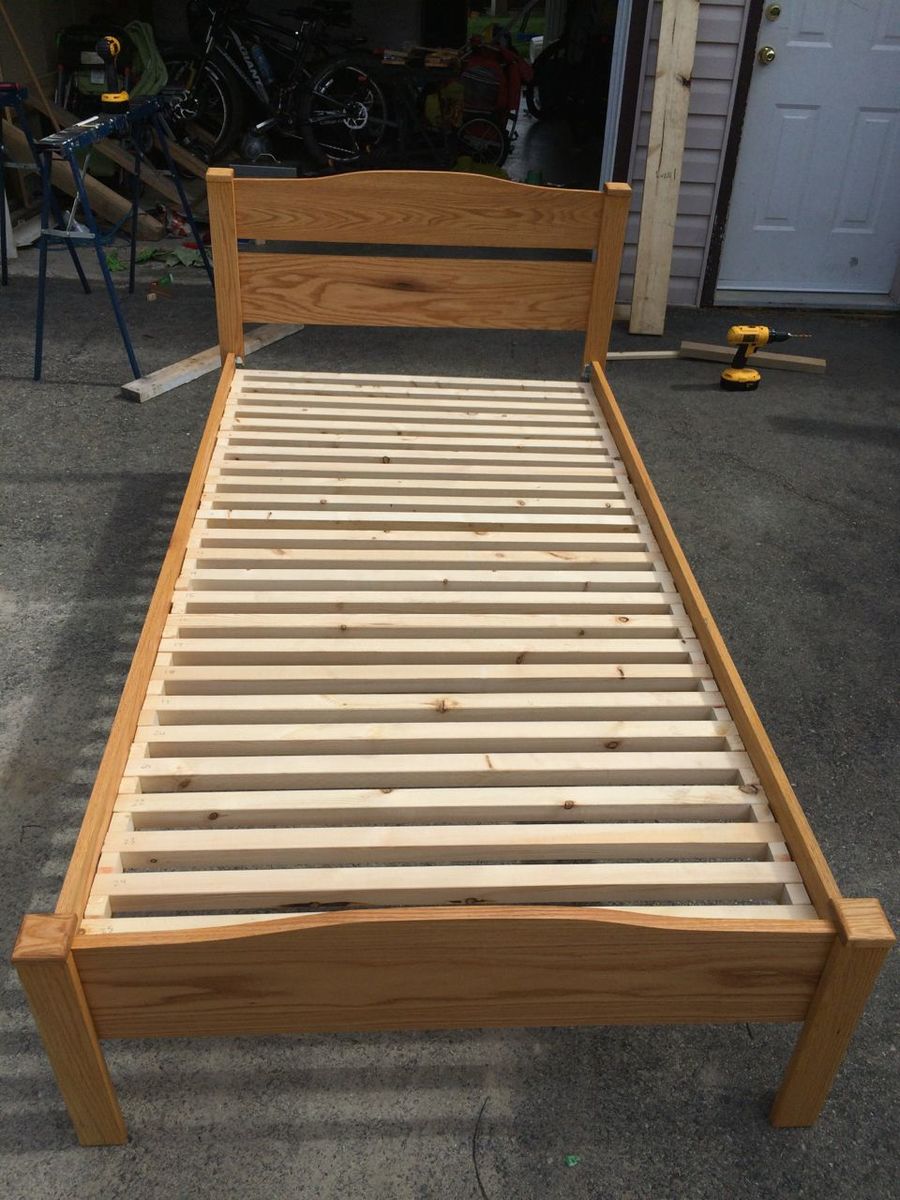
This is my take on the Narrow Farm House Table. Only Fifty-two inches by thirty-two Finished with a flat red base and Jacobean stained top with an over coat of oil based polyurethane. If I were to do this project again I would consider cutting in an arc on the long side stretcher. I did taper the legs in both directions so it dosen’t appear to be too chunky. Corner braces were installed and I didn’t add a stretcher since the overall length was shortened.
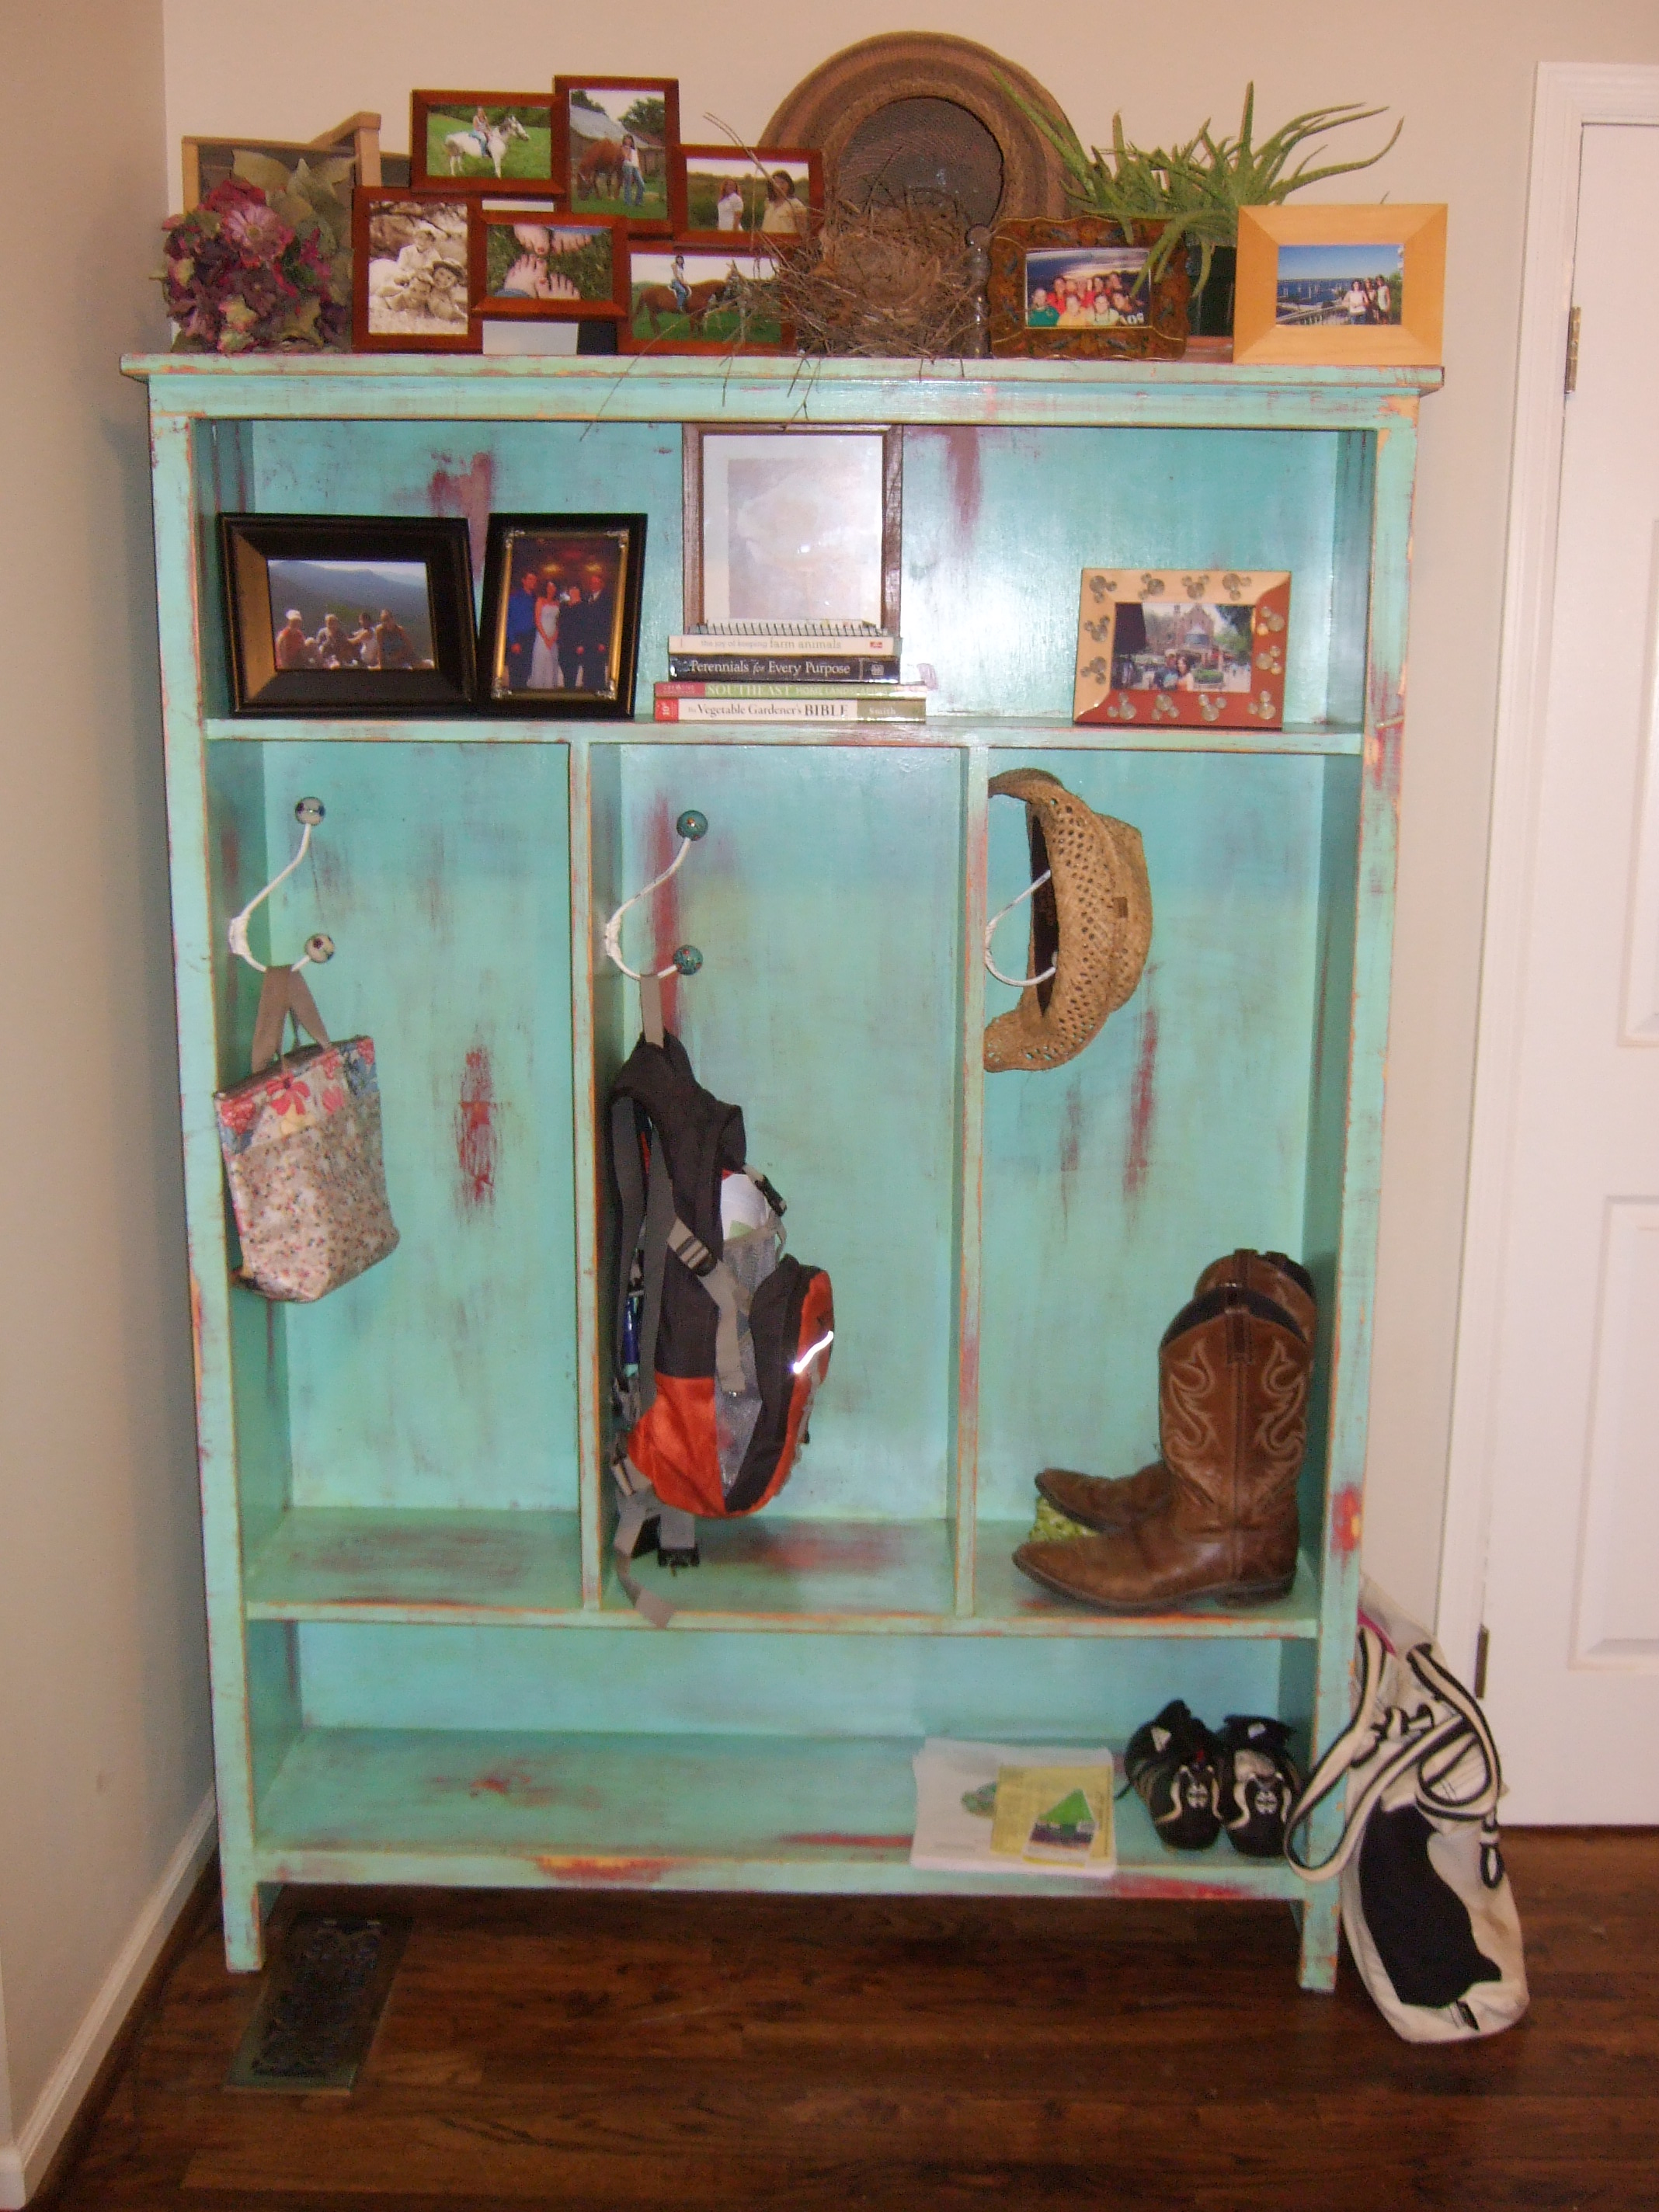
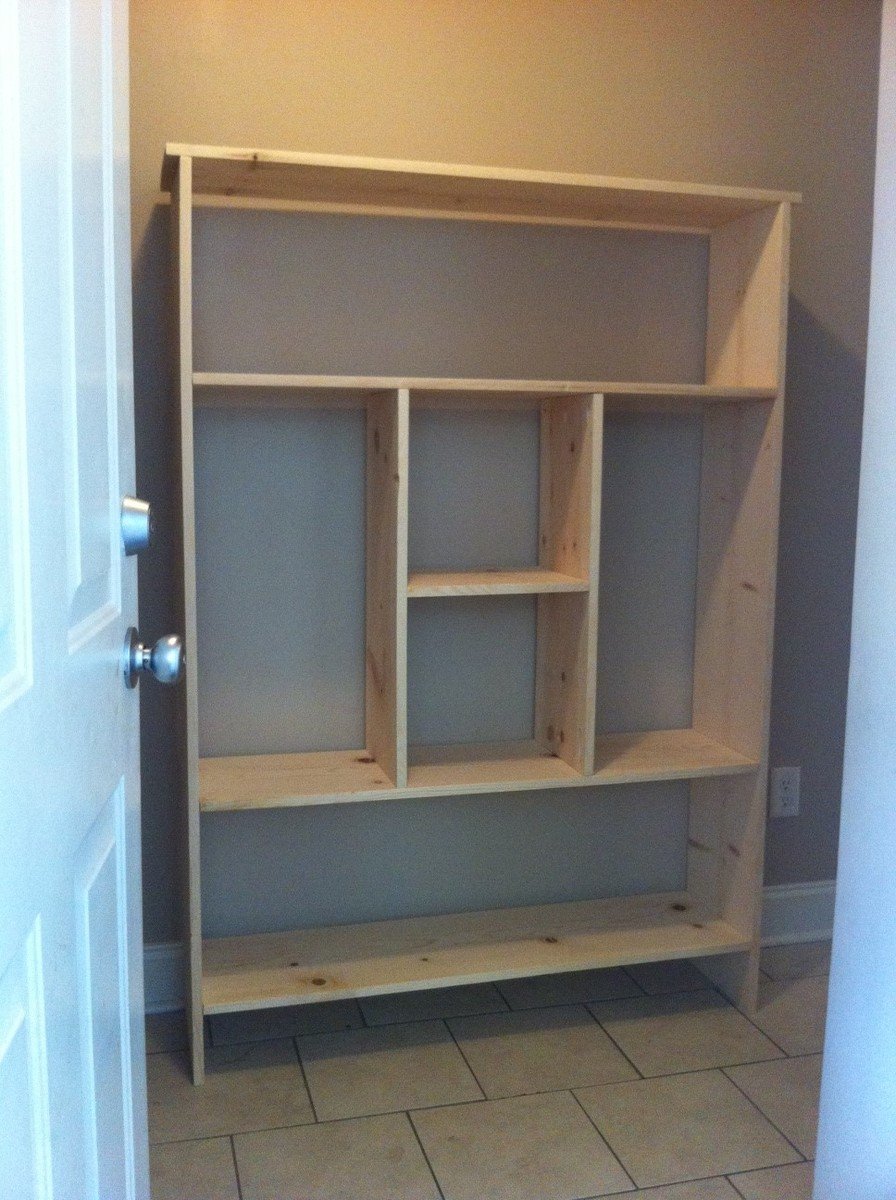
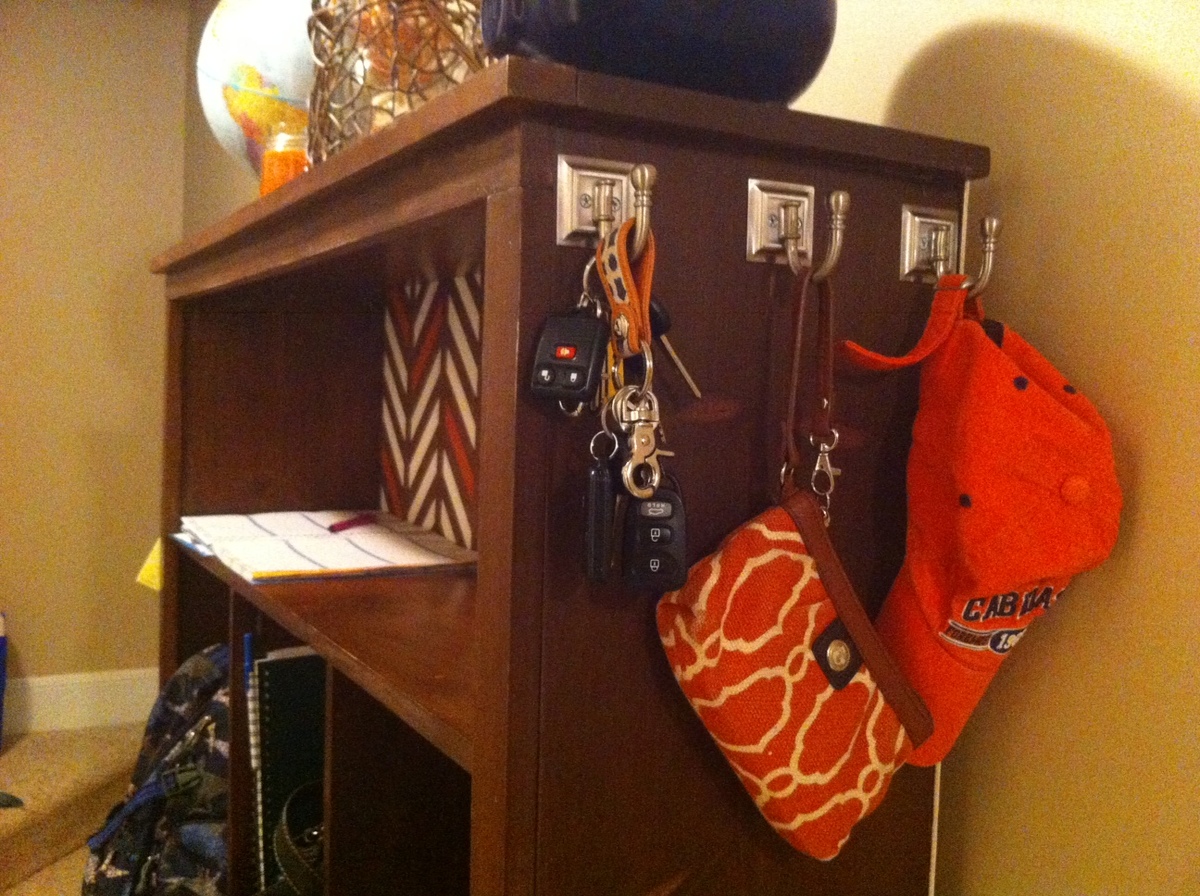
I found the plans for a locker type cabinet that I really liked. Not only did I like it but I knew it would go perfect by our front door.
Fri, 12/16/2011 - 14:17
You did a great job! I think this is going to be my first after-Christmas project. I have 6 kiddos, though, so I think I will make 2! :)
Thu, 01/05/2012 - 04:20
Your lockers came out beautifully. I am very impressed with the distressed look of your paint here. Would you be willing to share how this is done? Also... the hooks you chose to use are unique... I have not seen anything like that at our local hardware store. Thanks! ;-)
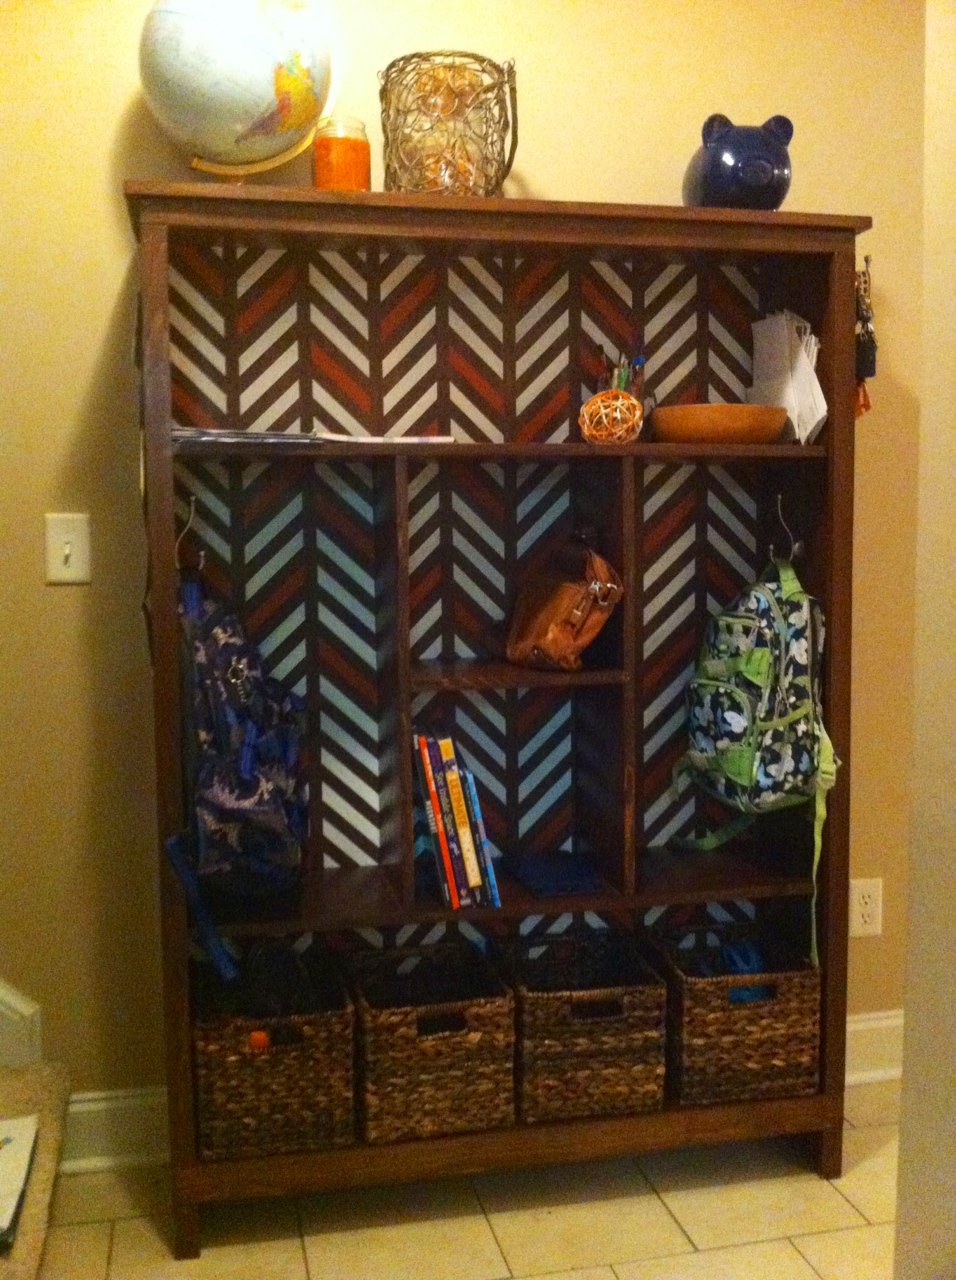
I have loads of space in the entry by the front door, but we never use that entrance. I needed a mini-mudroom to fit in the hallway by the garage door. I wanted a locker cabinet to hold everything we need to walk out the door on a school morning, and a home for all the clutter on my kitchen countertops, all without disrupting the flow of traffic in the hall.
I followed the instructions in Ana's plans, but modified the dimensions. I made the top and bottom shelves 14" high, the tall lockers 28"x14", and the square shelves in the middle 14"x14". Drawing up the plans with new dimensions and making my own cut and buy lists took a lot more math than I expected!
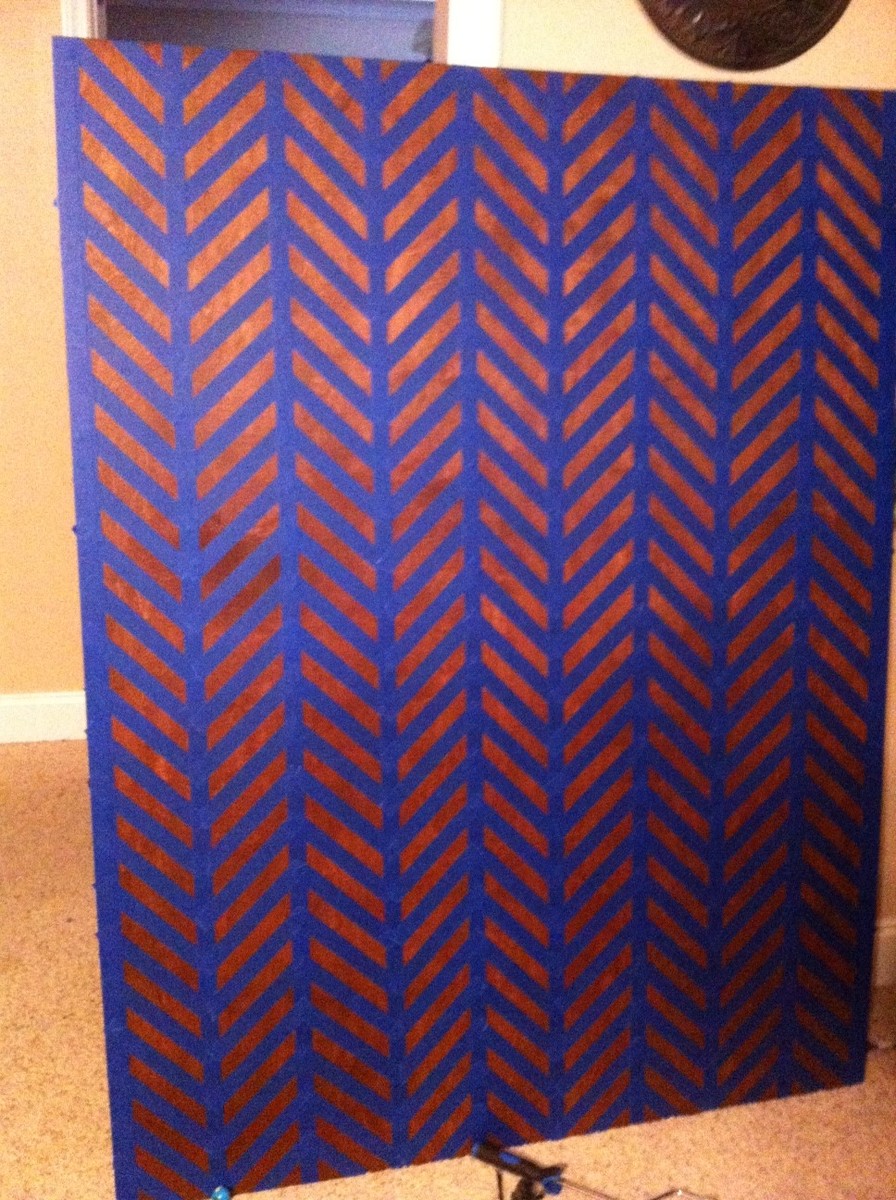
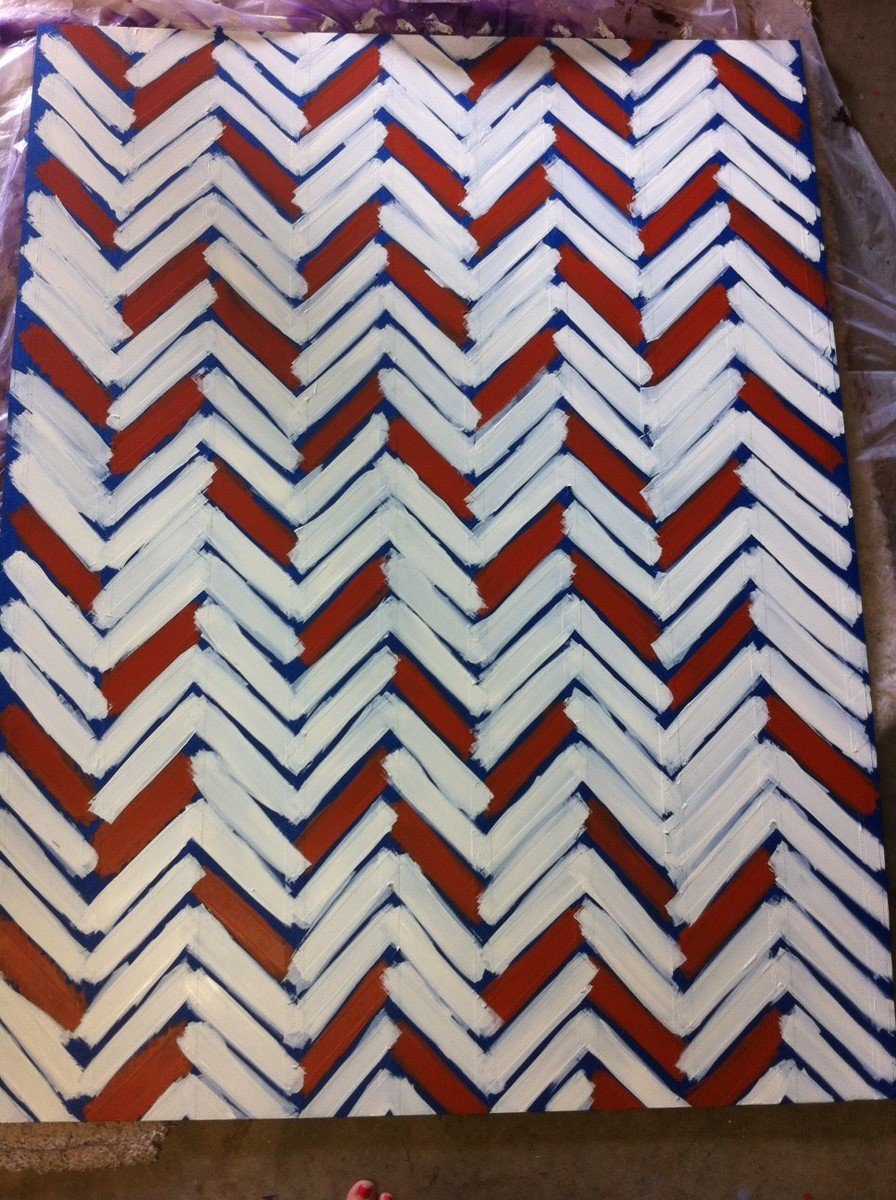
This was my third project, and it's gotten easier to be more precise. However I did put one board on with the pocket holes facing outward. I attached 3 hooks to cover the holes, and ended up loving this feature. The build came together fairly quickly, but the finishing process took a couple of weeks.
I love my new command center, my husband loves the clutter-free kitchen, and the kids actually use the thing!
Sat, 08/10/2013 - 18:41
What an awesome way to cover the holes! The back looks like it took a long time to get the tape right but it looks so good!
Came out very nice , thanks Ana this plan! I love it!
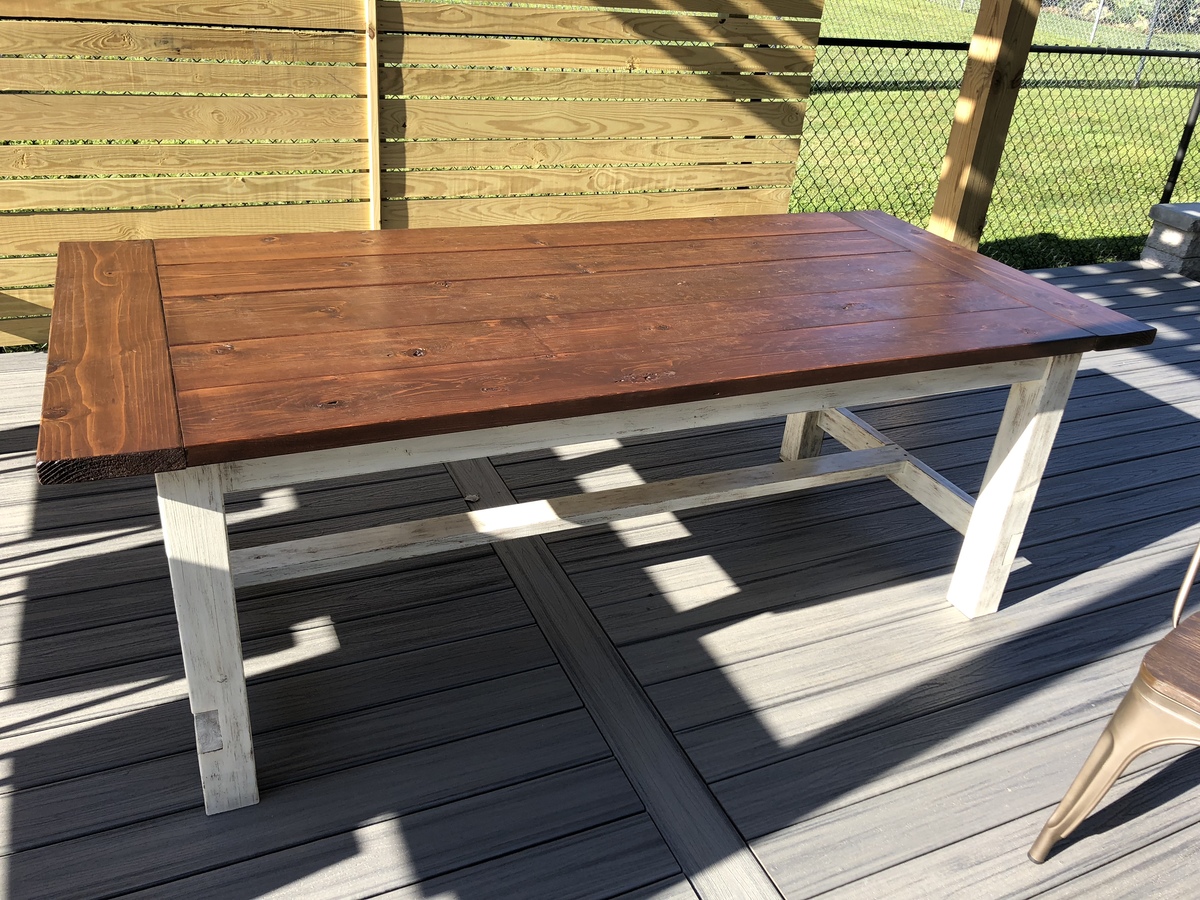
My husband and I built this table from the farmhouse table plans (Kreg-jig). I wanted a farmhouse table for our new patio and couldn’t quit find one to buy-so we made it! We used red cedar because it is an outdoor table and we wanted it weather resistant.
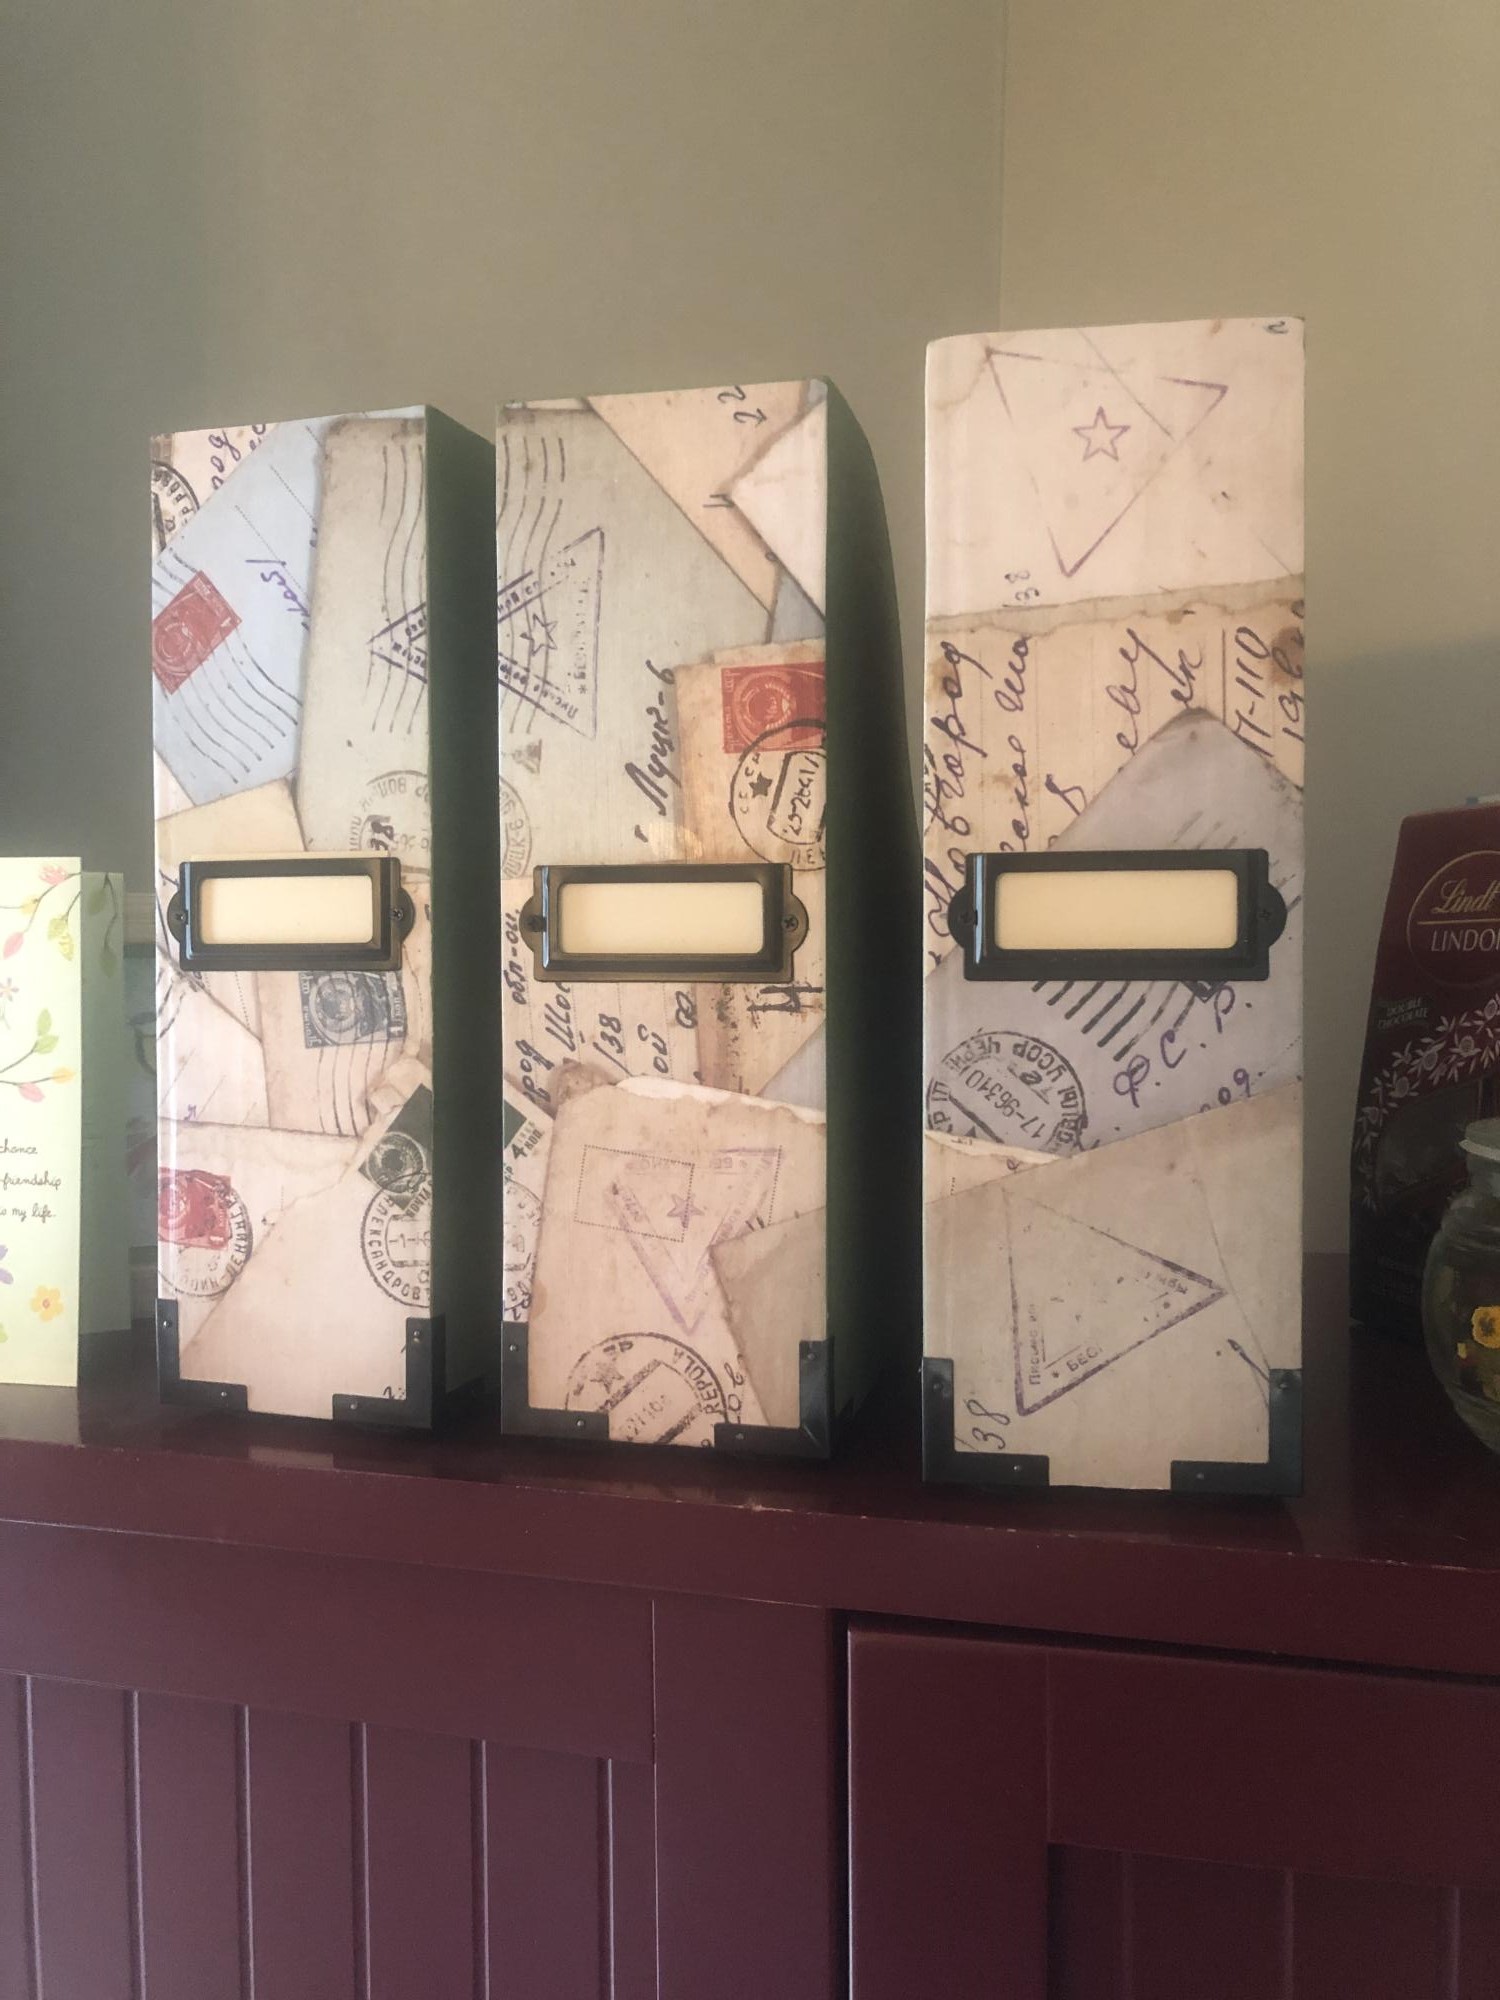
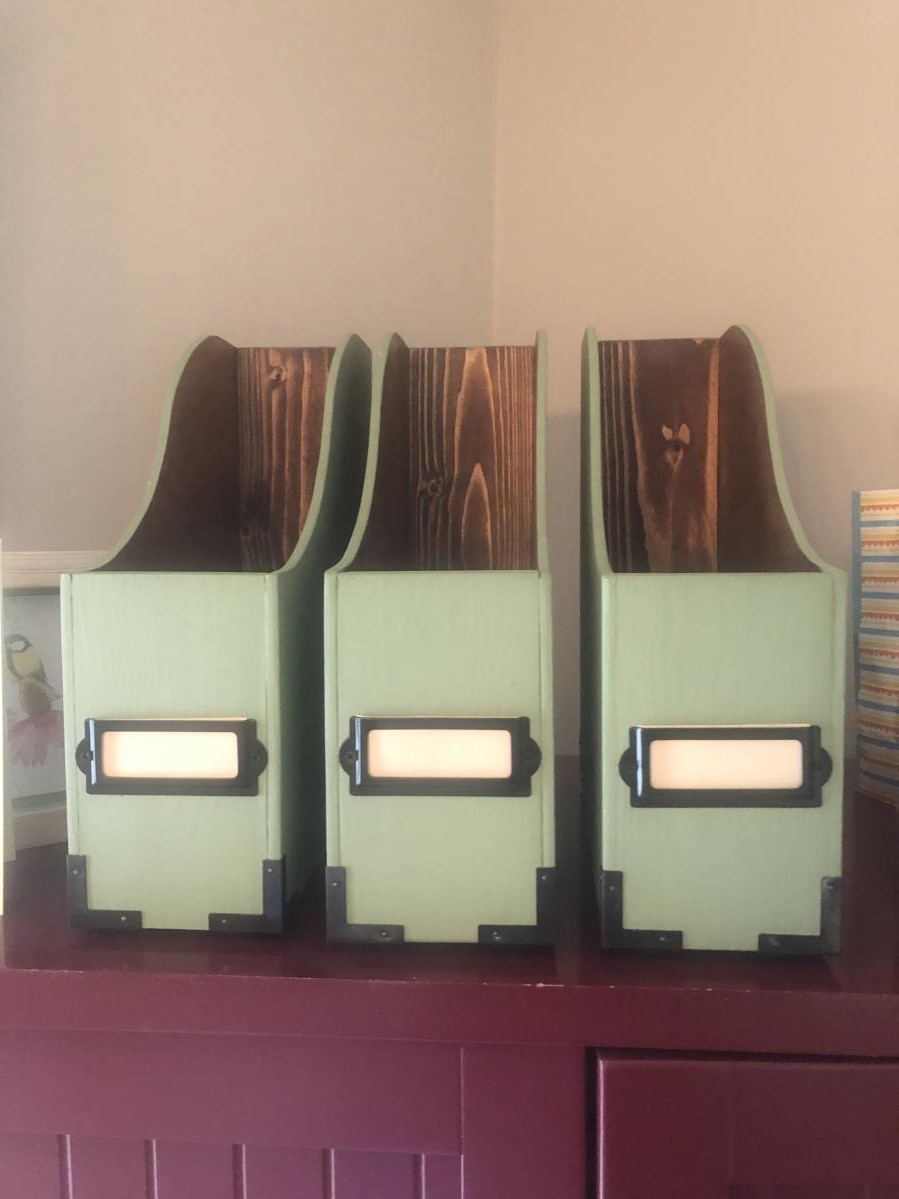
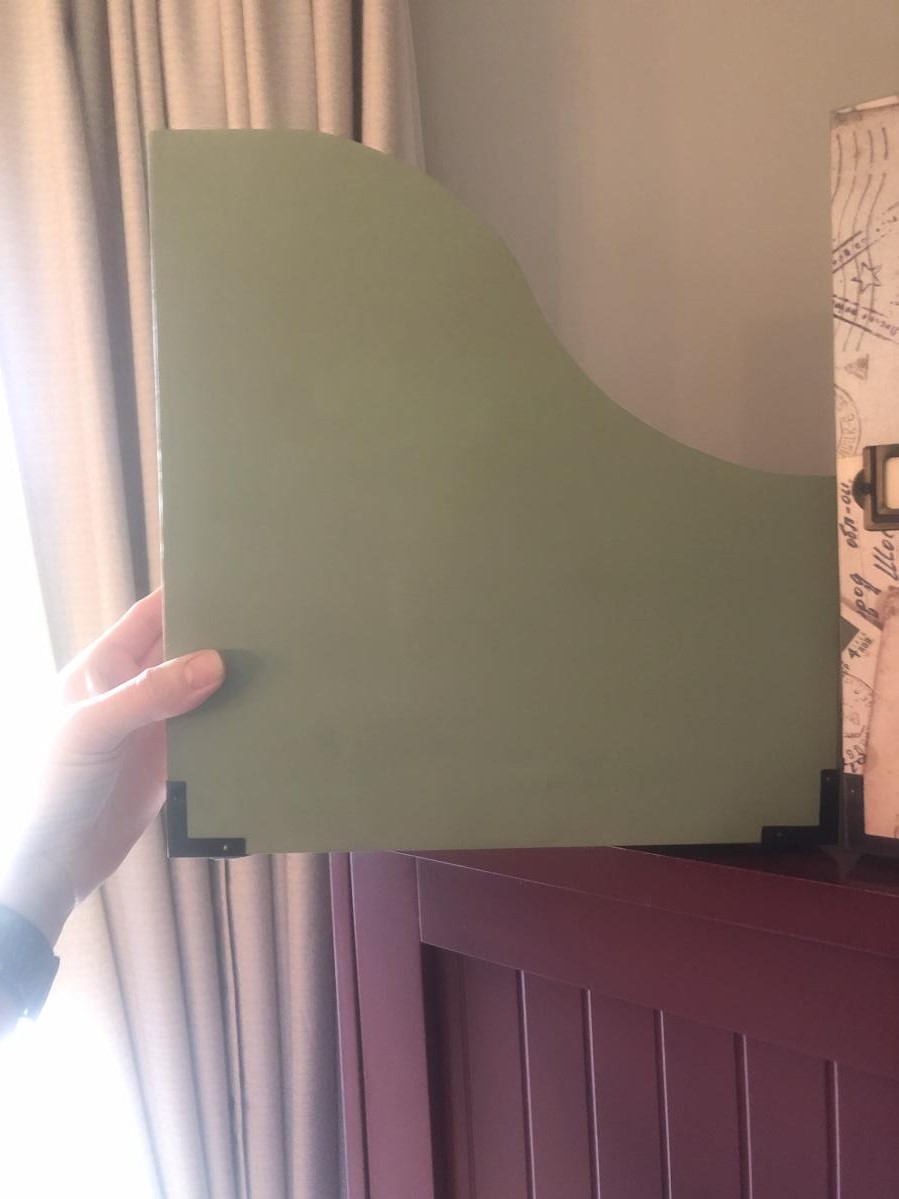
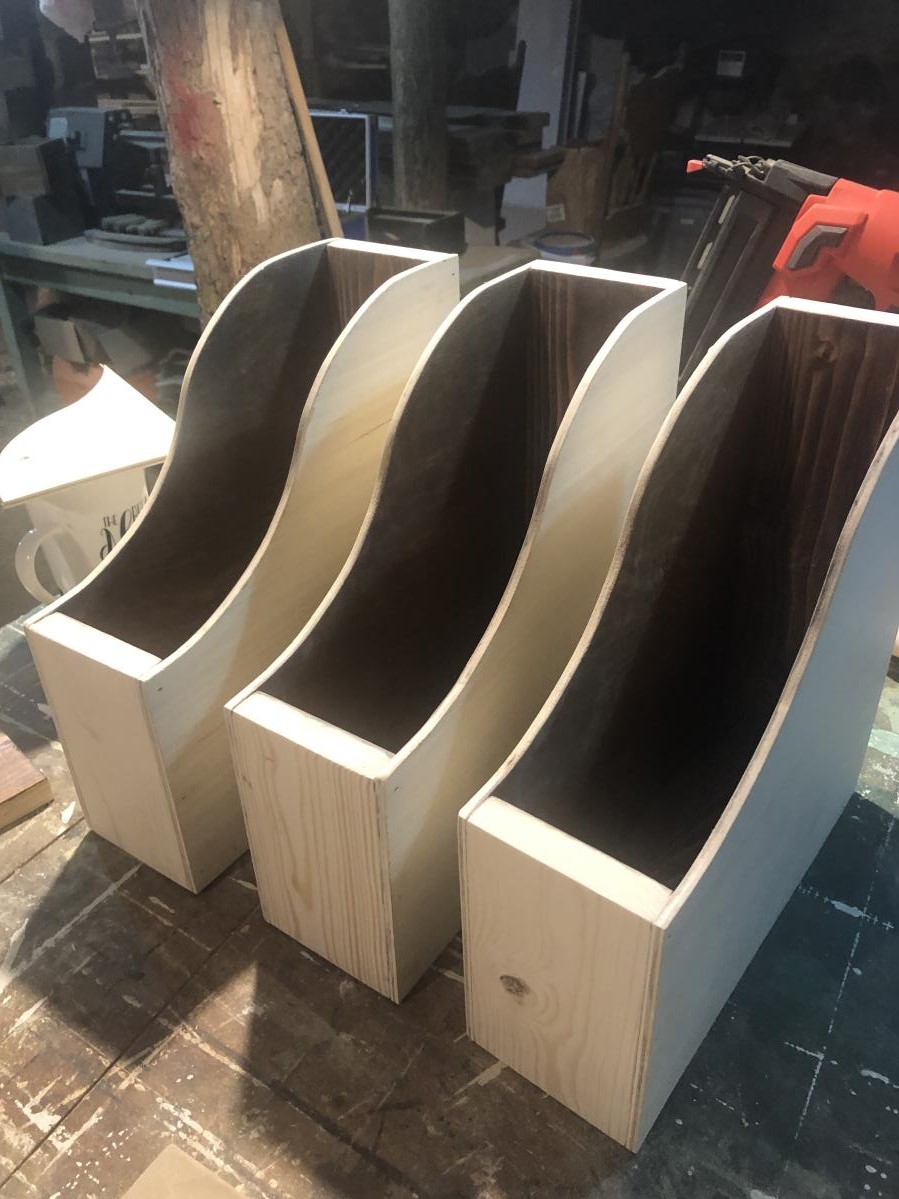
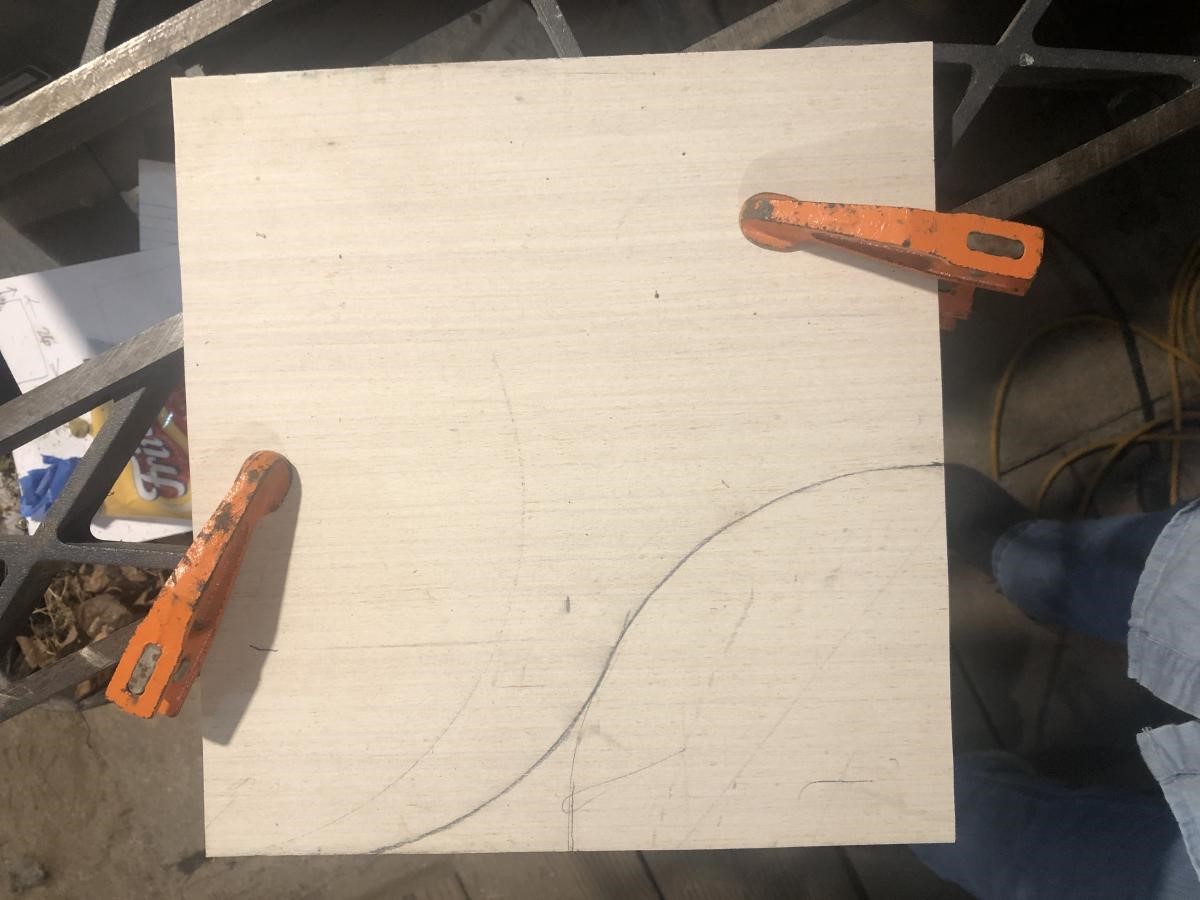
My BFF was looking for magazine holders but refused to pay $10-15 for one made out of cardboard. I told her I could make her some from wood and paint them to match her decor. I found the “letter” paper on Amazon but came in a pack titled Vintage Treasures. I decided to do an S curve on the sides to make it a little more fancy. I can’t wait to give these to her! Thanks for the inspiration, Ana!
Wed, 05/04/2022 - 12:22
Great job, your friend is going to love them! Thanks for sharing.
This is my first build and I'm pretty pleased with how it turned out. There are a few things I learned along the way that will help me with my next build. We have a lot of children's book so I made the bottom shelf an angled shelf for more room.
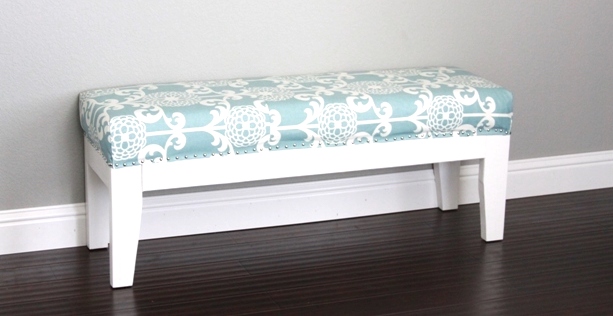
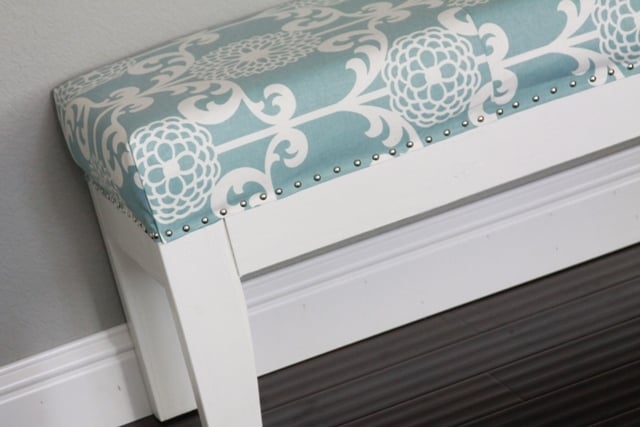
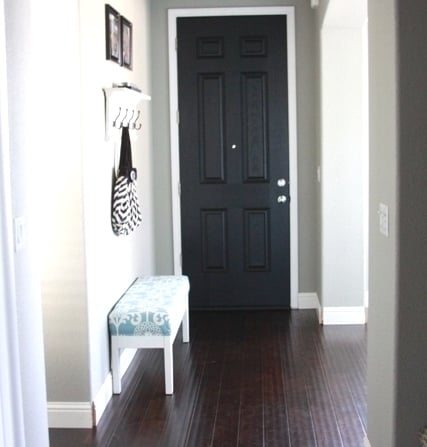
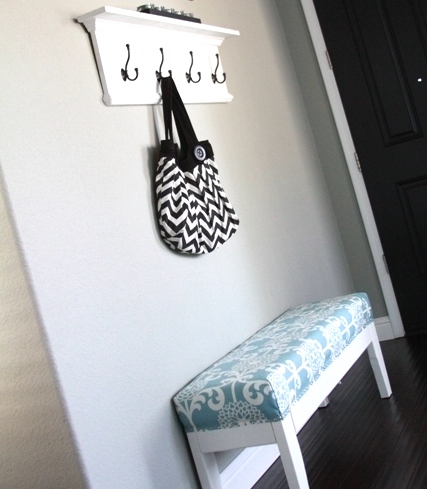
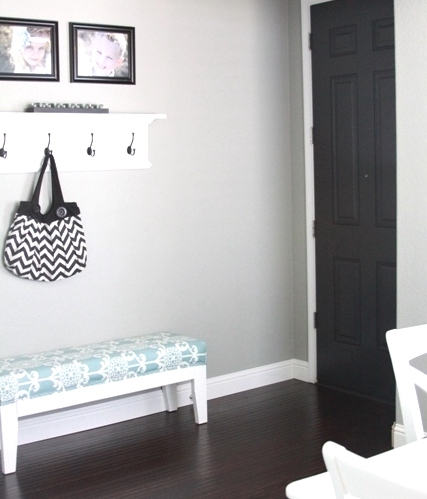
This was my first solo wood project! My husband normally builds things that we want. This bench was very easy. The hardest part would have been the upholstery. I decided to fully upholster it instead of making a slip cover. I plan to make holiday themed slip covers to slide over this though. I painted the legs white, and we ended up using MDF for the top portion since we had a piece on hand. I used a cushion off of an old chair we were going to get rid of to save money on the foam, so I had to change the dimensions a little. This bench is 13" by 48" total instead of the 16" by 55". It still fits the space beautifully. Since I had the foam and mdf on hand it only cost me about $20 to make this including the price of 6 packs of nail heads and the fabric. So a very inexpensive project! The shelf in the pics my husband built from some scrap wood and hooks we got from lowes.