Community Brag Posts
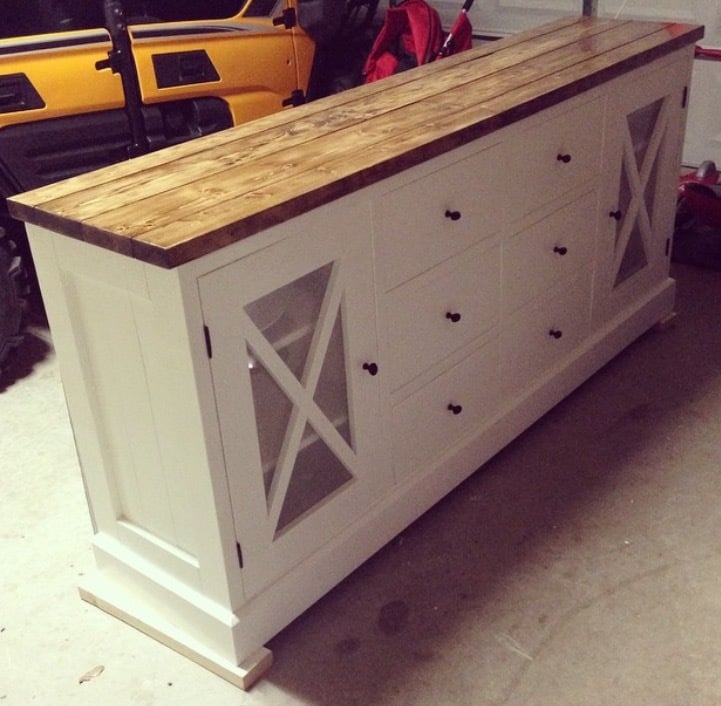
Media Cabinet
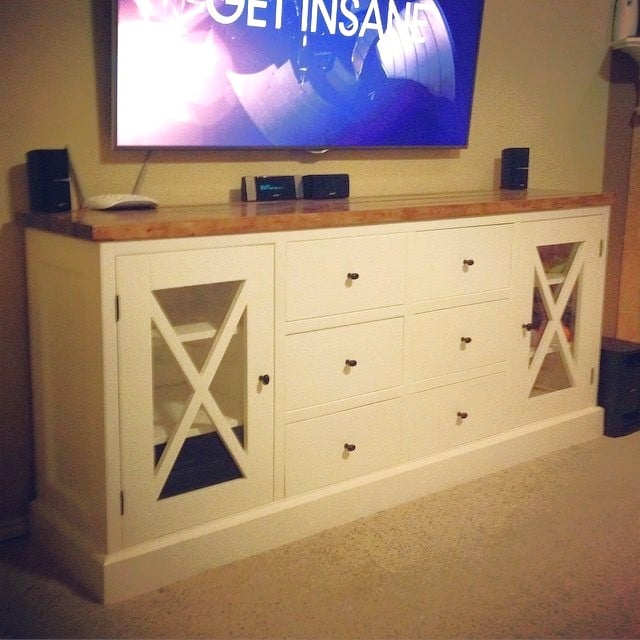
Being a stay at home mom I am on a budget. Finding a cabinet that fit our price and style was near impossible, until I found these plans. I was looking for a piece that could function as a media stand but also had enough space hide my kids toys. This plan fit the bill perfect. I modified it slightly to suite our needs by adding additional drawers in the center and making the doors full height on either side. This was surprisingly easy to build and I plan to make another in the future.
Built from Plan(s)
Estimated Time Investment
Week Long Project (20 Hours or More)
Finish Used
Body of cabinet was painted was a latex ultra white paint and top was several layers of antiqued walnut wood stain that was sanded in between coats till I got the desired look I was looking for. I ended by sealing the cabinet with three coats of polycrylic
Recommended Skill Level
Beginner
Comments
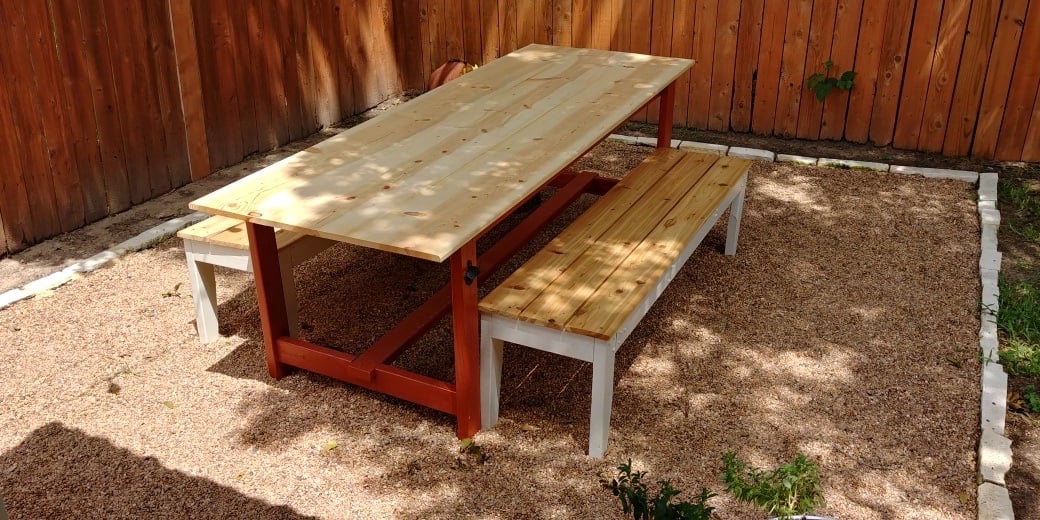
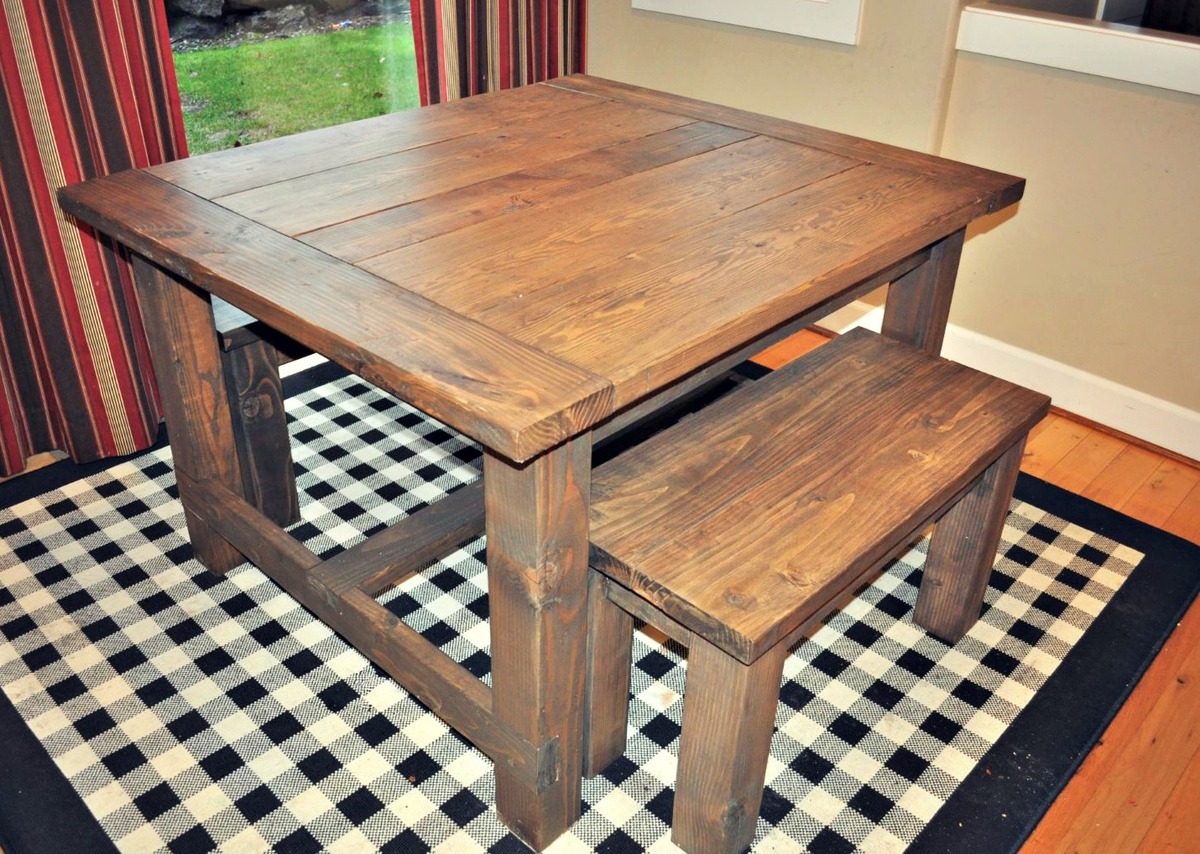
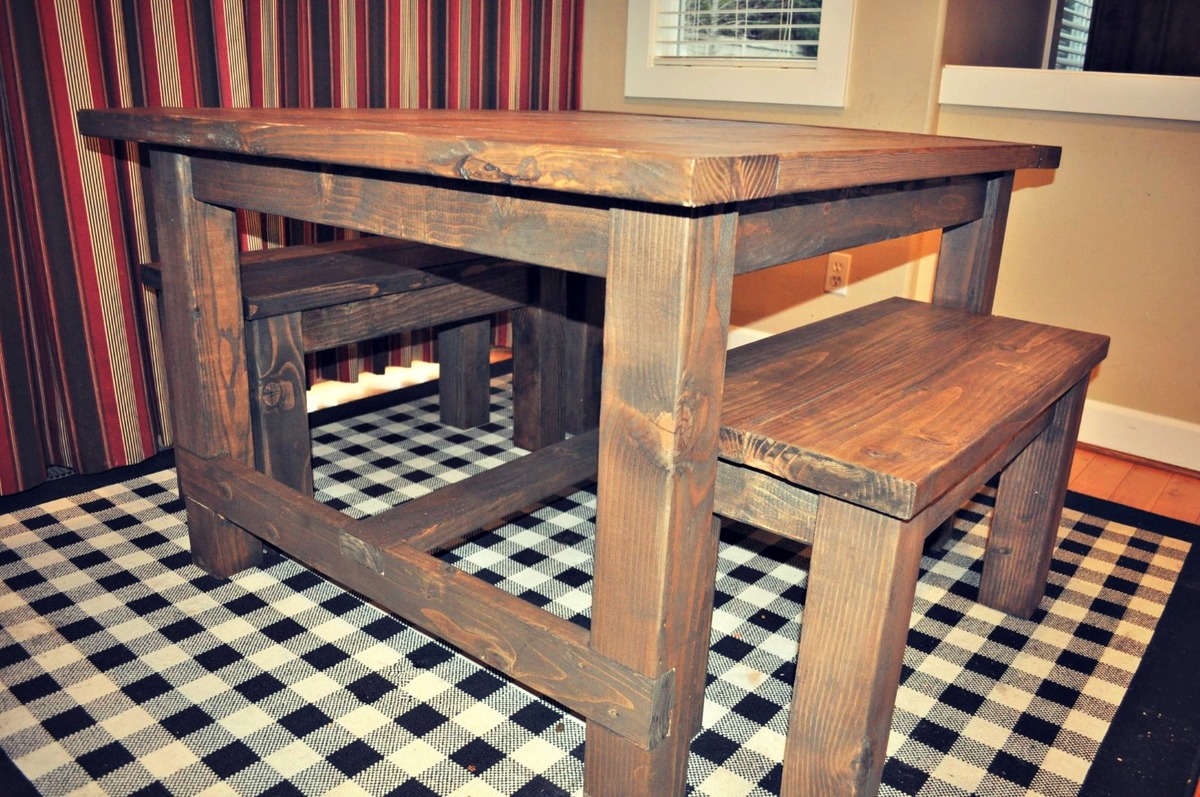
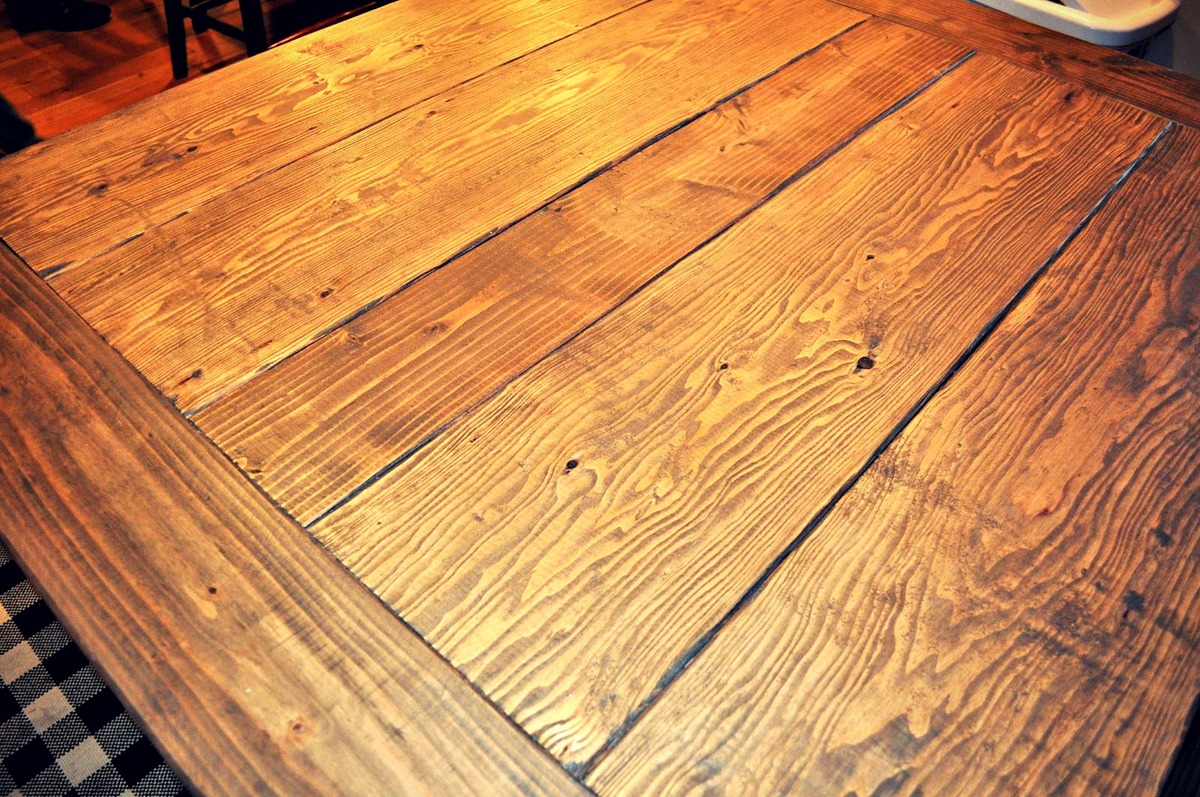
Farm Table for Birthday

This table was for my wife's birthday present. I followed/modified the simple and pocket hole farmhouse table plans. The table top is 1x12 pine as I couldn't find any cedar that wasn't cupped or warped after several weeks looking and wanted a wider board top. Then we used the easiest padded bench plans, adding height as suggested to the legs and using 3 cedar 1x6's for seats. All tops were sanded and sealed before 4 coats of marine spar poly were used.
Thanks for the plans, Ana.
Built from Plan(s)
Estimated Cost
$300 - $400
Estimated Time Investment
Week Long Project (20 Hours or More)
Finish Used
Minwax Pro Polyurethane Spar Varnish
Recommended Skill Level
Beginner
Little Kids Picnic Table with Umbrella
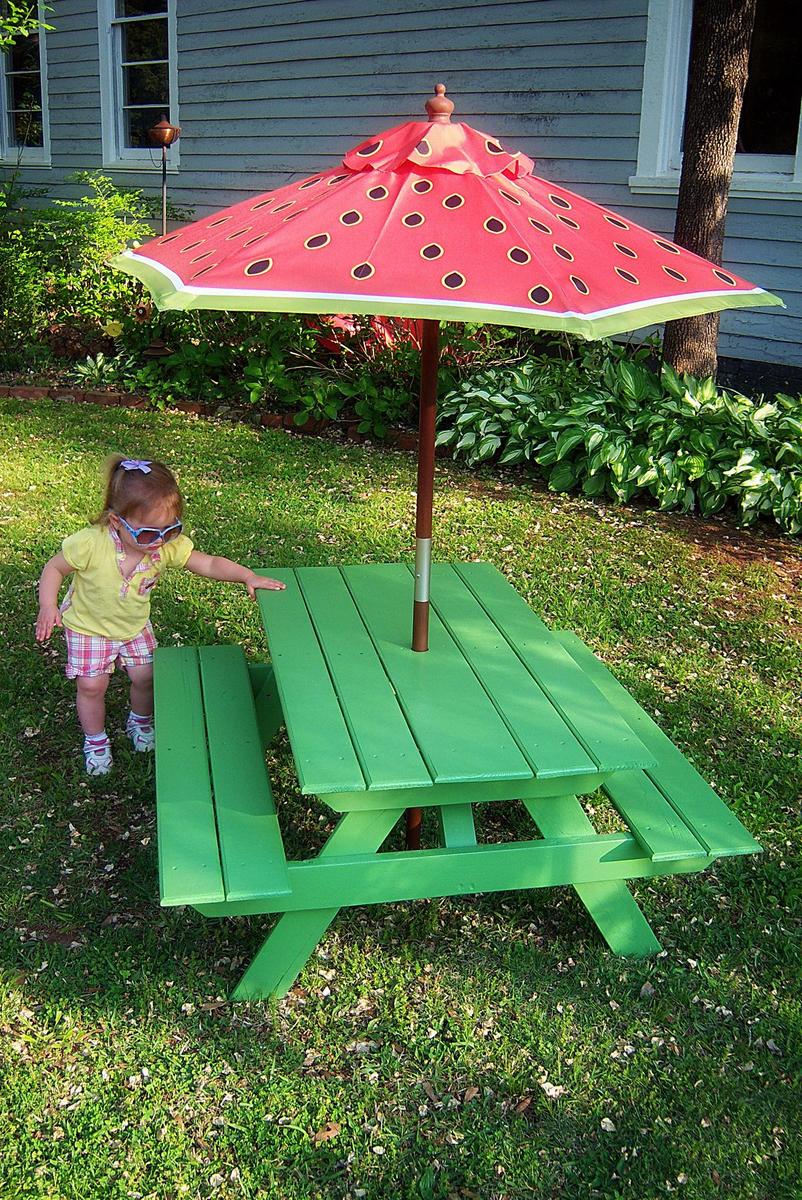
My daughter was given this umbrella at Christmas, but needed a table to go with it. Ana's plans for the preschool sized picnic table worked perfectly. I built it using one standard sized shipping pallet and even got to try out my new router! Thanks Ana!
Built from Plan(s)
Comments
Tue, 04/04/2023 - 13:58
So cute - love the added umbrella!
Looks like the perfect solution, love the fun finish! Thanks for sharing.
Floating Modern Tree
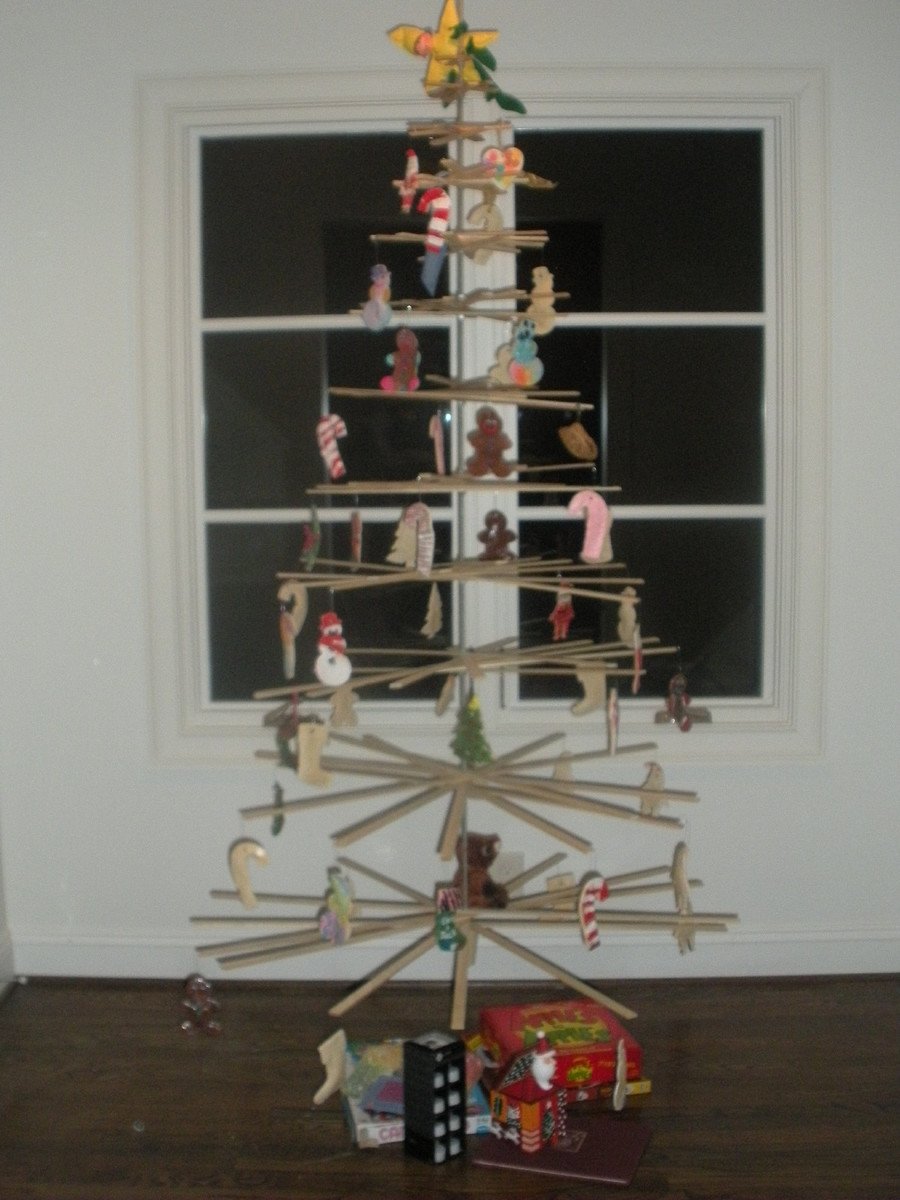
I was obsessed with Chelseawa's plan for a tree like the Possibilitree and finally whipped one out this week for my boys. This was my first time to use a table saw, so my cuts aren't as even, but it still turned out great. I hung it with heavy duty fishing wire from the ceiling, instead of making a stand, and I love the way it "Floats". Thanks, chelseawa!
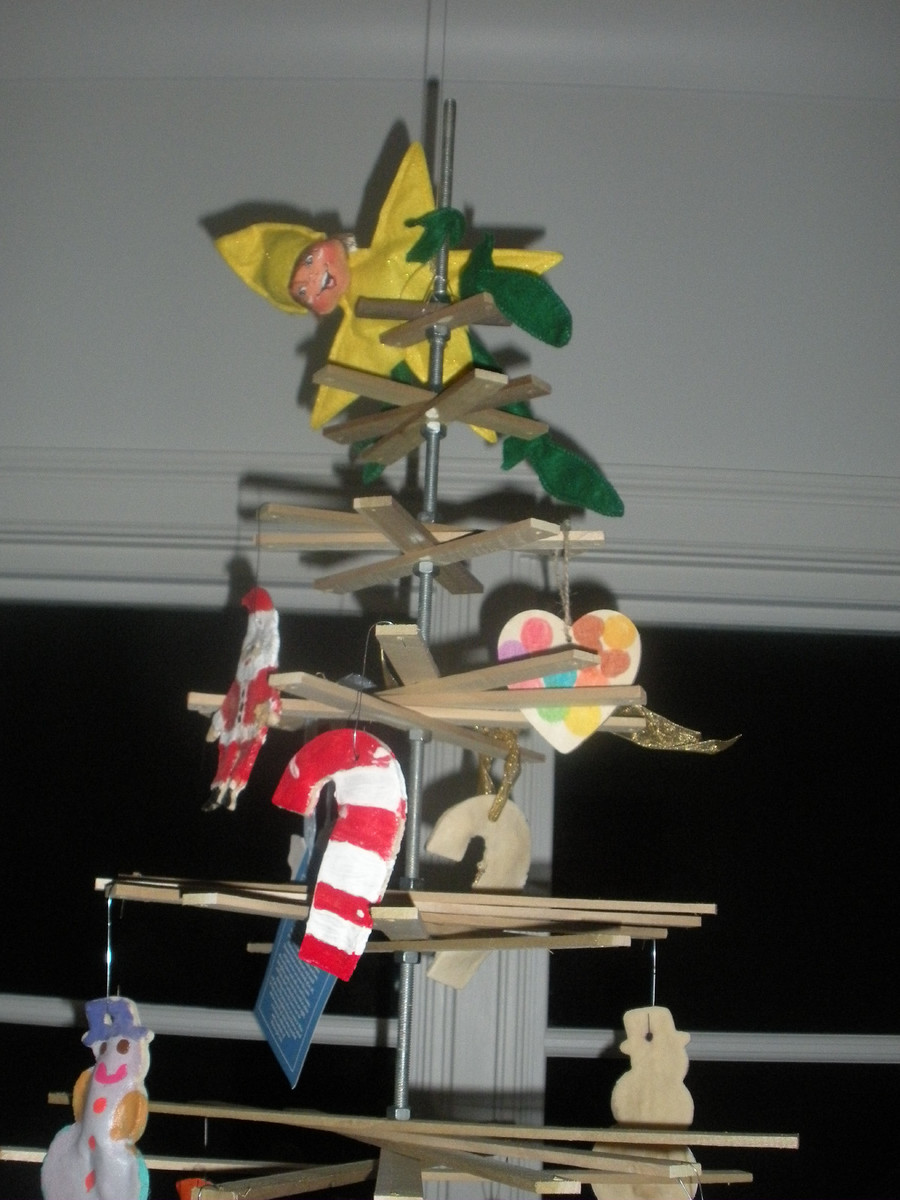
Estimated Time Investment
Afternoon Project (3-6 Hours)
Finish Used
none
Recommended Skill Level
Beginner
Comments
Sat, 11/17/2012 - 12:05
Nice tree!
Looks great! I am considering hanging mine this year just because we now have kittens and if it is hanging at least it can't be knocked over. I am glad someone found my plan useful!
Six cube storage units
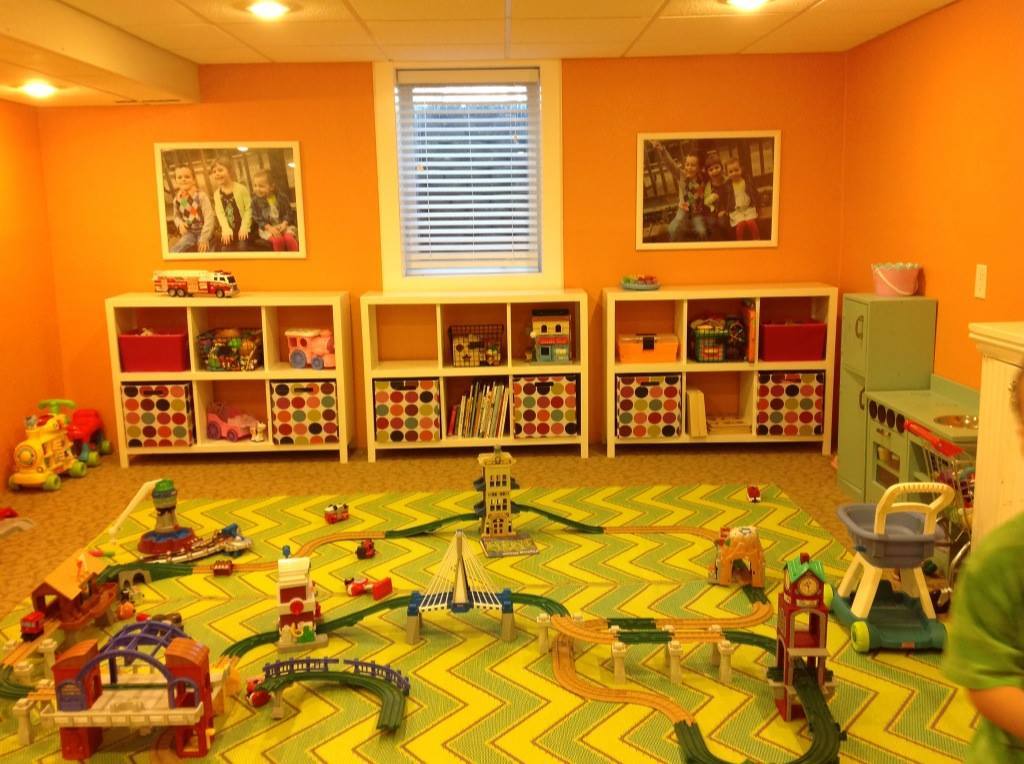
I needed some storage for our toy room that was kid friendly and aesthetically pleasing. I modified the 6 cube plan to fit 13" baskets. I am very happy with the final product!
Built from Plan(s)
Estimated Cost
$45 per unit
Estimated Time Investment
Afternoon Project (3-6 Hours)
Finish Used
I had the lumber yard pre-cut everything. I sanded and primed all pieces and all sides prior to assembly. I then filled all the holes, and finished two coats of benjamin moore eggshell paint (it's what I had at home) and two coats of polycrylic.
Recommended Skill Level
Beginner
Deck sofa
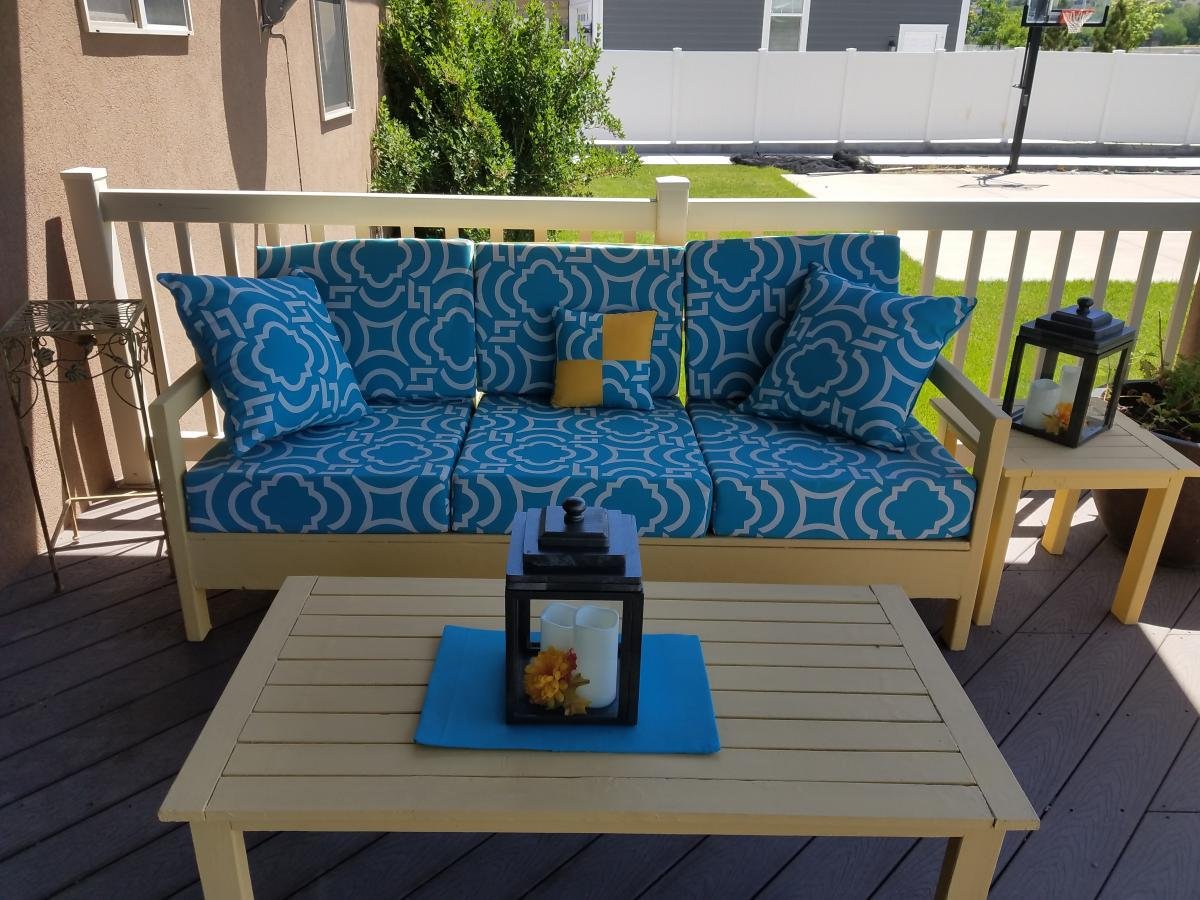
Love the fact that I can build just what I want for my deck furniture! I built this two seasons ago, and since I hate refinishing furniture, I used deck paint to finish it. It leaves a little rougher surface, but since I made cushions it really doesn't matter. The paint looks almost the same as it did the day I painted it after two years of winter snow and hot summer sun.

Built from Plan(s)
Estimated Cost
$180 including cushions
Estimated Time Investment
Weekend Project (10-20 Hours)
Finish Used
Behr Deck Over paint
Recommended Skill Level
Intermediate
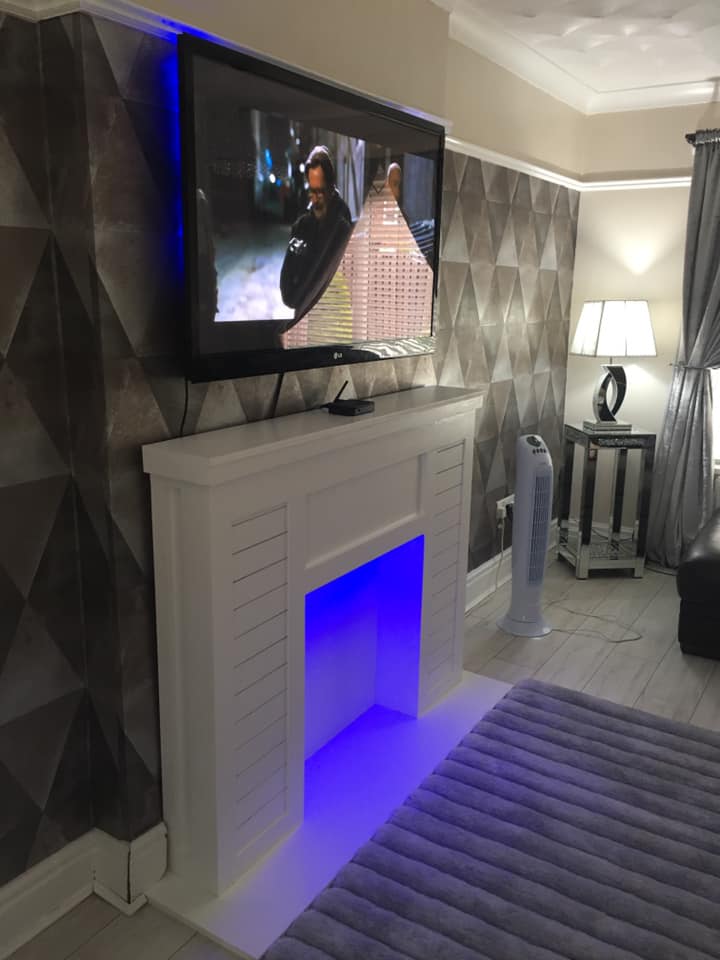
Rustic X for the win!

This was my first Ana White plan after lurking for awhile! I’ve dabbled with other DIY furniture and woodworking plans but this my first one for indoors that required some more meticulous finishing. Super happy with how it turned out!
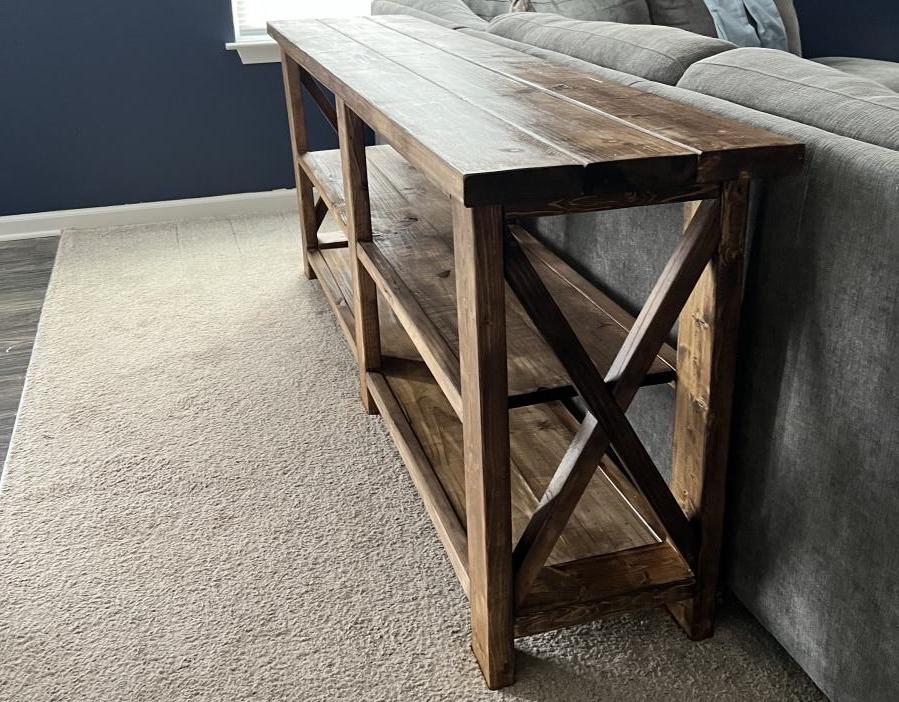
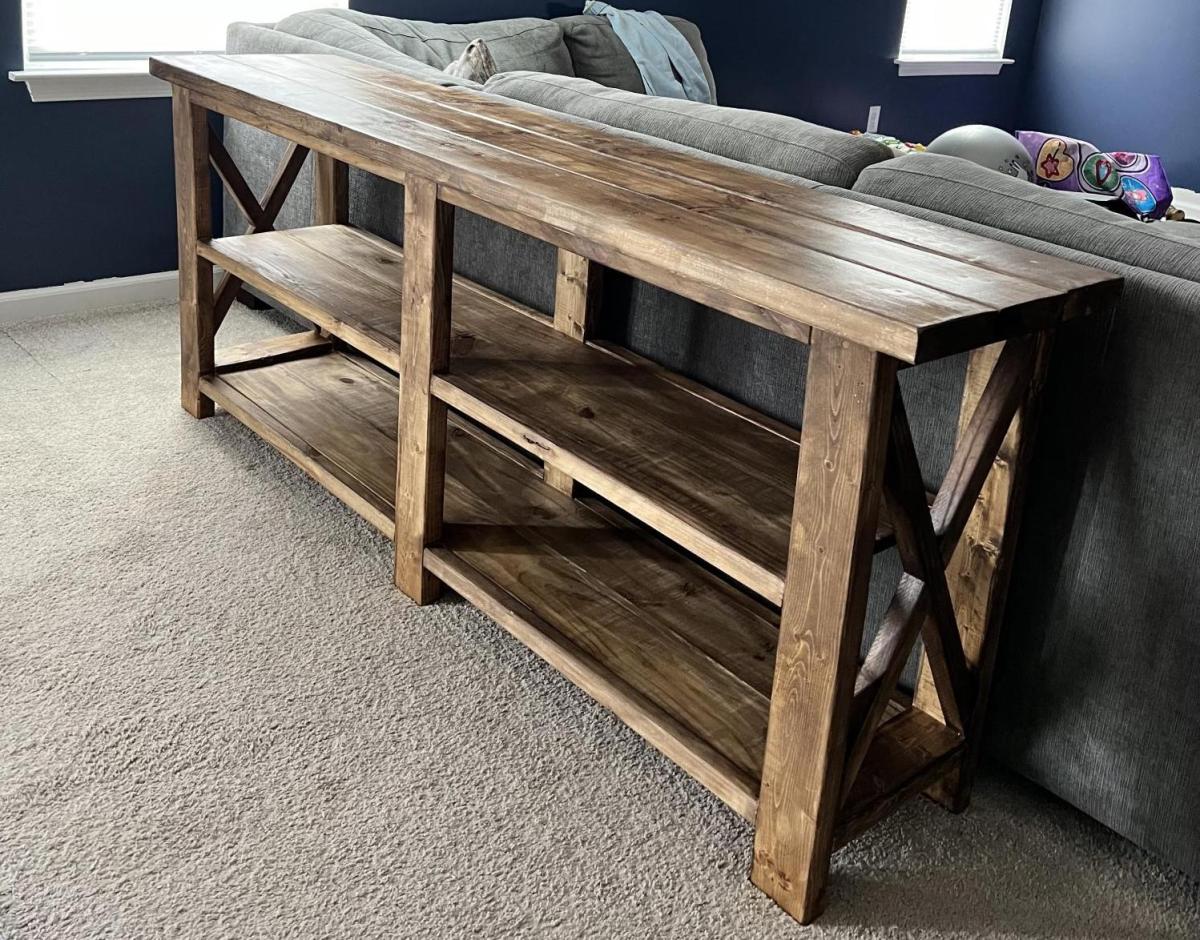
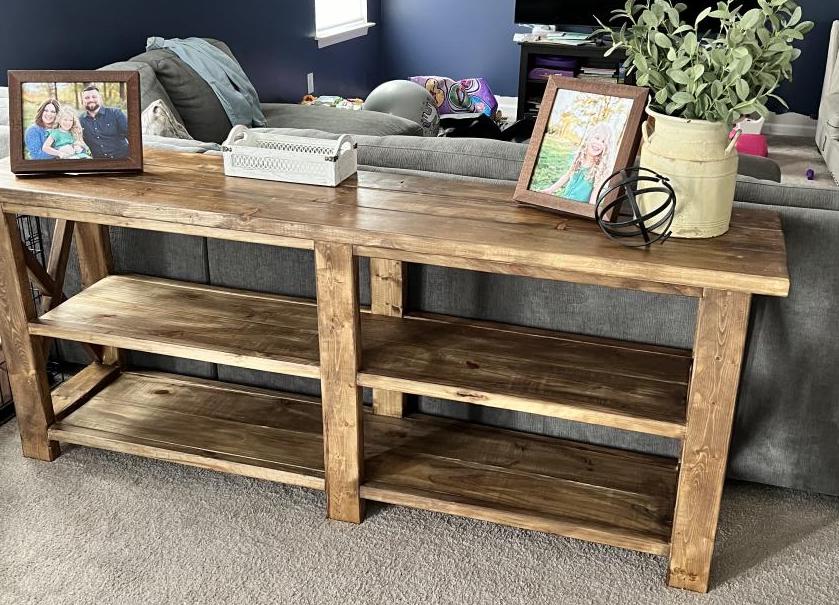
Built from Plan(s)
Comments
Tue, 04/11/2023 - 11:43
Beautiful console!
Wonderful job, it looks perfect there! Thanks for sharing.
Thumb Chairs
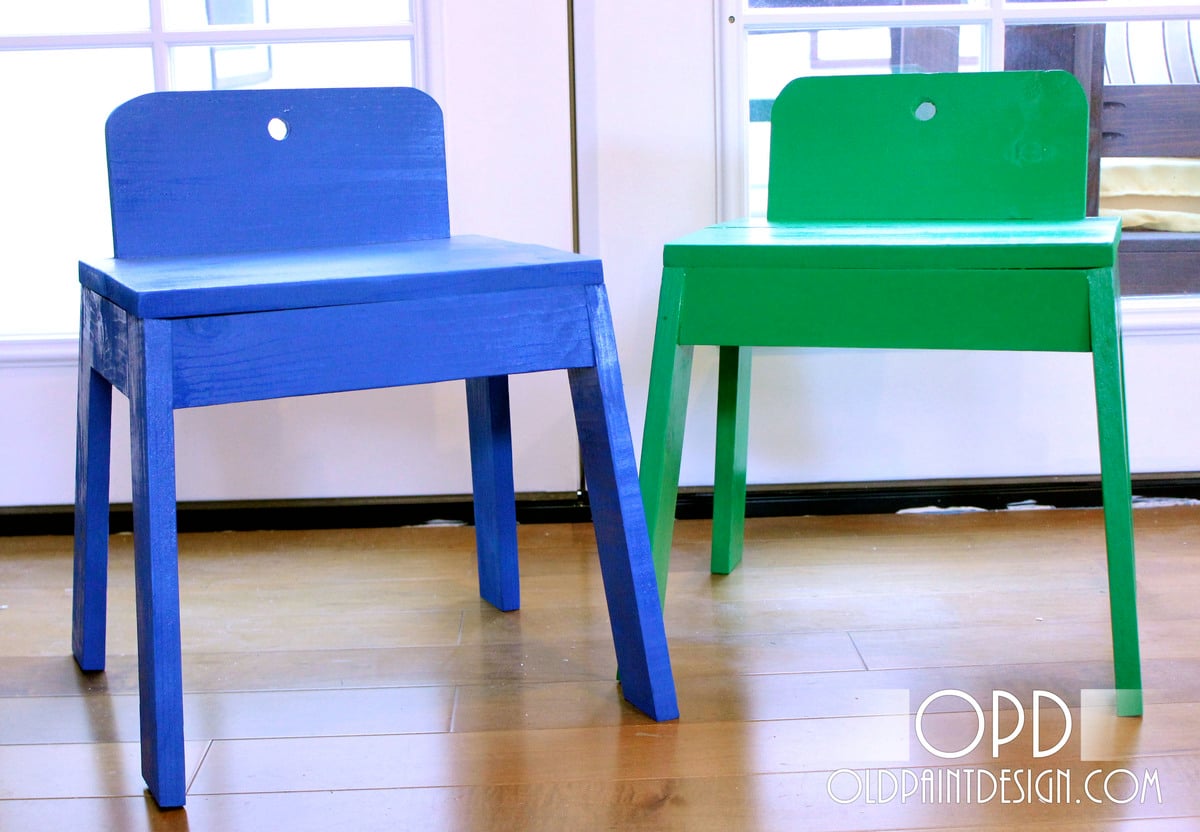
This is seriously the easiest plan ever - great job, Ana! I needed a gift for some children on my husband's side of the family (2 boys, ages 2 and 7), and as I was desperately trying to figure out what to make/give to them Ana posted these amazing plans. I saw them and instantly knew they were perfect! I made them entirely out of scraps from a daybed I had made the previous weekend. The only thing I purchased was the green spray paint - $5 for two great gifts! And, it took me less than 2 hours to build them after work. We gave them to the children last weekend and they LOVED them. They couldn't stop carrying them around with them at the party, and their parents were so touched that I made them a home made gift. PS - As I was getting ready to paint the chairs, I had the blue spray paint leftover from another project and my husband suggested that the other one should be green. I had completely forgotten that Ana painted hers the exact same color! I guess it's a popular color combo, huh?
Built from Plan(s)
Estimated Cost
$5
Estimated Time Investment
An Hour or Two (0-2 Hours)
Finish Used
Rustoleum Spray Paint in Deep Blue, Valspar Spray Paint in Garden Green
Recommended Skill Level
Beginner
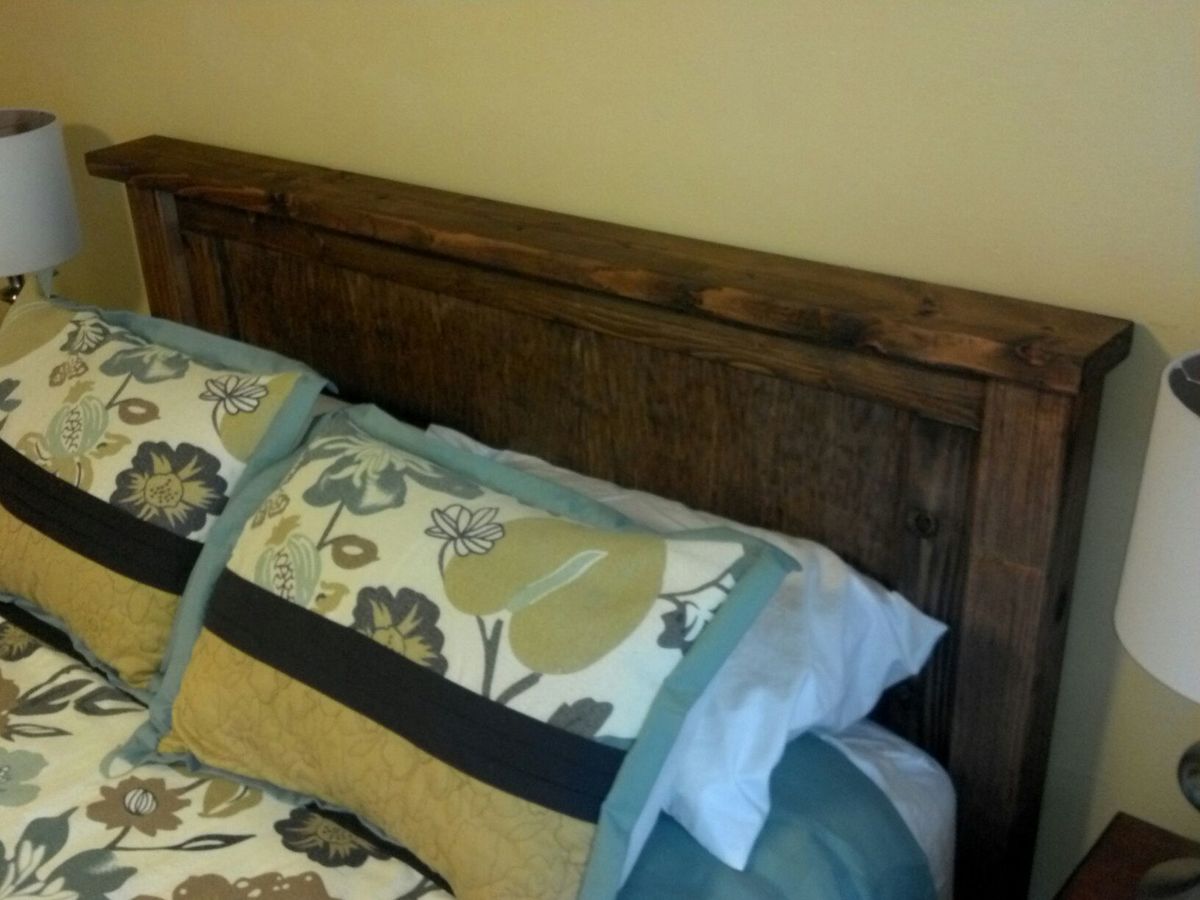
Surprise Headboard for my Mommy!

My parent's helped us re-roof our home this summer and we wanted to build them something as a thank you gift. They went out of town this weekend so we busted out this little headboard, finished it and snuck it into their bedroom. They get home tomorrow and they're going to be so surprised! I really hope they love it!
We built this from our experience with Ana's site but it isn't one of her plans. It is a piece of purebond plywood we had leftover measuring 25" by 48" so we framed it out in 2x4s and topped it with a 2x6" and 4x4 legs. It was super simple and cheap to make. I finished it with Watco Danish oil in Dark walnut and did 2 coats.
I love it and it really looks good with the rest of their furniture and their beautiful bedding!
Estimated Time Investment
Afternoon Project (3-6 Hours)
Finish Used
Watco Danish Oil in Dark Walnut
Recommended Skill Level
Beginner
Comments

Sun, 11/10/2013 - 12:07
Lovely gift!
What a lovely gift! Also great that it is a surprise, beautifully done!

In reply to Lovely gift! by JoanneS
Sun, 11/10/2013 - 12:40
Thanks! I am so excited for
Thanks! I am so excited for her to get home and see it!

Mon, 11/11/2013 - 04:15
Great idea
Love the build and element of surprise! You have to let is know their reaction!
Planter step

I only needed one step up, but replacing the old, cracked, weird, faux concrete step with the new planter box worked great!
Built from Plan(s)
Estimated Cost
$86
Estimated Time Investment
Day Project (6-9 Hours)
Finish Used
Solid color exterior stain.
Recommended Skill Level
Intermediate
Comments

Fri, 07/12/2019 - 19:36
This is perfect for your…
This is perfect for your front door ! Love how you tied it in with your house colors.
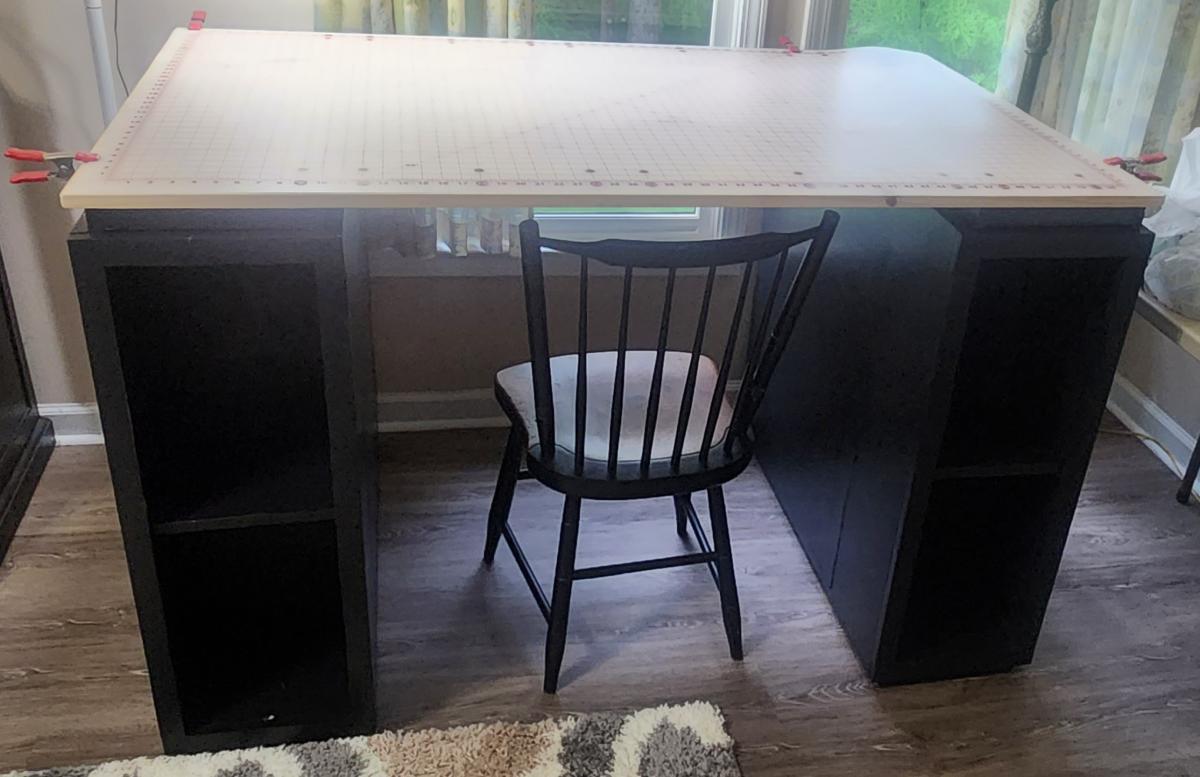
Craft table
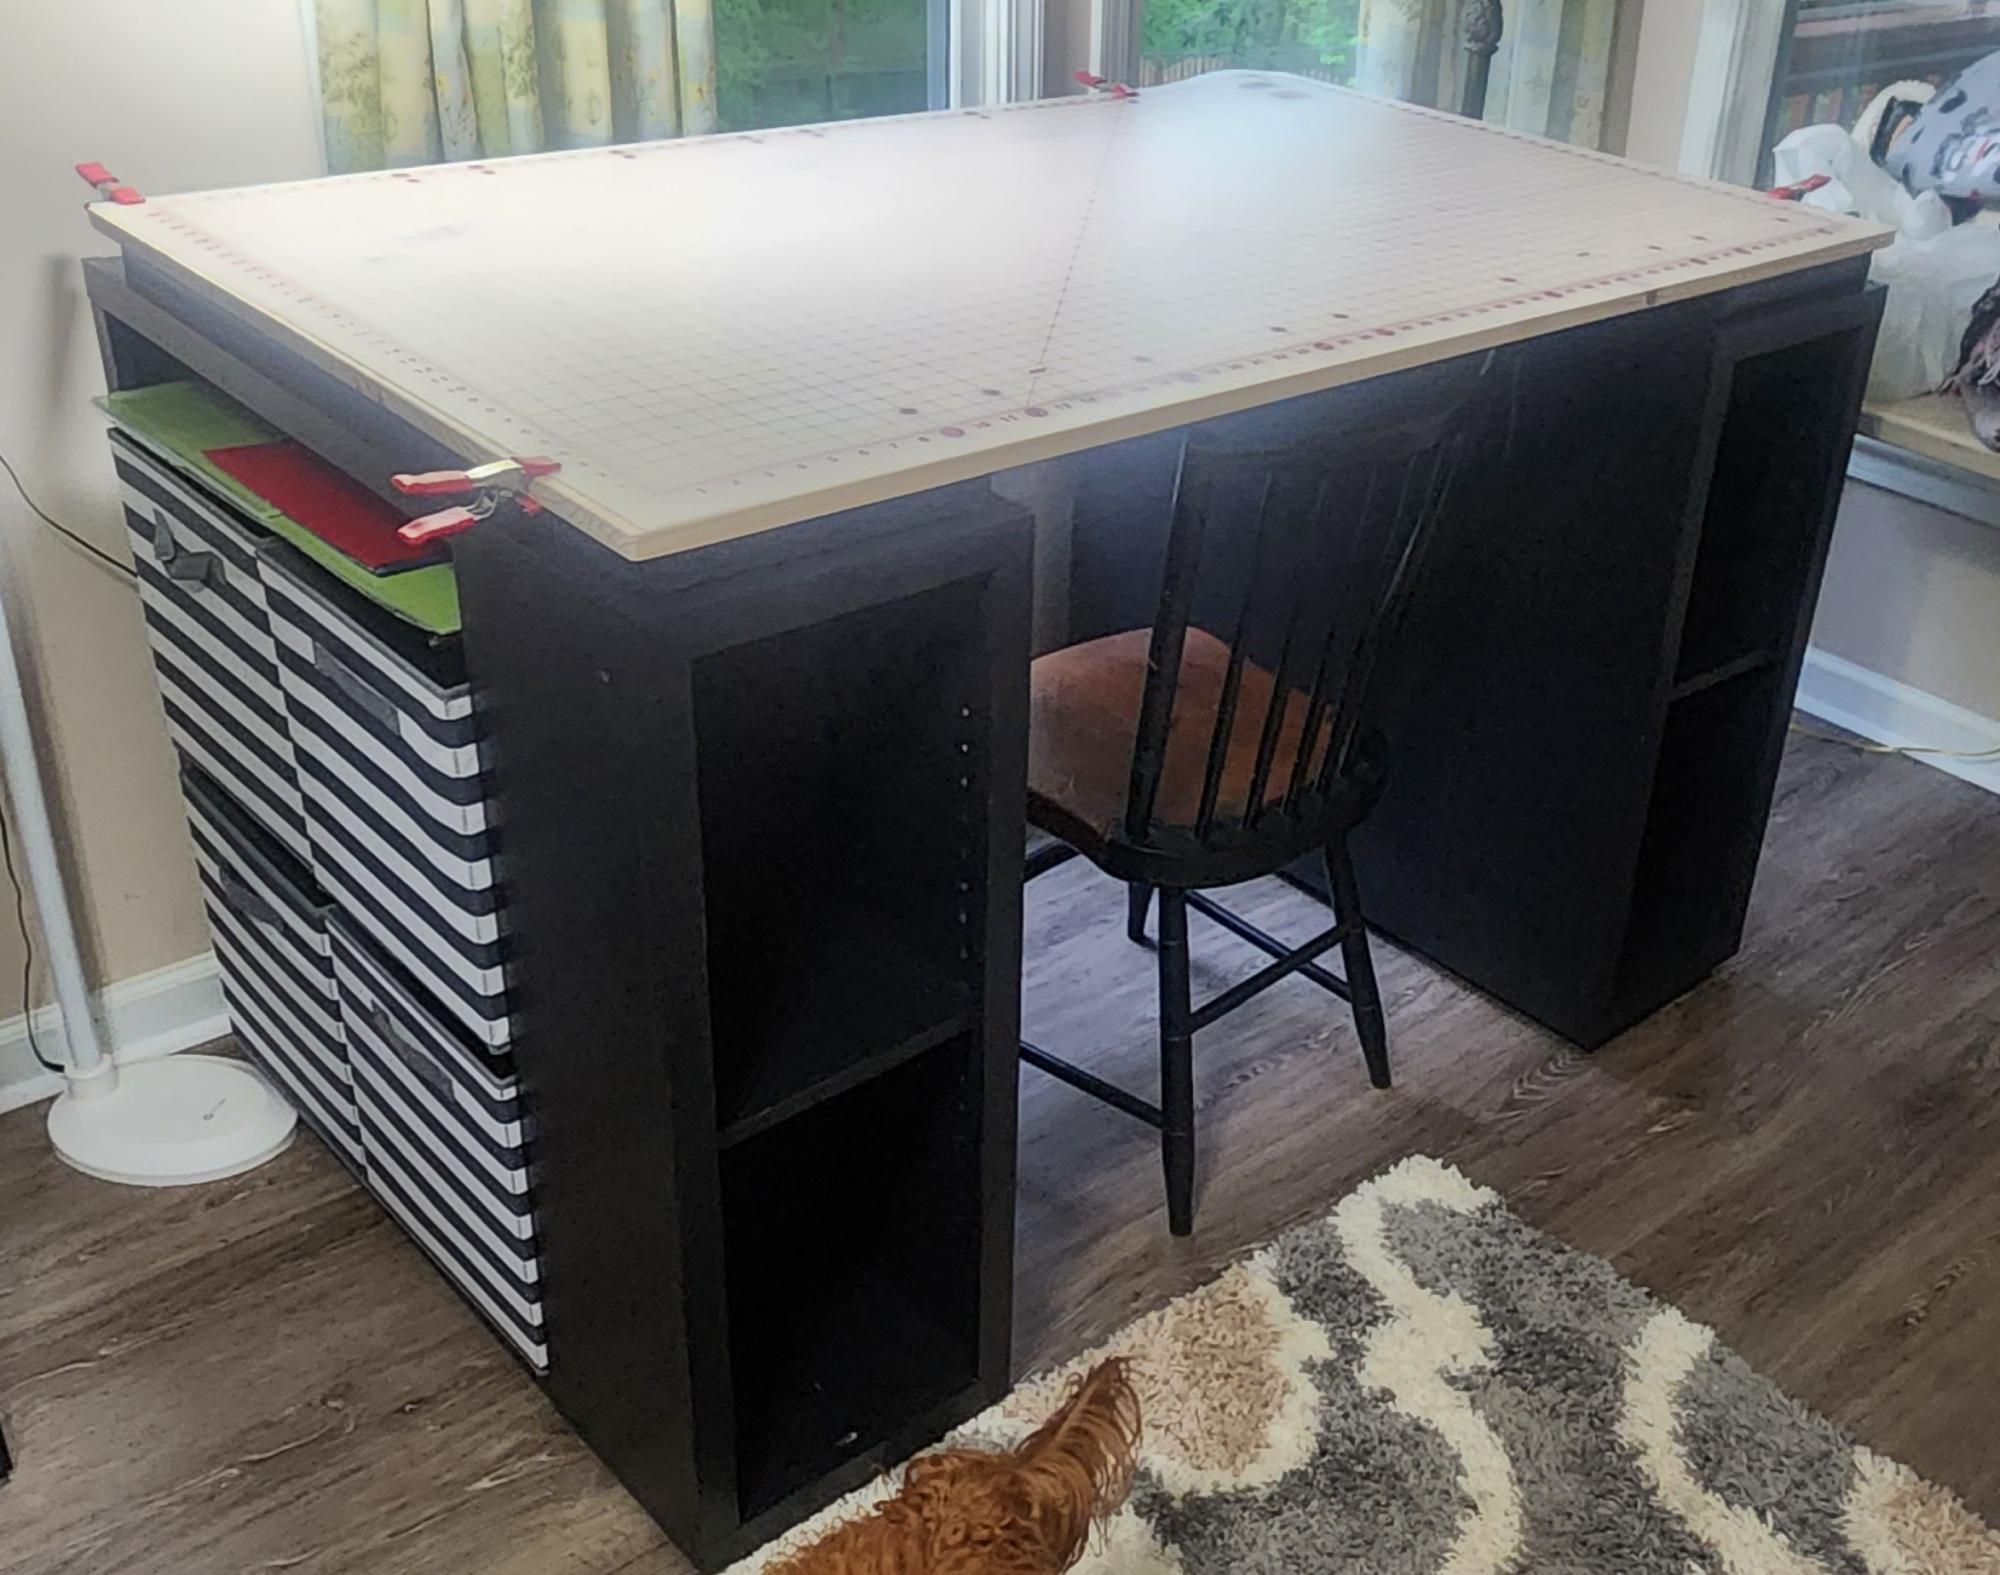
Fun build for my wife. Added back boards to the shelves. They were routed and set flush to the cabinet
Built from Plan(s)
Comments
end table based on Ana's, design, added my own touch

learning woodworking. this is only my 2nd project. We.are going.to use to place our 6 bottle wine chiller.on. Going to stain dark to match living room. I added some decorative molding as you.can. I.still can't believe I am actually making real furniture. Thanks Ana, I finally.found a hobby I enjoy after 30 years since wood shop in 7th.grade.

Built from Plan(s)
Estimated Cost
$30
Estimated Time Investment
Day Project (6-9 Hours)
Finish Used
have not applied.yet
Recommended Skill Level
Beginner
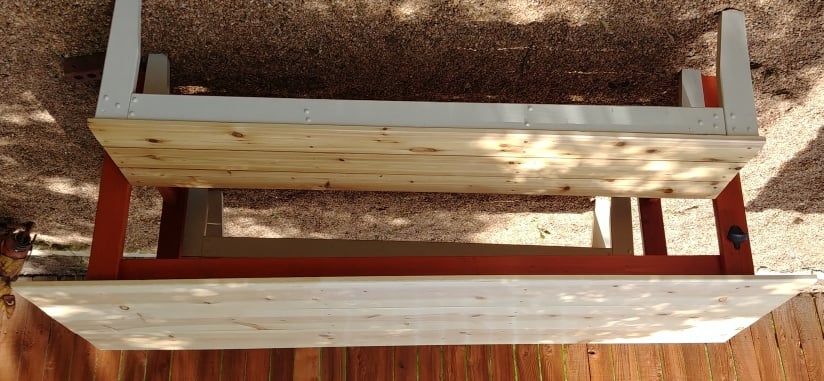
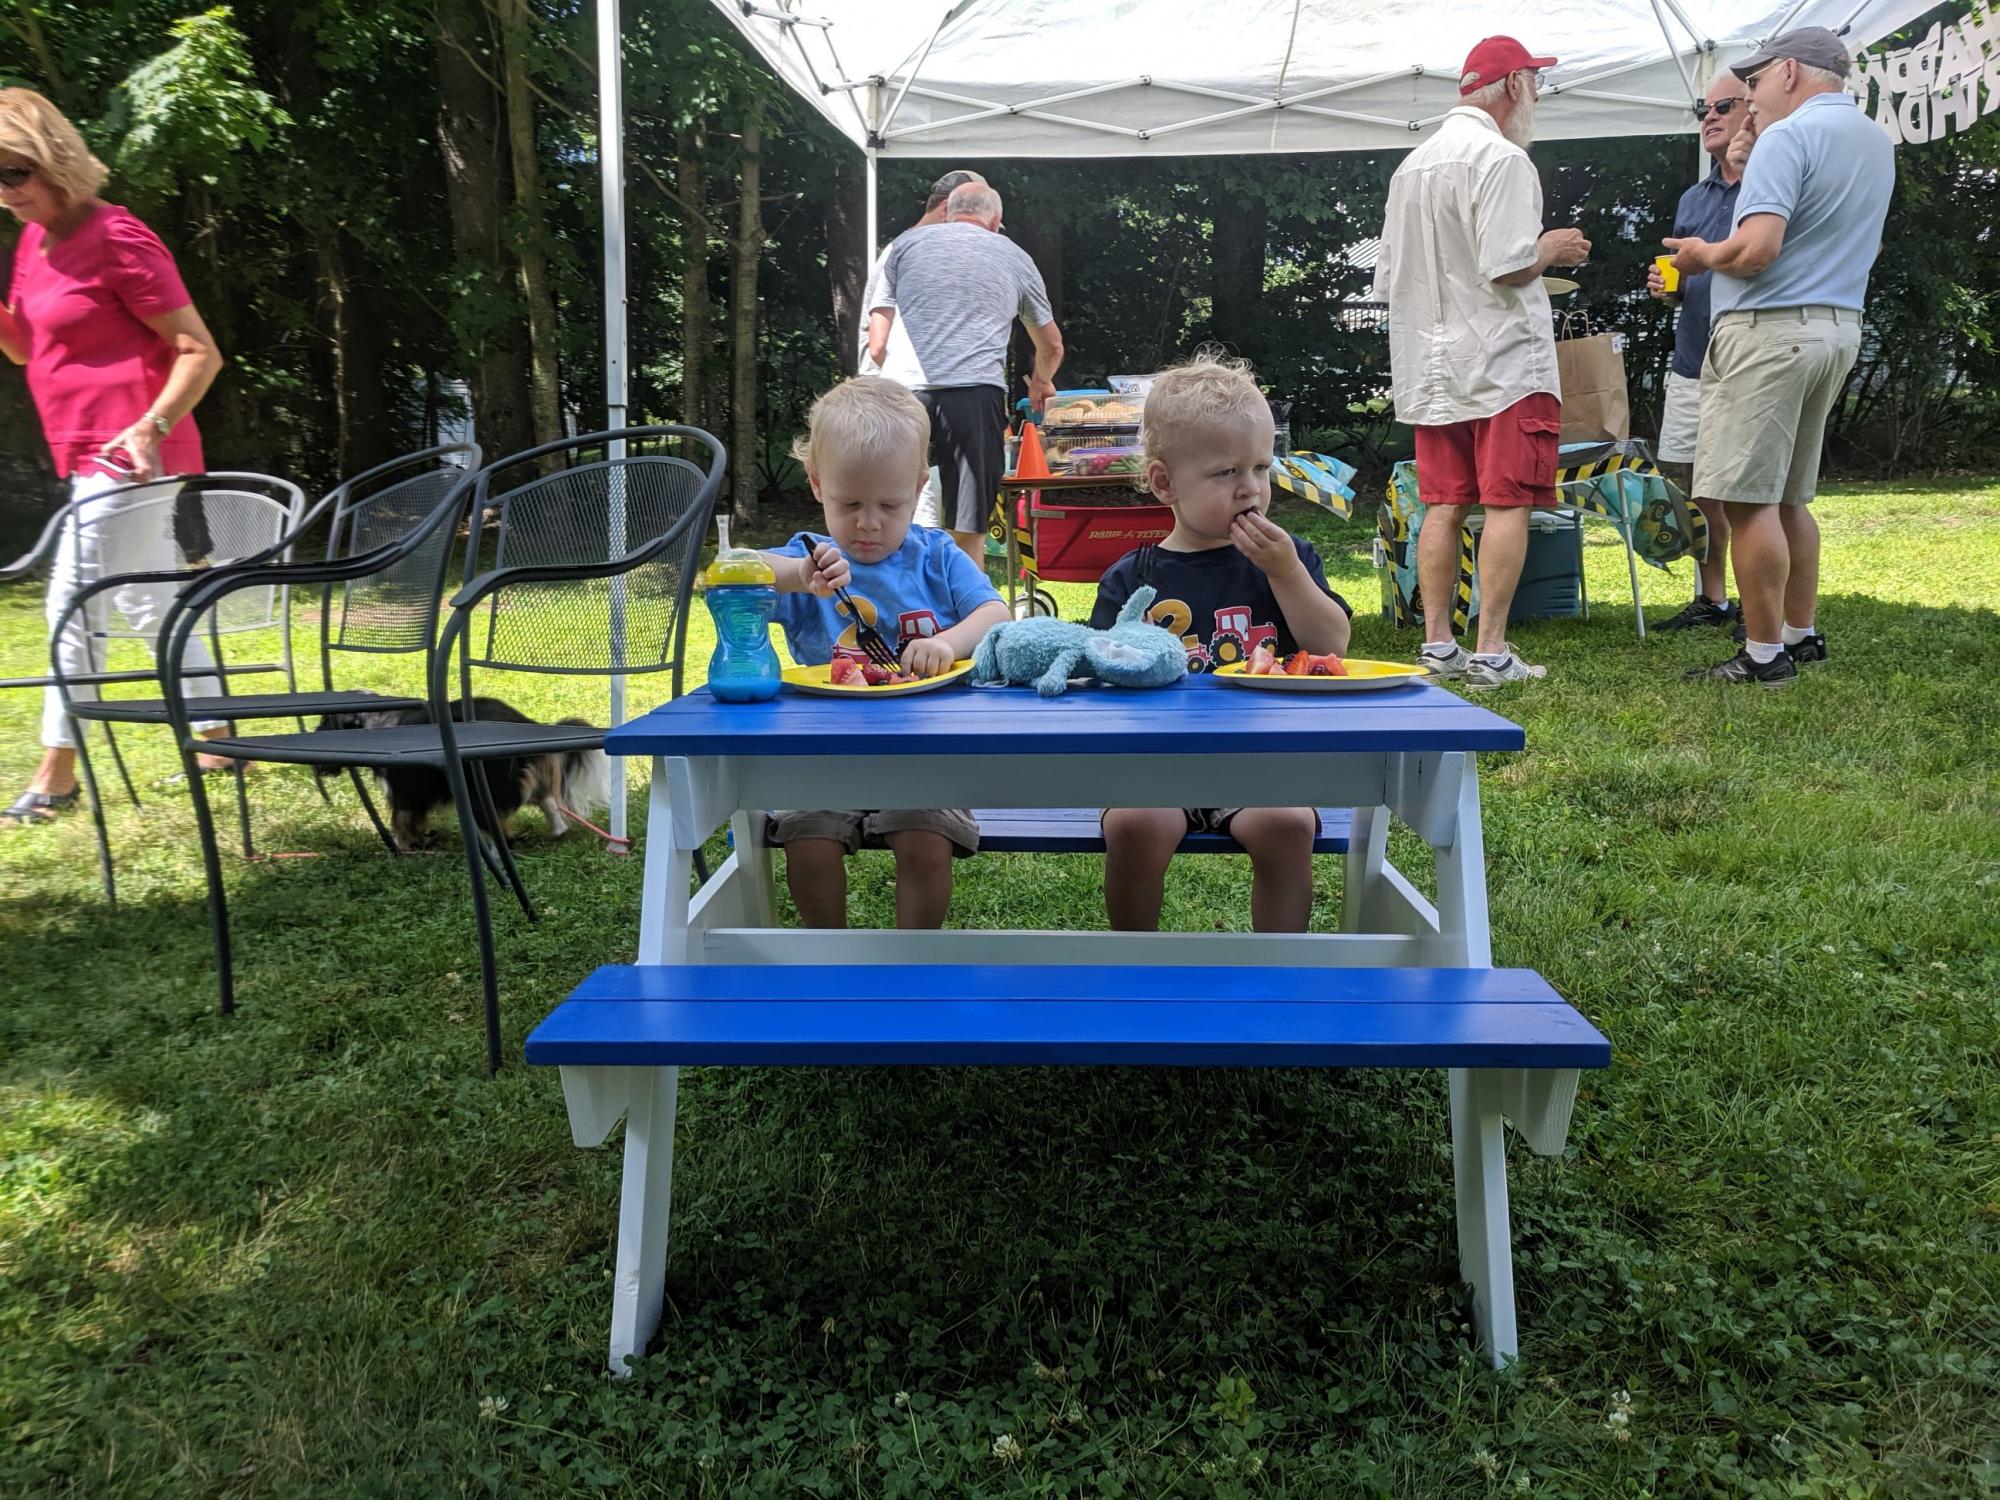
Our big kids picnic table!
We followed the plan and were able to successfully create a picnic table for our own "big kids". It's a great size for school-aged children and allows us to have a space for them and their friends to eat and do messy artwork.
Built from Plan(s)
Estimated Time Investment
Afternoon Project (3-6 Hours)
Recommended Skill Level
Beginner
Nook Farmhouse Table
It was fun to create this smaller version of the table
Built from Plan(s)
Estimated Time Investment
Day Project (6-9 Hours)
Finish Used
Dark
Recommended Skill Level
Beginner
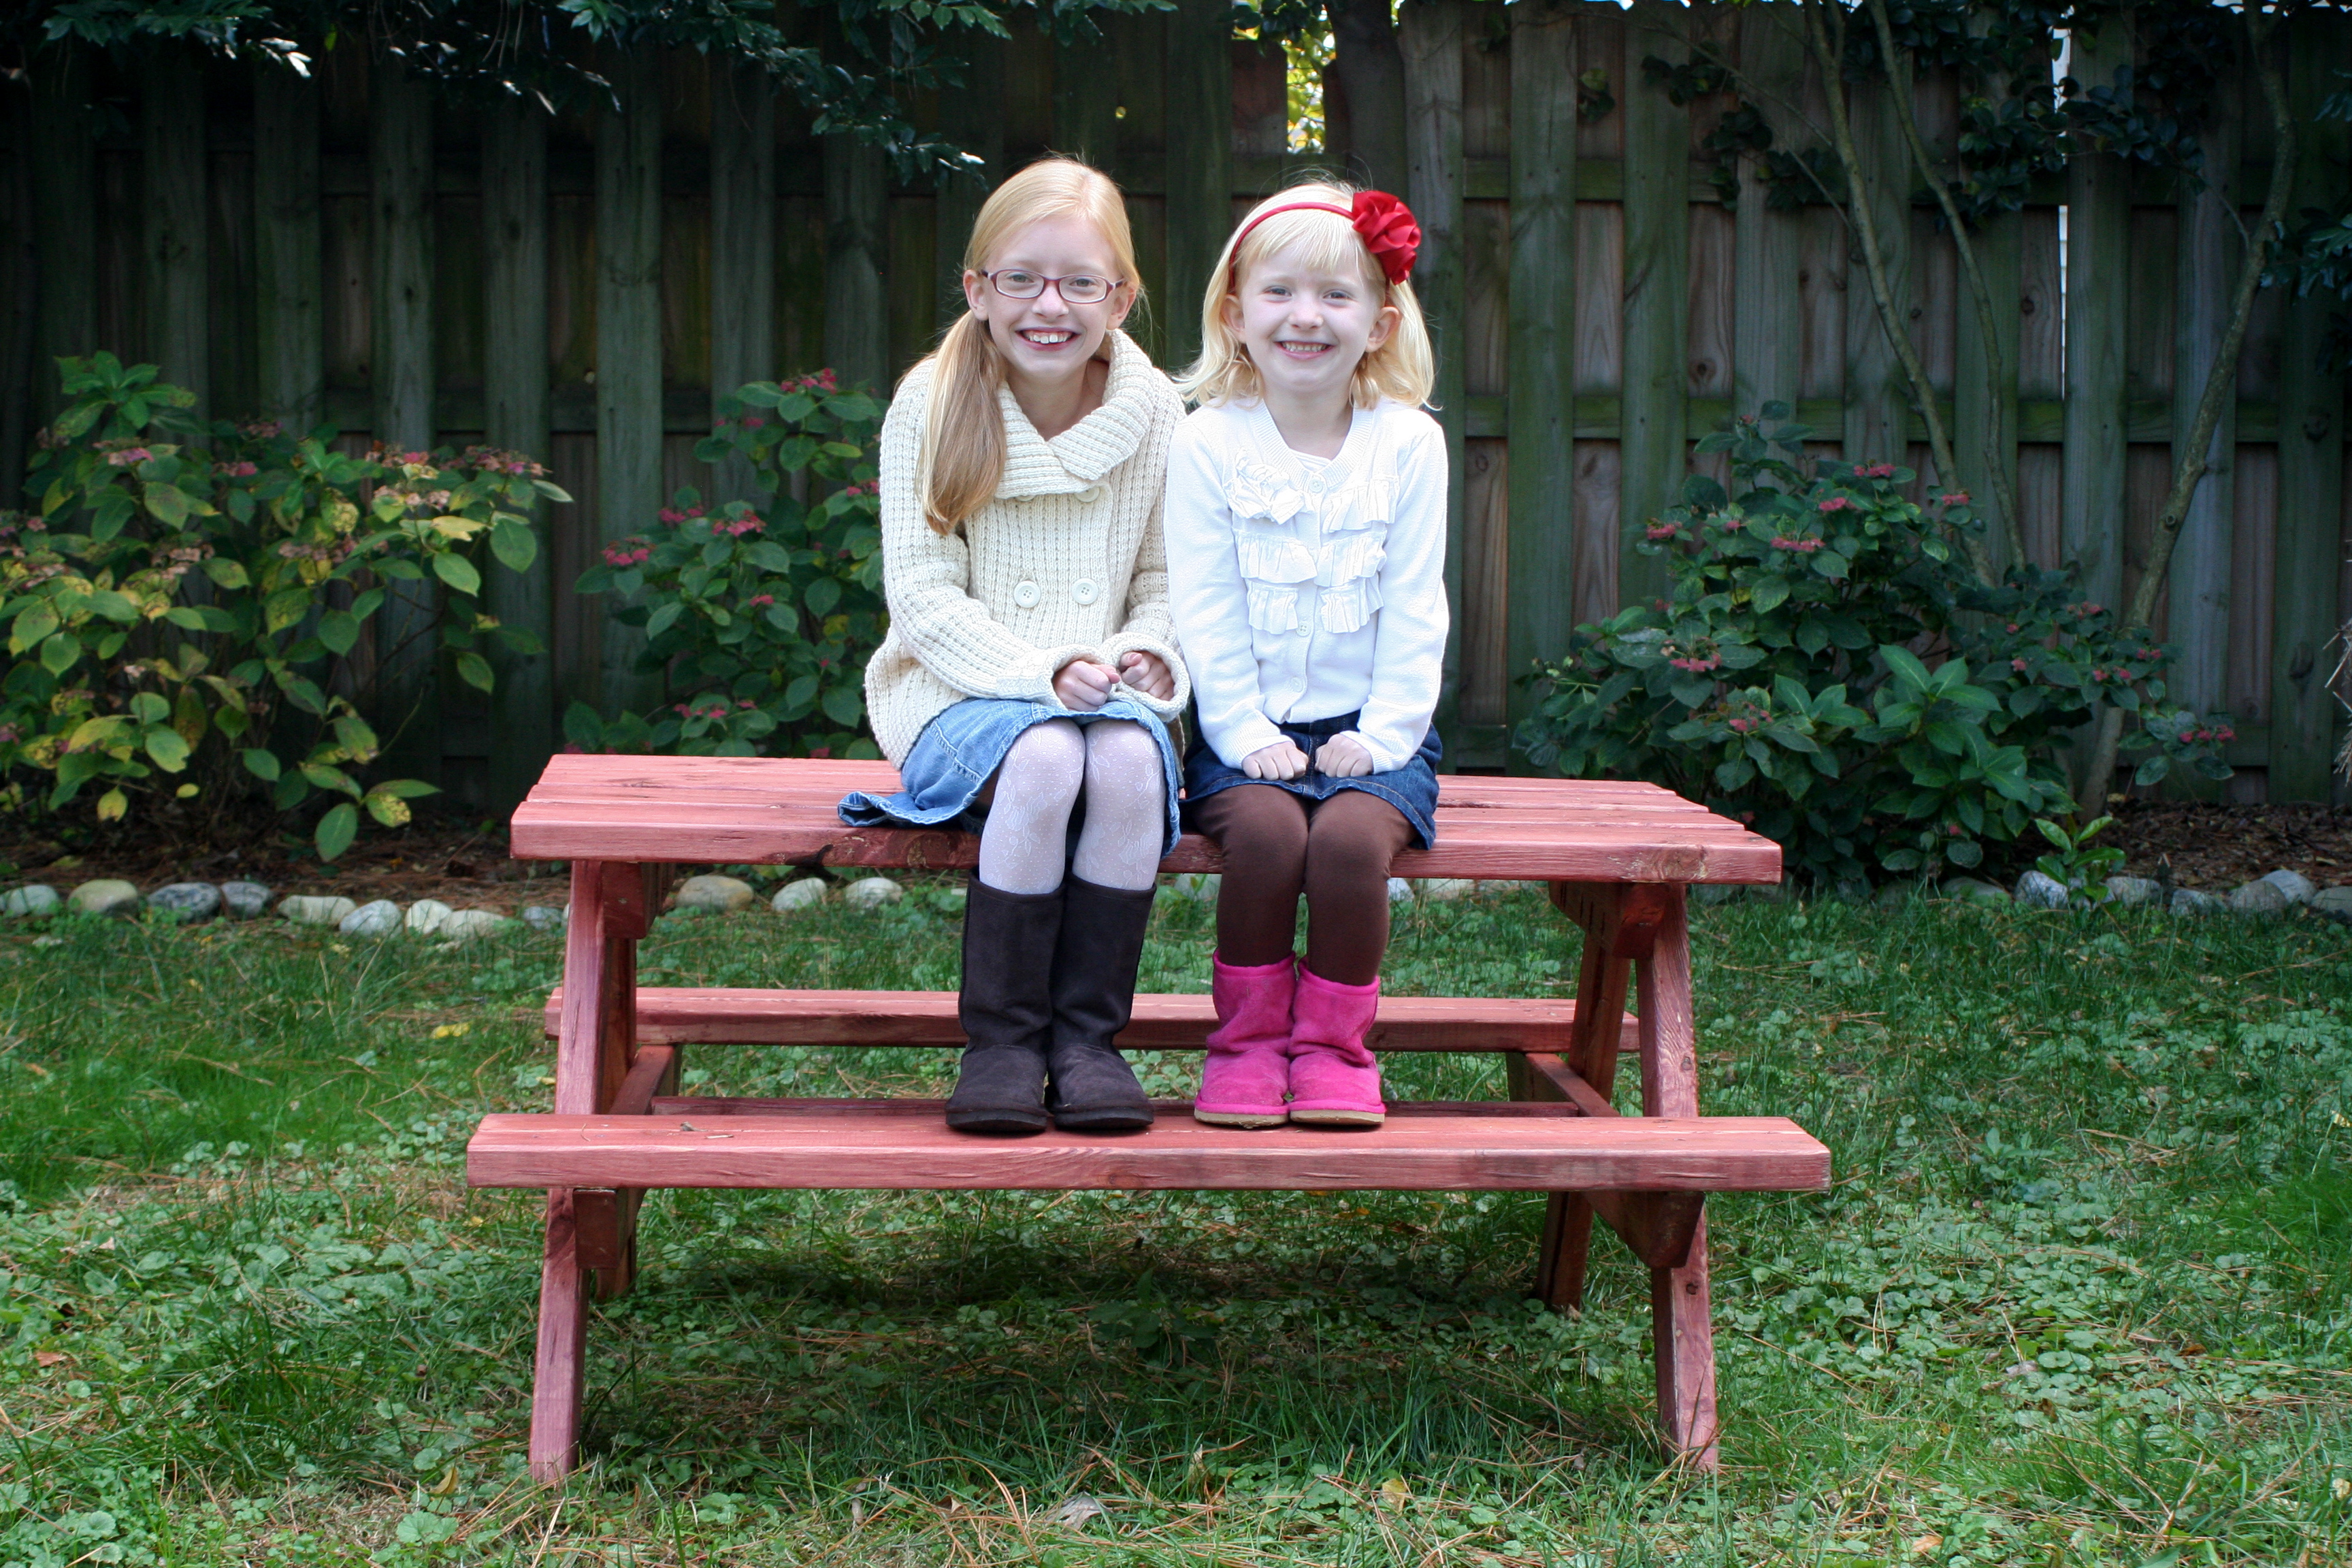
Little Kids Picnic Table
This was a really fun build. The bottom side boards were put on the outside instead of the inside (this was an accident) but it still seems very sturdy. Perfect for 2-5 years old.
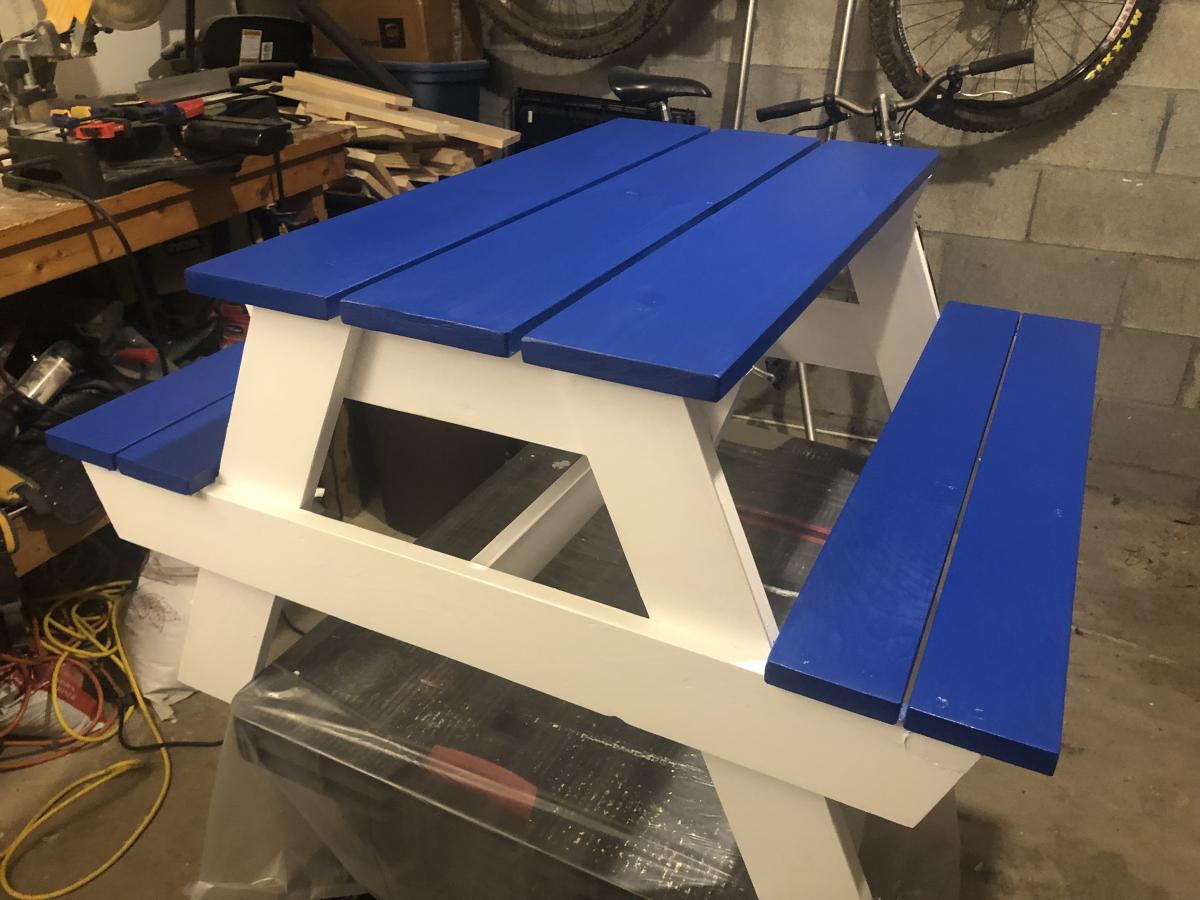
Built from Plan(s)
Estimated Cost
$20
Estimated Time Investment
Day Project (6-9 Hours)
Finish Used
Exterior Paint
Recommended Skill Level
Beginner
Comments
Fri, 07/19/2019 - 16:01
Super cute! I don't think…
Super cute! I don't think it matters if it's on the inside or out, looks awesome to me!
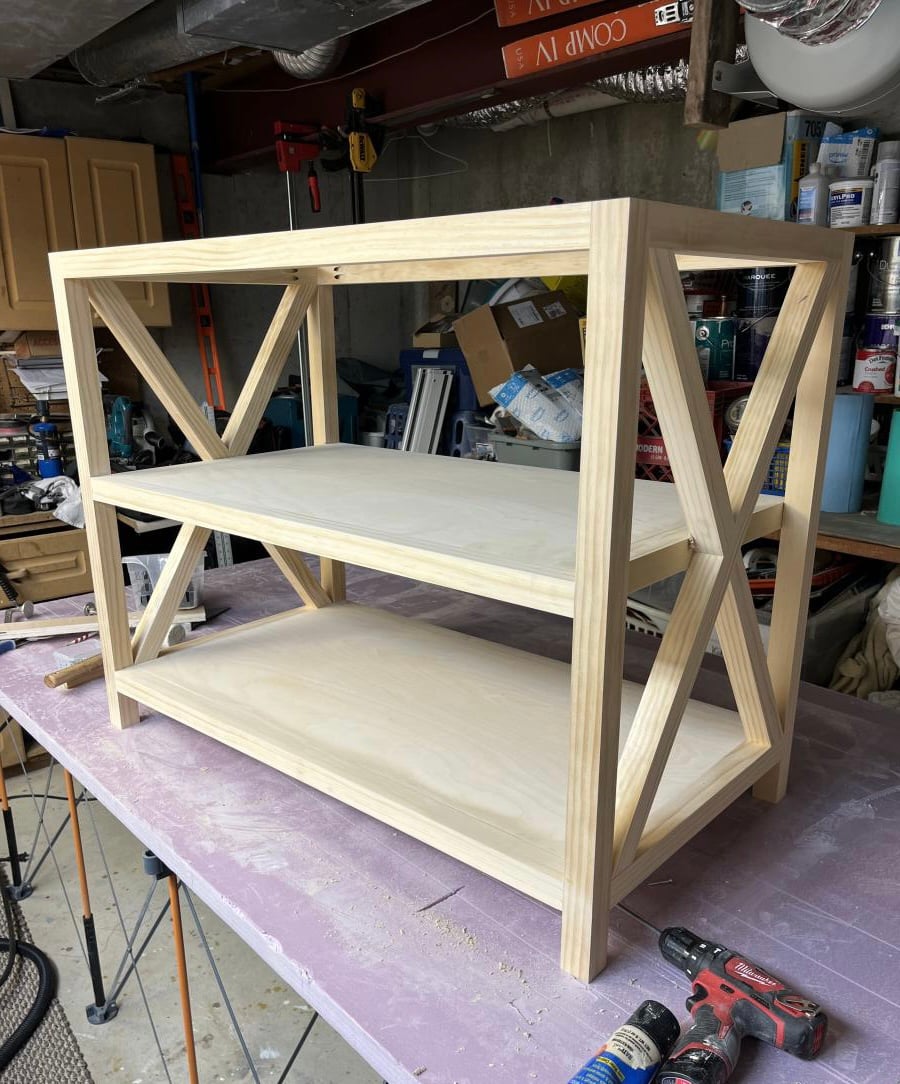
X brace console table
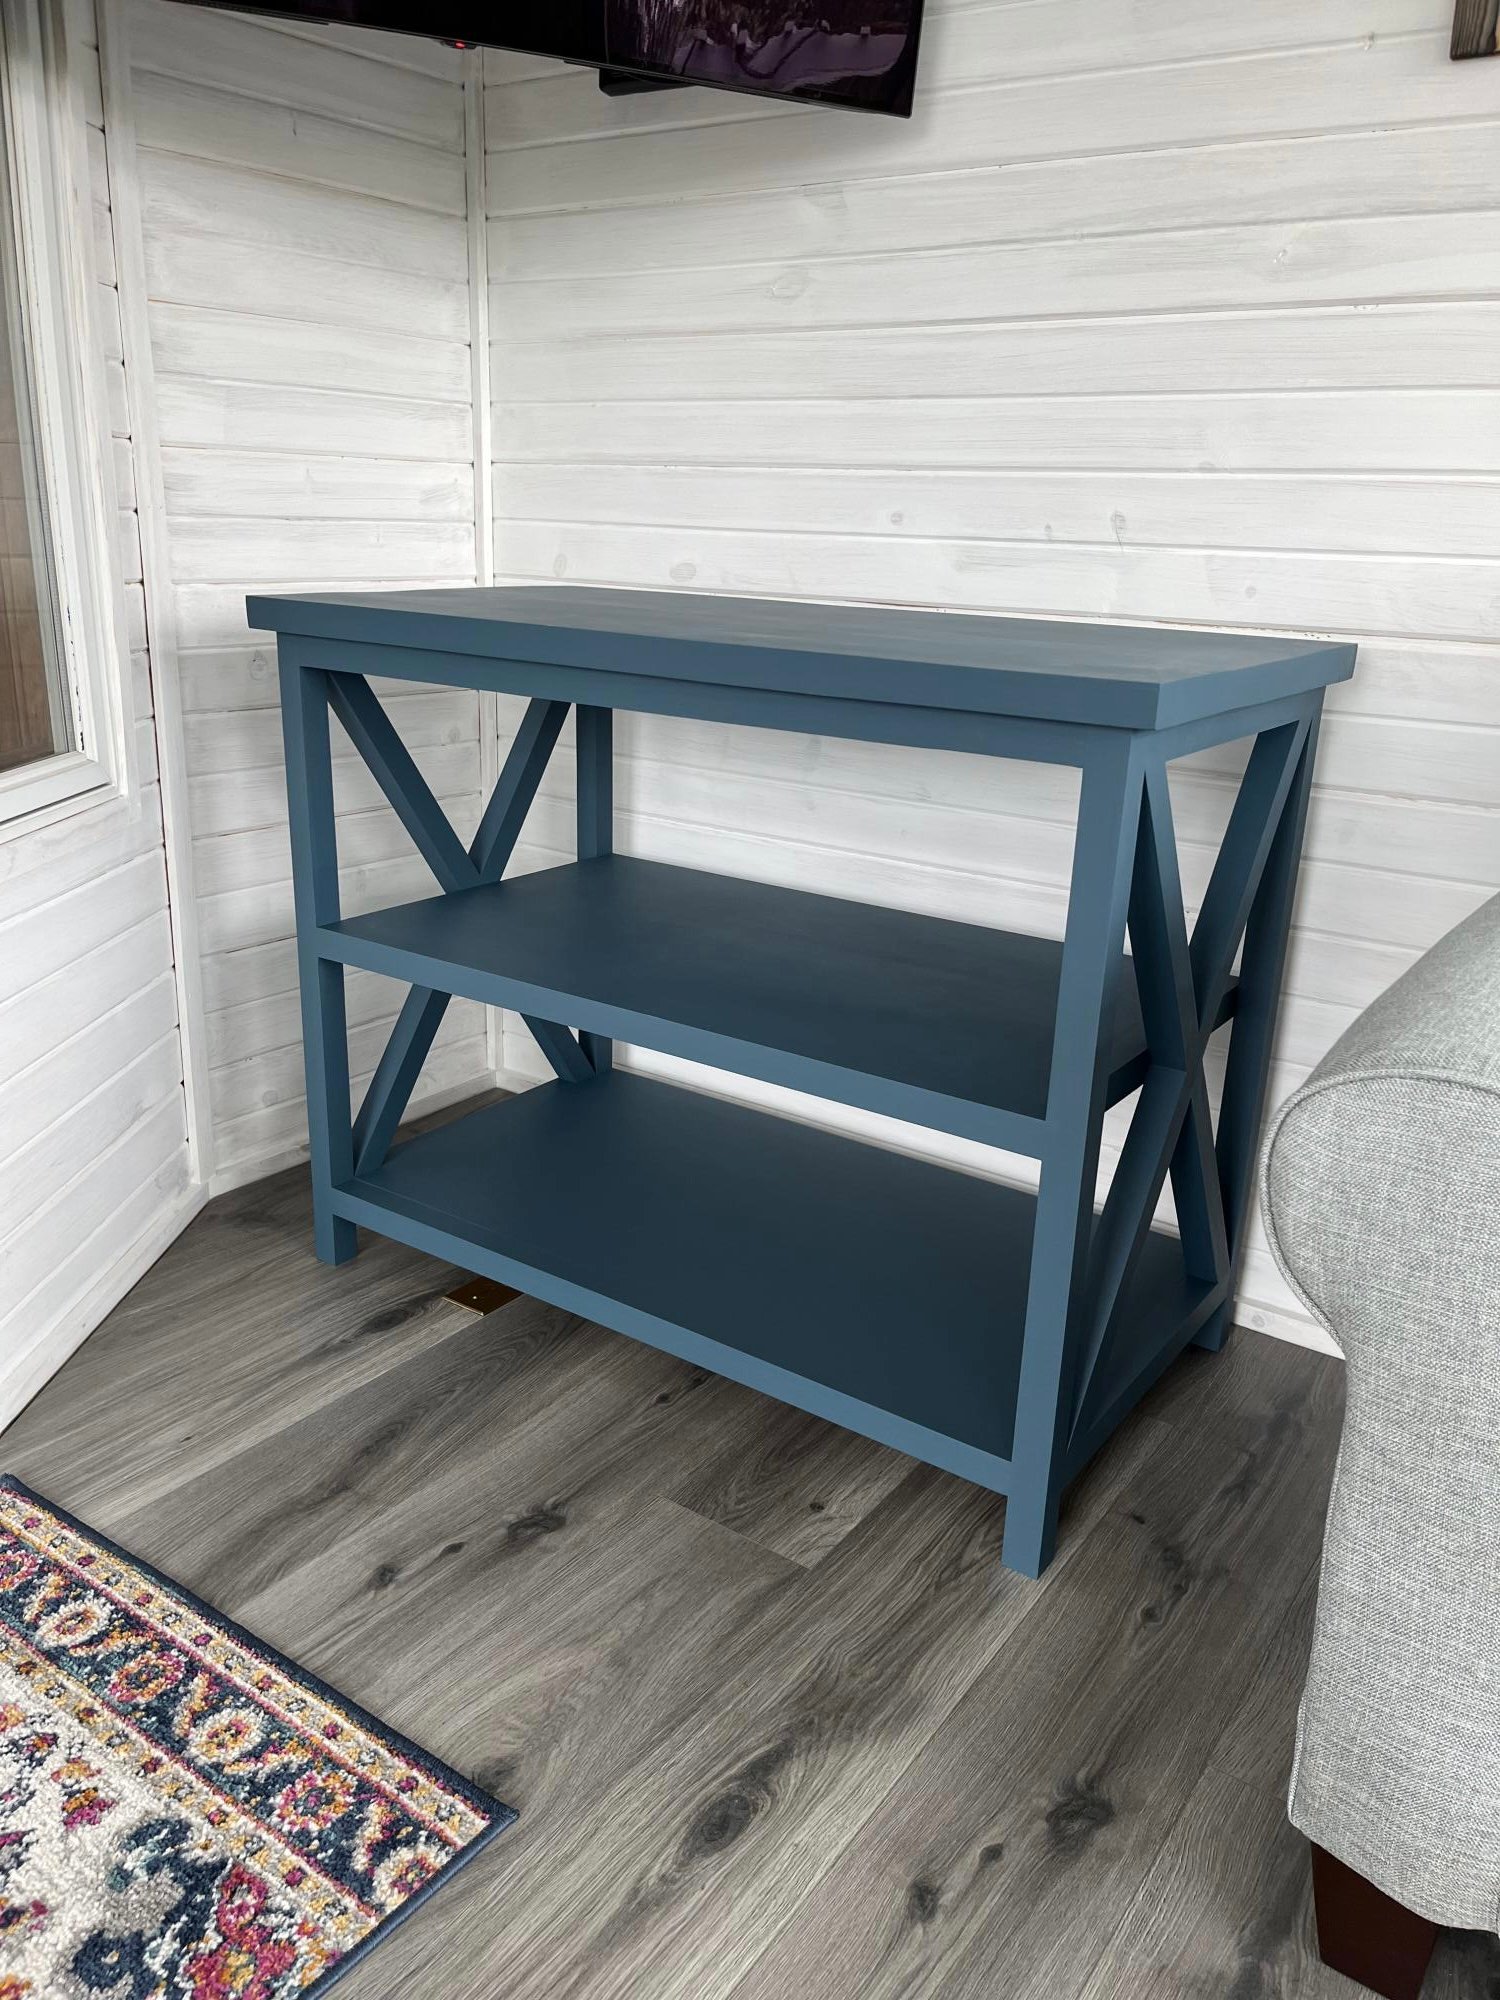
Built this from Ana White plans. Love how it looks in our four season room.

Built from Plan(s)
Comments
Fri, 04/21/2023 - 10:20
Silky smooth finish!
Gorgeous build and finish, well done! Thank you so much for sharing.
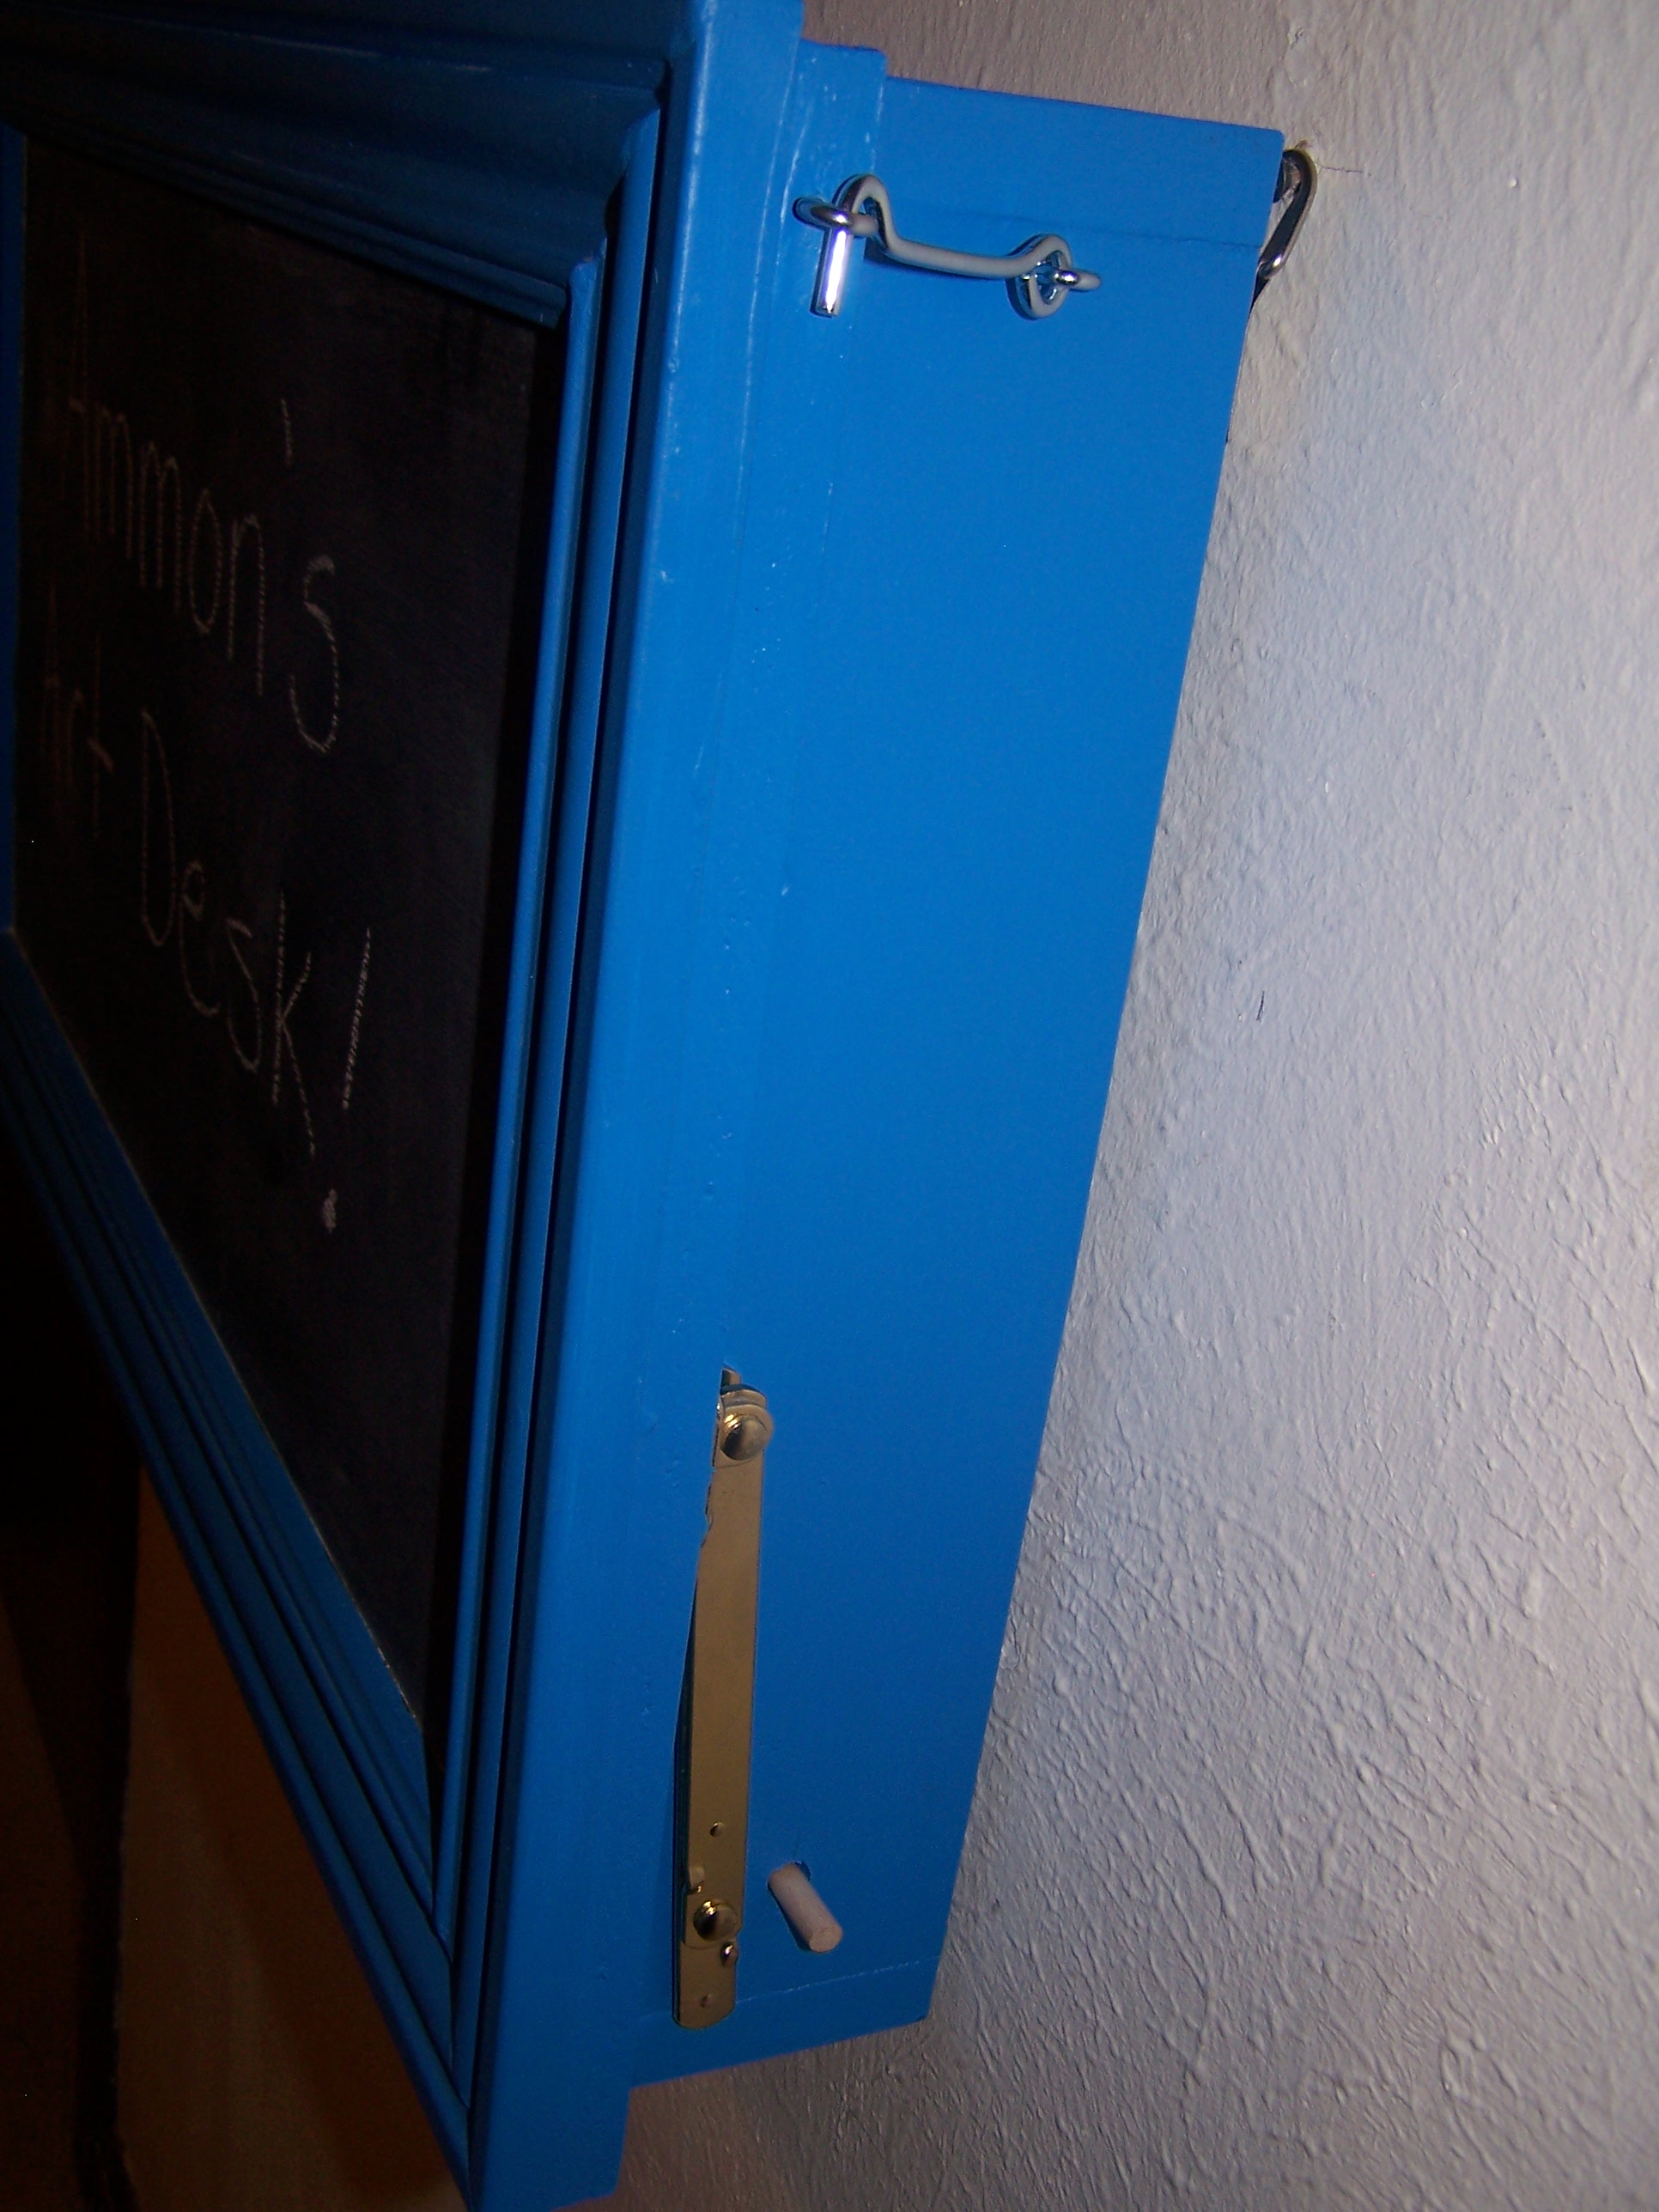
Ammon's Art Desk
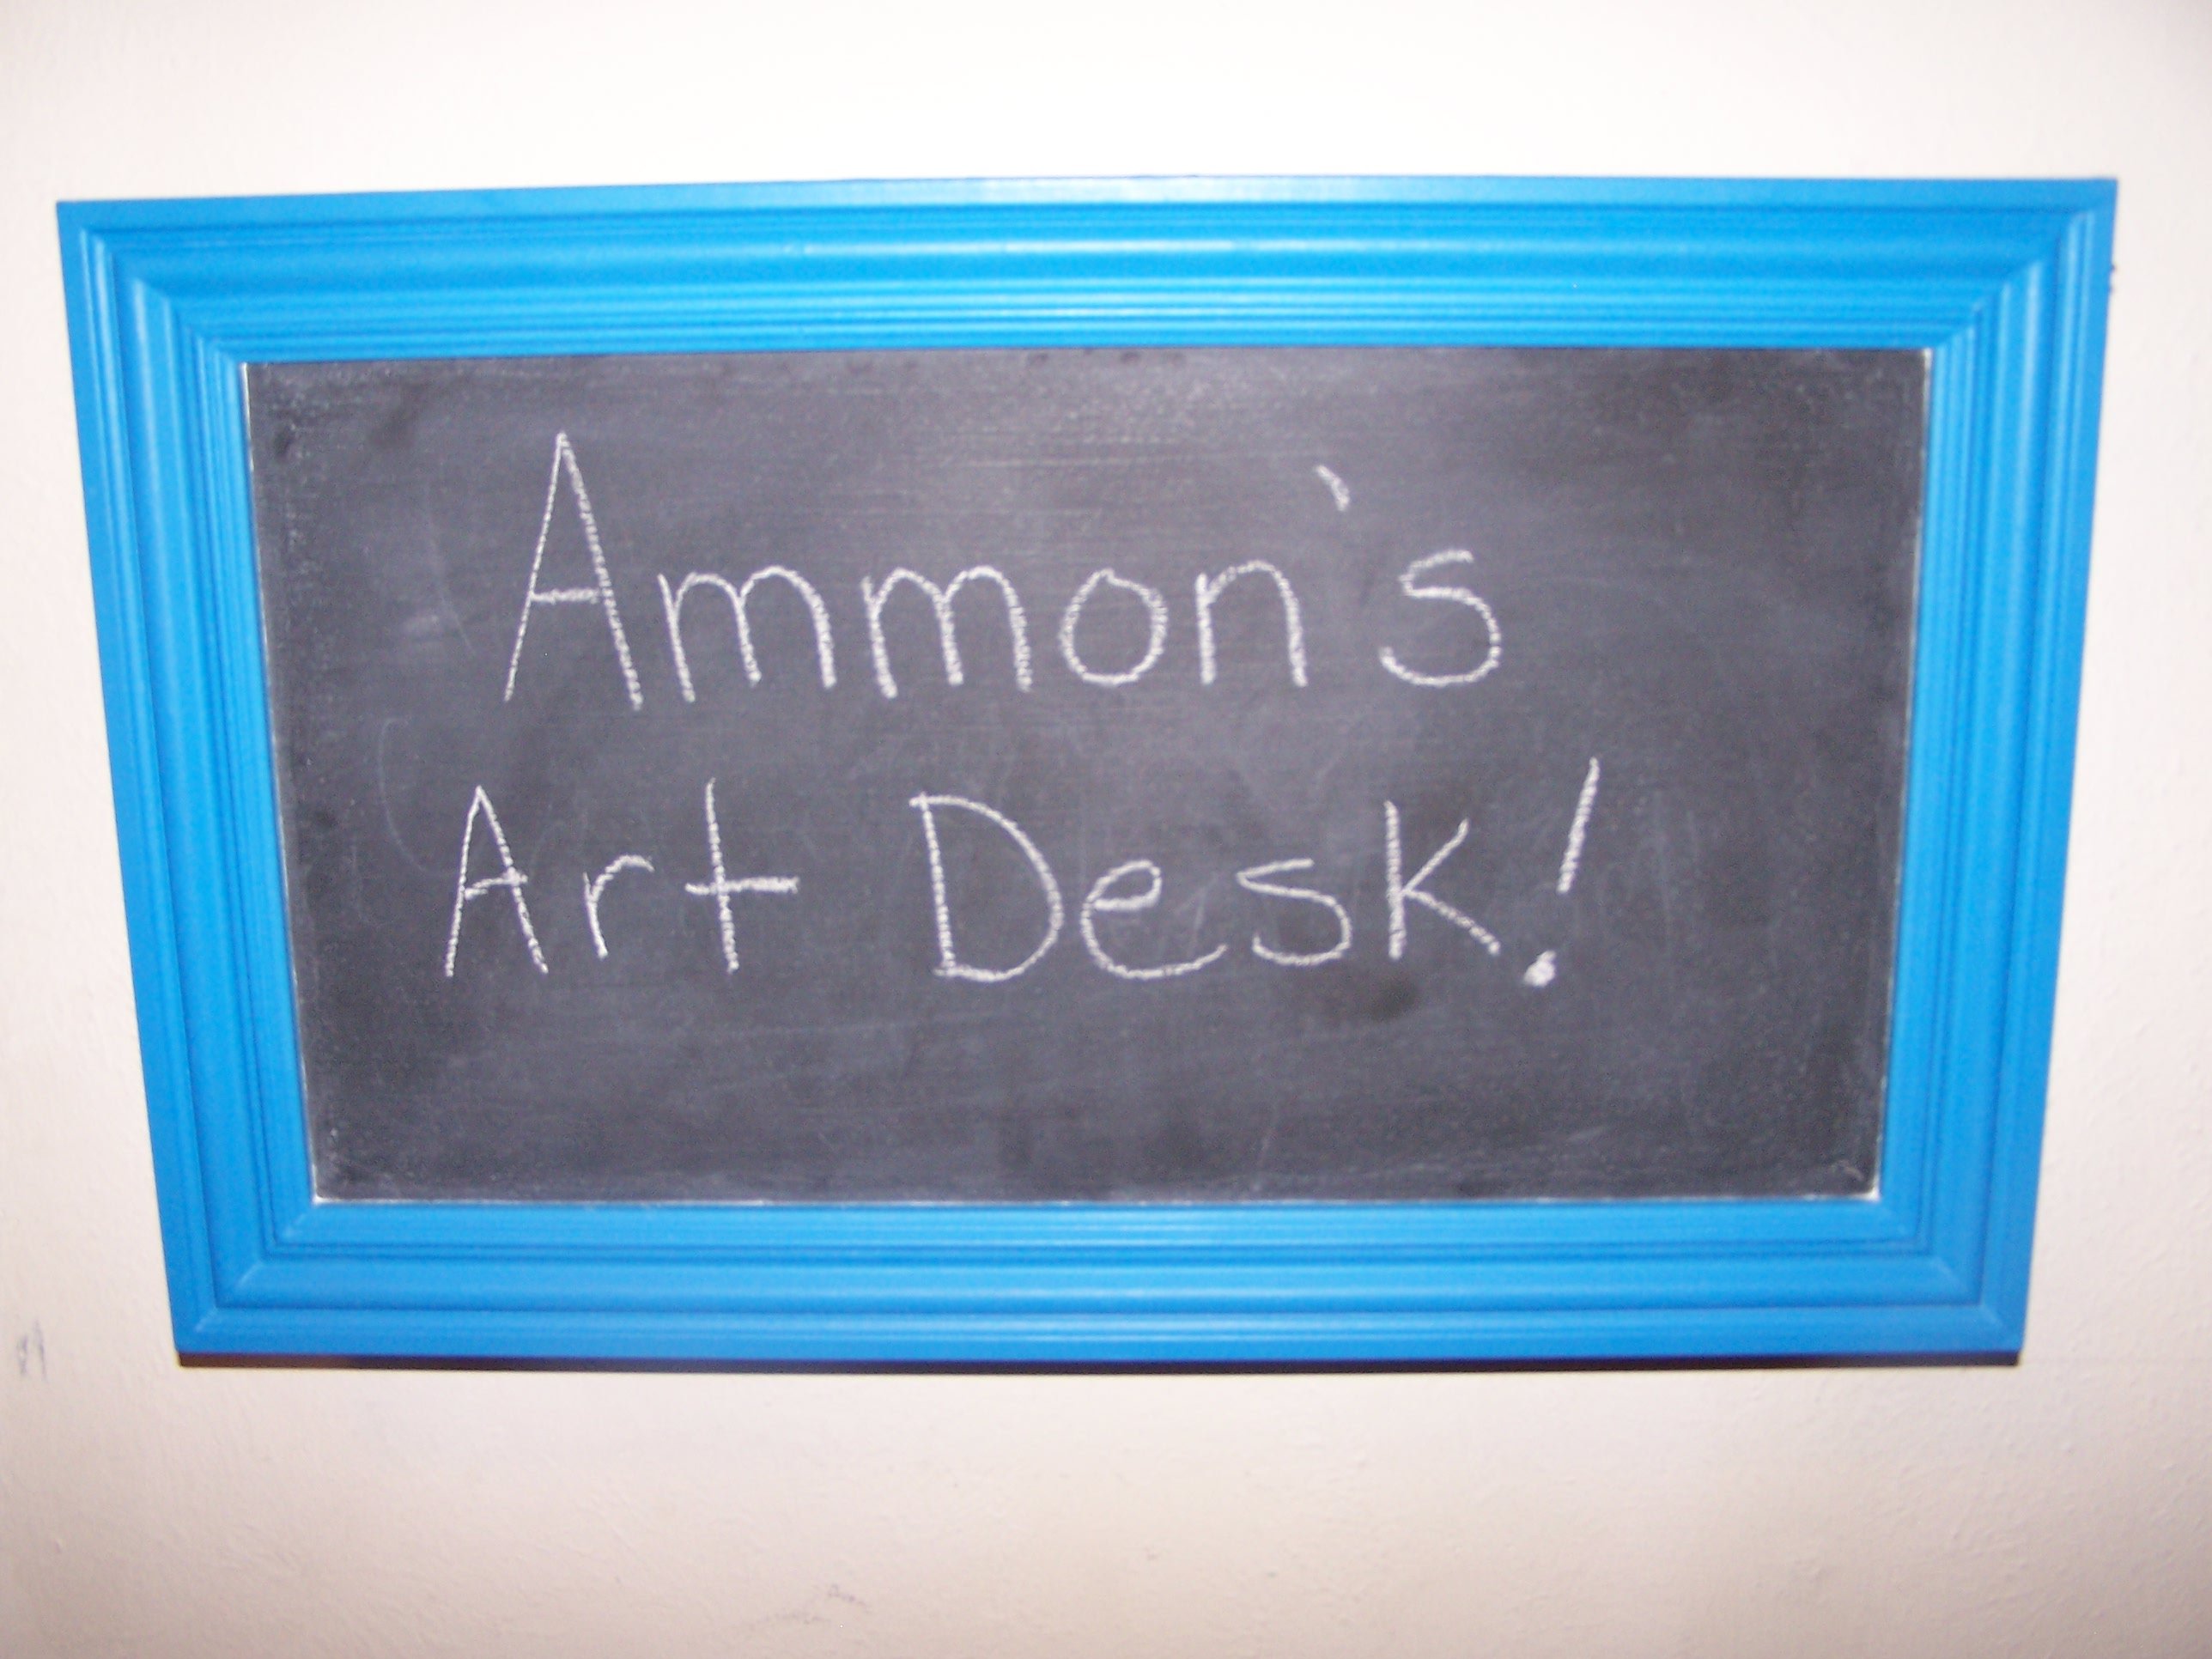
Yea! I made this for my second boy for Christmas. He wanted yet another art set. When I saw the plans I knew I had to make it! Ana I love you and your site and your amazing ideas! Thank you, thank you, thank you!
After reading all the comments I decided to make the desk part a little wider on each side to make room for the hinges. It worked great. The hinges did rub so I just got out a pocket knife and put some notches where they were rubbing...problem solved! My son loves it and I love that he has somewhere to hide his stuff!


Built from Plan(s)
Estimated Cost
$15 - Mostly for hinges, and hinge supports, hook, and D-rings. I used wood from the cull at HD. I had the moulding on hand. What can I say, I am cheap!
Estimated Time Investment
Afternoon Project (3-6 Hours)
Finish Used
I used a tint sample from the oops paint section. Three coats of chalkboard paint.
Recommended Skill Level
Beginner
Comments
Tue, 03/13/2012 - 20:16
Hinge issue
I have been flipping back and forth trying to figure out how to install the hinges. I just realized you made the desk top larger to allow the hinge installation on the outside. Now I can get back to work!

In reply to Hinge issue by Guest (not verified)
Wed, 03/14/2012 - 08:27
Yes that was the big concern
Yes that was the big concern with this desk. Making the desk top larger and putting the hinges on the outside seemed the easiest way for me. I did have to cut little notches in the wood for the hinges to slide freely but it works. My son uses it all the time and I am so glad that I made it! Good luck!
Julia Nightstand

I built this nightstand for a 7 year old girls birthday.
Built from Plan(s)
Estimated Time Investment
Afternoon Project (3-6 Hours)
Finish Used
pink paint
Recommended Skill Level
Intermediate
Storage Step Stools
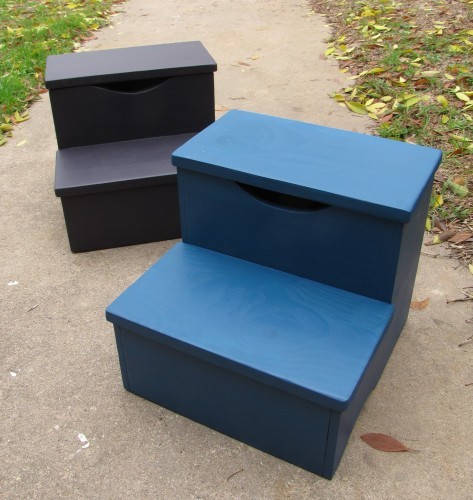
These storage step stools are super easy to build. I've built several over the couple of years. The first was for my daughter and then several more since, including one for the Make Two Challenge.
The functionality of these little stools is what really makes them great. My daughter is able to carry it from room to room with her toys stowed away in the little hidden storage area.
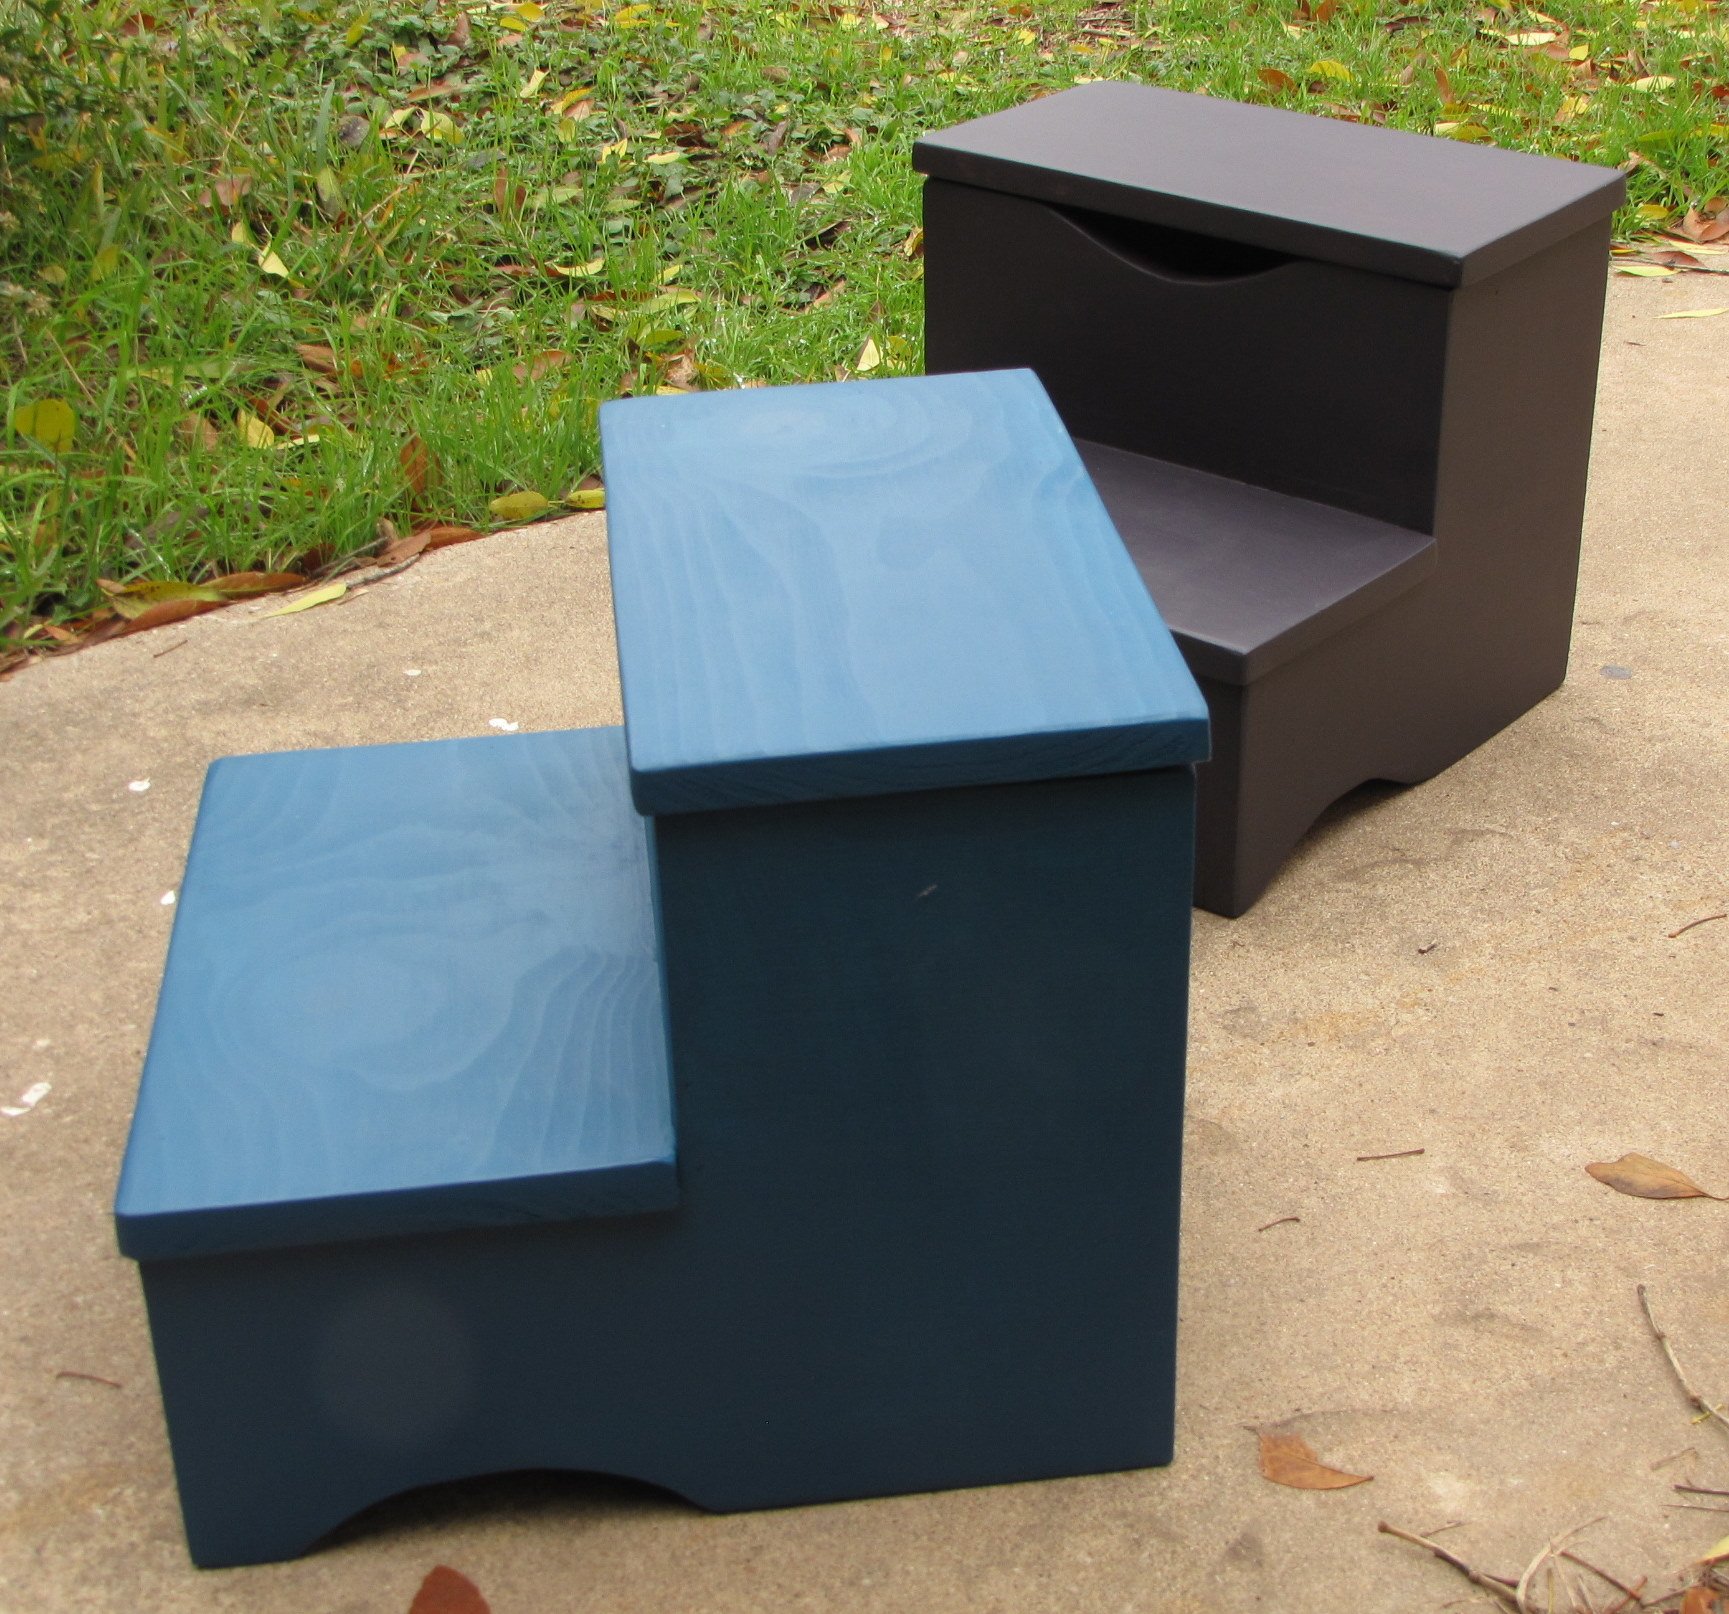
Built from Plan(s)
Estimated Cost
less than $20
Estimated Time Investment
Afternoon Project (3-6 Hours)
Finish Used
2 coats of paint and 2 coats of spray on clear coat for protection.
Recommended Skill Level
Beginner